16. System Integration
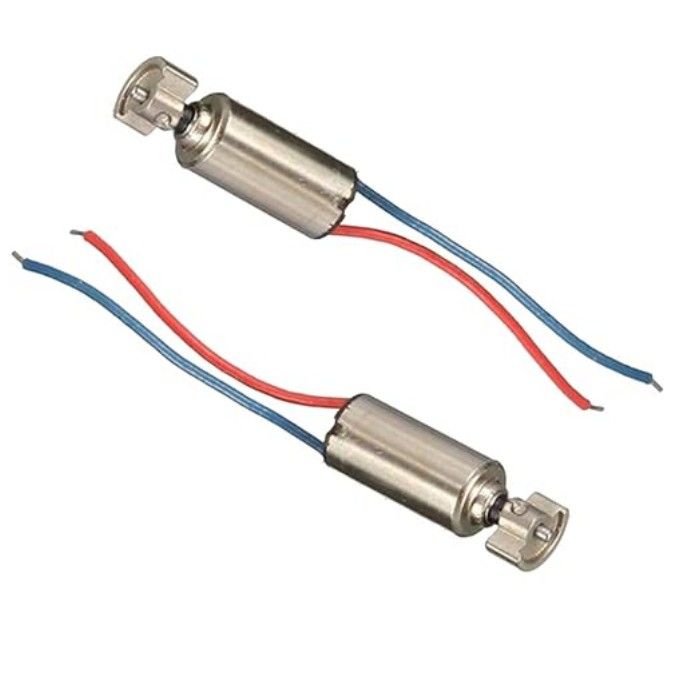
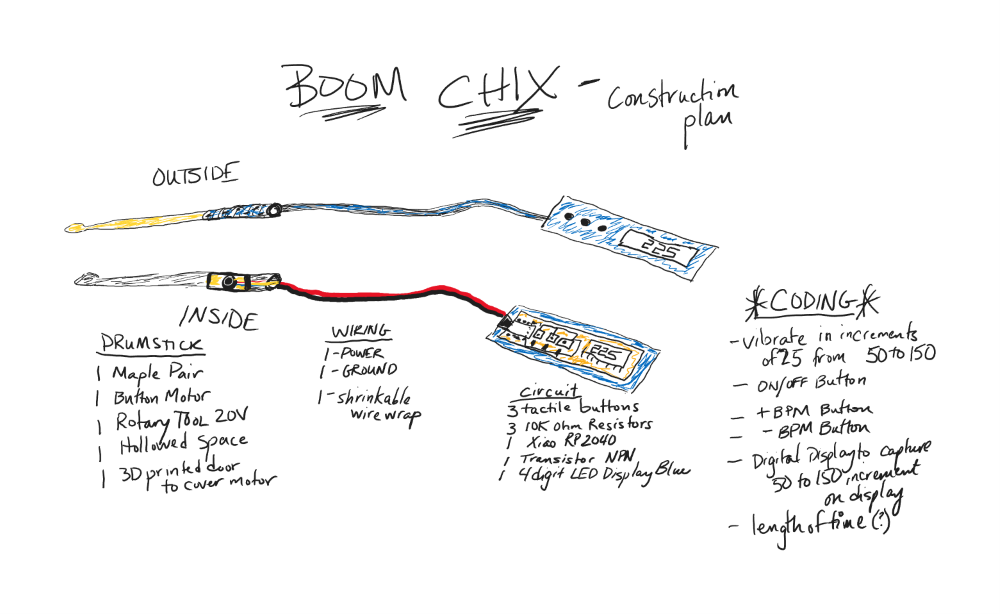
The goal is to create a pair of drumsticks with a vibrating metronome inside the stick of the lead hand. I was able to experiment with two different types of mini motors during Outputs Week and of course made the discover that the Eccentric Rotating Motor (ERM) mini motor would be ideal to fit inside the drumstick. It is the same type of vibrating motor found inside of a pager and some game controllers. I am hoping to program the controller using Python to make the metronome vibrate at specific intervals. Specifically I plan to build a machine that can function as a vibrating metronome between 50 BPM and 150 beats per minute that can be used by a beginner to intermediate level drummer to practice rudimentary drum exercises.
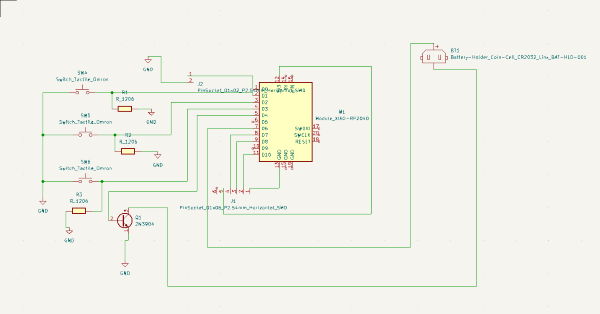
Electronics Components Used
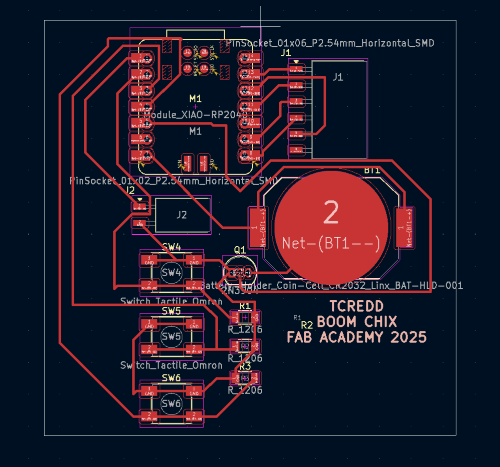
3 Tactile Buttons
3 10K Ohm Resistors
1 Transistor 2N3904
1 2pin SMD Socket
1 6pin SMD Socket
1 Xiao RP2040
1 Panasonic CR2032 Battery Holder
1 Pansonic CR2032 3V Battery
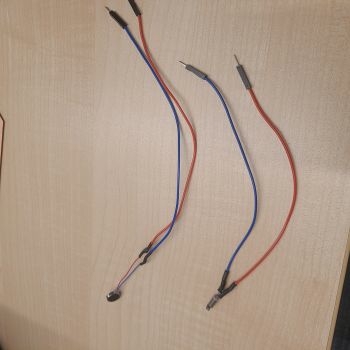
Red & Black 18AWG Semiconductor Cabling
1 Ada Fruit 4 digit LED Display in Blue
Planned Construction
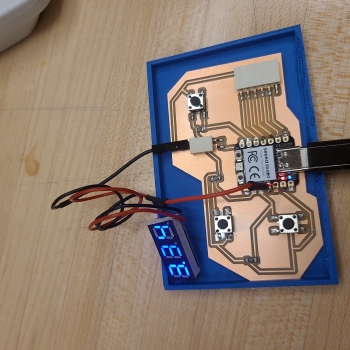
After testing several motors I've decided to go with the button shaped motor as it seems to have the stronger vibration of the two. It was recommended from the global evaluator that I couple the motor with a transistor on the development board so I will be designing a new with a new shape that will better compliment the look of the final prototype. As of 5/20 I have all the parts needed for the project. The LED pictured above turned out to be a voltage meter so that was returned and replaced with a 4 digit Adafruit blue LED display. The current development board has lots of extra space so it will be redesigned to be much smaller with a more convenient button layout.
Design
Notes on Power
During outputs week it was suggested to me that in order to avoid power and voltage issues I would need to use a transistor with the mini-motor as an output. I took this advice and redesigned my board to include both a 3V battery in addition to a transistor. I will be using an Adafruit 3.3V digital display with and I2C backpack as an output device. The mini ERM motor has an output between 1.5V and 3V. With the addition of the 3V CR2032 battery added to the 5V Xiao RP2040 the development board should be able handle operatingat 8V.
Packaging
A case with a top and bottom which snap together will be designed in Fusion 360 and 3D printed. I will use the specification of the development board measured in (mm) from the SVG plot created in pcb mode of Kicad. It will be necessary to create the shape slightly larger by a few mm in order to allow for space, extrusion of the sides and placement of the 4 digit LED. I will use hardware (mini nuts, bolts, screws) to mount the LED display through the bottom of the top of the case while the buttons and the usb connector will be accessible from the outside through the sides and top of the designed case. I have found a tutorial online that details how to create a top and bottom piece with tabs and grooves that allows the pieces to snap together. An example of what the bottom piece will look like is pictured below. The top will be made with similar construction but with access points for the 3 buttons and opening for the USBc port. The tutorial that I watched can be found here: Plastic Snap Tutorial I will also keep in mind that threaded inserts can be another option for keeping the bottom and top pieces of the outer case together.


Testing
Once fully assembled and programmed I will have the 2 drumming instructors test out my product prototype. I would also like to have a few of the children who attend my drum school give it a try as well to see if it is child friendly. Both groups would be the most appropriate focus group members as they play the drums almost daily and experience the same challenge I am trying to address.
I've already begun to test the strength of the cable once attached to the stick. That portion seems quite sturdy but what I will test next is the wires that come with the mini motor to make sure they are strong connections and will not detach from the motor after extensive vibrations.
Feedback and Feedforward
The most feedback often received on my idea is a concern that I've had since before beginning to prototype. What drummer will want to play with a pair of sticks with a 4 ft wire hanging off of it? Since this is a prototype and I only have access to creating a larger circuit, I chose to build this prototype with wired design. Version 2 will have a circuit small enough to fit inside the drum stick with a smaller battery as well. Once that size is determined manufacturing can be scaled to include removable drum handles that can be transfered across stick styles such as brushes, mallets, and dowels.
Repair
The component that seem to have the most risk in breaking seem to be the motor and perhaps the buttons on the contoller board. As far as accessing the motor for repairs, the grip tap for the drum sticks in easily removable, can be changed to different color, or removed to make repairs. The 3D printed cover below the grip tape on the stick will be affixed using hot glue that can be easily removed or replaced as well. The contoller cover will be 3D printed so if necessary, I would be able to go back inside with ease to check connection or look into shorts using a multimeter. I have also taken measures to remove the SMD pin sockets so that some challenges like copper lifting from the circuit board can be avoided by added holes to solder more permanent connections. Not that it wouldn't be able to happen but it would be less likely to occur that way.
Life Cycle
Wooden drum stucks in maple or oak could last for a very long time, however at some point they do lose would though chipping. It is recommend that the Boom Chix be used for practice session for rudiments and that will certainly extend the life of the gadget. Since they are made of maple they can certainly be repurposed, recyled or upcycled. The PLA material that the packaging is made of most likely consists of cornstarch, cassava, and sugar cane and so is completely biodegradable and environmentally friendly. The remainder of the electronic components should be disposed of the same as other electronics, through recycling. For instance, our campus is located in Norton, Massachusetts and old computers, electronics, wires, and machines of call kinds can be dropeed off eWaste New England for proper upcycling and disposal efforts.
Final Materials List
| Qty | Description | Link | Price |
|---|---|---|---|
| 1 | 7 Pairs Maple Sticks | Promark Maple Drum Sticks Size 5A | $16.95 |
| 1 | Drumstick Grip Tape | 6pk Drum Stick Grip Tape | $13.48 |
| 1 | 17 pk Miniature Button Motor | 17 pk Vibrating Mini Motor 3V | $6.99 | 1 | Expandable Wire Sleeving | Wire Sleeving Blue and Black | $8.99 | 1 | Adafruit 4 Digit Display w/ Backpack | Adafruit 4 Digit Blue LED display | $11.95 |