15. Interface and Application Programming
In-class Group Lab Work
Sending Serial Data in Arduino IDE
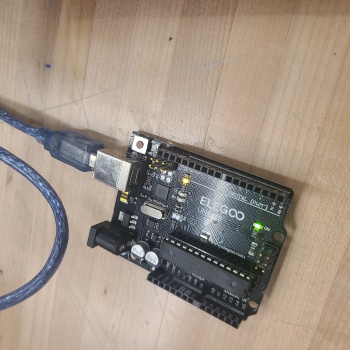
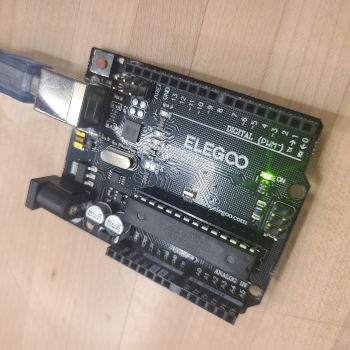
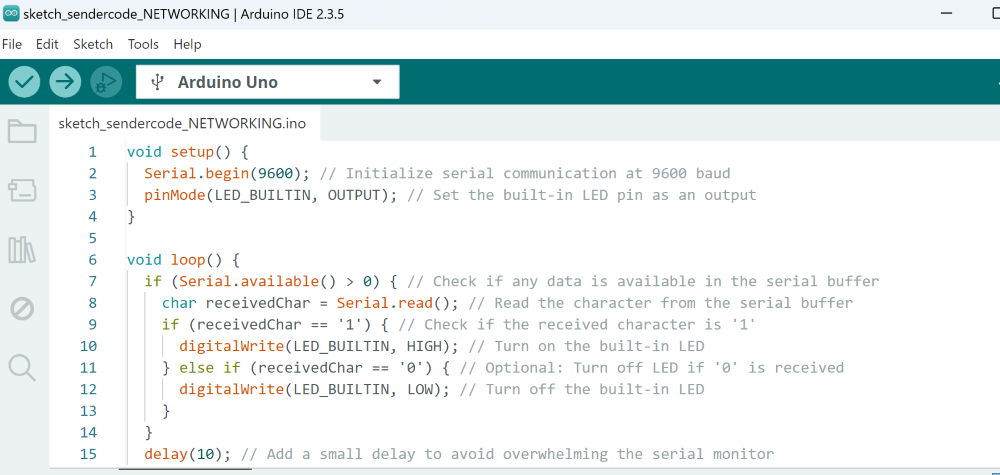
First we created our own code for the Arduino Uno in Arduino IDE to listen to the serial port at 9600 baud and respond to serial input prompts. We programmed it to turn on the onboard LED when 1 was received as a serial message and to turn the onboard light off when a 0 was entered. We were able to find the appropriate code by doing a search on google and finding an example in the Arduino Forum. The pictures of the LED experiment are above and below is the code we ended up using.
Sending Serial Data with Python
We had to download the software in order to run Python. The download is located at: Python Download Link
Prompts used for downloads: pip install pyserial and pip install tk
Tkinter is a Python's library for Graphic User Interface (GUI). You can create desktop applications, windows, buttons, labels, boxes that allow users to interact with the applicaiton using visual components such as an on-off button. It remains one the most often used GUIs.
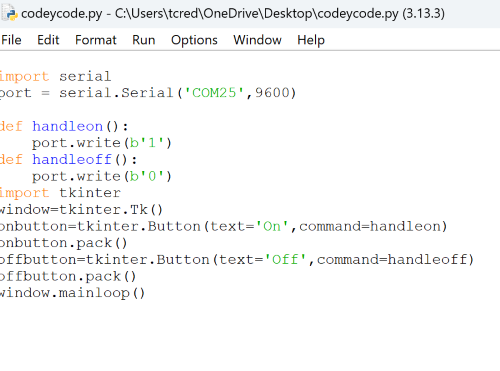
Taking note of the COM port we used in Arduino IDE, in our case, COM25, we closed the arduino ide window and downloaded Python. In the Python IDLE window we entered the code that is in the picture below. Arduino Uno was already programmed for 0/1 on/off when we uploaded the program in Arduino IDE. Our instructor recommended saving this file as a template particularly for use aspects from with Tk. We were able to accomplish the same however this time the coding created an app-like window with an on and off button that would trigger the on-board LED on the Arduino Uno on and off. I saved the code and when I double click on the file I was able to use the on and off buttons to turn the light on and off.

Exploring the MIT App Inventor
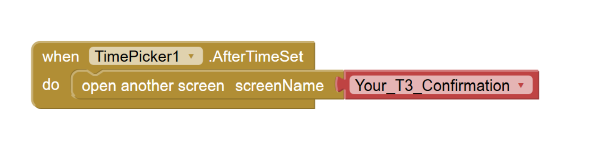
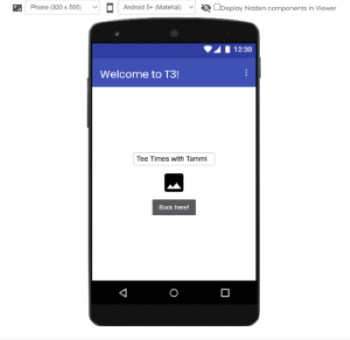
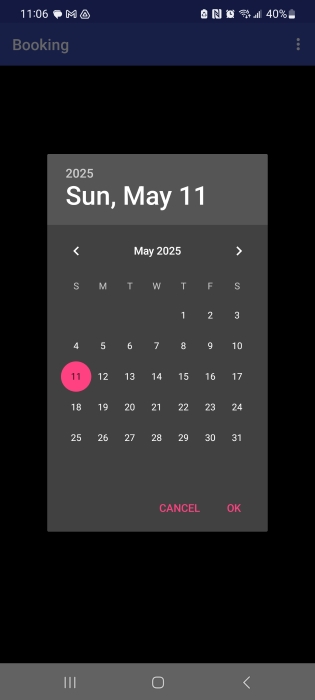
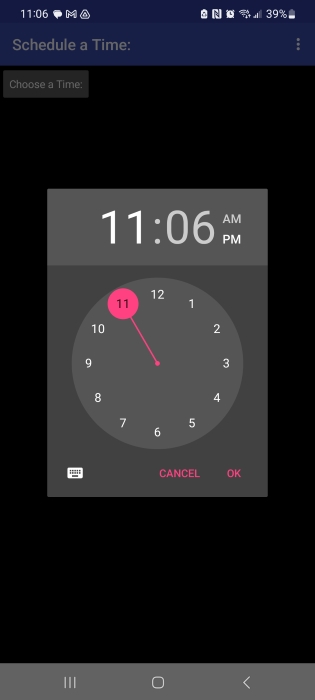
I checked out the MIT App explorer because after a quick google search it seems to be rated one of the most user friendly starter programs for setting up an app. It also has the option to set up beginner, intermediate, etc modes. I used the intermediate mode and just wanted to see what the look feel was like. The side menu makes it very easy to drag and drop buttons, sliders, labels etc onto the page and format their placements. The top menu allows you to add pages for the user to navigate to and also allows you to build an app for an android device. As of today, an app is not available for apple phones just yet but I have an adroid so I tried it out to test the app from a mobile device. The interface has both a design and blocks menu. The design tab allows you to set up the look and feel of the app while the Blocks menus allows you add logic and allows for the movement of the user across different pages. I created a shell for a golf app to create tee times. It would require many more pages but I just created 5 so that I can see how it works.
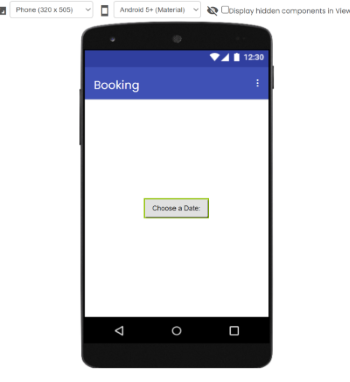
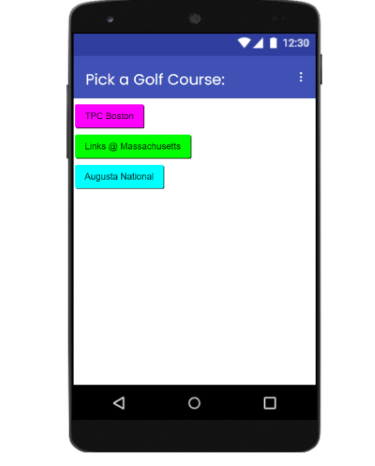

You have to download the companion app to your phone in order to download the app you've created. I did notice that even after compressin a photo for the app's home page it did not populate when I tested the app. The website generates a QR code to scan from your sell phone to make set up easy for both the companion app and the app you've created. It also updates the app as you make changes. Below are screenshots of the mock up app I created. To make it look nicer would certainly require a few more pages for the user to navigate, pictures, perhaps an animation and of course a deep dive into a logic tutorial. There seem to be quite a few on Youtube.

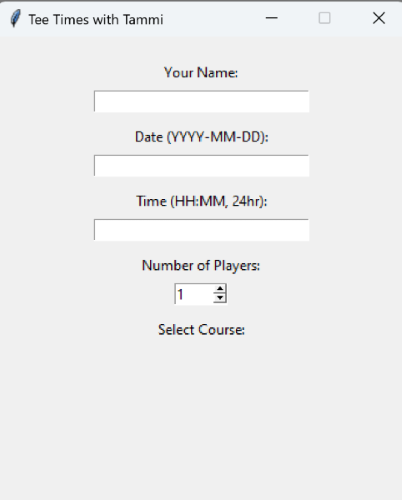
Writing Code for an Application using Tkinter
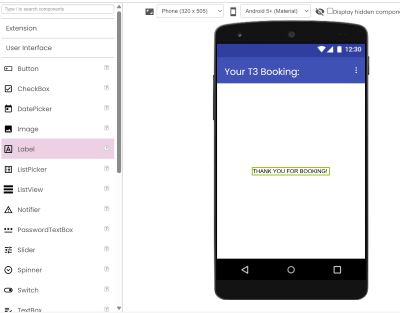
I was interested in creating an app where golfers can schedule a round of golf. They would choose date and time, location from a list of choices, and of course a tee time. Once the round is booked I would like to the message "booking confirmed" to display and upon the user receiving that message I want to program my development board to vibrate through an ERM output device signifying that a round of golf has been booked. The development board would vibrate to alert me that a new round of golf has been booked. Below is what the application looks like after entering the code into Python: