14. Molding and Casting
Laboratory & Group Work
This week in during group work in the lab we experimented with several techniques in creating silicon molds and casting white plastic from some premade molds in the lab. Refer to section below for the results of those activities.
In terms of supplies we needed paper cups, rubber gloves, popsicle sticks for mixing, scales for weighing, drop cloth for the work area, aprons to protect the clothing, goggles to be worn during carving, small screw drivers/thing wedges, and mixing kits for both quick set silicon and quick set white plastic.
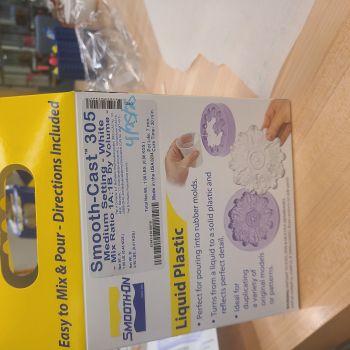
For this weeks lab work we used products from Smooth-On brand. Specifically we used pourable silicon rubber and liquid plastic.
Safety Protocols
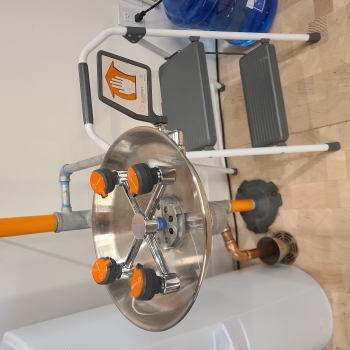
There are some safety steps to consider when handling the materials required for plastics molding and silicon molds. First, there should be proper ventilation and safety glasses should be worn to protect the eyes. Long sleeves, an apron or smock are also recommended to minimize risk. Users should also wear vinyl/nitrile rubber gloves. If contact does occur with the eyes, it is recommended to flush the eyes with water for 15 minutes and to immediately seek medical attention. If the mixtures come in contact with the skin, a waterless hand cleaner should be used and then followed up with soap and water. These materials should also not be inhaled, however if they are accidently it is important to have the person moved to area with fresh air immediately. If swallowed, do not induce vomiting; instead call the poison control center. The local toll free number for Poison Control Center in our area is 1-800-222-1222. Pictures of our emergency eye wash station and emergency shower station can be seen in the pictures below. They are only to be used in case of a real emergency so they are ready to be used when needed.
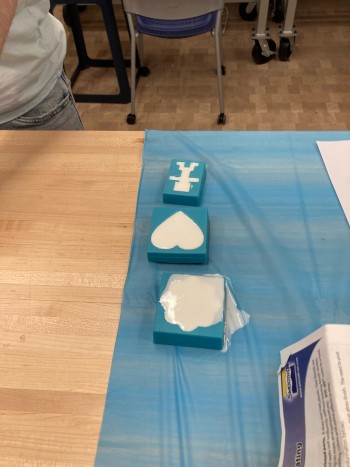
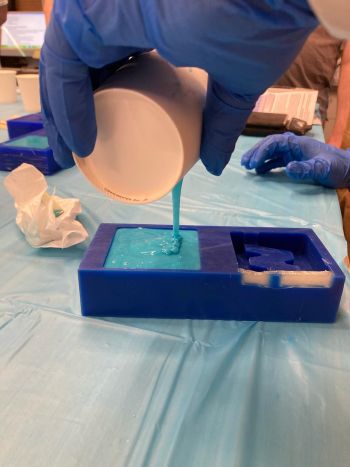
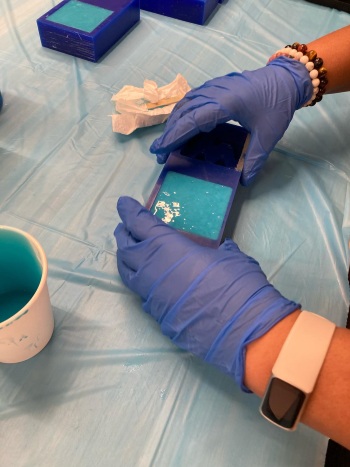
Casting From Various Pre-made Molds
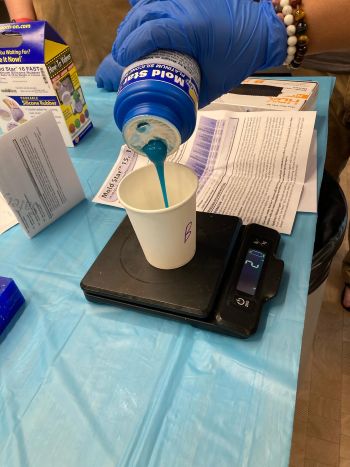
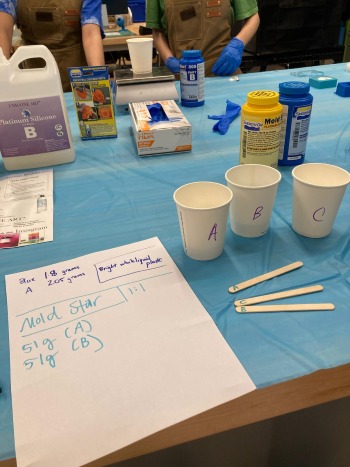
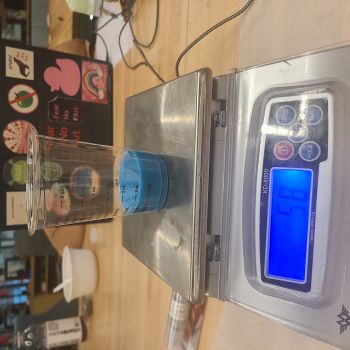
We used various silicon molds to cast some items out of white plastic. We had to first measure by weight bottle A and B from the plastics kit as a 10:9 ratio was required. The pot time for this white plastic mixture was 6 minutes so we had to move fast between mixing and pouring into the silicon molds. It was necessary to measure each substance separately and use a separate mixing stick for parts A&B until the ratio was achieved and quickly mixed together. It is good to have additional molds handy for in the event you have extra plastic mixture left which was the case with me and my partner. We used the left over mixture to cast a few additional items. While the white plastic required a 10:9 ratio, the blue silicon mixture required a 1:1 ratio by volume. The pot time for the silicon was 7 minutes but both substances required a 30 minuted curing period.
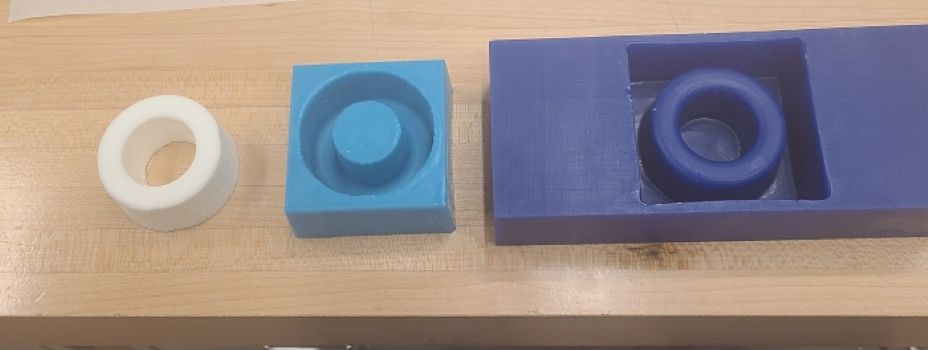
Creating Silicon Molds
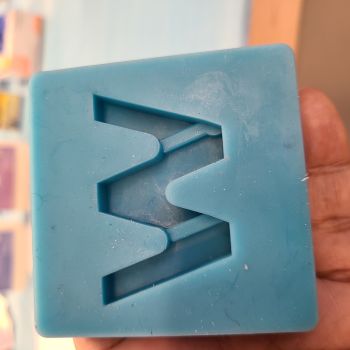
This silicon mixture was much heavier, almost twice as heavy and three times as thick. It seemed to be a little more difficult to work with as the thicker mixture was more difficult to pour into the mold with out air bubbles. Afte the pour we tried added a little force in picking up and putting back down the wax mold in order to remove some of the bubble and this seems to have worked as it set quite smoothly. We check the the silicon after 30 minutes and it seemed that it had completely set. When removing the plastic castings it was simple to wiggle and twist the silicon in order to remove the casting. However, removing the silicon from the blue wax molds took a little more effort. We chose to pull from the edges to begin to dislodge the silicon from the wax which helped but wasn't good enough. We found a very tiny screw driver that could be wedged in without scratching blue wax and that allowed us to losen the silicon enough to remove the Wheaton W from the wax mold.
This Week's Assignment: Designing Something to Mold and Cast in Fusion 3D
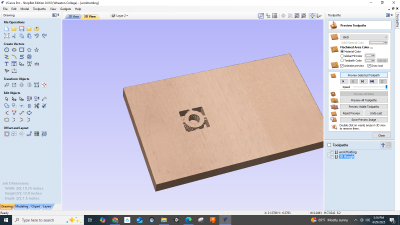
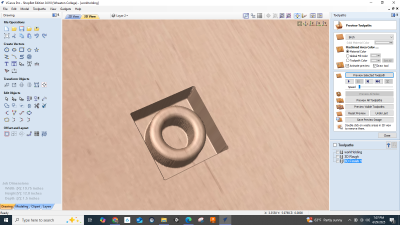
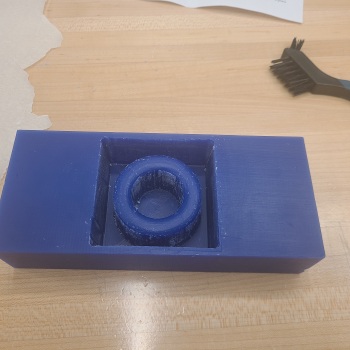
I decided to create a round donut or bundt shape mold with the intention of molding it out of plastic and later to make into multicolor and multi-scented soaps. I decided it would be best to have a whole in the middle to replace the concept for soap on a rope. It would allow you to grasp the soap easier because of the hole but at the time I was unaware of how small these items would end up being after the carving process and the silicon pouring process. I was mindful that a thinner hole would be more difficult to dislodge so I opted for a wider center. I unfortunately had to it the ring having a much smaller diameter in order to allow the end mill to pass completely around the outer circle for carving. In the end I am happy with the design so will look into repeating this experiment with actual soap as I see online the wax blocks are available in multiple shapes, sizes, and thicknesses.
It was necessary for me to draw the wax block on Fusion 360 to the dimensions of the blocks we would be using which were 3 x 7 x 1.5 inches. I then shelled the rectangular block leaving a 0.5 inch edge on both sides. I then drew a cylinder with a whole in it and used the align feature to place it in hollowed out box. Since there was tons of space left I chose to draw two blocks to fill some of the empty space to make my design faster to mill. I used the filet feature to round the edges to be more like a bundt pan/ or donut.
Setting Up the CNC Machine for Carving Wax
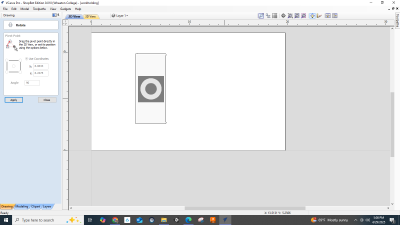
I had to be sure in the V-Carve software to place my carving drawing in the exact place I would like to end up on the wax block. I was able to check the process and placement by uploading the files for roughing and smoothing and running a simulated preview. There are some screenshots of the preview process which allowed me to see how the wax would be carved. I was grateful to know about the preview simulation because the brush on the cnc machine obstructs the view while the carving was taking place. It allowed me a vague idea of what would be carved but also how long it would take was indicated on the interface.
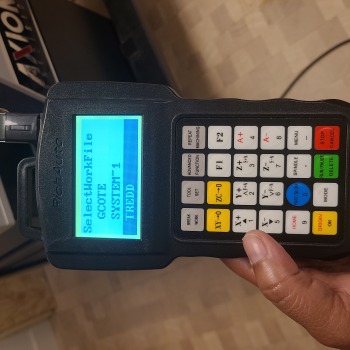

We used a remote to access the roughing files and smoothing files which are on a small USB drive that connects directly to remote. We also used the remote to home the machine as pictured. This informs the cnc machine of where the x and y axis. I lined up the mill end with the magnet that connects to the cnc using the remote.
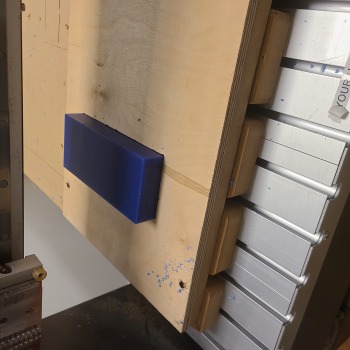
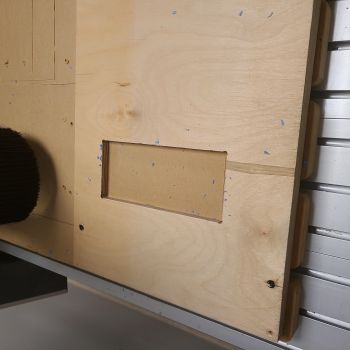
The holding spot for the wax block that was creating for the cnc machine by my instructor was incredibly helpful. The hole was cut into plywood and held our wax blocks into place perfectly when paired with very strong double-sided adhesive tape.
The machine created some shavings that were difficult to remove as the wax spray off tended to collect in tight corners. I was able to remove most of it with my fingers but used a small soft bristle brush for the areas that were difficult to remove by hand. Even after removing several of the shavings by hand, I decided to use the hot air got from the soldering station to melt and smooth some of the grooves that were created by the end mill when it fileted the top of the model to make it smooth. The top came out very smooth but as a result the sides of the model and the hole in the middle had ridges. The hot air worked very well for the wax smoothing process.
Creating the Silicon Mold
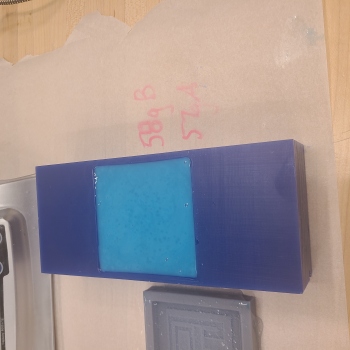
I used the same approach as documented group/lab section of my notes above to pour and mix the silicon in my newly finished wax mold. This one also took the same 30 minutes to set and was little more difficult to remove that the one we did during lab, as expected since the design contained a whole in the middle that was difficult to dislodge. I used the same approach with a mini screw driver to loosen the silicon from the wax without causing any damage. I used 58 grams of substance B and 57 grams of substance A. Since there is a 1:1 ratio for this mixture, I believe my measurement may have made my result a bit stiffer, but since the subtances were both so heavy I decided to leave them be.
The side edges and the middle whole of my wax model were incredibly rough in texture after being carved. I believe this was because of the rounding process/fileting that made the top curved and smooth. I used a popsicle stick to remove all the rough edges and then used the hot air soldering gun to smooth out the ridges on the sides as much as possible. It worked pretty well.

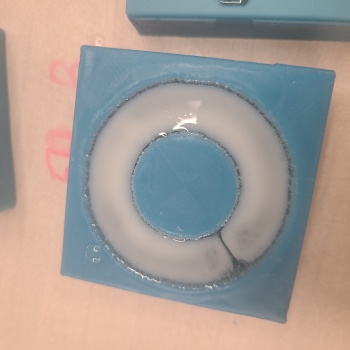
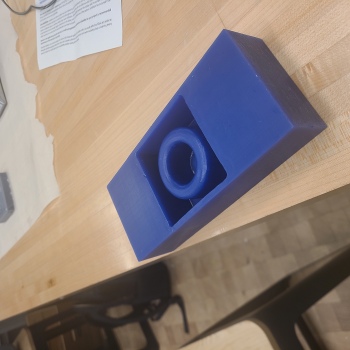
Casting Plastic Model from the Silicon Mold
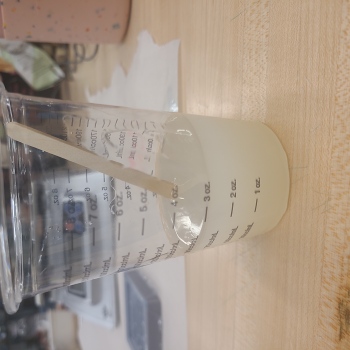
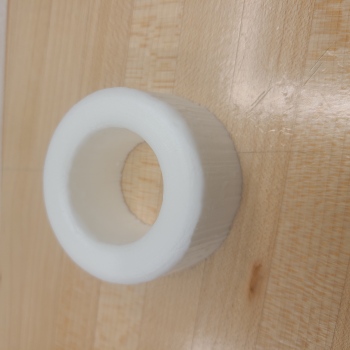
I used the same process as we used during the laboratory time to cast a plastic model for wax mold that I made. There was 7 minute pot time and 30 minute curing time for the white plastic mixture. In the photos below you can see the plastic at mid-set about 15 minutes in. As time goes on the plastic mixture changed from transparent to completely opague and white in color. Again, based on the result, I would love to recast this out of a large square wax block that would be more suitable for a bar of soap with a slightly smaller hole in the middle.