7. Computer-Controlled Machining
This week we explored computer-controlled cutting with the CNC machine. In our lab we have an Axiom Precision 8. The machine allows for cutting much thicker wood than the type we used in previous weeks with the lazer cutter. This machine can not only cut thicker cuts of wood, but can also perform decorative cuts, carvings and engraving.
Group Assignment
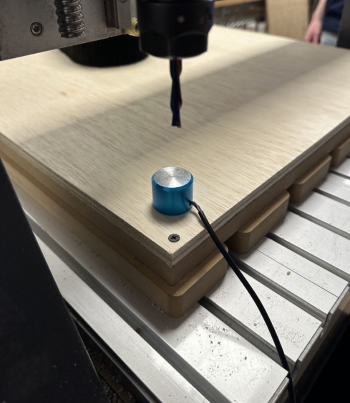
We attended the safety training for the CNC machine in groups. We were also able to explore test runout, alignment, fixturing, speeds, feeds, materials, and toolpaths for your machine. In the picture below someone from our group is homing the machine to ensure that the machine will know which reference point to return to. The results of our exploration can be found here: Group Assignment
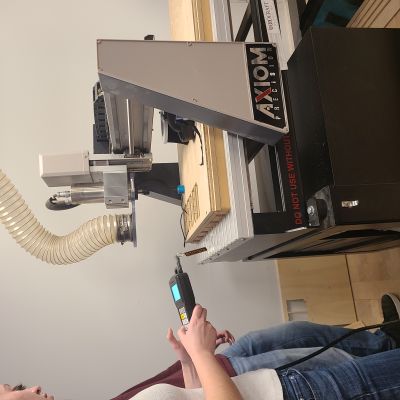
The Axiom CNC
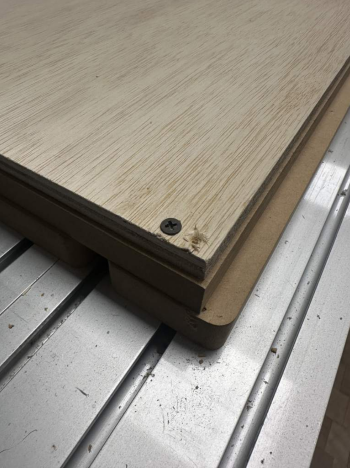
The Machine uses a cutting bit that not only travels at different depths, it can also cut from the cutting bits sides as well, allowing for more precise cuts and more intricate designs. We also discussed saftety when using this machine as it can be very dangerous if one is not careful. Hair must be tied back or up and it isn't recommended to wear loose clothing or open toed shoes. When the machine is in operation both an exhaust fan and dust accumulator are enabled to keep the air in the room safe. Everyone in the room should wear ear plugs and protective eye coverings to be as safe as possible. The machine is equipped with a spoil board to capture cuts that go deeper than the target material. The would that we cut must be screwed down to the spoil board at the very edges to make sure that the sheets of plywood for instance, will not move while the cutter is in motion. The images for the pieces that will be cut are transfered by USB as SVG files to the machine simply by plugging the USB drive to the wired control board/remote. The other neat feature is the brush component that surrounds the cutting bit and is attached to a vacuum which minimizes saw dust and keeps the cutting surface clean. There is also a red button to be pressed in emergencies to shut down the machine.

Make Something Big Assignment!
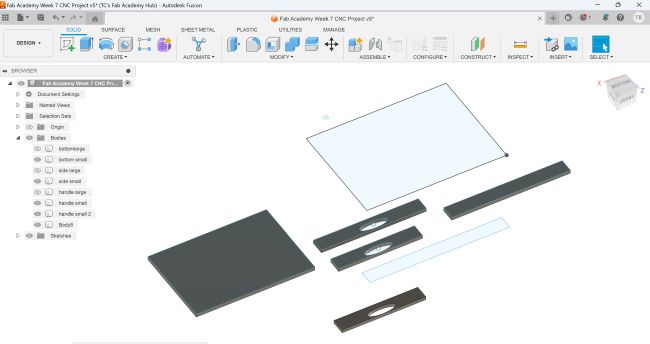
Tray Design in Fusion 360
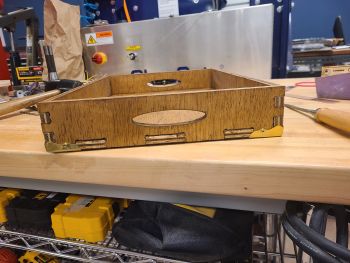
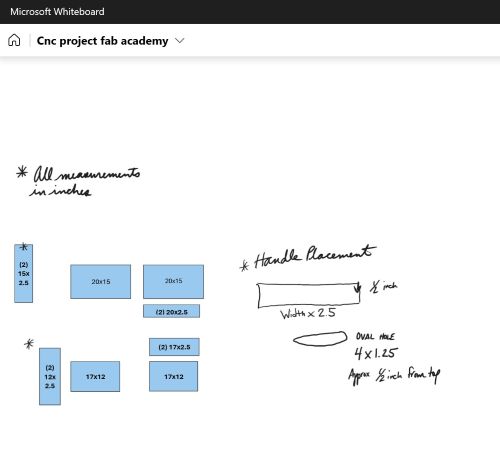
I loved the idea of not using screws and fasteners for this process and I was super excited about the interlocking would pieces that could be hammered together with a wood mallet so I decided to make something that would employ that approach for my project this week. After examining the wood I decided to make a service tray to be used as a type of rustic serviceware for guests. I love housewares but I've never made something that I can have on display but that would be functional as well. I first jotted down my idea in MS Whiteboard just to get my idea written down somewhere. I then drew the individual pieces on Fusion 360. Although this was much easier this time around as I am more familiar with the Fusion 360 interface, I am still finding that the learning curve for this software is quite steep for someone who does not know the digital side of design and drawing. I learned a few features that helped me assemble the pieces I had drawn. First I need to save each piece that I drew as its own component so that I could use the align function in Fusion 360 to bring multiple pieces together to form the tray. I also had to extrude the 2d shapes I had initially drawn to reflect the 0.48 inch thickness of the plywood I would be using. This was helpful to correctly design how the pieces would interlock. In the sketch function I used the pattern function to drag a 1/2 inch cube across the bottom edges of each wooden piece. From there I could choose which cubes would be tongues and which would be grooves brought together to form each joint.
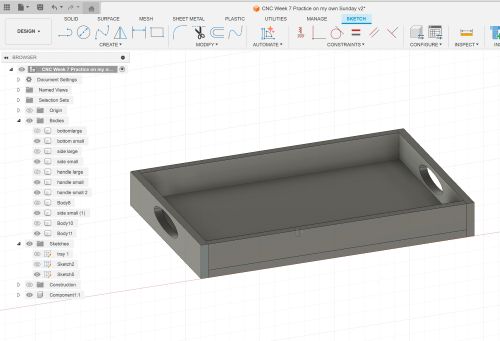
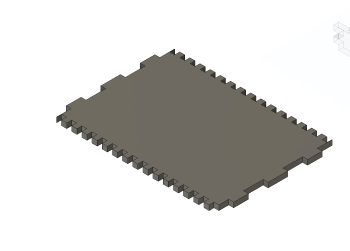
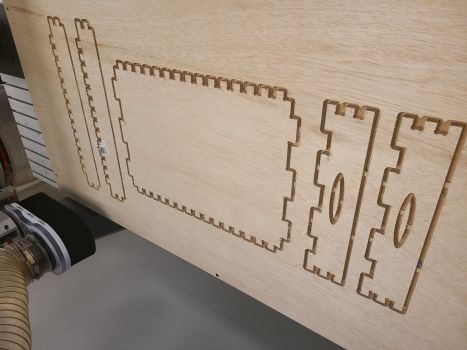
The trickiest part of this design was designing the final piece. I need to make several adjustments to the bottom tray piece to account for corners joining correctly and to make sure there would be no holes or openings in the top of the tray. On the short sides of the bottom piece I also realized that it wasnt necessary to create as many finger joints and so I made those a little thicker, mostly for 1.5 inches and 3 inches instead of the 0.5 inch fingers used for the other pieces. Each piece of the tray then needed to be exported as individual 2D files in .dxf format to be loaded into V-Carve.
Safety with the CNC Machine
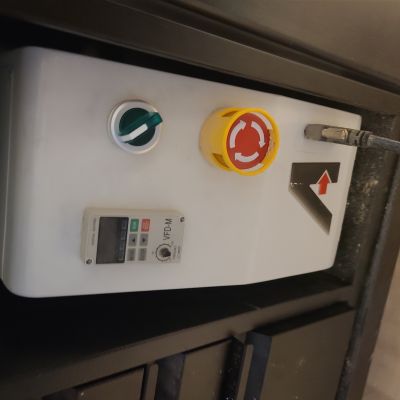
Our instructor reviewed the safety protocols for using this machine one more time before I began to cut my project. All hair and pony tails should be tied back. No loose clothing should be worn. Safety googles should be worn at all times when running the machine and we have both regular goggles and those that can be worn over eye glasses in the lab. There is an emergency kill switch to stop the cut in the invent of a mishap and we also have a kill switch to shut off the electricity for the entire wood shop on the wall near the entrance to the machine room. I also wore gloves to protect my hands when change the end mill bits on the CNC machine as the wrenches could cause injury or scratches to the hand depending on how tight the mill has been tightened into the collet. This machine must not be used with out an instructor present and you must remain in the room while the cuts are being milled.
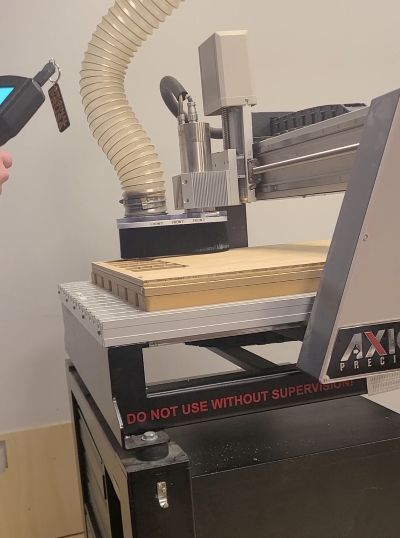
Cutting the Pieces with the Axiom CNC
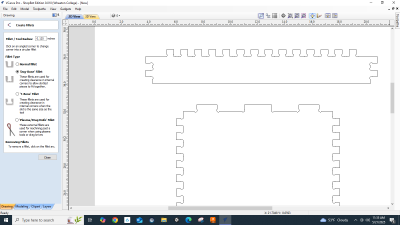
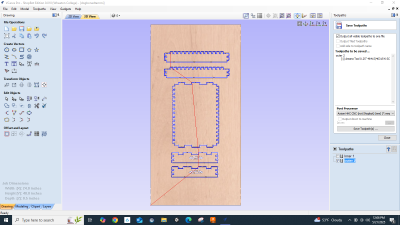
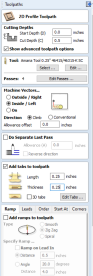
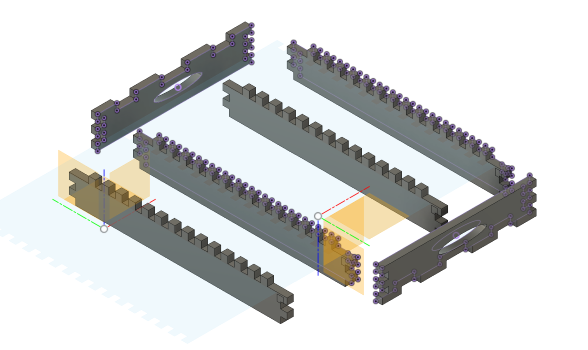
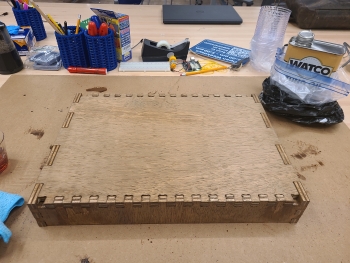
We set up the V-Carve Pro software by importing each of the three .dxf files. I then arranged them on the canvas to make sure that none overlapped. We set the thickness of the wood at 0.48 inches and the wood canvas was 2 x 4 feet. I also used this interface to create dogbones on all ther right angles in the grooves of each piece. The dog bones are used to create small circles at the corners of each 90 degree angle to make fitting the parts together easier to fit and join. Because of the shape of the router bit, it is difficult to create sharp inside corners and so adding these dog bone fillets addresses the limitation of the CNC machine to do so. These dog bones can been seen quite clearly on the finished pieces. I also added tabsin the outlines of each pieces strategically, so that the pieces would remained anchored to the spoil board while the several passes of the mill blade were made. Since the wood was roughly 1/2 inch in thickness I programmed V-Carve to do 4 passes in total. Each pass would will mill away approximately 1/8 of an inch of wood and on the fourth pass would complete the cut. This is how to carefully protect the mill end by cutting in thin layers and putting less stress on the blade. I first did the inside cuts which were the tray handles. Next I did the outside cuts which included all 5 of the tray pieces.
Sanding, Assembly, and Finishing
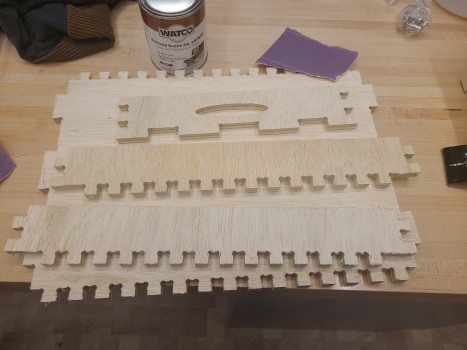
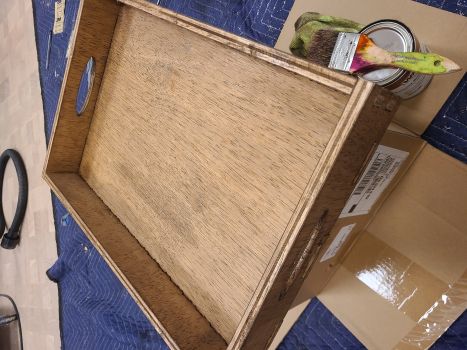
Having done a little work with plywood in the past I was prepared to do quite a bit of sanding before assembling the final product. I used 220 grit 3M sandpaper to sand down all the edges and any other surface level blemishes. I wanted teh tray to appear somewhat rustic but of course didn't want to cause someone to get splinters. After sanding I had to line up 2 pieces at time to align the fingers and grooves and then hammered the two pieces together using a rubber mallet. I repeated this with the remaining parts. I also figured out that I had the best leverage hammering at waist height. Not only did the pieces fit well, the tray also seems quite sturdy. After all the pieces were together and the tray was fully assembled I again sanded the edges of the wood to get rid of any splinters that may have loosened during the hammering process.
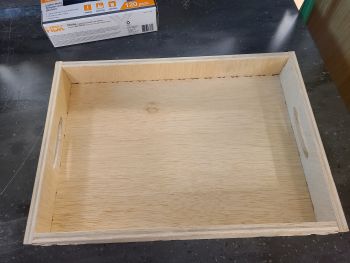
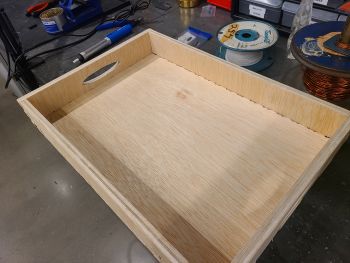
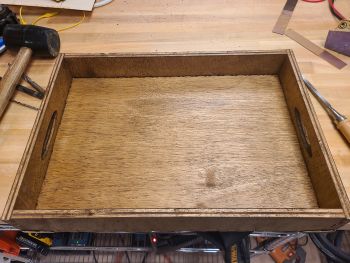
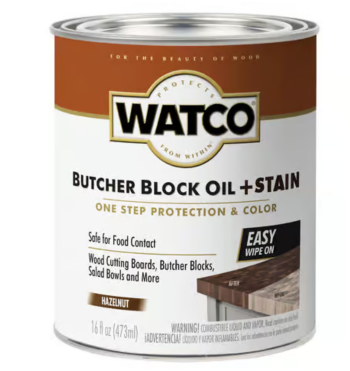
I finished the wood with a coating of odorless, foodsafe stain called Watco Butcher Block Oil in the color hazelnut. I've turned to this product in the past when faced with not having a place to stain wood outdoors. Althought this tray will probably not be exposed to food at any point, the butcher block oil offers several nice colors and waterproof protective coating without all the terrible fumes. I also added one coat of Tung Oil to add additional waterproof-ability along with some decorative corner pieces.
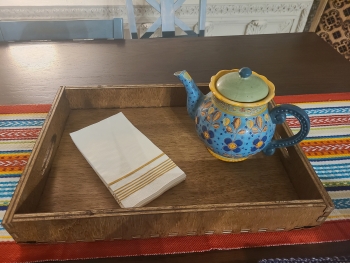
The Finished Tray