Forest CNC Router:
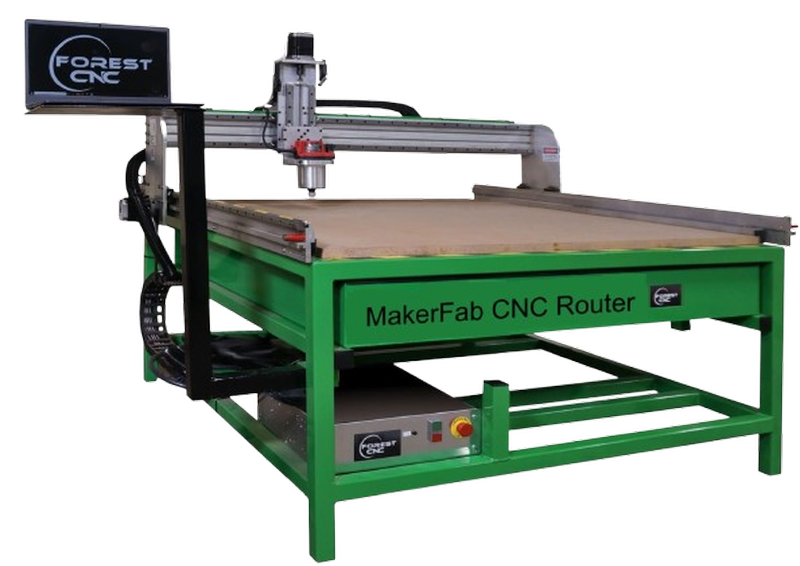
A computer-controlled device for accurate cutting, engraving, and creating is the Forest CNC Router. It can be used on light metals, composites, wood, and plastic. Fabrication, prototyping, signage, furniture manufacturing, and industrial applications are its primary uses.
More info
Types of End Mill
| End Mill Type |
Image |
Description |
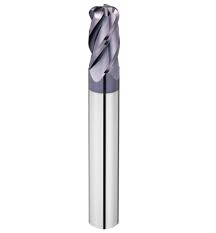
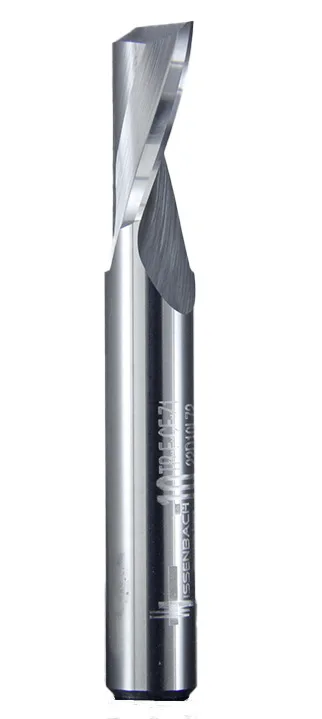
| Square End Mills |
 |
These mills are commonly used for straight cuts, slot creation, and surface finishing with a flat end. |
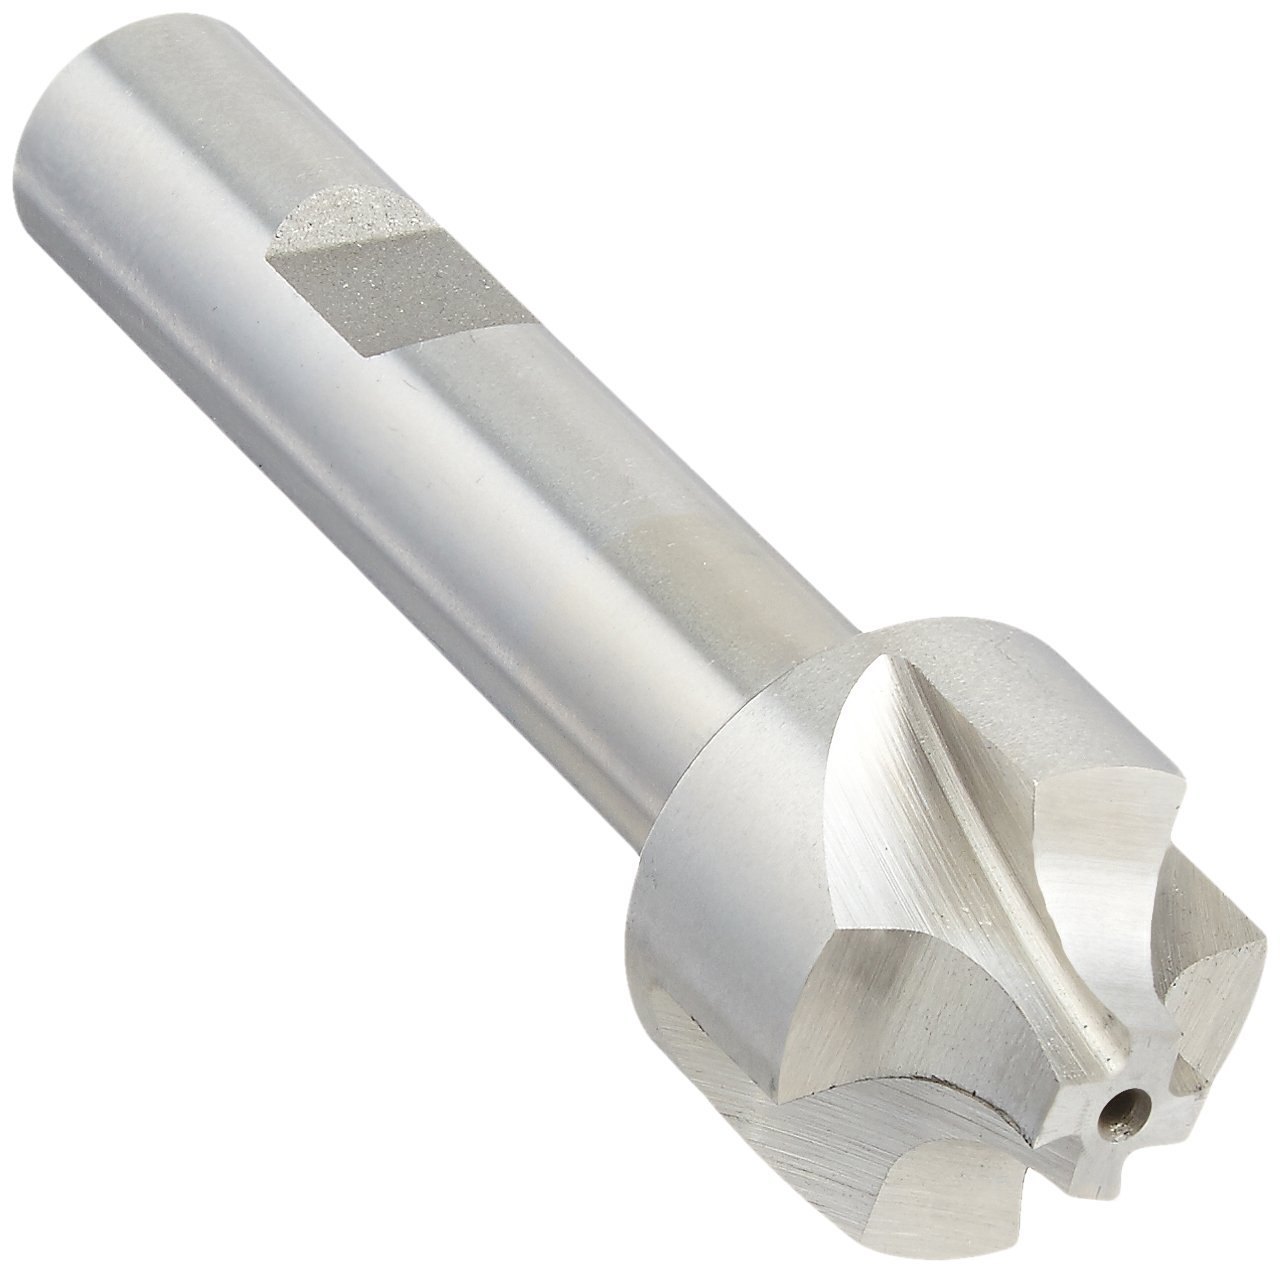
| Keyway End Mills |
 |
Designed to cut key-shaped slots in metallic parts to fit woodruff keys or other inserts. |
| Ball End Mills |
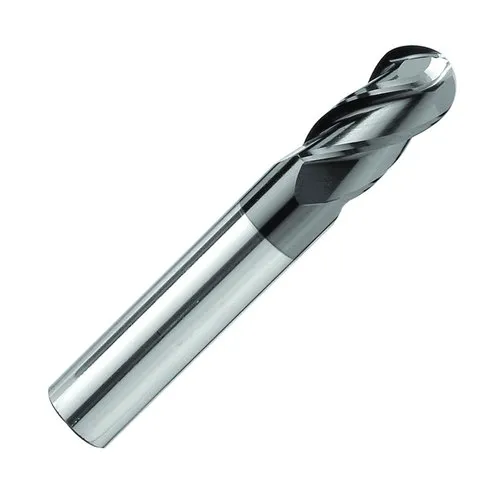 |
Perfect for contouring, 3D shapes, and making curved features due to their rounded tip. |
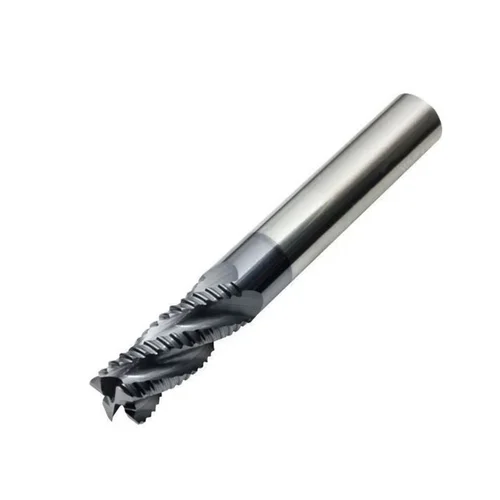
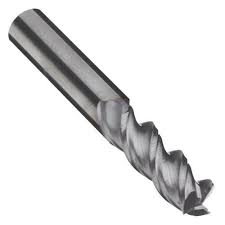
| Roughing End Mills |
 |
Ideal for fast material removal with reduced chatter due to their unique tooth profile. |
| Corner Radius End Mills |
 |
These tools have a slight radius at the corner, which helps prevent chipping and improves strength. |
| Roughing and Finishing End Mills |
 |
This type performs both rough cuts and fine finishing in one go, saving time and effort. |
| Corner Rounding End Mills |
 |
Useful for creating rounded edges on parts, making them smooth and less prone to damage. |
| Drill Mills |
 |
Multi-purpose tools used for drilling, chamfering, milling, and light profiling. |
| Tapered End Mills |
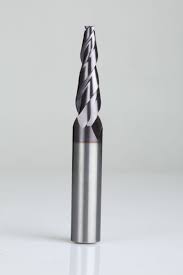 |
These end mills taper towards the tip and are suited for mold making and angled surfaces. |
Flute Types and End Cut Types
| Flute Type |
Image |
Description |
| Single Flute |
 |
Great for rapid cutting and soft materials due to its large chip clearance. |
| Two Flute |
 |
Commonly used for slotting tasks with good chip ejection ability. |
| Three Flute |
 |
Offers a balance between strength and chip removal — ideal for shallow cavities. |
| Four/Multiple Flute |
 |
Provides smoother finishes and faster feed rates but limited chip space. |
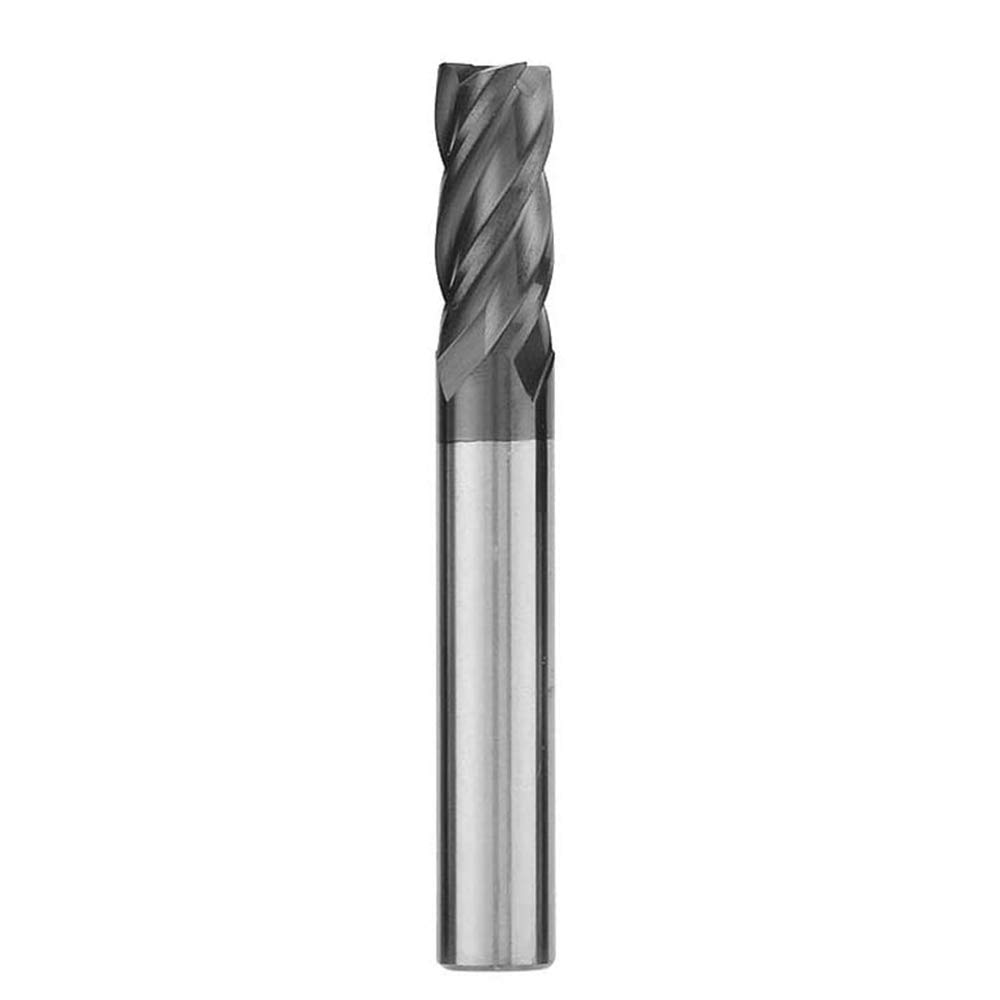
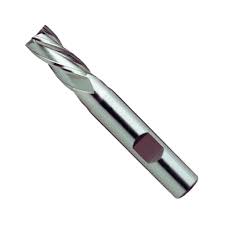
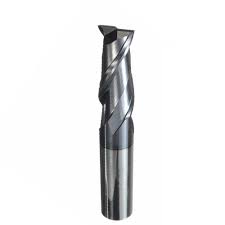
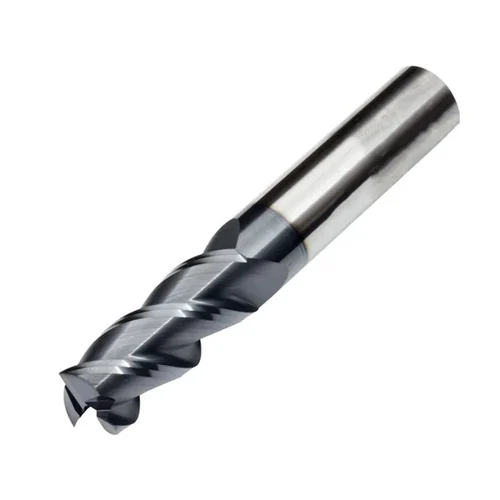
We used a 6 mm end mill with a 6 mm collet for both our group and individual assignments. This particular end mill is strong, reliable, and performs well with MDF material. It also provides a 6 mm kerf, ensuring precise and efficient cutting results.
Safety Measures
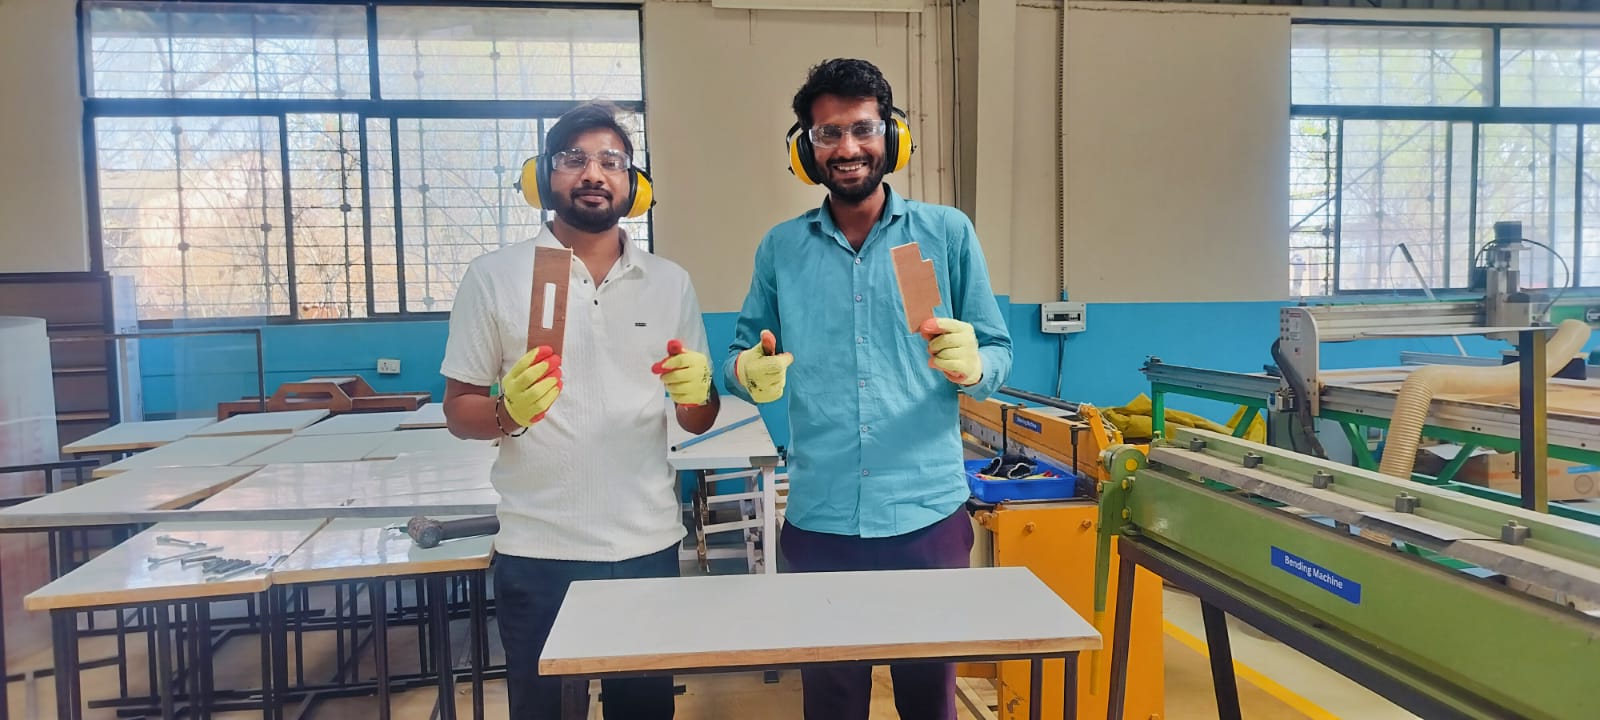
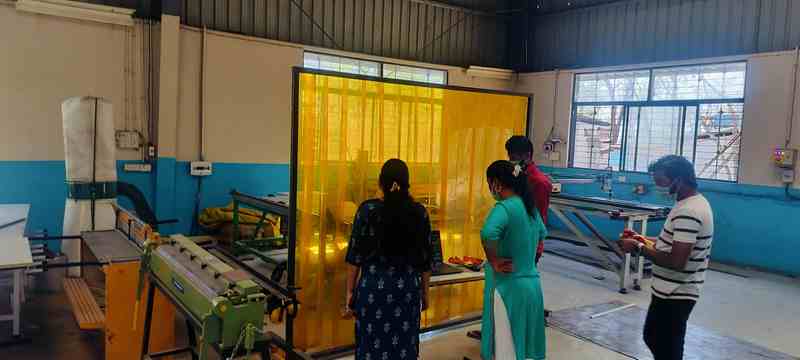
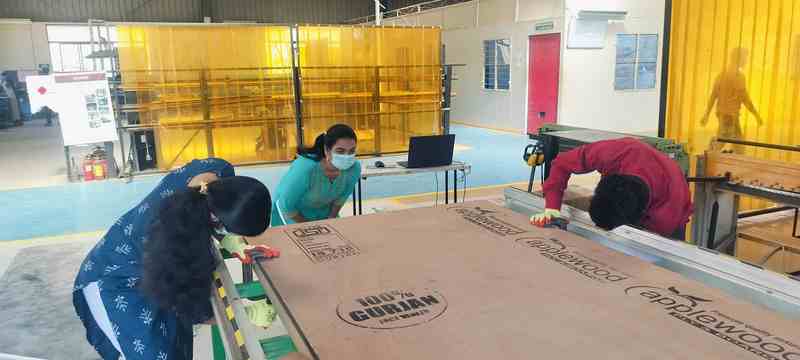
Prior to beginning the work, we carefully reviewed the safety procedures, the things we need to wear when operating the machine, and the precautions we should take.
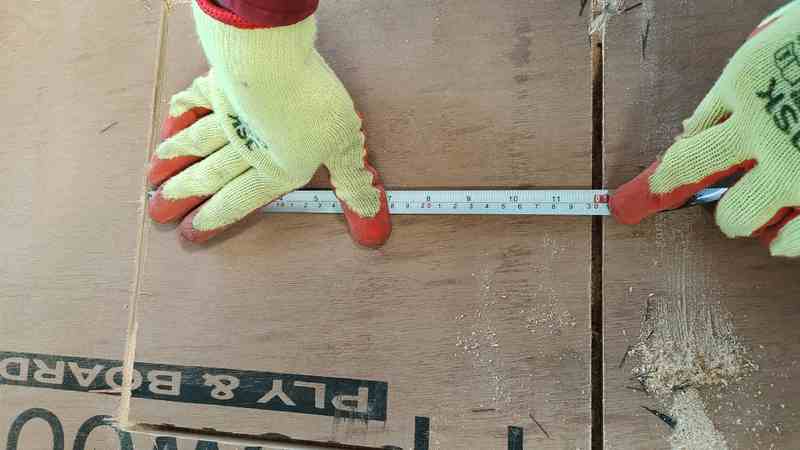
1. First, we selected plywood, which was 18mm thick.
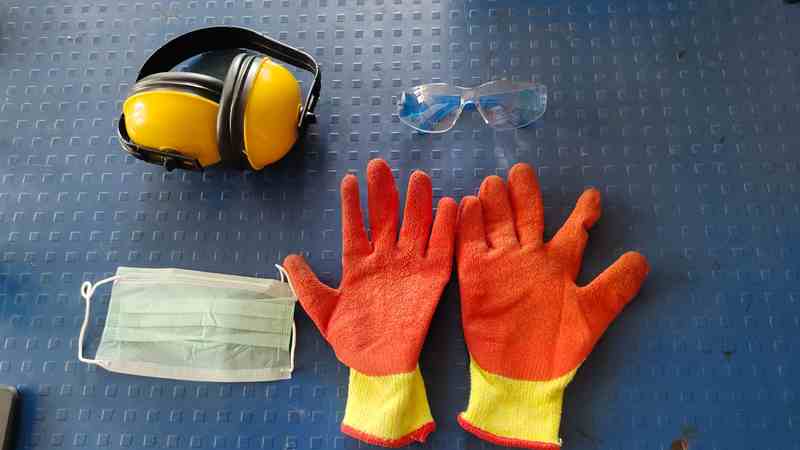
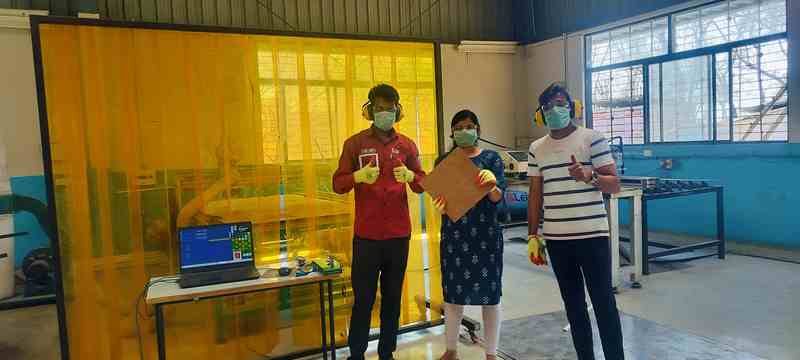
2. After that, we focused more on safety tools, using headphones, glasses, gloves, and a mask.

3.Then, we thoroughly cleaned the machine.
Useing CNC machine safety shield
5.We gained basic knowledge about the CNC machine.
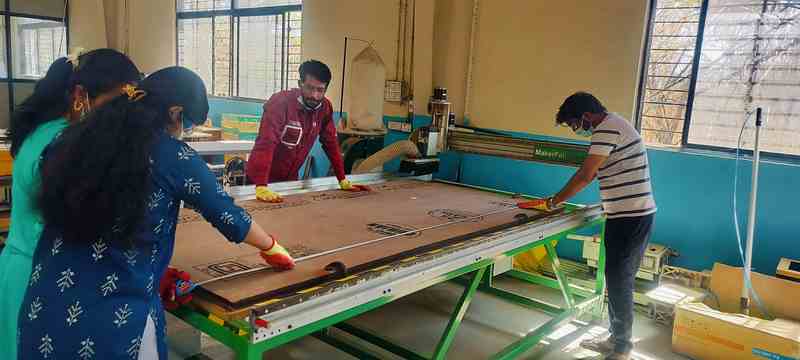
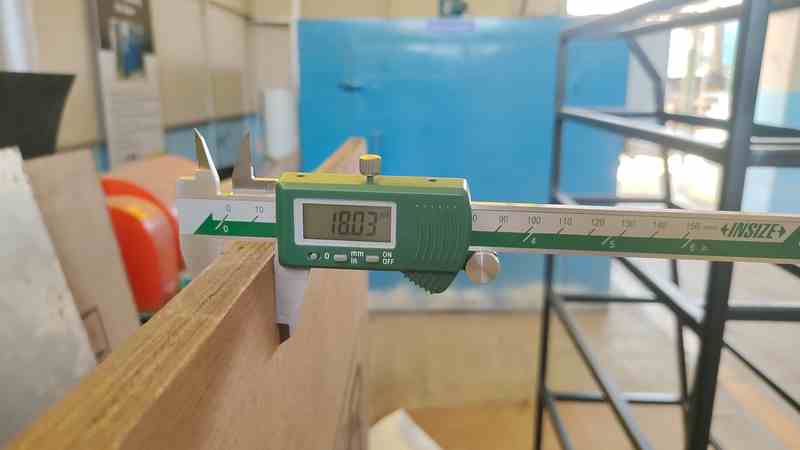
6.Then, we measured the horizontal dimensions of the plywood.
7. Then, we measured the vertical dimensions of the plywood
Toolpath & Cutting Parameters
Different toolpaths include pocketing, profiling, and engraving. Parameters such as feed rate, spindle speed, and depth of cut impact the quality of the machining.
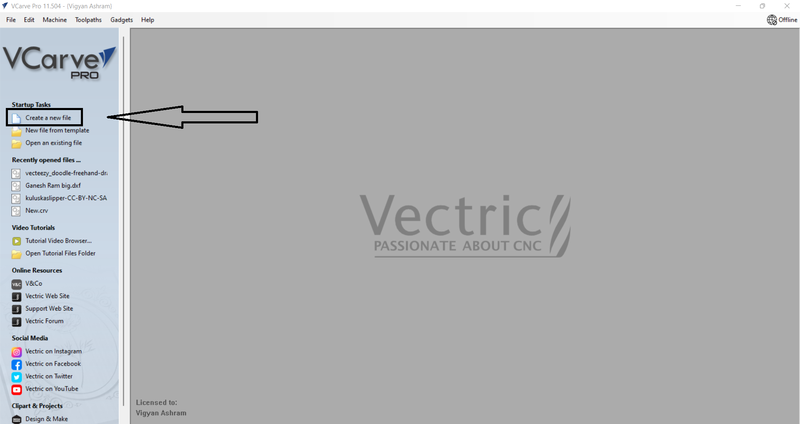 1. First, we gathered basic information about the V Curve Pro software on the laptop at the Vigyan Ashram and then opened the software. After that, we clicked on "Create a New File.
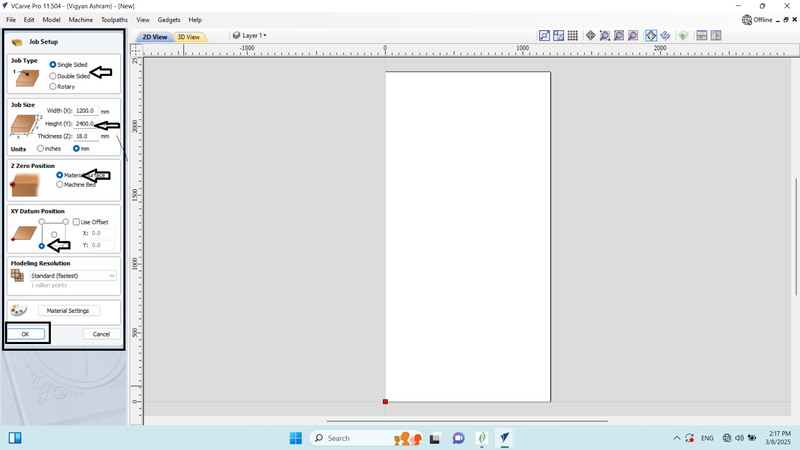 2. After creating the file, we set up the job.
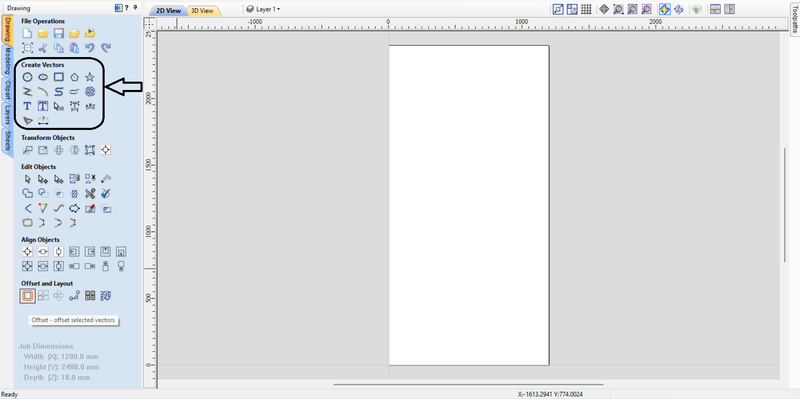 3. On the drawing page, we gained basic information about vector design and then created a rectangle.
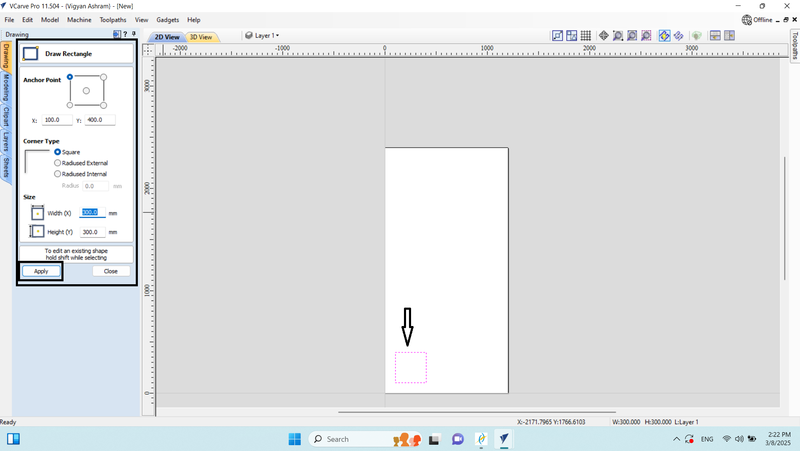 4. After that, we set the rectangle's size to a width and height of 300 by 300 mm and applied the changes.
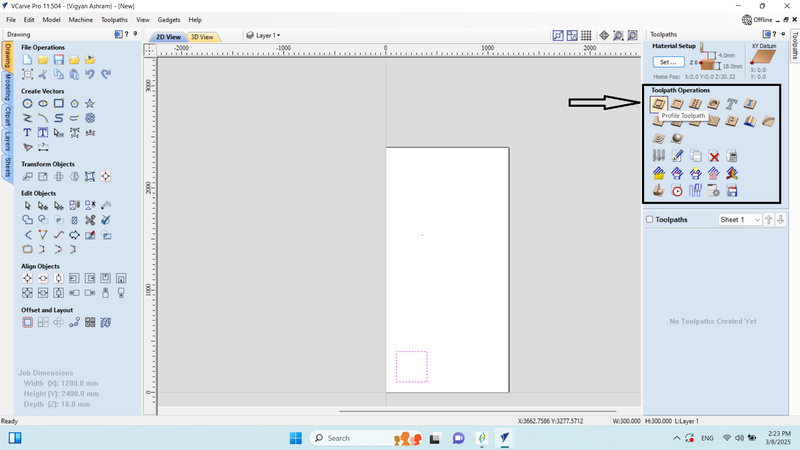 5. We selected the Profile Tool Path and learned about the tool path operations.
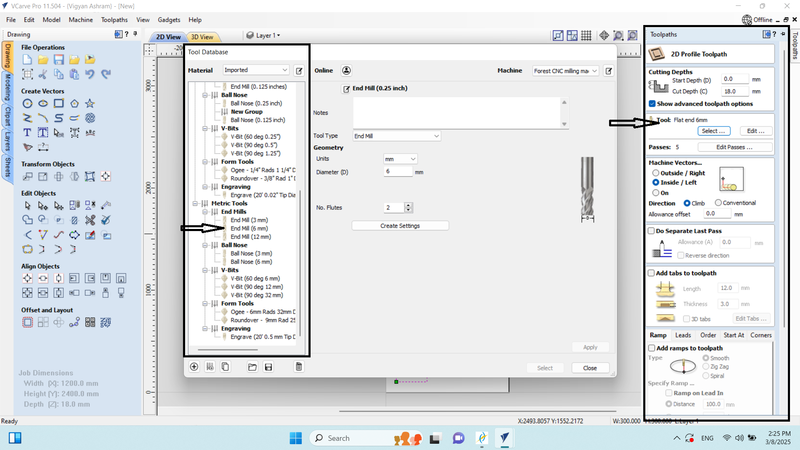 6. We selected a 6 mm end mill for the tool path and gathered information about the tool and its flat.
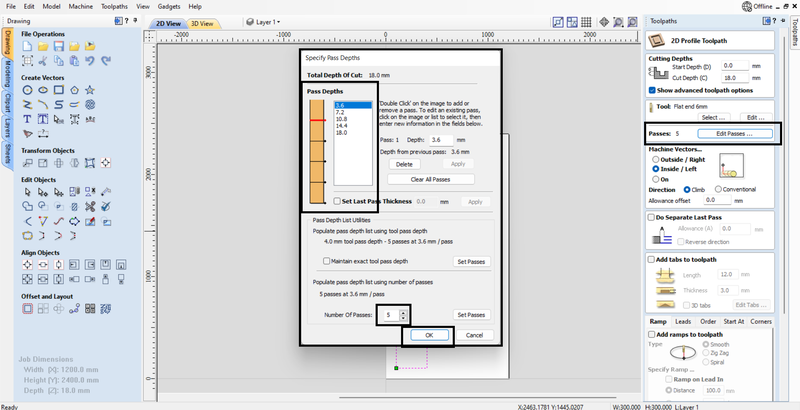 7. To edit the passes, we set the pass depth to 3.6 mm, which resulted in 5 passes, allowing us to cut through the 18 mm plywood in 5 passes.
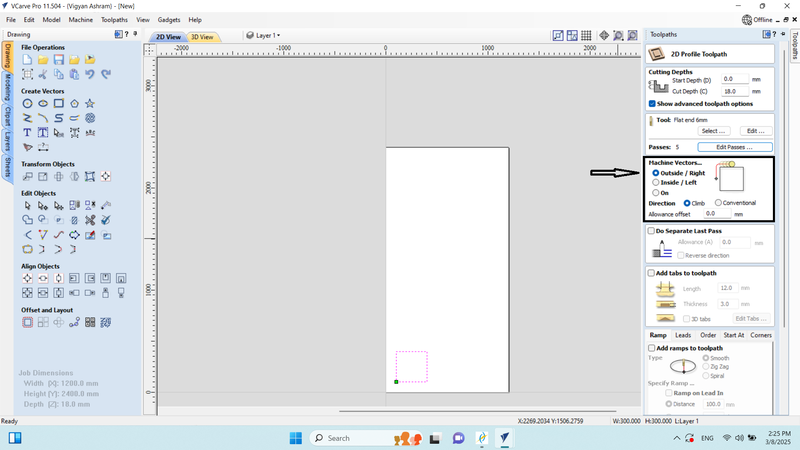
8. In the machine vector, we set it to "Outside/Right" because we needed to start the cutting from the outer side of the design at 300 mm. Next, we entered the tool path name and clicked on "Calculate."
7. To edit the passes, we set the pass depth to 3.6 mm, which resulted in 5 passes, allowing us to cut through the 18 mm plywood in 5 passes.
8. In the machine vector, we set it to "Outside/Right" because we needed to start the cutting from the outer side of the design at 300 mm. Next, we entered the tool path name and clicked on "Calculate."
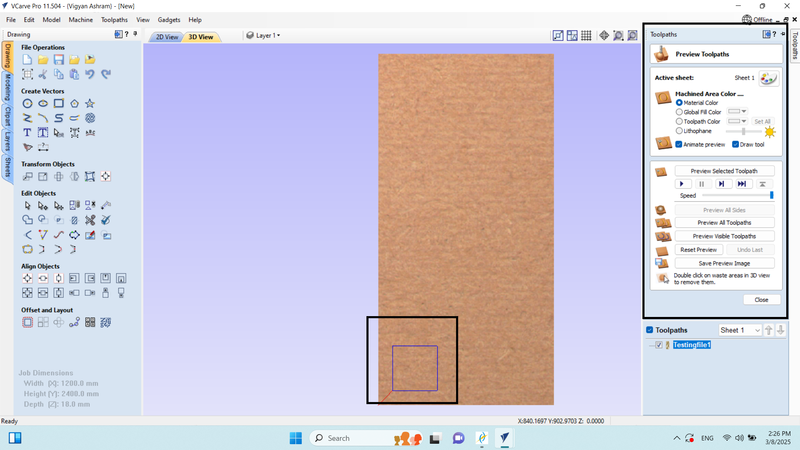
 9. We run the preview of the selected tool path, where we saw that our design was cut in 5 passes, and then we closed it.
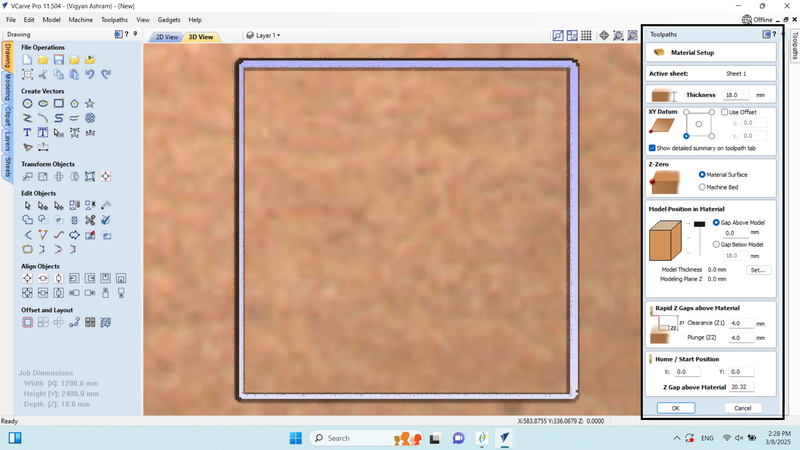
 10. In the material setup, we configured the material settings.
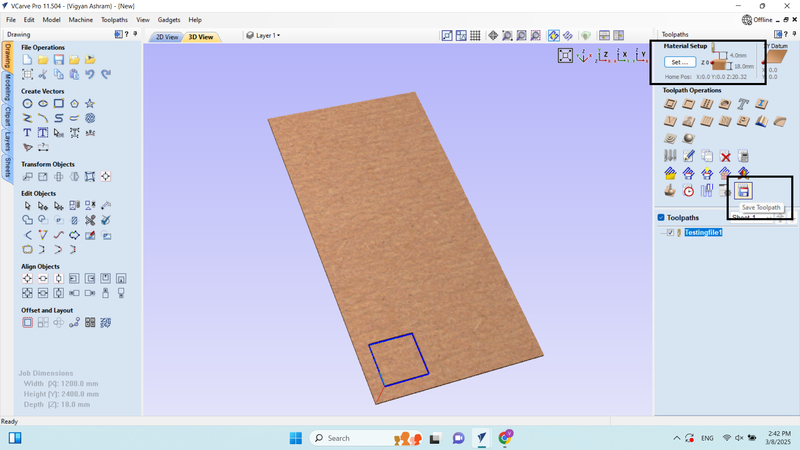
 11. In the tool path section, we saved the tool path in (.CNC) file format, which generated our G-code.
 12. Saved the G-code in .cnc file format on the local device.
 13. This time, we drew a circle in the drawing workspace with a diameter of 200.
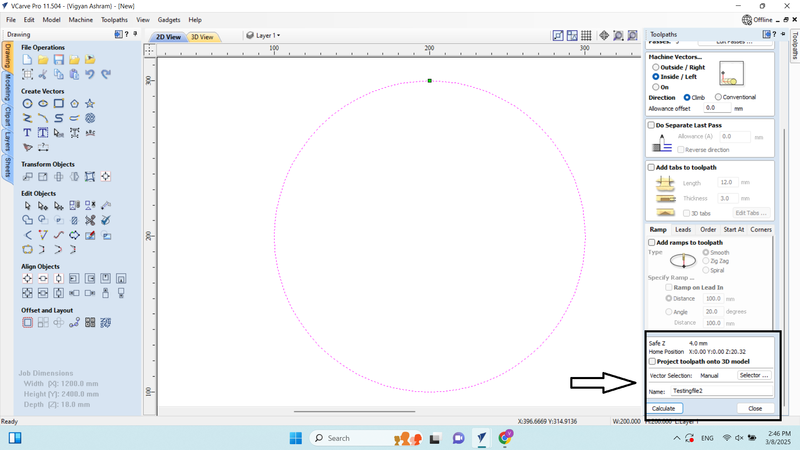
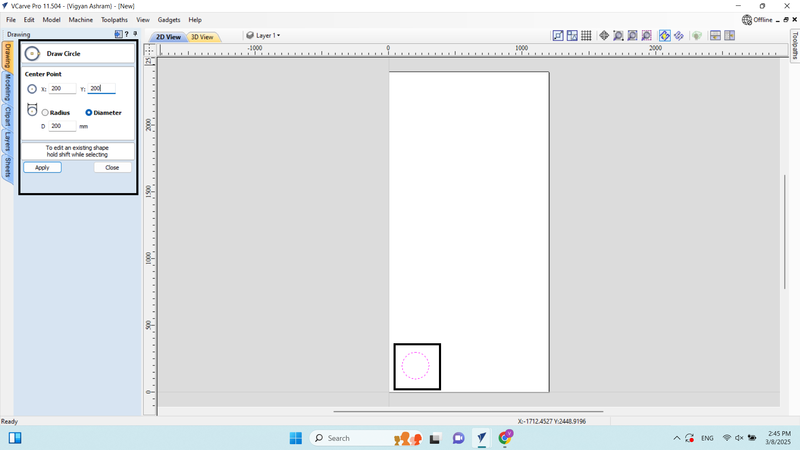 14. In the 2D profile tool path, we adjusted the settings according to the material and set the machine vector to "Inside (Slice)/Left" because this time we wanted the end mill to cut from the inside.
 15.We entered into the tool path option and saved the tool path.
 16. Saved the G-code in .cnc file format on the local device.
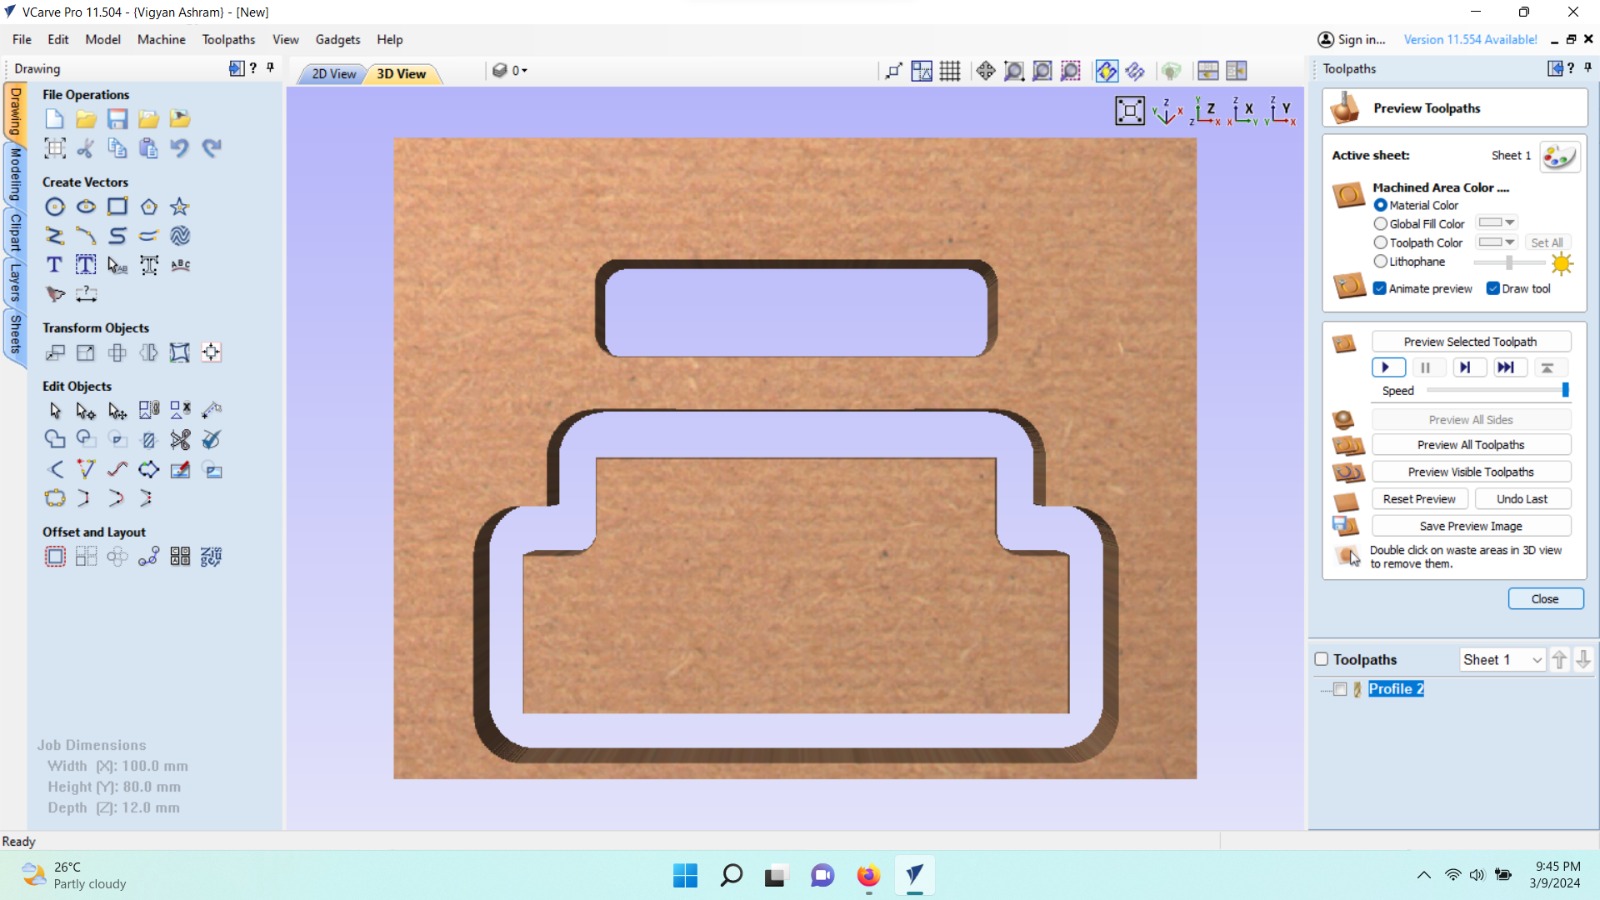
As per the process, we also created a CNC file for the press-fit part.
Machine Setup & Operation
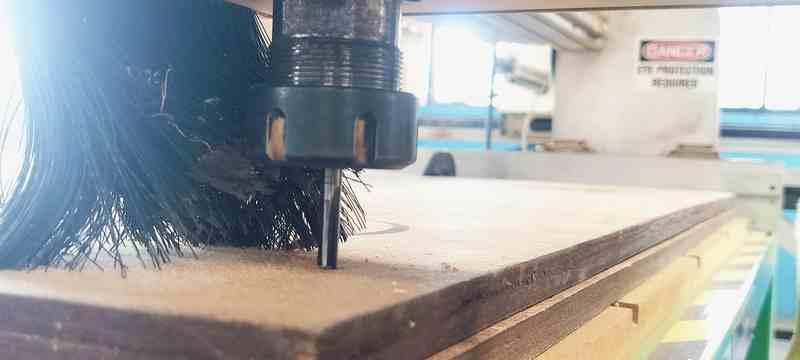
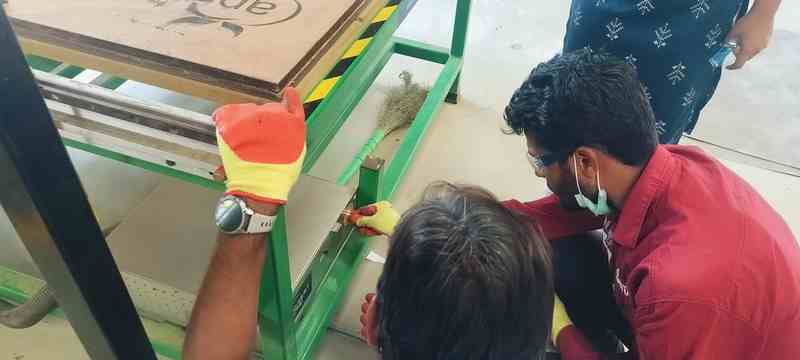
First, we properly placed the plywood on the router bed in an organized manner.
Then, we securely tightened the C-clamps.
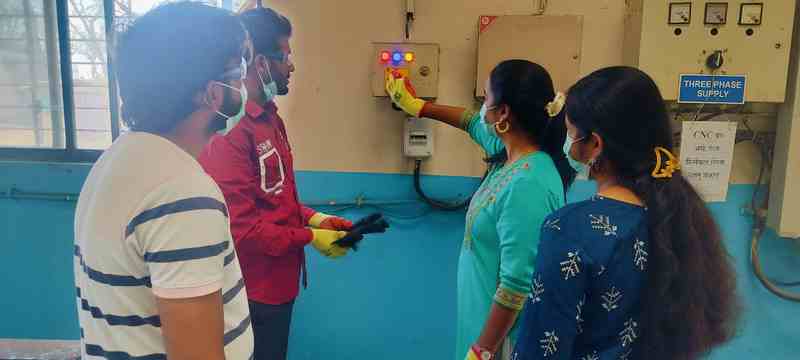
Since our machine operates on a single phase, we connected the switch to a single-phase power source.

Then, we turned on the machine's power, switched on the dust collector, and started the machine.

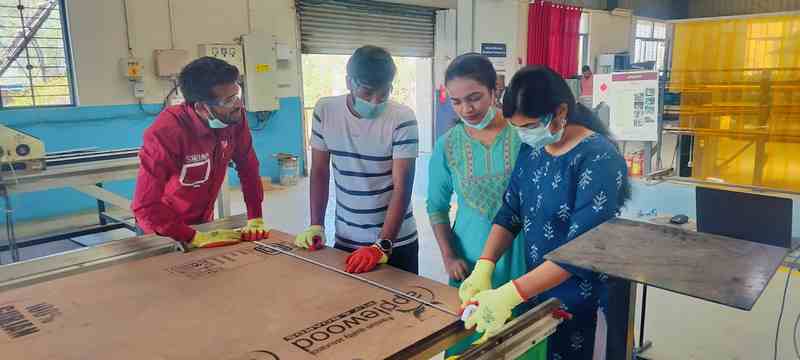
Then, we cleaned the area around the end mill and securely fixed it in place.
Then, we pressed the machine's power-on button and released the emergency stop button.
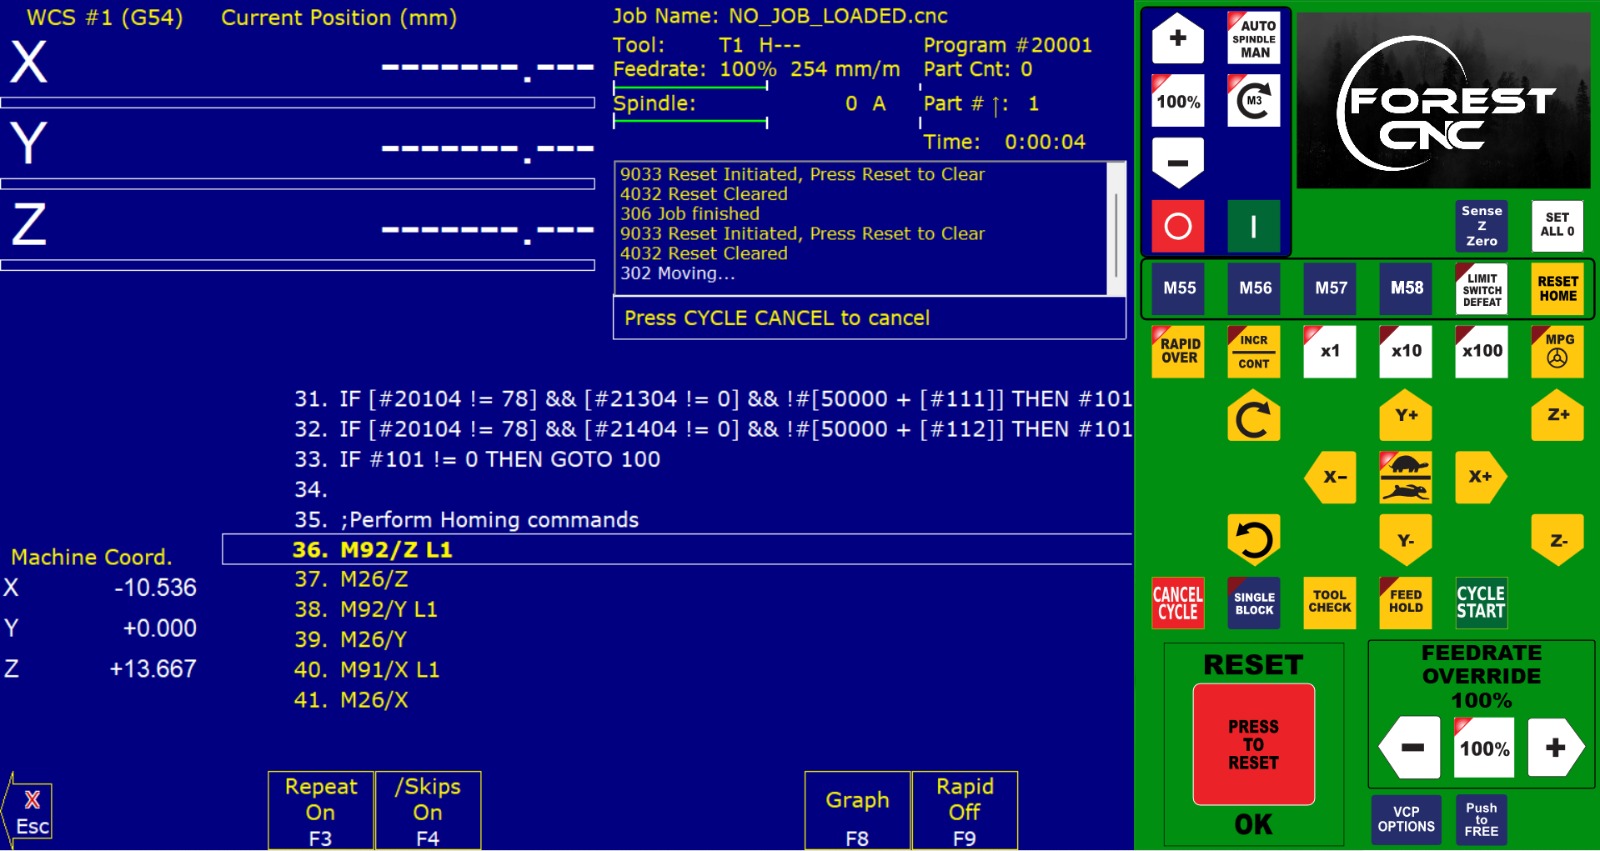
Then we opened the machine and turned on the machine's software and We clicked on the "Reset" button and did the home reset
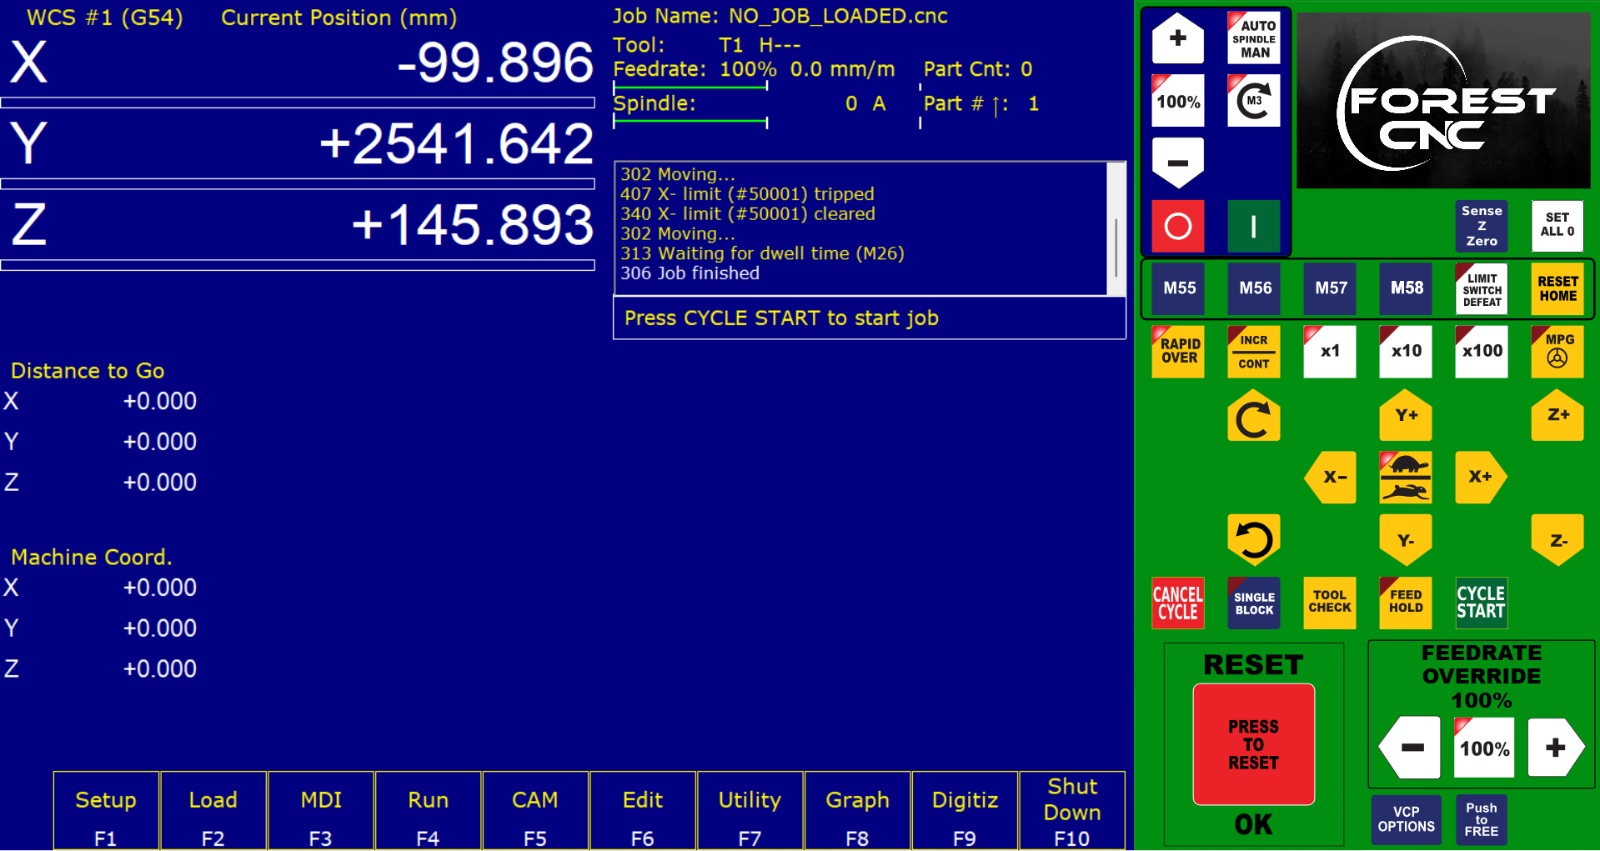
We brought the XYZ axes to their origin.
Then, we set the Z-axis to the corner of the router.

We set XYZ to zero and loaded the CNC file.
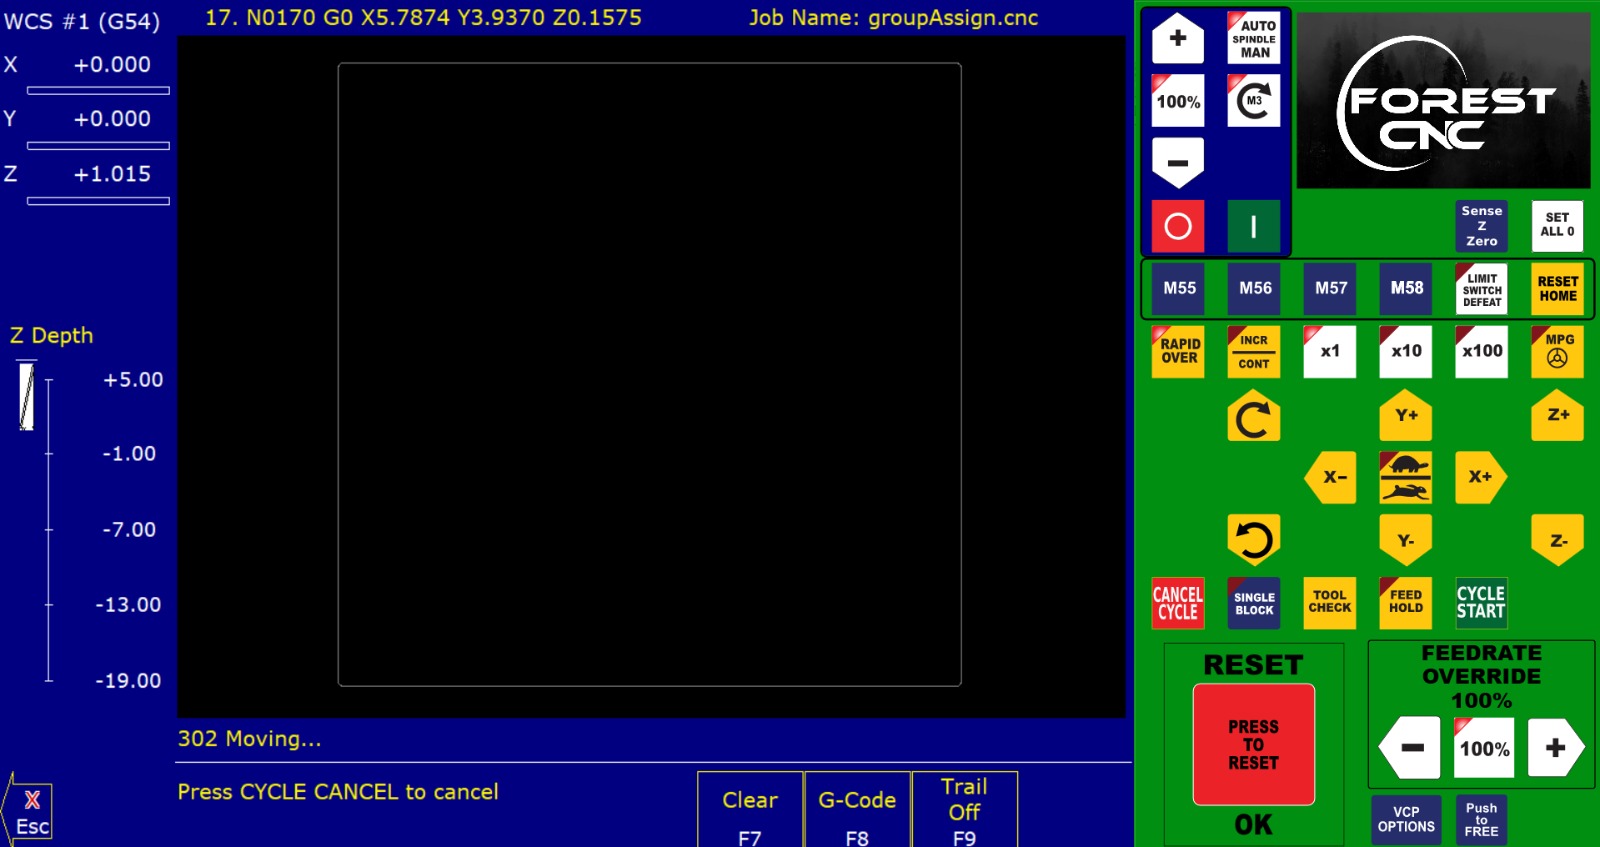
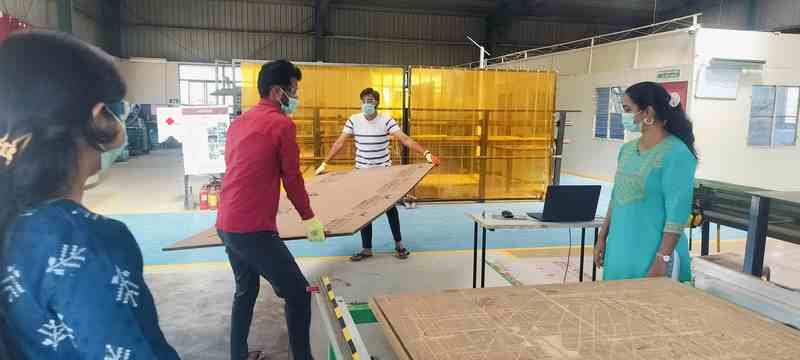
After that, we clicked on "Cycle Start," and the machine started running.

After some time, the job was completed.
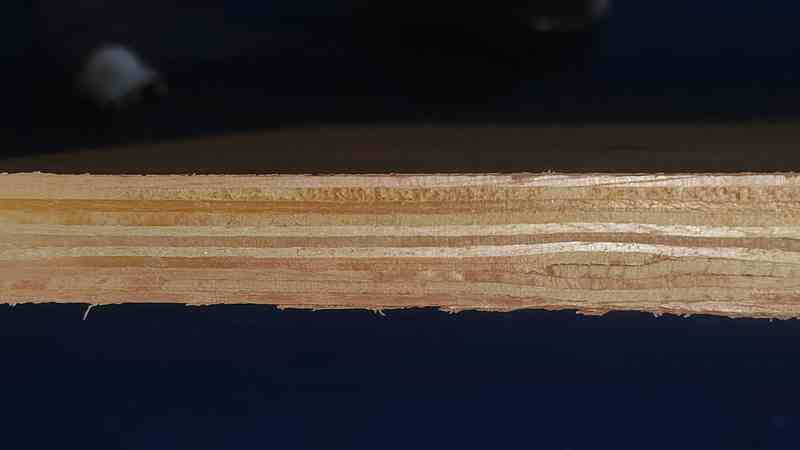
Finally, our object was successfully cut. The rectangle was completed in five passes.
curve of 6 mm.
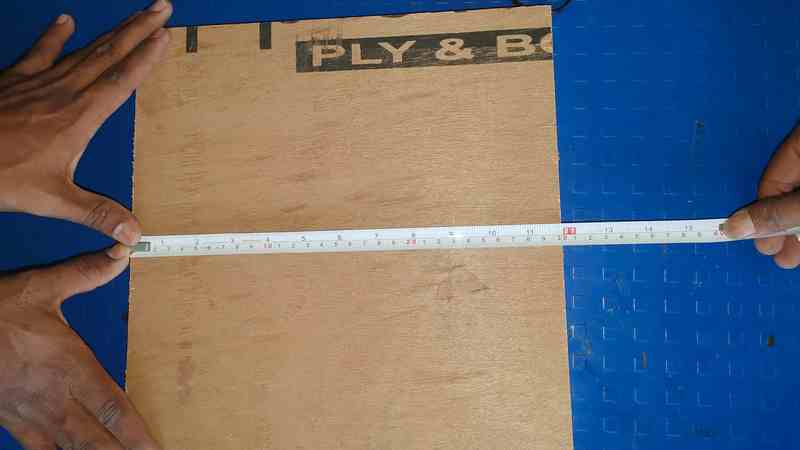
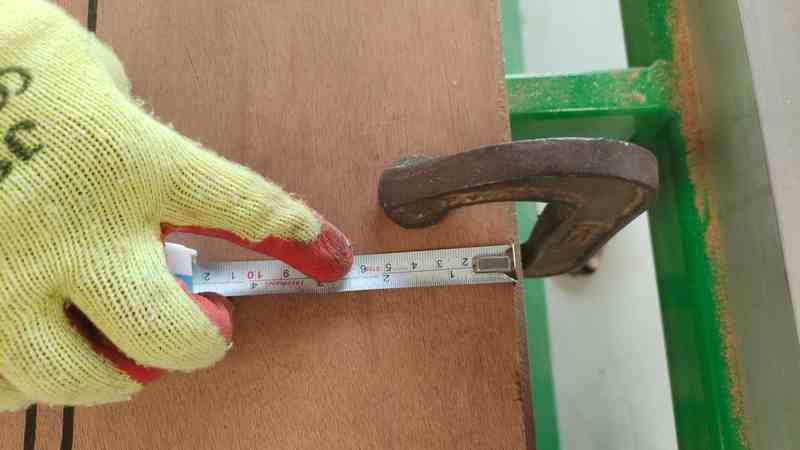
Then, we moved the rectangle from the plywood and checked its dimensions. The rectangle measured 300 mm by 300 mm
Finally, we inspected the finishing of the extracted object.
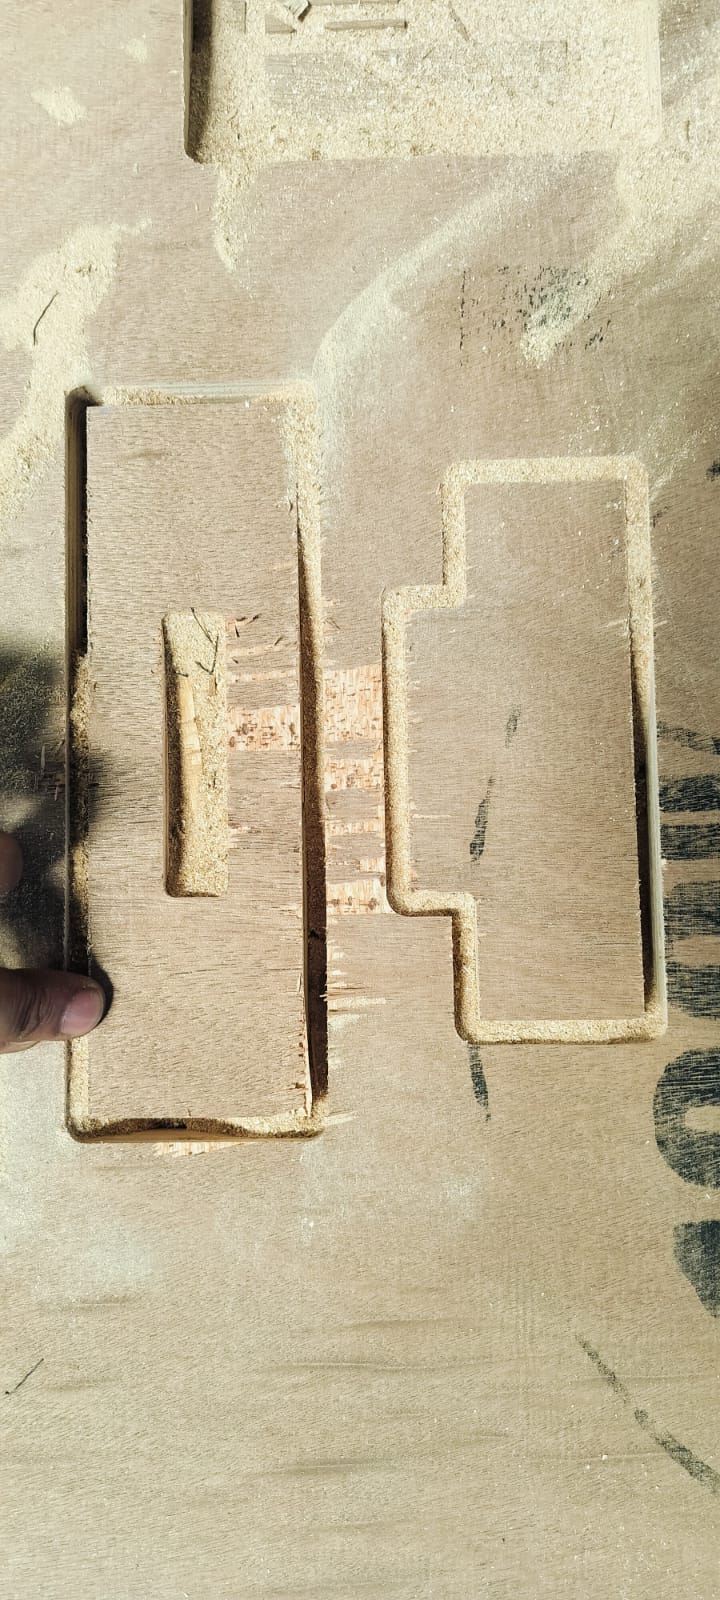
We prepared the press-fit design as suggested by Neil, with dimensions of 18mm × 100mm. We cut the press-fit design by generating a toolpath.
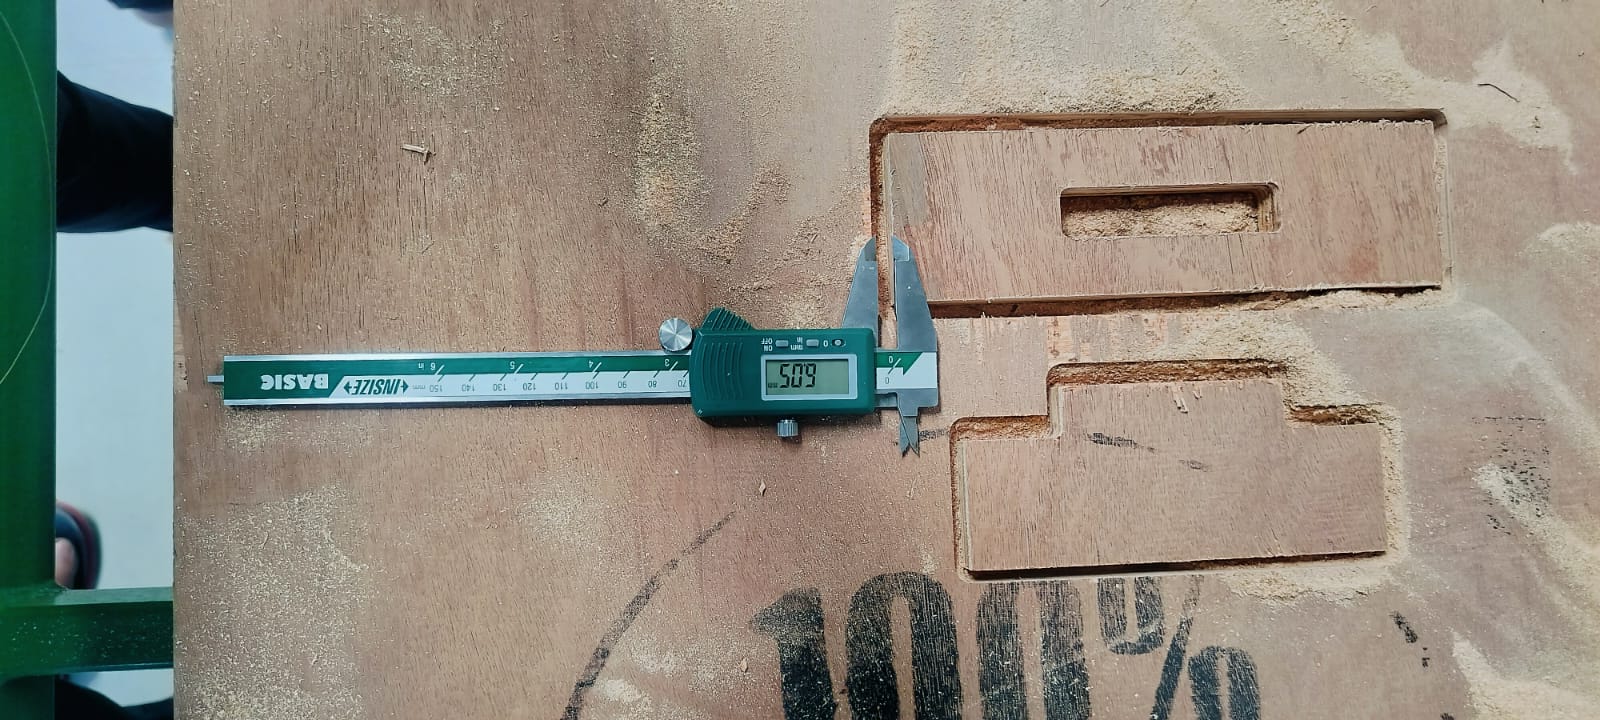
We checked curve, and it was coming out well, 6 MM

We also checked the dimensions of the press-fit design, and it came out nicely as 18 x 100 mm
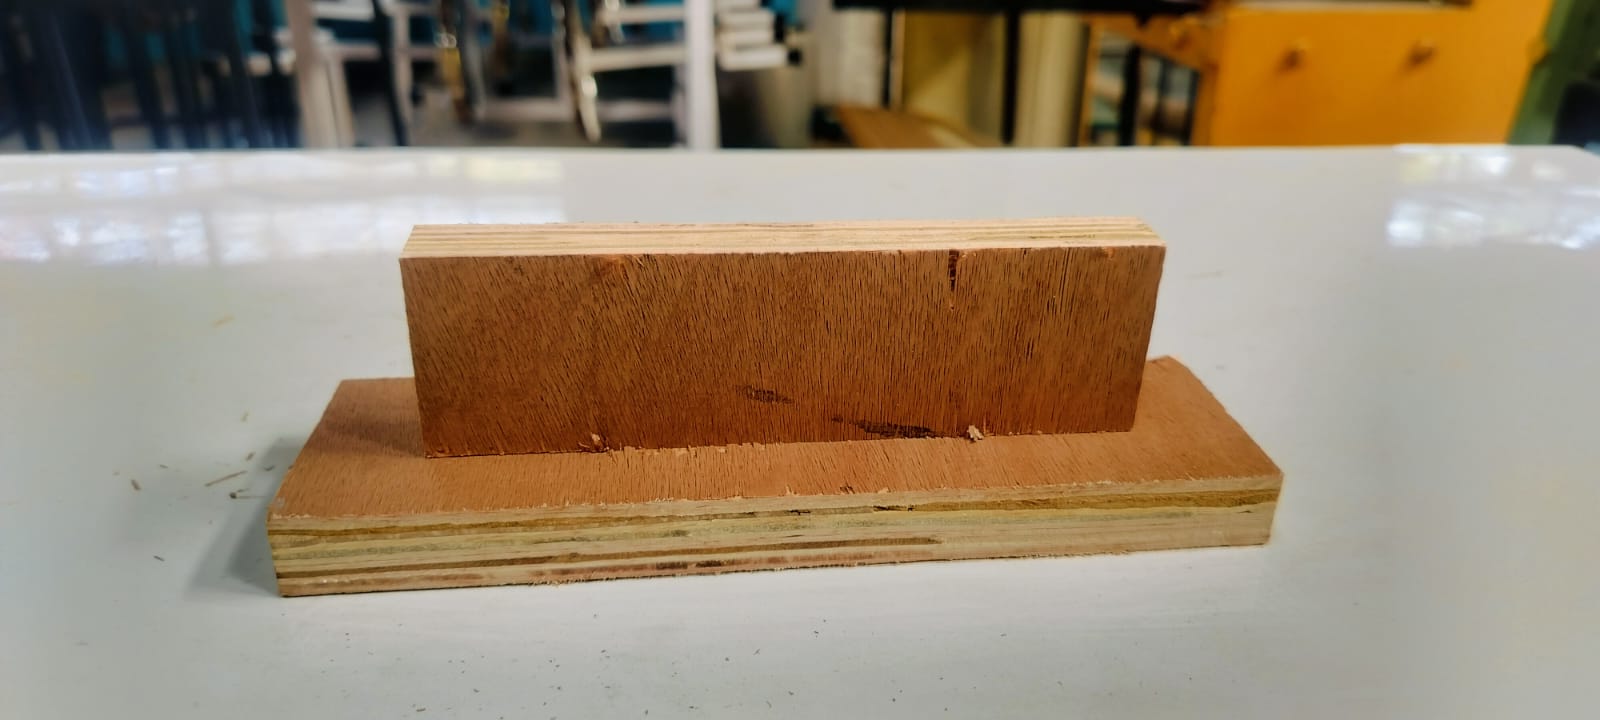
Finally, we press-fitted the design using a hammer, which resulted in a secure and precise fit.
.
Challenges & Learnings
We discovered in the wood router lesson that we need to measure whether we want to use an external or inside design before we can create any kind of design. In order to cut with an appropriate press fit, this step is essential. We also concentrated on how to properly finish the design, giving safety measures the utmost consideration.