Assignments
Principles and practices
- Model (raster, vector, 2D, 3D, render, animate, simulate) a possible final project.
- Compress your files and post a description on your repo.
The idea from sketches
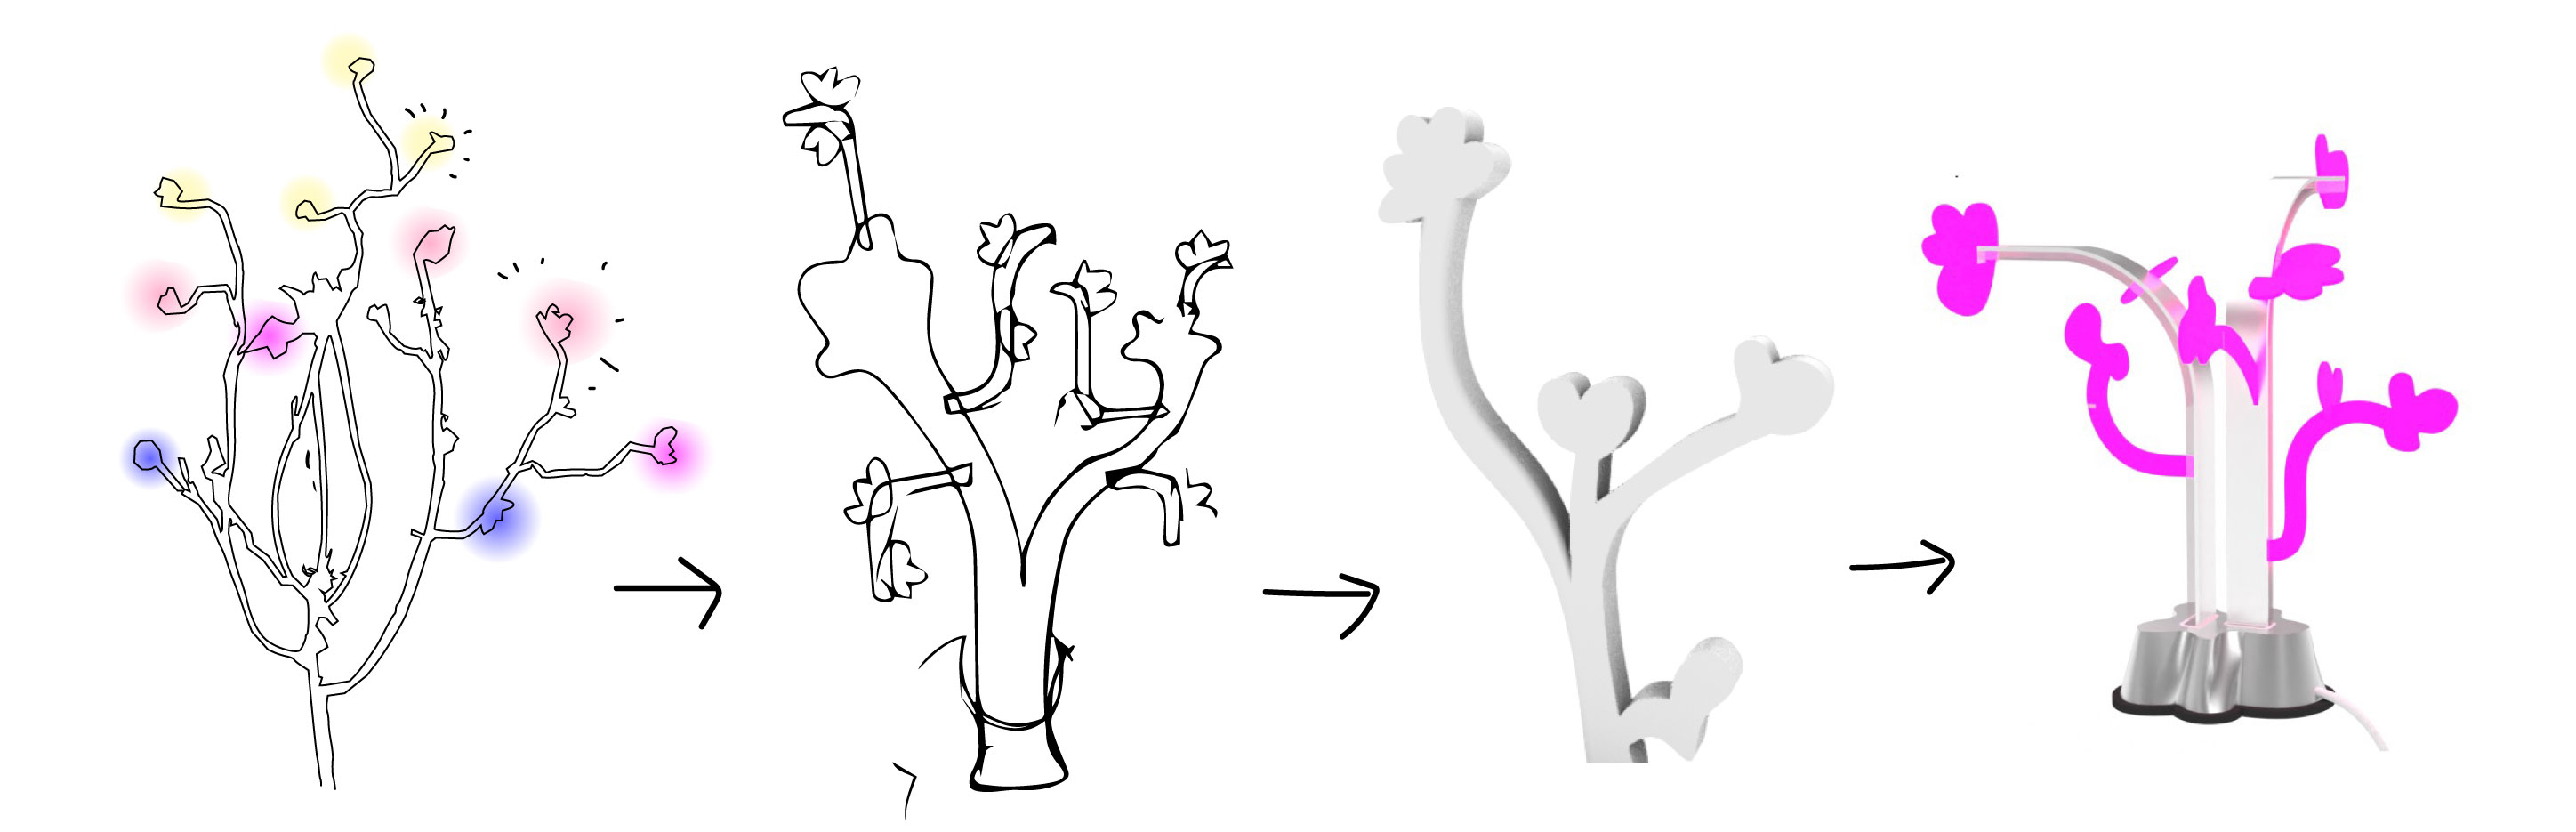
I conceptualize the idea of the lightstick as one of my drawings like a tree. I choose this drawing because I could explore with the elements of a tree such as a stem, some branches or even petals. So, for this week I started from my hand drawings and sketches, make them 2D as vectors and then tried to make a first 3D idea of how it can transform in a project.
2D s o f tw a r e E x p l o r a t i o n
2D VECTOR: ILLUSTRATOR
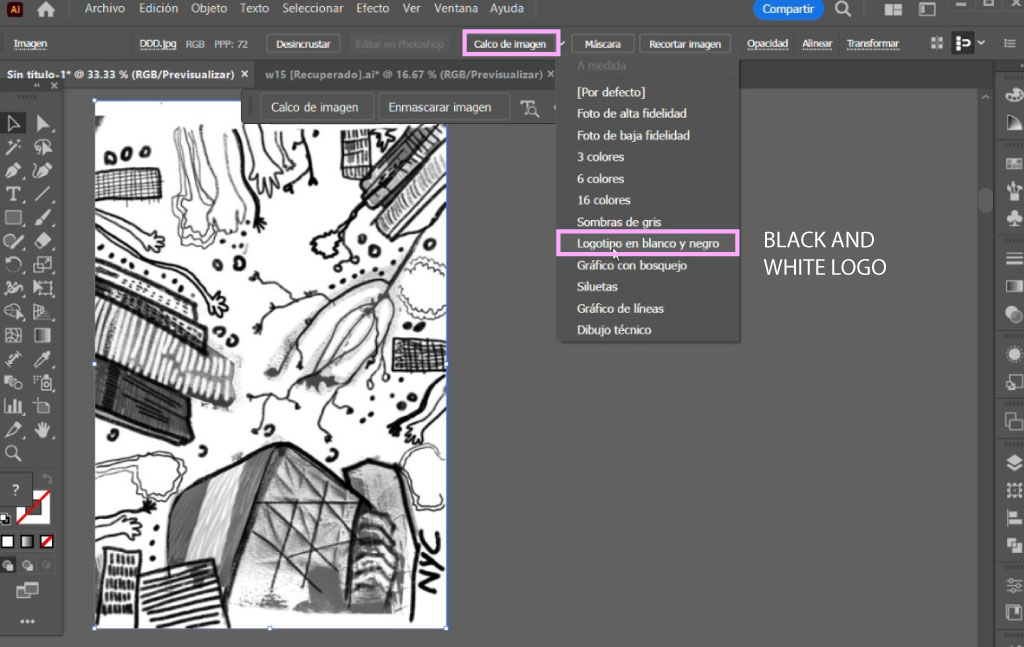
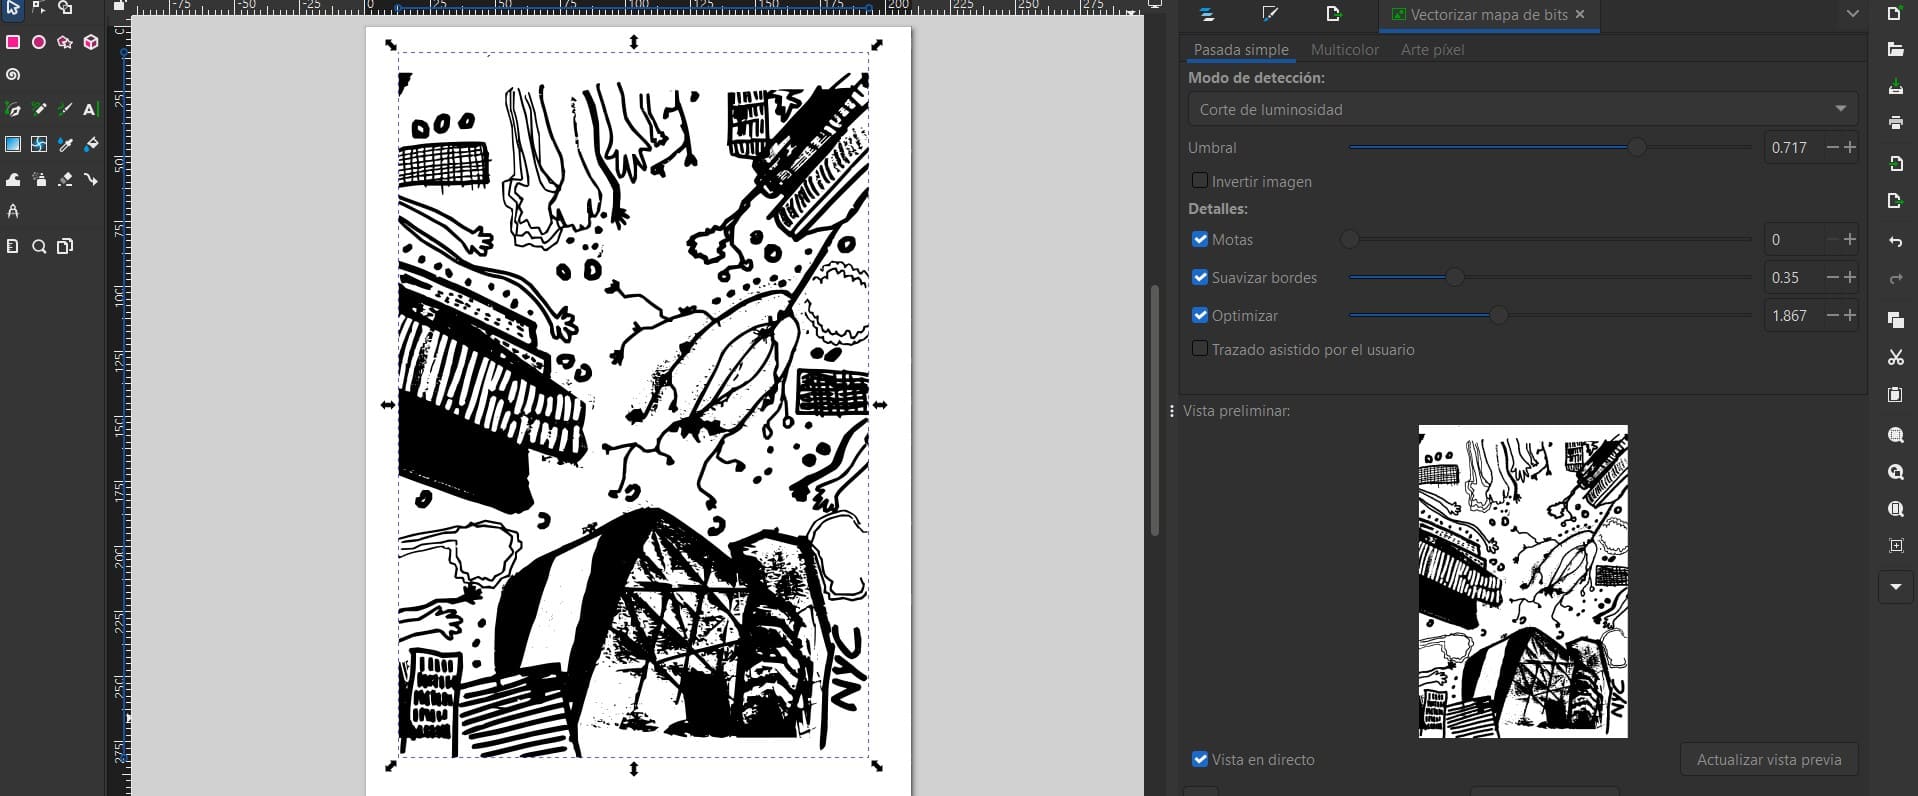
I first imported the black and white drawing and then make them "Image Trace" to keep just the borders as vectors. I choose the black and white logo option to keep the borders.
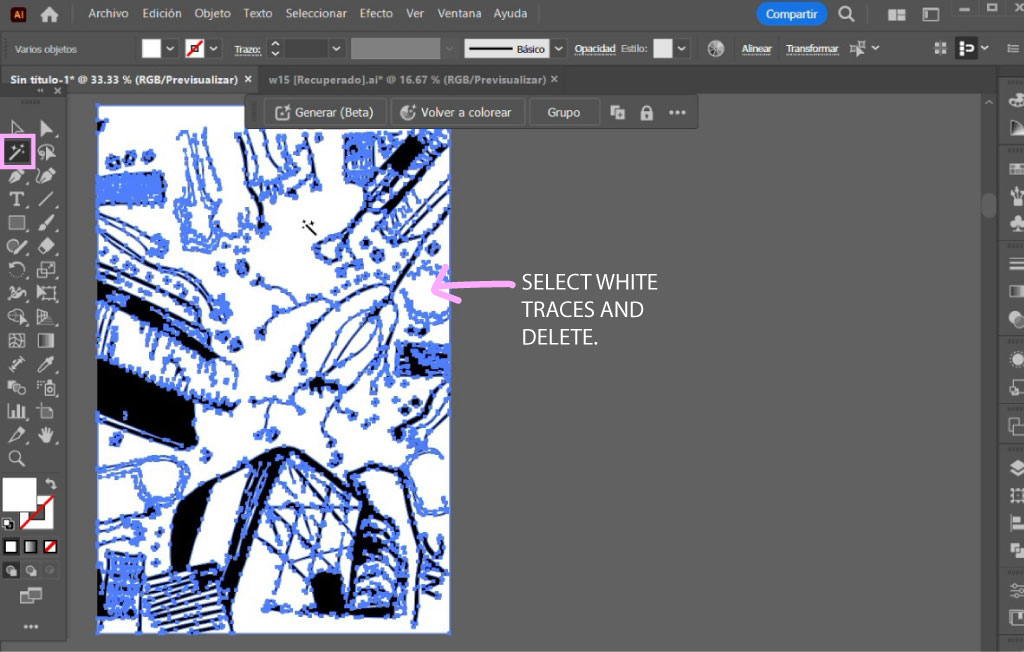
Then with the Magic Wand Tool I selected the white background and erase this vectors to just keep the black drawings.
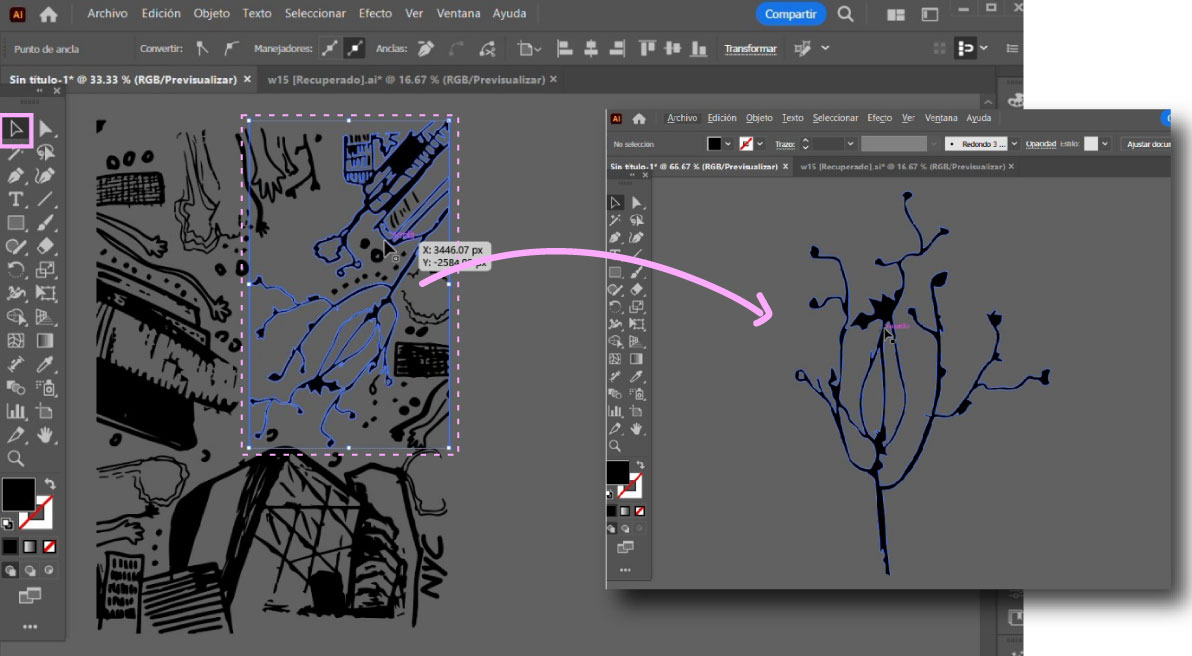
To keep just the select area I wanted I just erase the vectors.
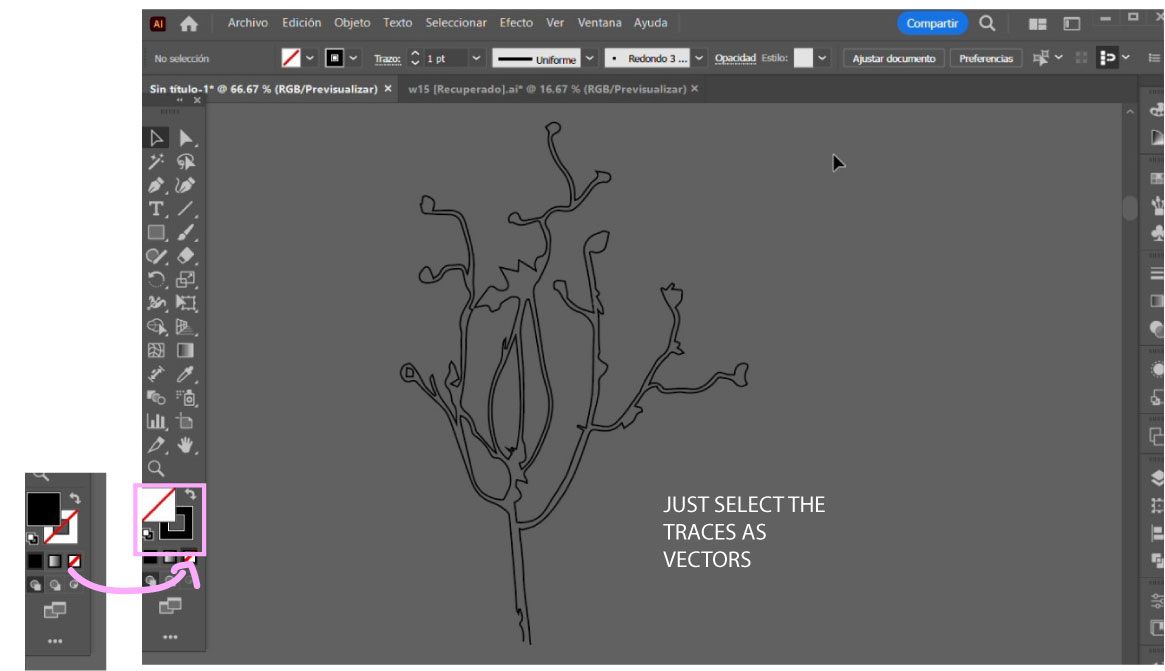
And finally I changed the vector color from fill to just the traces.
I n k s c a p e T r y
I also tested Inkscape to vector the same drawing. It turned out to be faster but with the same idea of the traces in black and white.
Vectors on Inkscape
With this first vectors I tried to make a volume in 3D first in Rhinoceros. However then I choose to make it parametric with grasshopper so I could change parameters in the following weeks assignments.
3D s o f tw a r e E x p l o r a t i o n
3D: RHINOCEROS + GRASSHOPPER
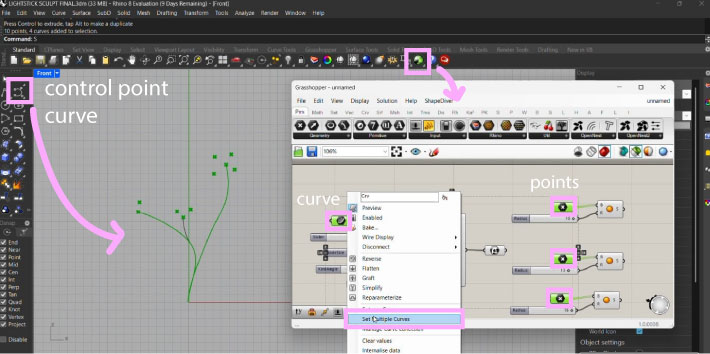
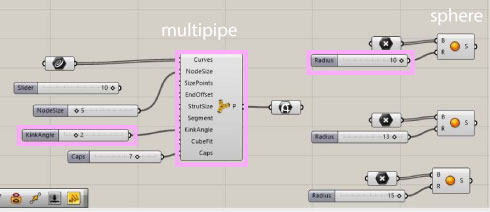
To start I just imported some lines of the vectors. I just keep like 3 axis for the tree. Then I added some points to refer where I wanted the tree to grow in petals. Then in grasshopper I created a curve of multiple selection to have the 3 main in the same parameter, and then 3 class of points to have a variety of petals.
Grsshopper parameters changing
Then I adjust the parameters to have the volume I expected. Such as the stem and branches. With the Kink angle I could have 3 iterations of this base. And then for the shperes I could change position of the base points and also the radius to have different sizes.
3D + a n i m a t i o n
ANIMATION: BLENDER
I wanted to try to do some animations to express the idea of this sculpture as a lightstick. For this I had to simulate the color change and lightning with the models I did in rhino. So I move to Blender . For which I made two tests because I had the 3d model of the tree idea but still I make some fun and imagine a lightstick to try too.
First I saw some tutorials here to understand the interface and then move in to try.
first steps in blender
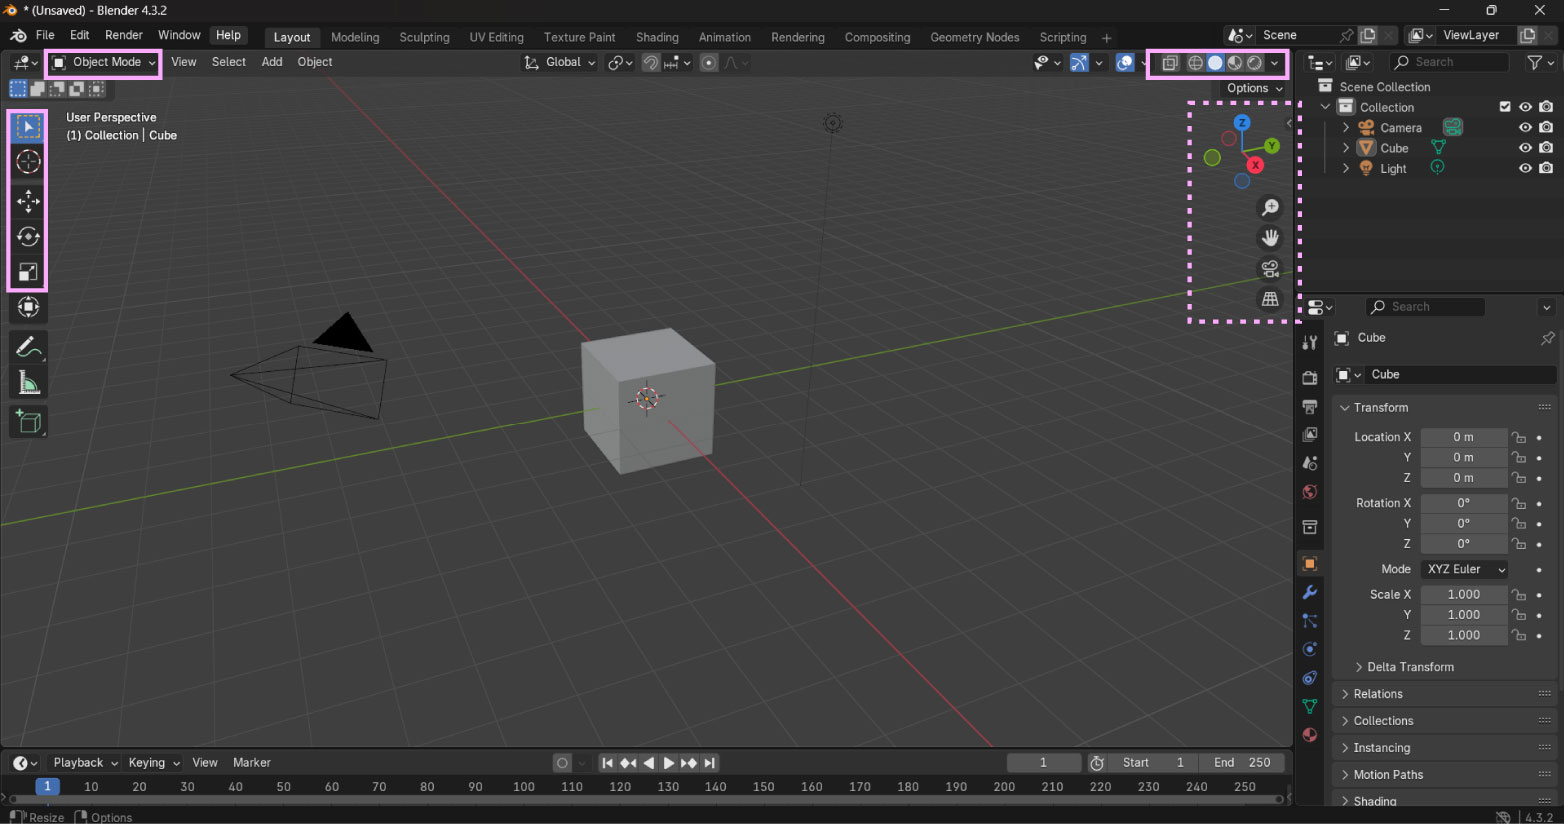
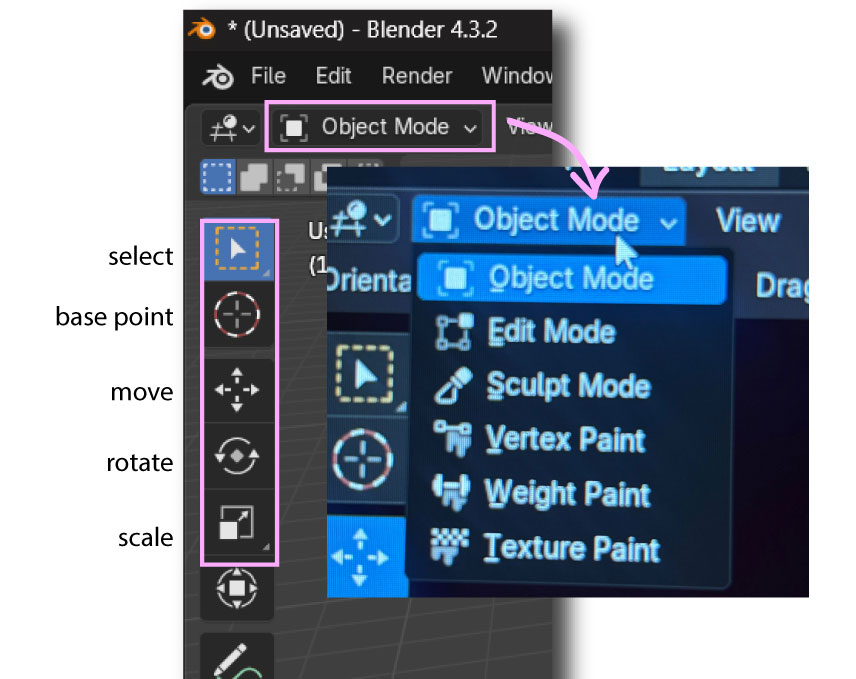
I didn't understand that there are two important modes: Edit and Object.
All the options change in between both. Also some important shortcuts are Scale, Rotate, and Fill.
I’m still not sure about the materials of the parts of the lightstick, that is why I kept it all the same transparent material to let the light see trough.
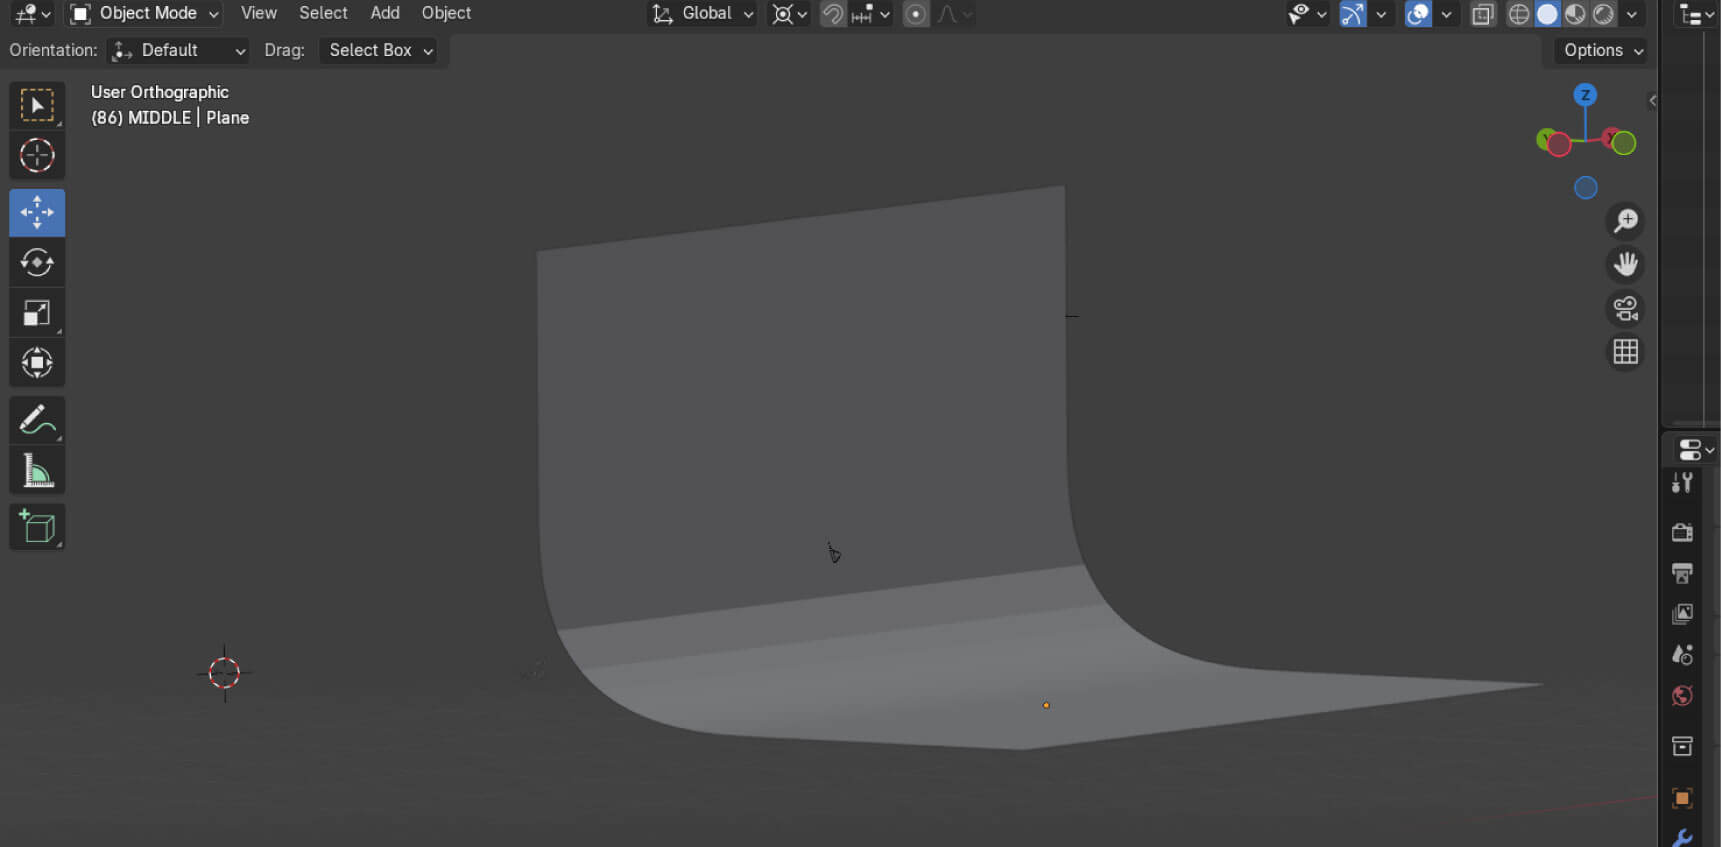
Before importing the models of the objects I made this simple background to understand how to make figures in Blender. Then I insert the models and change materials. To assign the materials it has to be in Object mode. So I made a new custom material with alpha and difusse settings.
Material settings
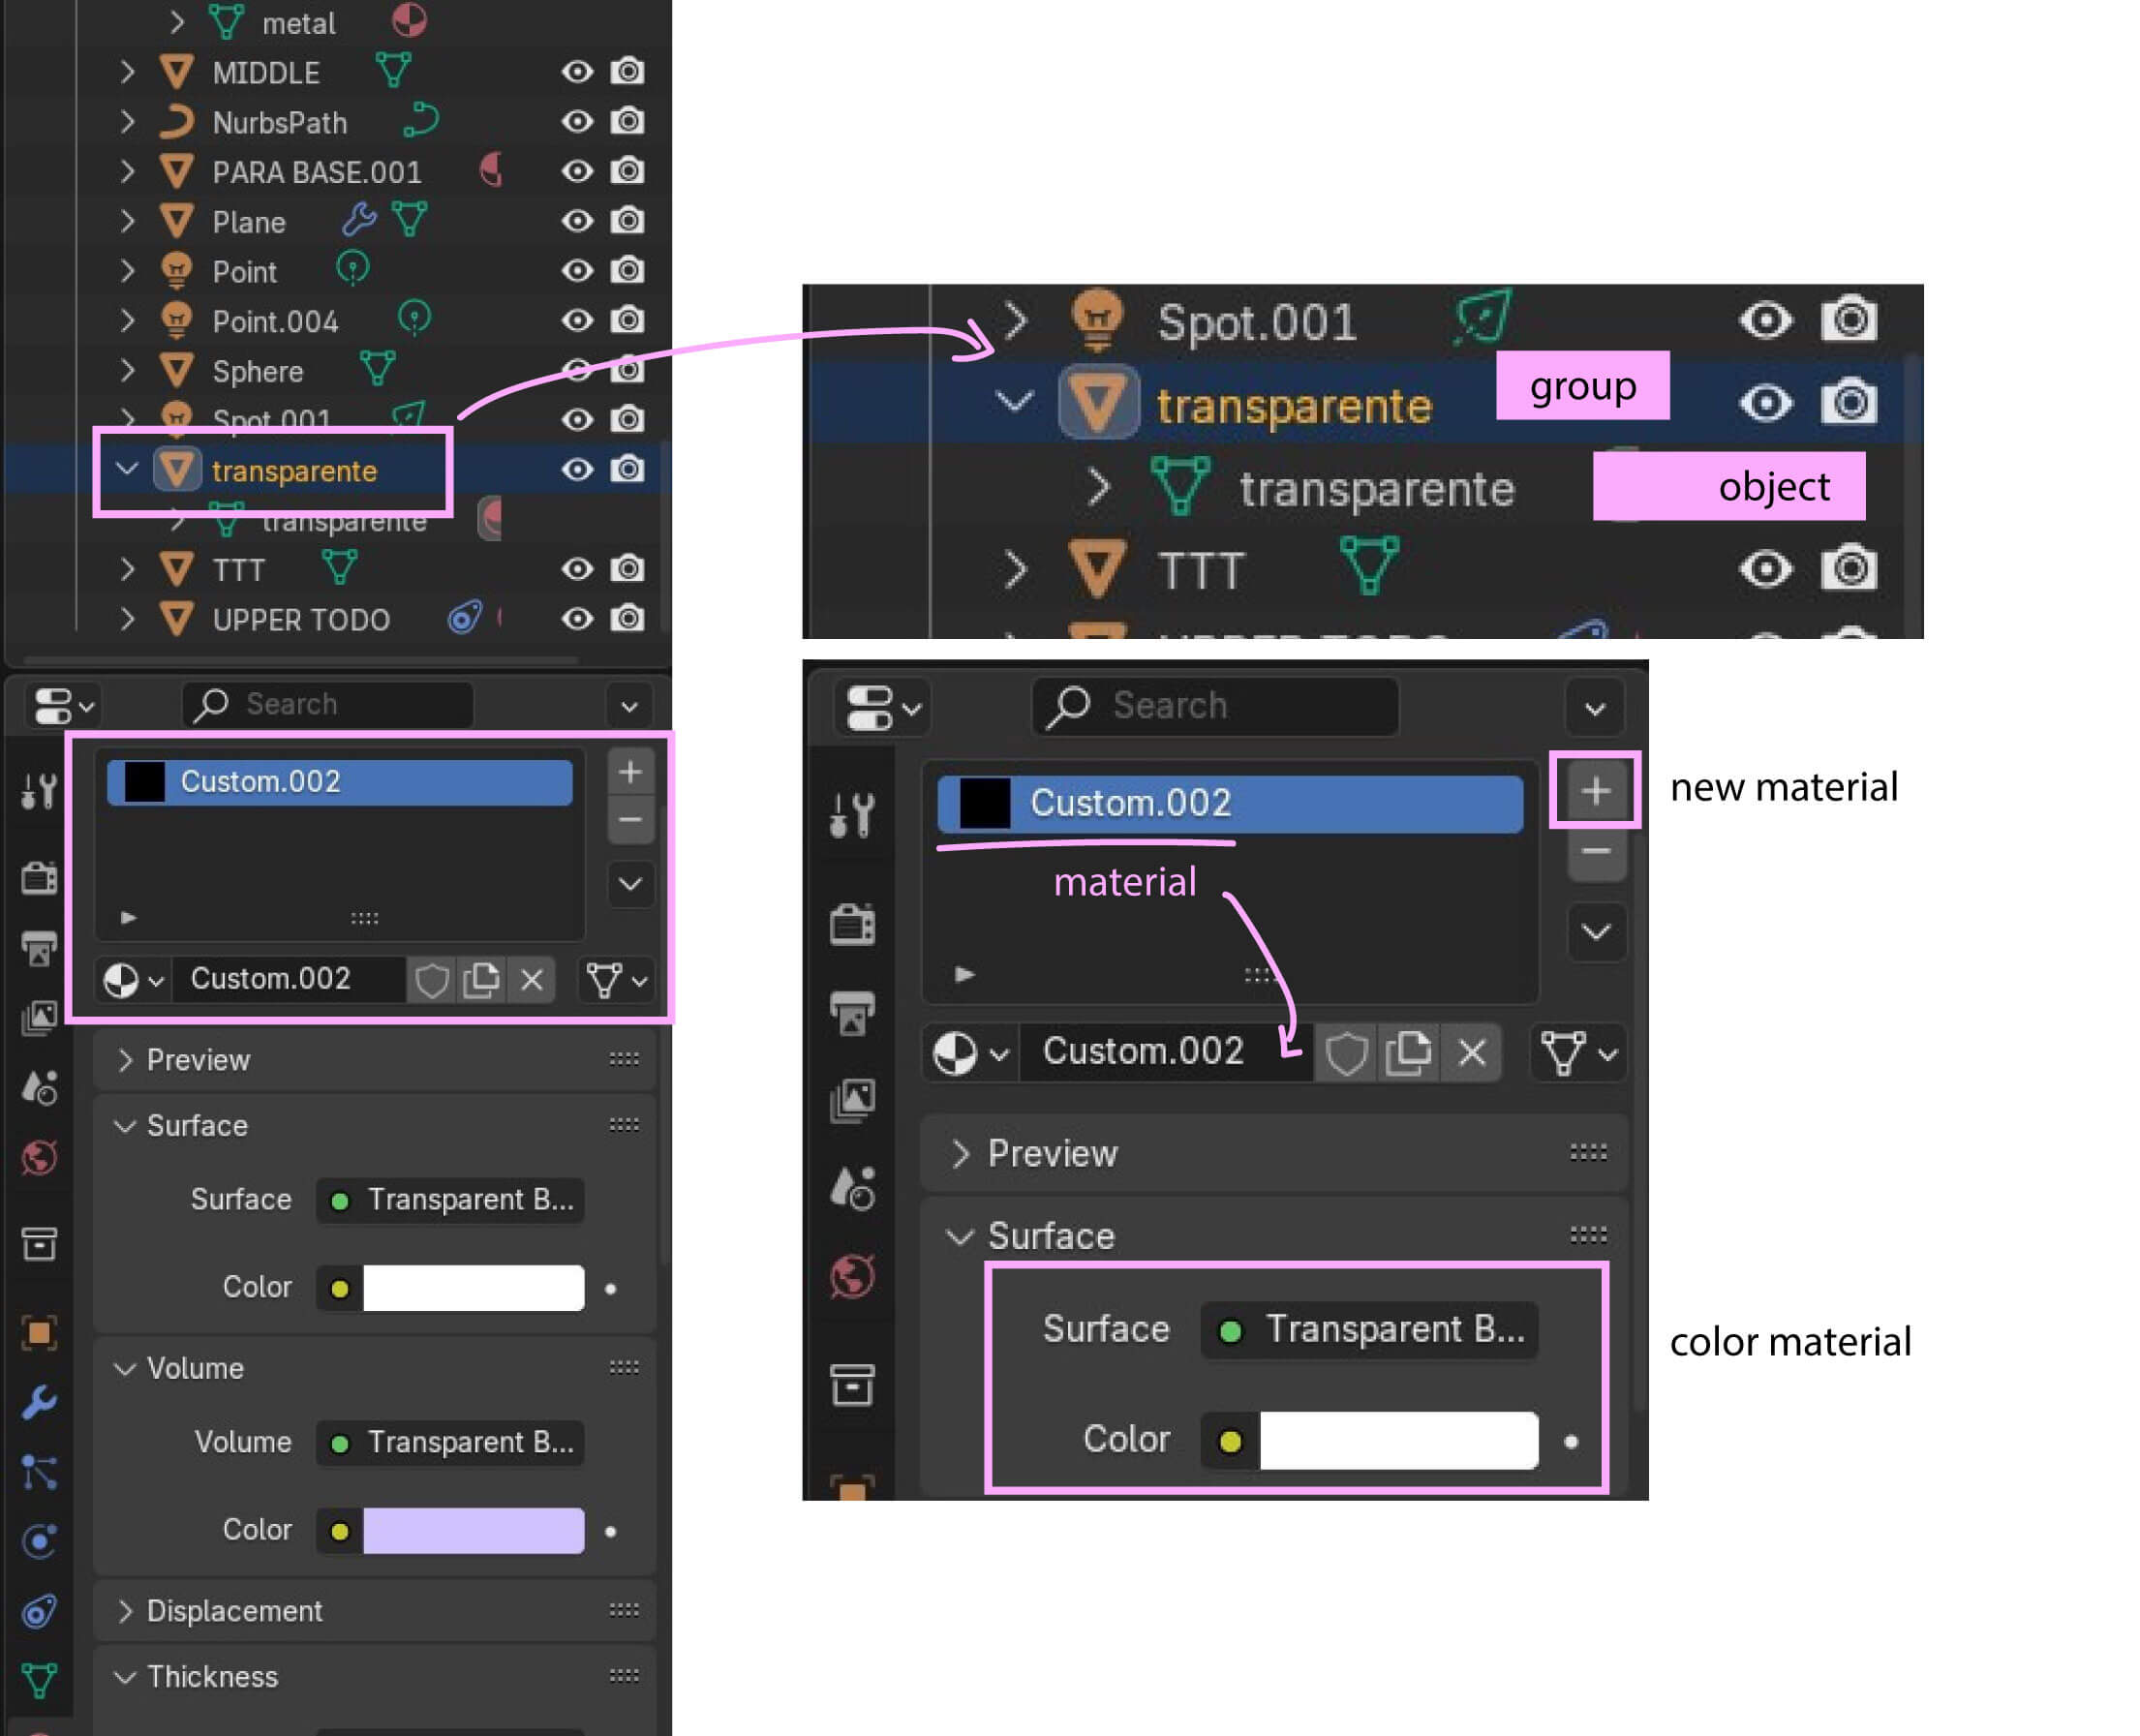
To assign a material, it's important to first look at the layers you're using as an object. Each layer has different groups. You must select the object to assign the material. Once you've selected the object, you can see the custom material you want to edit or replace at the bottom right. The most important things are the surface material and color.
But the light material isnt showing!
To make the lights I had to separate each with different settings. But to really visualize the glare in Blender 4.3 I had to search and go to the Compositing nodetree just as grasshopper. To activate this in render visualization and adjust its intensity related to the alpha settings.
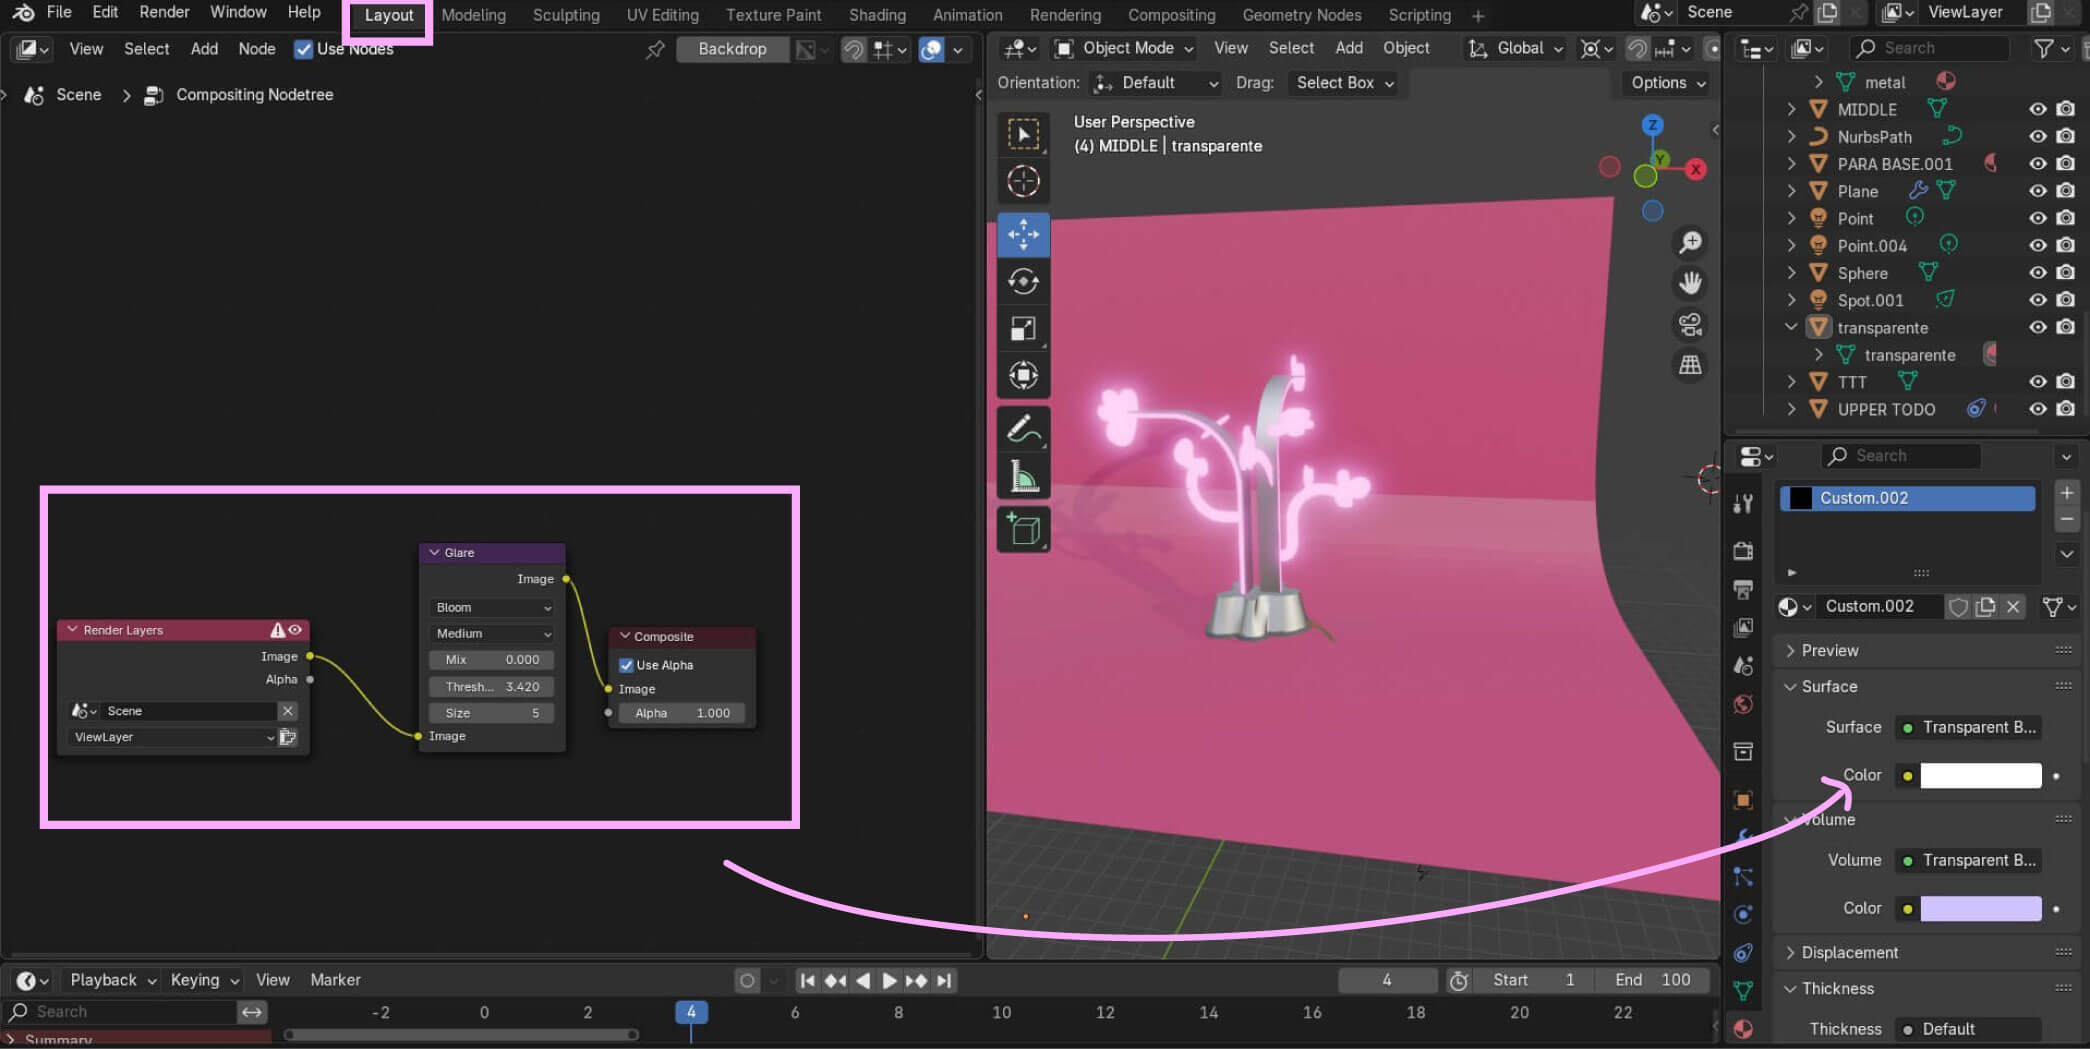
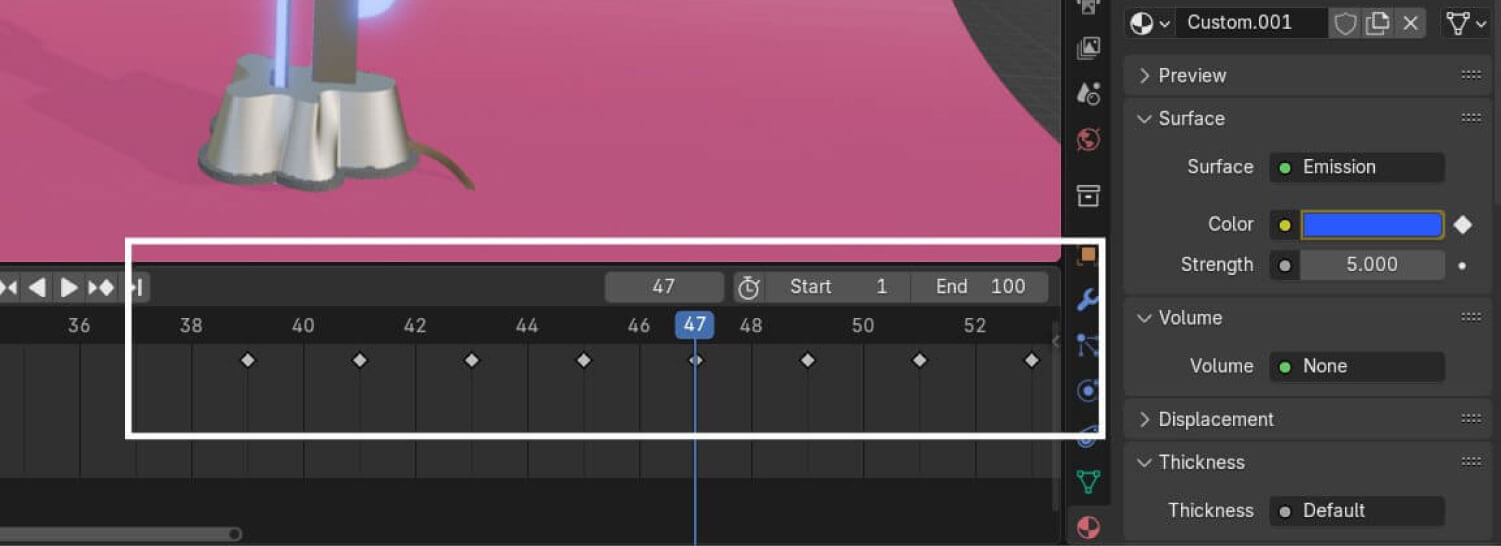
After setting the glare the emission material shines as real light! Is is key to change the strengh and color as desire. As you can see here, the interior material is emissive and the outside is transparent. ⬇️⬇️⬇️
t h e A n i m a t i o n
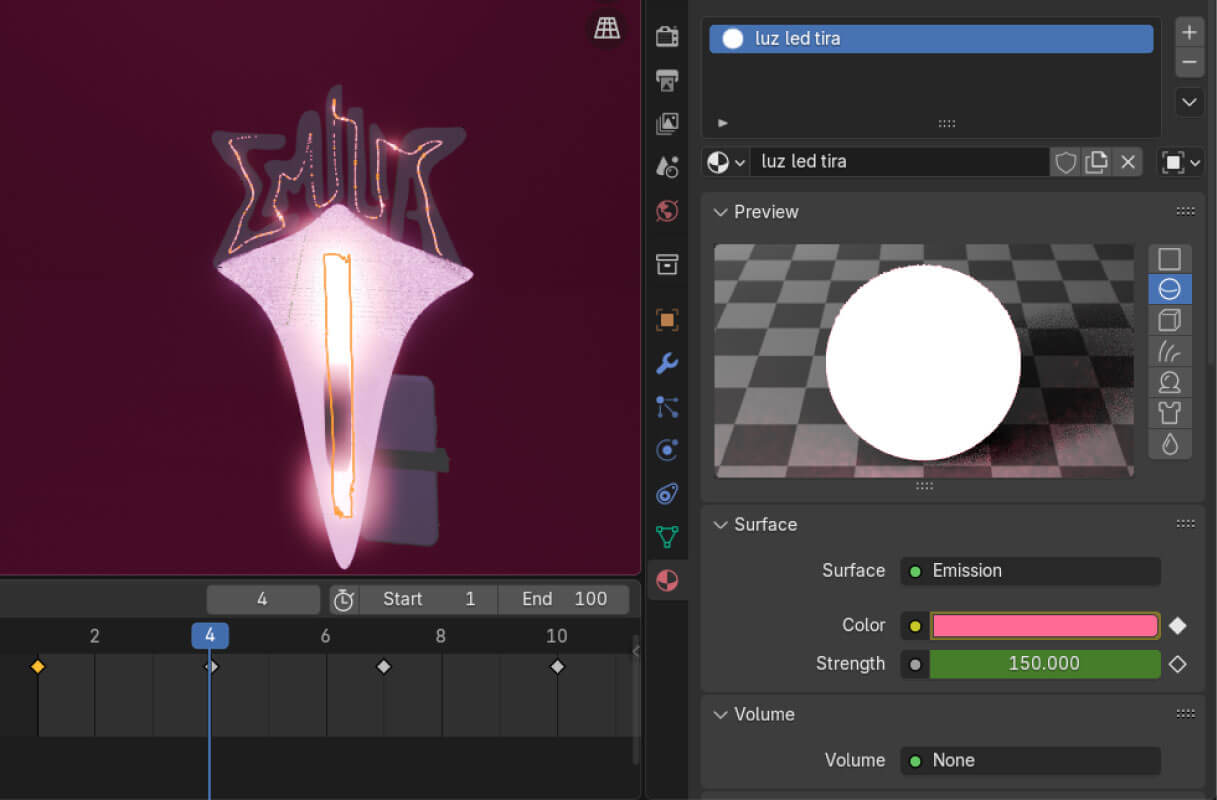
To create the animation, you need to activate the timeline at the bottom and set the seconds. Insert a keyframe at the second you want the animation to change.
Color emission keyframes