

Assignments
Group Assignment
- Review the safety data sheets for each of your molding and casting materials, then make and compare test casts with each of them.
- Compare mold making processes.
Individual Assignment
- Design a mold around the process you'll be using.
- Produce it with a smooth surface finish that does not show the production process toolpath, and use it to cast parts.
- extra credit: use more then two mold parts.
GROUP ASSIGNMENT
More specific detailed from the worked done with Ernesto Castro in Fab Lab Universidad de Lima here
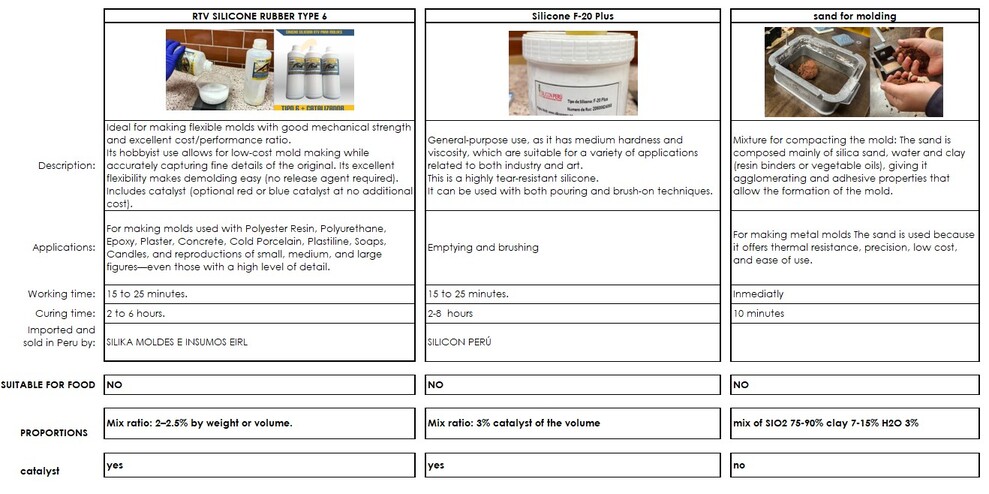
M a t e r i a l s D a t a S h e e t s
M o l d i n g M a t e r i a l s
I compare both molding materials I used in my individual assignment with the sand used for the group assignment. Either of the materials are suitable for food since I wanted to try to make some transparent figures. The silicones are imported by Silika Perú and Silicon Perú. However the materials from the lab were kinda aged. And both suppliers have now new presentations of the material.
Personal comparisson:
The F-20 Plus silicone had a better finish and result.
C a s t i n g M a t e r i a l s
I compared the crystal resin they had in the lab, however it was really yellow because of time. But I like the clor so I tried. Also I had epoxyc resin I once bought for a project but never used it, so I also wanted to use it now. Finally I compare both resins with ZAMAK, the material we use for the group assignment. The proportions were way different and also the process since its metal.
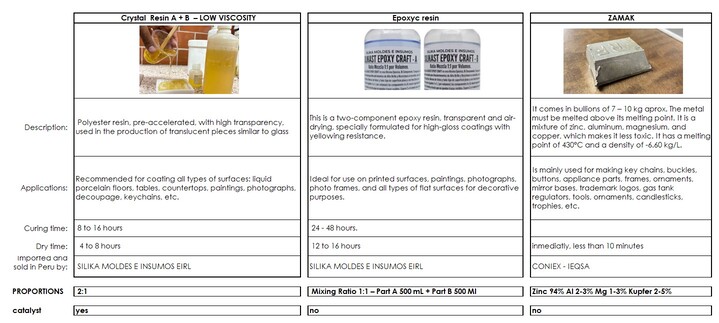
Personal comparisson:
The krystal resin was alredy yellow because of time, appart from that both materials were really transparent.

CONCLUSION:
From the datasheets I could confirm the times of curing and mix proportions. Also if they used a catalyst how is used and for how long. There are materials suitable for food and materials that resist certain temperatures. Both silicones I try could't resist the zamak temperature so I could not mix with the silicones.
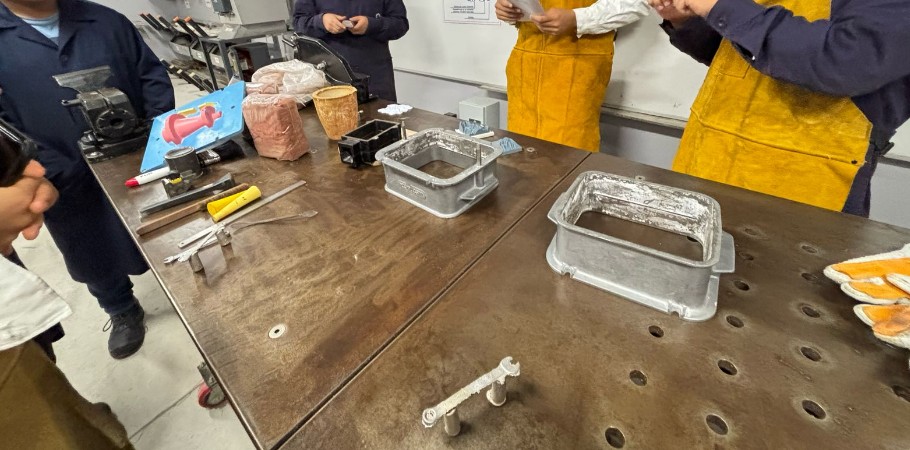
Z A M A K M o l d i n g a n d c a s t i n g
For the group assignment appart from comparing both of our molding and casting with silicone and resin, we decide to try ZAMAK metal process.
Metal casting process
- Design and fabrication of model
- Sand preparation for the mold
- Molding in sand
- Heat the metal
- Metal casting
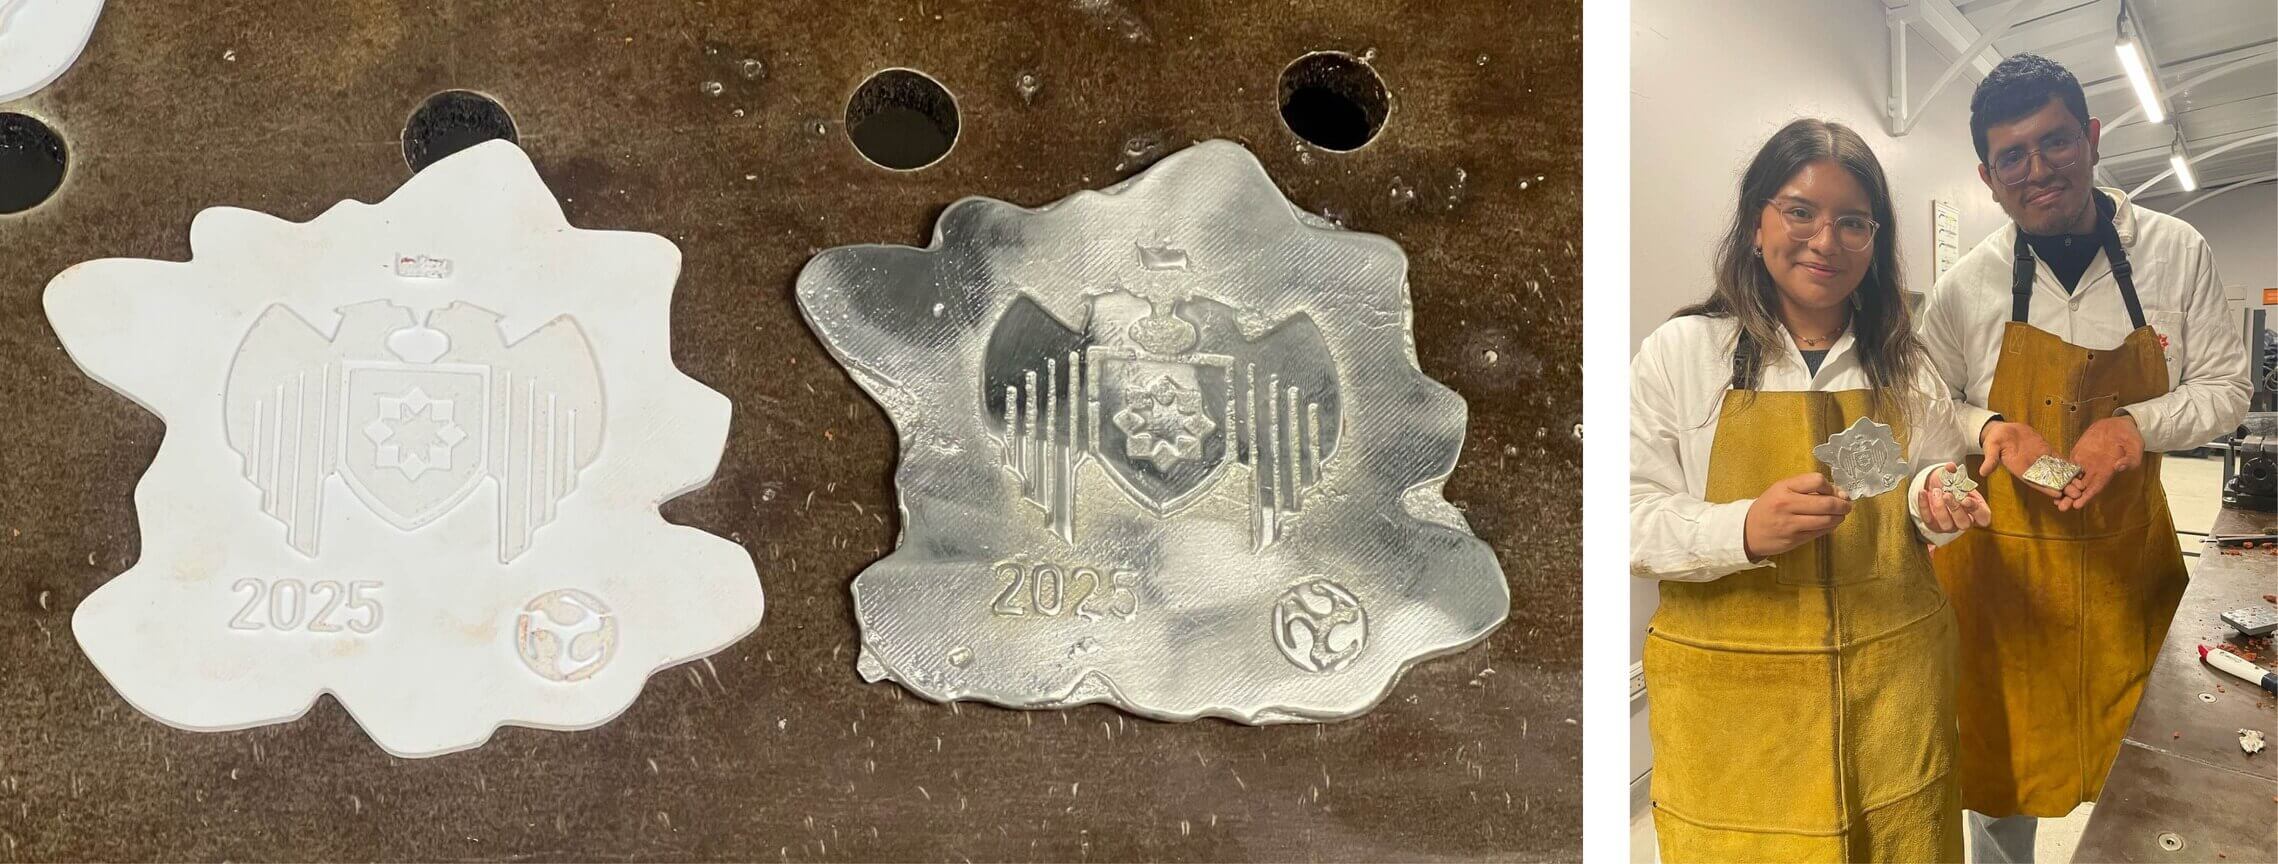
1. Design and fabrication models
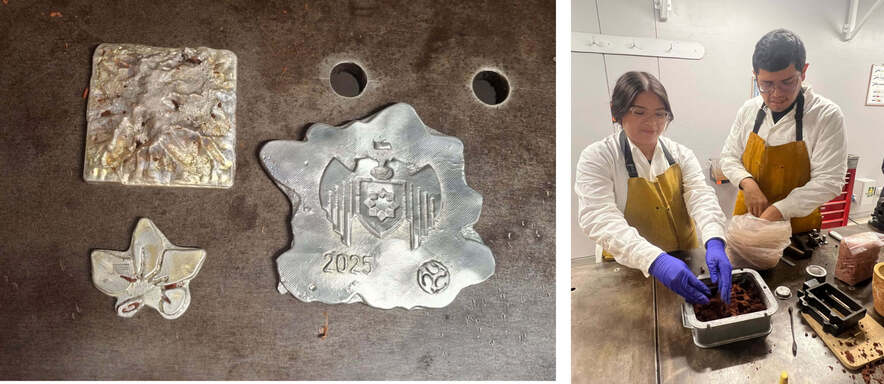
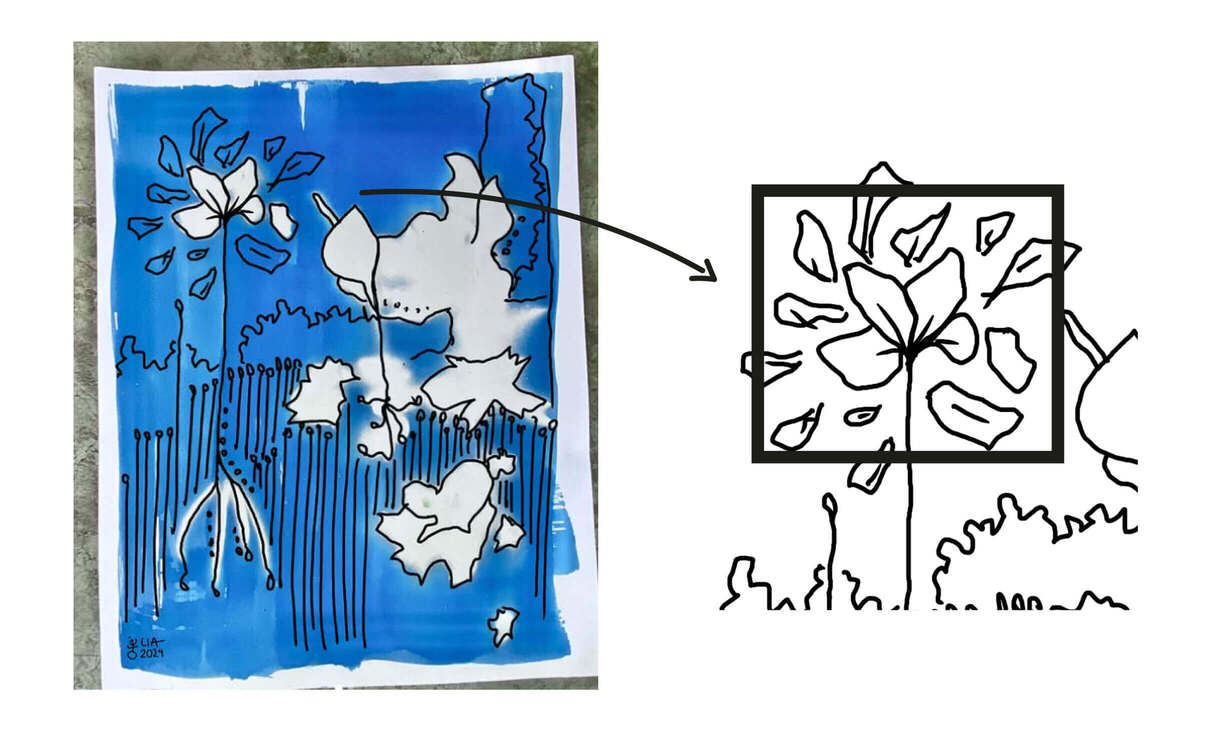
I design a kind of medal with the logo of the Universidad de Lima and the fab academy logo from the front and for the back some drawings of petals and flowers that I wanted to try since I have been using all my drawings in differents assignments.
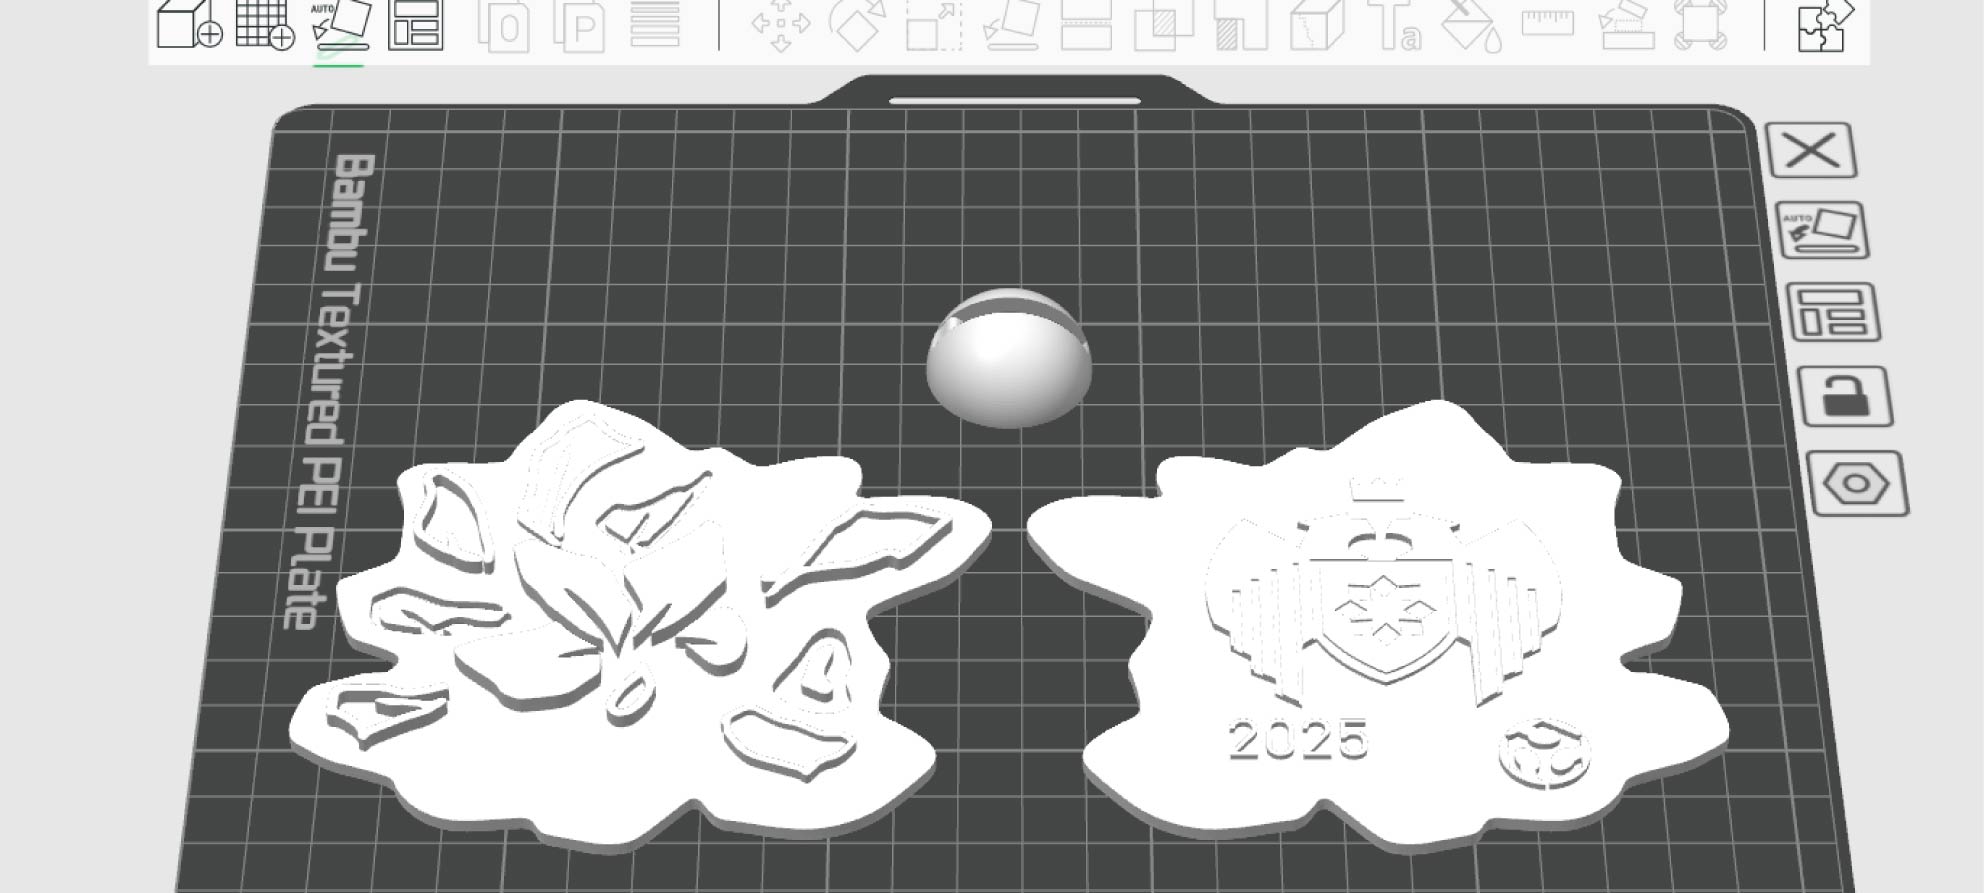
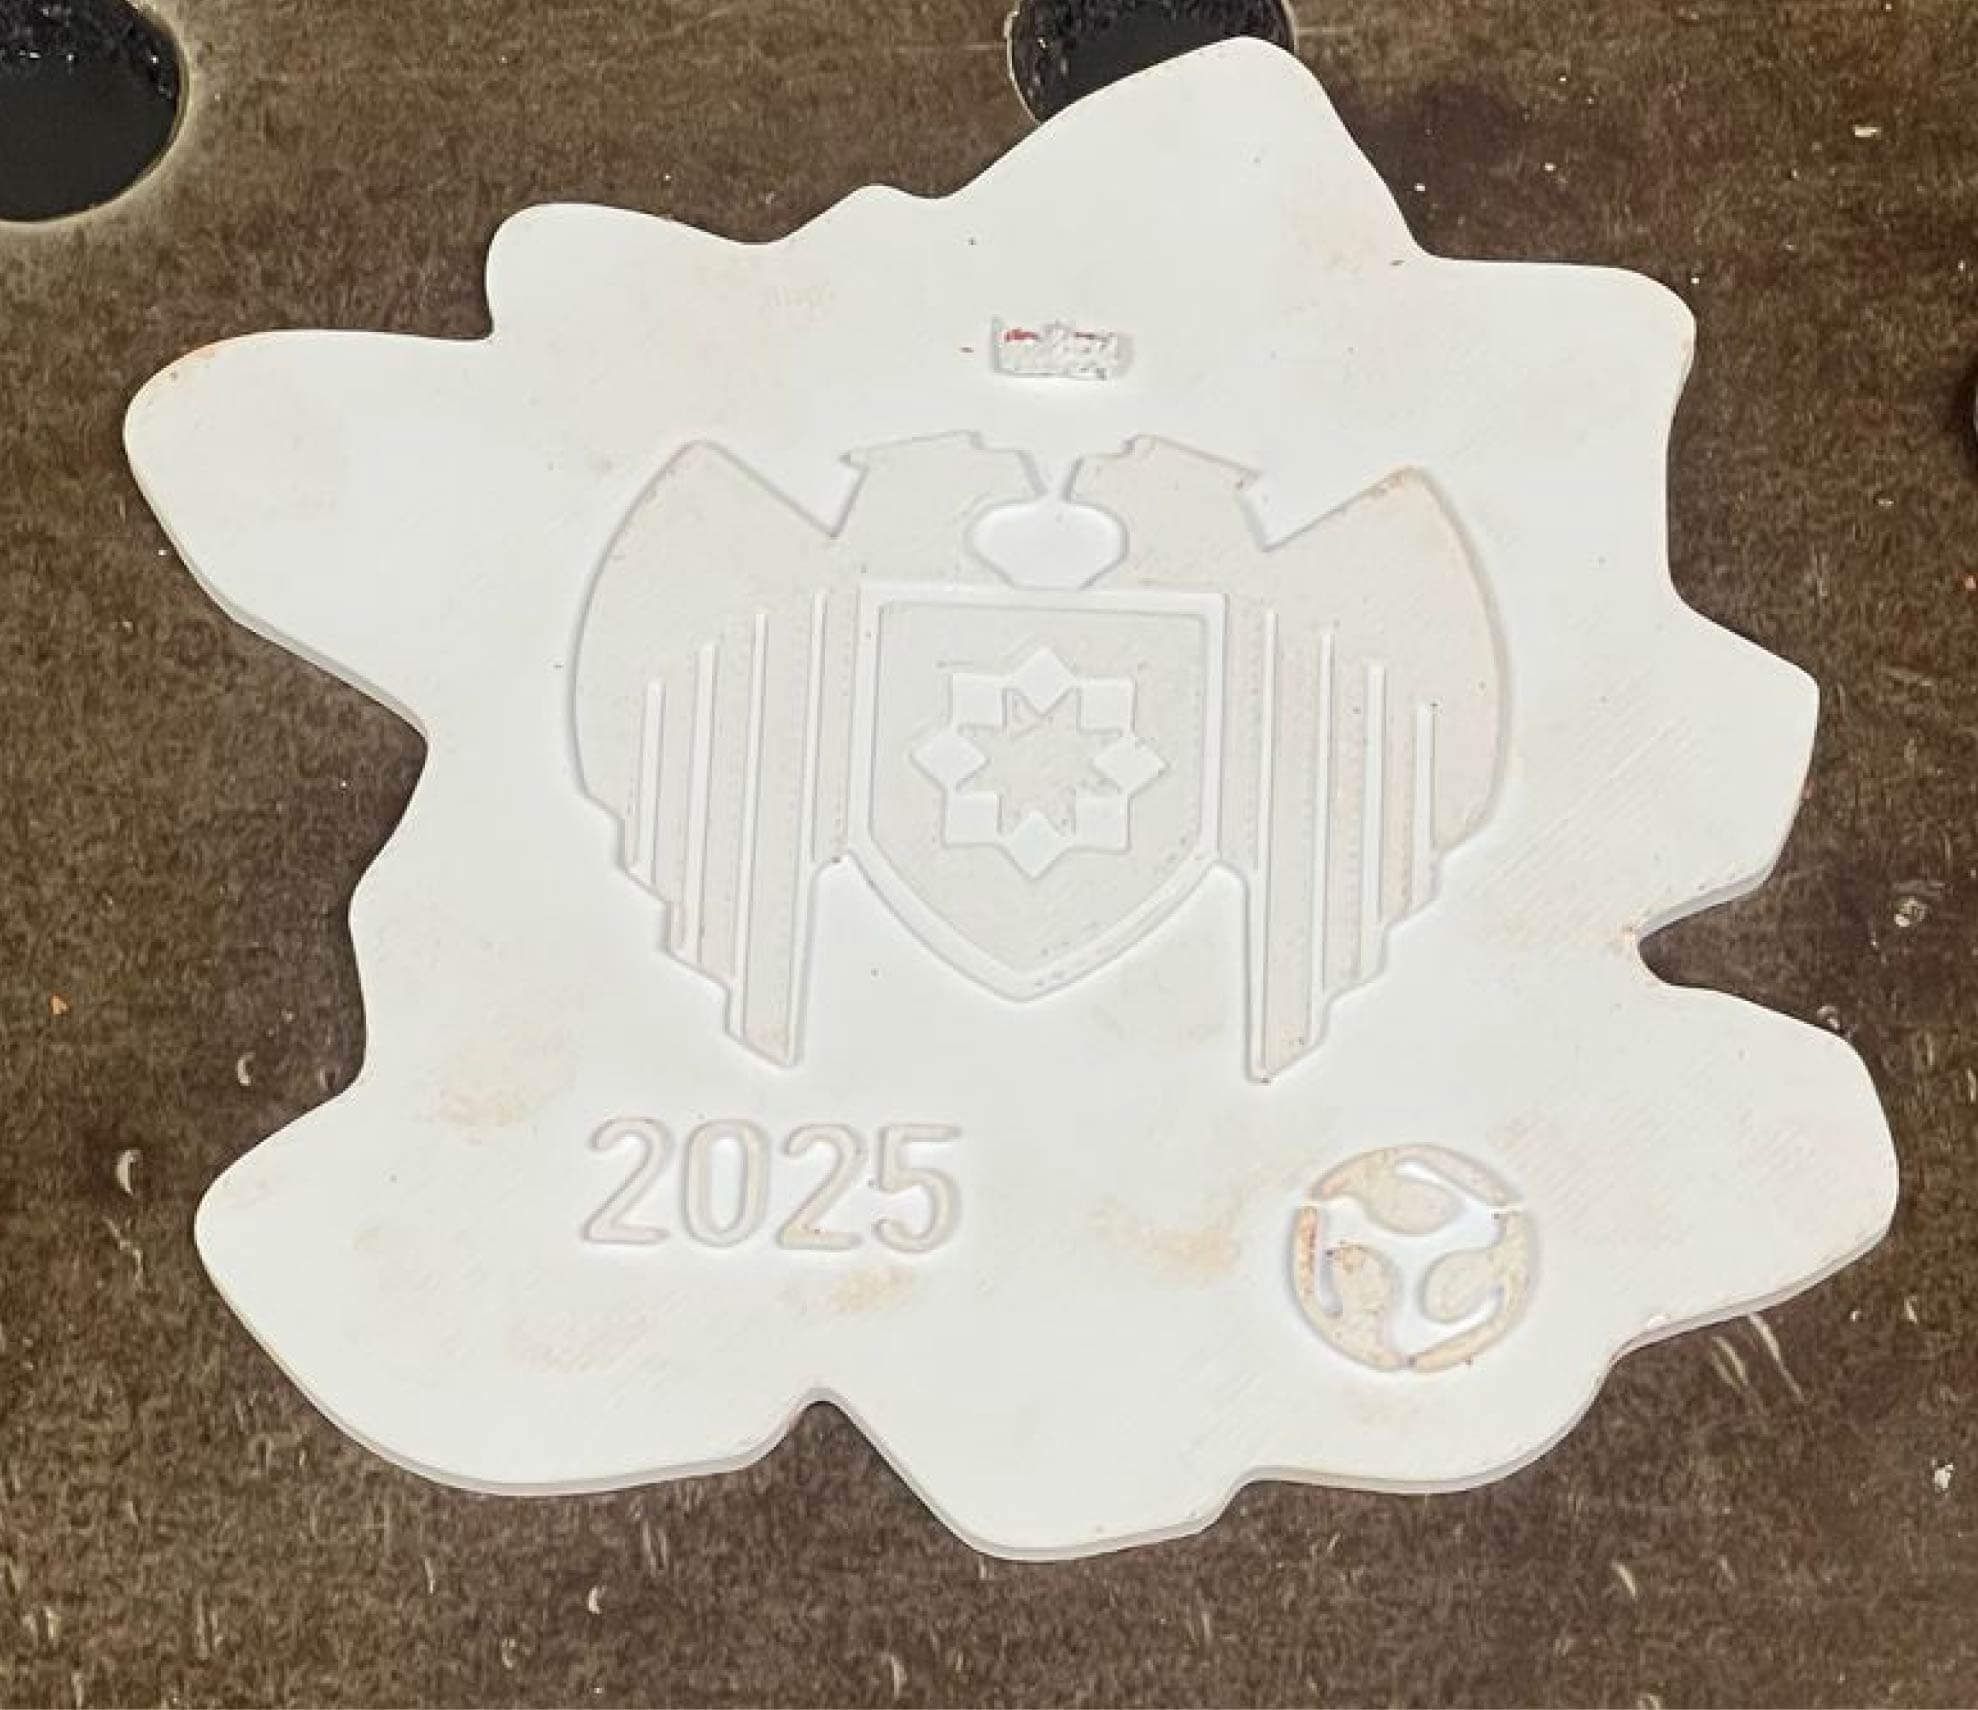
I divided it in two parts since for the silicone casting you need a flat part for casting. However for metal casting the 3d object does not need to be divided. That is why at the end we did each part separated and started with de ulima logo.
2. Sand preparation for the mold
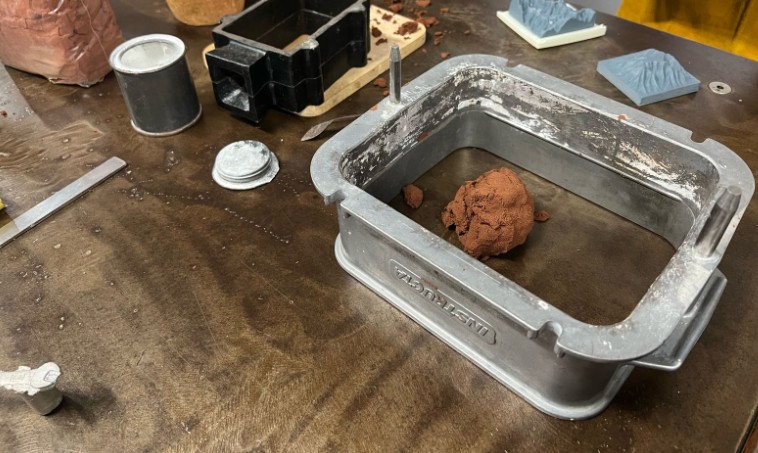
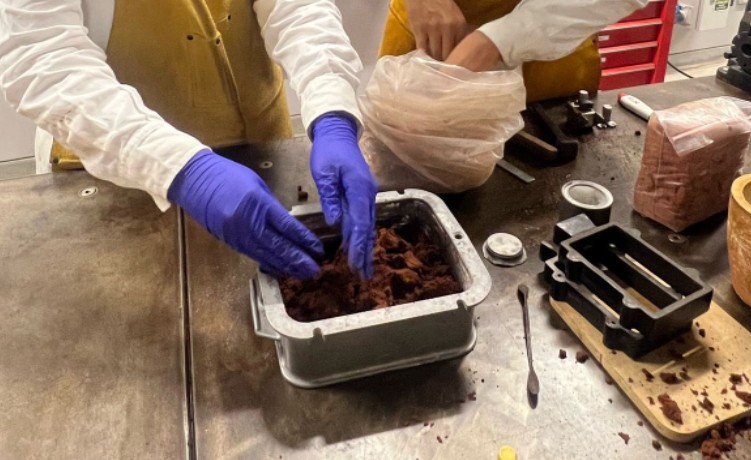
Molding sand is composed of silica sand with water and clay. This makes it malleable and adhesive, so the piece leaves a sufficiently compact imprint as a mold.
The sand must be compacted in the metal box they have in the laboratory, which is divided into two parts: the body and the lid. However, since I had already divided the object into two parts and it had one flat side, we only filled the body and left the lid uncovered to pour the metal into it.
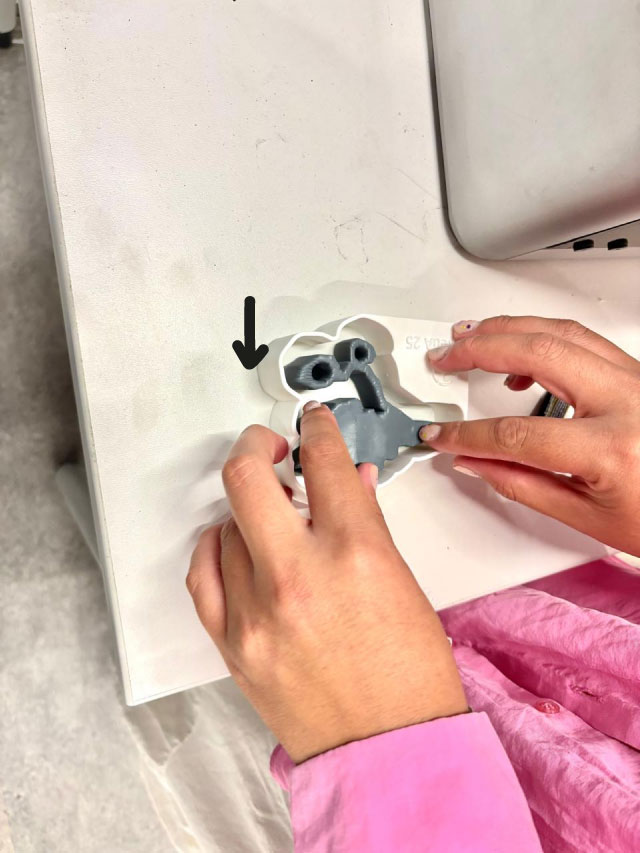
3. Molding in sand
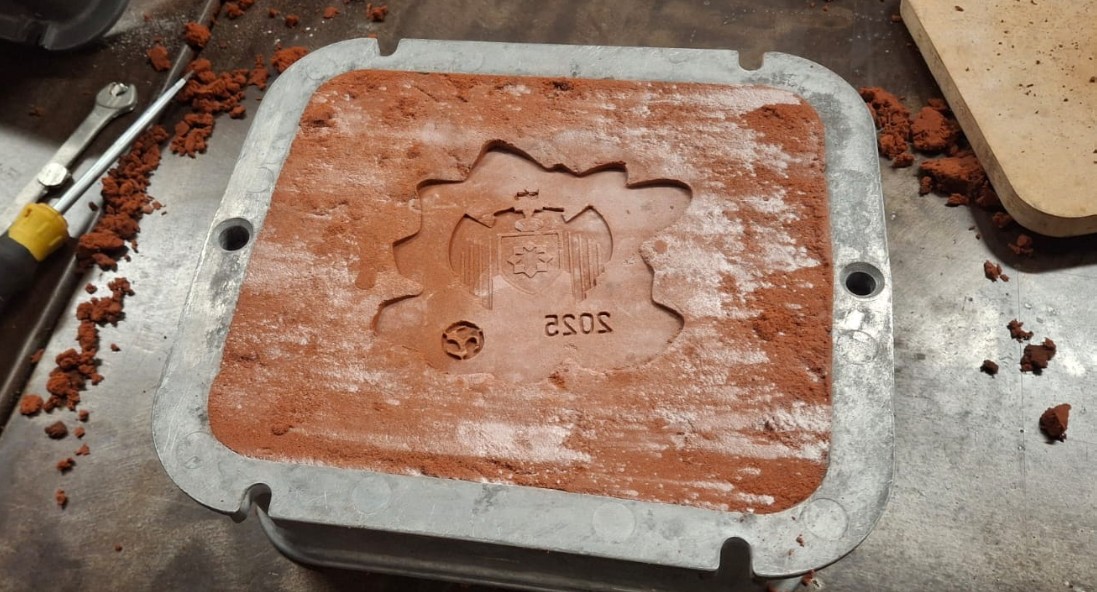
Once the sand is compacted, place the model in the container and compact it. Since it's not a 3D object, we don't need a feeder hole or a vent hole, as one side will be exposed to the air. Carefully remove the model.
4. Heat the metal.
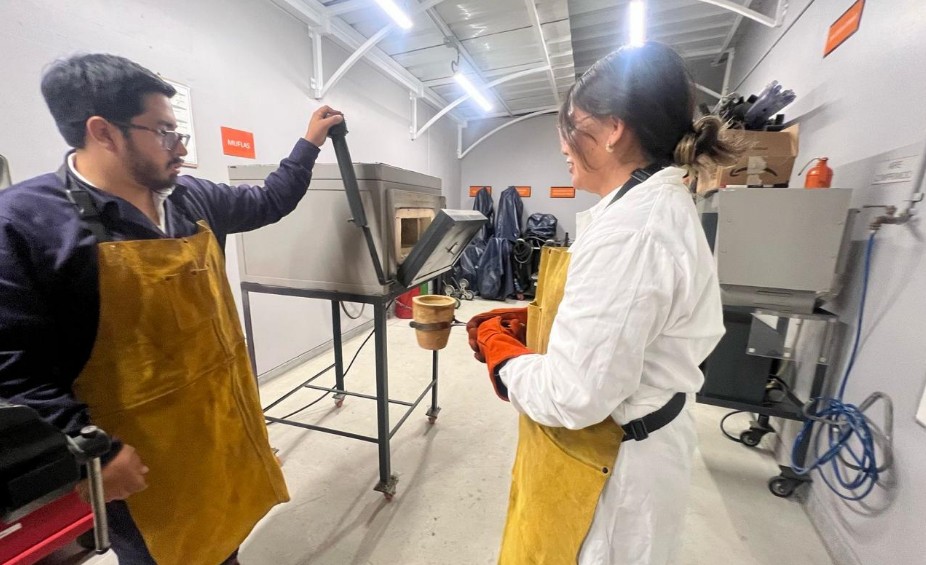
The metal to be worked is ZAMAK. It must be melted above its melting point. It is composed of zinc, aluminum, magnesium, and copper. It is nontoxic and dries quickly, making it a popular teaching material for students in the laboratory. It melts at 430°C.
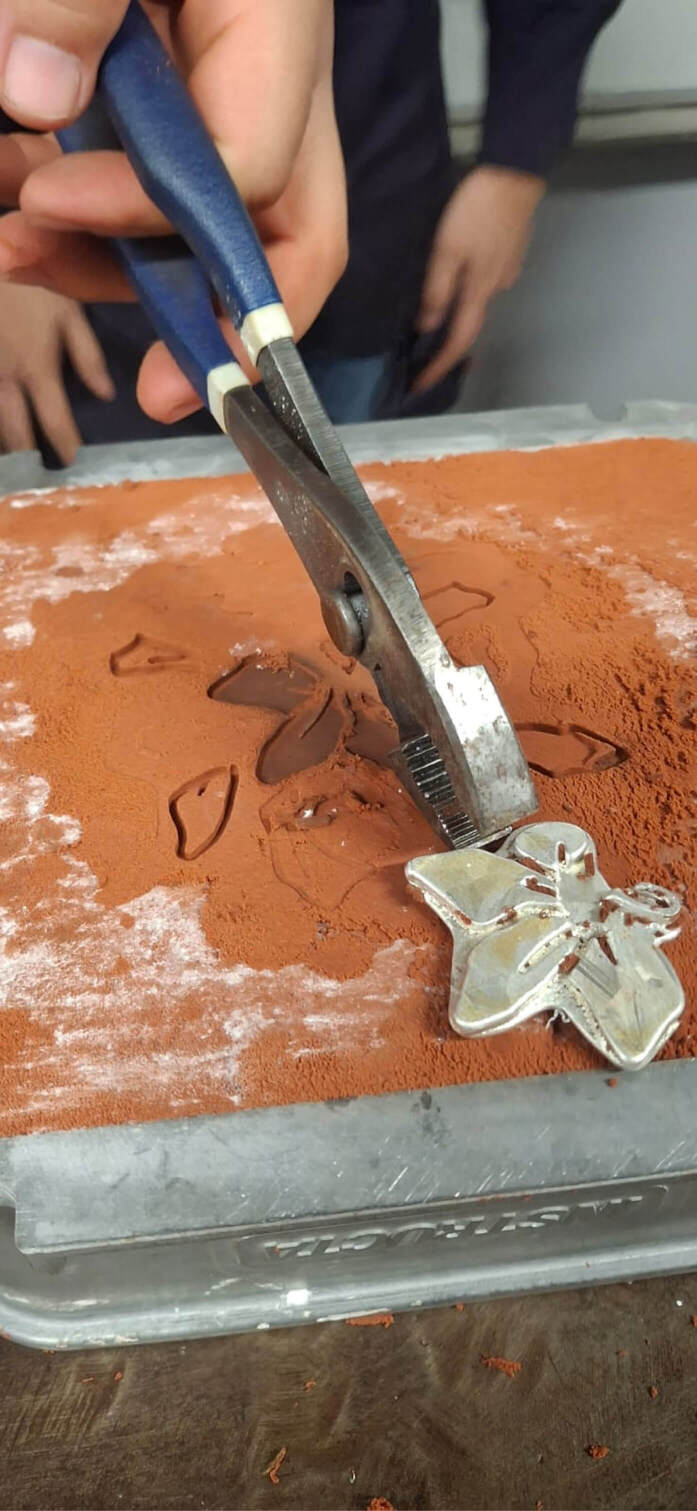
5. Metal casting
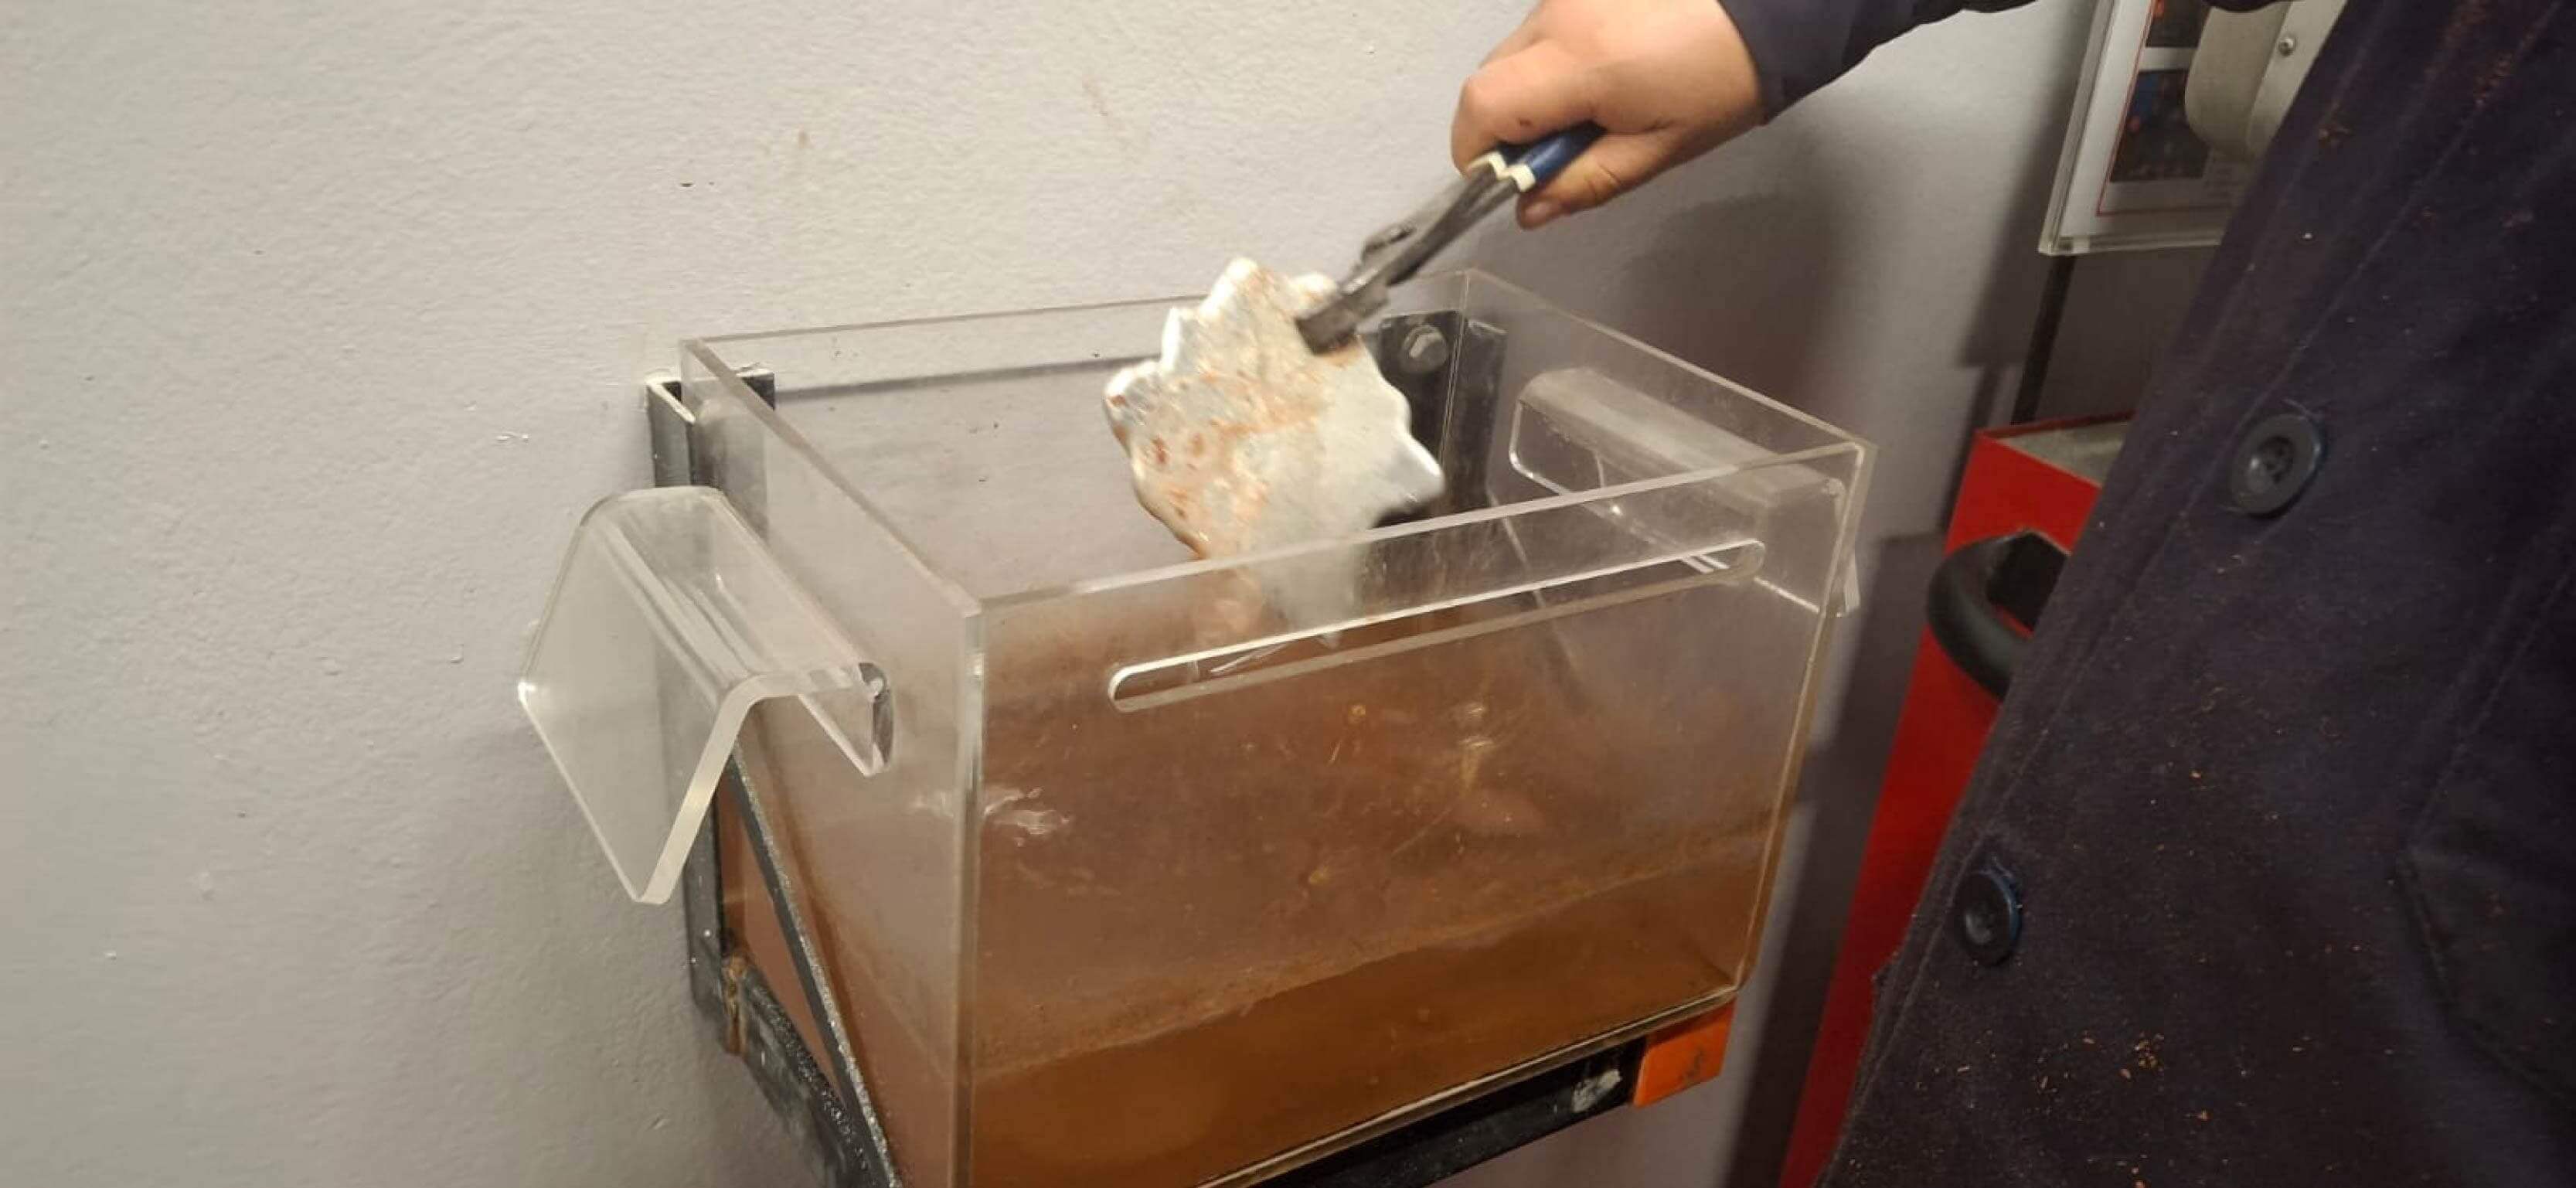
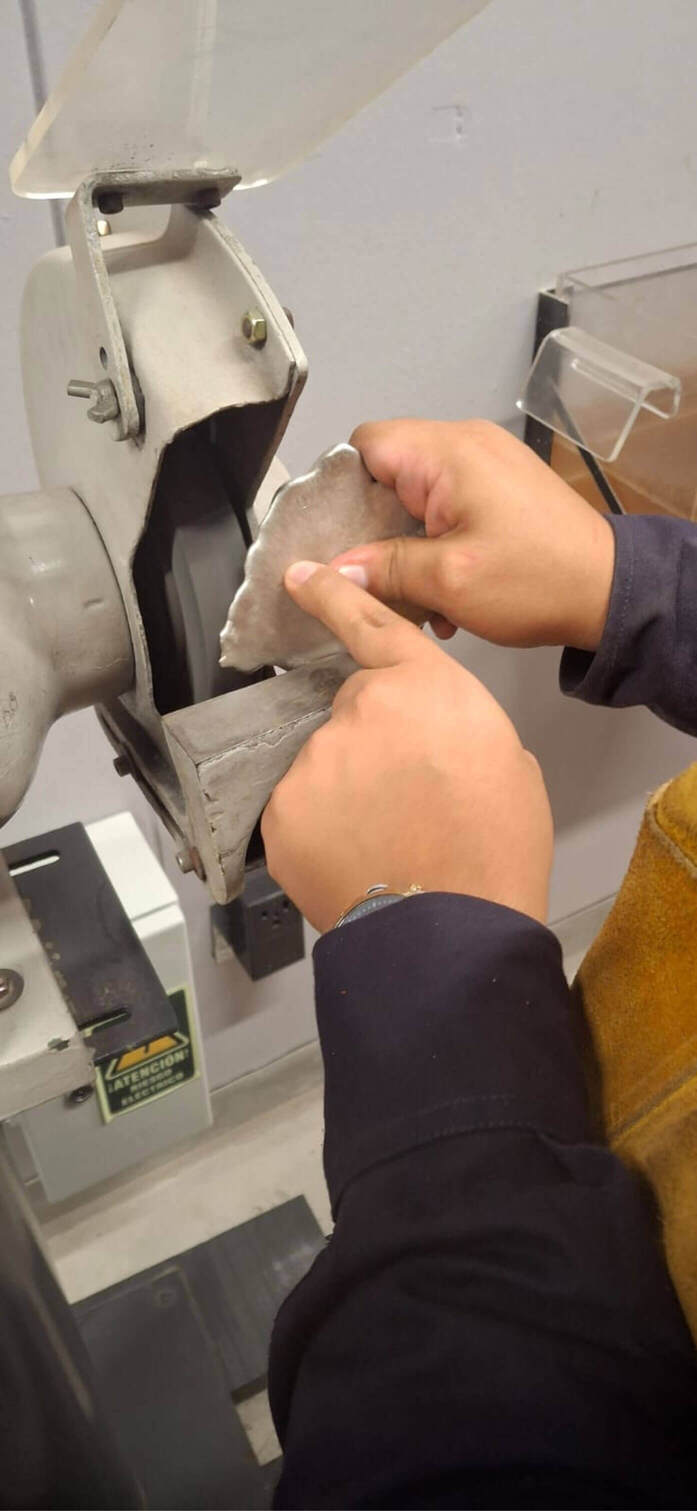
Finally, we poured the zamak into the sand mold and let it cool for approximately 5 minutes until the metal had solidified. We carefully removed it with protective gloves and pliers, then soaked it in water to cool and cure. Finally, we polished it for a better finish.
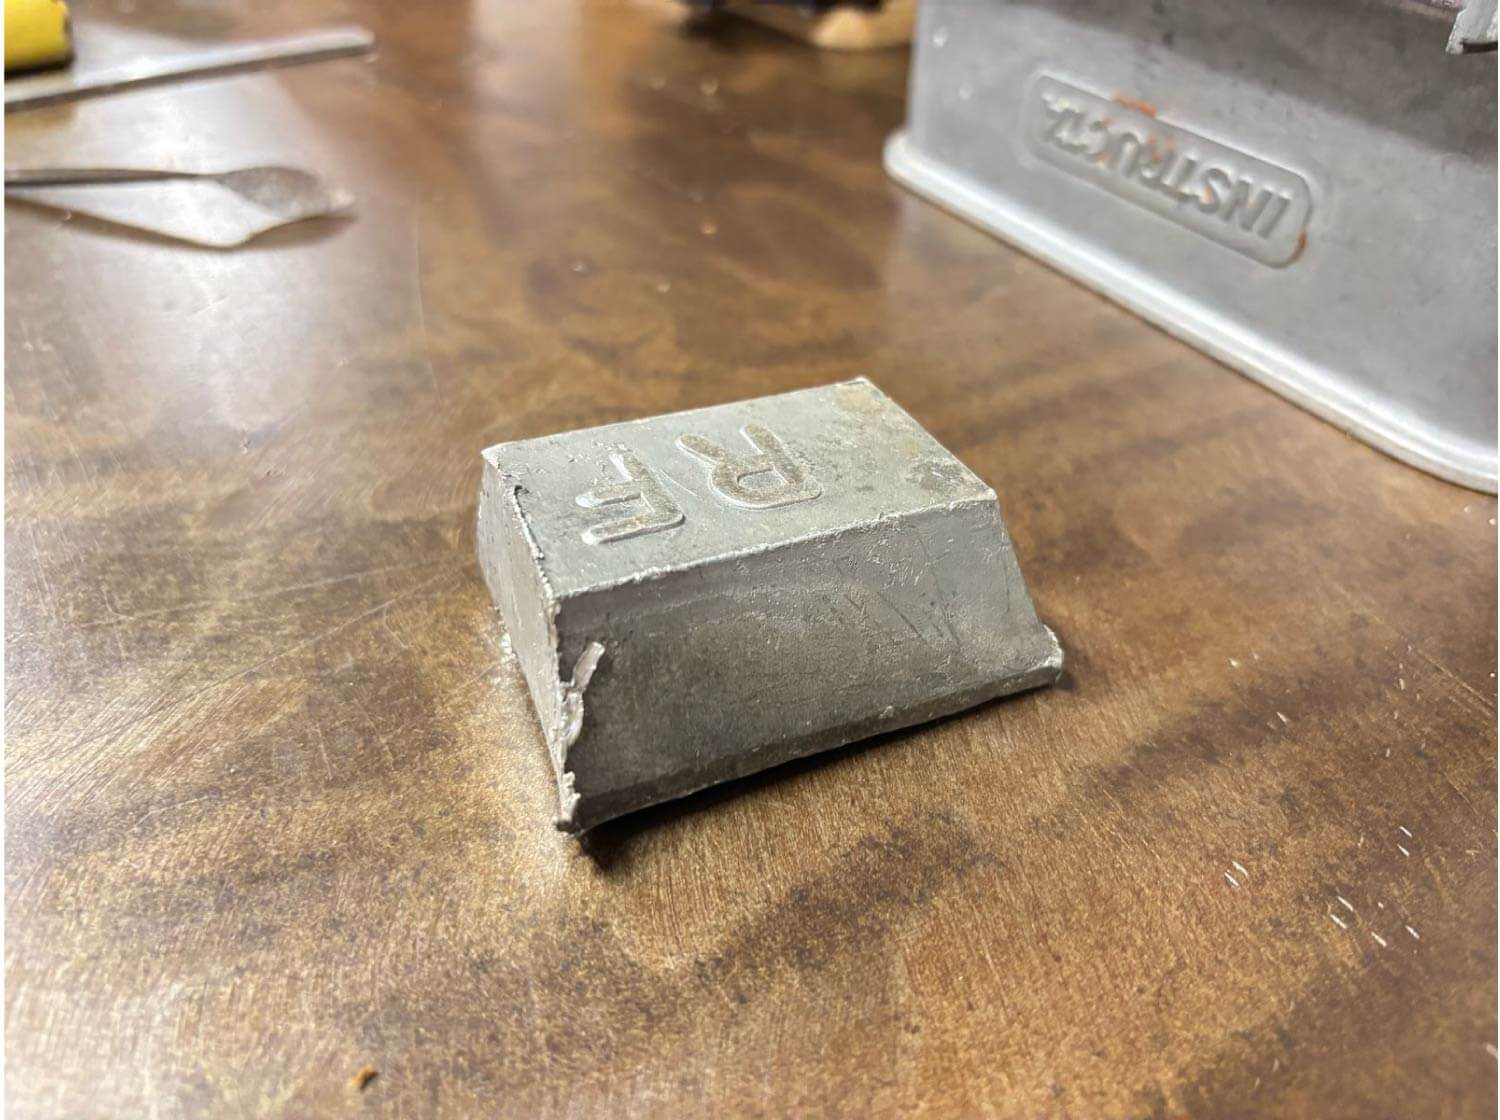
RESULT GROUP METAL CASTING
CONCLUSION:
The zamak process is very different from the silicone processes. It requieres more protection equipment since its a material that melts at very high temperatures. The finish is really detailed even tough the molding is in mixed sand.
INDIVIDUAL ASSIGNMENT
Z A M A K M o l d i n g a n d c a s t i n g
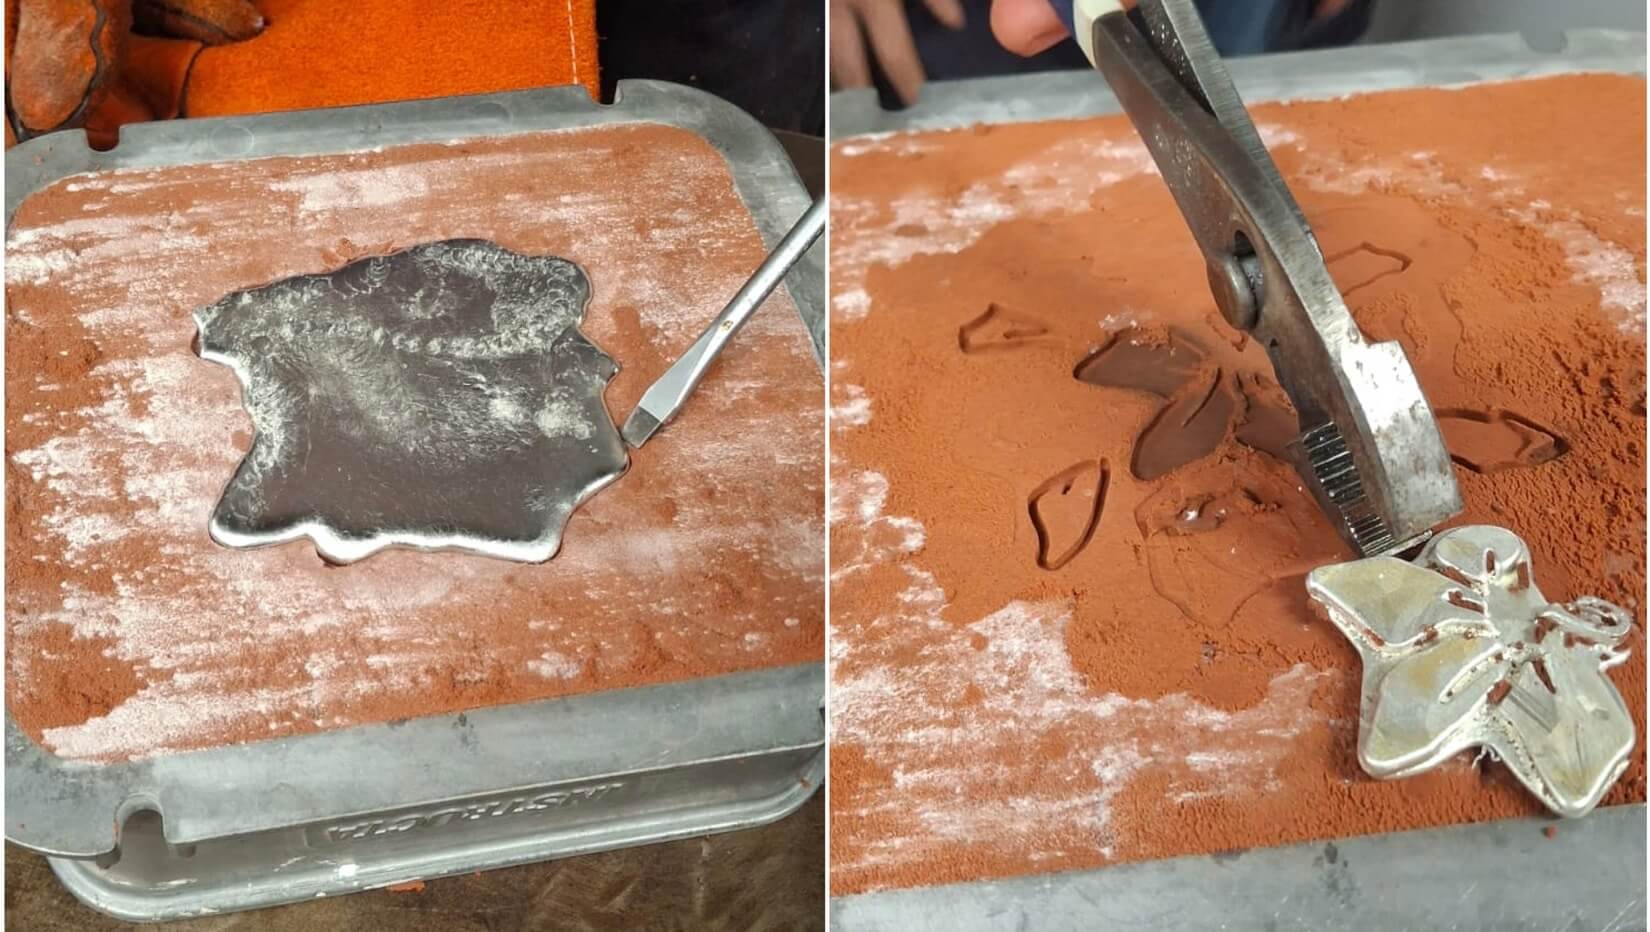
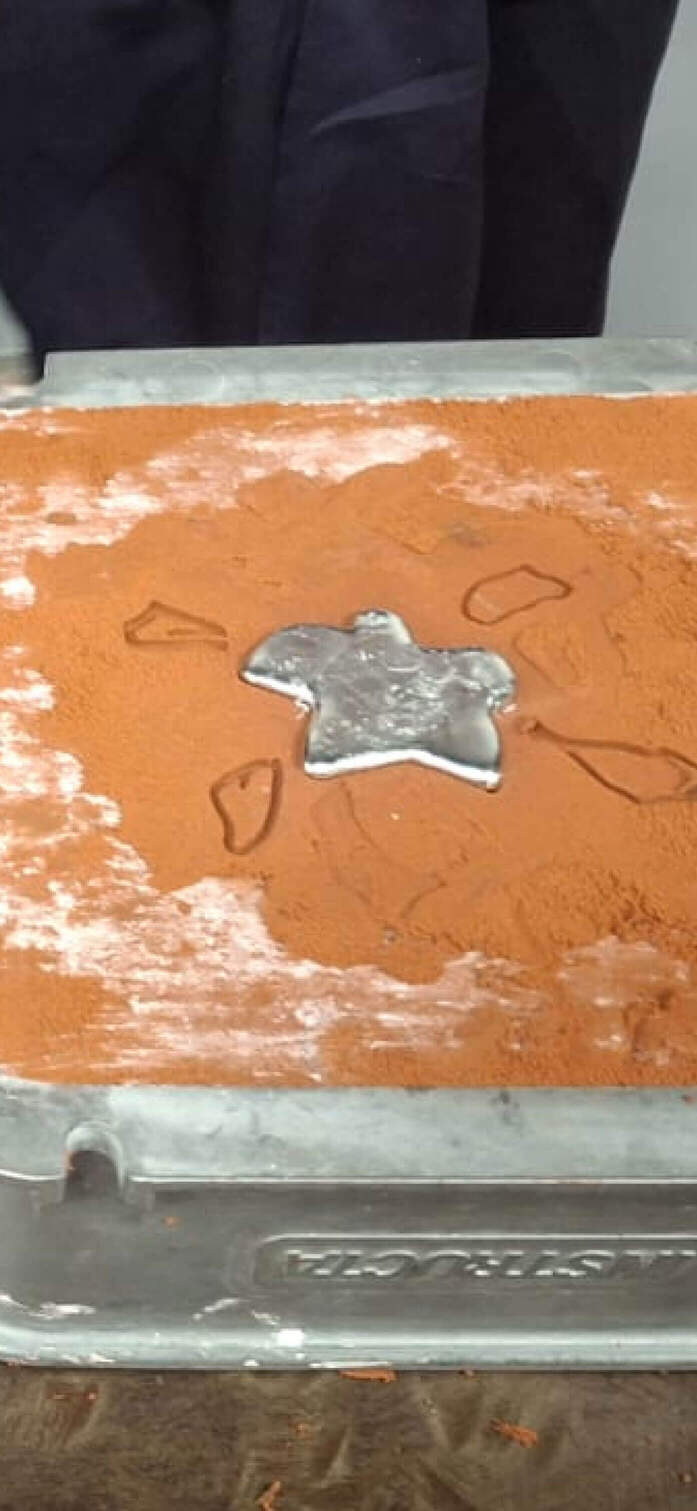
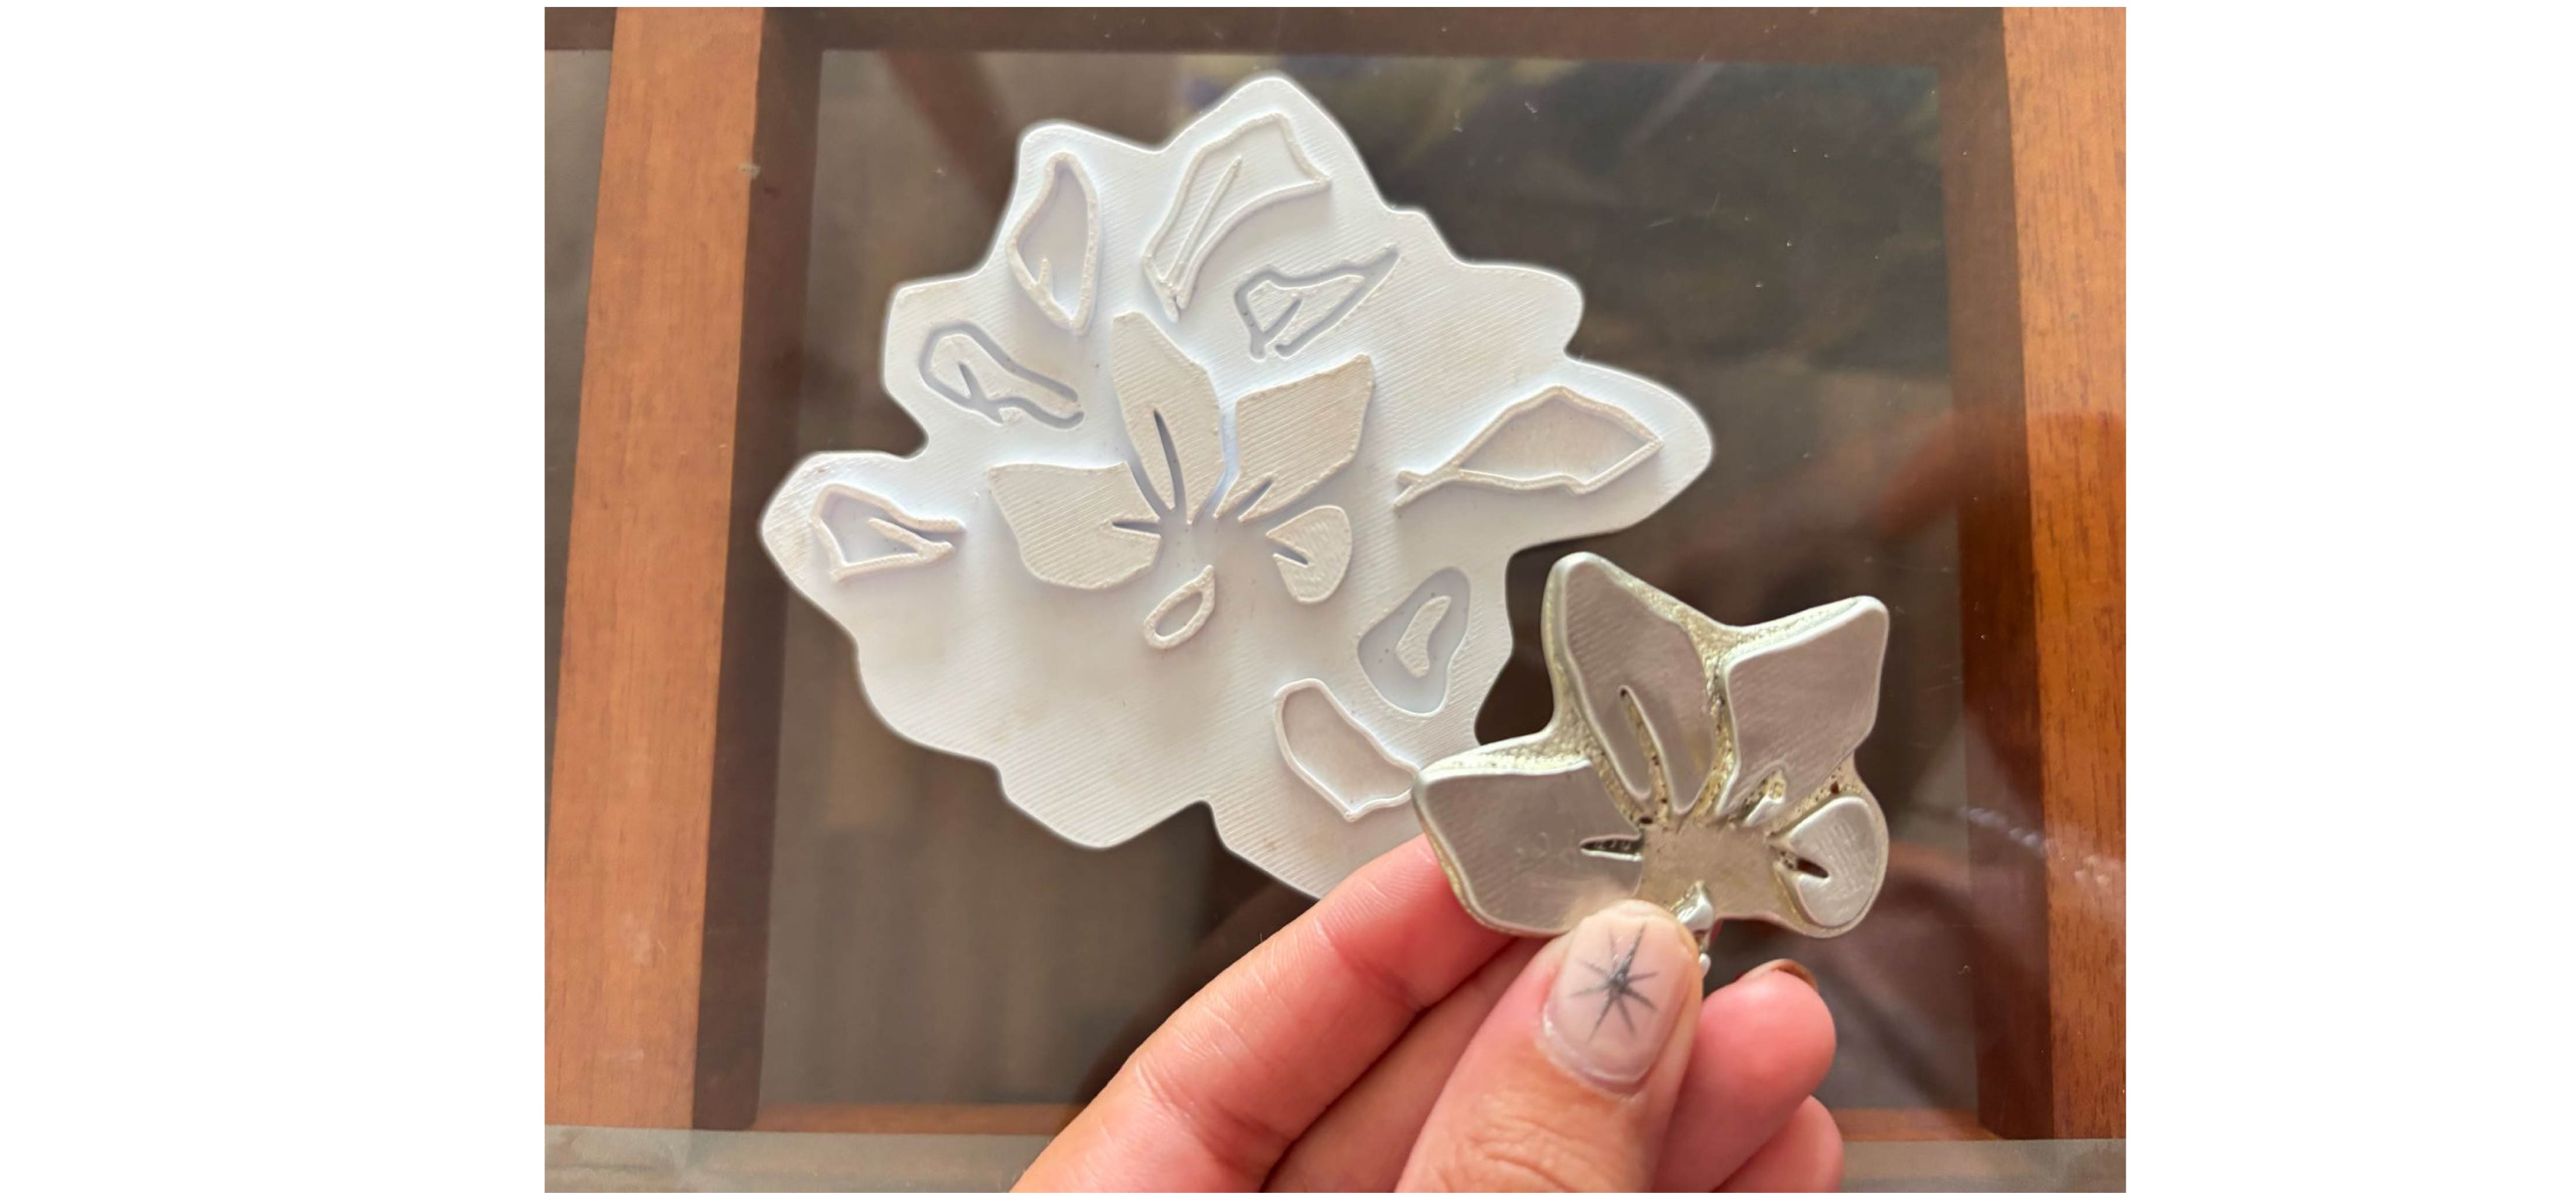
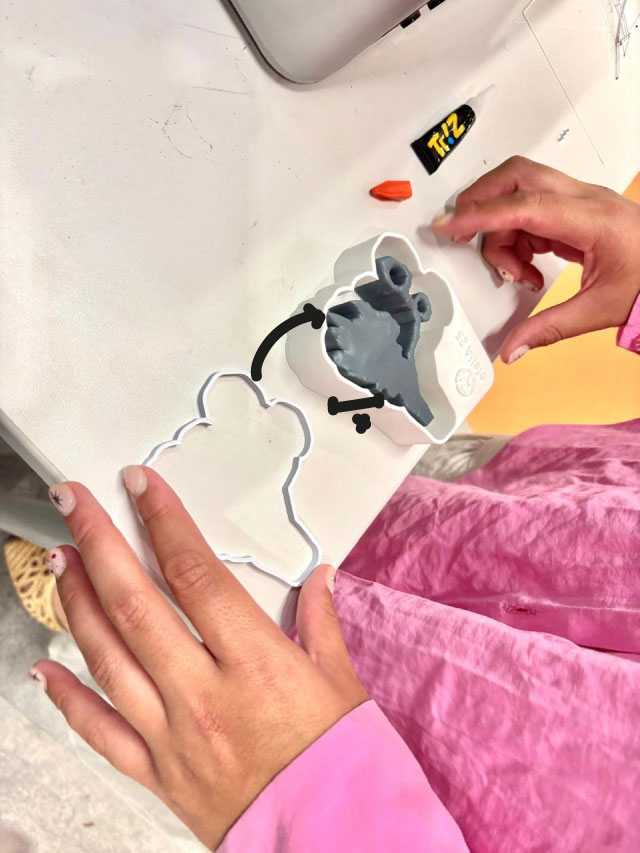
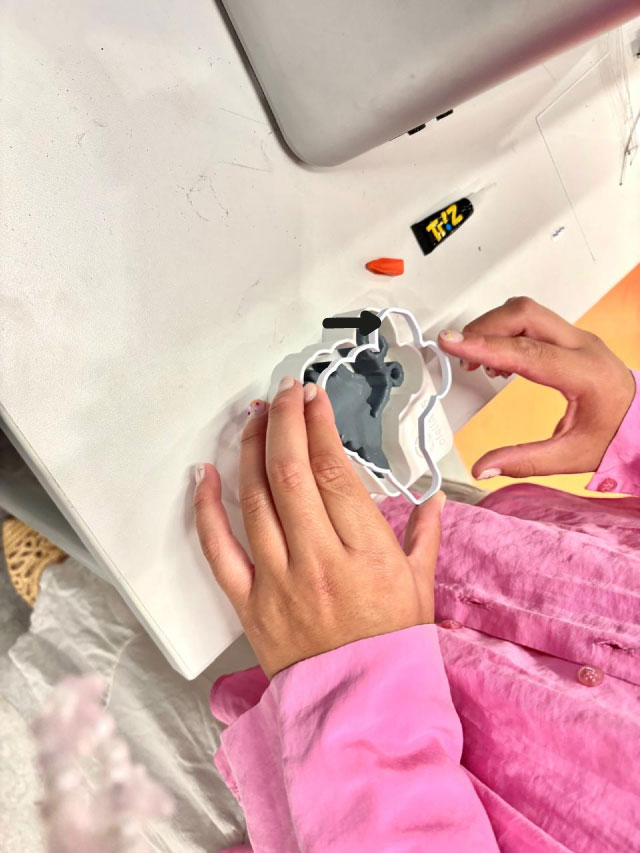
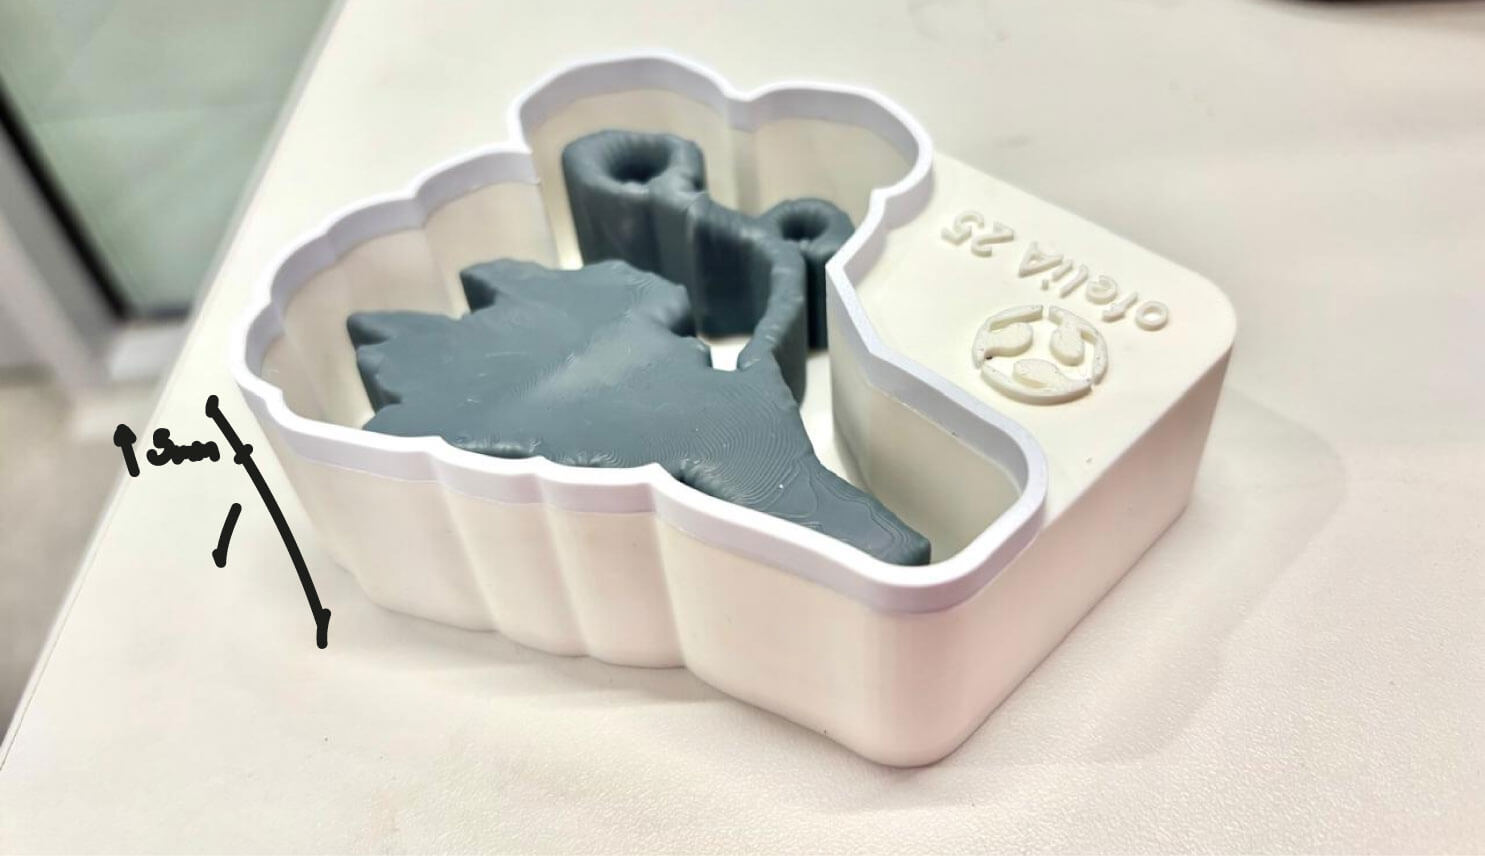
We also tried the metal casting with personal designs. Ernesto tried with a topography he made for his individual assignment. And I still wanted to try with something of my drawings (as in all assignments). So I decided to try the other side of the medal I design but just cast the flower in center like a kind of charm.
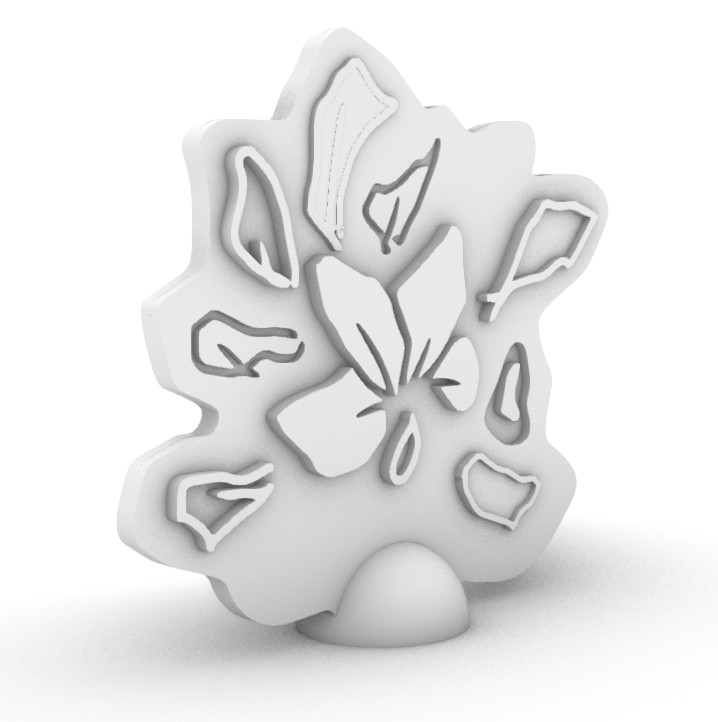
I did the same process as in the group assignment but did not cast all the mold. Just the flower in the center, since I did not want the complete side of the medal. It turned really well and in the end I polish it.
p r o c e s s

For the mold I 3d printed the model in white Polylite PLA since is the generic material we use in the lab and I just wanted the surface and the model did not have too much detail in complex meshes. The molding turned out really well with just the flower in the center. After polishing it looked fine.
M o l d in g And C a s t i n g
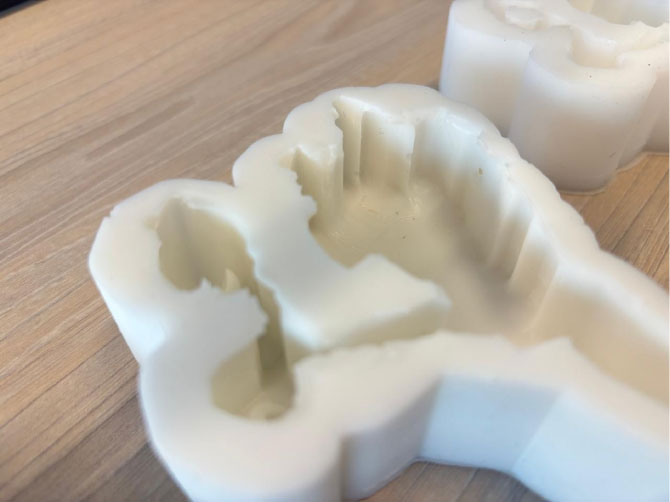
Following the idea of making my drawings in 3 dimensions I chose this small tree I always make as a character. For making the 3d version of it I tried to give it a balloon texture with some holes to make it look like a pencil holder or just a holder for something (I wanted to see how to cast holes too). I tried two silicones for the molding: RTV SILICONE RUBBER TYPE 6 and Silicone F-20 Plus.
All molding tests.
Cating results with acrylic painting and epoxic resin.
1. D e s i g n
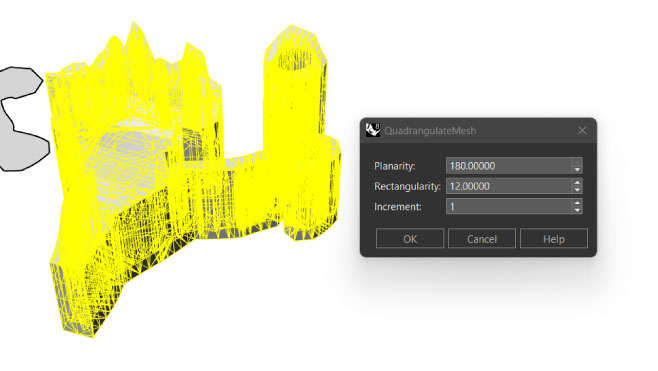
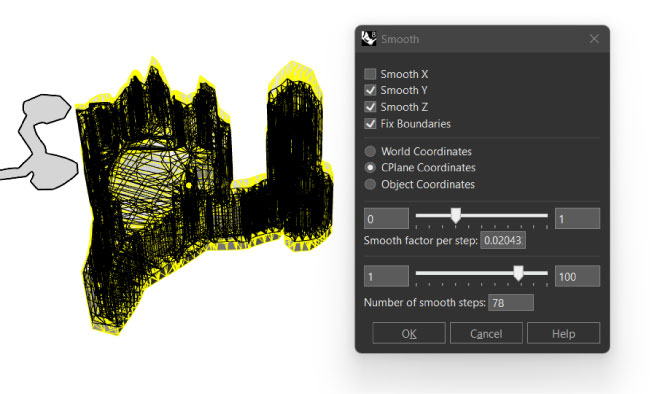
I started importing my drawing in Rhinoceros and making the silhouette. Then making a first surface to extrude and deform as I wanted the tree to be. Finaly I gave the texture of balloon by increasing the mesh quads and smoothing the mesh.

Rhinoceros modeling process
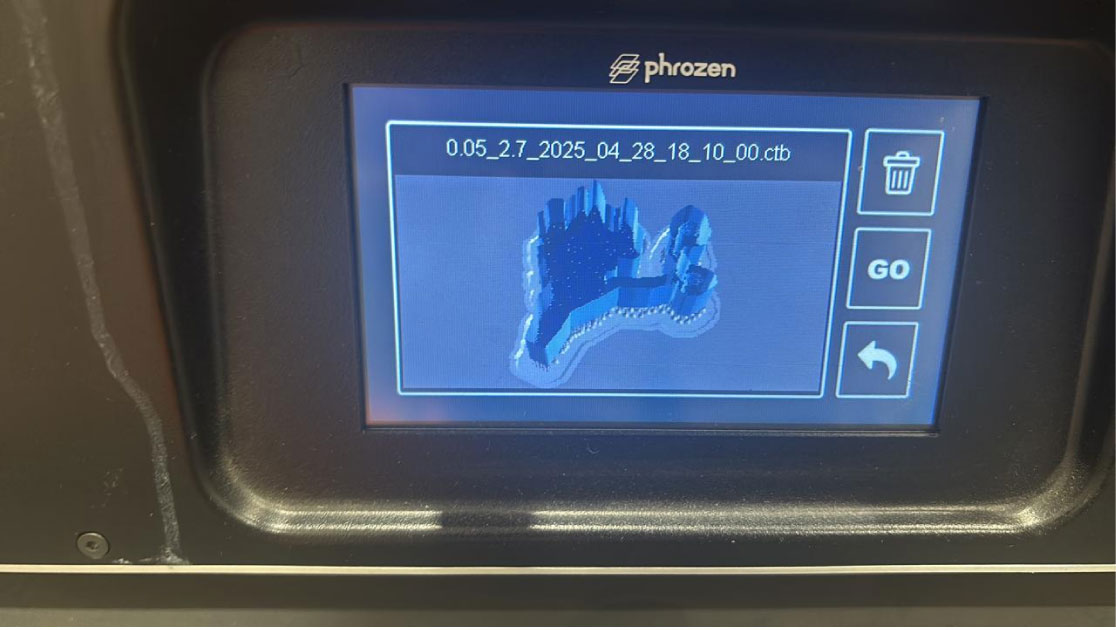
For the model to replicate I 3D printed it in resin to have a smoother finish in the surface. I chose Phrozen Aqua Gray 4k for this test. I make sure I was just printing the mesh and not the solid since for this case the filled model was not important just the exterior.
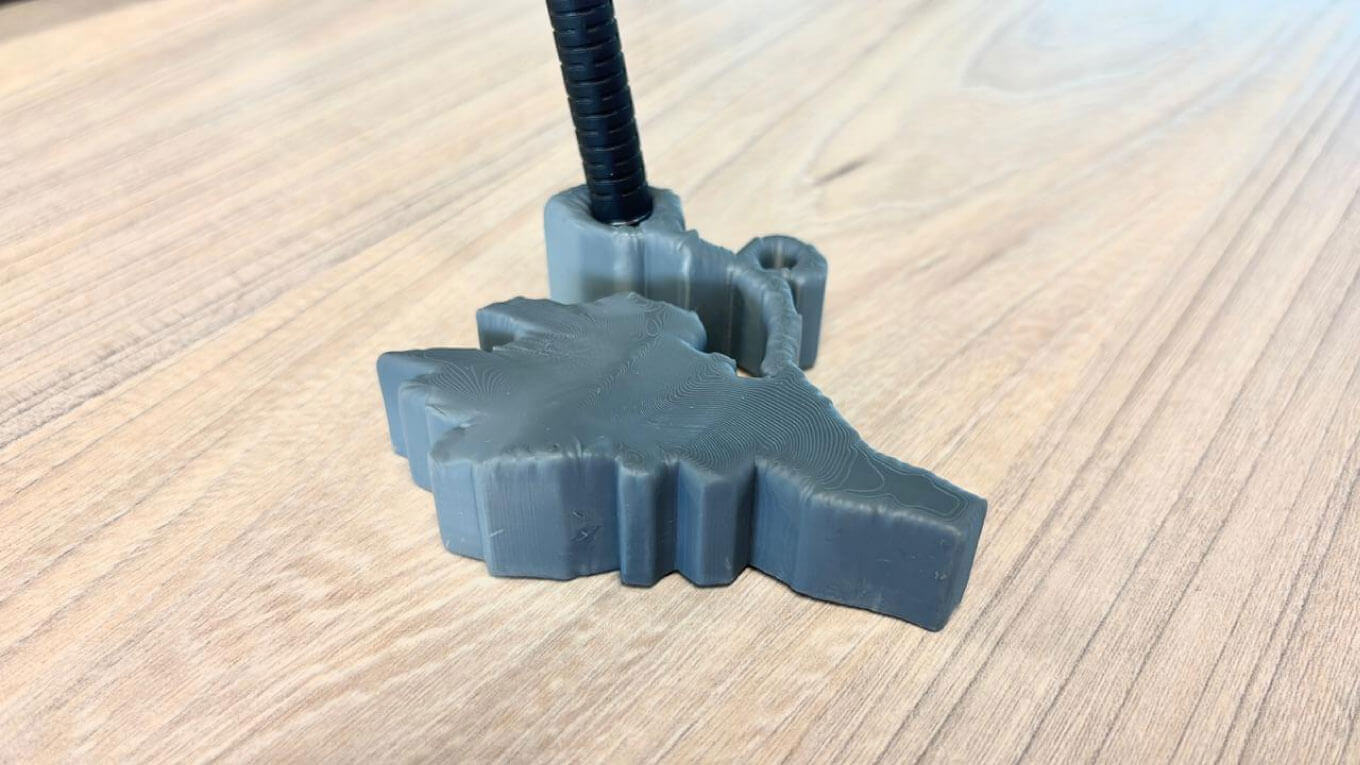
Final printed model
M o l d in g i n S i l i c o ne
2. M o l d F a b r i c a t i o n
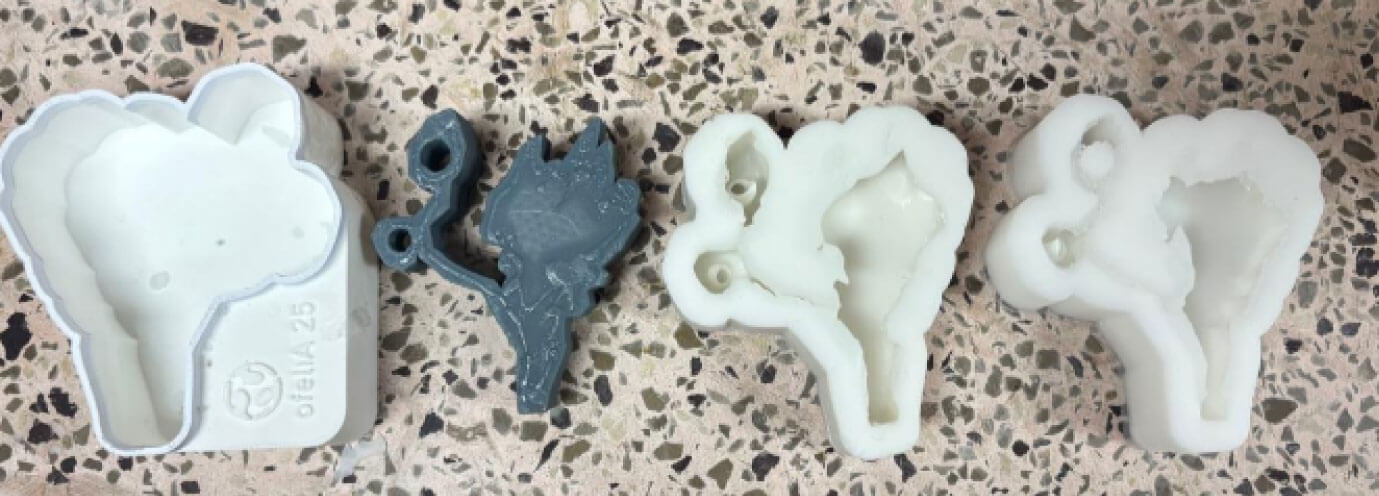
After 3d pirnting the model to eplicate I had to make the "case" for it to have the final negative of the model. For this in Rhinoceros I offset the contour of the object around 5mm for the outside and make a case to 3d print in PolyLite PLA since for this I dont really care too much about the finish I just needed the object to cast.
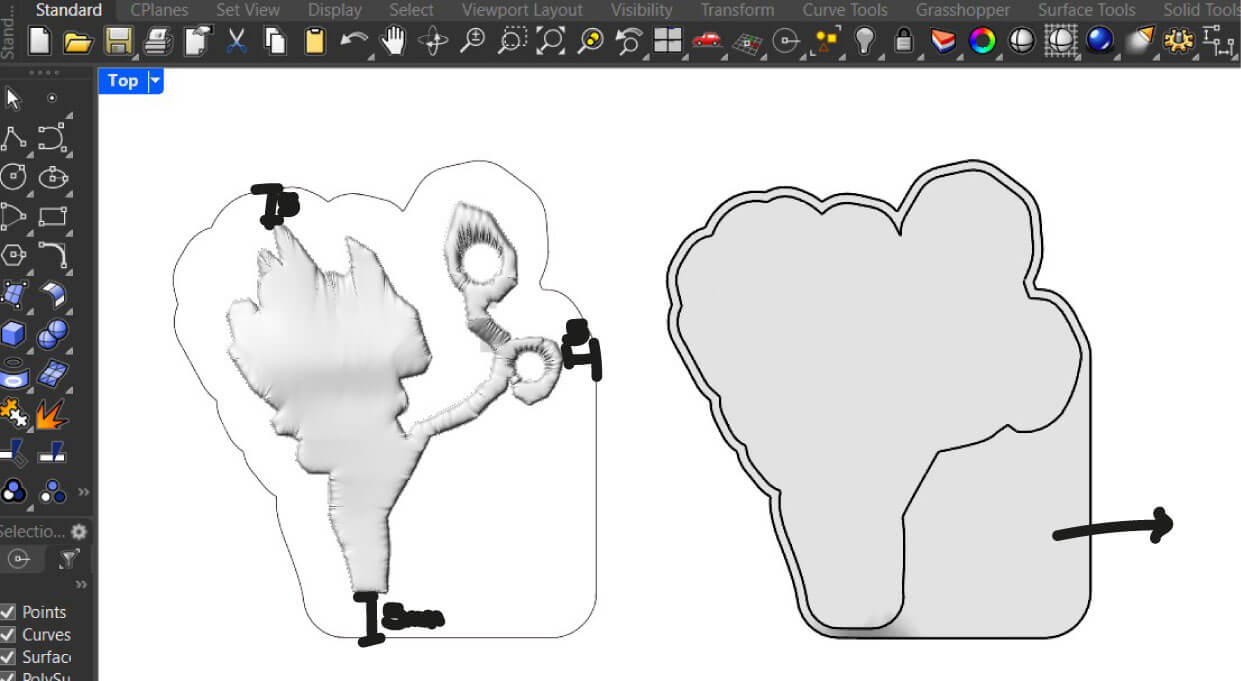
However for the height of the mold I measure the exact height of the object from the lower side and forgot that there is a part where is longer. So the case +5mm offset was just 22mm when the highest point was at 23mm.
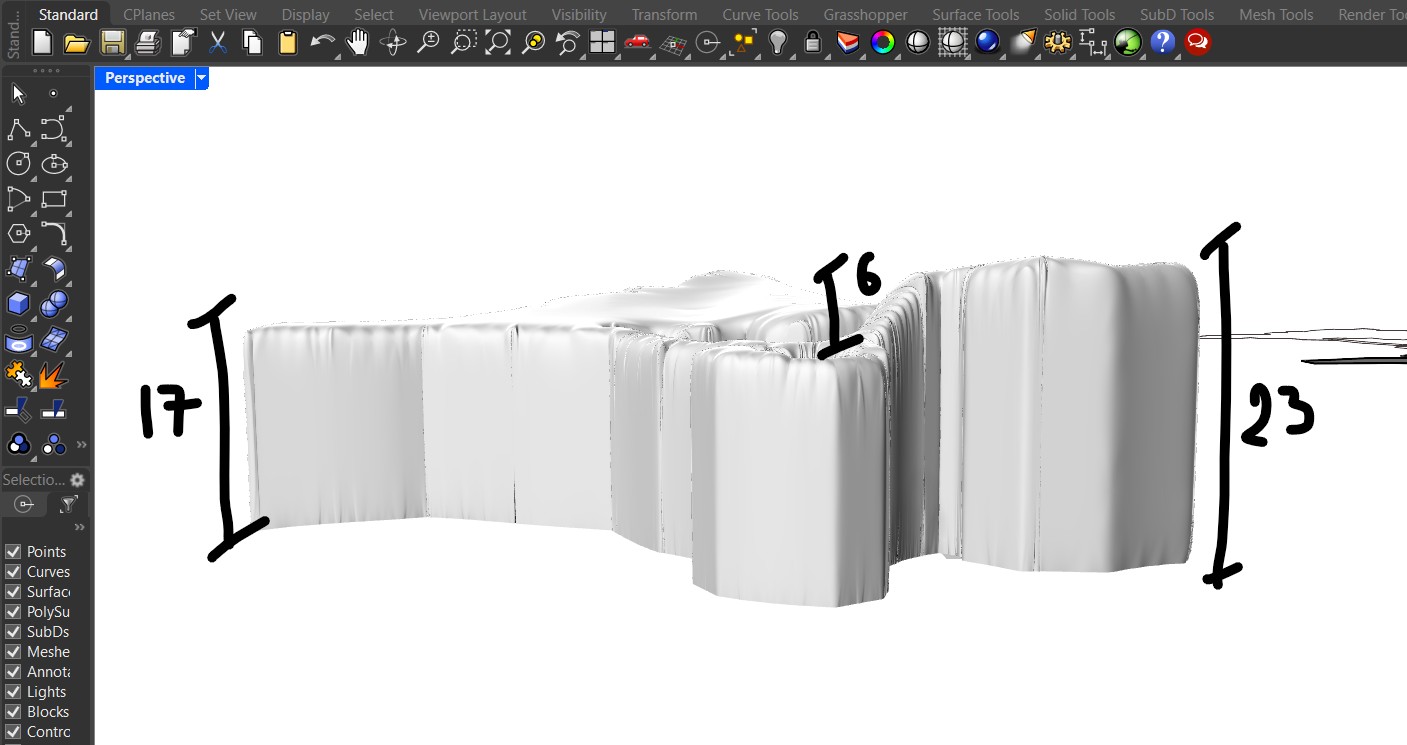
height difference in the model.
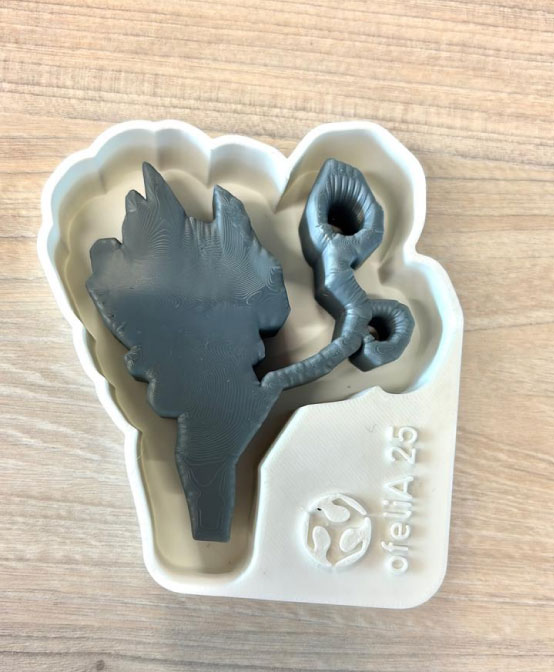
To fix this I 3d printed just the contour in a height of +7mm to make sure it was taller than the object. To then just join everything from he object in the case to the contour fixed with super glue.
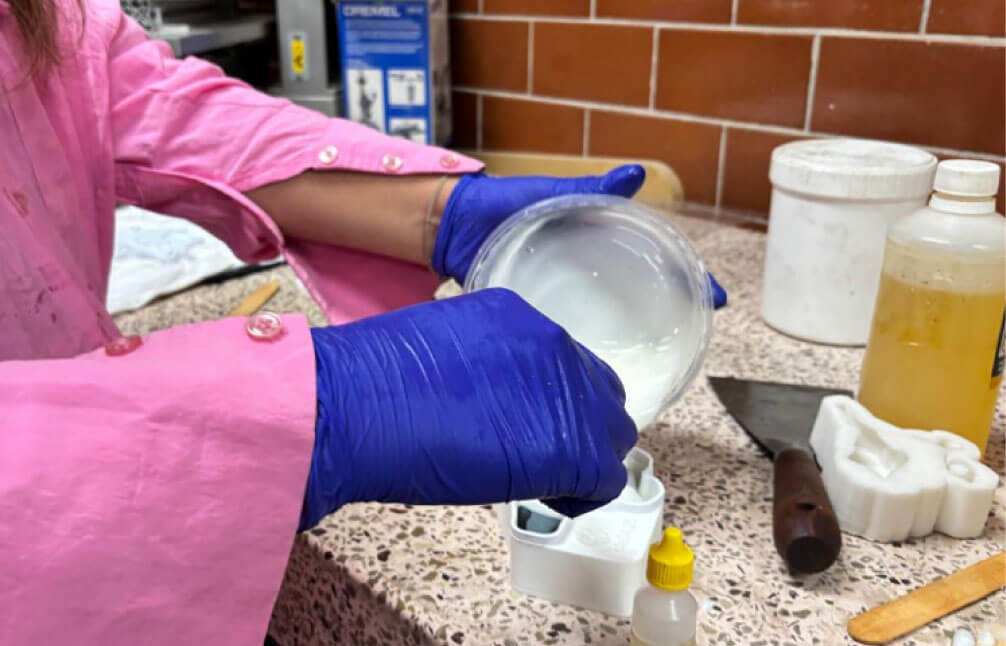
2. M o l d i n g i n S i l i c o n e
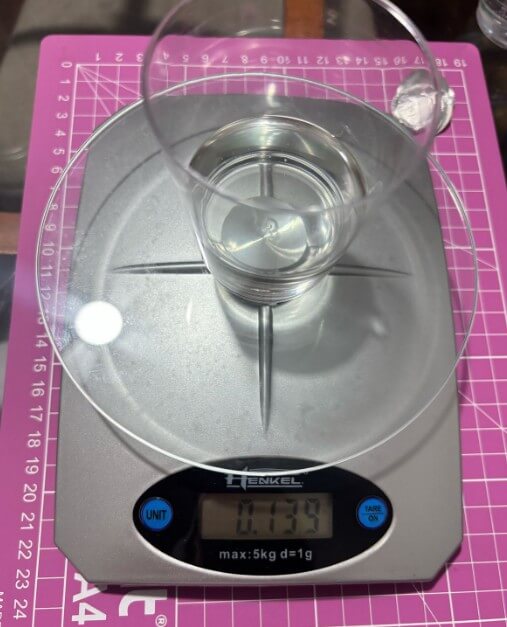
First I had to calculate the volume of the mold I made in 3d printing to know how much material I had to mix. Is a really fast process because the catalyst makes the mix dry really fast. I measure the volume with water.
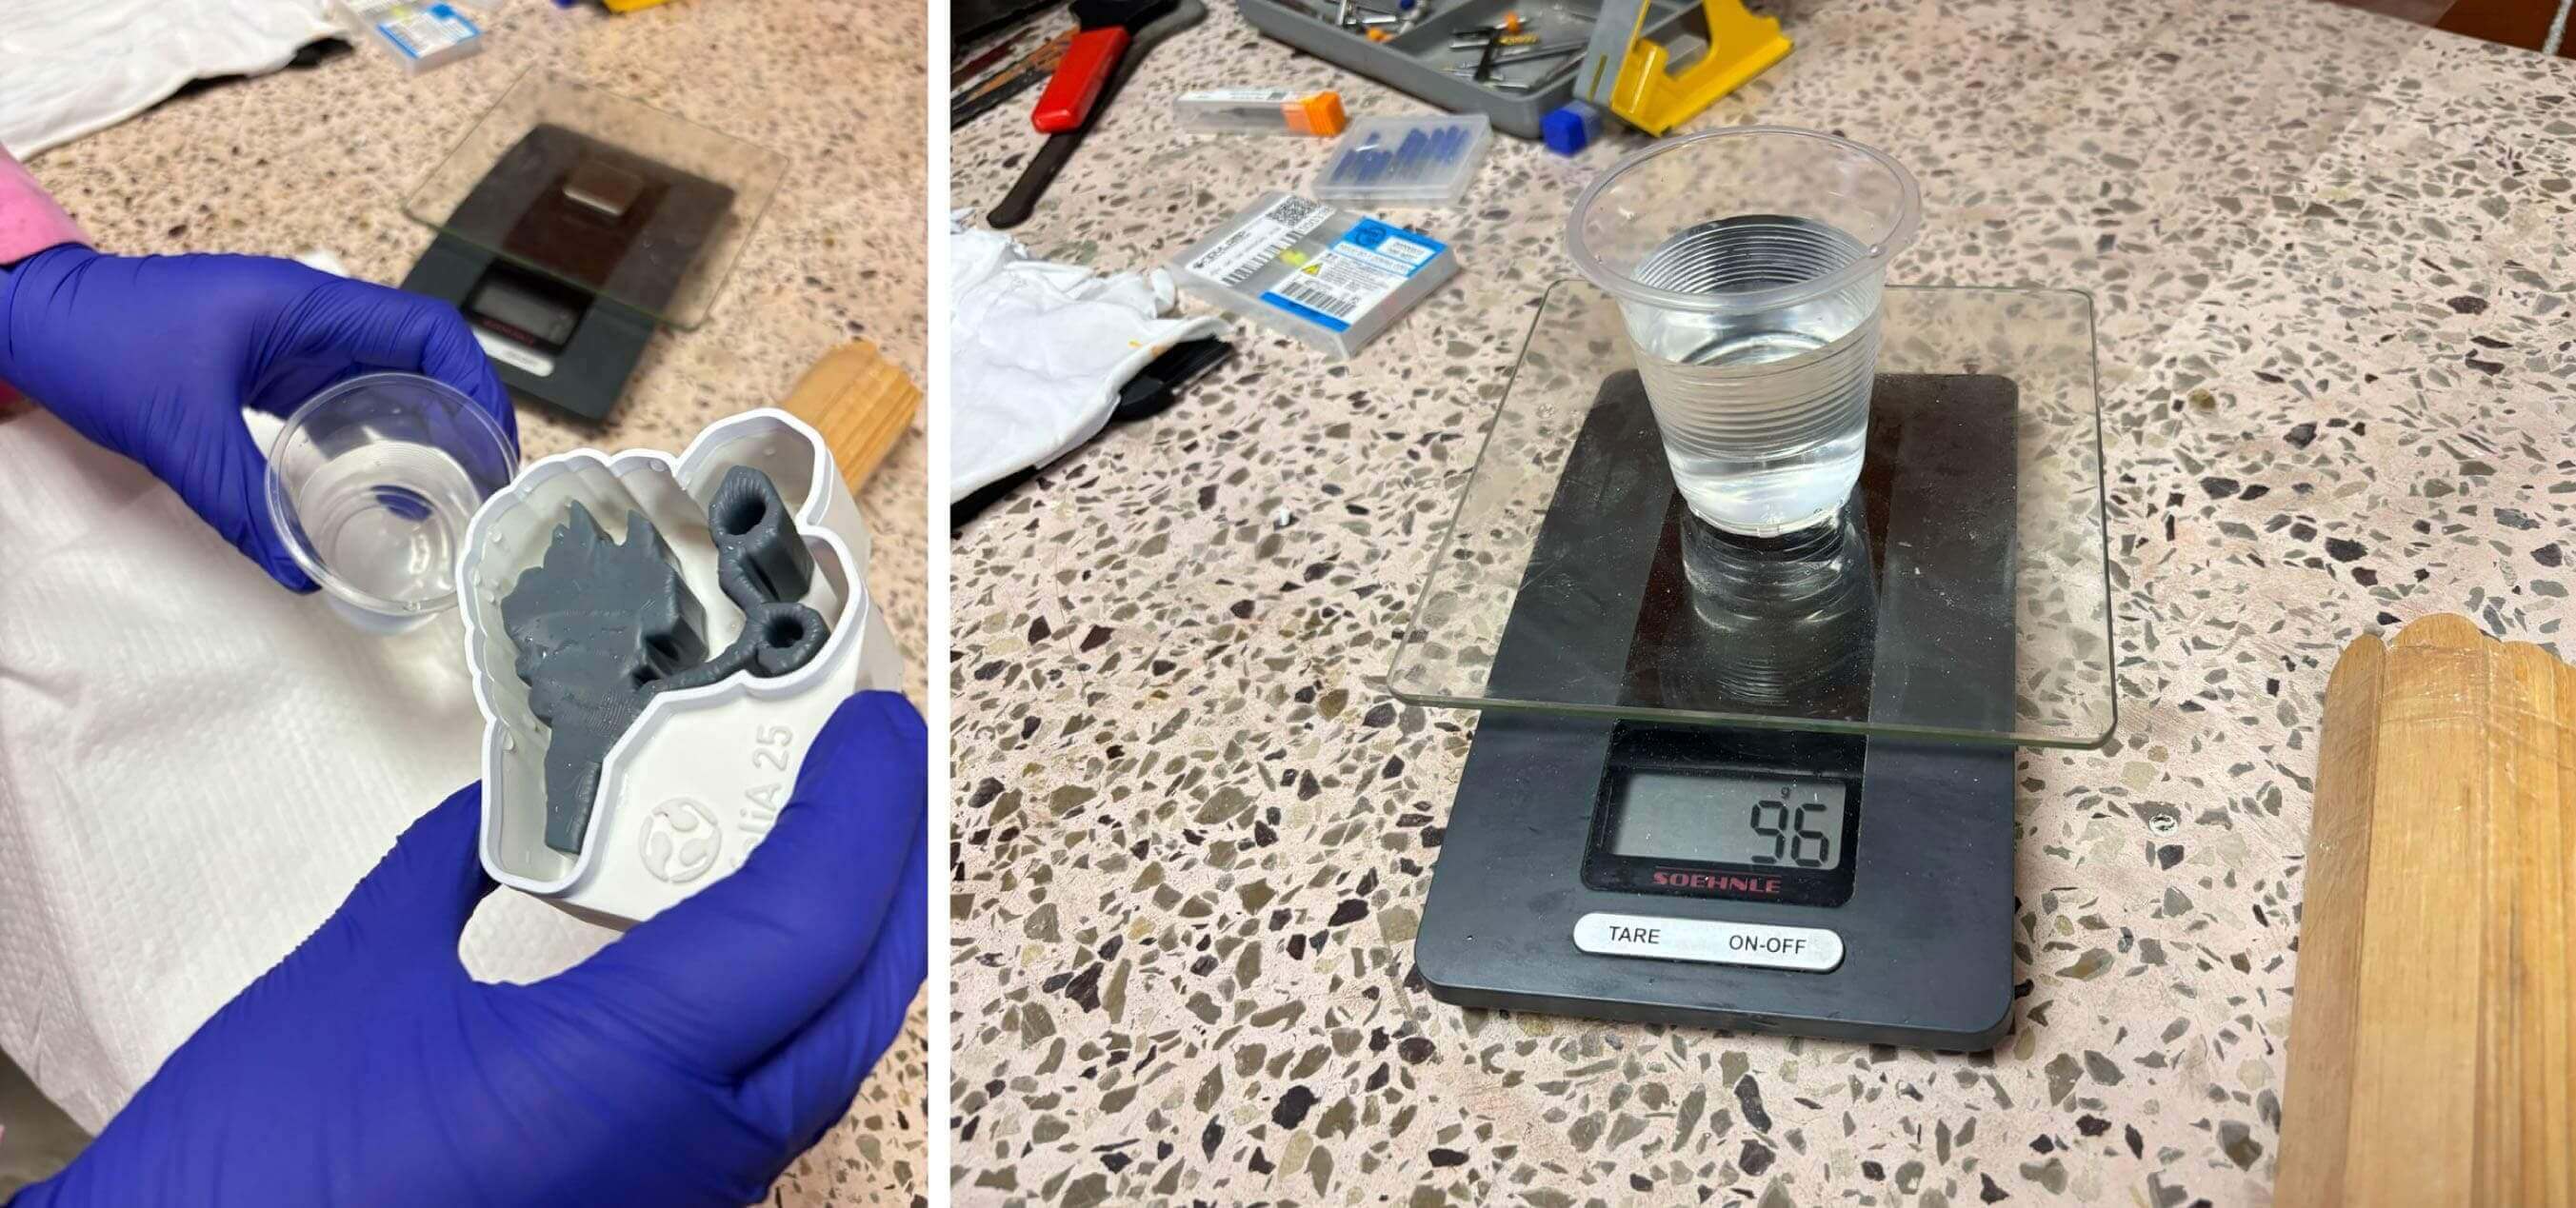
First I calculated the volume of the mold with water.
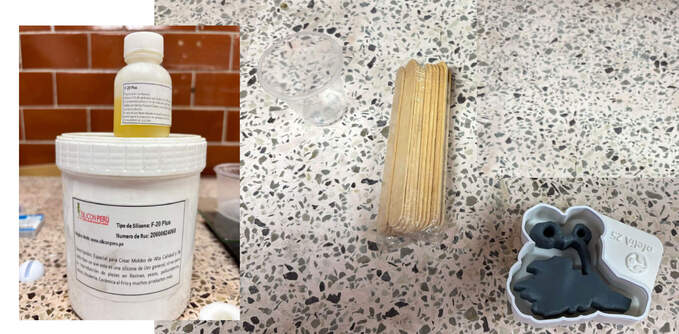
RTV SILICONE RUBBER TYPE 6
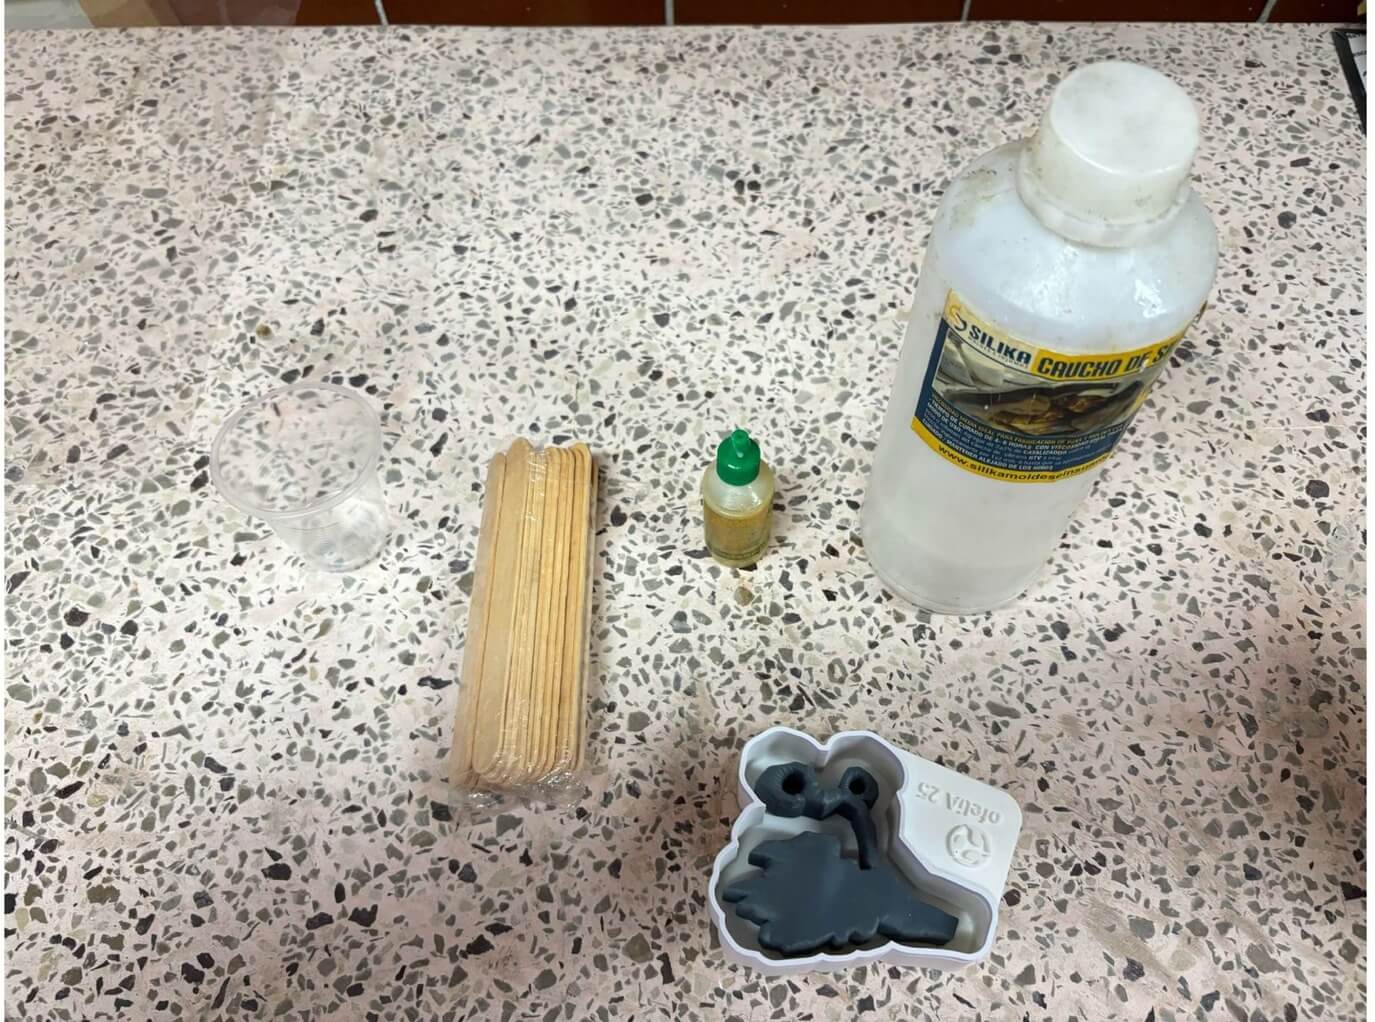
Materials.
Process
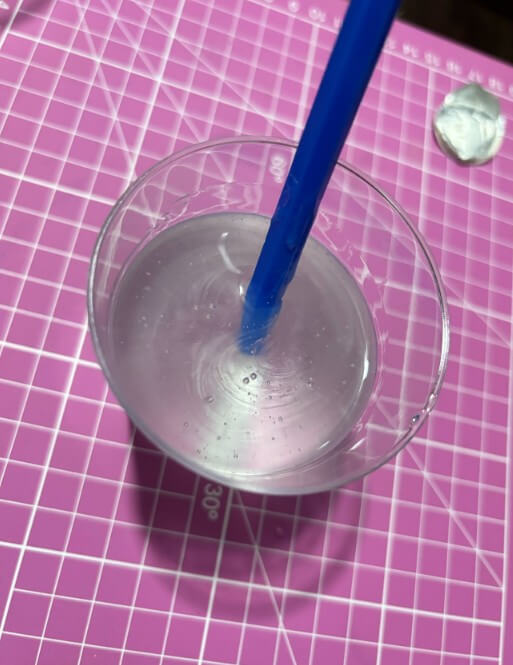
As I alredy knew the volume of the mold, I measure the silicone unitl the same amount + 4% extra just in case. This silicone just has one part.
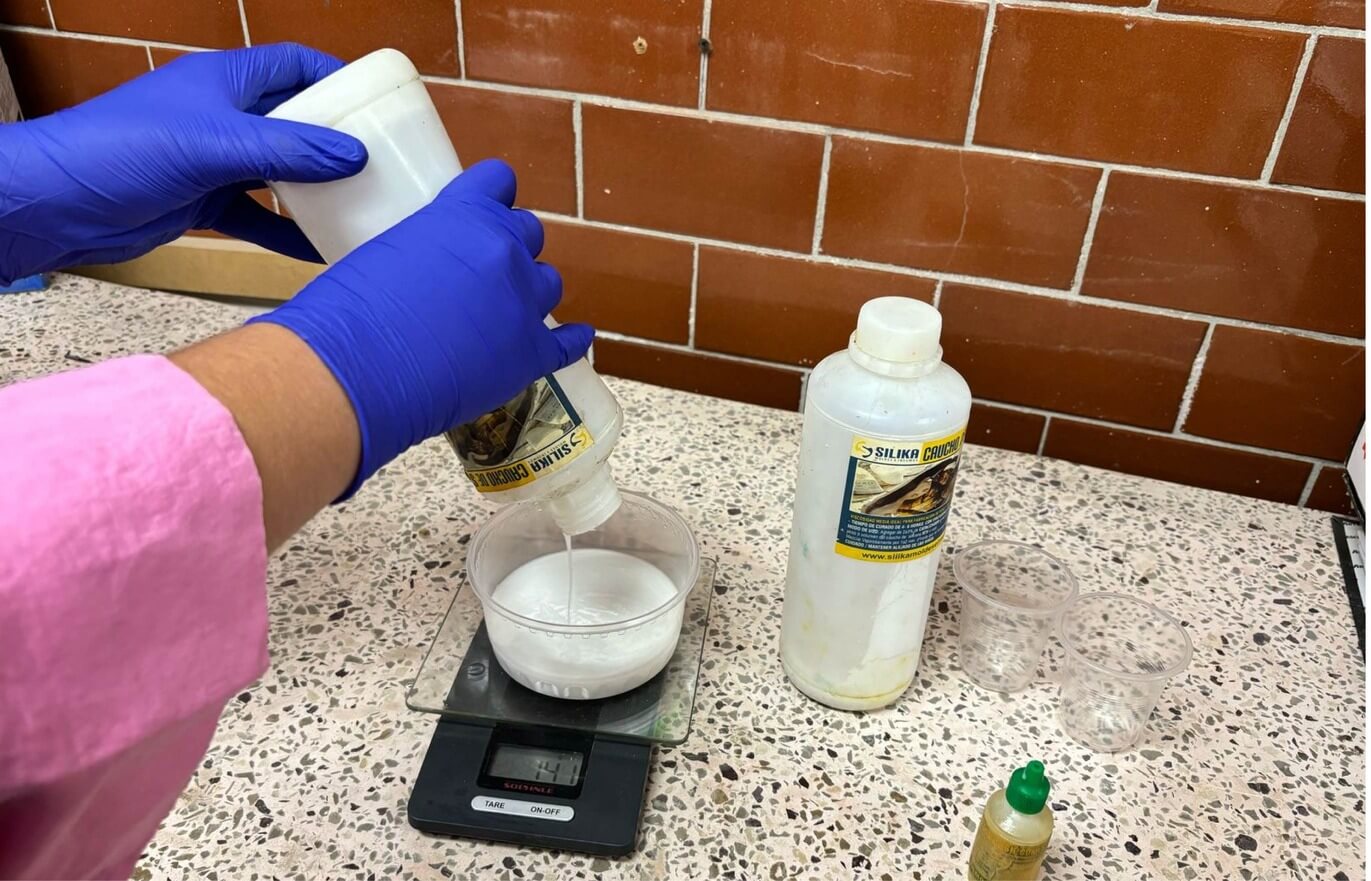
Silicone measure till the density I calculated + 4% extra in case of error.
It is recommendated to use the catalyst between 2–2.5% by weight or volume.However I wanted to try to speed up the process a little if I add more catalyst and add it in 4%.
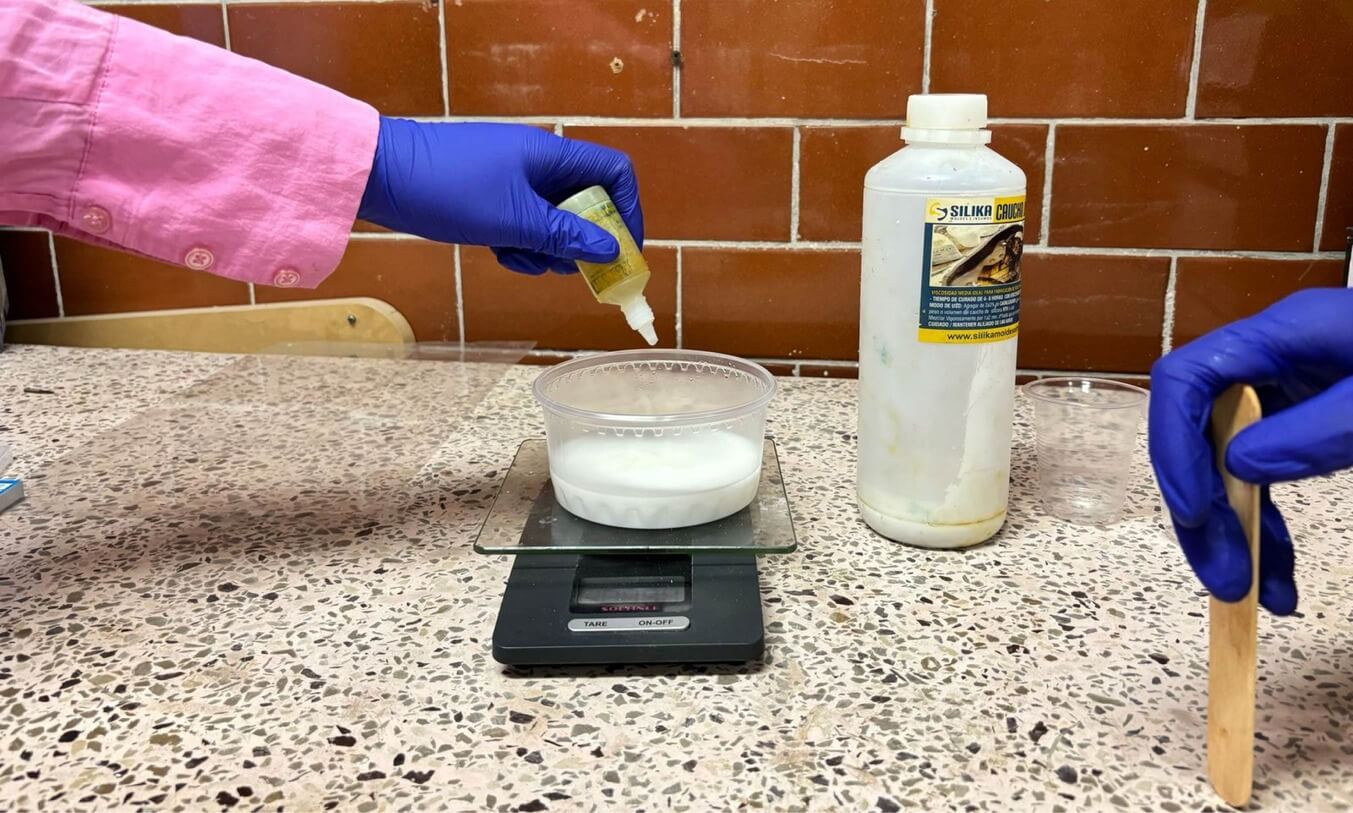
Catalyst in 4%.
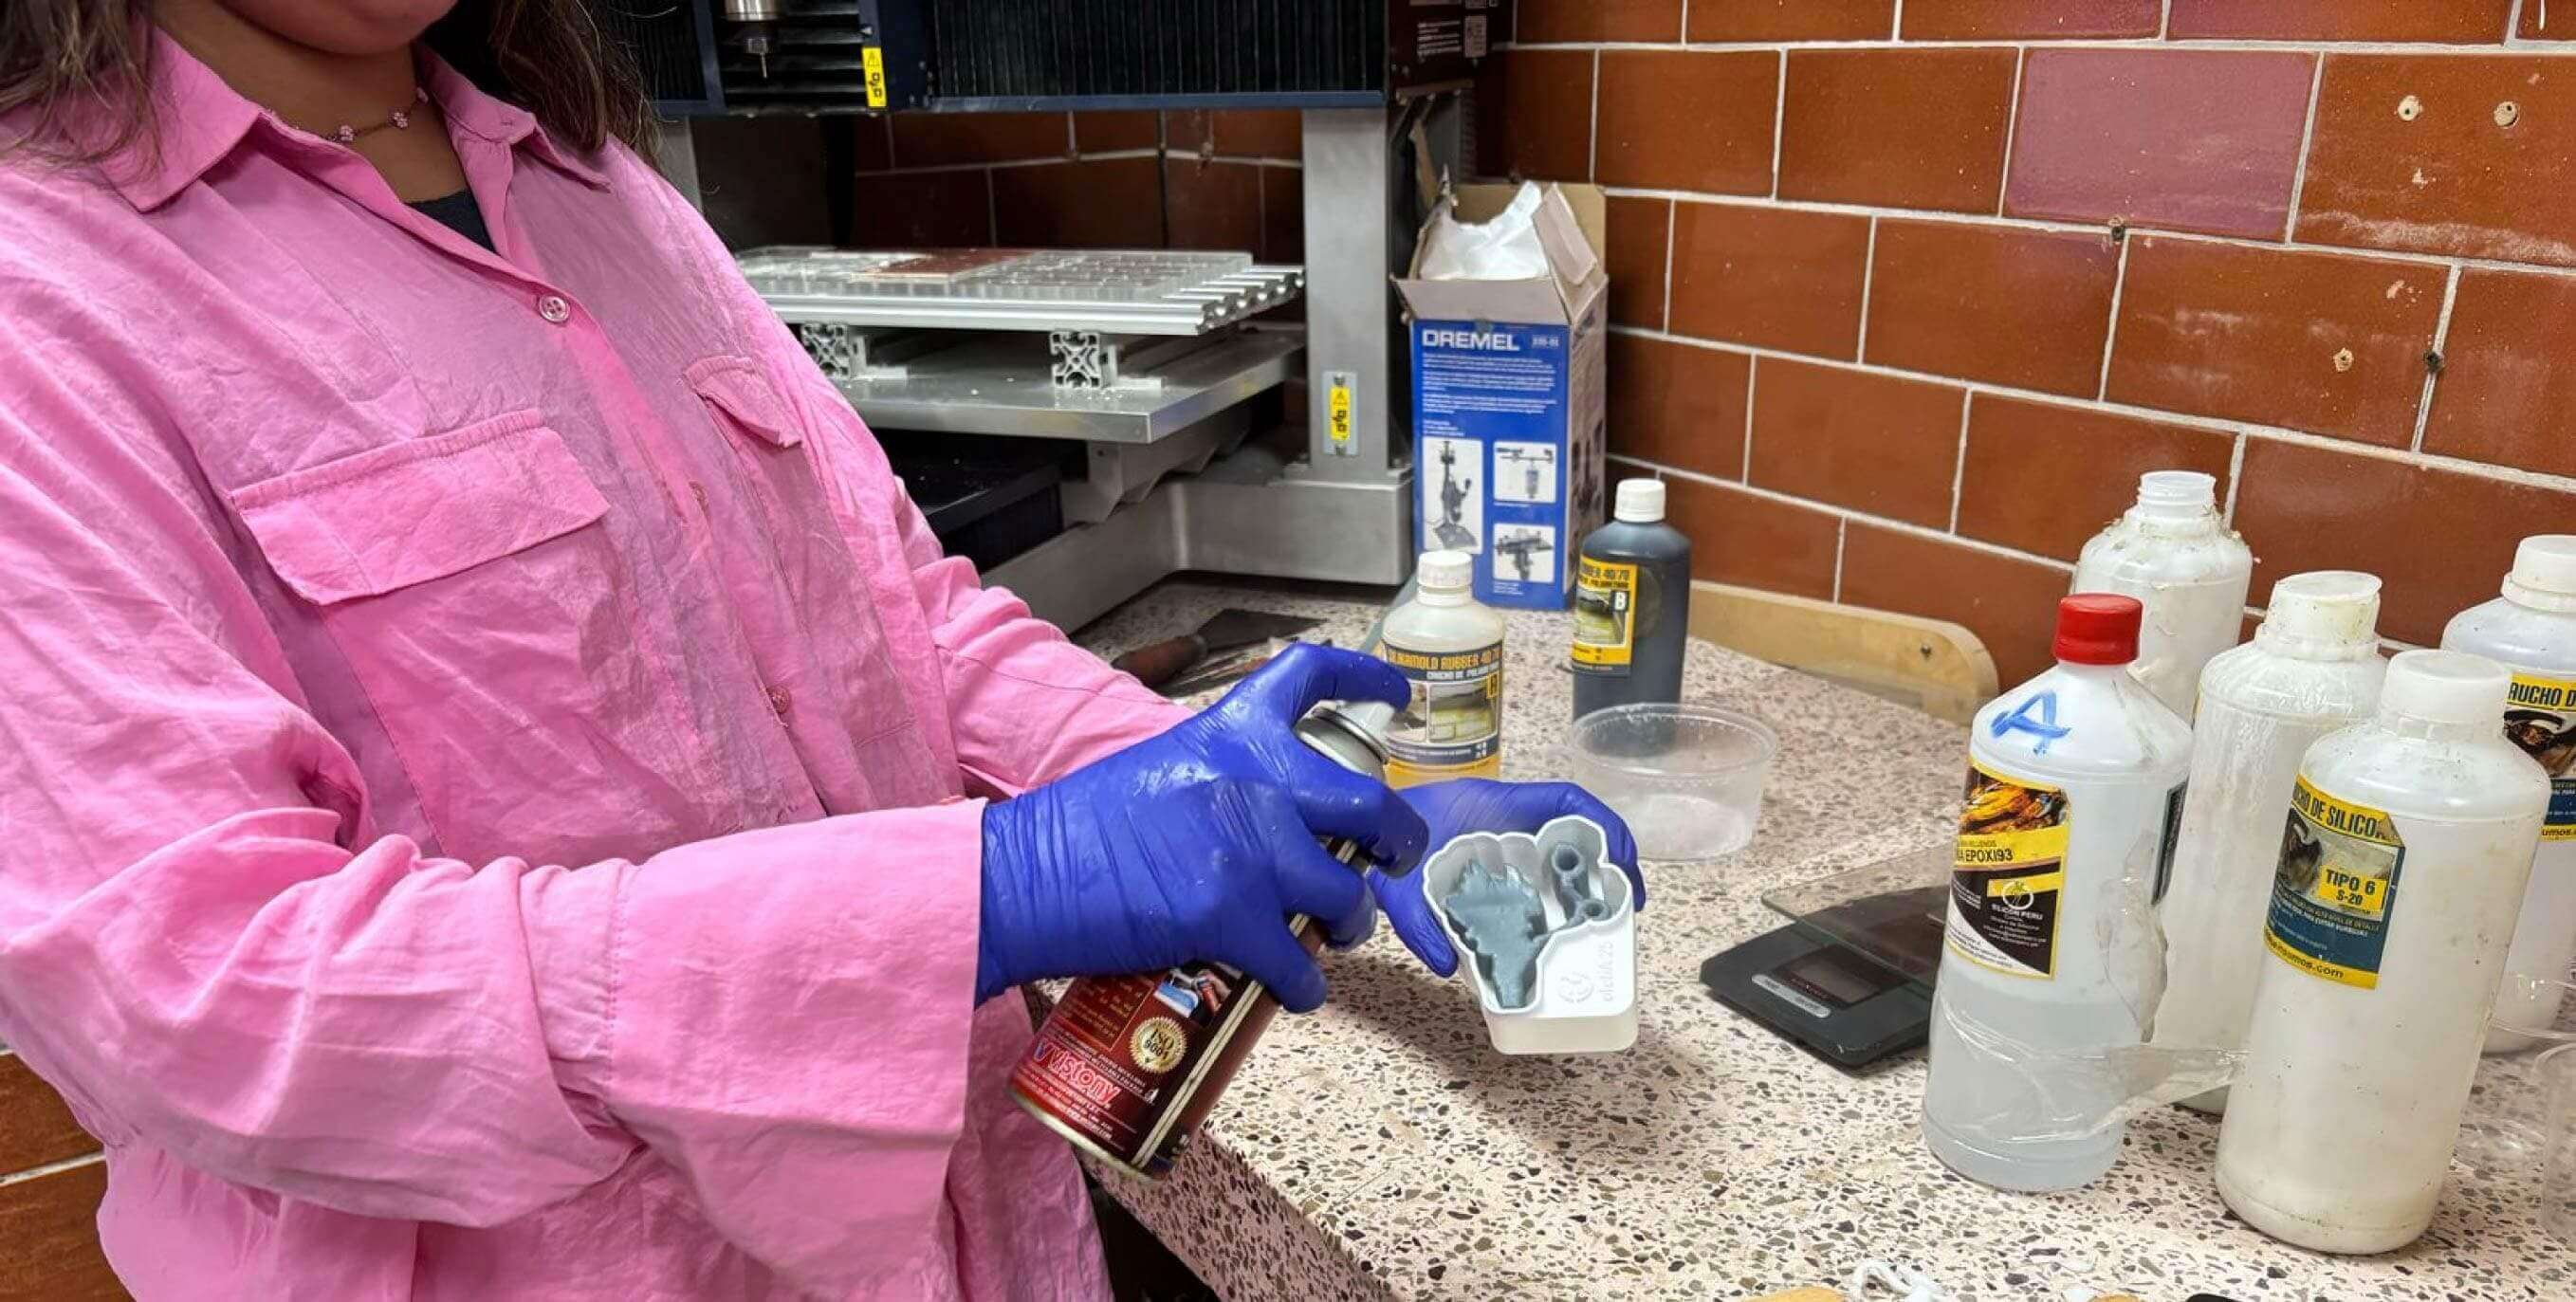
Dont forget the release agent in the mold so the silicone doesn't stick in it.
The silicone is poured into the mold.
Silicone molding done.
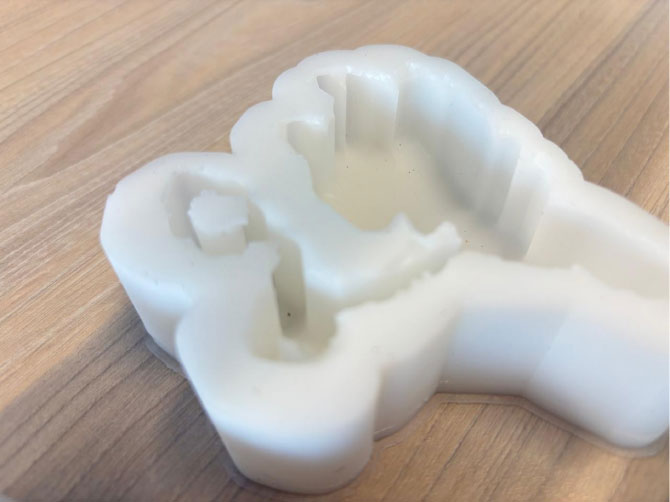
Silicone F-20 Plus
I also tried with other silicone since I did not really liked the texture of the other one. I felt I needed an smoother finish of the mold.
materials.
Process
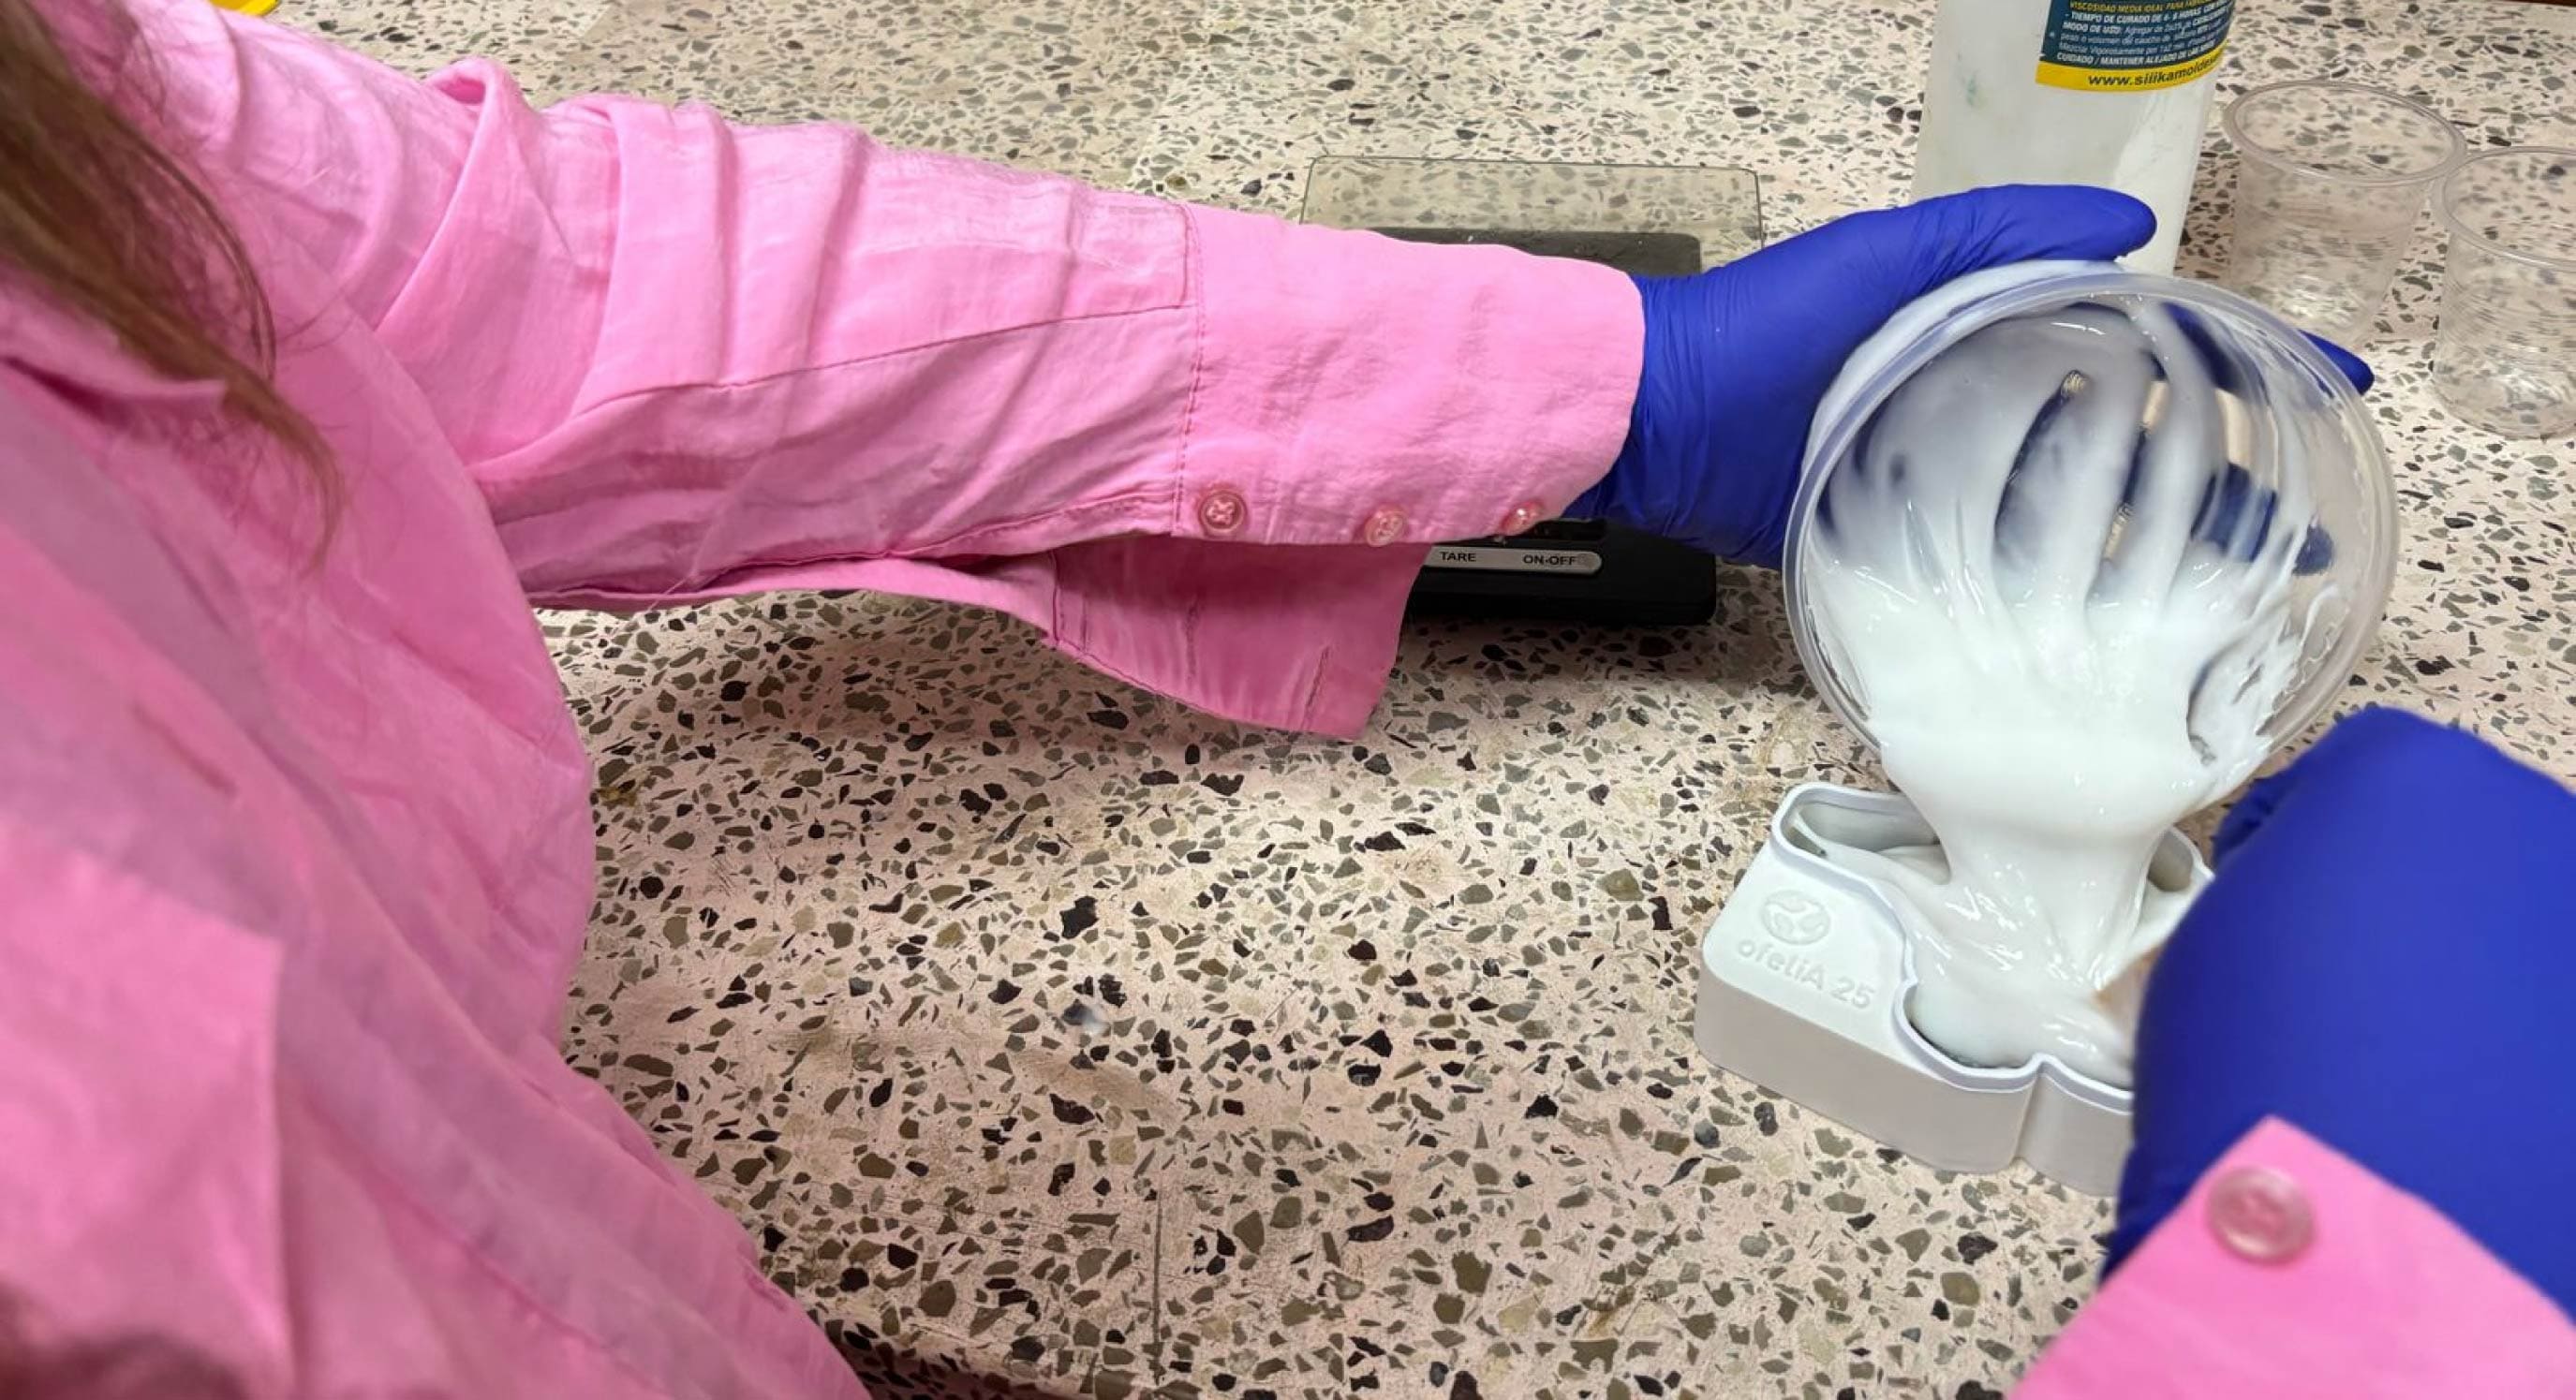
This silicone did not have part B. So I just measure the volume of the mold and then add the catalyst in 3% as recommendated.
Catalyst in 3%.
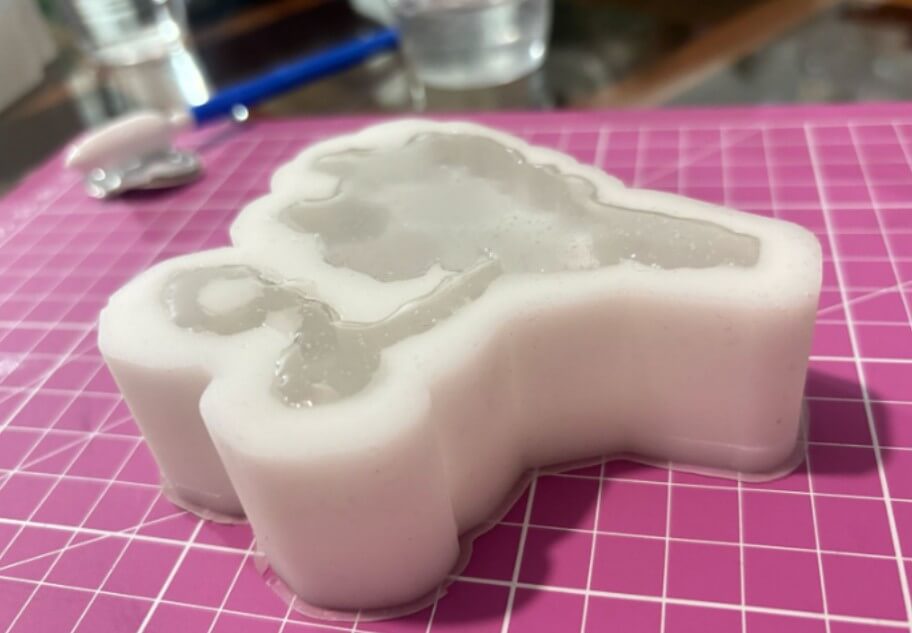
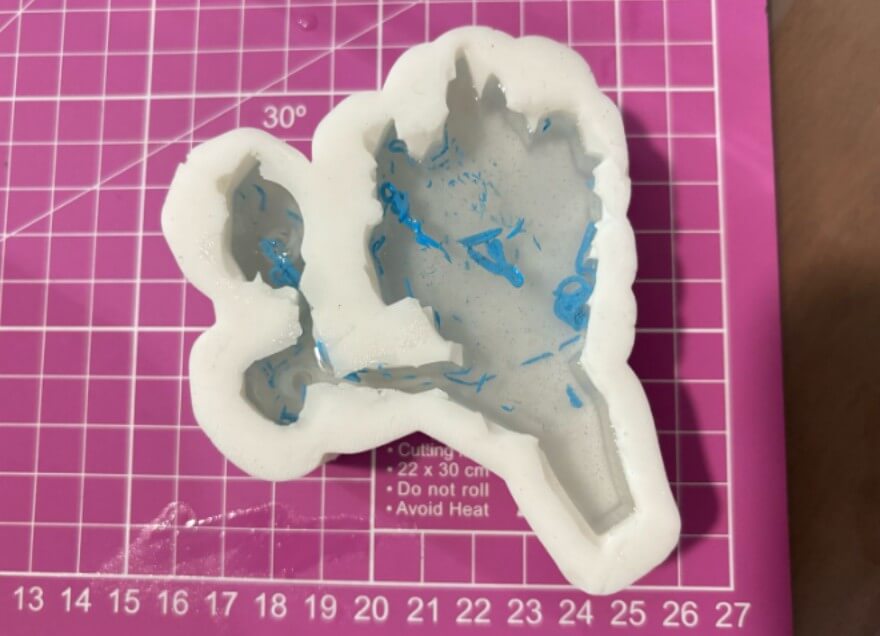
The poured really fast in the mold making sure the holes are filled first. Because in the other silicone I forgot the holes.
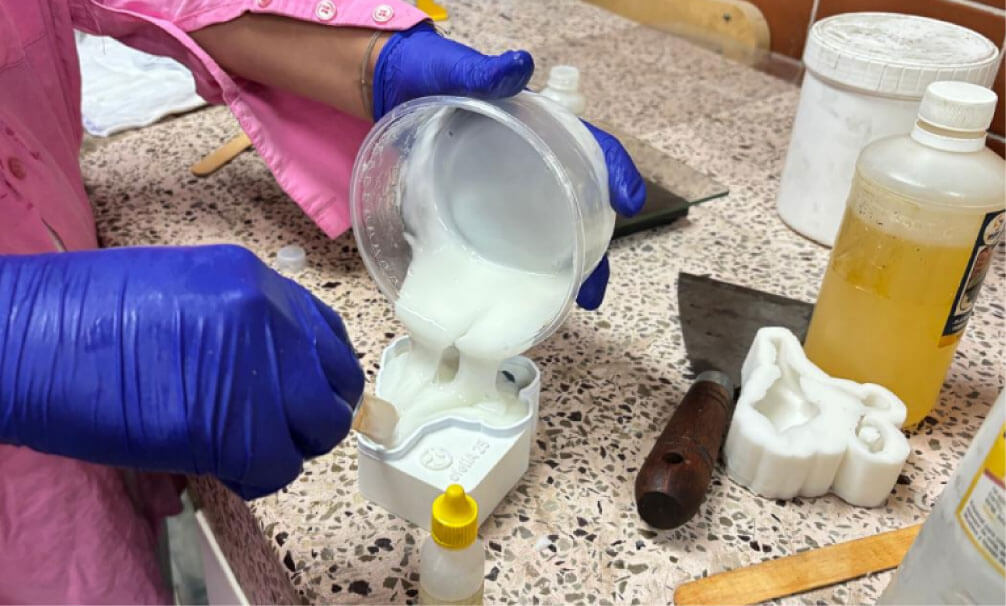
Pouring the silicone.
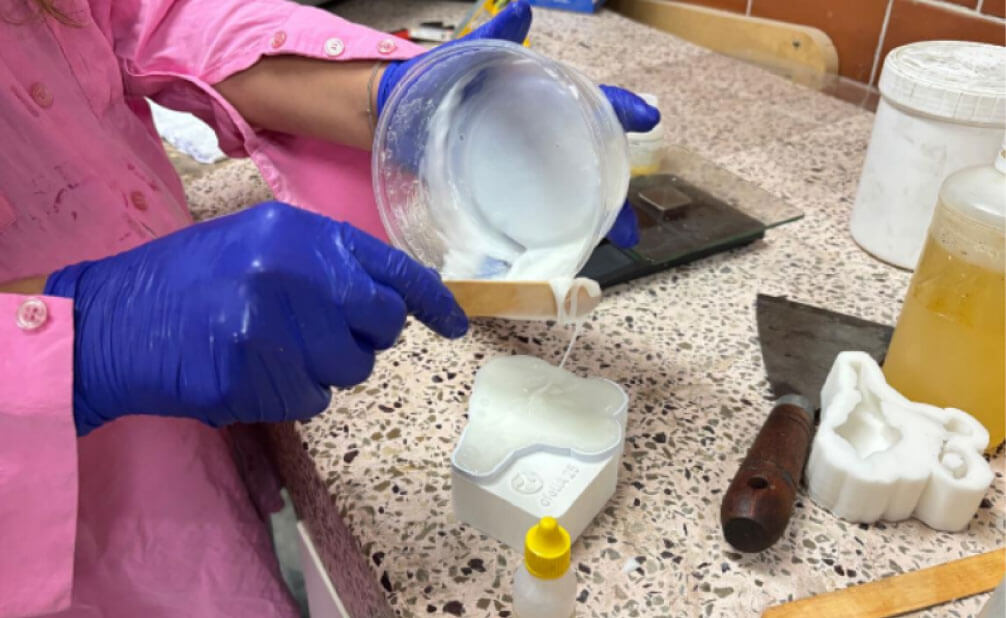
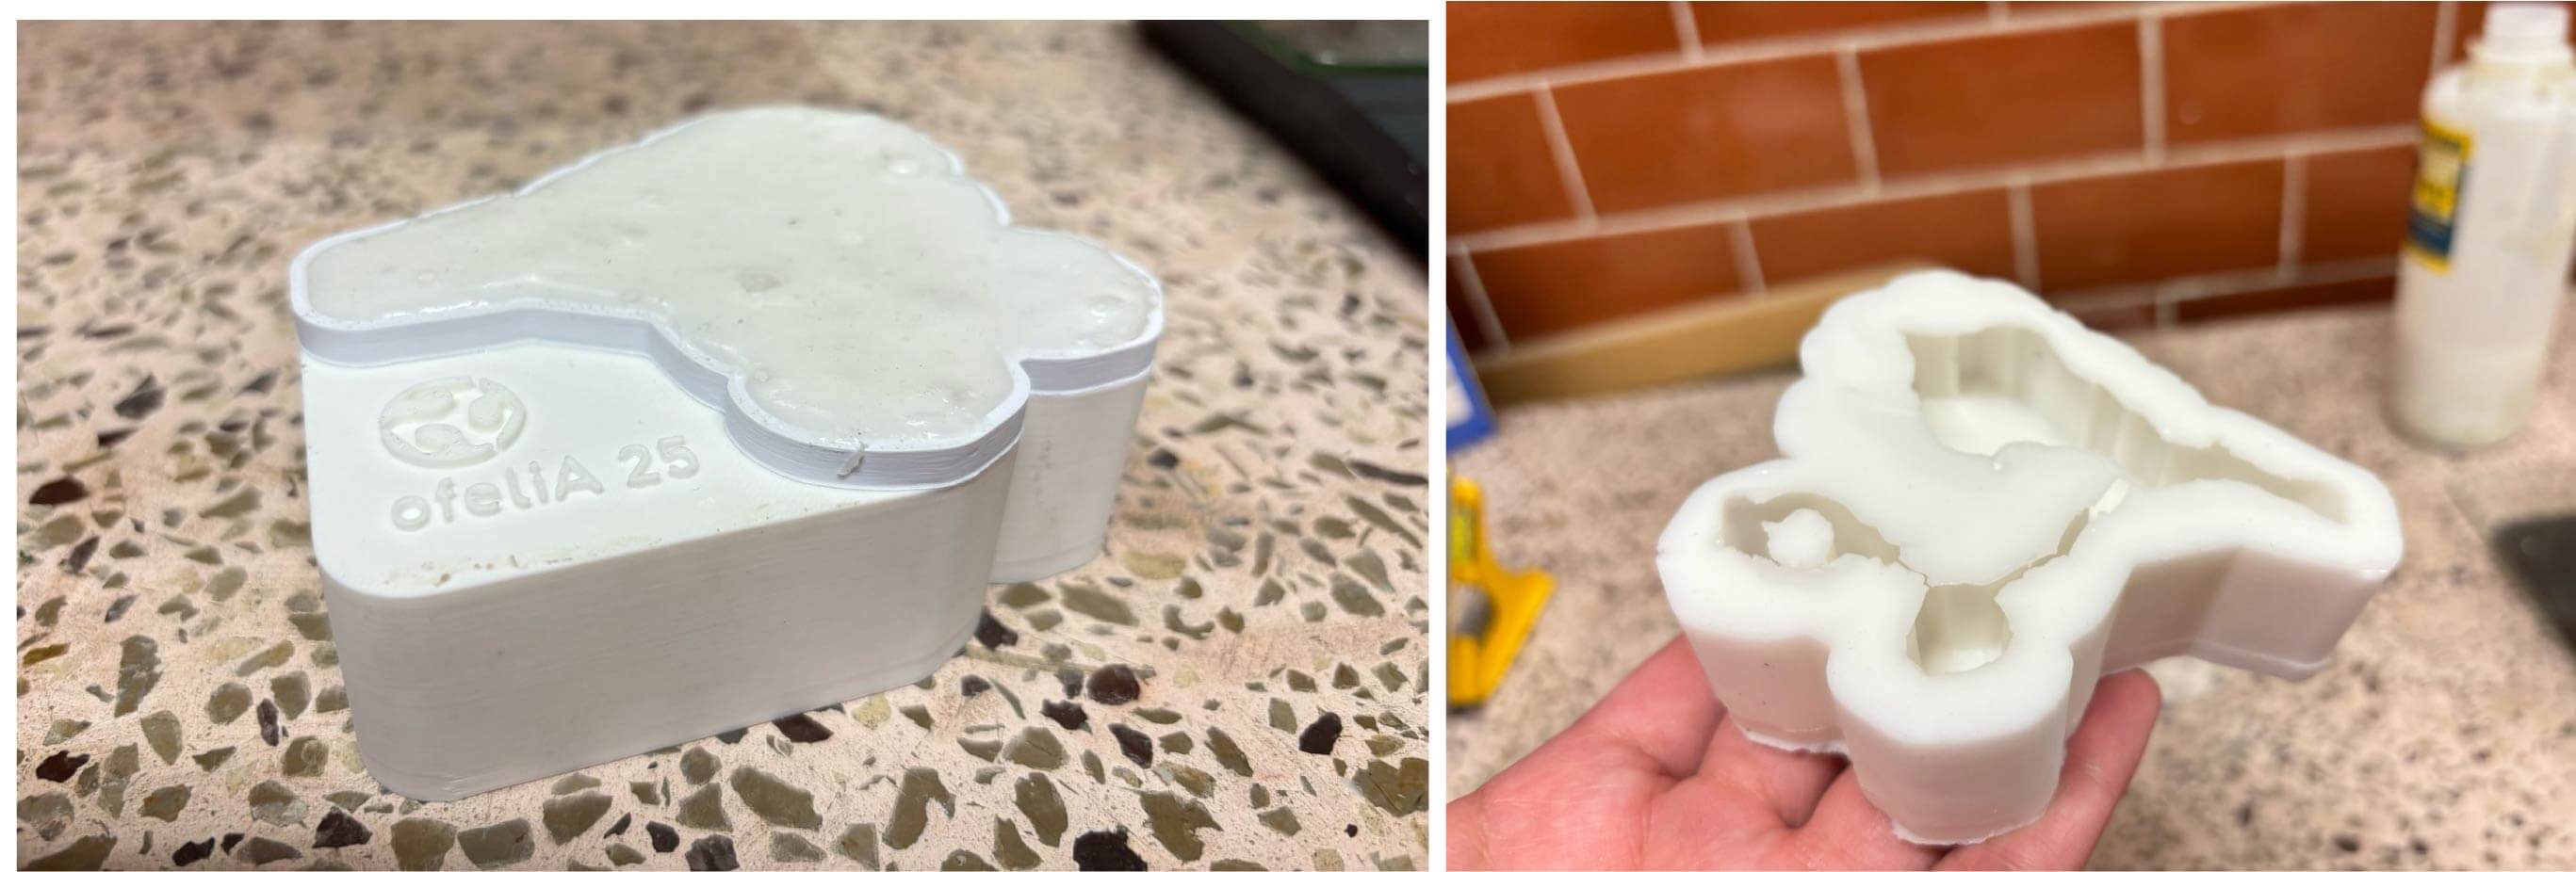
Filled mold.
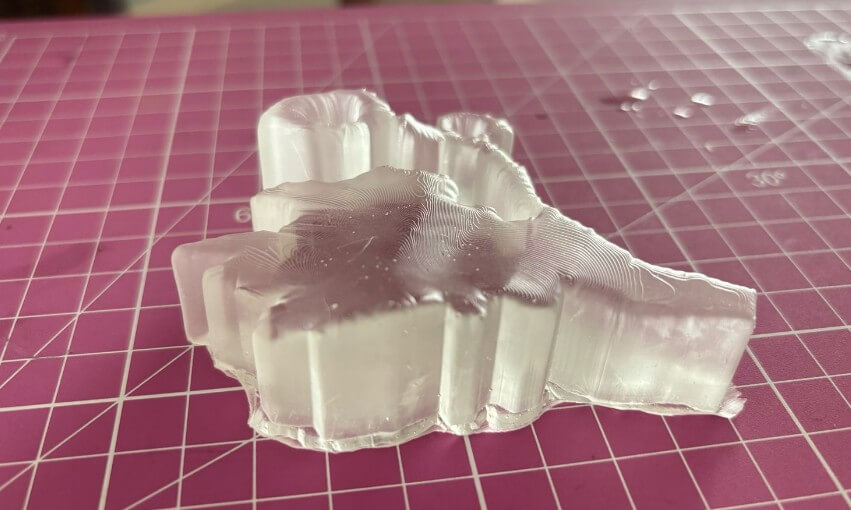
I like the texture of this silicone better. it doesn't feel slimy.
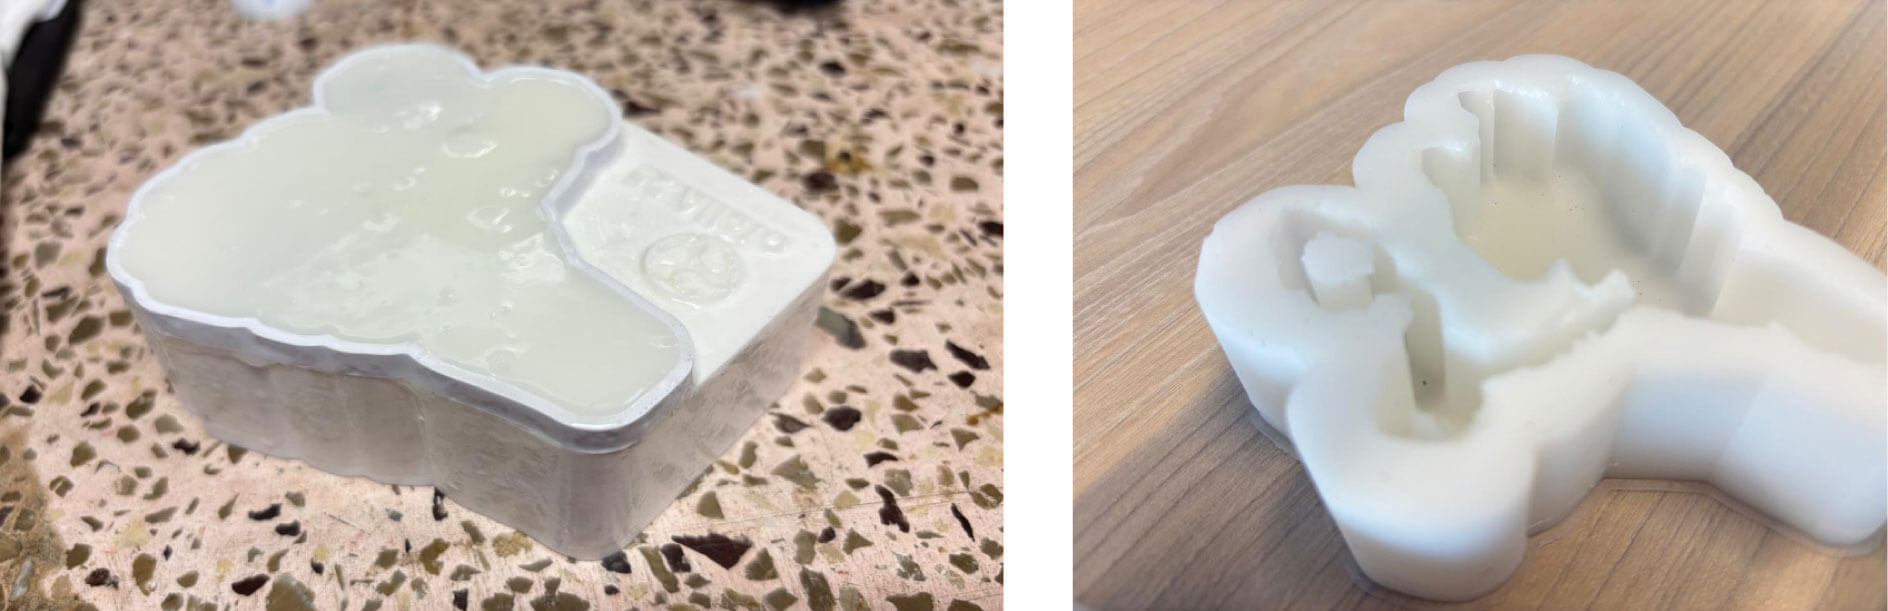
Silicone F-20 mold done.
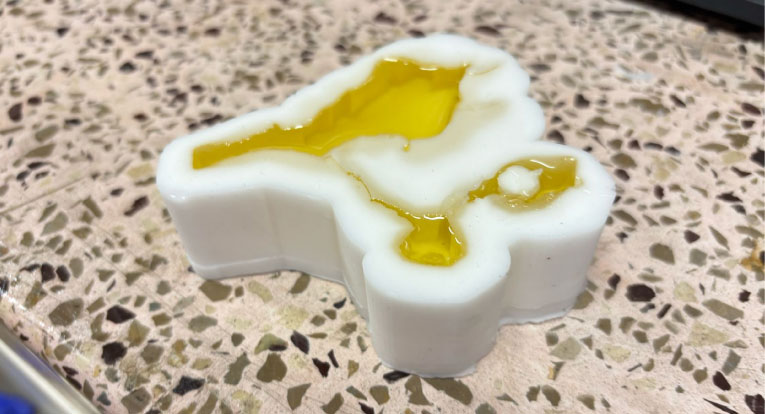
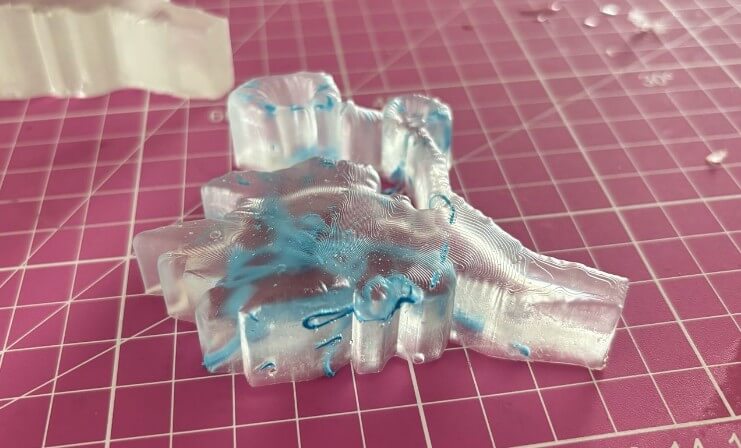
C a s t i n g T r a n s p a r e n c y
3. R e s i n C a s t i n g
Crystal Resin A + B – LOW VISCOSITY
Process
For this resin I tried the casting in the RTV Silicone Rubber Type 4 mold. I had to mix part A and B in equal parts untl the volume of the mold. Then I poured the mixture in the mold with 3% catalyst as recommendated.
Preparated the mix with resin part A and B.
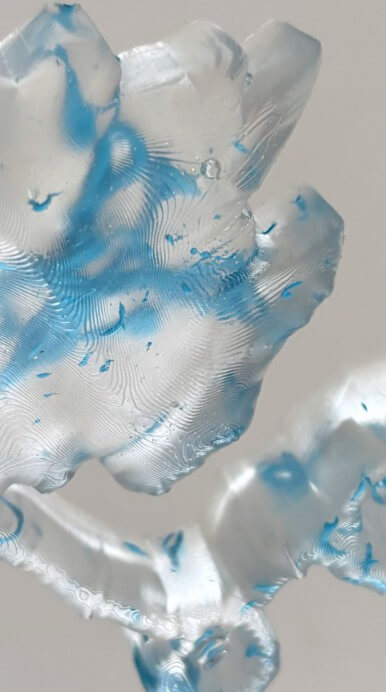
I let it dry for 24 hours. Taking out the casting from the mold was faster than with the other silicone. The result was really impressive for the detail of the texture and teh transparency. However I did not liked the yellow finish.
Casting still drying.

Taking out the casting was really easy.
What's next?
Try the F-20 Slicone mold with the epoxyc resin I alredy have. Also try a mold for my final project with the F-20 Silicone and epoxic resin mixed with other materials.
Update from Thursday: EPOXIC RESIN A + B
For this resin I tried the casting in the F-20 PLus Silicone mold. And then I made another test with the RTV Silicone mold with the same resin but add some acrylic paint to see how it reacted.
Epoxic resin tests
Process
For this process I also had to mix part A and B in equal parts until the volume of the mold.This resin does not need a catalyst. I mixed both parts for 10 minutes as recommended until there were not (lots) of bubbles.
Epoxic resin TYPE A

Epoxic resin TYPPE B
Mixing
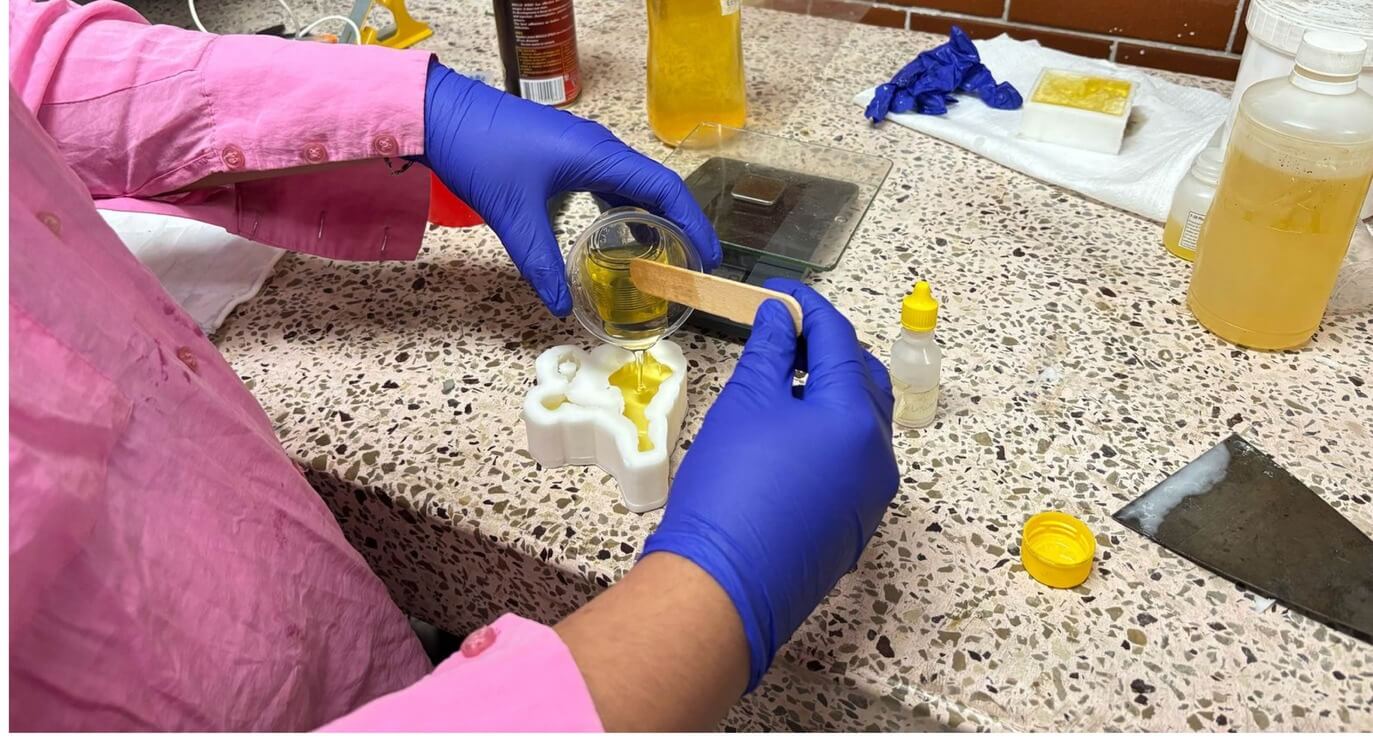
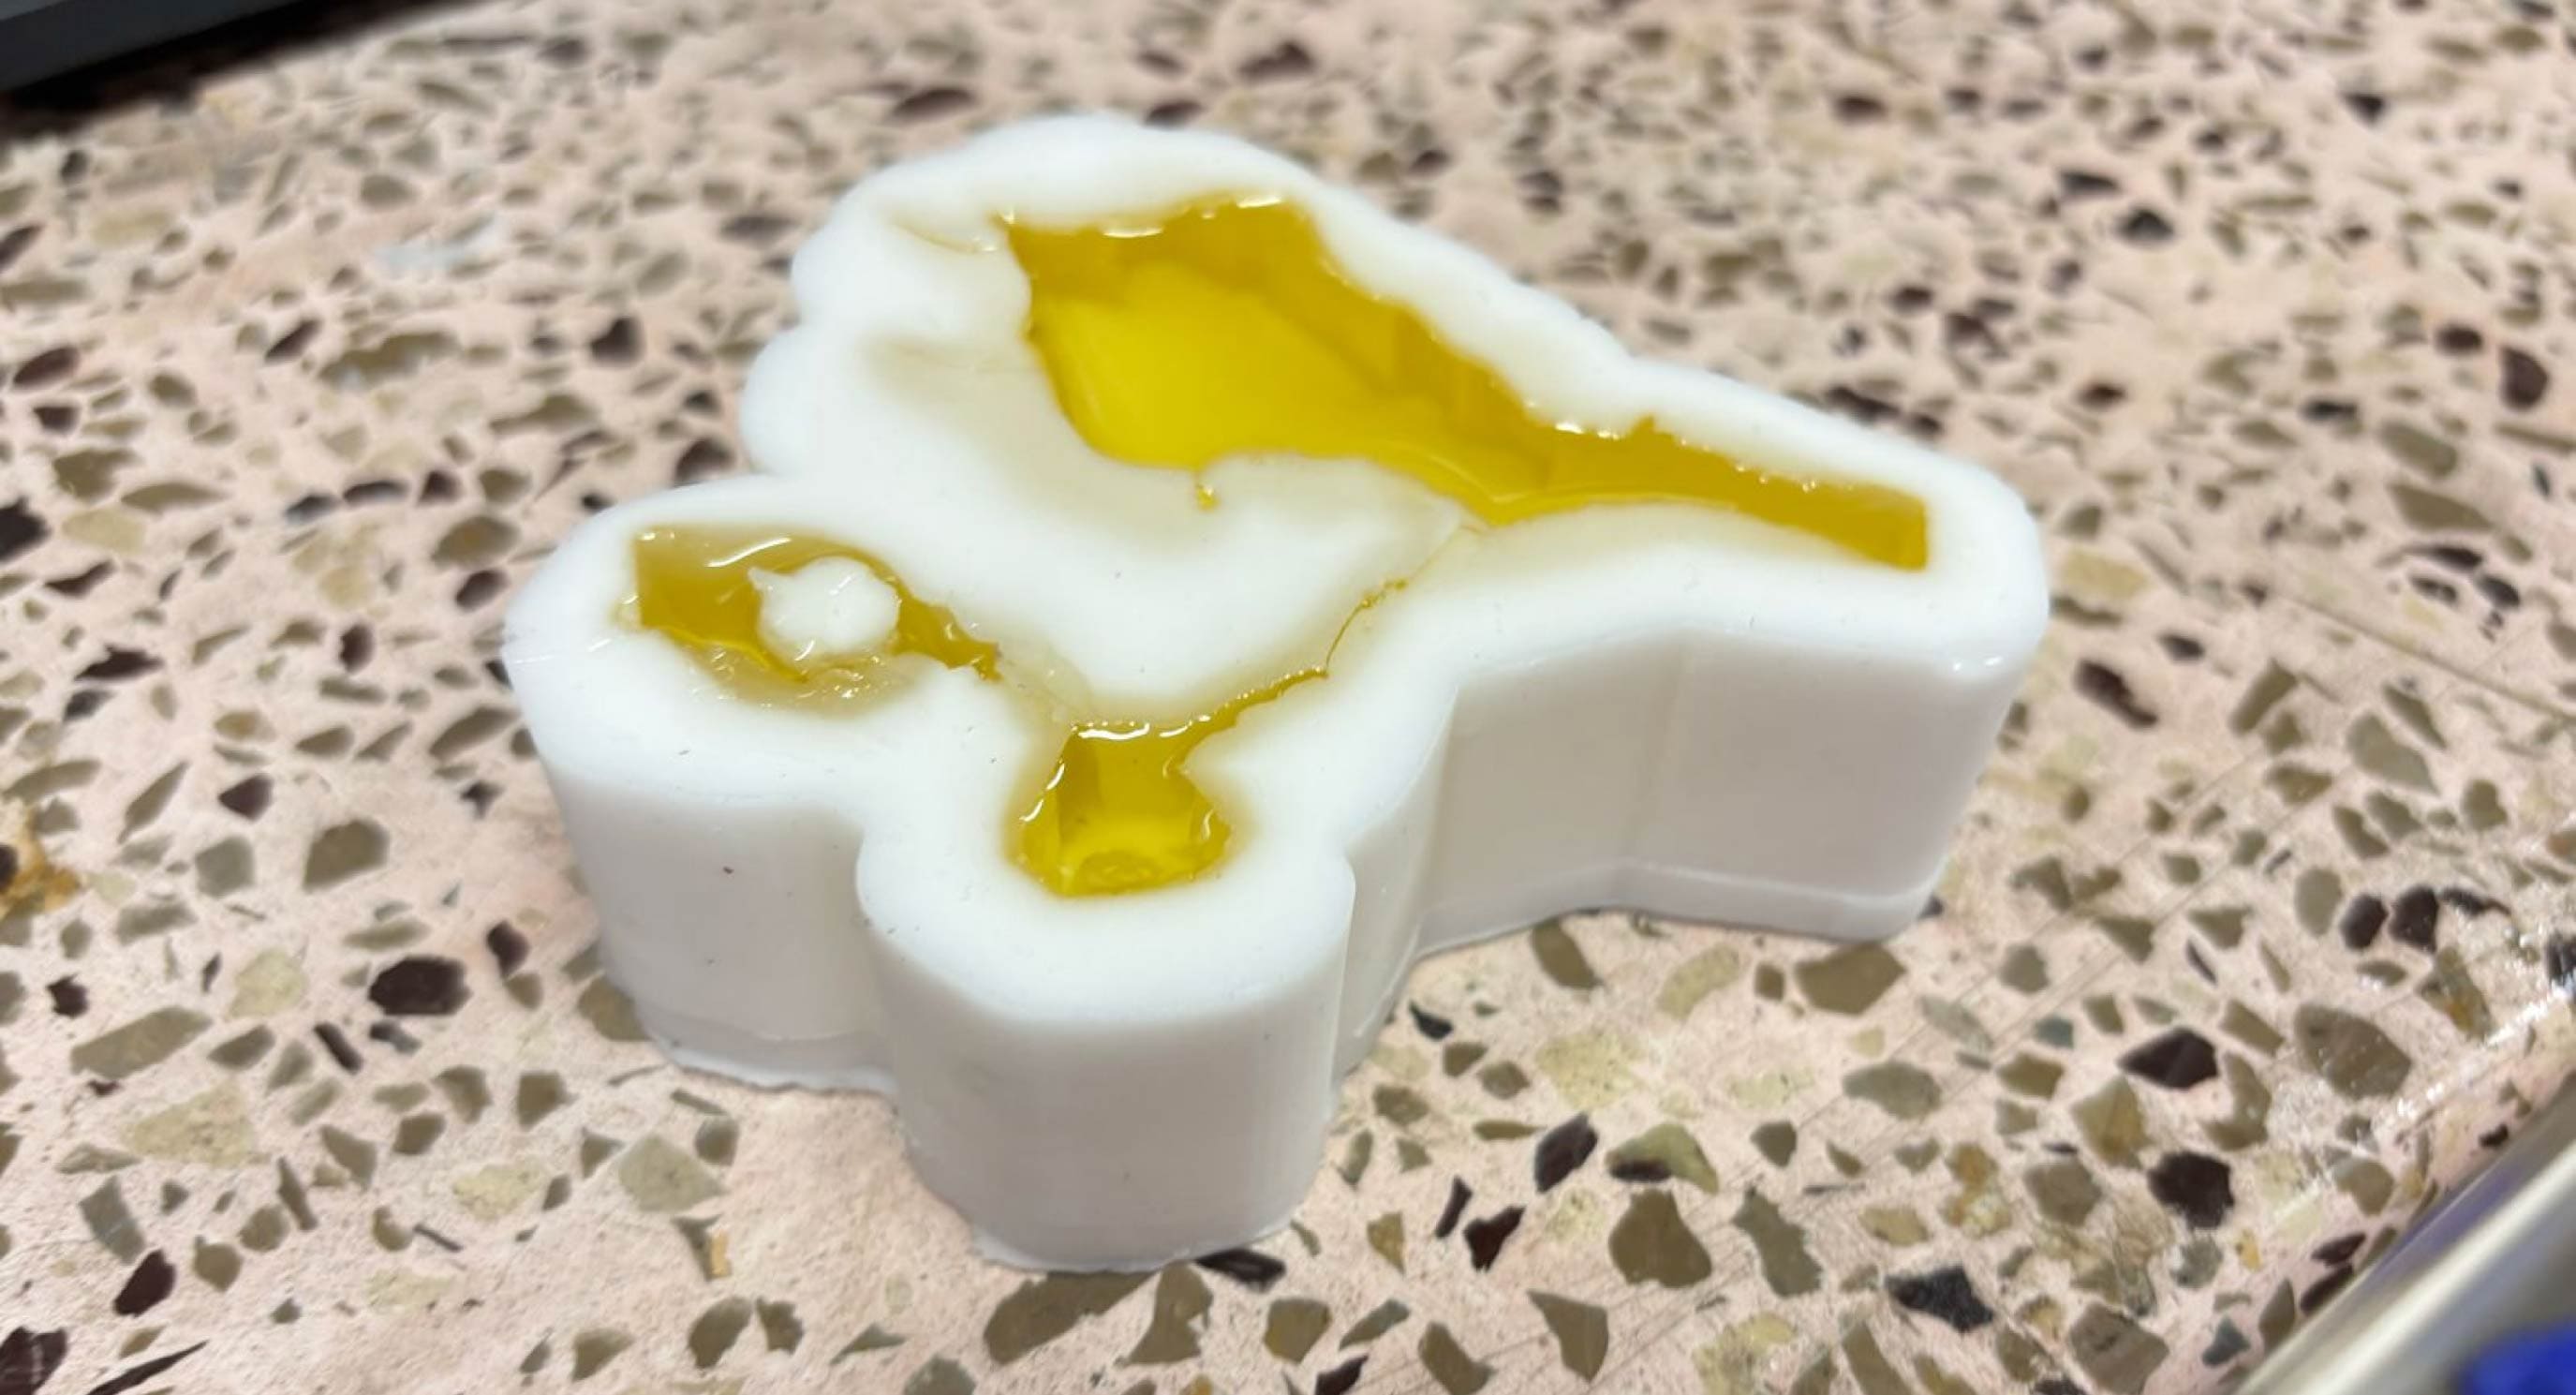
I poured the mix in the mold being very careful to first fill the hole and then fill the big part of the mold. In the first step I measured the volume of the mold but I tink I made a mistake because after filling all the mold I had extra resin.
Casting still drying.
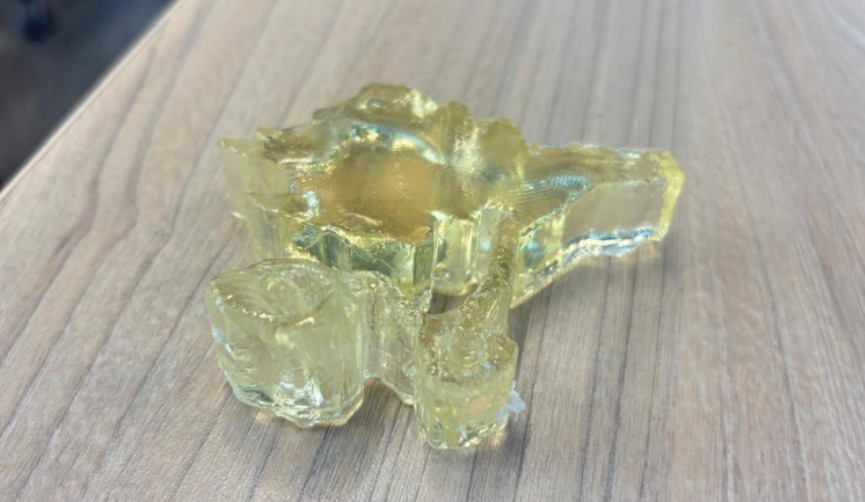
Taking out the epoxic resin
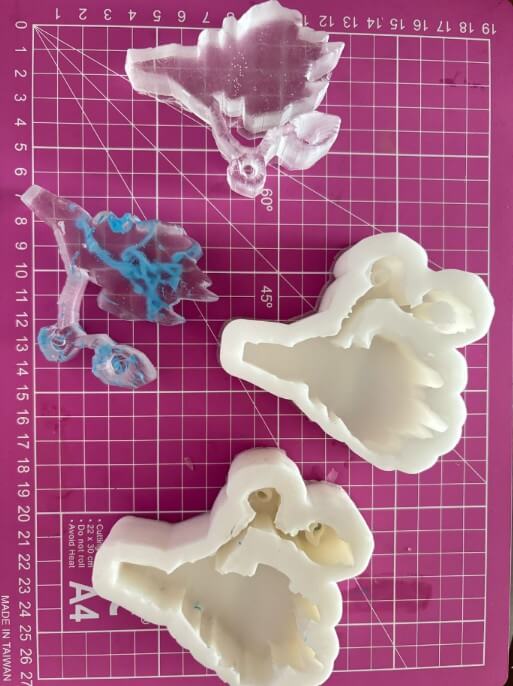
I let it dry and with that extra resin I made another test in the other mold I had of RTV Silicone I had some acrylic painting and as this mold come from my drawings I thought about making this object look like a drawing tree. I choose acrylic painting because this type of paint is like solid and I wanted to see how it reacted with the resin because I didn't want the materiales to mix at all.

Adding the acrylic panting to the mix.
Pouring the mix
After pouring the mix I add more acrylic painting direct to the base of the mould and did not mix it because I couldn't but Ithis time insted of just puring the paint I darw with it as it is solid and draw the tree branches (because lets not forget this comes from a tree drawing).
After drying finish
I really liked the finish and dimension the acrylic paint gave to the resin. Also the transparency worked really well with the epoxic resin.
Texture
