

Assignments
Principles and practices
- Plan and sketch a potential final project
- Read and sign and upload the student agreement.
Project Management
- Work trough a git tutorial.
- Build a personal site
PRINCIPLES AND PRACTICES
p o t e n t i a l F I N A L p r o j e c t
CONCEPT IDEA
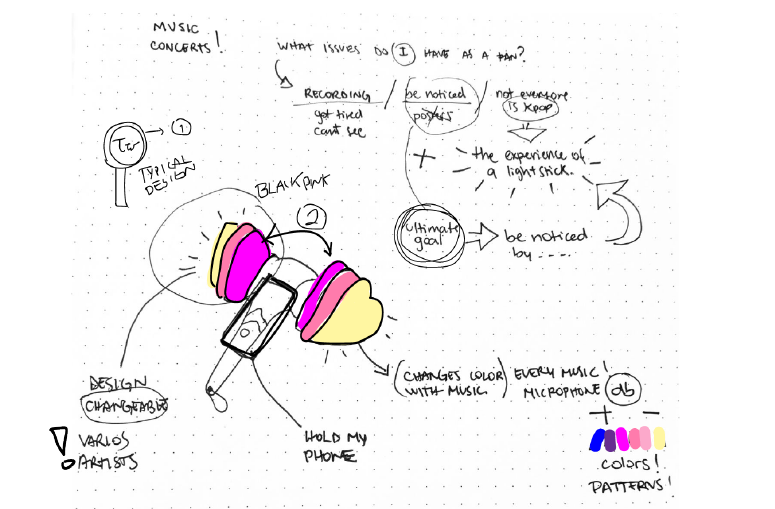
During these weeks at the Fab Academy, most of my assignments will be focused on a personal art project I began a few years ago. It's a mix of art, photography, and urban planning. It is called: My CyAN CiTies: where cyanotypes reveal photos of cities that I then edit with digital art.
Within these drawings I've already developed of cities, I always seek to highlight nature. This is my main character that I want to give different forms in the assignments through digital fabrication.
For the final project, I'd like to three-dimensionalize my drawings and experiment with light and the interplay of light that can be experienced at concerts.
All the sketches are linked in this title and the "final project tab".
s t u d e n t A g r e e m e n t
The Fab Academy is responsible for:
Teaching principles and practices of digital fabrication Arranging lectures, recitations, meetings, and events for the class Evaluating and providing feedback on student work Offering clear standards for completing assignments Certifying and archiving student progress Supervising class preparation Reviewing prospective students, instructors, and labs Providing central staff and infrastructure for students, instructors, and labs Fund-raising for costs not covered by student tuition Managing and reporting on the program's finances, results, and impacts Publicizing the program Promoting a respectful environment free of harassment and discrimination Encourage a diverse, accessible, and equitable community
I am a Fab Academy student, responsible for:Attending class lectures and participating in reviews Developing and documenting projects assigned to introduce and demonstrate skills Allowing the Fab Academy to share my work (with attribution) in the class for purposes compatible with its mission Honestly reporting on my work, and appropriately attributing the work of others (both human and machine) Working safely Leaving workspaces in the same (or better) condition than I found them Participating in the upkeep of my lab Ensuring that my tuition for local and central class costs is covered Following locally applicable health and safety guidance Recognizing limits on lab and staff time Promoting a respectful environment free of harassment and discrimination
Signed by committing this file in my repository,
Ofelia Sevilla Valeriano
PROJECT MANAGEMENT
wHAT iT gIT, and GIT HUB?
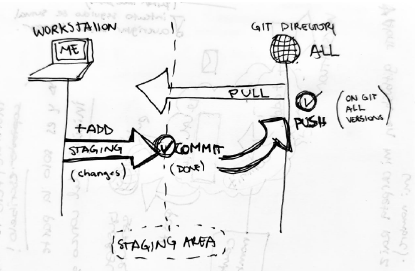
I couldn't understand it until I made a graphic for myself. With the help of the GIT GUIDE I got to the idea of GIT as a control for versions repository where you can save alone or in groups the same information. So, you can work in ypur personal workstation and make changes that will not upload to the "global" repository until you *tell* the staging area to do so and to save it as a version in all changes history.
Download GIT BASH and opened it inside the general folder
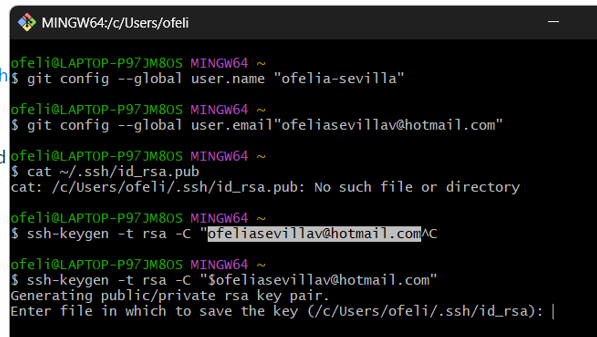
First I add my username and email address.
git config --global user.email
Then checked if there is alredy a SSH key
cat ~/.ssh/id_rsa.pub
As it wasn't I generate my SSH key
ssh-keygen -t rsa -C "my mail"
Then to saw the SSH key generated
cat ~/.ssh/id_rsa.pub
And to associate it with my repo html in git I copied the key with a command! ctrl c does not work!!!
clip < ~/.ssh/id_rsa.pub
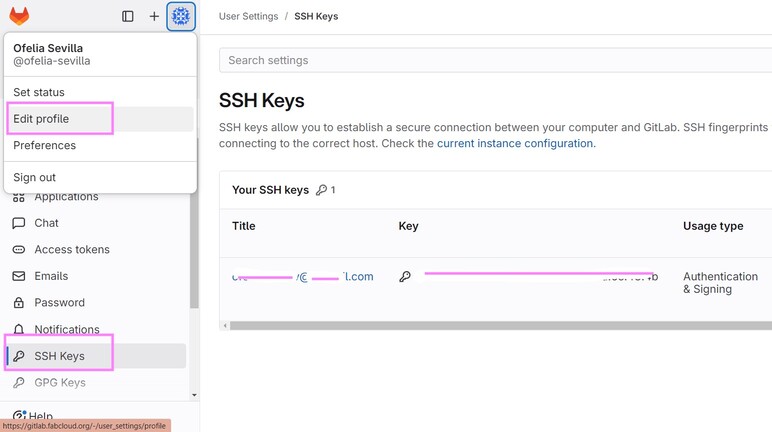
Then just log in to Fabcloud and add the copied key to GIT on web version
First go to EDIT PROFILE and there you will find the SSH Key to upload with the email you register.
(Don't forget to first clone your repo to you local workstation to start with! )
git clone git@gitlab.fabcloud.org:academany/fabacademy/YOUR LINK .git
It is alredy set up to work!
b a s i c C O M M A N D S g i t
git status to know the current situation of your work, if it something loadinng still to commit or if everything is alredy updated.
git add . to add to the staging area EVERYTHING you have edited. I used this once I set up all the basics of my template and started to edit it
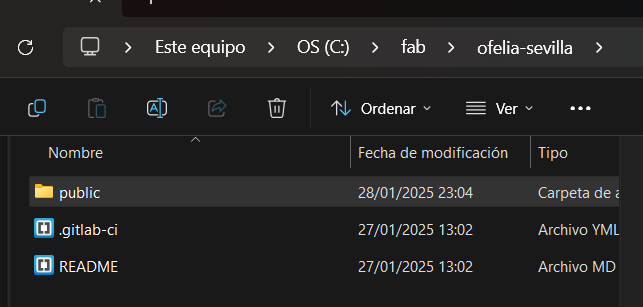
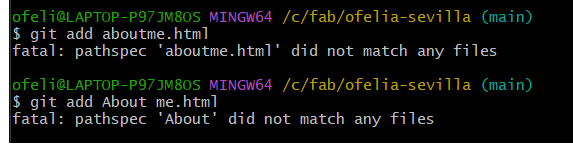
git add public/name to add folders and htmls or specific images. First you have to be very careful and upload everything INDIVIDUAL by starting with PUBLIC/ because everything was in this folder. This is VERY important since i first saved everything outside this folder and I couldn't add anything.
git commit -m "name" When you commit your changes you are telling the staging area what you did. For thet it is better to name every change you made for your versions record. Also it is important to write -m together and not separate I first struggle by not paying attention to spaces.
git push finally submitting to the golbal repo versions.
(Important to remember)
Do not save archives with spaces. It will not recognize it. Use - or _ to separate words
git config --global user.email cat ~/.ssh/id_rsa.pub ssh-keygen -t rsa -C "my mail" cat ~/.ssh/id_rsa.pub clip < ~/.ssh/id_rsa.pubFirst go to EDIT PROFILE and there you will find the SSH Key to upload with the email you register.
git status to know the current situation of your work, if it something loadinng still to commit or if everything is alredy updated.git add . to add to the staging area EVERYTHING you have edited. I used this once I set up all the basics of my template and started to edit itgit add public/name to add folders and htmls or specific images. First you have to be very careful and upload everything INDIVIDUAL by starting with PUBLIC/ because everything was in this folder. This is VERY important since i first saved everything outside this folder and I couldn't add anything. git commit -m "name" When you commit your changes you are telling the staging area what you did. For thet it is better to name every change you made for your versions record. Also it is important to write -m together and not separate I first struggle by not paying attention to spaces.git push finally submitting to the golbal repo versions.4. m y p e r s o n a l S I T E
How????
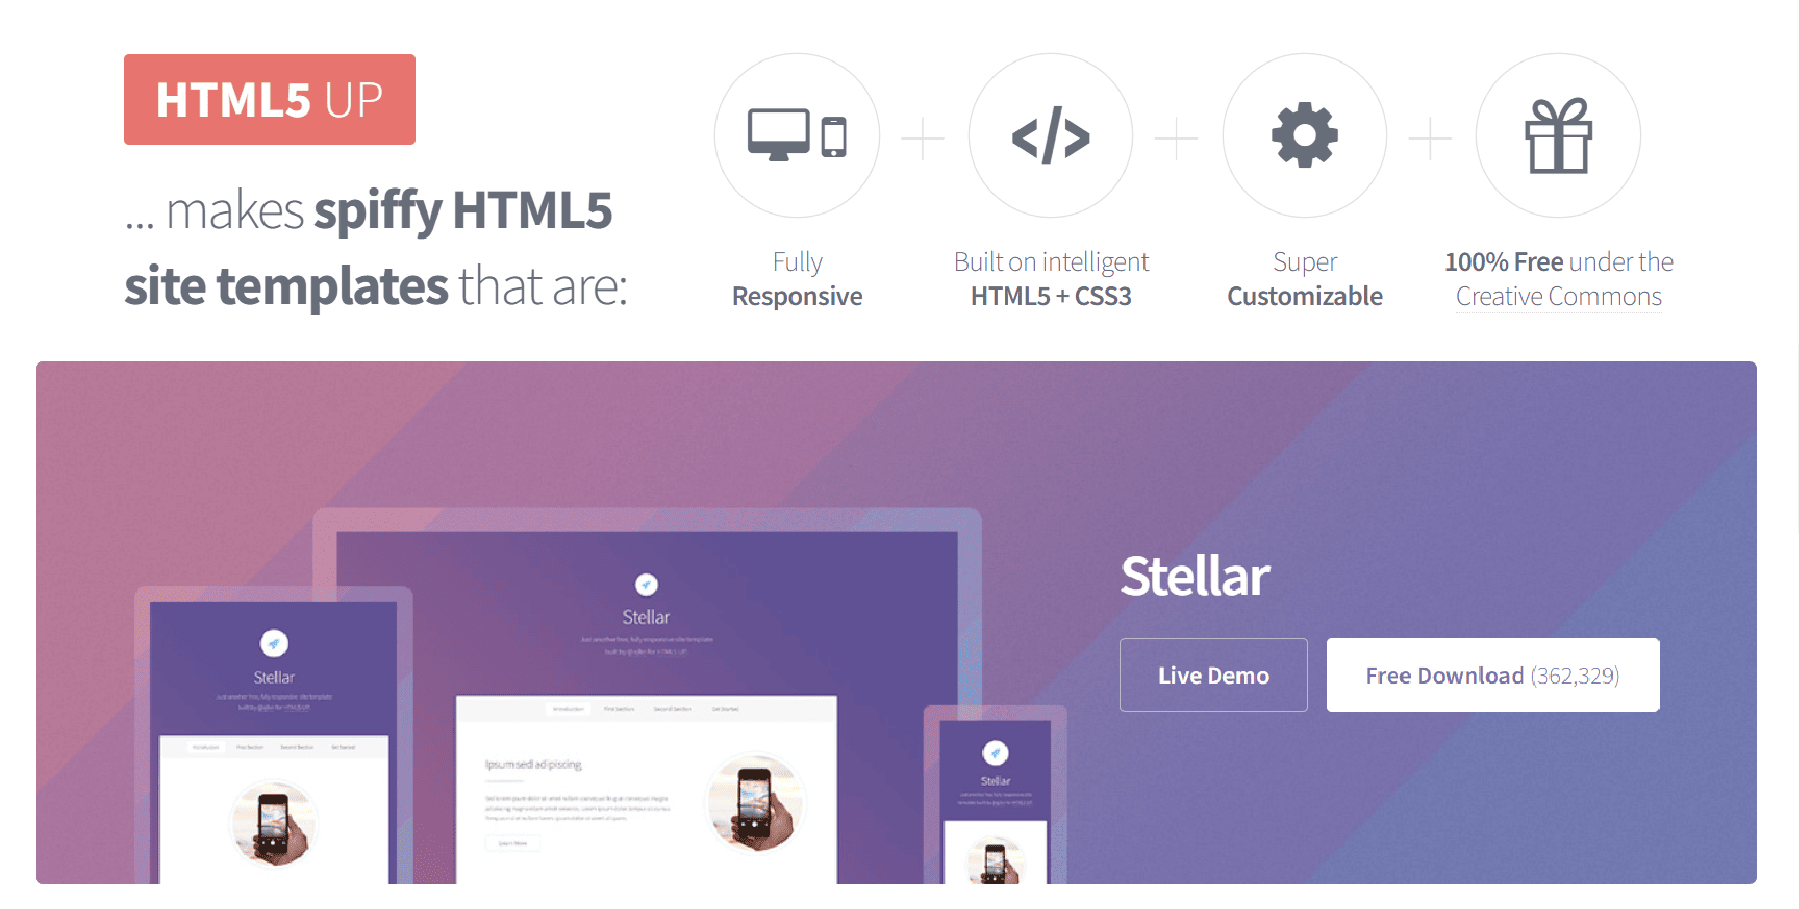
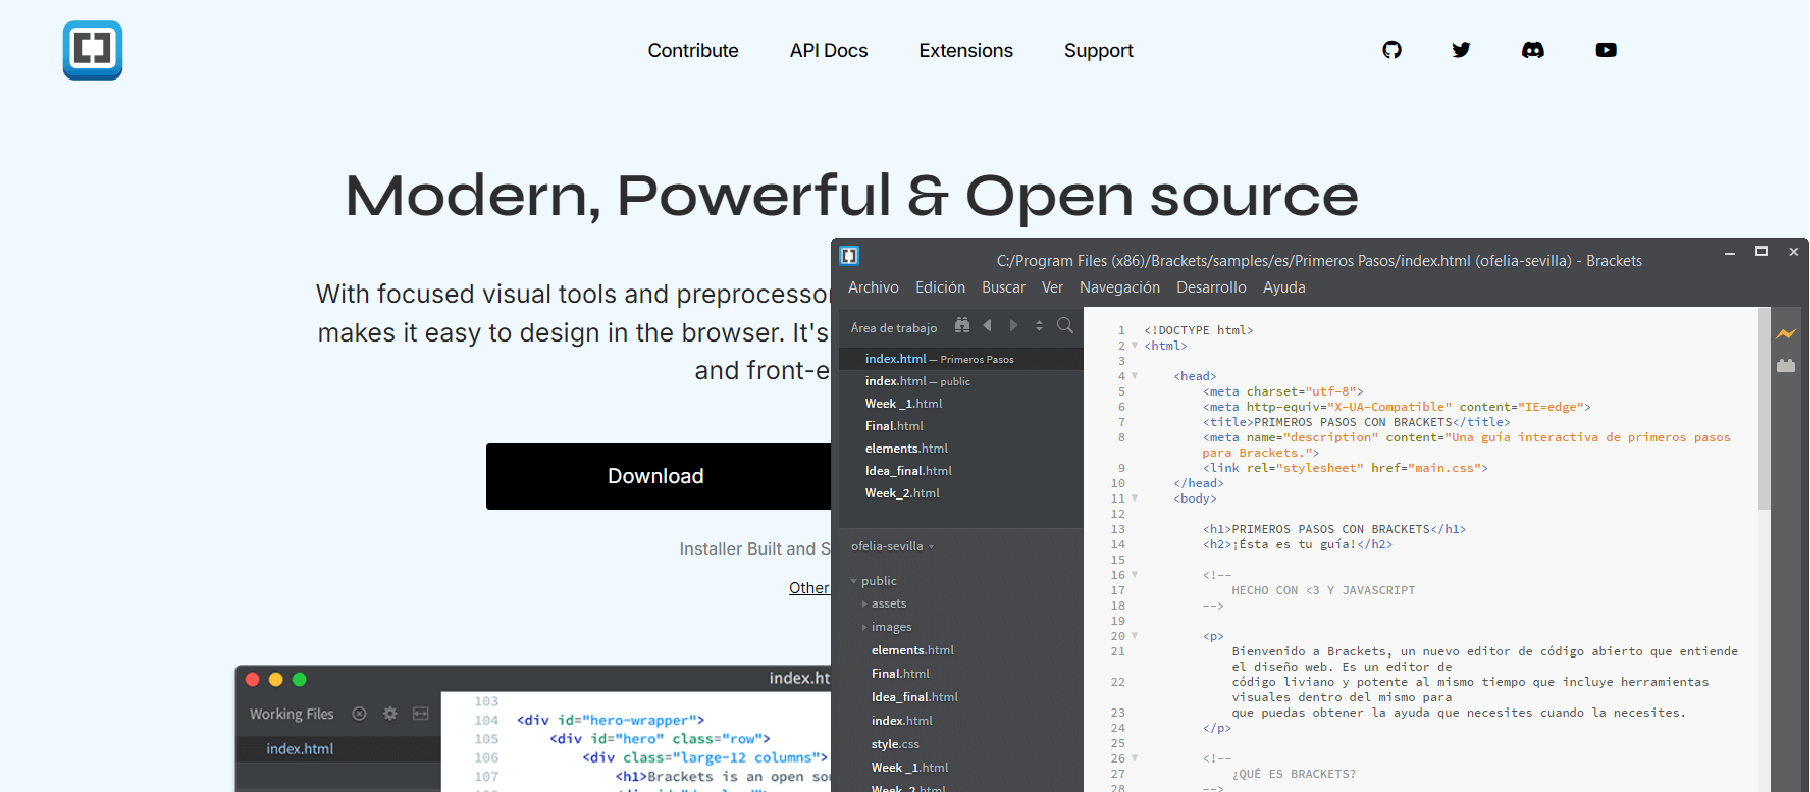
I have never done a webpage from the start. I have used Adobe portfolio that works as a portfolio itself but it does not work with coding. Is more familiar with editors that use Adobe suite because is like arrainging images and texts on Illustrator for example. So, to understand how this works I choose to code in html and to start I found a template from html5. Then to edit and visualize the coding I download brackets.
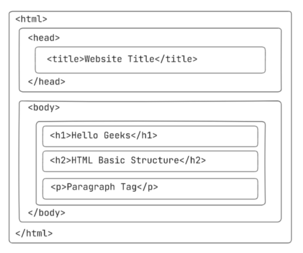
First to understand how html coding works I visited this geeksforgeeks tutorial where I understood it has a basic structure as an essay with Header and body. Inside each you can add sections as titles, paragraphs and images.
Also I used Chatgpt to help me improve and correct some coding. I didn't remember at the start that each decision always begins with a command and ends with the same command.
Structure by Geekforgeeks.com
E D I T I N G A S S E T S
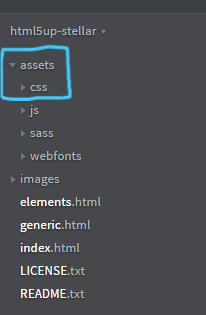
As I started with a template I first explore some and found what I liked from each. With ONE that I like the most I explore the template folders and understood Assets is like the basic configuration of everything and has the shortcuts matrix I could edit. Here I edit and added some settings from other templates.
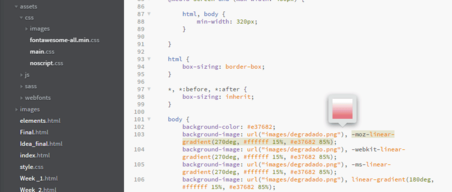
Then I found where to change the colors for the entire template Saved the COLOR GRADE i wanted as a .jpg and copied the rgb color code:
I M P O R T A N T c o d i n g
< p> < /p> To start a paragraph (it will have the style specified in the main assets)
< h > < /h > followed by a number refers to the text style in the template.
(in assets:css:main.css) < b> < /b>"Bold text.
< div > < /div >Helps you organize sections in your code by grouping elements.
Inside a section you can edit style="background-color: SELECT THE COLOR; padding: 10px;"> and manage the individual color for that text or also align the text. style="text-align: left;">
< span > < /span > let you make individual decisions for any image, video or links you want to add in a paragraph. Example: < p > THIS TEXT < span style="color: red;">TEXT< /span> IS GOING TO BE RED.
< div class="row" style="margin-top: 40px" > To stablished a margin between sections. (I used chat gpt to help me find this because I separate with sections and could not do it)
10 M B l i m i t ‼️ ---------------->
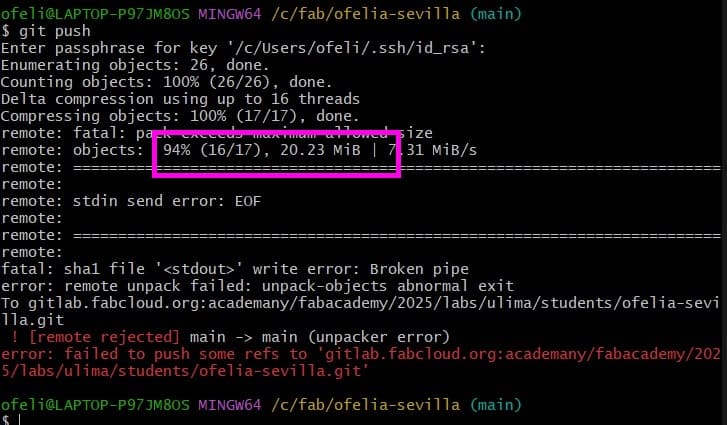
The told us there is a 10MB limit per push. However in the very first push I forgot to (mentally) add up the weight of the files I uploaded. I forgot this while setting up the entire matrix of my page and without compressing anything.
The push failed. So after searching A LOT. In the GIT GUIDE I knew reset must delete the commits history. However It did nothing. After watching lots of tutorials I found this video that explained there are two kinds of git reset:
git reset --hard and git reset --soft
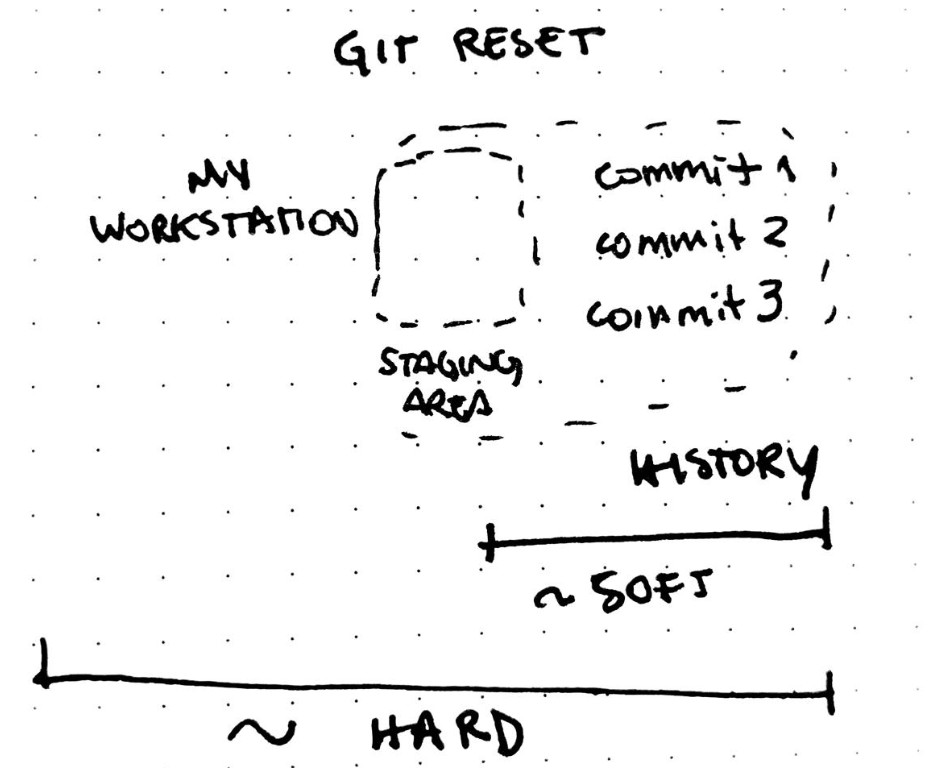
First try SOFT. It should reset the last commit or the one you choose in the history of commits and not touch your workstation files or the entire commits if you have various in line. So first to be sure about this go git status to know how many commits pending you have :

I only had 1 commit pending so I type git reset --soft HEAD 1 It means that I will go back 1 commit.
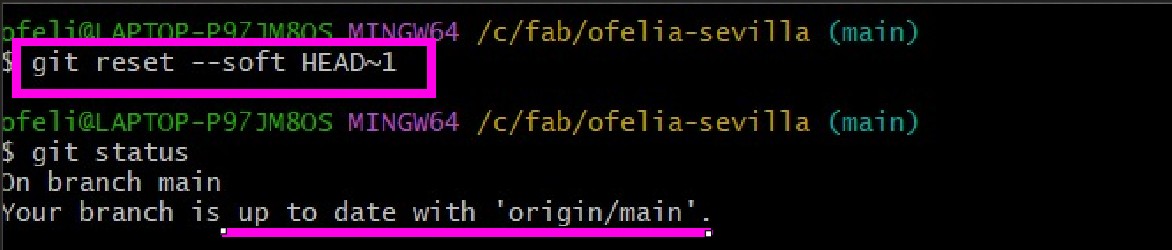
As i understood if I had many commits pending I could have gone with git reset --hard but this deletes all the uncommited changes and affects your workstation files still. So always is better to check git status to know what is commited in the staging area and what is not.
I M P O R T A N T c o d i n g
< p> < /p> To start a paragraph (it will have the style specified in the main assets)
< h > < /h > followed by a number refers to the text style in the template.
(in assets:css:main.css) < b> < /b>"Bold text.
< div > < /div >Helps you organize sections in your code by grouping elements.
Inside a section you can edit style="background-color: SELECT THE COLOR; padding: 10px;"> and manage the individual color for that text or also align the text. style="text-align: left;">
< span > < /span > let you make individual decisions for any image, video or links you want to add in a paragraph. Example: < p > THIS TEXT < span style="color: red;">TEXT< /span> IS GOING TO BE RED.
< div class="row" style="margin-top: 40px" > To stablished a margin between sections. (I used chat gpt to help me find this because I separate with sections and could not do it)
10 M B l i m i t ‼️ ---------------->
The told us there is a 10MB limit per push. However in the very first push I forgot to (mentally) add up the weight of the files I uploaded. I forgot this while setting up the entire matrix of my page and without compressing anything.
The push failed. So after searching A LOT. In the GIT GUIDE I knew reset must delete the commits history. However It did nothing. After watching lots of tutorials I found this video that explained there are two kinds of git reset:
git reset --hard and git reset --soft
First try SOFT. It should reset the last commit or the one you choose in the history of commits and not touch your workstation files or the entire commits if you have various in line. So first to be sure about this go git status to know how many commits pending you have :
I only had 1 commit pending so I type git reset --soft HEAD 1 It means that I will go back 1 commit.
As i understood if I had many commits pending I could have gone with git reset --hard but this deletes all the uncommited changes and affects your workstation files still. So always is better to check git status to know what is commited in the staging area and what is not.
< p> < /p> To start a paragraph (it will have the style specified in the main assets)
< h > < /h > followed by a number refers to the text style in the template.
(in assets:css:main.css) < b> < /b>"Bold text.
< div > < /div >Helps you organize sections in your code by grouping elements.
Inside a section you can edit style="background-color: SELECT THE COLOR; padding: 10px;"> and manage the individual color for that text or also align the text. style="text-align: left;">
< span > < /span > let you make individual decisions for any image, video or links you want to add in a paragraph. Example: < p > THIS TEXT < span style="color: red;">TEXT< /span> IS GOING TO BE RED.
< div class="row" style="margin-top: 40px" > To stablished a margin between sections. (I used chat gpt to help me find this because I separate with sections and could not do it)
< p> < /p> To start a paragraph (it will have the style specified in the main assets)
< h > < /h > followed by a number refers to the text style in the template. (in assets:css:main.css) < b> < /b>"Bold text.
< div > < /div >Helps you organize sections in your code by grouping elements.
Inside a section you can edit style="background-color: SELECT THE COLOR; padding: 10px;"> and manage the individual color for that text or also align the text. style="text-align: left;">
< span > < /span > let you make individual decisions for any image, video or links you want to add in a paragraph. Example: < p > THIS TEXT < span style="color: red;">TEXT< /span> IS GOING TO BE RED.
< div class="row" style="margin-top: 40px" > To stablished a margin between sections. (I used chat gpt to help me find this because I separate with sections and could not do it)
The told us there is a 10MB limit per push. However in the very first push I forgot to (mentally) add up the weight of the files I uploaded. I forgot this while setting up the entire matrix of my page and without compressing anything.
The push failed. So after searching A LOT. In the GIT GUIDE I knew reset must delete the commits history. However It did nothing. After watching lots of tutorials I found this video that explained there are two kinds of git reset:
git reset --hard and git reset --soft
First try SOFT. It should reset the last commit or the one you choose in the history of commits and not touch your workstation files or the entire commits if you have various in line. So first to be sure about this go git status to know how many commits pending you have :
I only had 1 commit pending so I type git reset --soft HEAD 1 It means that I will go back 1 commit.