Week 1
Principles and Practices, Project Management
This week, i focused on refining my final project plan and sketch then I’m going to read and sing the student agreement and commit it to my repo and familiarizing myself with the documentation process. I’m going to work on my personal website for describing my self and my final project. The complete documentation I’m going to done on html, CSS little bit of java script using visual studio code.
Project Workflow: From Problem to Execution
1. Identify the Pain Point
- Observe and Analyze: Look for challenges or inefficiencies around you.
- Talk to Users/Stakeholders: Gather insights from those directly affected by the problem.
-
Define the Problem: Write a clear problem statement.
Example: "People struggle to measure soil moisture accurately for home gardening."The Problem I identified is :SOLAR DRIER:
Solar drying is a sustainable and energy-efficient method for drying agricultural produce, organic waste, and industrial materials. However, several key pain points need to be addressed to improve efficiency, reliability, and scalability.
The major Problem is Inconsistent heating due to weather changes and heat loss.
Outcomes
Communicate an initial project proposal
Identify and utilise version control protocol(s)
Explore and use website development tool(s)
reference links


2. Research and Understand the Problem
- Market Research: Identify existing solutions and analyze their limitations.
- Technical Feasibility: Explore the technologies/tools that could solve the problem.
- User Persona: Understand who the end-users are and what they need.
3. Ideation and Concept Development
- Brainstorm Solutions: Generate multiple ideas without restrictions.
- Evaluate Ideas: Compare ideas based on feasibility, cost, and impact.
- Select the Best Idea: Choose the solution that best addresses the problem while remaining achievable.
4. Define Project Scope and Objectives
- Set Clear Objectives: Break down the project into smaller, measurable goals.
- List Deliverables: Identify key outputs — designs, prototypes, documentation, etc.
5. Plan Your Project
- Create a Timeline: Use tools like Gantt charts or Trello to track progress.
- Allocate Resources: Identify the tools, software, materials, and skills needed.
- Risk Analysis: Identify potential risks and plan contingencies.
6. Design and Prototype
- Concept Sketches: Draw rough sketches or flowcharts.
- CAD Modeling: Use tools like Fusion 360 or SolidWorks to create detailed designs.
- Prototype: Build the first version using quick fabrication methods (e.g., 3D printing, laser cutting).

7. Test and Refine
- Test Prototype: Check if the prototype solves the problem effectively.
- Collect Feedback: Gather feedback from users or peers.
- Iterate: Refine the design based on test results and feedback.
8. Document Everything
- Take Notes and Photos: Document every step, including challenges and solutions.
- Version Control: Use tools like GitLab to track design files and changes.
9. Launch and Implement
- Finalize Design: Make any last adjustments.
- Produce Final Version: Use high-quality fabrication techniques for the final product.
- Deploy/Test in Real Environment: Ensure the project works in real-world conditions.
10. Share and Reflect
- Document Your Journey: Share your process on the Fab Academy documentation page.
- Get Feedback: Present your project to peers and mentors for feedback.
- Reflect and Improve: Identify what went well and what could be improved for future projects.
Project Management
1. Learning HTML and CSS
This is my first attempt at creating a website. Initially, I had no idea where to start, what steps to take, or what essential skills I needed to learn in order to build a functional website.
I explored various online tutorials to understand how websites are built. Through this, I gained a foundational knowledge of HTML. I learned that every HTML file should be saved with a .html extension.
HTML serves as the structural framework of a webpage. It enables us to organize content and define the layout effectively. However, to enhance the aesthetics and make it visually appealing, we need to incorporate CSS.
CSS (Cascading Style Sheets) is responsible for designing and styling a webpage. It allows us to modify the layout, colors, fonts, and overall presentation. CSS files should be saved with a .css extension.
To create a fully functional webpage, we must link the CSS file within the HTML file to apply styles.
Throughout my learning journey, I found W3Schools to be an incredibly valuable resource for beginners like me. Their structured exercises and interactive tutorials provide an excellent platform for exploring multiple coding techniques and best practices.
As I continued learning, I found W3Schools to be an incredibly useful resource for beginners like me. Their practice exercises and tutorials are well-structured and allow for exploring multiple ways to code efficiently.
creating web page on github cloud


Website Structure
My FabAcademy website is organized inside the public/ folder of my GitLab repository. To make it easy to maintain and clear for others to understand, I divided the work into separate folders for pages, styling, images, and scripts. Below, I have explained each part step by step with screenshots.
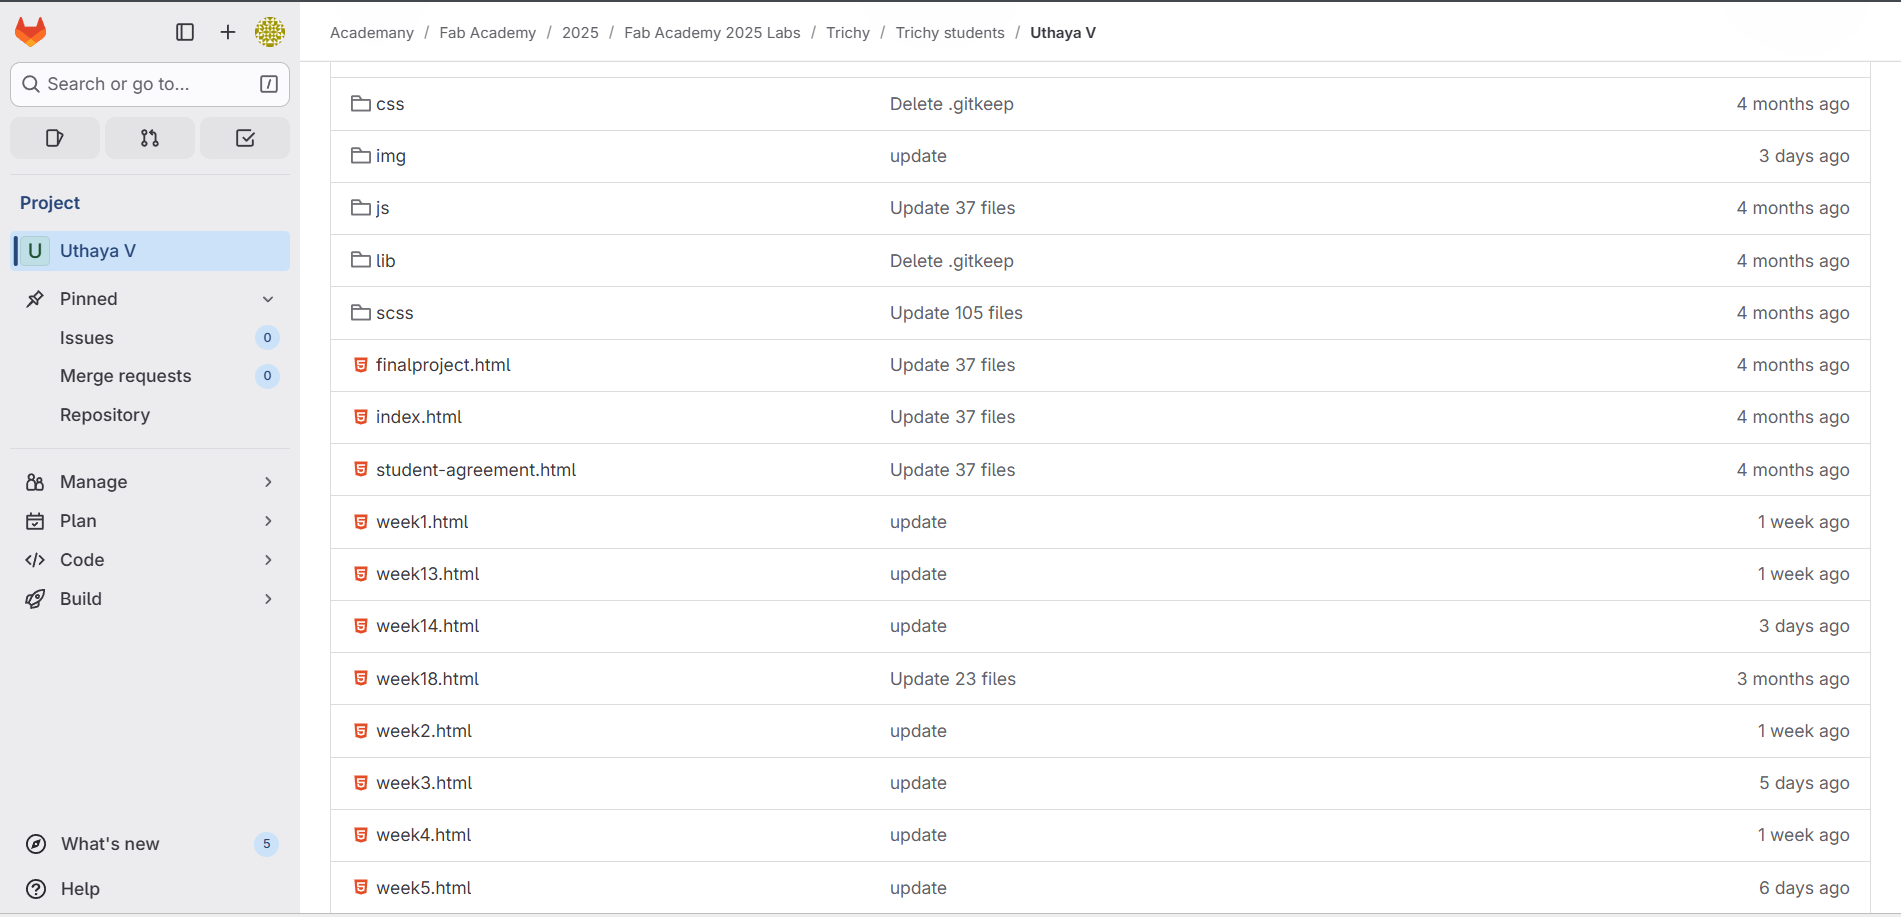
Step 1: HTML Pages
The main pages of my website are HTML files. The homepage is index.html. Then I created separate pages for each week, such as week1.html, week2.html, up to week18.html. This makes it easy to document progress week by week.
I also have supporting pages like student-agreement.html, weeklyassignments.html, and finalproject.html. All of these files are inside the public/ folder.
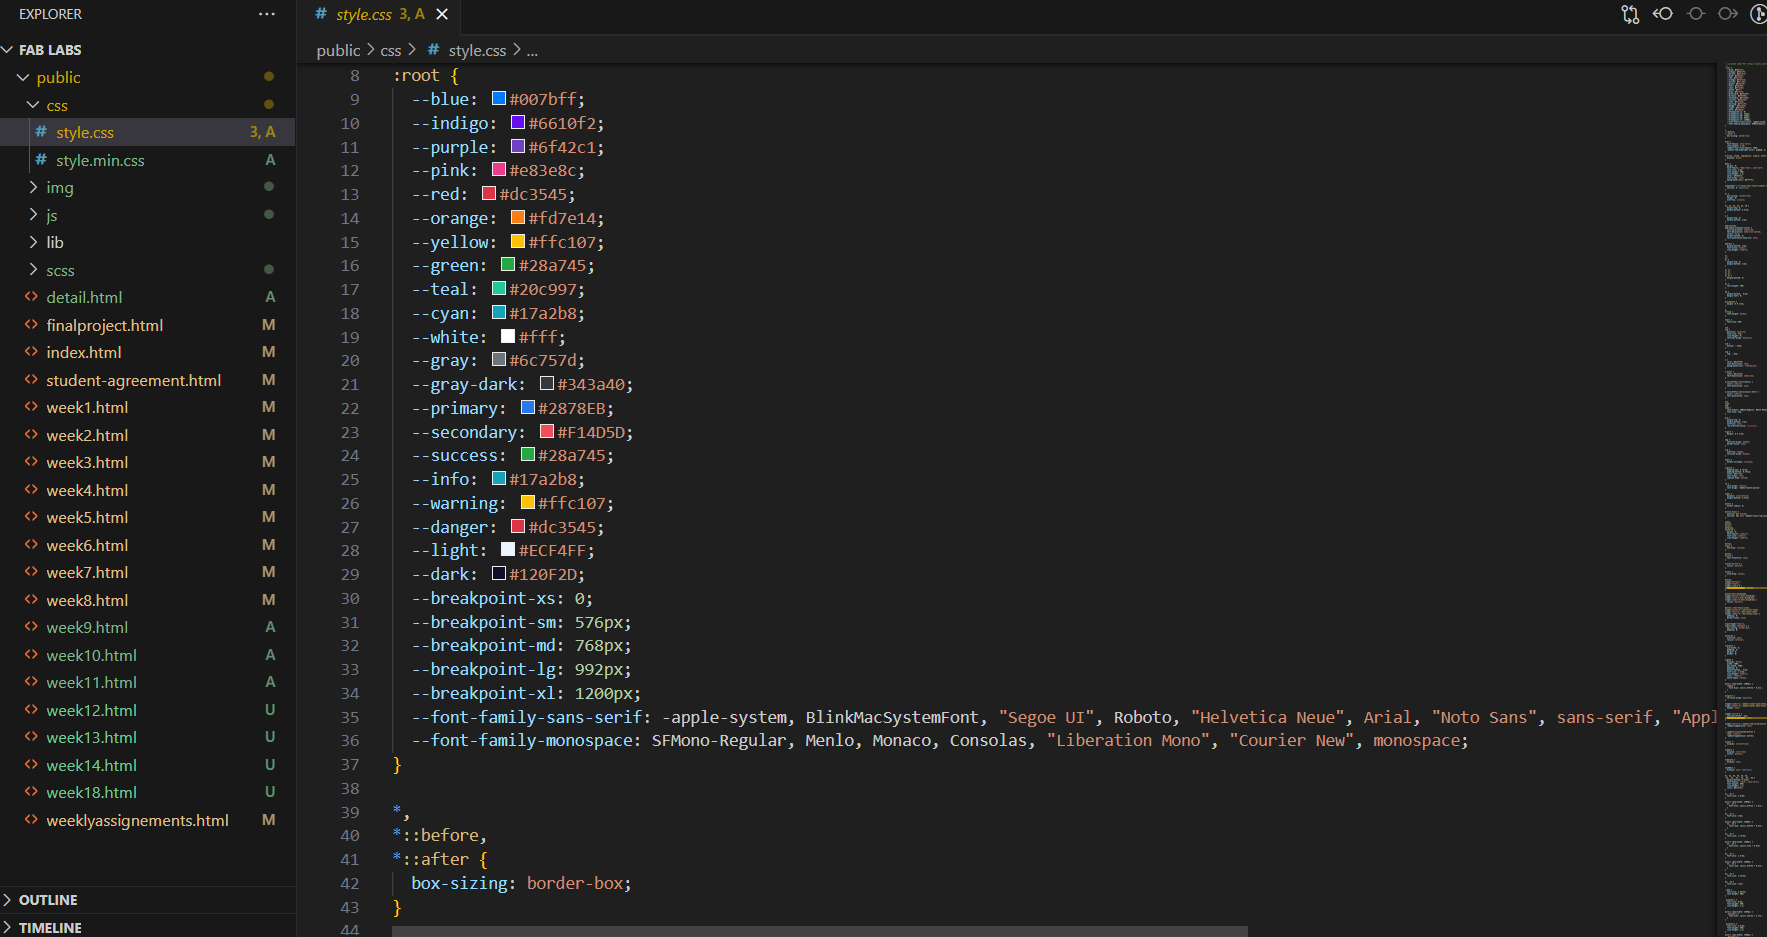
Step 2: CSS Styling
The styling of my website is handled inside the public/css/ folder. This folder contains two files:
- style.css – the main file where I can edit and customize the design (fonts, colors, spacing, responsiveness).
- style.min.css – a minified version of the same stylesheet. This file is optimized for faster loading on the live website, but usually I do not edit this directly.
I mostly work with style.css during development, and the website can use style.min.css for performance when hosted.
Step 3: Images
All screenshots and images are stored inside the public/img/ folder. To keep them organized, I created separate subfolders for each week (for example, img/week1/, img/week2/, etc.). This makes it simple to find images for a particular week’s documentation and prevents confusion.
Step 4: JavaScript
If I need to add interactivity, I place JavaScript files inside the public/js/ folder. For example, I can use these files to create animations, validate forms, or add custom functionality in the future.
What I Understand by Version Control (Git)
Git is a version control system that helps me keep track of all changes I make to my website files. Every update is recorded, so if I make a mistake, I can easily go back to a previous version. Using Git with GitLab allows me to organize my work, back it up online, and share it if needed. It makes managing my FabAcademy website safer, easier, and more structured across all weeks of the course.
Working with My FabAcademy Repository: Online Editor vs Local Clone
I decided to clone my FabAcademy GitLab repository to my computer instead of only using the online editor.
Why I chose cloning over the online editor
What happens when I clone
My Git Workflow: Step-by-Step with Basic Commands
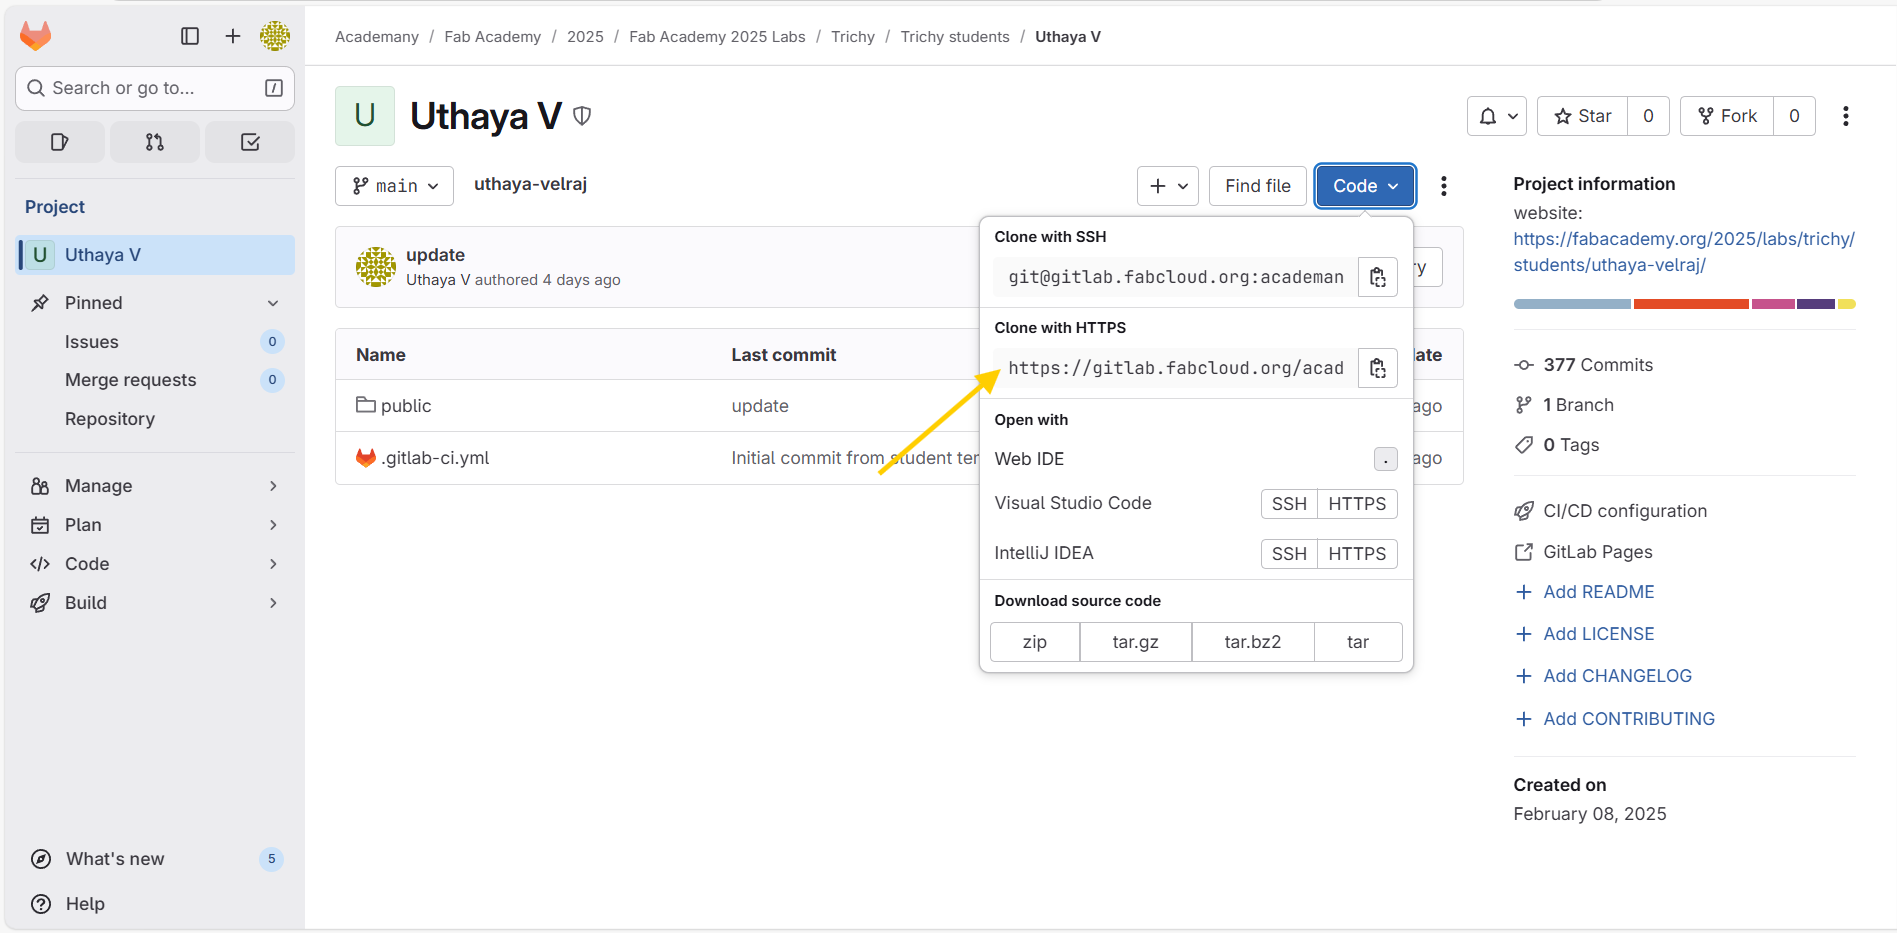
Step 1: Copy the Repository Link
I first went to my FabAcademy GitLab repository page. From the Clone option, I copied the HTTPS link of my repository. This link allows me to create a local copy of the project on my computer.
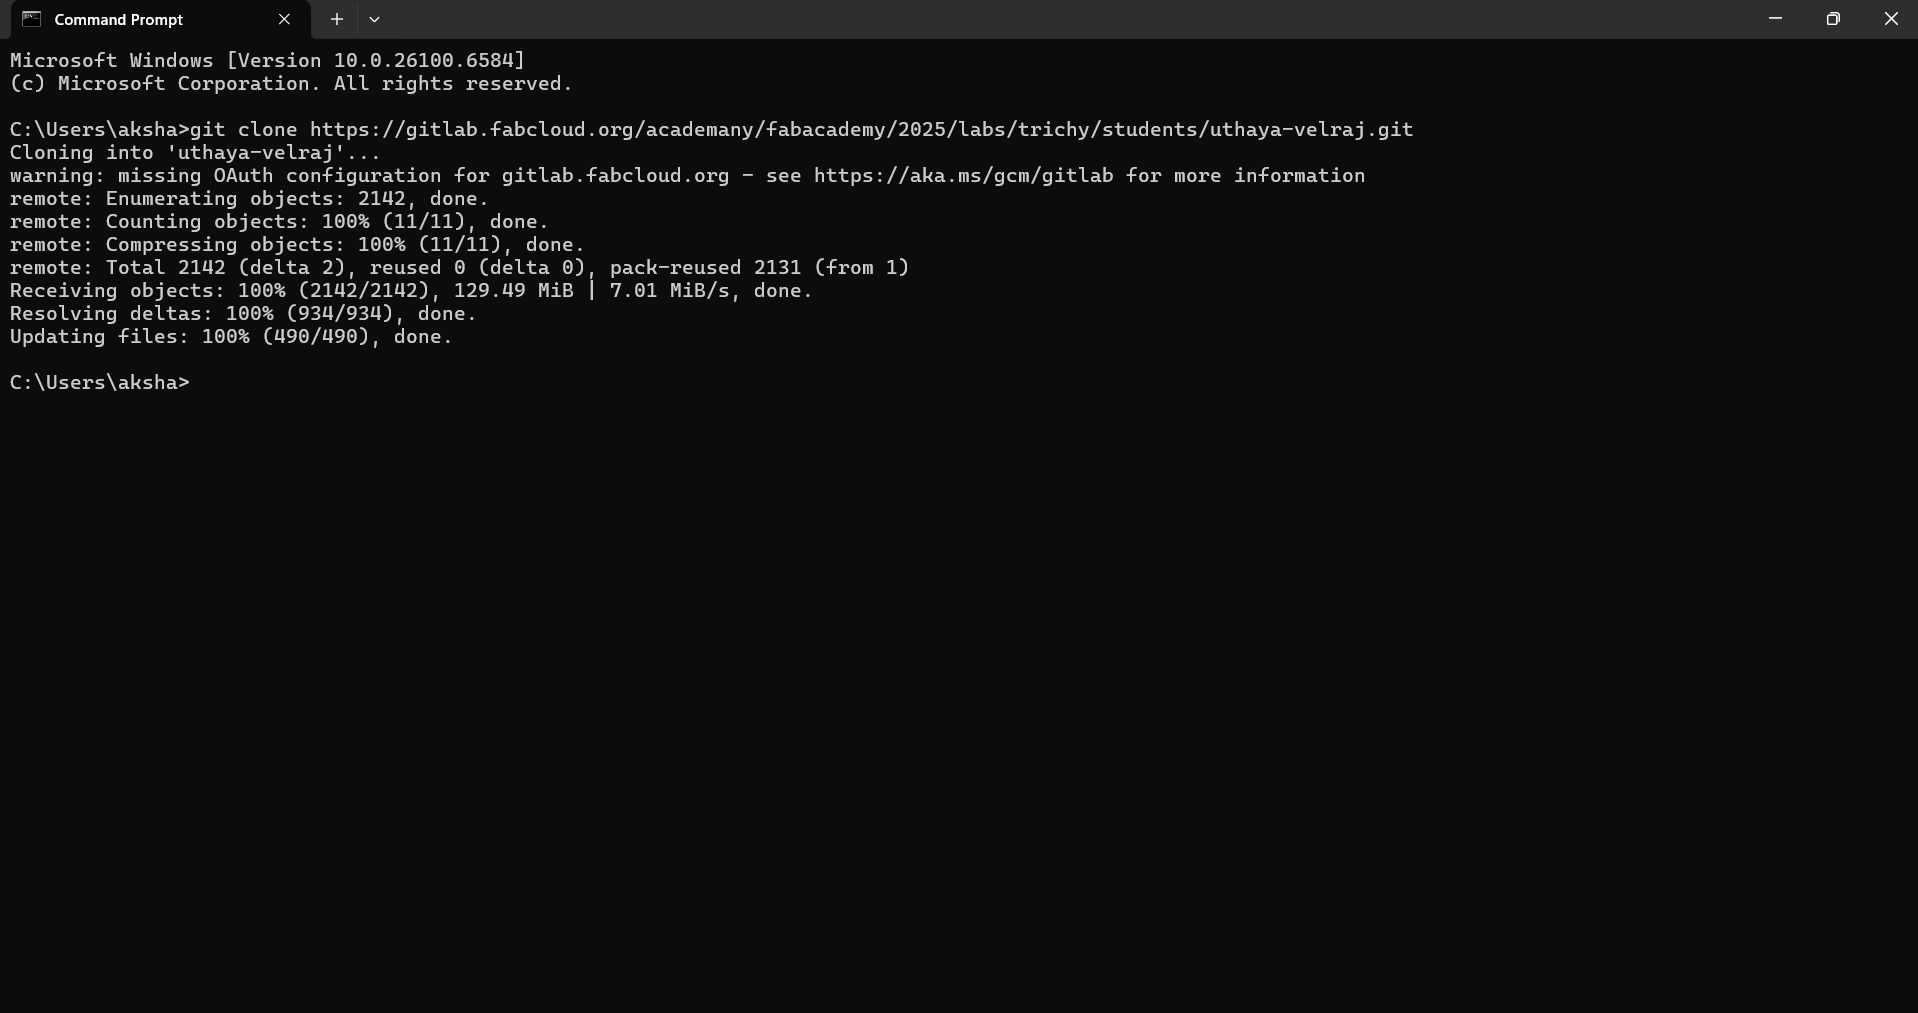
Step 2: Open Terminal and Clone the Repository
I opened the terminal or command prompt on my computer and typed:
git clone <repository-link>This command created a local folder containing all the files from my FabAcademy repository. If prompted for a password, I used a Personal Access Token (PAT) from GitLab to authenticate.
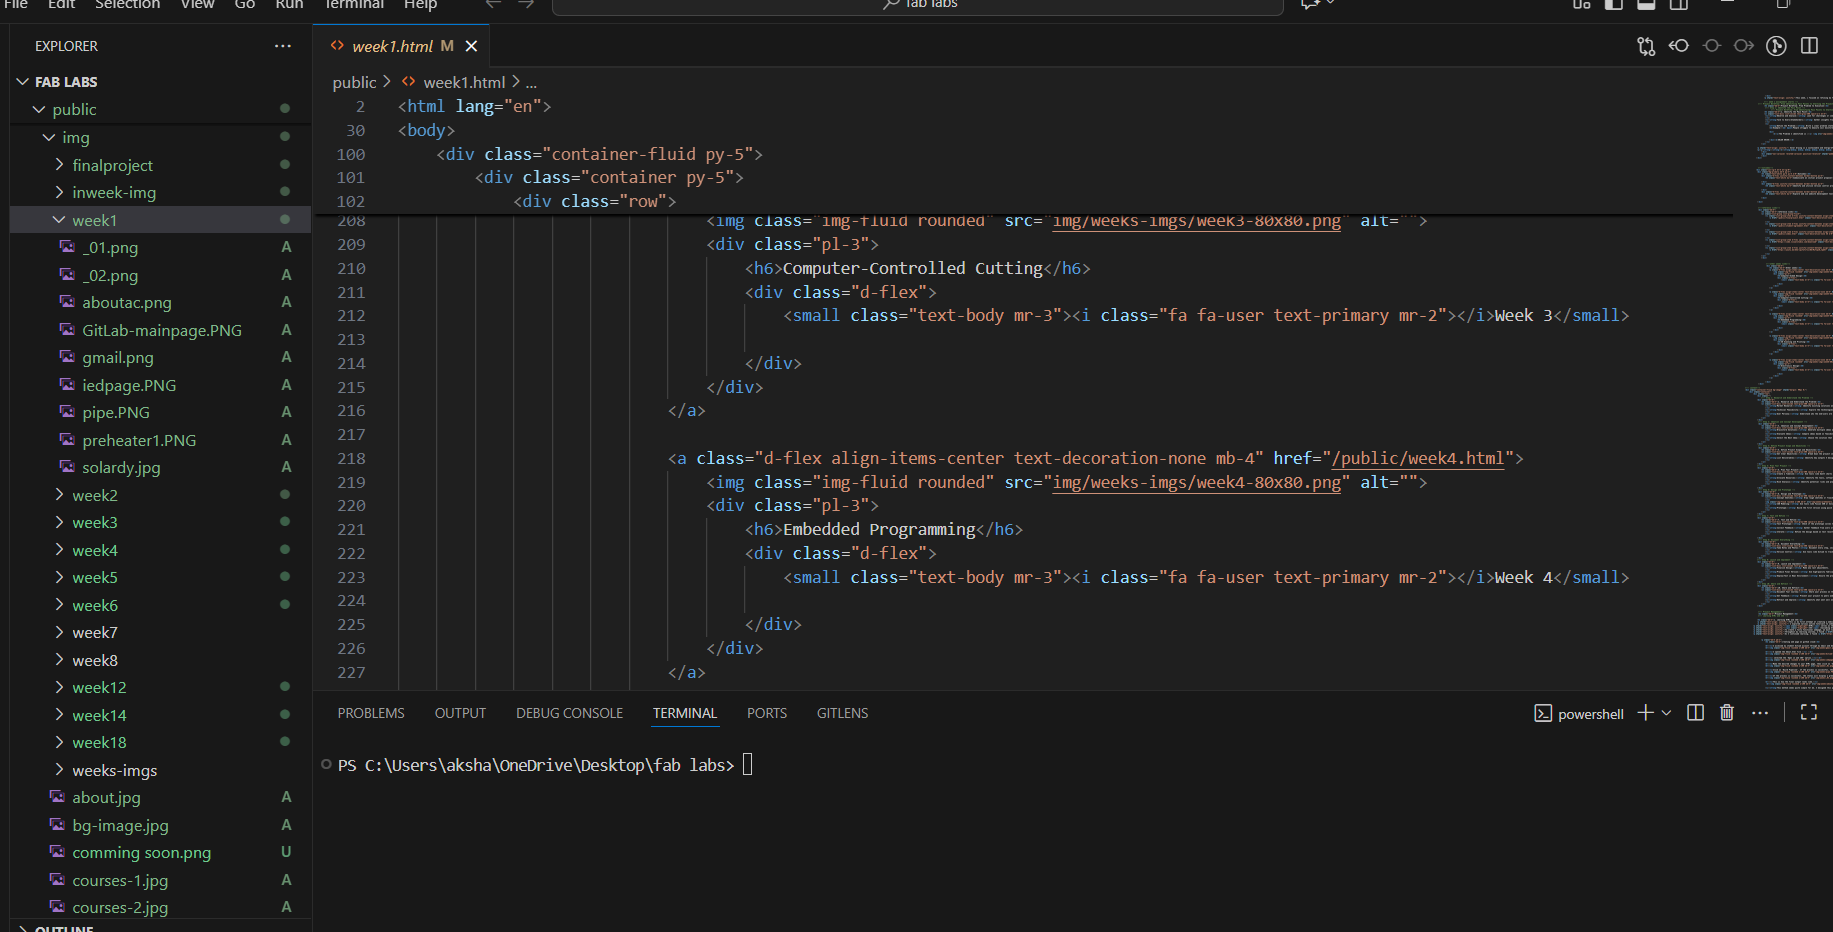
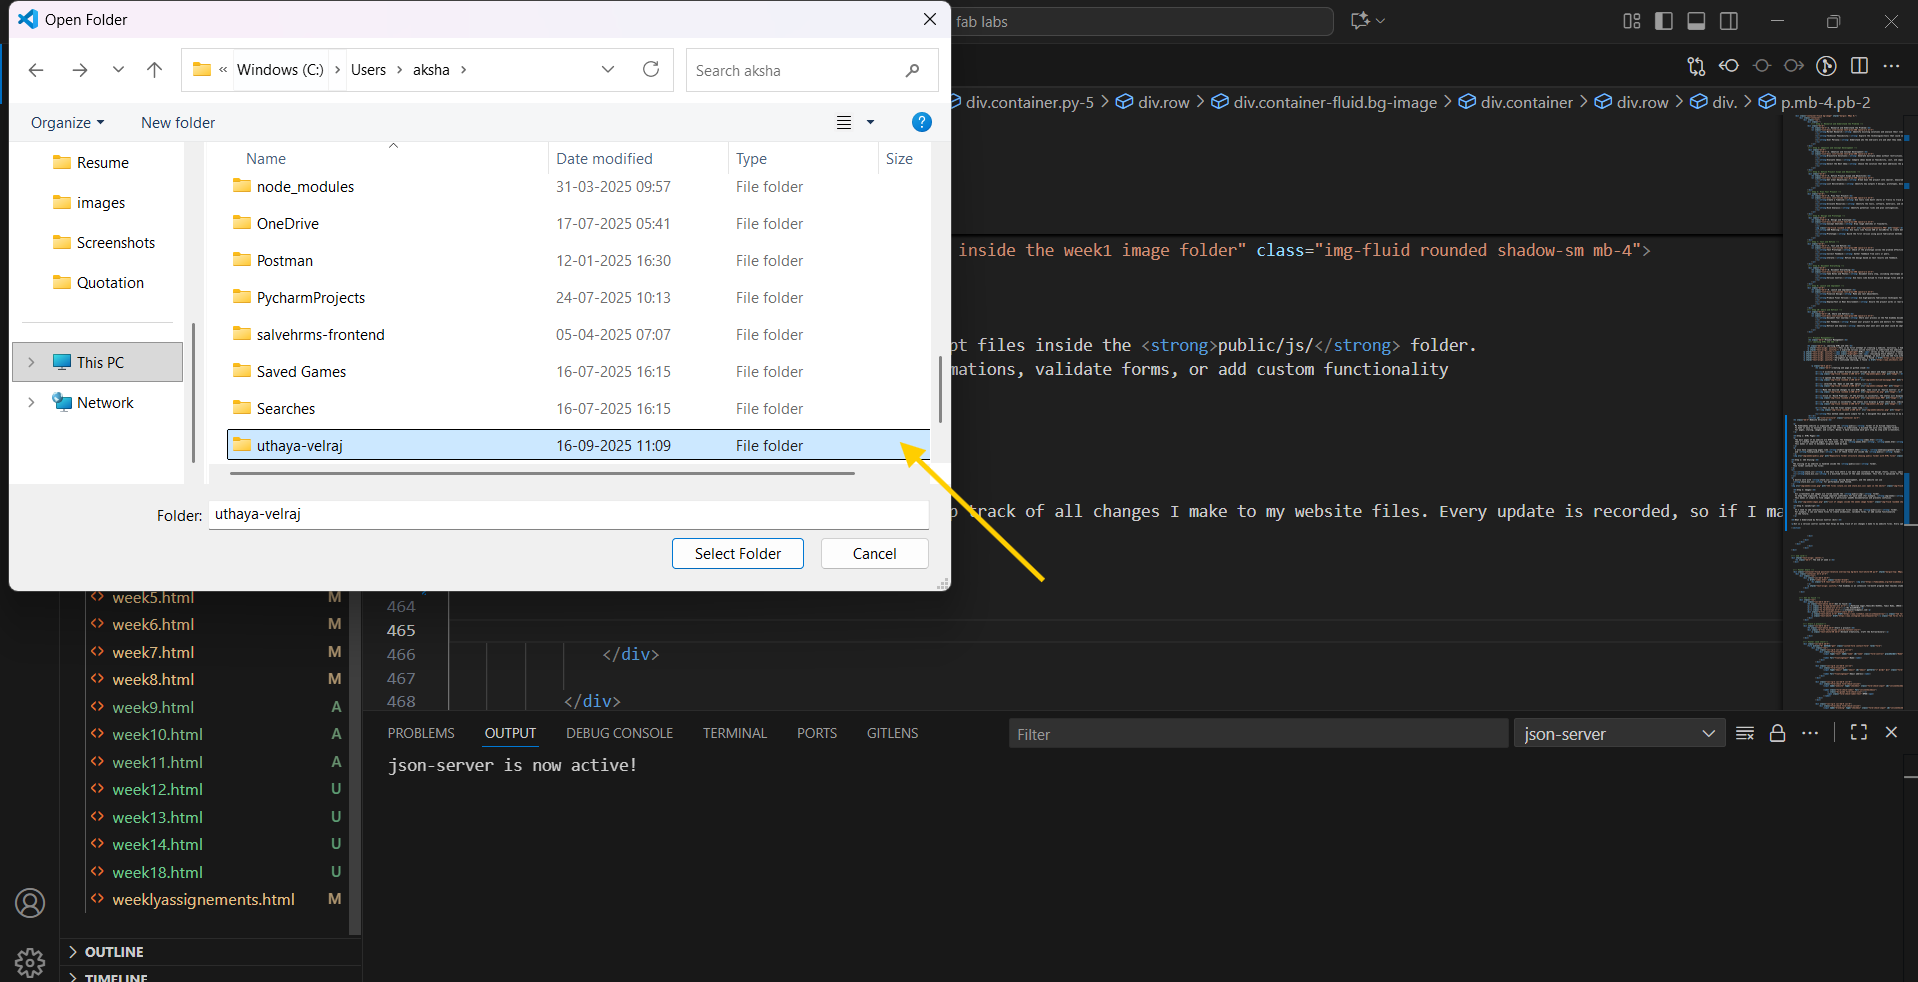
Step 3: Open the Project in VS Code
Next, I opened the cloned folder in Visual Studio Code (VS Code). This makes it easy to edit my HTML, CSS, and image files in one place.
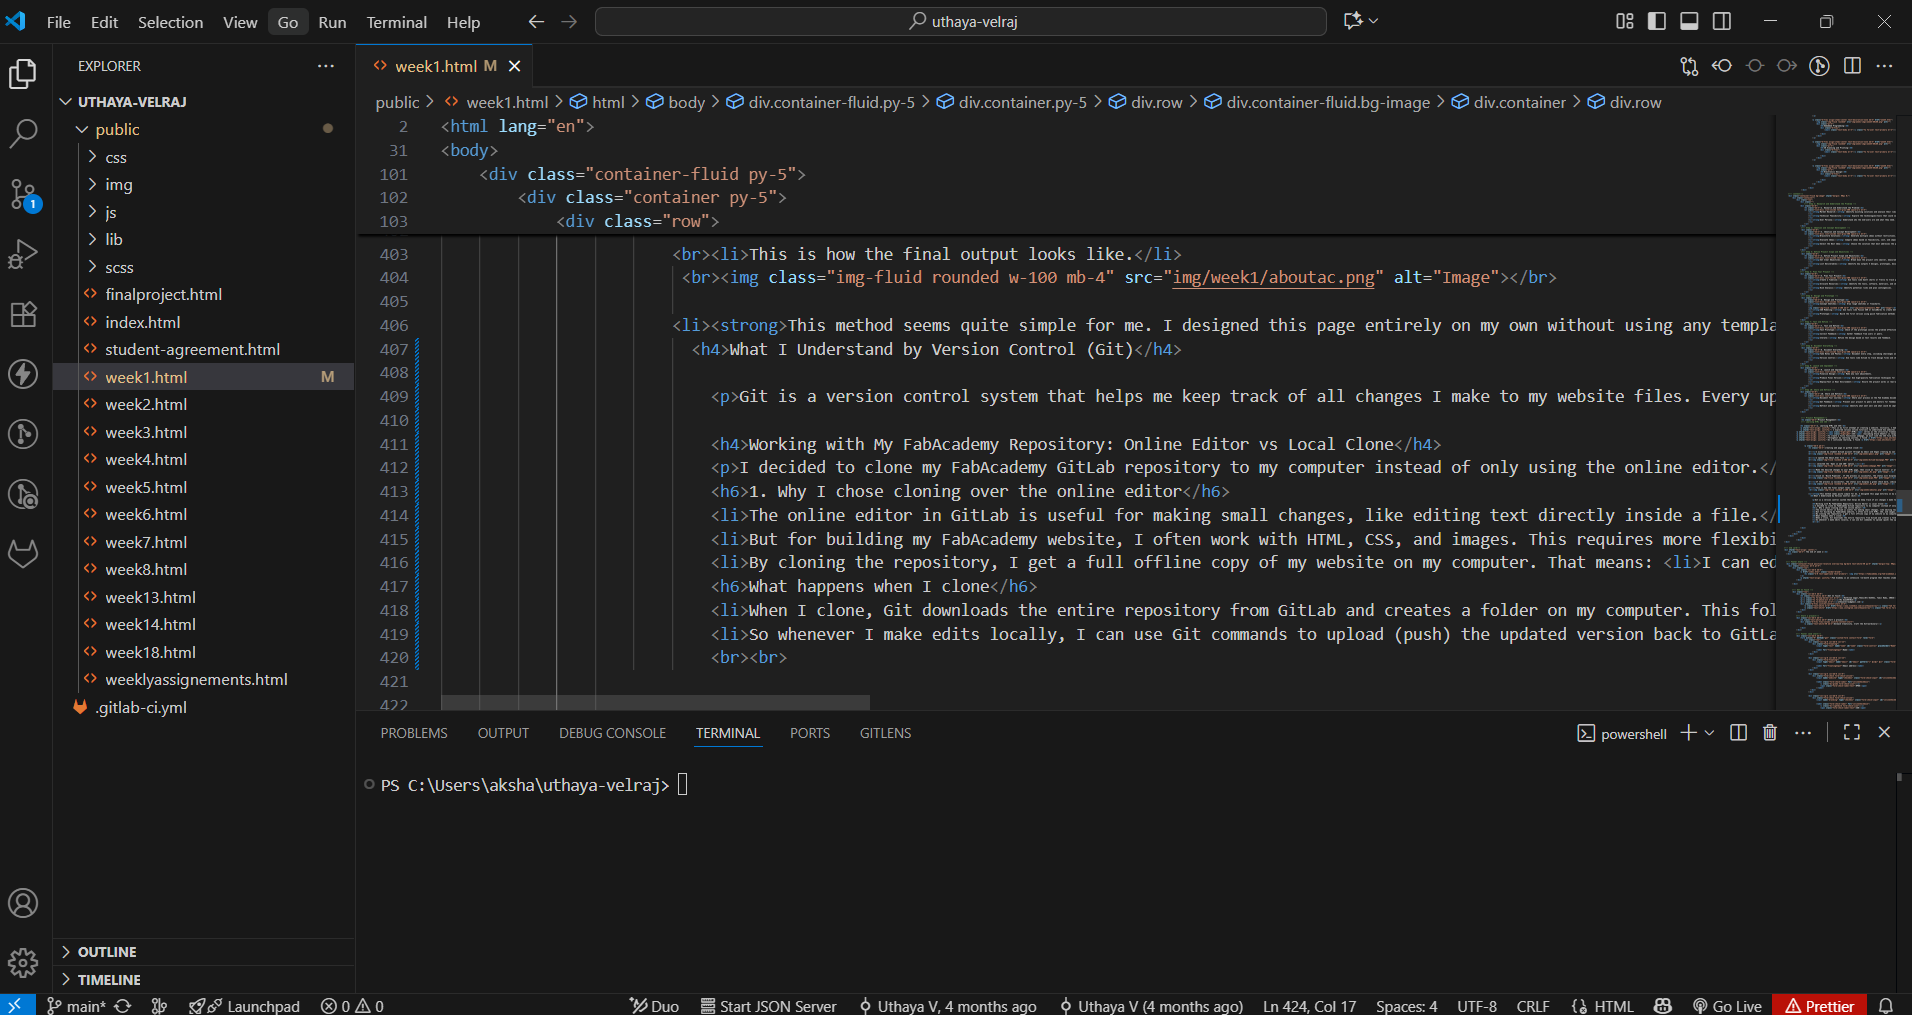
Step 4: Make Changes Locally
Inside the public/ folder, I updated my website content by:
- Editing HTML files like index.html and weekly assignment pages
- Adding or updating images in the img/ folder
- Modifying CSS to improve styling
This step lets me work offline and test changes before updating the online repository.
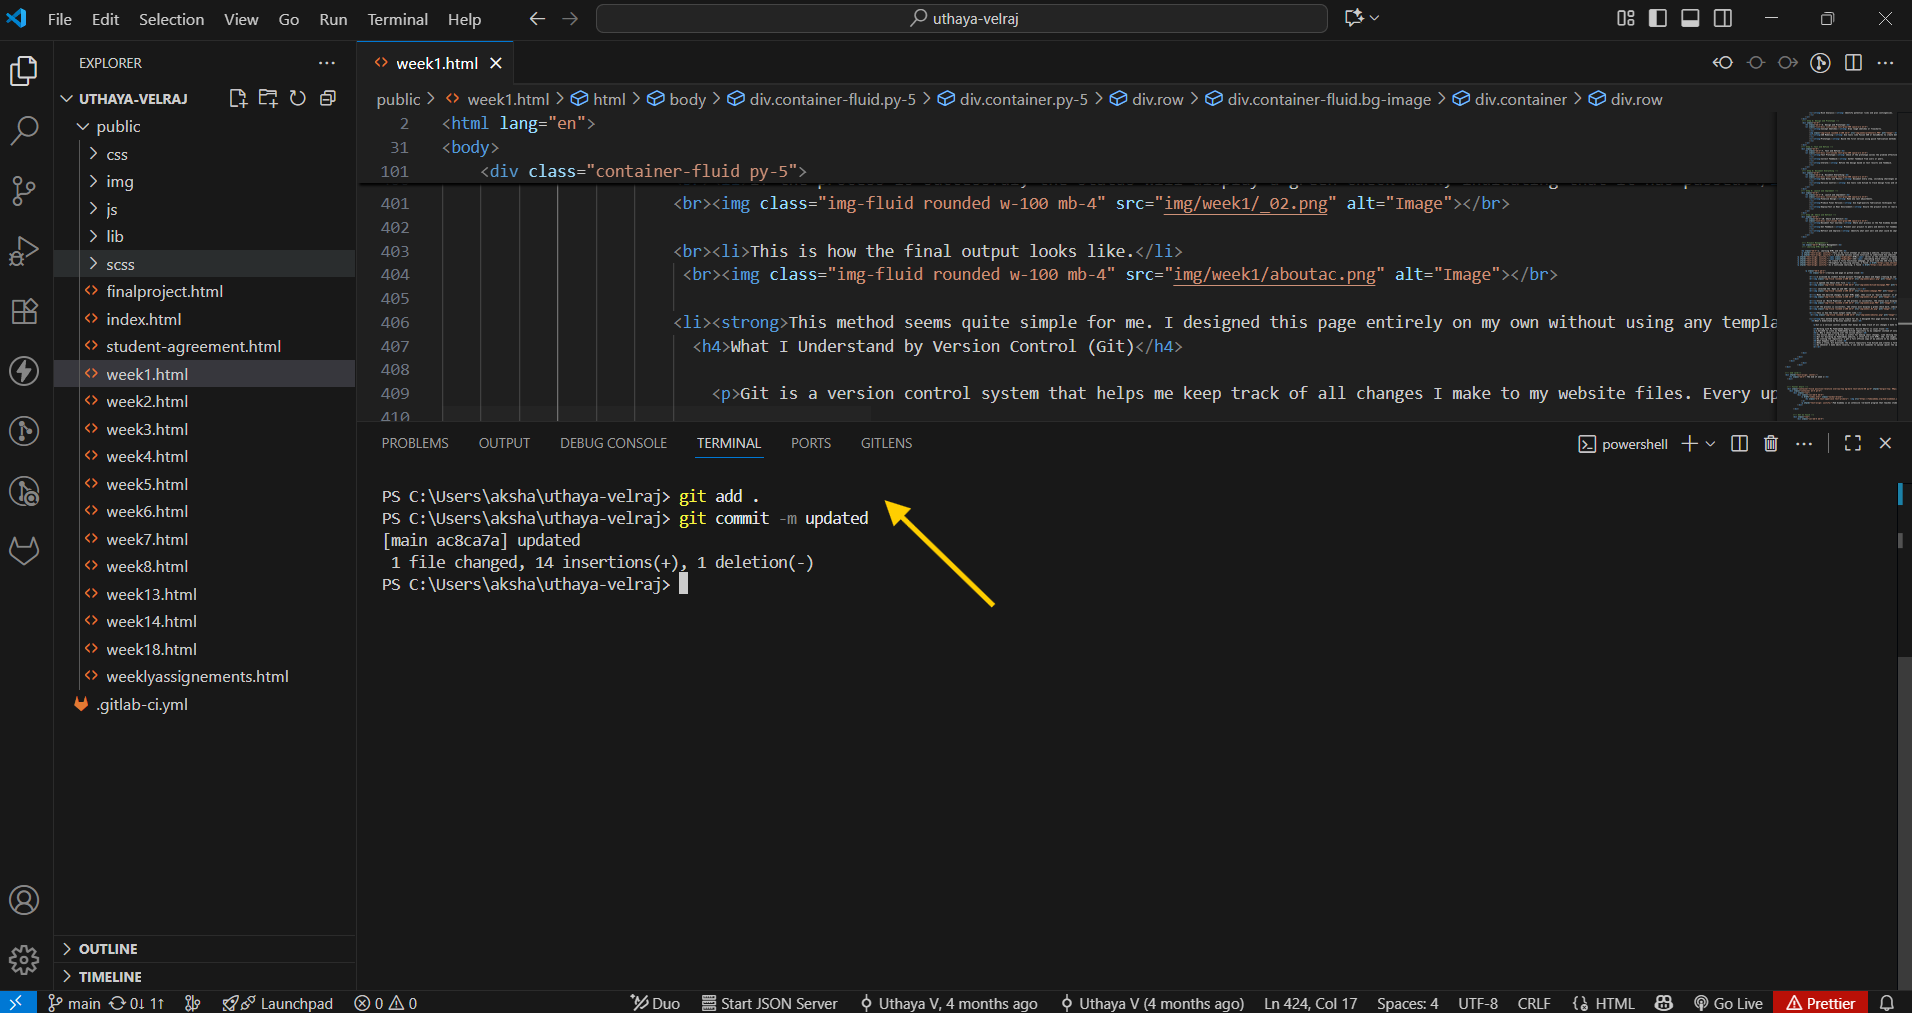
Step 5: Stage and Commit the Changes
After making edits, I used the following basic Git commands to save my progress:
                              git status
                              git add .
                              git commit -m "Updated"
These commands help me track all changes and maintain a clear record of my work.
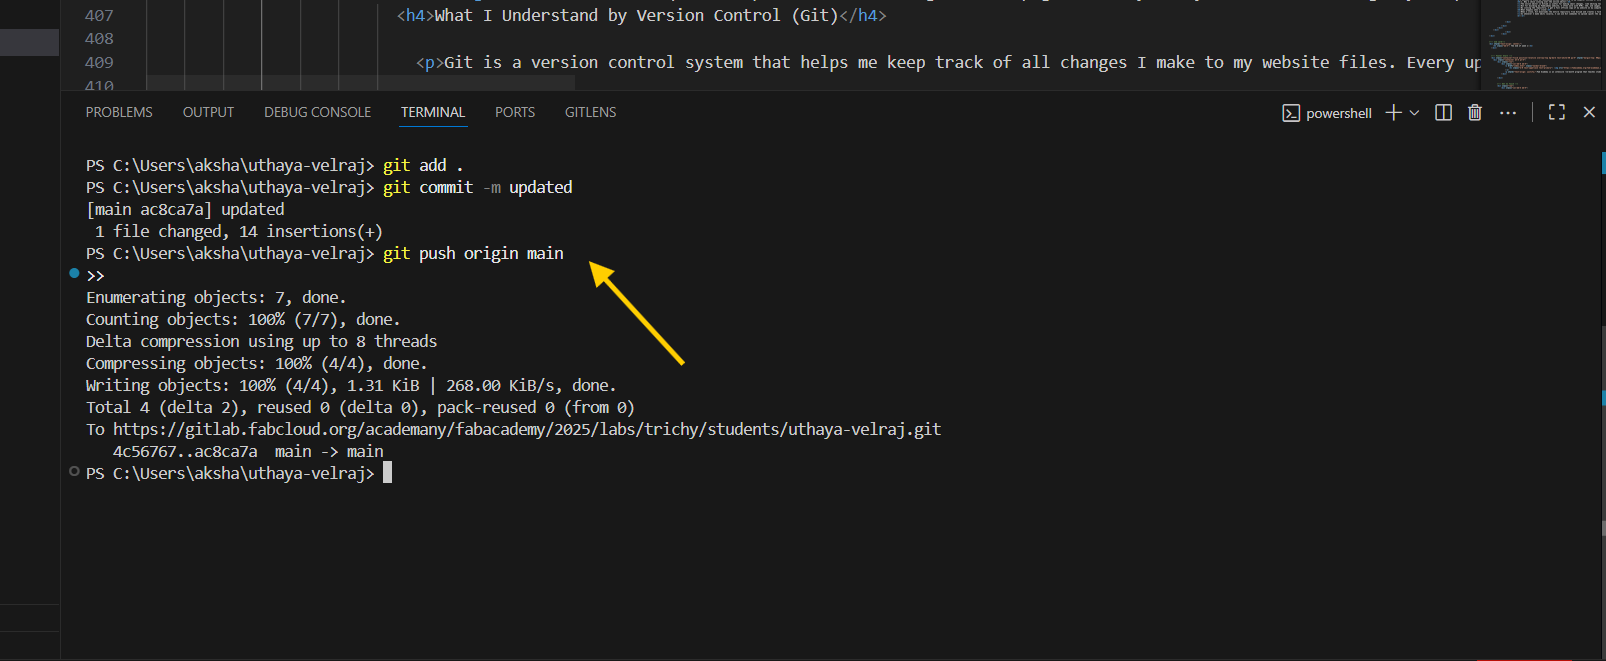
Step 6: Push Changes to GitLab
Finally, I uploaded my changes to GitLab with:
git push origin main
Once pushed, my FabAcademy website automatically updated with the latest version of my work.
Summary of Basic Git Commands
| Command | Purpose |
|---|---|
| git clone <repo> | Create a local copy of the repository |
| git status | See which files have been modified |
| git add . | Stage all changes for commit |
| git commit -m "msg" | Save changes locally with a message |
| git push origin main | Upload changes to GitLab |
Using these steps and commands helps me keep my FabAcademy website updated, organized, and safe every week.