Introduction
In Week 5, we explored both 3D printing and 3D scanning techniques. The goal was to understand the capabilities and limitations of our printers through benchmarking, then apply those insights to design, fabricate, and digitize a complex part—a rotary joint—unsuited for subtractive methods.
Group Assignment: Printer Design Rule Tests
As a group, we printed a standard test model containing:
- Overhangs (0–90°)
- Bridges (5–30 mm spans)
- Small text and holes
- Thin walls, cylinders, and clearance tests
Key findings
- Overhangs up to 60° succeeded without support.
- Bridges performed well to 15 mm, sagging beyond.
- Text smaller than 6 pt became illegible.
- Walls under 0.4 mm often failed.
- Part tolerances below 0.3 mm did not fit freely.
Individual Assignment: Rotary Joint
Design & Print
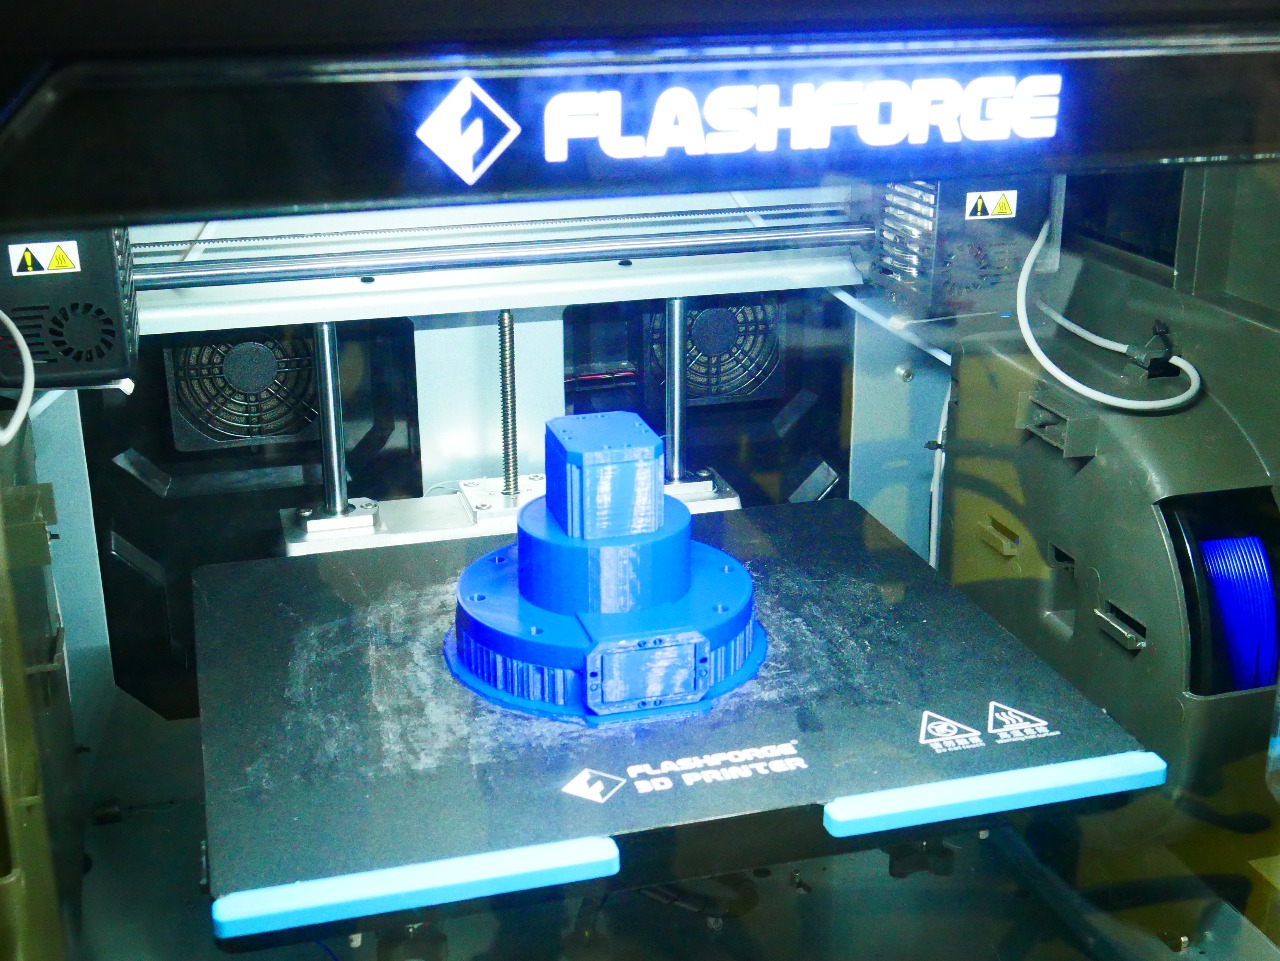
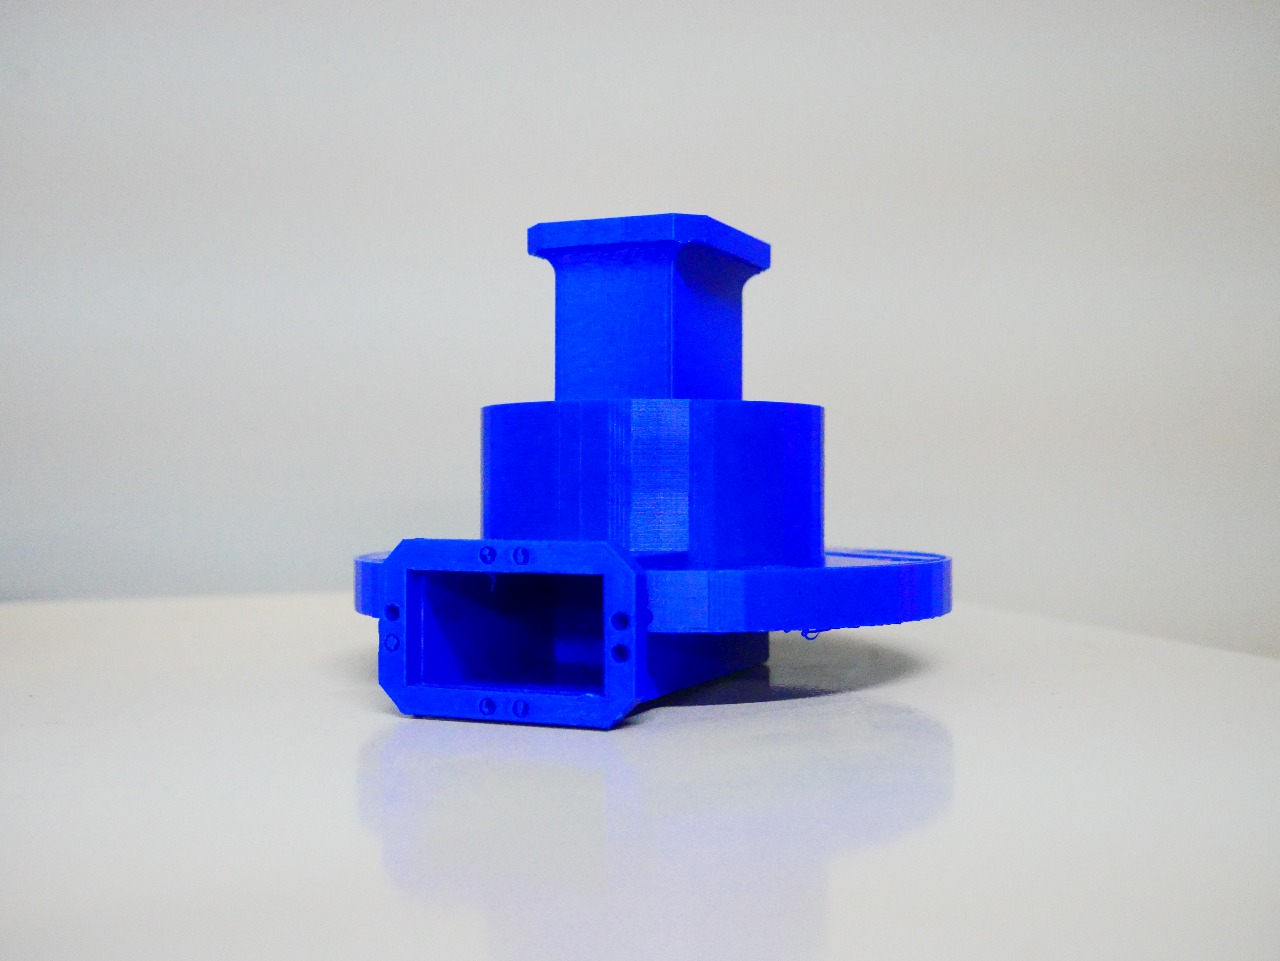
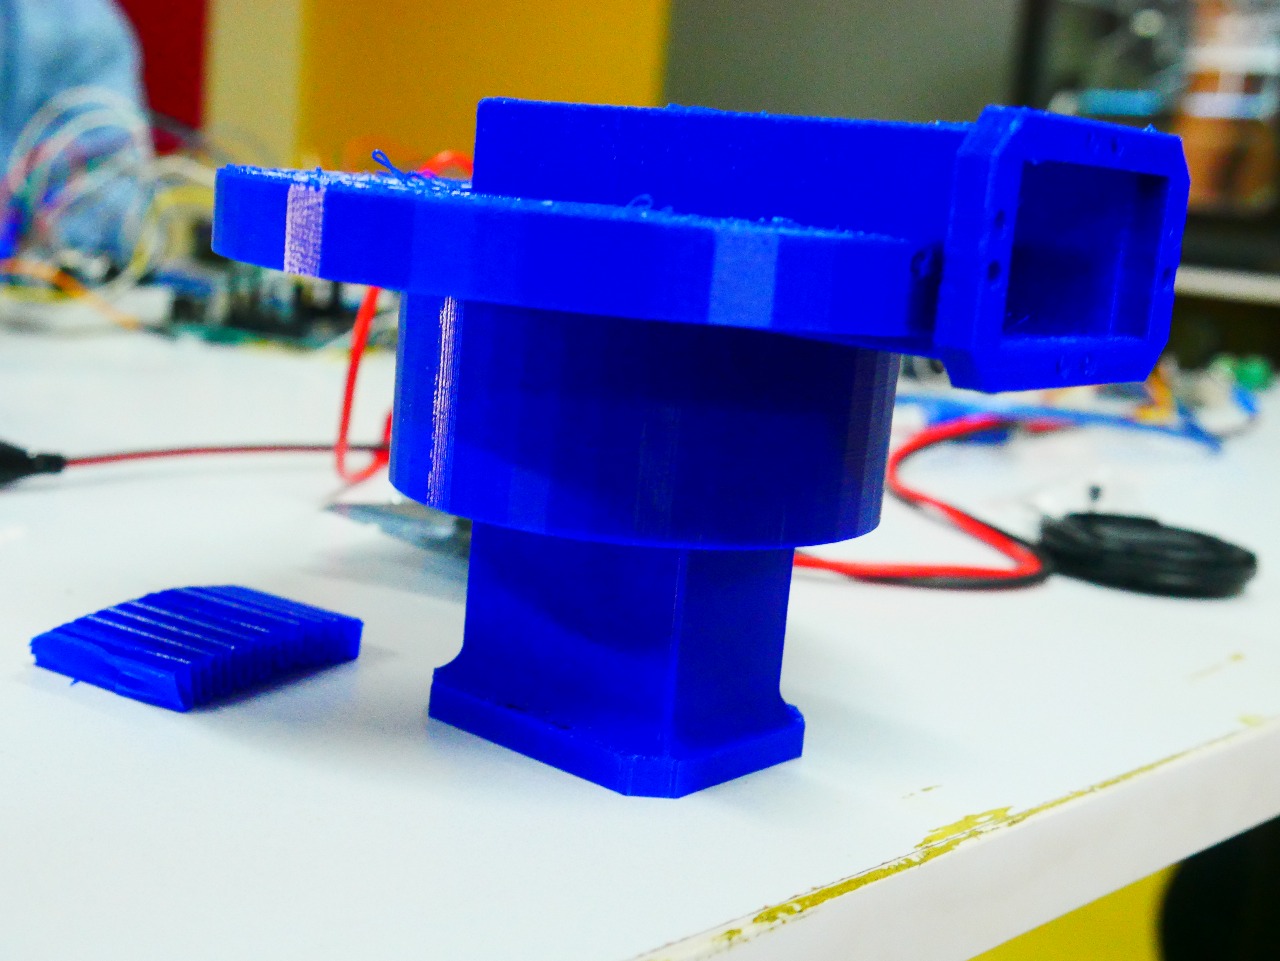
I designed a three-part rotary joint in Fusion 360. Its geometry—hollow core, interlocking flanges, and ribbed housing—could not be easily machined subtractively. Each part prints in a single run with minimal supports.
- Parts:
- Housing (circular body with mounting holes)
- Adapter (rectangular flange)
- Cap (top cover)
- Material: PLA
- Printer: FlashForge Creator 3 Pro
- Layer Height: 0.2 mm
- Infill: 20%
- Print Times: Housing ~8 h, Adapter ~4 h, Cap ~2 h
Design files:
Housing.f3d
Adapter.f3d
Cap.f3d
Step-by-Step Print Process
-
Slicing Preview
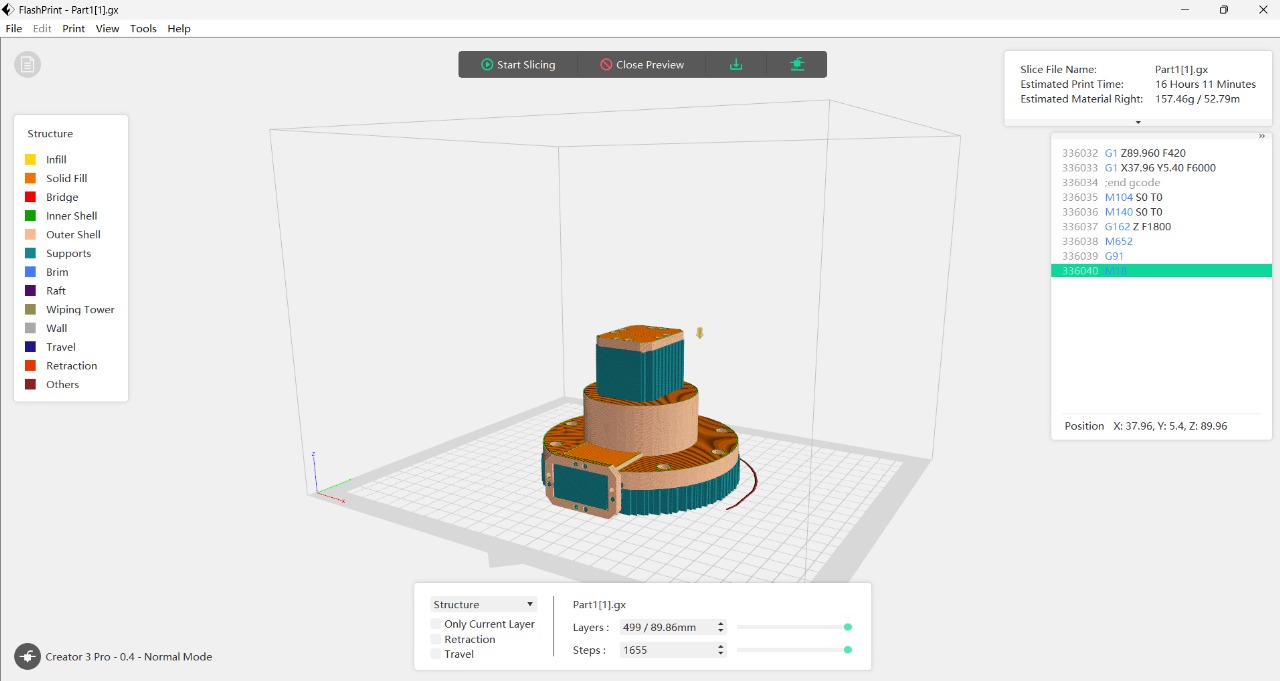
Confirm orientation, supports, layer height, infill, estimated 16 h total.
-
Mid-Print Support Removal
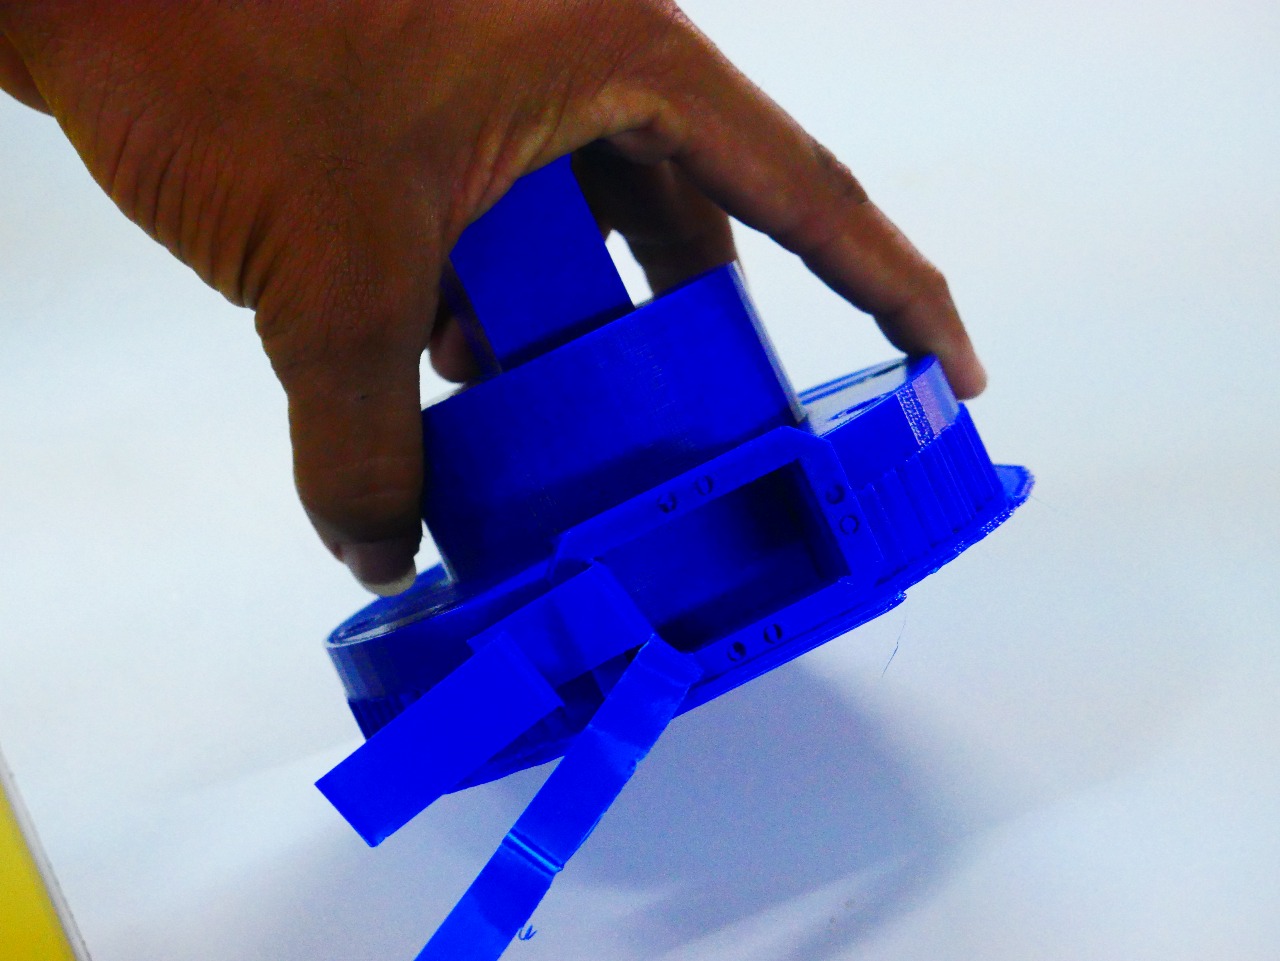
Carefully peel off brims and support structures; monitor overhangs.
-
Initial Inspection
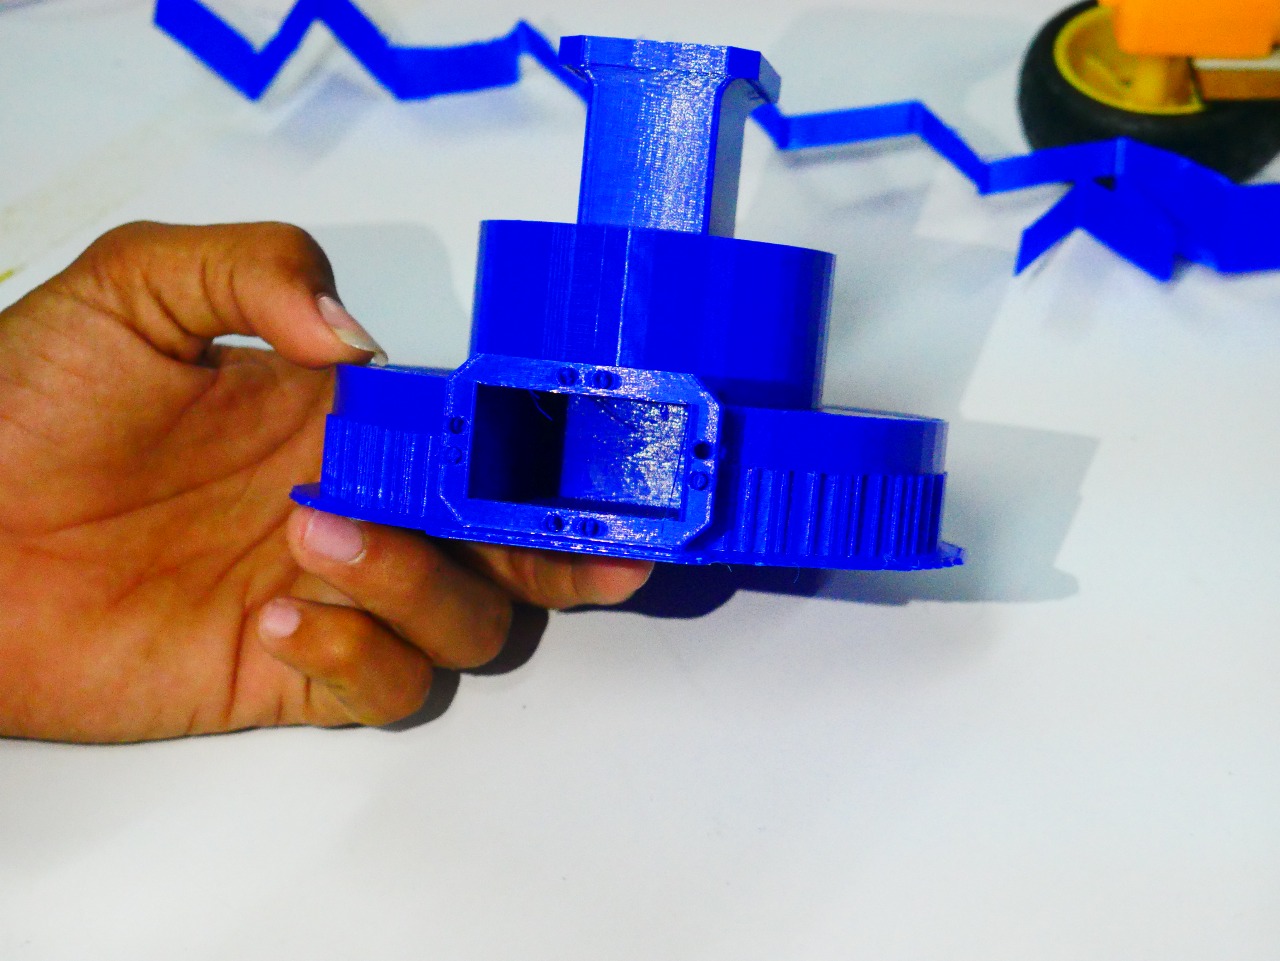
Check wall thickness, hole clarity, bridging artifacts.
-
Final Part on Build Plate
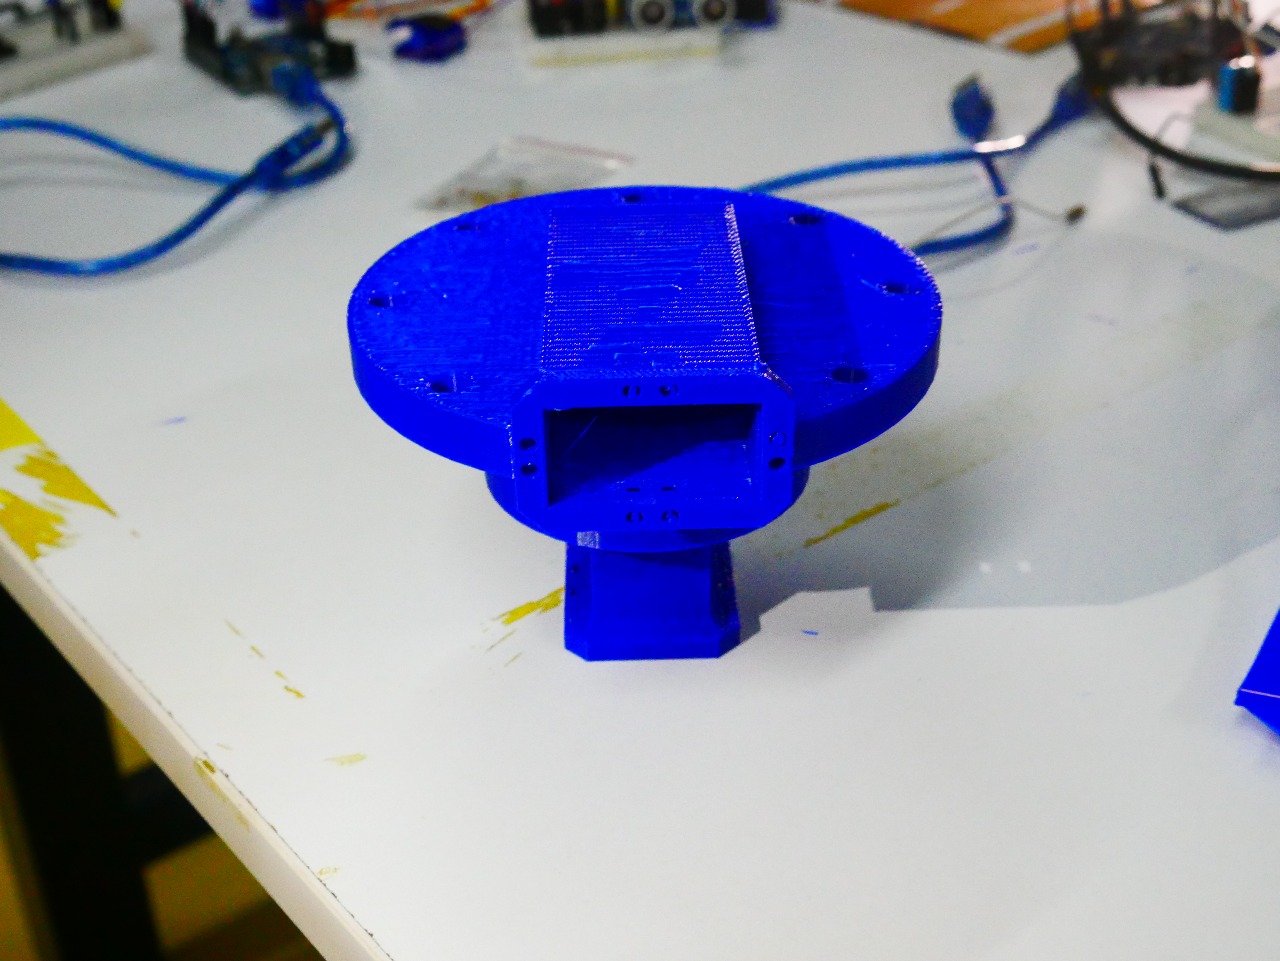
Ensure no warping; all features formed cleanly.
Photogrammetry & Mesh Export
To digitize each part into an STL:
- Photograph part on a turntable under even lighting (≥20 views).
- Process in Meshroom (or COLMAP) to generate a mesh.
- Inspect the mesh; export as OBJ.
Alternatively, export directly from Fusion 360:
- Right-click body → Save as Mesh → choose STL.
- Select Binary format, refine tolerance to control faceting.
Cleaning & STL Export
- Import the OBJ/STL into Meshmixer.
- Run Analysis → Inspector to auto-repair holes.
- Reduce mesh density if needed (~200 k faces).
- Export each part as STL:
- rotary_housing.stl
- rotary_adapter.stl
- rotary_cap.stl
STL Files
Hero Shots
Learning Outcomes
- Advantages of 3D Printing: Complex geometries, internal features, minimal assembly.
- Limitations: Surface finish, dimensional tolerance dependent on nozzle size.
- Scanning Technology: Captures real-world topology; post-processing essential for watertight meshes.
Checklist
- Linked to group assignment page
- Summarized printer design tests
- Documented design & print workflow
- Explained why subtractive methods fail
- Outlined scanning & mesh export
- Included design & STL files
- Provided hero shots