Principles and Practices (part 1 of 2)
* Plan and sketch a potential final project
Project Management (part 2 of 2)
* Read, sign (add your name to) the Student Agreement and commit it to your repo.
* Work through a Git tutorial.
* Build a personal website in the class archive describing yourself and your final project. Refer to the lecture material for examples.
* Upload parts 1 and 2, to the class archive.
☑ Sketched your final project idea(s).
☑ Described briefly what it will do and who will use it.
☑ Made a website and described how you did it.
☑ Created a section about yourself on that website.
☑ Added a page with your sketch and description of your final project idea(s).
☑ Documented steps for setting up your Git repository and adding files to it.
☑ Pushed to your class GitLab repository.
☑ Signed and uploaded Student Agreement.
Plan and sketch a potential final project
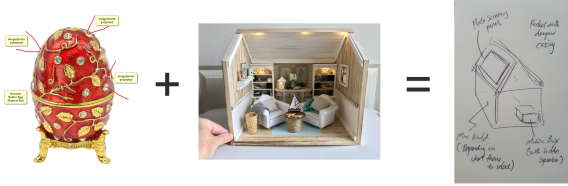
For my final project, I would like to make a MUSICAL BOX featuring photo-screening function through a projector. It would be the best gift for those who want to share their memories with their love ones, or a person that they treasured most, to screen the photos of them, with a memorial/touching song playing along.
A normal musical box with cute/sweet figurine with rotating motion can be easily find, but adding a photo screening function to the musical box would be rarely found. Thus, I would like to take this golden opportunity to make one up.
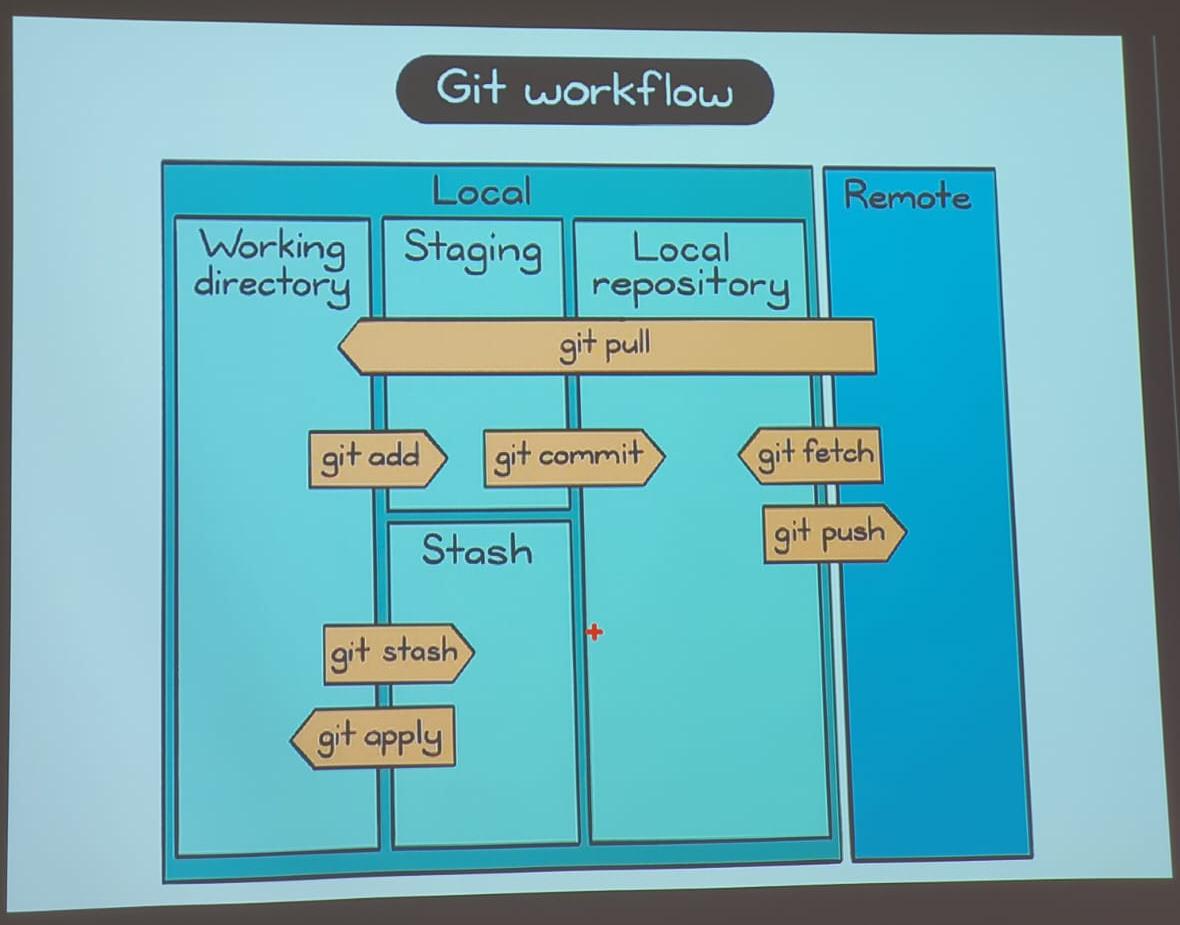
work through a git tutorial
What is Git?
Git is software for tracking changes in any set of files, usually used for coordinating work among programmers collaboratively developing source code during software development. Its goals include speed, data integrity, and support for distributed, non-linear workflows.
Below are some of the advantages of using GIT:
* Version Control: Tracks changes in files, allowing easy management of different versions of code.
* Collaboration: Enables multiple developers to work on the same project simultaneously without overwriting each other's changes.
* Distributed System: Each user has a full copy of the repository, enabling offline work and reducing dependency on a central server.
* Performance: Efficiently handles large projects and repositories.
* Open Source: Free to use and widely supported by a large community.
working on git
I have followed step-by-step Git tutorial on both Fabcloud and Articulate 360 Rise.
• Install Git - I downloaded GitBash for Windows user. The download should run automatically. Next, to check if git installed correctly on your PC:
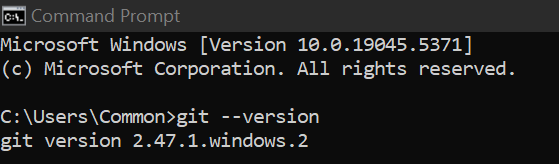
1. Click on the Windows button.
2. Type CMD, press Enter.
3. Type git --version to check Git installed correctly on your PC.
• Add my Git username and configure my email address for uploading
1. git config --global user.name “my_username”
2. git config --global user.email “my_email_address”
• Generate SSH-Key
1. Go to GitBash app.
2. Navigate to the Git project folder.
3. Run this command ssh-keygen -t rsa -C "$my_email". If successful, you should see this.
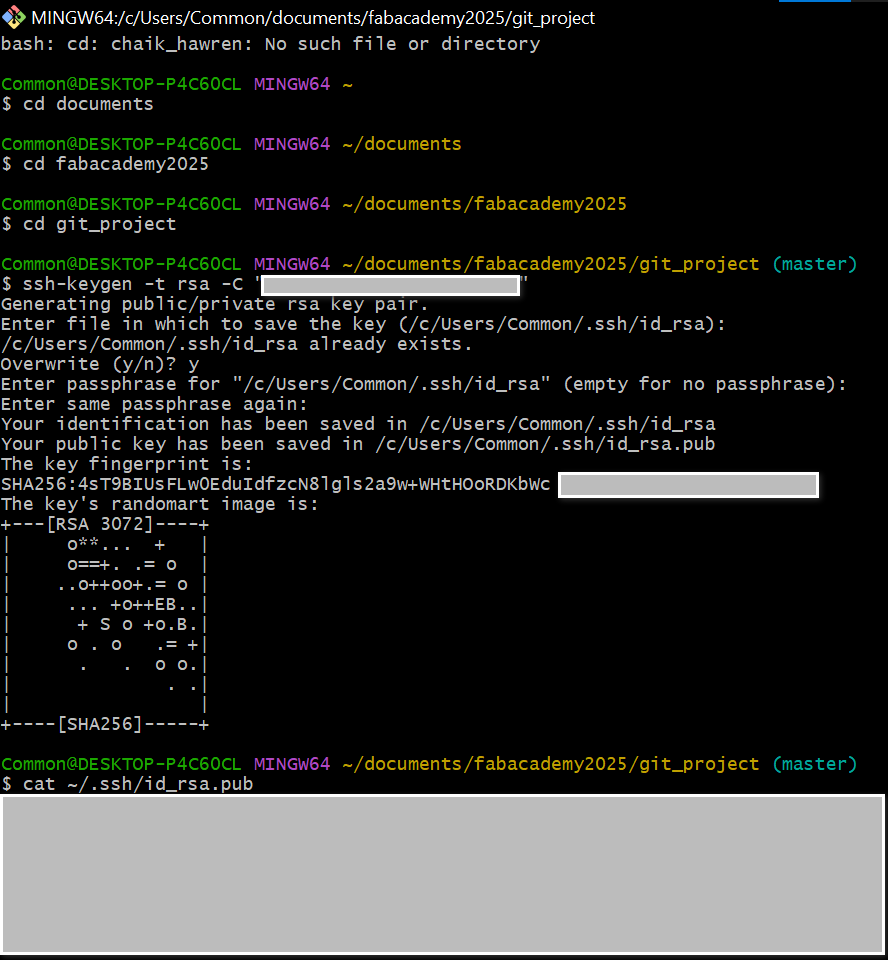
4. Use this command clip < ~/.ssh/id_rsa.pub to copy my SSH-Key.
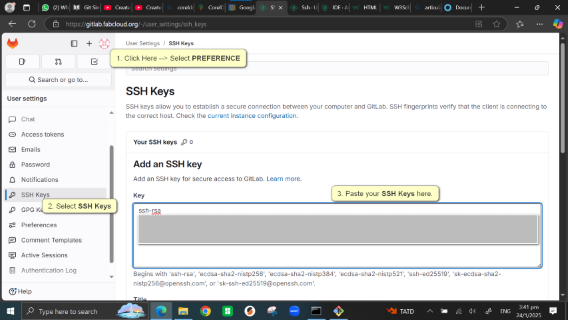
• Upload id_rsa.pub to your Gitlab account ssh-keys
1. Navigate to Gitlab account at https://gitlab.fabcloud.org/
2. Follow the steps below to add the ssh-key to your gitlab account:
• Clone my repo to local
1. Go to Windows command prompt.
2. Navigate to the Git project folder.
3. Run this command git clone git@git.fabacademy.org:fabacademy2025/yourlabname/yourstudentnumber.git. Below is a screenshot of my successful clone.

• Uploading my repo online
1. Go to Windows command prompt.
2. Navigate to the Git project folder. In my case, this was:
C:\Users\Common\Documents\FabAcademy2025\Git_Project\chaik_hawren.
3. Use the following commands to upload to the repo online:
1. git add ..
2. git commit -m "describe the changes made" .
3. git push.
If successful, the Git Tutorial is done.
In summary,
Many thanks to my FabLab colleagues for walking me through this tutorial, especially Louis Goh and Florimond Chu, who took time to guide me through it step-by-step.
Prior to FabAcademy I had 0 experience in building websites. Luckily, thanks to Florimond Chu, who introduce me using Adobe Dreamweaver 2021, and also guide me how to it, I am manged to make this page out within one weeks.To build the website, I have downloaded a free website template (Strongly Typed) from HTML5up and then used Adobe Dreamweaver 2021 to edit it, which is a WYSIWYG (What-You-See-Is-What-You-Get) editor. It sounds easy enough to apply the template, but I had to resolve some problems to get it to work.
Problem 1 - The Navigations
How can I edit the navigations on top of the webpage according to my preference?
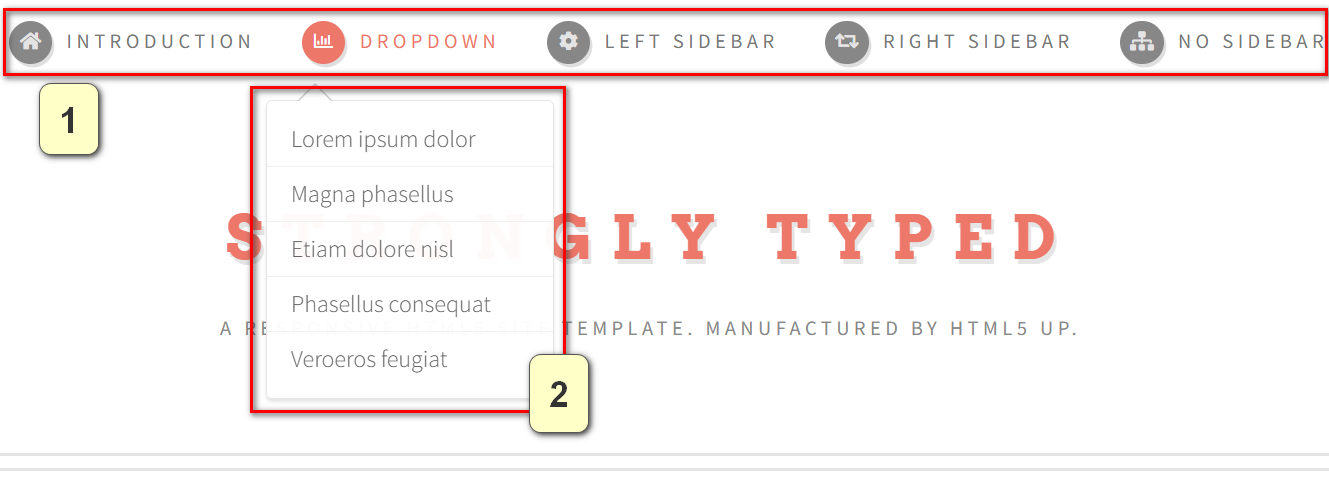
I need to figure out:
• How can I rename and change the icon of each navigation?
• How can I change the drop-down list to the navigation that I want to assign?
How can I rename and change the icon of each navigation?

1. Renamed the navigation title to (Main Page).
2. Changed the icon that suitable to the respective navigation. e.g. Home icon for Main Page.
3. Link the page to the respective webpage.
How can I change the drop-down list to the navigation that I want to assign?
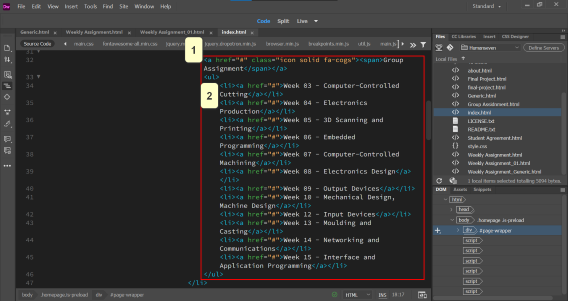
1. Preset the reference link to "#", as "#" refers to a variable link that will link to different webpages depending on your link selection.
2. List down all the webpages that you wish to link to based on the navigation.
Final Result

Problem 2 - Jump to the respective Header after click on the point
When my webpage getting longer, it feels troublesome to keep scroolling down to view the topic that I want to read. So I wish to add a command that allows me to ease my process when viewing.
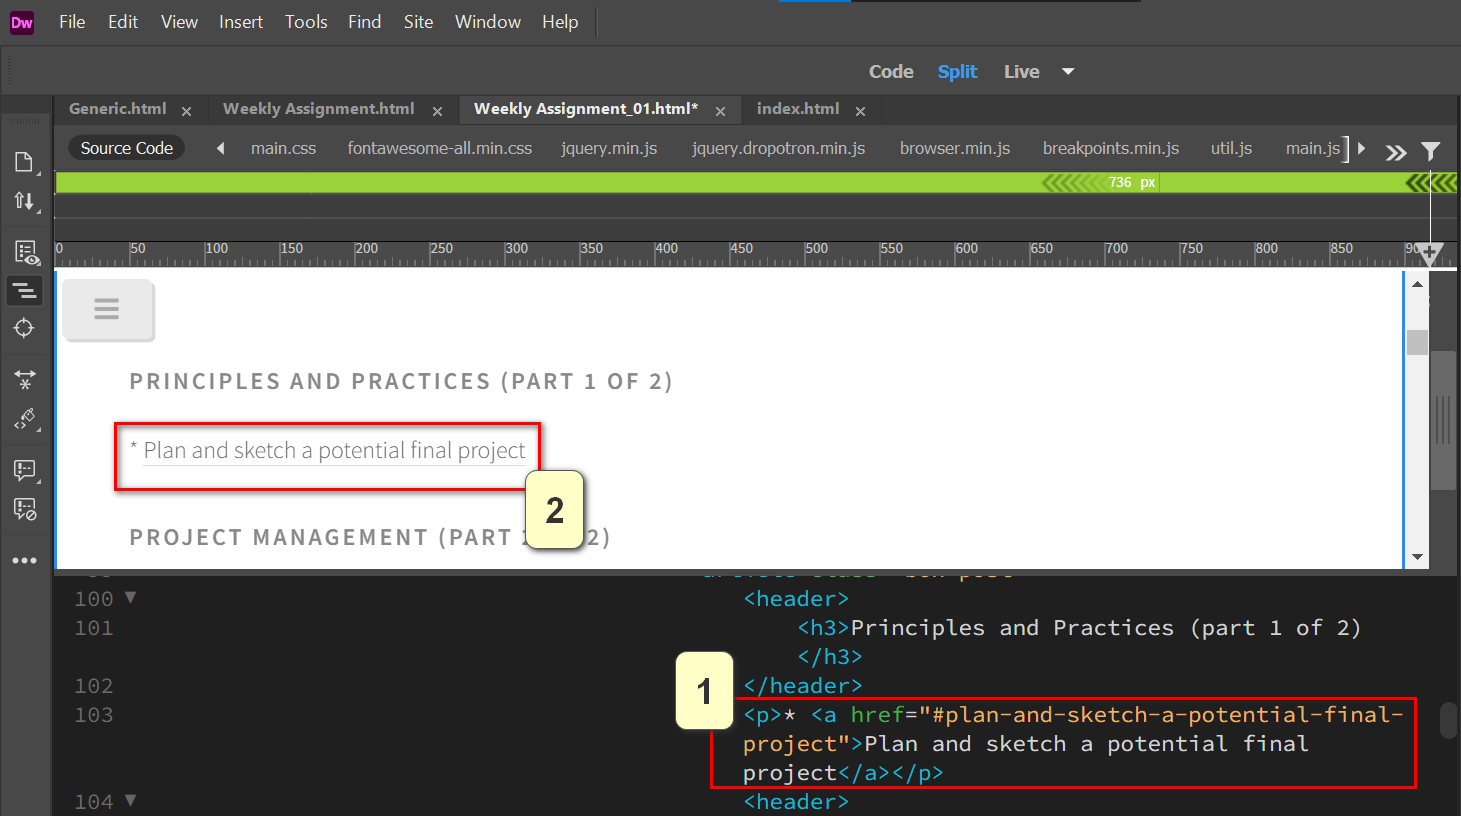
1. Add a link that reference to the header.
2. Make sure that the header is underlined as shown.
1. Ensure that the script comprises the link that you have added in the previous action.
Problem 3 - Request more tiles on the template
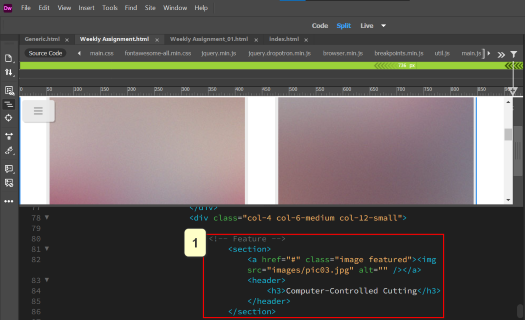
1. After checking through the script, I am assured that this block of codes is representing the command to add a new tiles. You need to update reference link to the topic, the corresponding image that you want to show for the topic, and the header of the topic.