Week 05 - 3D Scanning and Printing

Group Assignment:
• Test the design rules for your 3D printer(s)
Testing the design rules for our 3D printers
For our Group Assignment, we tested the two most common 3D Printers in our Lab:
• Bambu Lab X1C
• Prusa MK4 (Original)
Design Rules to test
Below are the tests that we decided to perform to understand the design rules of our 3D Printers:
1. Angle test
2. Overhang test
3. Bridging test
4. Wall thickness test
5. Dimension test
6. Speed test
7. Surface finish test
8. Infill test
9. Clearance Test.
Test Findings
Angle Test and Overhang Test
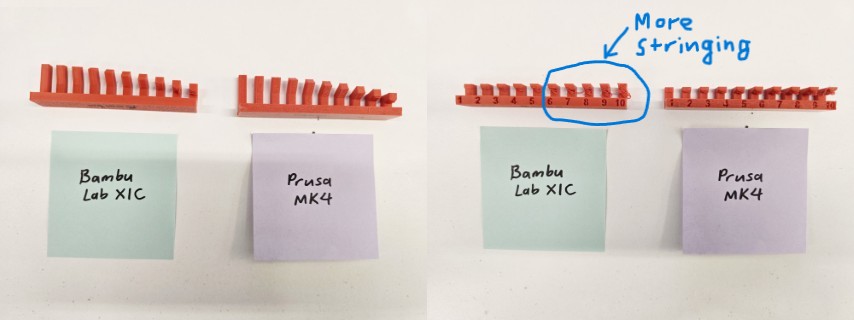
The purpose of these tests is to see how overhanging features will print without supports.
For the angle test, for both 3D printers, decent results can be achieved for features up to 20 degrees angle. Smaller angles (0-10 degree) still manage to print, but there is noticeable stringing. For the overhang test, on a scale from 1 to 10, with 1 being the shortest 90-degree overhang, the test shows that at 2 on the scale, the stringing effect is already noticeable and gets worse as the 90-degree overhang lengthens towards 10 on the scale. Head-to-head, the Prusa MK4 performs better than the Bambu Lab X1C for this test, with less noticeable stringing without supports.
Bridging Test
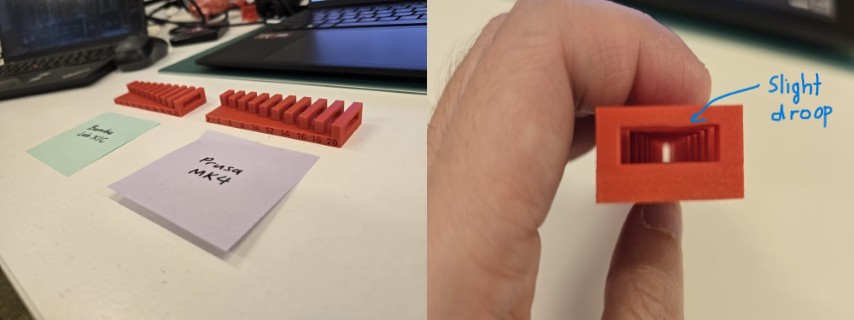
The bridging test is used to determine the width of gap that can be bridged without any supports. This is done by having the 3D printer head move and extrude fast enough so that the filament bridges from one pillar to another, somewhat like a spider weaving a web. Surprisingly, we do not see any stringing at all for both 3D printers throughout the scale from 2 to 20. You can see a very slight droop under the bridge when examining the 3D prints up close, but it is barely noticeable.
Wall thickness Test
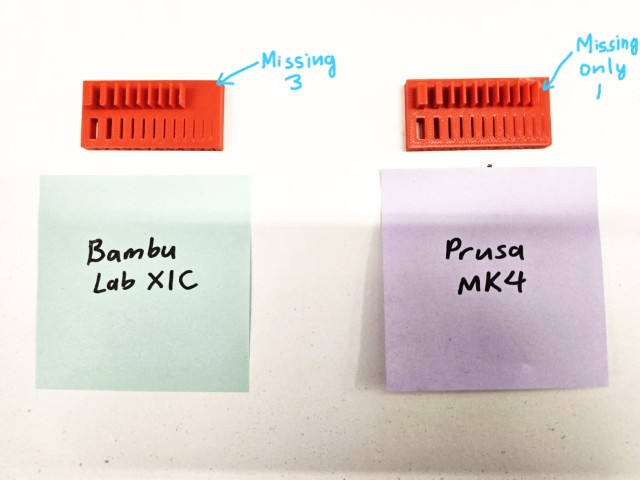
This test is meant to determine the minimum thickness the 3D printer can handle. In other words, when the thickness of the feature is set too thin, it will not appear. For this test, the winner was the Prusa MK4, which managed to print out all the walls, except for the thinnest wall at 0.1mm. The Bambu Lab X1C fails at anything lower than 0.3mm.
Dimension test
This test is straightforward. You print out an object of certain virtual dimensions and then measure the result of the physical print.
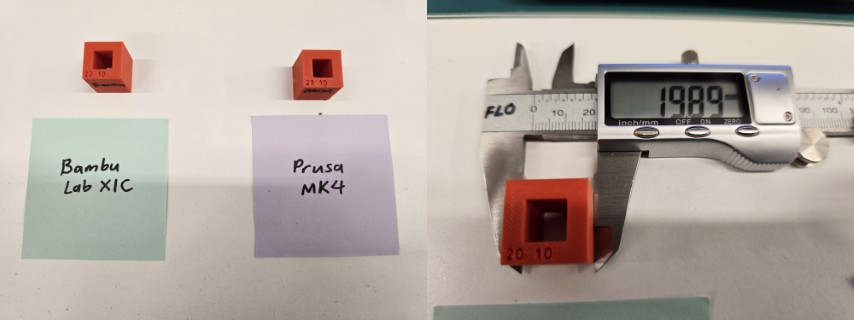
We measured our physical 3D prints with digital vernier callipers and here are our results:
| Dimension (mm) | Bambu Lab X1C | Prusa MK4 |
|---|---|---|
| Outer Dimension – Virtual | 20 | 20 |
| Outer Dimension – Physical | 19.90 | 20.02 |
| Inner Dimension – Virtual | 10 | 10 |
| Inner Dimension – Physical | 9.70 | 9.73 |
From our test, there is a small difference (up to 0.3mm) between the virtual and physical dimensions of the object.
Speed test
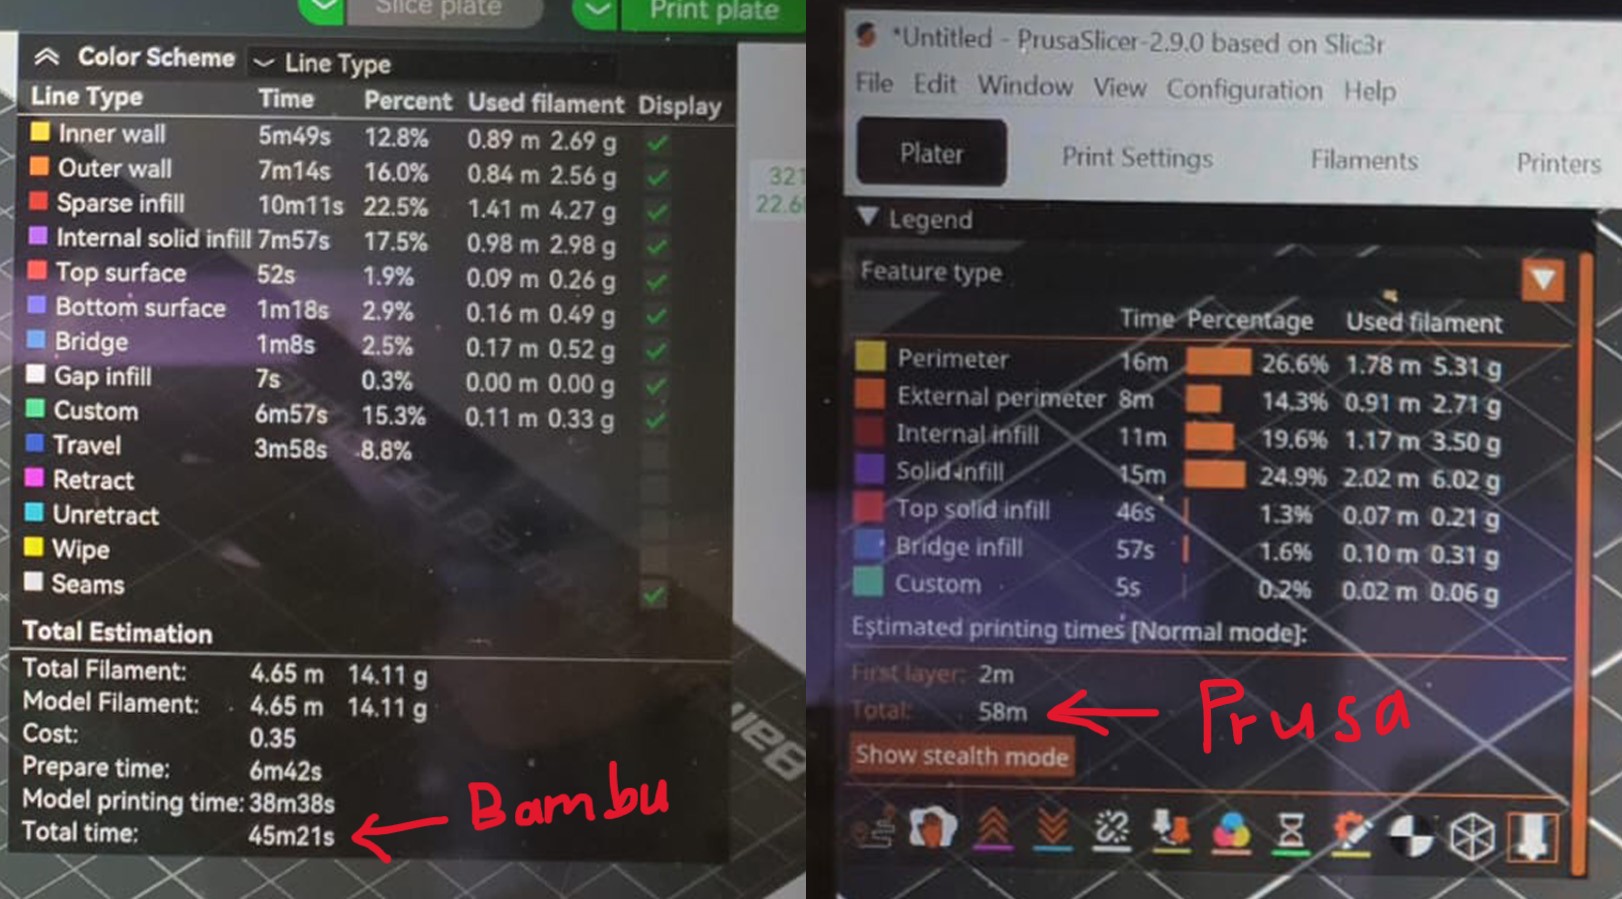
This test is to determine which 3D printer is faster, with the same settings applied. We performed this test on our surface finish test 3D prints, and the Bambu was the faster 3D printer.
Surface finish test
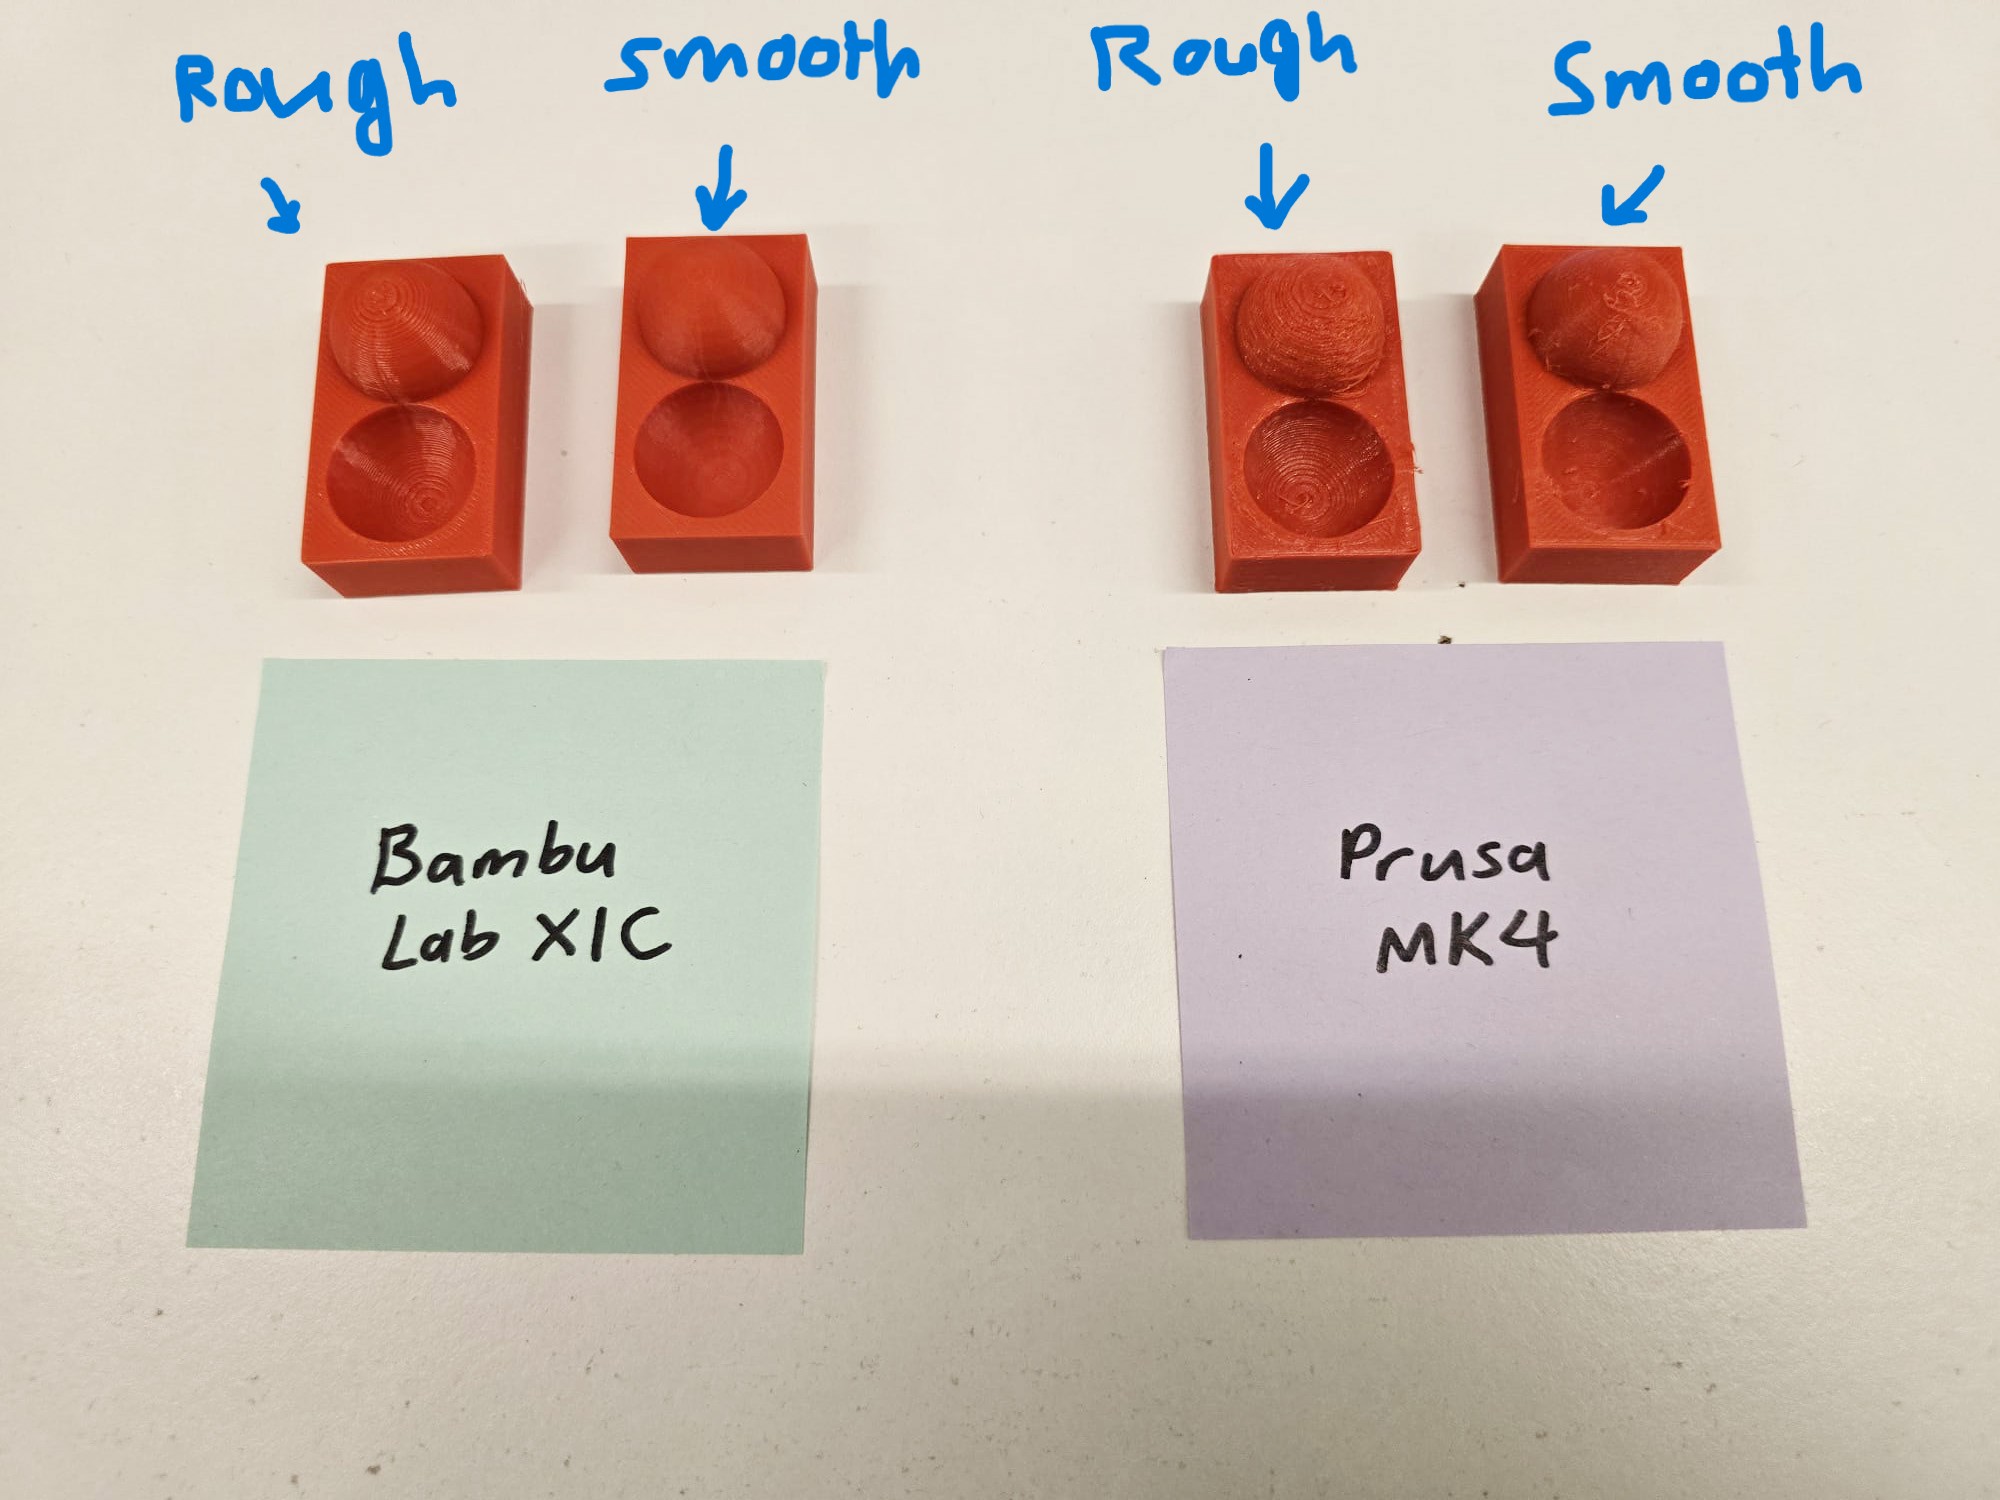
As FDM 3D printers build layer by layer, smaller layer heights should result in smoother surface finishes. This can be seen in our print results. The smaller the layer height (more layers), the smoother the print was. This effect is more pronounced towards the top of the convex surface, and the bottom of the concave surface.
Infill test
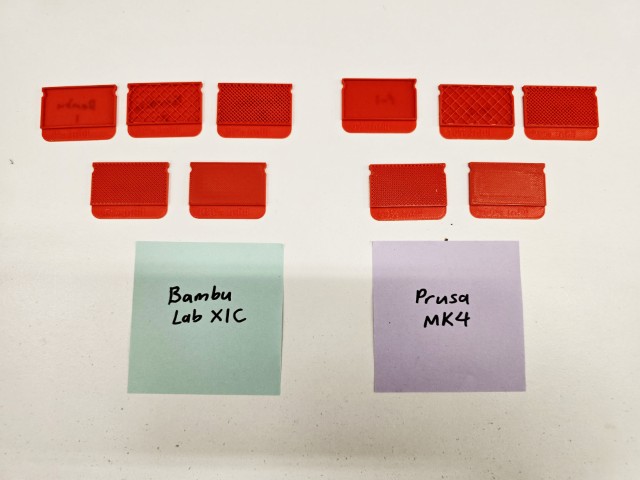
For this test, we printed out 5 pieces of varying infill density and then tested their strength by trying to bend the pieces. The higher the infill density, the stronger the part (i.e. harder to bend). Both 3D printers produced the same results.
Clearance Test
The intention of the clearance test was to find out how moving joints performed while printed at different clearances. Our results were as follows:
| Clearance (mm) | Bambu Lab X1C | Prusa MK4 |
|---|---|---|
| 0.5 | Loose | Loose |
| 0.35 | Loose | Loose |
| 0.3 | Loose | Loose |
| 0.25 | OK | OK |
| 0.2 | Ok but stiffer than 0.25 | Completely fused |
| 0.15 | Completely fused | Completely fused |
| 0.1 | Completely fused | Completely fused |
We found that the optimal clearance was 0.25mm, the only difference was that the Bambu Lab X1C’s joint was still able to turn at 0.2mm clearance, while the Prusa MK4 was completely fused at 0.2mm. This tells us that we need to leave at least 0.2mm clearance in order to have joints that do not fuse together.
Conclusion
Before we started testing the design rules, we assumed that the Bambu Lab X1C was the better 3D printer compared to the Prusa MK4. After our tests, we found that while Bambu Lab X1C was generally faster than the Prusa MK4, both 3D printers produced good prints. We were even surprised to find that the Prusa MK4 won some of these head-to-head tests (such as the wall thickness test). We also observed that by testing these design rules, we understand the capability and limitations of our 3D printers much better. Some insights we gained:
• Overhang Features without Supports - The 3D printers can handle overhang features without supports, provided that the overhang angles are not too extreme (not below 20 degrees angle).
• Clearance – We should have at least 0.2mm clearance between joints that are intended to move so that they do not fuse together.
• Dimensions – Just something for us to note: There is a slight difference between the virtual and real-world dimensions. In most cases, this difference is negligible.
