Group Assignment
Compare as many tool options as possible Click on this link
Individual Assignment
write an application that interfaces a user with an input &/or output device that you made
This week was completely new for me. Every week feels like a wild card – I learn by doing, and it takes time to figure out what works best. At first, it felt really difficult, but later it became manageable. I started the week working with the Node-RED application, but I couldn’t succeed because there weren’t enough tutorials or the right resources. So, in the later part of the week, I switched to using MIT App Inventor to send DHT sensor data to an app. I followed many YouTube tutorials to understand how to connect and program everything. I faced a lot of challenges along the way.
My journey started with creating a Firebase database account. After setting it up, I moved on to using MIT App Inventor. Then, I shifted to modifying the code in the Arduino IDE to connect it with the Firebase account.
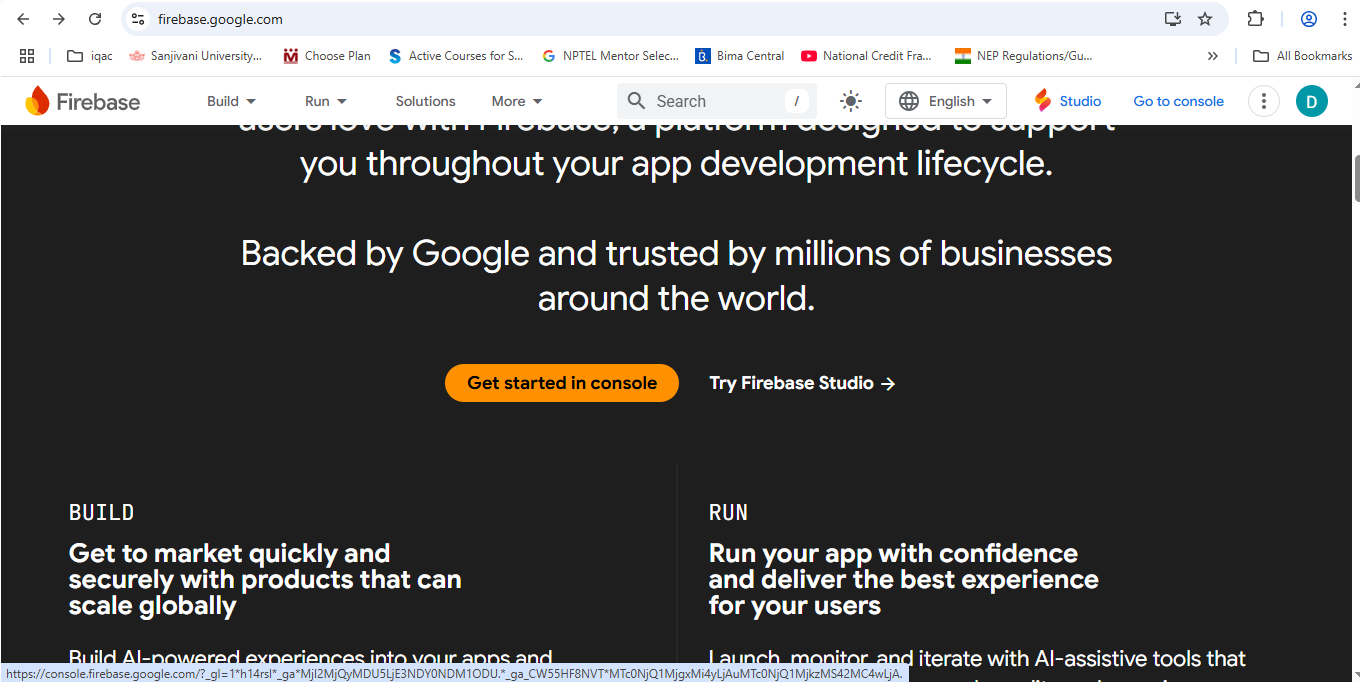
Open Firebase account and later switched to open the Open Firebase Console
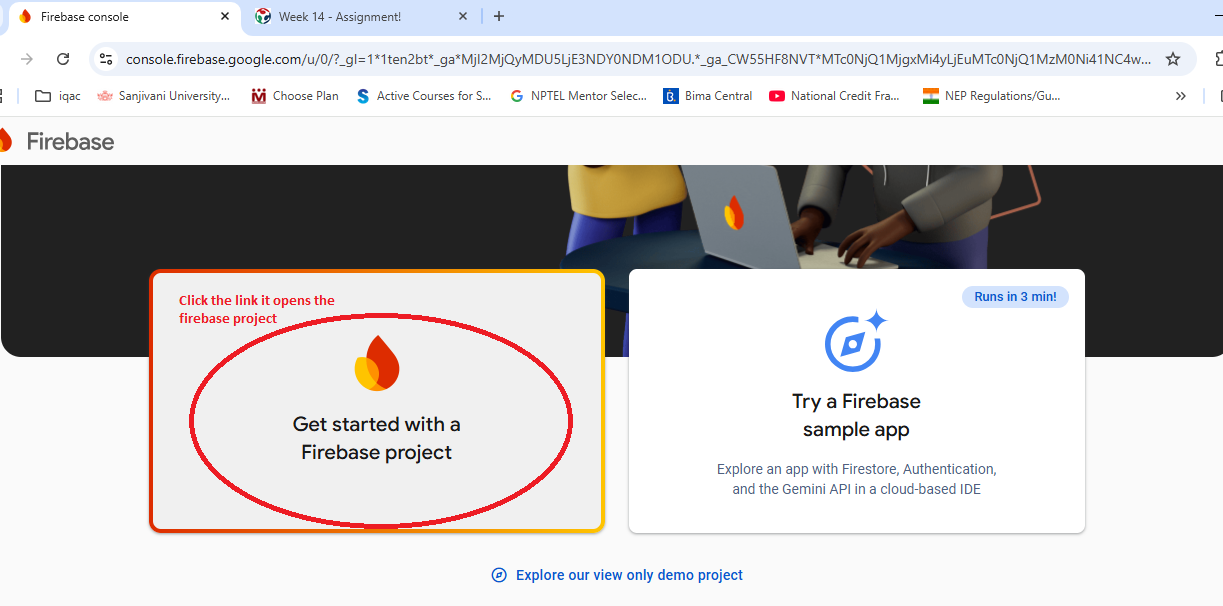
After get entered in to console, select the option of choose the firebase project
After selecting the above option, windiws goes to create project options
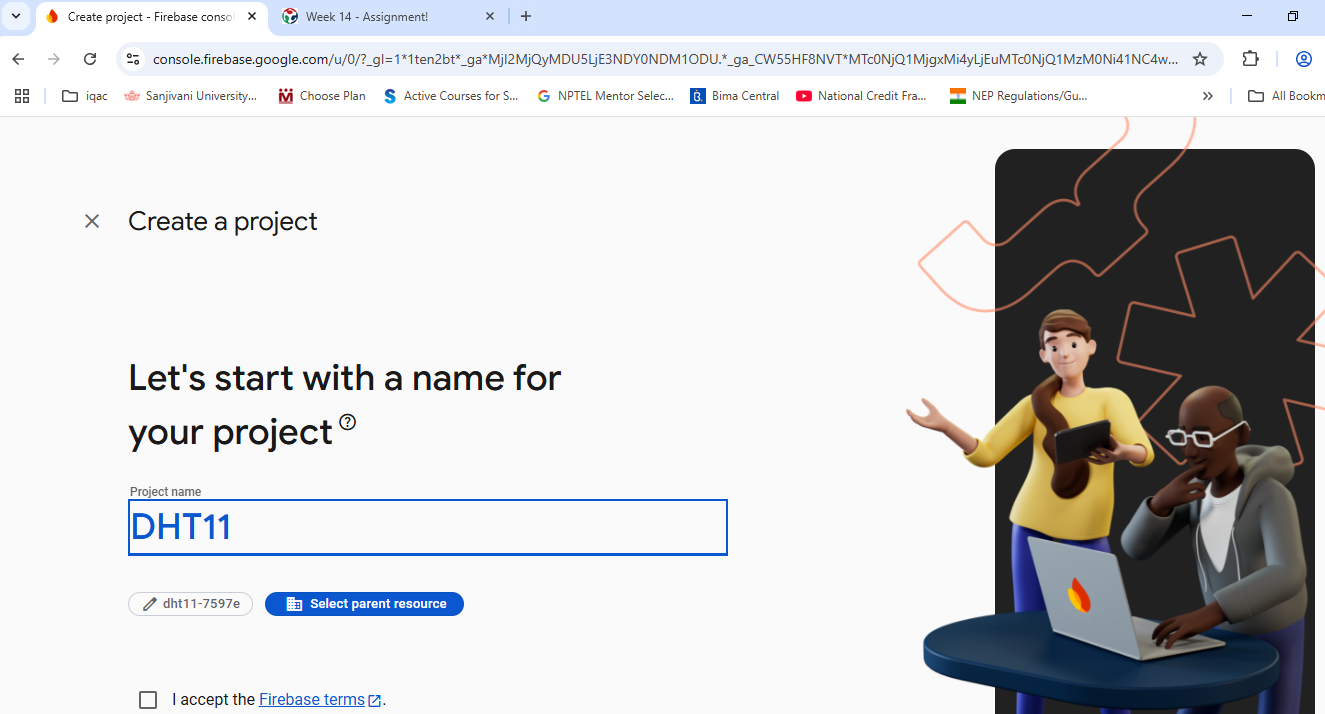
After that i m given the name for the project
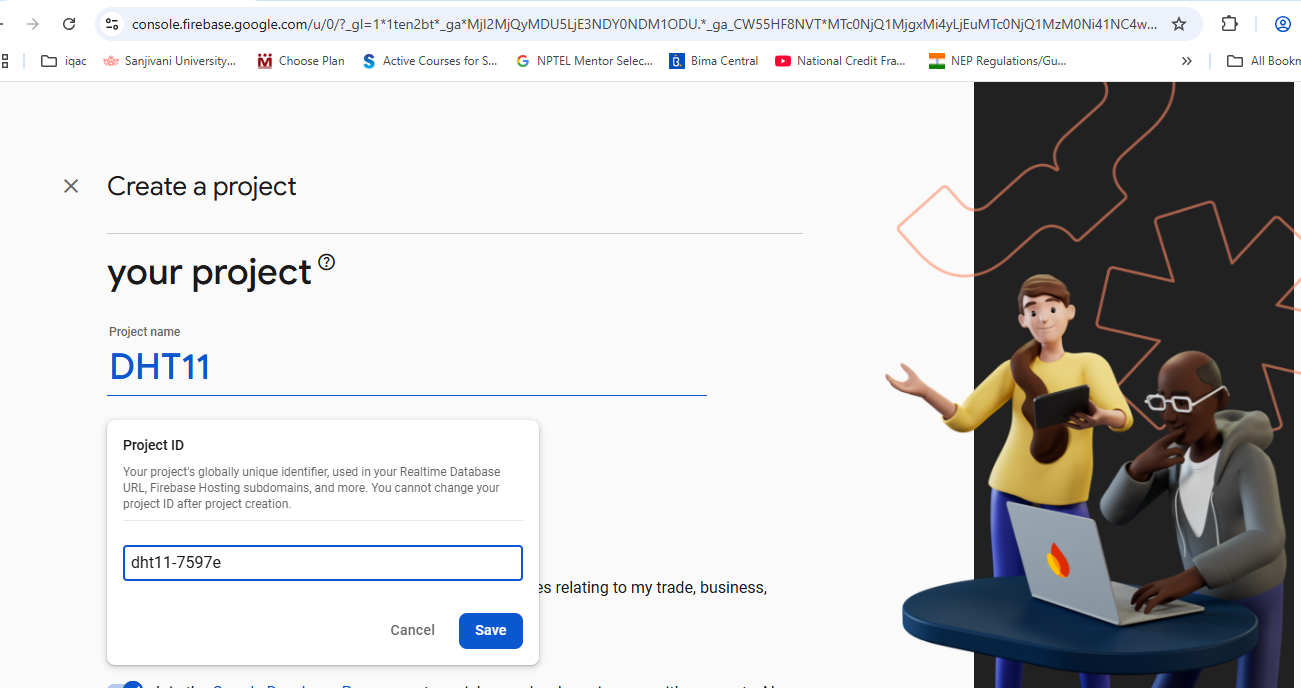
After name , project id is created defaultly in the login
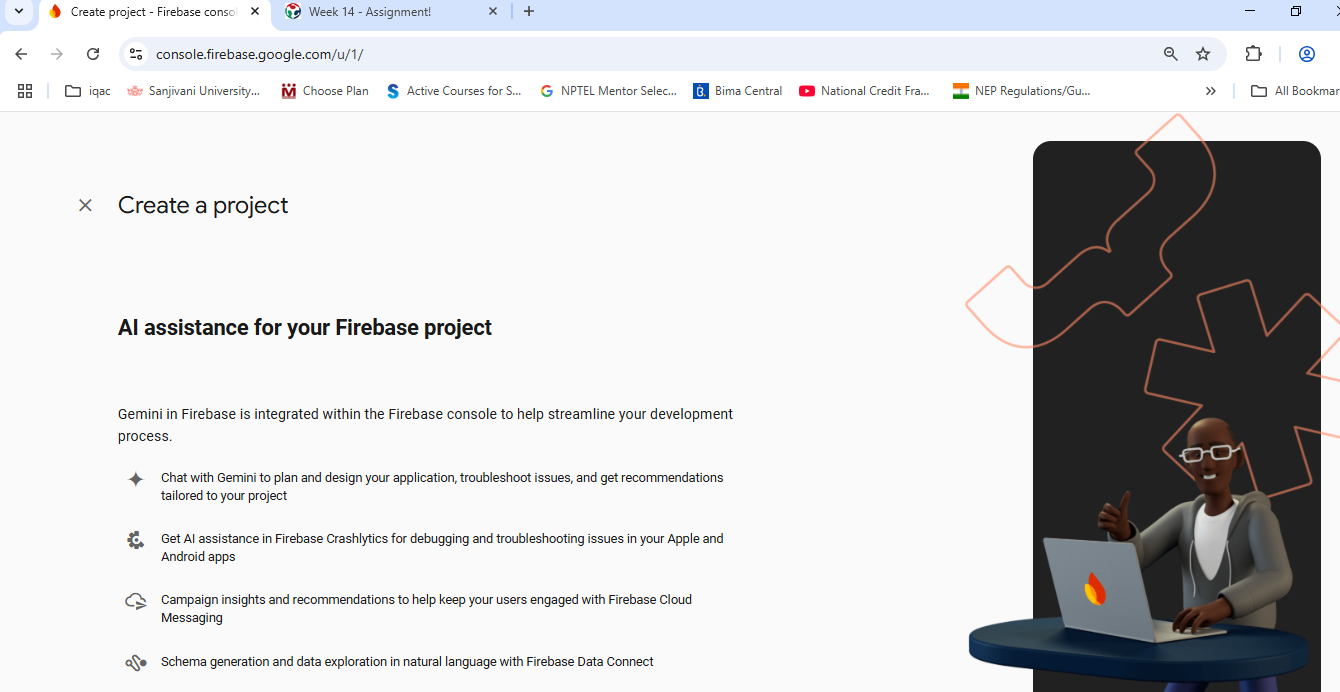
Default option coming across the section as proceed for the AI Assistant, i have enabled and click on continue
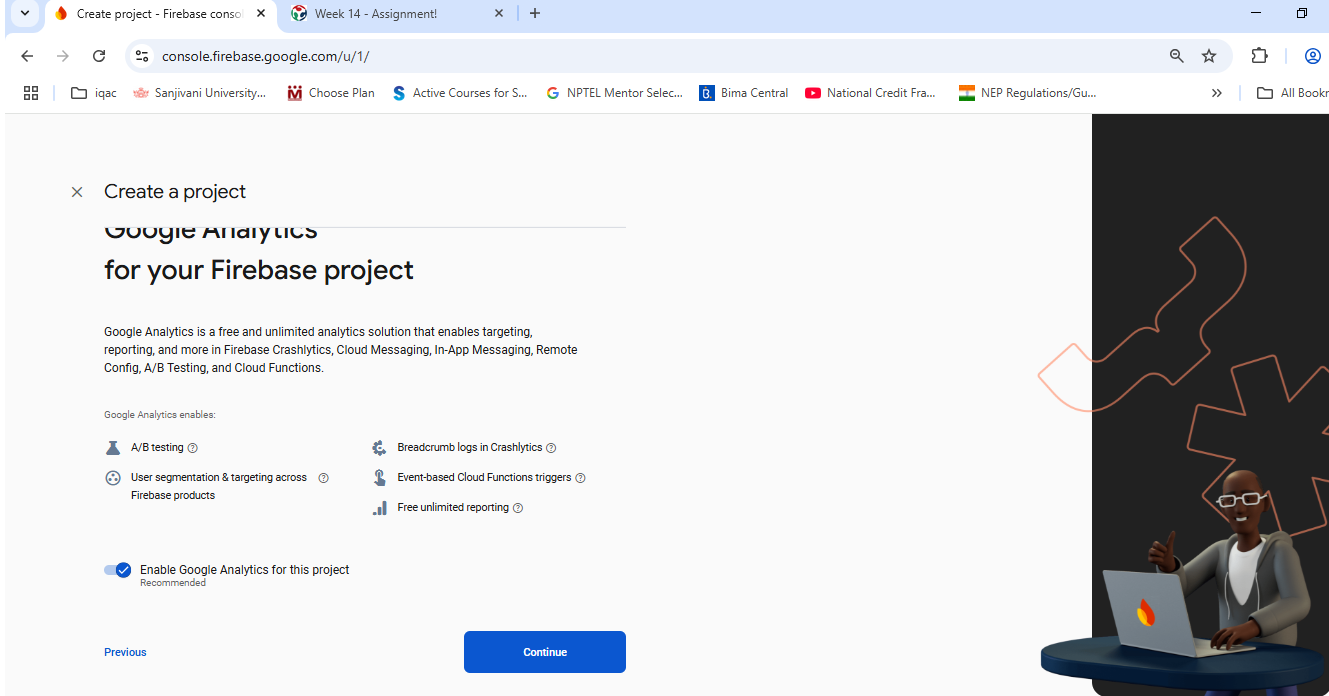
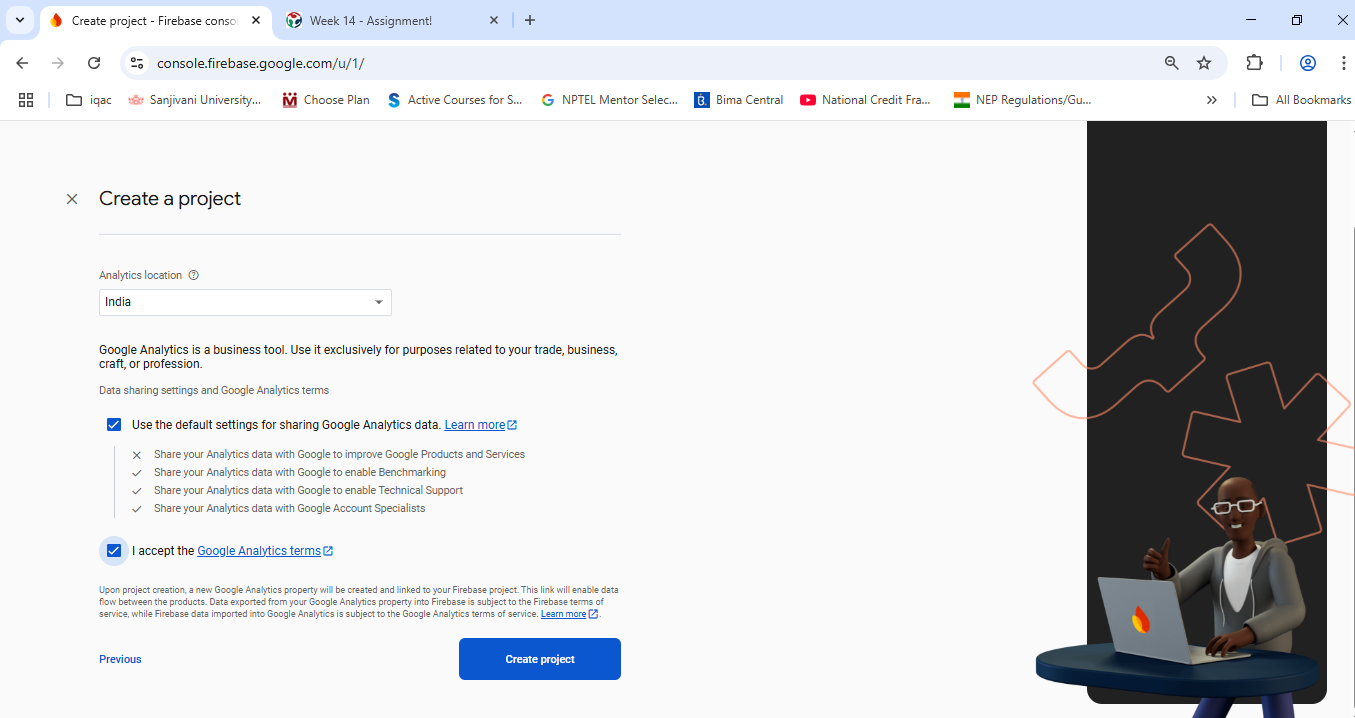
Next choose the location , i have selected India for analysis, accept the terms and conditions and create the project
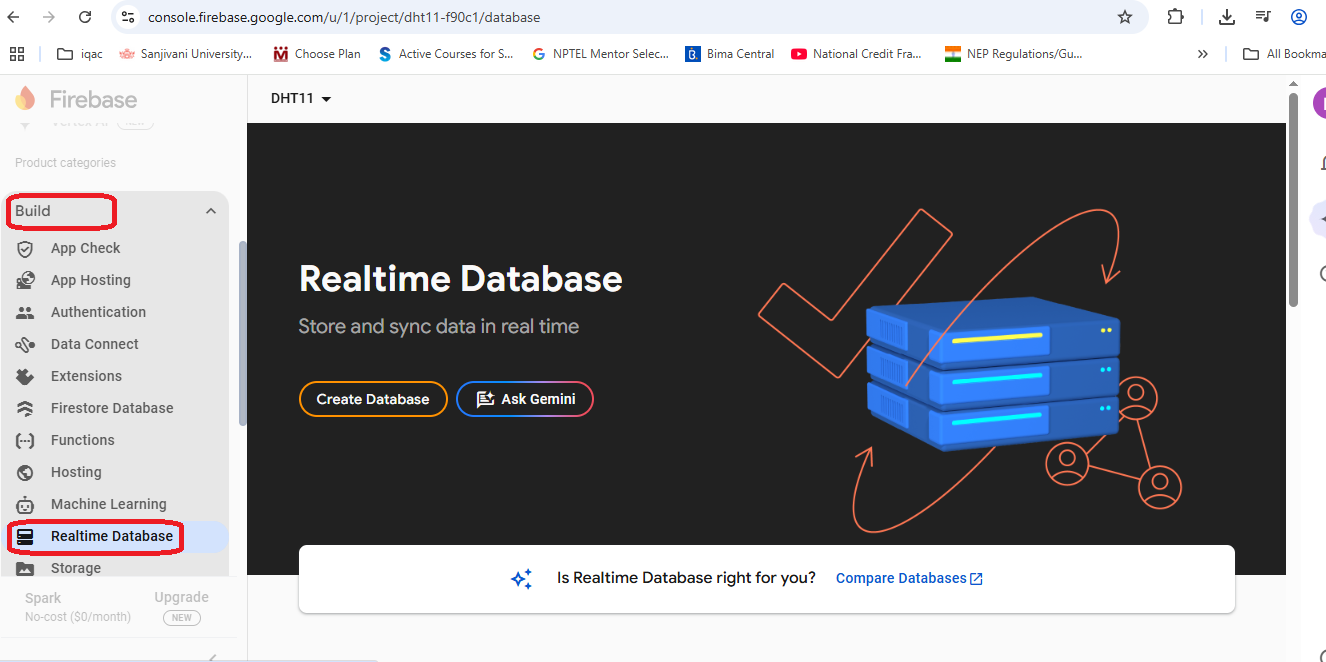
After entering to console on the left side few options are available, i have selected the Build Option, under that click on realtime database
After entering to the realtime database , i clicked on setup database, as shown in image, i changed false to true and enabled the option
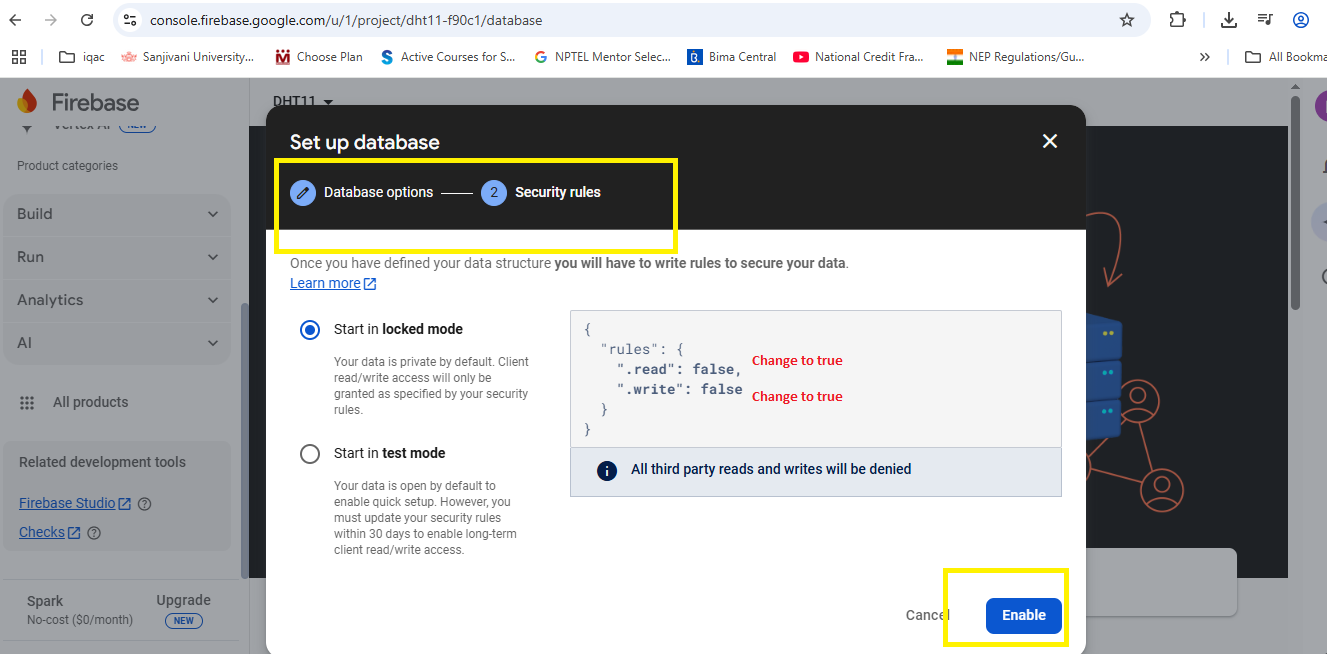
once the option is enabled, realtime url is enabled and shown in the login shown below

Again go to back to the " build" tab, select the authentication and entered inn to the options
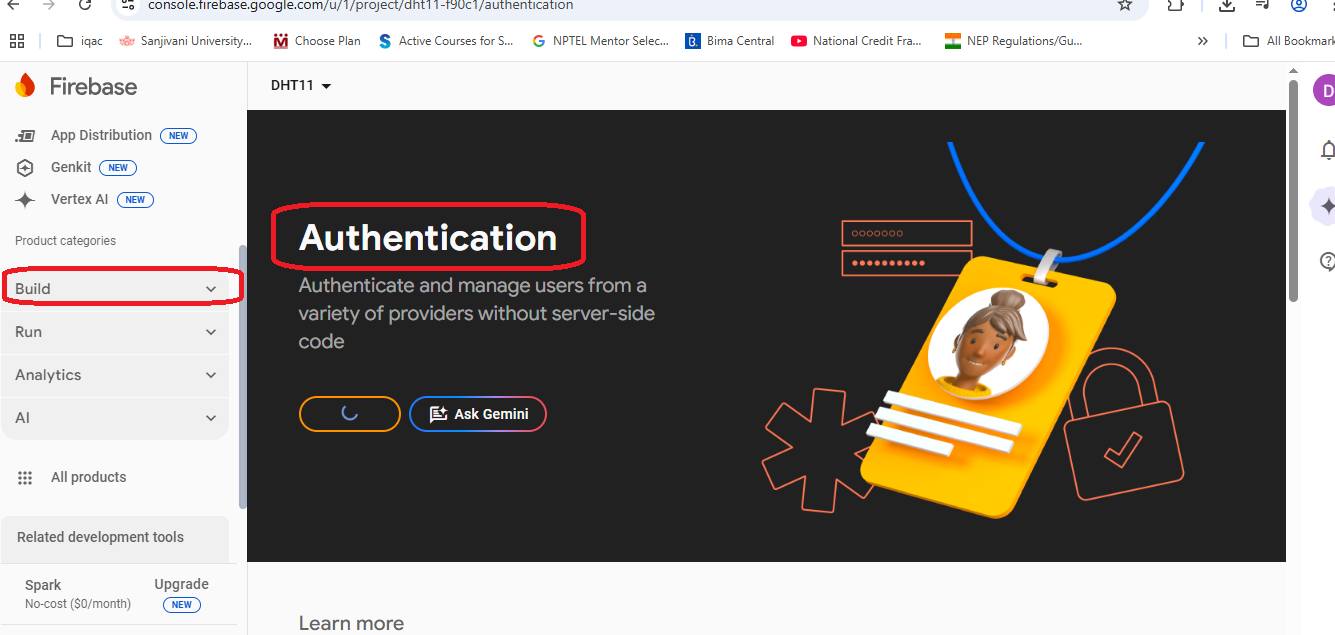
Changd the sign in option to anonymous
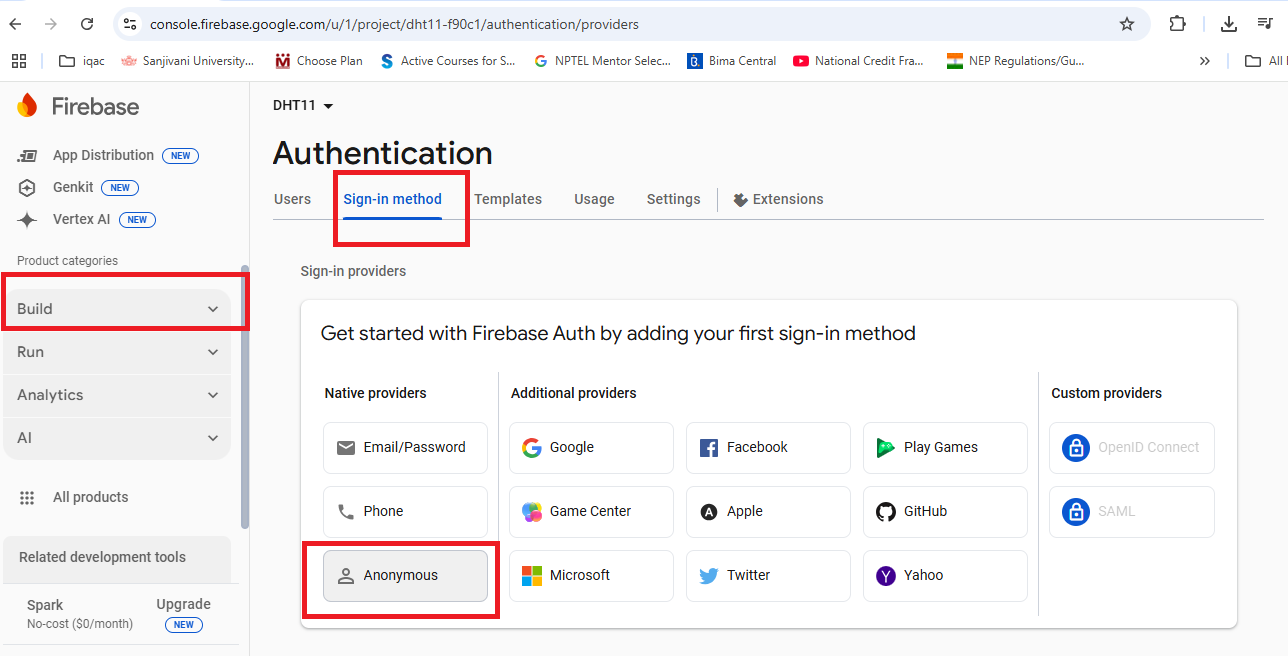
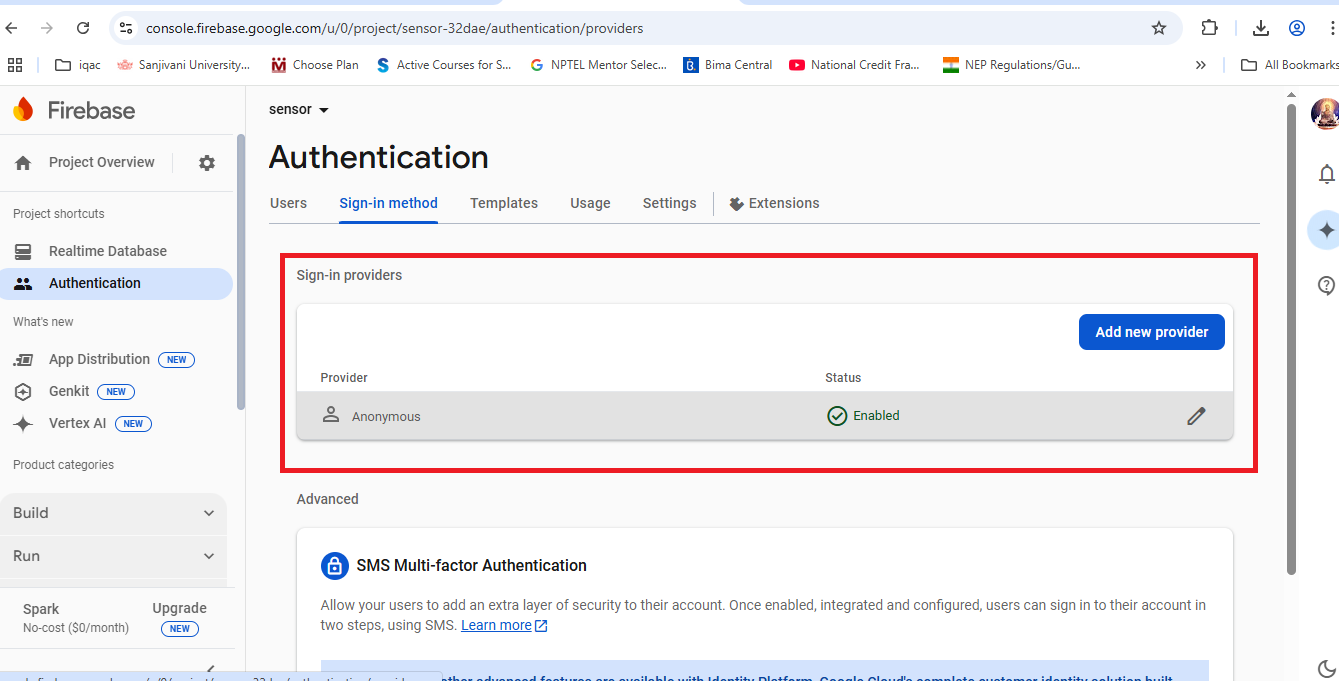
Enabled the option in the window
Ans switched to left top corner " project overview " option, click on the same i may get few options, i have opted the project settings
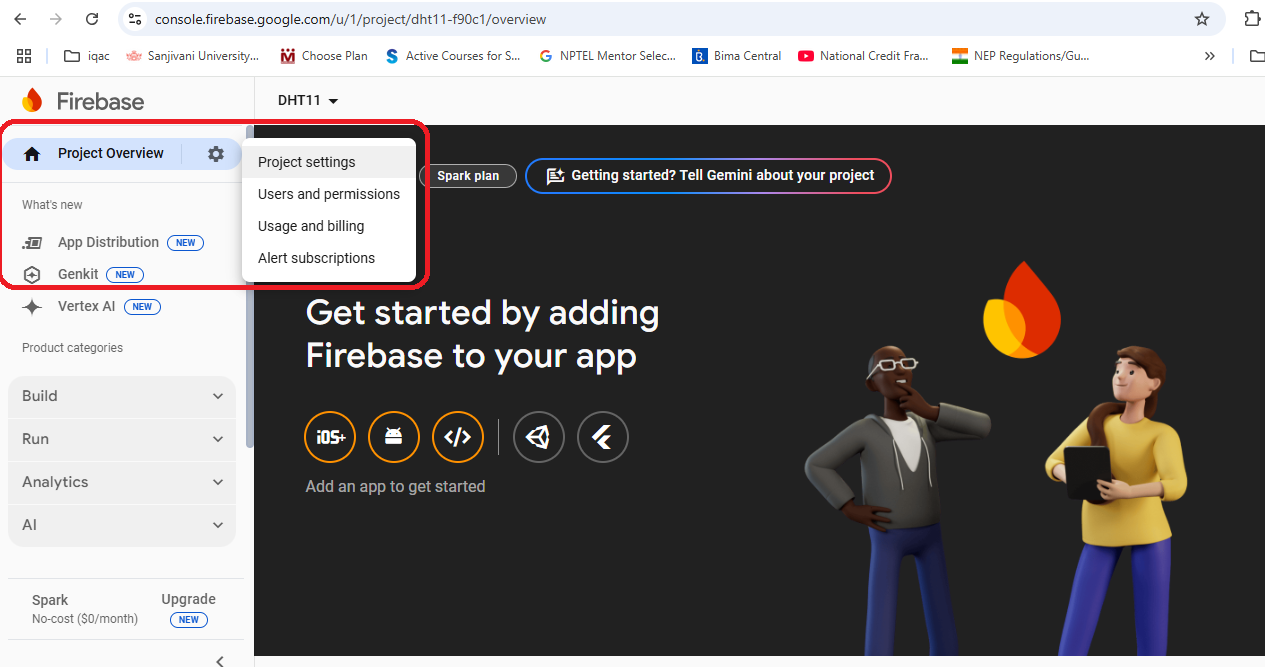
After enntering to setting, click on service accounts and clicked on "firebase Admin SDK"
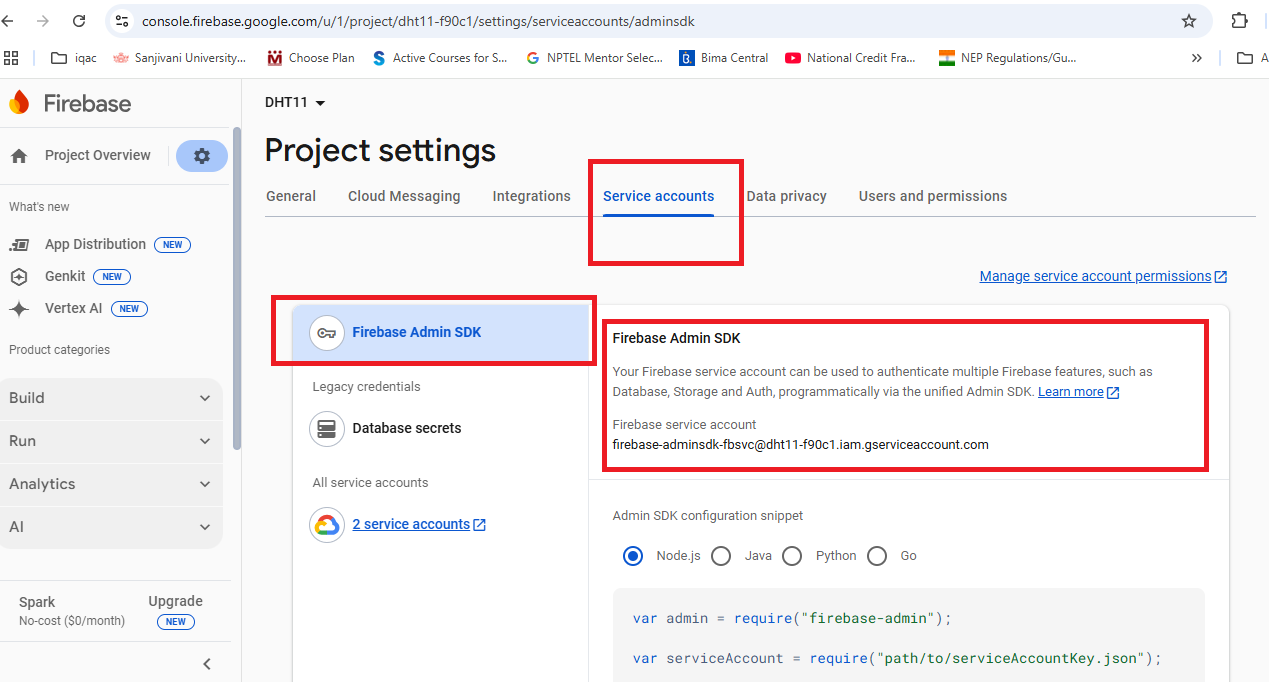
Next I have clicked the option of generate key for api settings in database
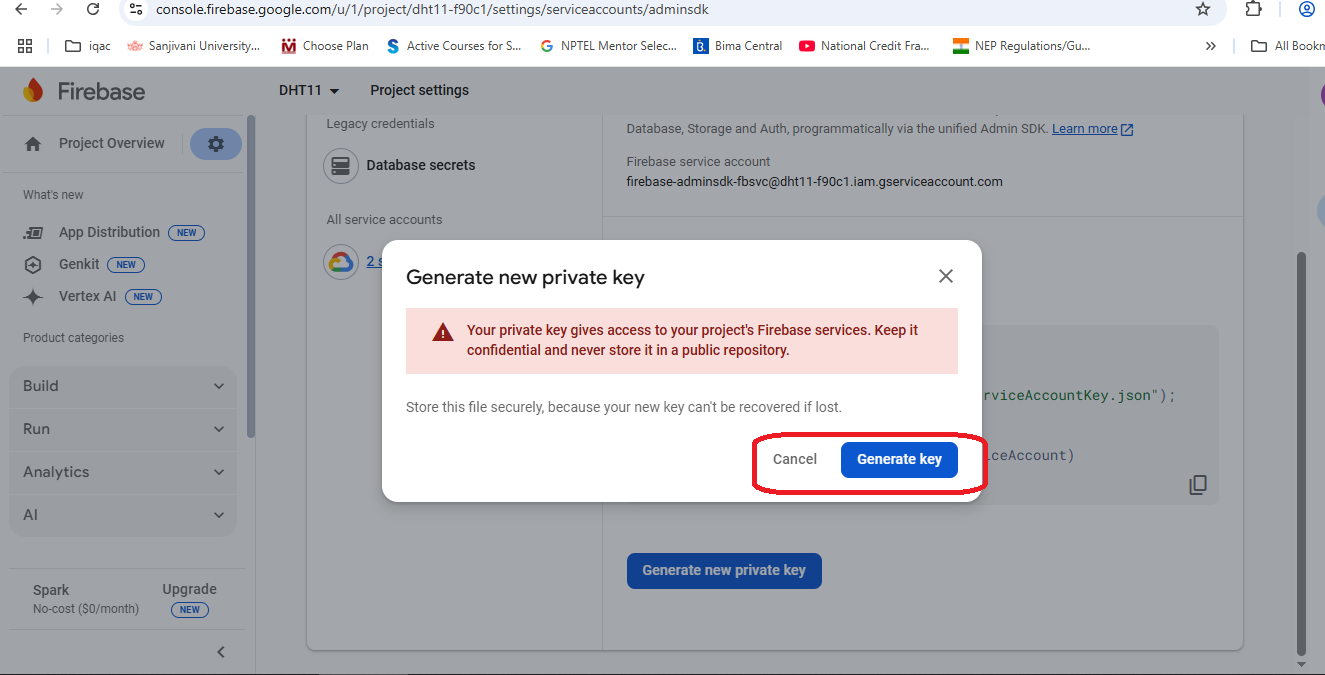
After that API KEY is generated, it shown under the database secrets,
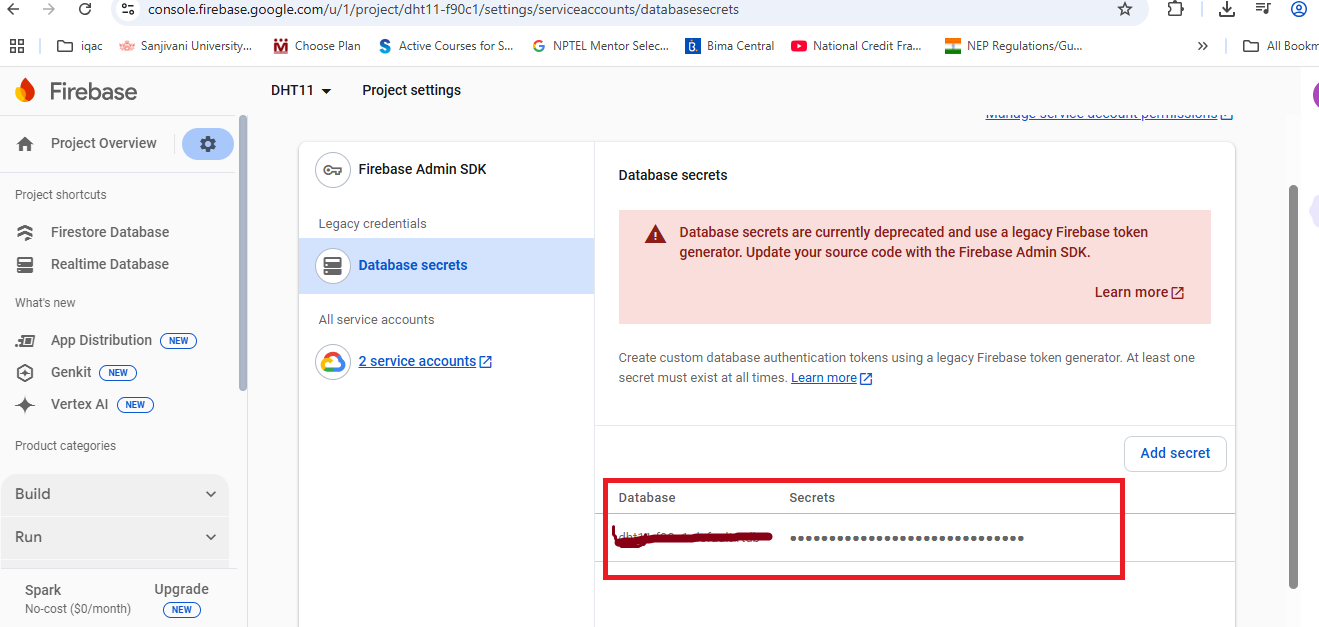
After ensure the setting, I have to use API Key is available in project settings
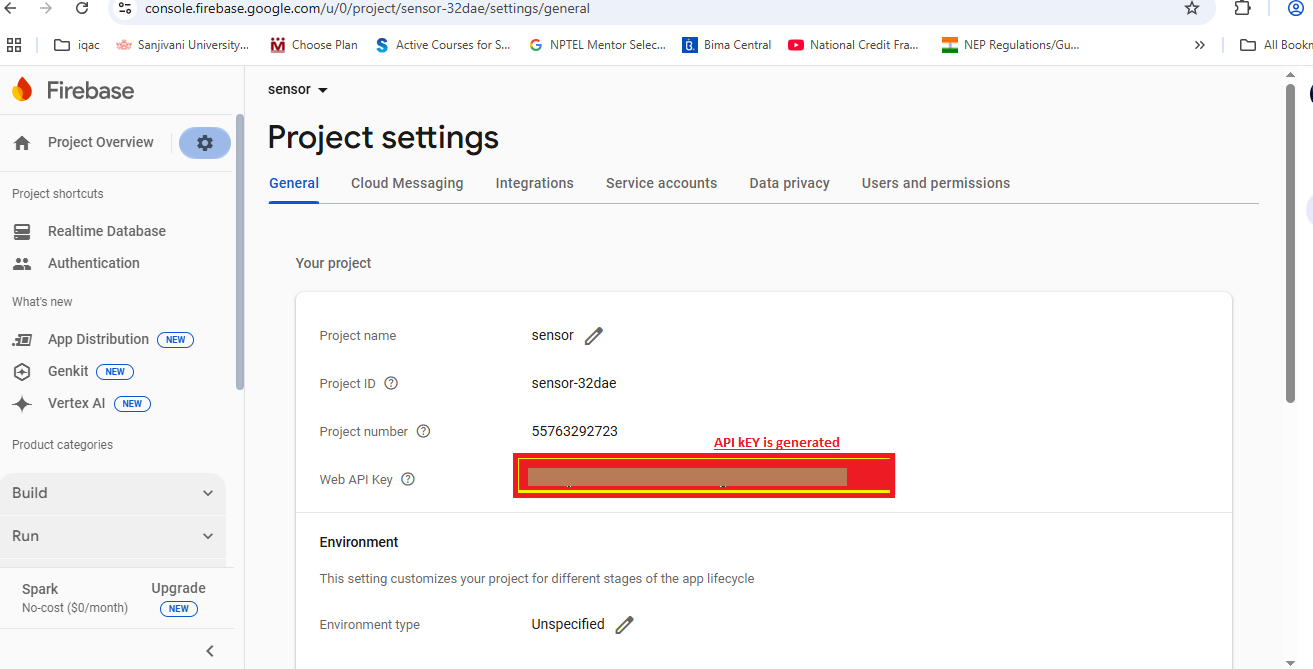
Have to use API Key and Same Url incorporated in the MIT App Inventor as well as in Program. Next i moved to the MIT App creation
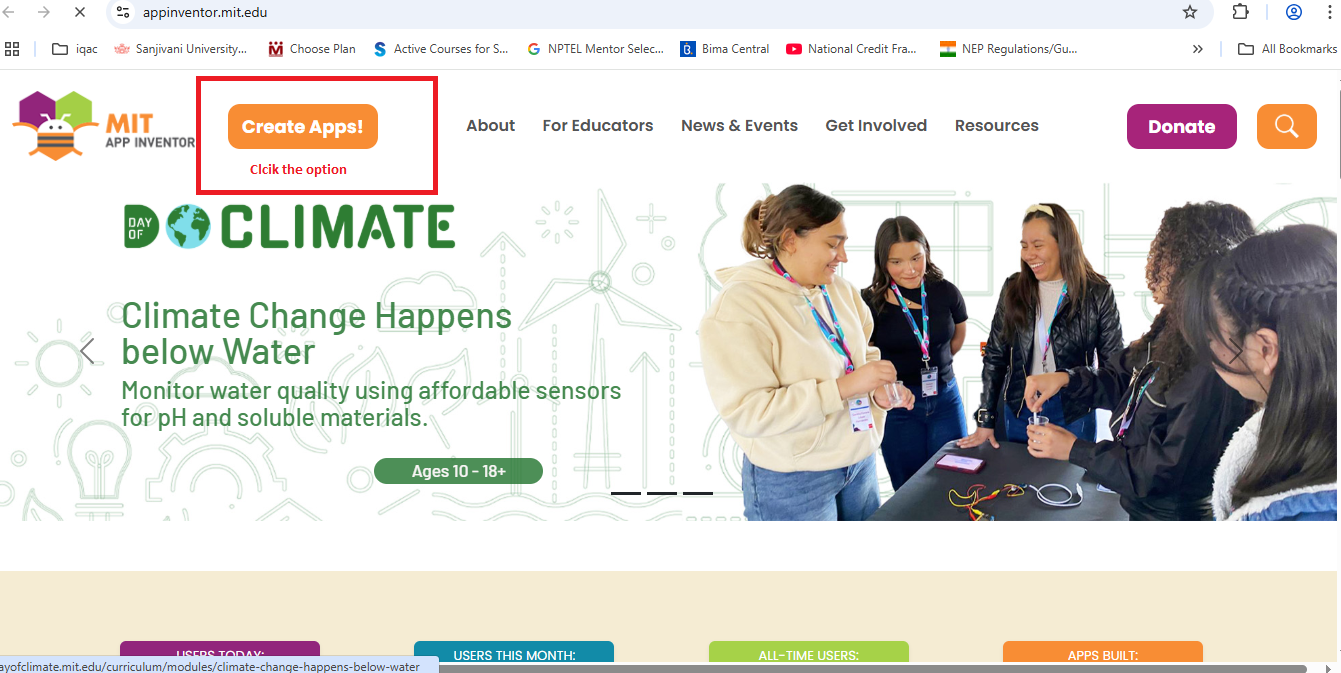
Go to MIT APP and sign up for a free account by click the option of create project
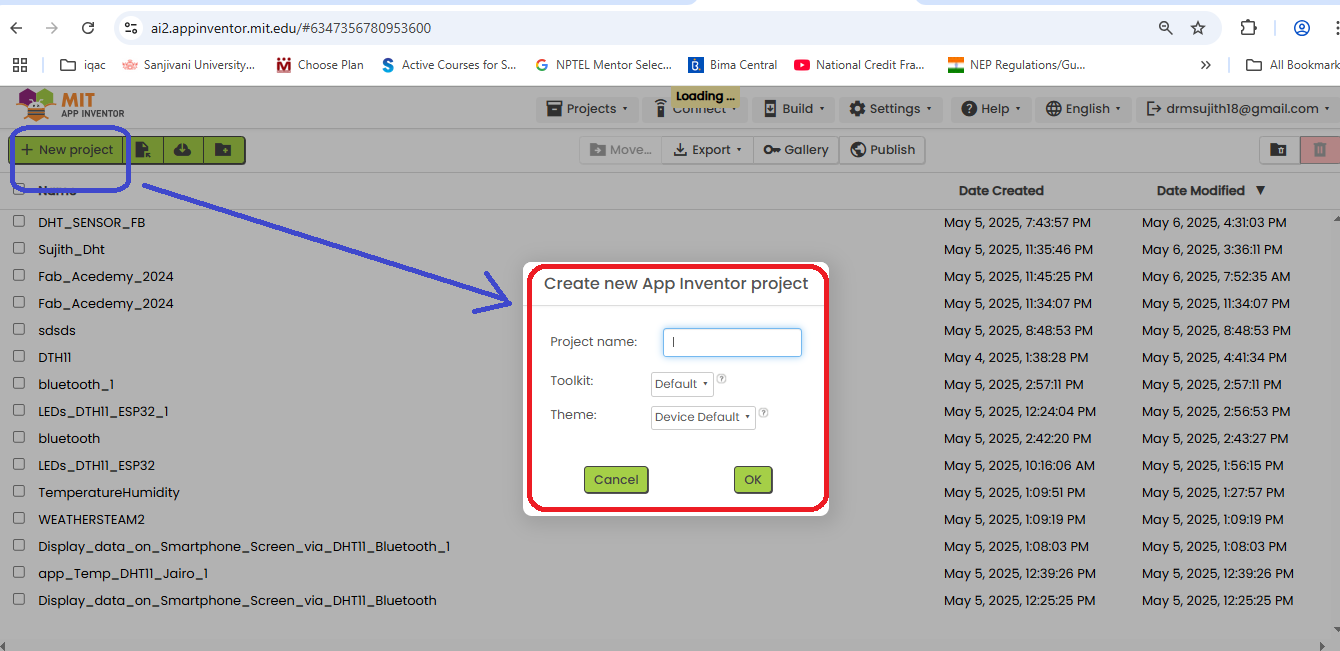
After signing using gmail acccount, it went inside the online account, selected the option of new project, give the project name and get entered with defaut option
In left side of panel i have used two option one is user interface and layout option, in most of the time, i have used horizontal arrangement layout option
under the horizontal arrangement, i fixed the height with piexel and under the width selected the fill parent, it means it occupy the entire width of the screen for the palette
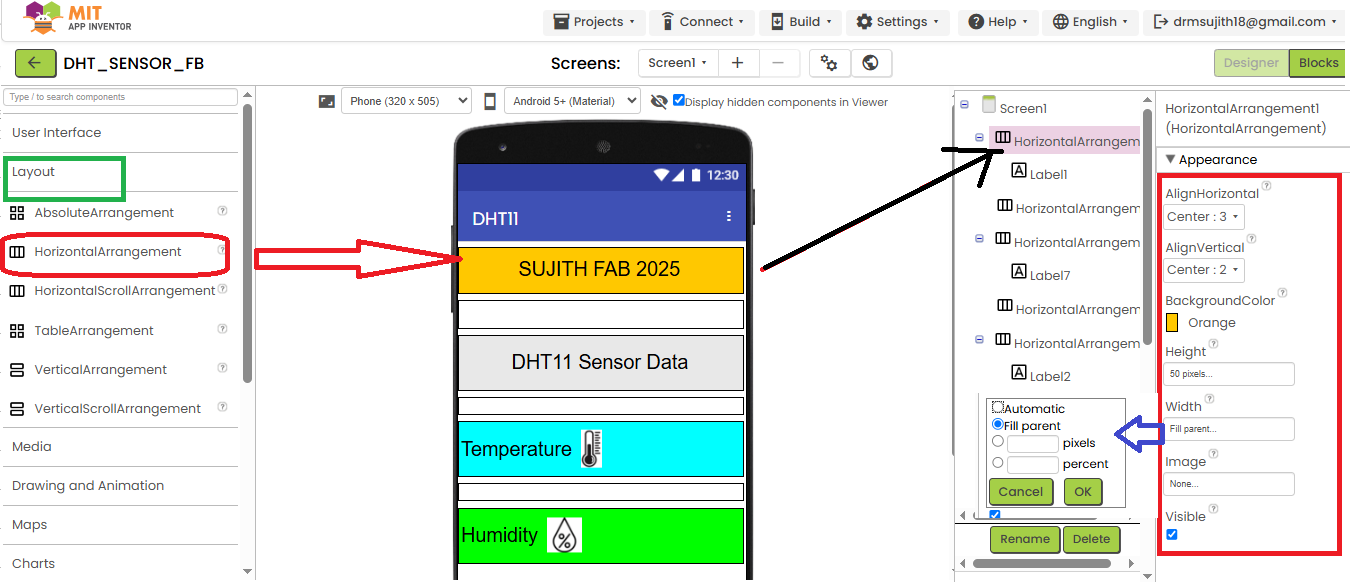
Next i have chose "label" from user interface and inserted in to horizontal arrrangement and renamed to sujith fab 2025
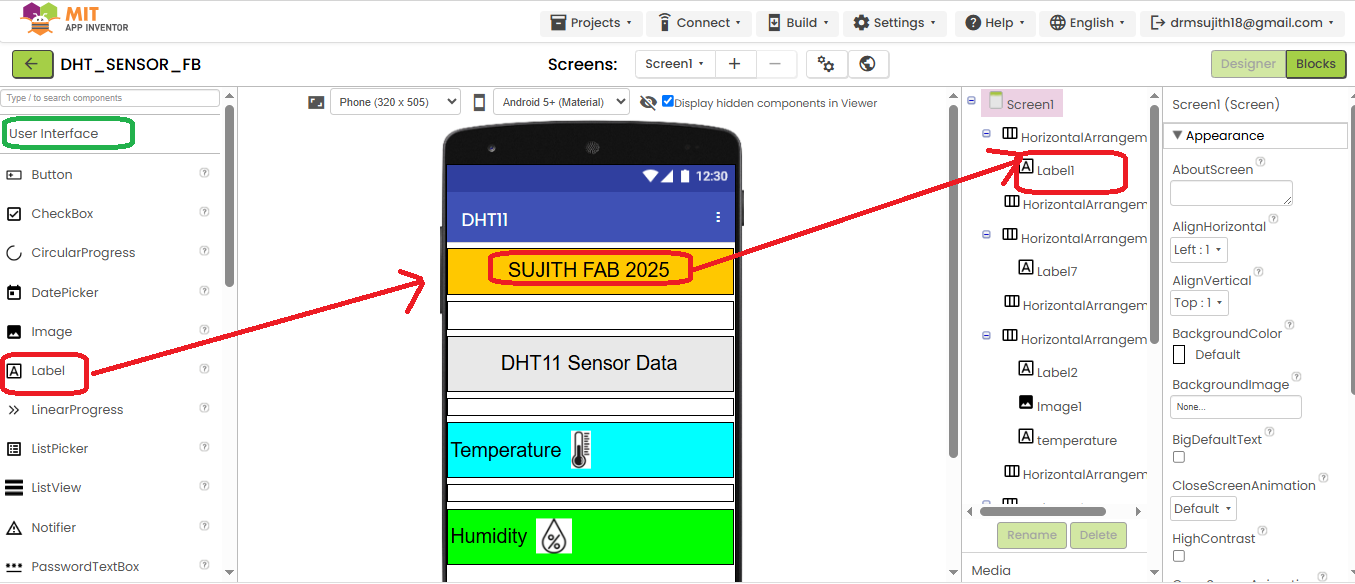
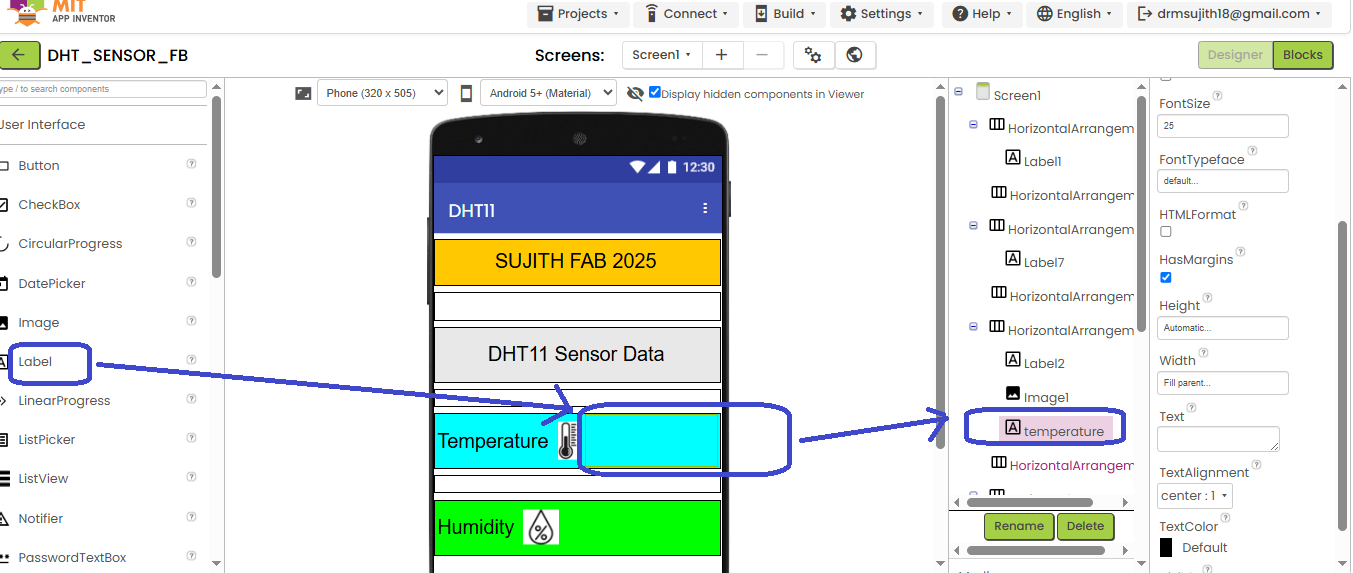
In same manner all option are inserted shown in right side and inserted image through user interface and uploaded the image of temperature to the horizontal arragement

Inserted in the label in the same horizontal arrangemnet of the temperature for the reading display purpose, similarly same option used to create the humidity palette shown in the screen
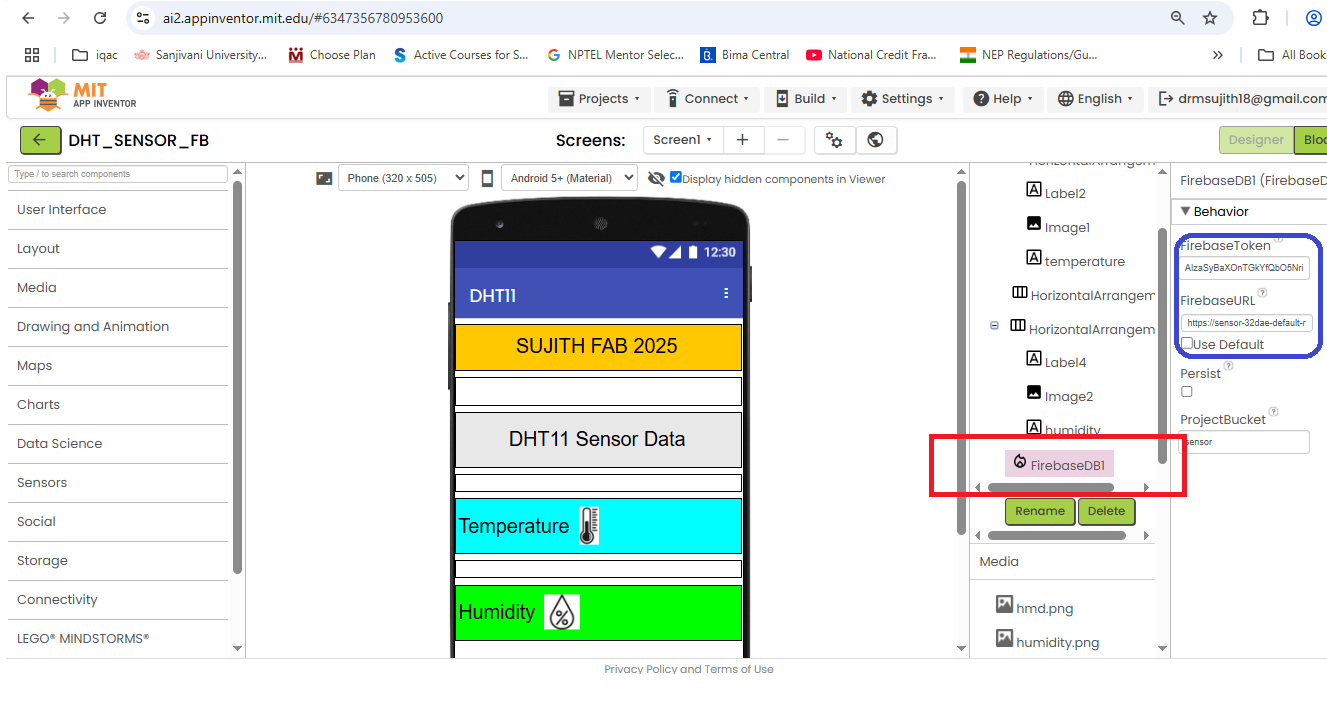
Next, I searched for "FirebaseDB" in the left-side panel. Once it appeared, I dragged it to the bottom of the screen (though it wasn’t fully visible). Then, using the right-side panel, I configured the options by copying the API key and Firebase URL (which were already created) into the token box and Firebase URL field in the MIT App Inventor interface.
Now the Switch the window from designer to blocks to set the logics for MIT APP available in right side top corner shown in image
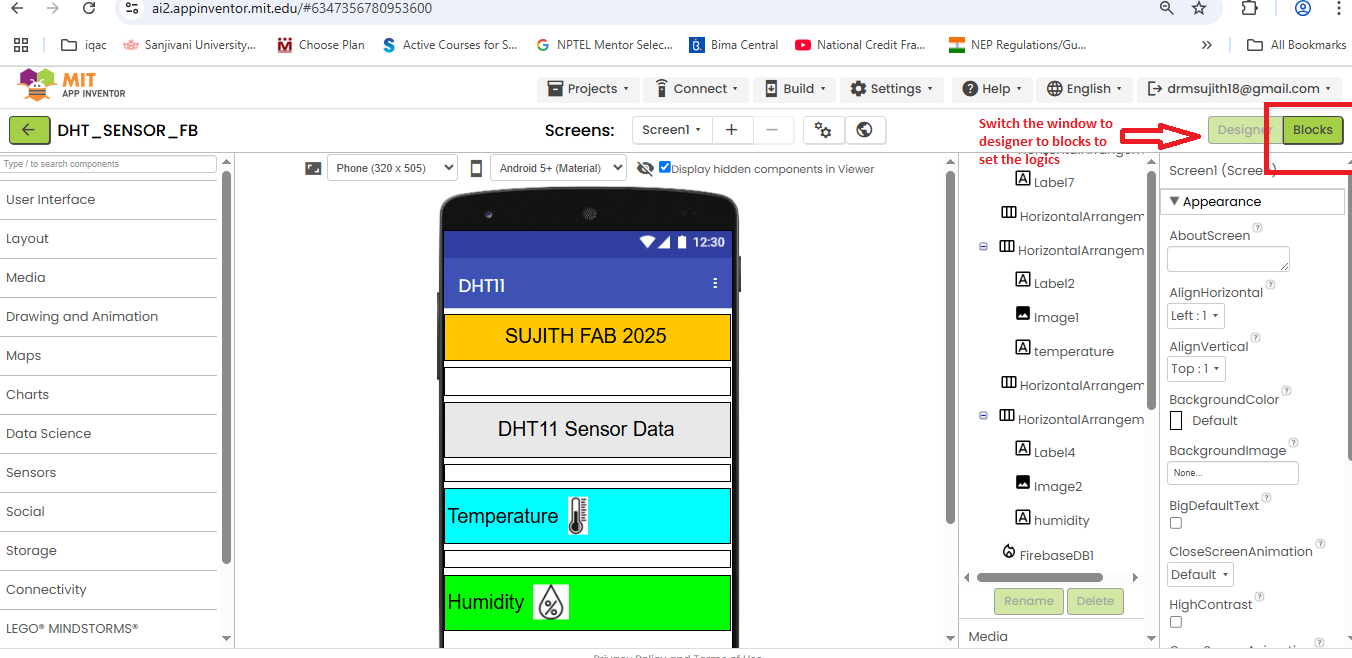
After entering the Blocks window, I used the FirebaseDB and Temperature/Humidity palette options (created earlier) to set up the required logic.
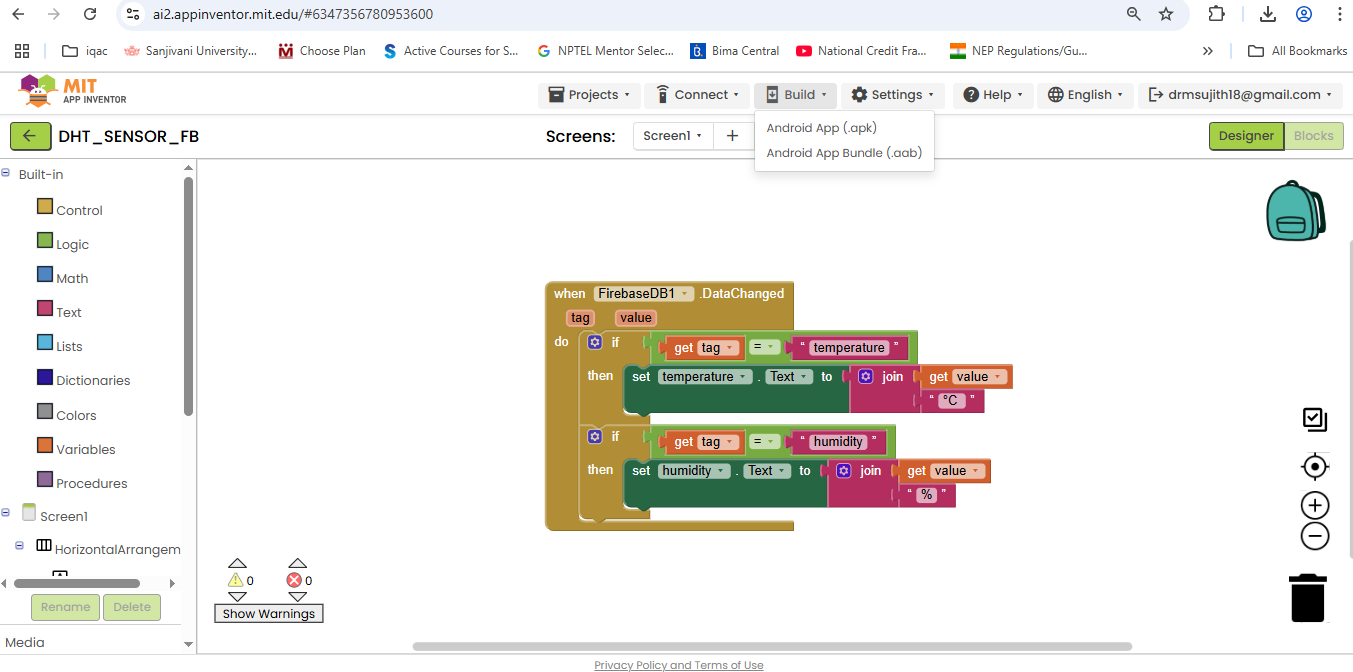
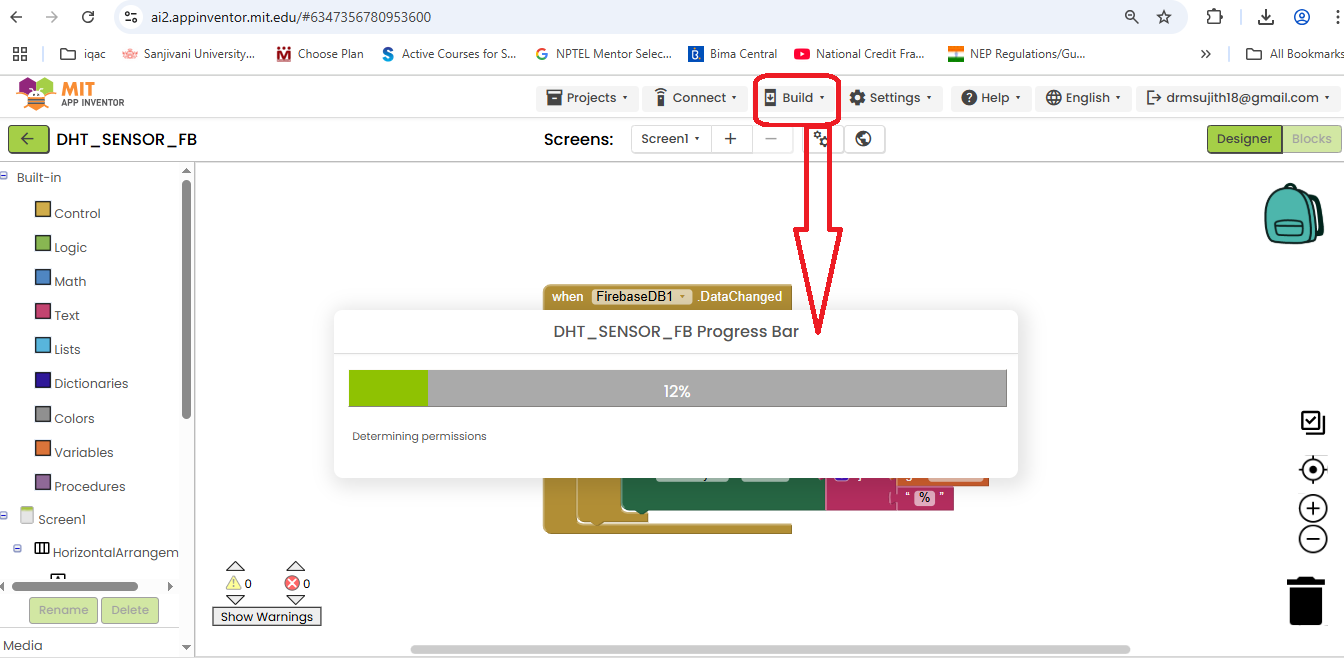
After completing the block logic , select the build option to generate the android app , once clicked on , progress window will show
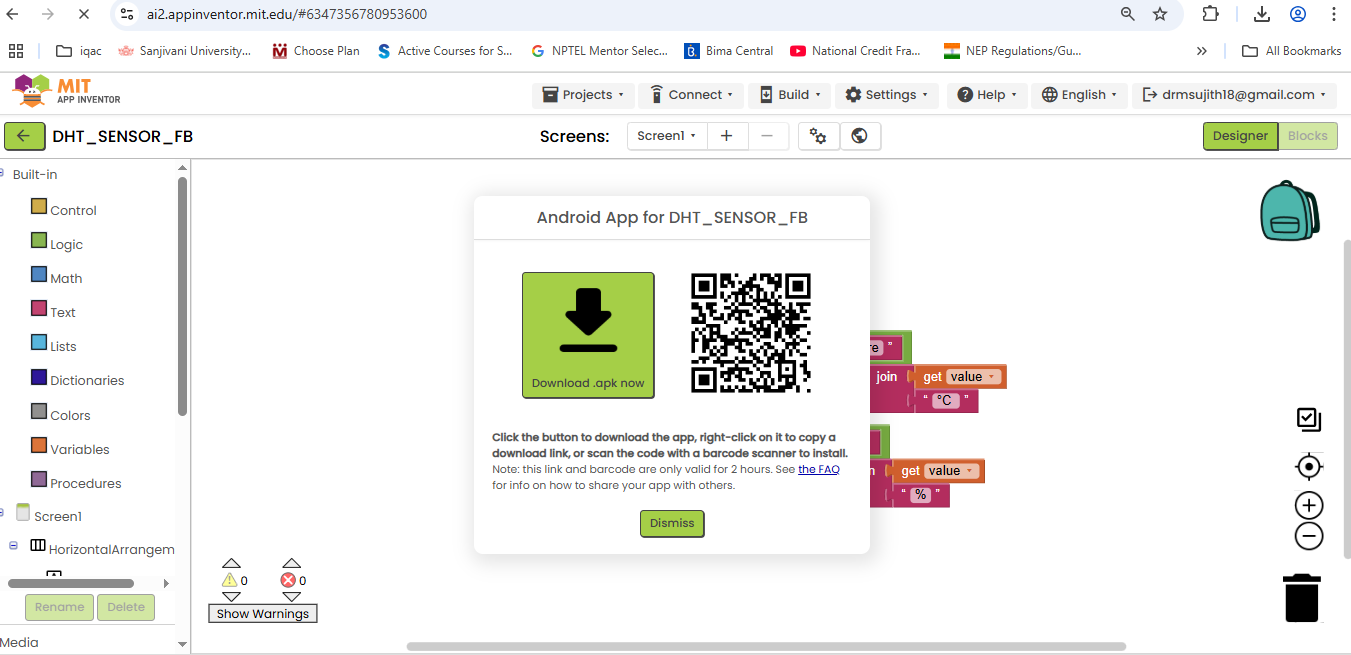
After that, scan the QR code directly with your mobile phone to download and install the app.
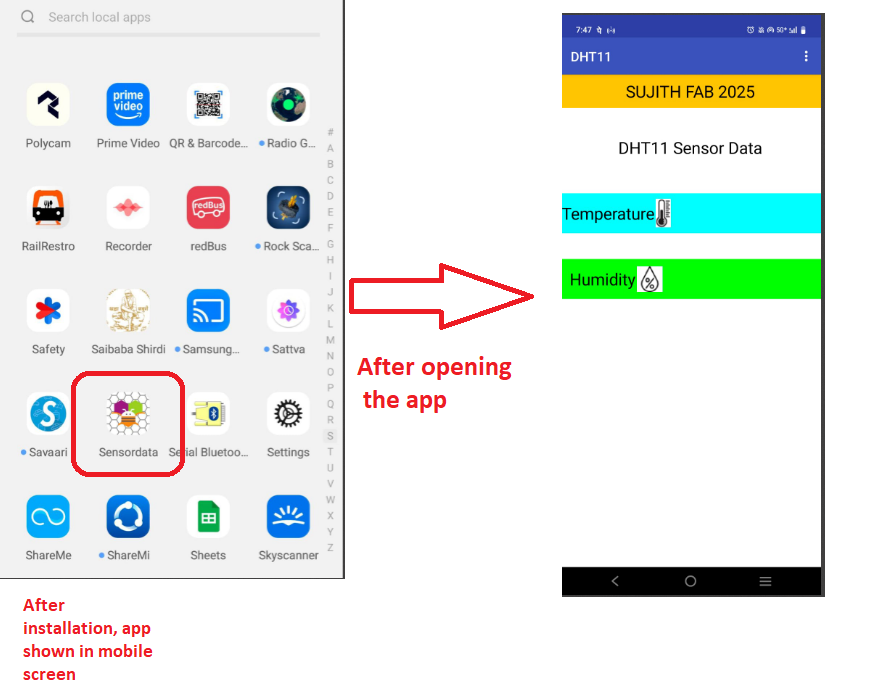
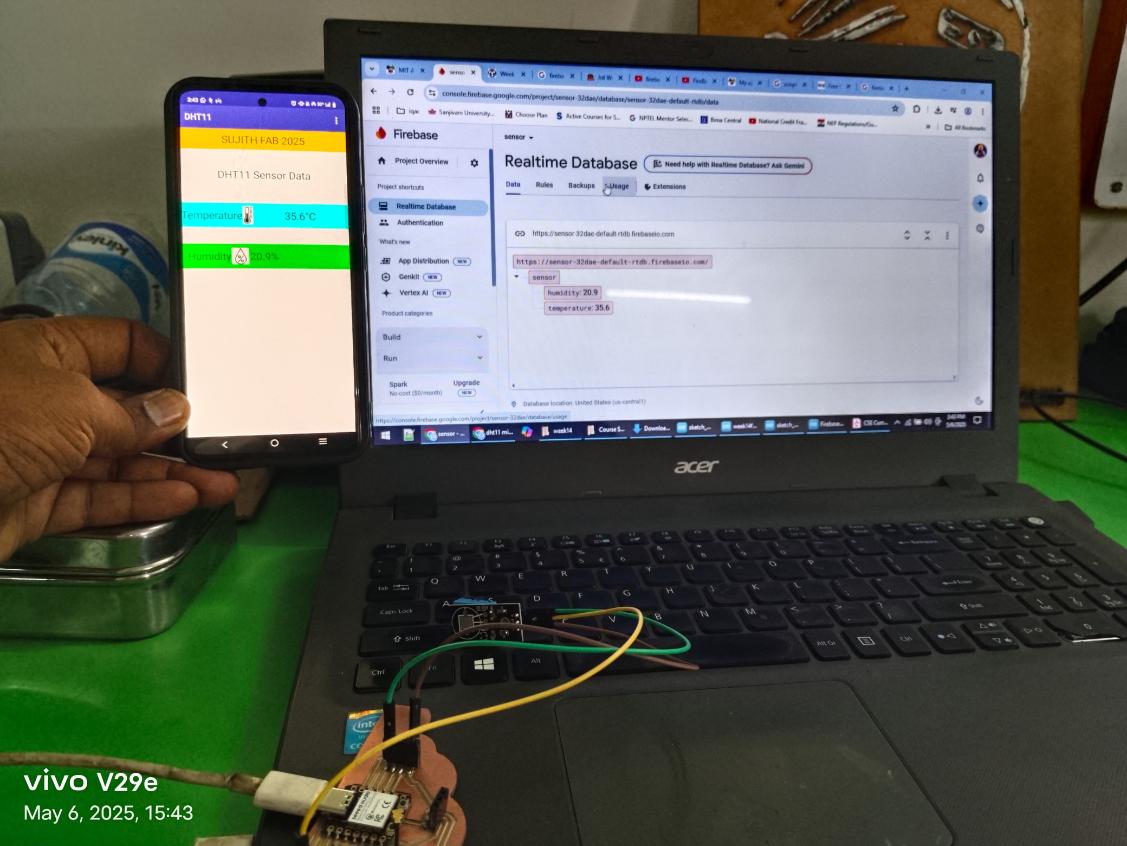
After download, i have installed in the mobile, below images shown the mobile view
After that, I moved to the IDE (e.g., Arduino) and uploaded the program code to my XIAO ESP32C3 board (connected to a DHT11 sensor). This code enables the board to send sensor data to Firebase, which is then retrieved and displayed on the MIT App Inventor mobile application
#include#include #include "DHT.h" const char* ssid = "sujith"; const char* password = "123456878"; const String FIREBASE_HOST = "https://sensor-32dae-default-rtdb.firebaseio.com/"; const String FIREBASE_AUTH = "AIzaSyBaXOnTGkYfQbO5Nrimg5MfsXcSoVScJUw"; const String FIREBASE_PATH = "/sensor"; #define DHTPIN D4 #define DHTTYPE DHT11 DHT dht(DHTPIN, DHTTYPE); void setup() { Serial.begin(115200); dht.begin(); WiFi.begin(ssid, password); while (WiFi.status() != WL_CONNECTED) delay(500); } void loop() { float temperature = dht.readTemperature(); float humidity = dht.readHumidity(); if (isnan(temperature) || isnan(humidity)) { Serial.println("Failed to read from DHT sensor!"); return; } if (WiFi.status() == WL_CONNECTED) { HTTPClient http; String postData = "{\"temperature\":" + String(temperature) + ",\"humidity\":" + String(humidity) + "}"; String url = FIREBASE_HOST + FIREBASE_PATH + ".json?auth=" + FIREBASE_AUTH; http.begin(url); http.addHeader("Content-Type", "application/json"); int responseCode = http.PUT(postData); Serial.println("HTTP Response: " + String(responseCode)); http.end(); } delay(5000); }
At first, I tried using Node-Red for my IoT project, thinking it would be easier. But no matter how many blocks I connected or tutorials I followed, I just couldn’t get it to work. The app wouldn’t communicate with my code, and I had no idea where the problem was—was it the MQTT setup? The wrong nodes? Missing dependencies?
I spent days experimenting, rearranging flows, and searching for solutions, but nothing clicked. Since I was learning on my own, there was no one to point out my mistakes. Frustrated, I finally gave up and switched to the MIT App Inventor, hoping for better luck.
I built a Bluetooth-based MIT App to read DHT11 sensor data from my Xiao ESP32C3. After designing the app, Bluetooth wouldn’t connect—it just showed "Not Connected." I checked the wiring, code, and app settings, but it still failed. I cant able to find the issues, tried lot of modifications. Still troubleshooting. Frustrating!
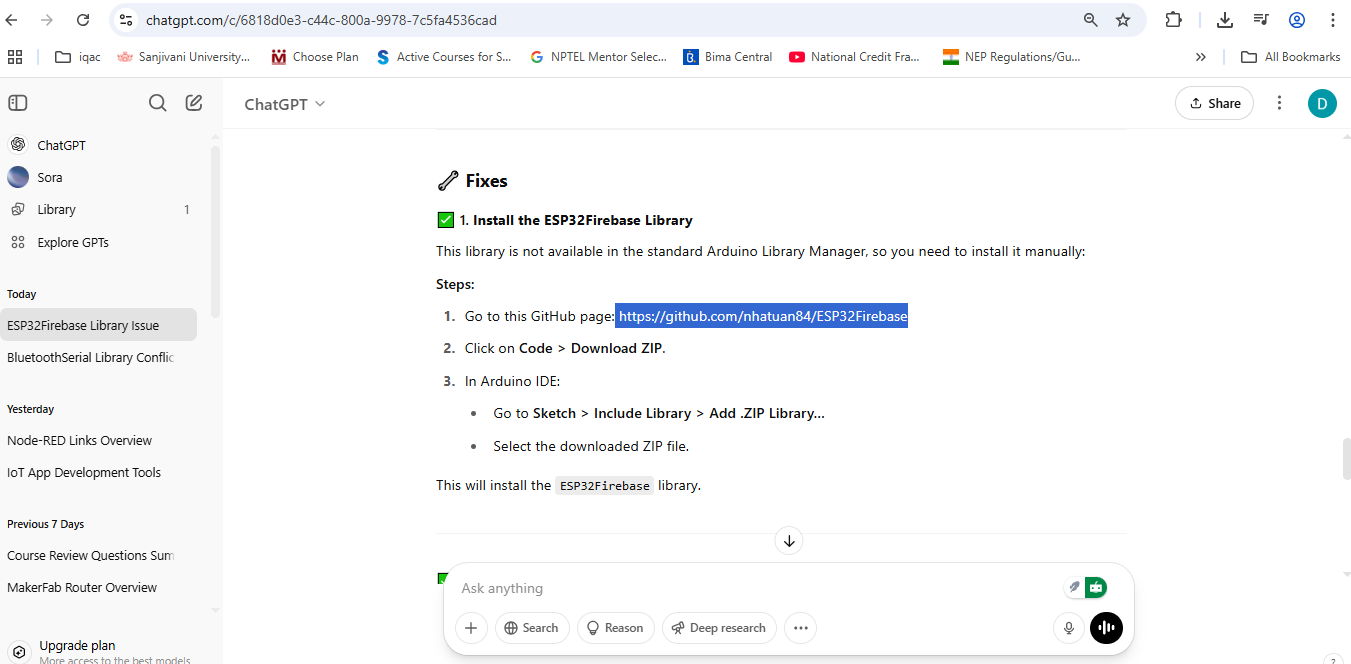
Switched from Bluetooth to WiFi and Firebase for my MIT App. Firebase worked fine, but the app wouldn’t connect—no data showed up. Spent days of learning MIT App blocks, watched 15 videos of tutorials and used chatgpt, visited the website, and rebuilt it. Still no luck. Then, library conflicts messed up the code. Asked ChatGPT for help, but still stuck. Another roadblock—so frustrating!
At first, I thought switching from Bluetooth to WiFi and Firebase would solve all my problems—but I was wrong. Firebase itself worked fine, but getting the MIT App to display the data was a nightmare. Every time I fixed one issue, another popped up. My old laptop made things worse—each code change took 15-20 minutes just to compile, and I must have run 15-20 different programs, tweaking things over and over.
I spent hours watching tutorials, adjusting MIT App blocks, and debugging. The app just wouldn’t connect to Firebase, even though the data was being sent. I double-checked API keys, Firebase rules, and even rewrote parts of the code with ChatGPT’s help. Still, nothing worked.
Then, after an entire day of frustration, I realized my mistake—I was using the wrong authentication method in the MIT App. Instead of the Firebase token, I needed to use the API key. Once I made that change, rebuilt the app, and reinstalled it… finally, the data appeared!
What seemed like a simple task turned into days of trial and error. Teaching all morning and coding late into the night was exhausting, but that moment when everything finally worked made it worth it. Hands-on learning is tough, but now I understand Firebase and MIT App better than any tutorial could’ve taught me. Still… I hope my next project goes smoother!
This week's hands-on IoT journey taught me invaluable lessons through persistent troubleshooting. I first discovered the limitations of Bluetooth connectivity in MIT App with ESP32C3, learning about critical pairing requirements and UUID matching. When shifting to WiFi, I gained practical experience in Firebase integration, understanding how to properly structure and send sensor data to the cloud. The debugging process revealed crucial insights - particularly how API keys (not tokens) serve as the vital link between Firebase and MIT App, and how library conflicts can derail an entire project. Working with my hardware constraints (15-20 minute compile times on my laptop) forced me to plan tests more carefully. Through 15-20 code iterations and strategic use of ChatGPT (learning its limitations as a debugging aid), I experienced firsthand how persistence and systematic testing eventually yield solutions. Juggling teaching responsibilities with late-night coding sessions improved my time management, while the Node-Red failure earlier in the week taught me the importance of knowing when to change approaches. Most importantly, I learned that real IoT development demands iterative problem-solving - no tutorial provides perfect answers, and each roadblock overcome makes me a more capable developer.
Happy Learning
😀 Suith Mayakrishnan 😀