My Exciting IoT Learning Journey
This week, I'm learning how to connect my XIAO ESP32C3 microcontroller with a DHT11 sensor to measure temperature and humidity. With chatgpt guidance, I'll be sending this sensor data to two important platforms:
Data Platforms
Key Learning Objectives
I'm particularly excited about seeing my live sensor data appear on web dashboards! This hands-on experience will help me understand practical IoT systems and give me confidence in working with cloud platforms.
Thingspeak Account
Steps to Set Up ThingSpeak
1. Create a ThingSpeak Account
Enter the following details:
2. Get Your API Key
3. Upload Code to XIAO ESP32C3
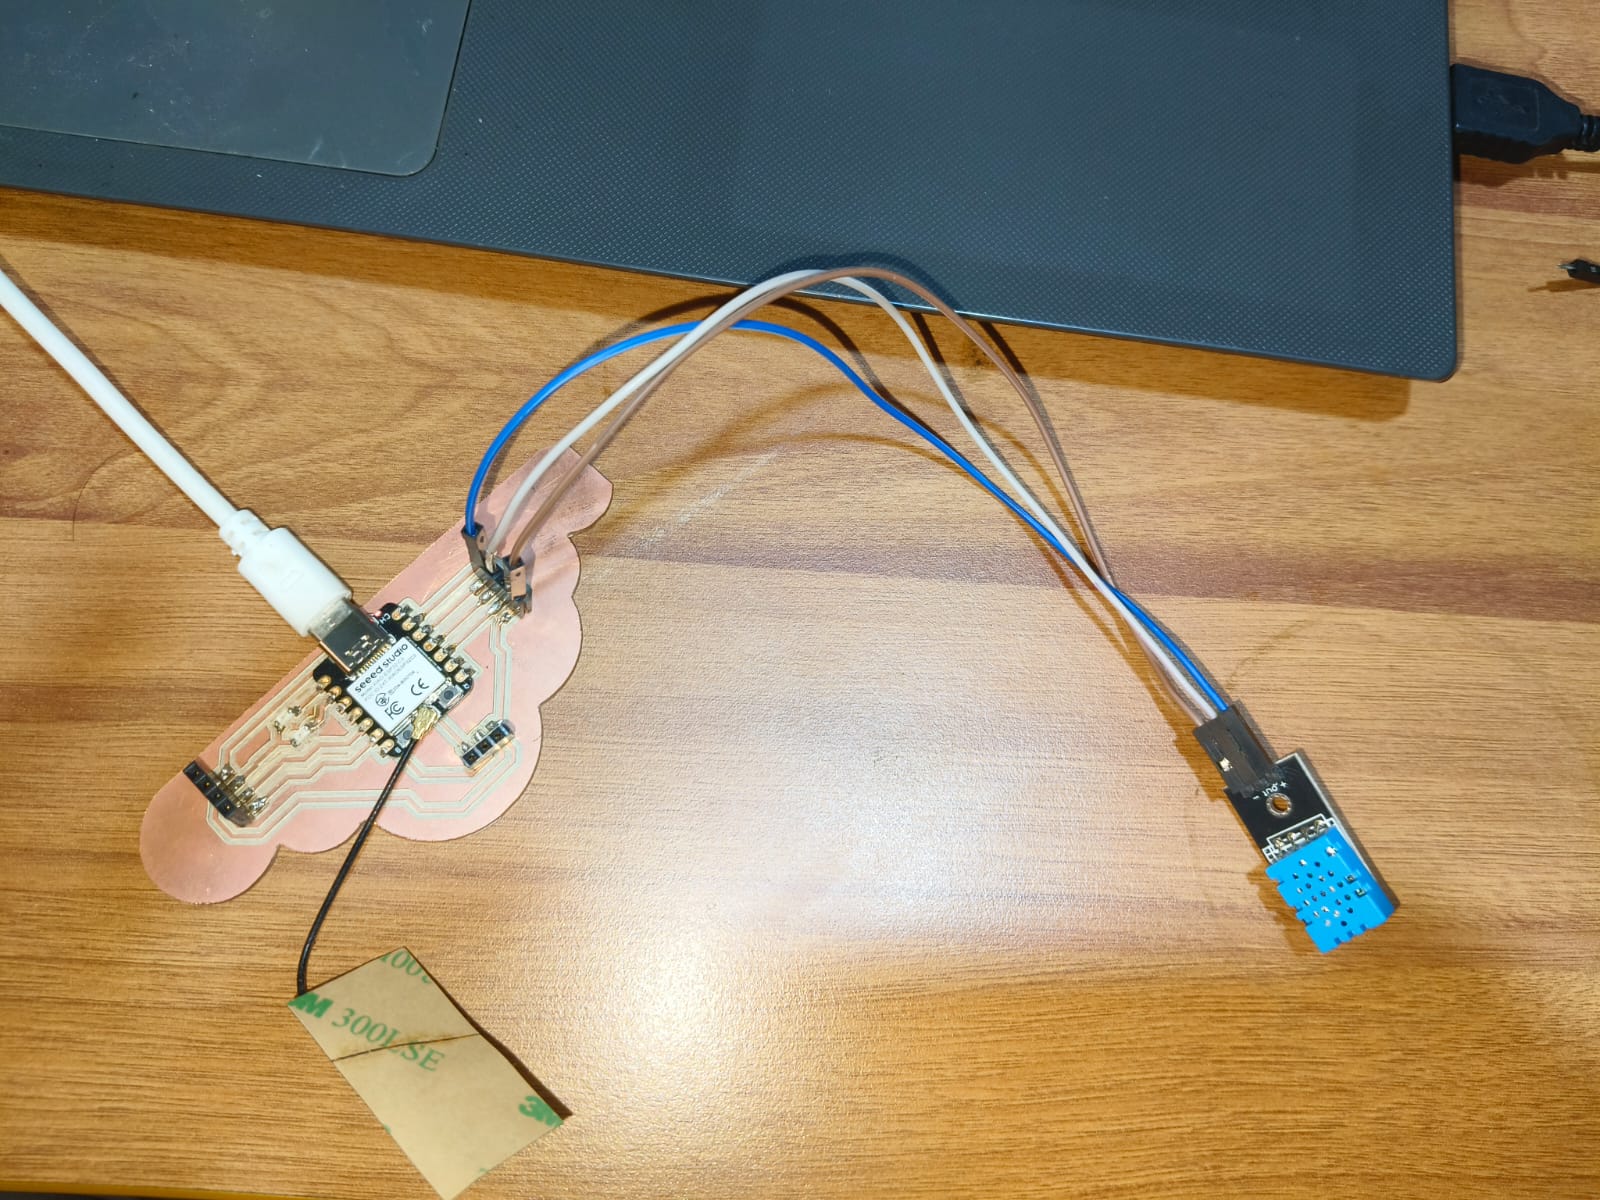
Wiring the XIAO ESP32C3 with DHT11 Sensor
- Connect the OUT pin of the DHT11 to pin
D10on the XIAO ESP32C3. - Connect the Vcc pin of the DHT11 to
3.3Von the XIAO ESP32C3. - Connect the GND pin of the DHT11 to
GNDon the XIAO ESP32C3.
Program to upload in the XIAO ESP32C3 using Arduino IDE
This code reads temperature & humidity using the DHT11 sensor, then uploads the data to ThingSpeak.
#include#include #include #define DHTPIN D10 #define DHTTYPE DHT11 const char* ssid = "sujith"; // Replace with your Wi-Fi SSID const char* password = "123456878"; // Replace with your Wi-Fi password const char* apiKey = "OGY3SZJ7ZSFUERU5"; // Replace with your ThingSpeak API Key const char* server = "http://api.thingspeak.com/update"; DHT dht(DHTPIN, DHTTYPE); void setup() { Serial.begin(115200); WiFi.begin(ssid, password); dht.begin(); while (WiFi.status() != WL_CONNECTED) { delay(500); Serial.print("."); } Serial.println("\nConnected to Wi-Fi"); } void loop() { float temperature = dht.readTemperature(); float humidity = dht.readHumidity(); if (!isnan(temperature) && !isnan(humidity)) { HTTPClient http; String url = String(server) + "?api_key=" + apiKey + "&field1=" + String(temperature) + "&field2=" + String(humidity); http.begin(url); int httpResponseCode = http.GET(); http.end(); Serial.print("Sent Temp: "); Serial.print(temperature); Serial.print(" C, Humidity: "); Serial.println(humidity); } delay(15000); // ThingSpeak allows updates every 15 seconds }
After establishment of the code
ESP32C3 reads DHT11 sensor data and sends temperature & humidity via Wi-Fi HTTP request.ThingSpeak stores the data and visualizes it in graphs.No Serial Communication, Just using Wi-Fi HTTP!
ESP32 as an HTTP Server- Your XIAO ESP32C3 will act as a web server and serve data over HTTP
The sensor readings will access using local WiFi network via a browser. uploaded the following code to esp32c3
#include#include #include // Replace with your network credentials const char* ssid = "sujith"; const char* password = "123456878"; // DHT11 setup #define DHTPIN D10 // GPIO connected to DHT11 data pin #define DHTTYPE DHT11 // DHT 11 sensor type DHT dht(DHTPIN, DHTTYPE); // Create a web server on port 80 WebServer server(80); void handleRoot() { float temperature = dht.readTemperature(); float humidity = dht.readHumidity(); // Check for errors if (isnan(temperature) || isnan(humidity)) { server.send(200, "text/html", " Failed to read from DHT sensor!
"); return; } String html = ""; html += "DHT11 Sensor "; html += "DHT11 Sensor Data
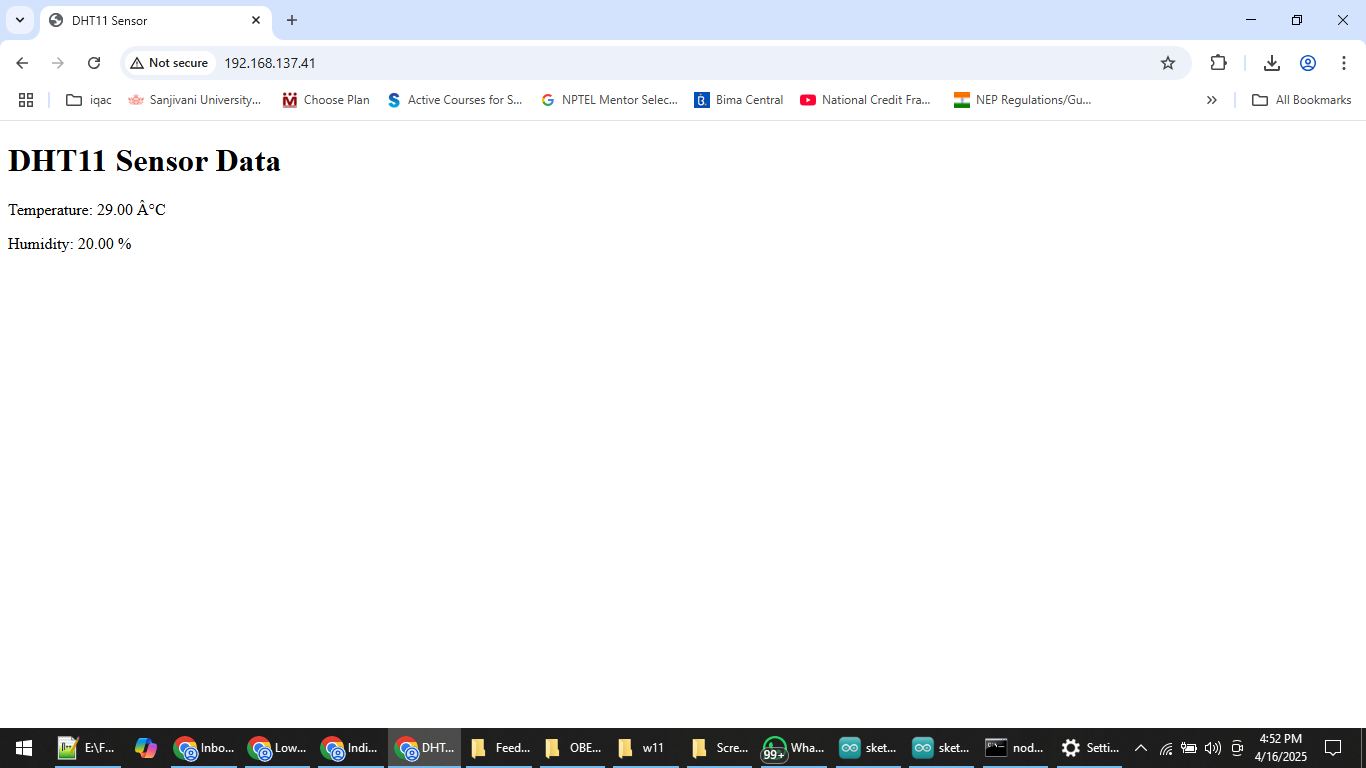
"; html += "Temperature: " + String(temperature) + " °C
"; html += "Humidity: " + String(humidity) + " %
"; html += ""; server.send(200, "text/html", html); } void setup() { // Start serial communication Serial.begin(115200); dht.begin(); // Connect to Wi-Fi WiFi.begin(ssid, password); while (WiFi.status() != WL_CONNECTED) { delay(1000); Serial.println("Connecting to WiFi..."); } Serial.println("Connected! IP address:"); Serial.println(WiFi.localIP()); // Define root route server.on("/", handleRoot); // Start the server server.begin(); } void loop() { // Handle incoming client requests server.handleClient(); }
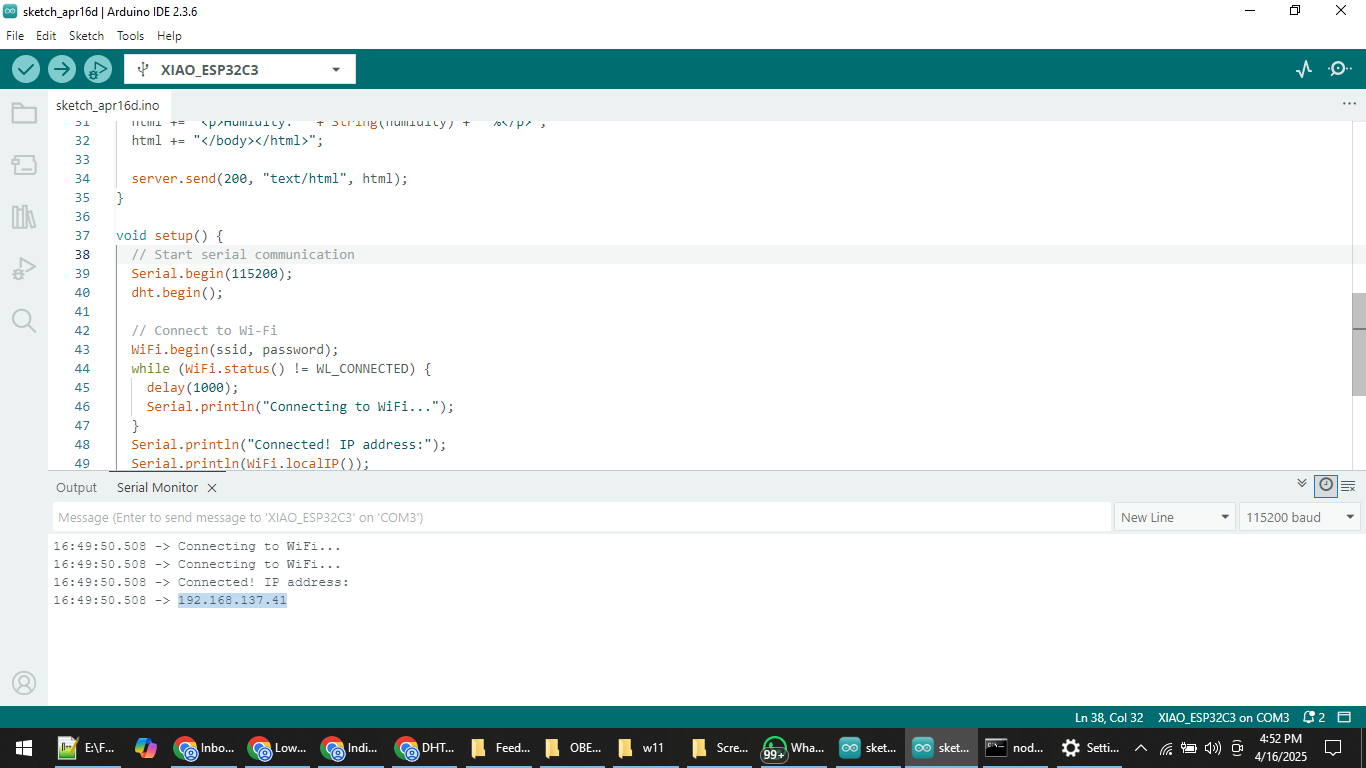
After uploading the code, IP address will be generated 192.168.137.41, copied to the webbrowser and see the data in web
Problems faced in learning MQTT Protocol
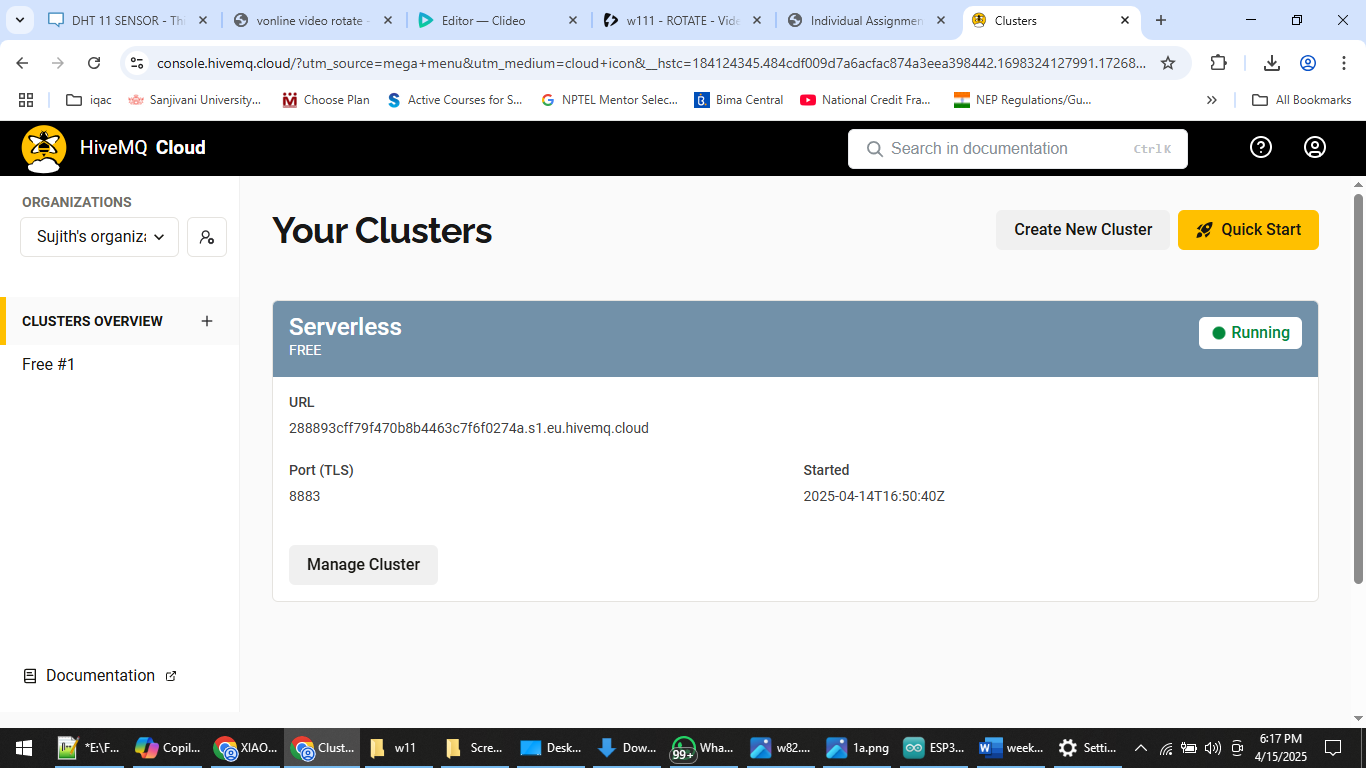
Tried to Publish Sensor Data to MQTT Server & Mobile App. I have created the hivemq.cloud free account for this progran
Tried to use Hivemq server, login created and again i m unsuccessful, almost two day i spent with this, i watched so many tutorials, but i m failed to get my results
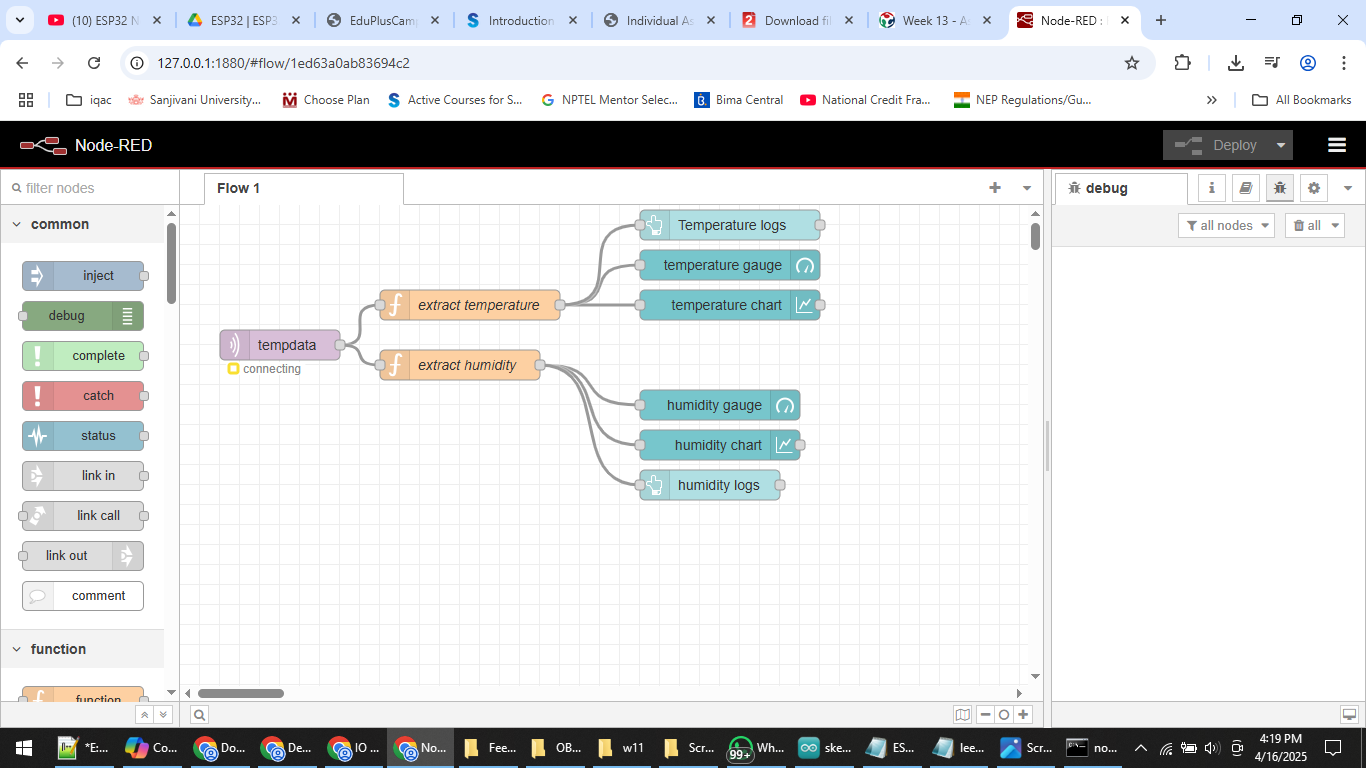
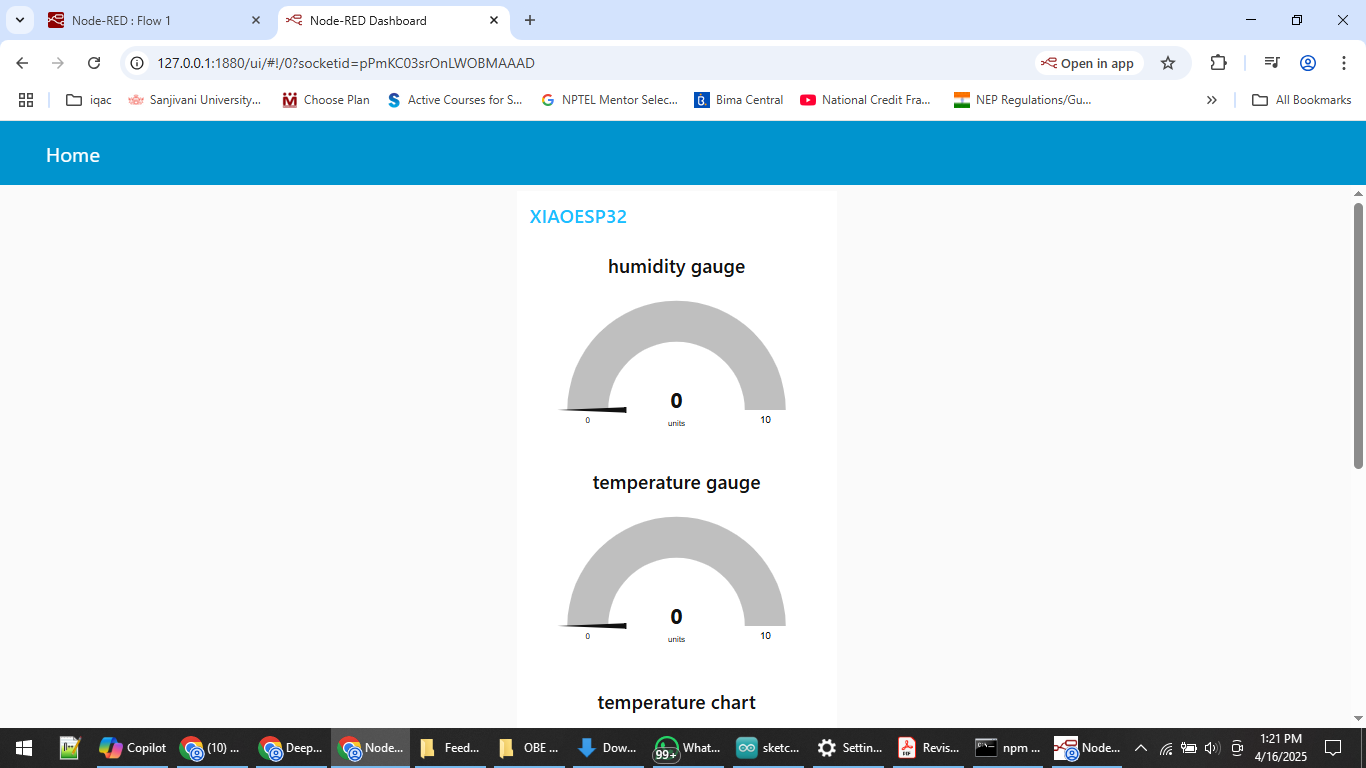
Next to that, Tried to use Node-red , created the dashboard, I m able to upload the code , no error, data is not pushed
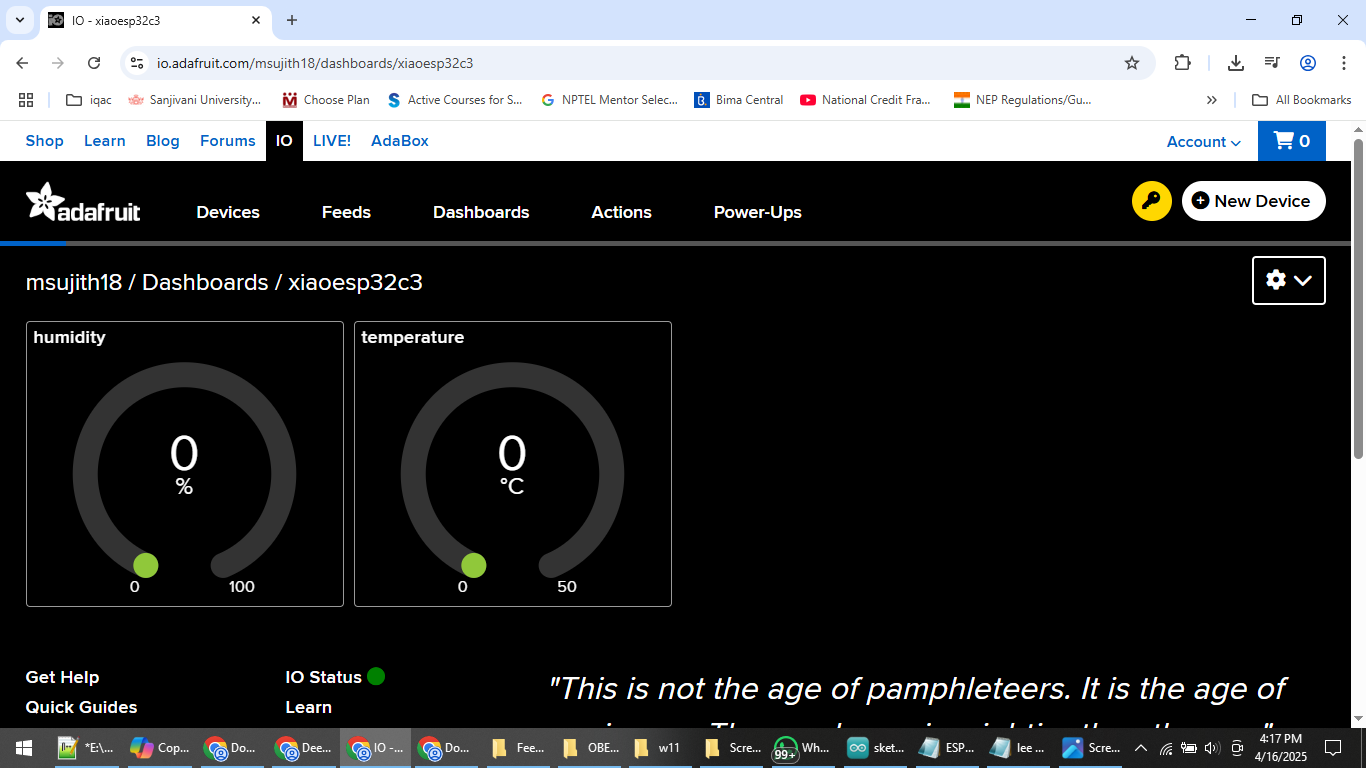
Next to that, Tried to use Adafruit io , created the dashboard, I m able to upload the code , i m not able to push the data,
I have spent almost four days on learning different platforms like Node-red, Adafruit, HivemQ, EClipse Mosquito without success. I hope to identify the errors in my code and learn from them as quickly as possible.
Learned in this week
Through this Week, I learned how to connect my XIAO ESP32C3 with a DHT11 sensor to send temperature and humidity data to ThingSpeak (a cloud platform for IoT) and an MQTT server (for real-time messaging). With ChatGPT’s guidance, I figured out how to write the code, set up Wi-Fi connections, and use APIs to upload sensor readings. It was exciting to see live data appear on ThingSpeak charts and learned to create MQTT dashboards! This experience helped me understand IoT communication better, and now I feel more confident working with sensors and cloud platforms.
Happy Learning
😀 Suith Mayakrishnan 😀