1. HTML Structure
The document follows a standard HTML5 structure: Declares the document type (<!DOCTYPE html>) and Sets the page title and metadata (viewport, keywords, description).

I was too excited t starting the fab lab assignment
I am having little experience in the website design and at the same time i dnt know thw
I started with free website template from Free CSS Templates https://www.free-css.com/free-css-templates?start=60, which provided a professionally designed foundation for my project. Once downloaded, I opened the template files in Notepad++—a versatile text editor known for its powerful code editing features like syntax highlighting and auto-completion.
Using Notepad++ allowed me to systematically explore and modify the HTML, CSS, and JavaScript components of the template, ensuring that every element was tailored to reflect the identity and requirements of Sanjivani Fab Lab.
This hands-on editing process enabled me to refine the layout, update metadata, and implement necessary design adjustments to create a unique and functional website.
The index.html file is the main page of a website titled SANJIVANI FAB LAB. Below is a breakdown of the code with explanations and necessary images.
The document follows a standard HTML5 structure: Declares the document type (<!DOCTYPE html>) and Sets the page title and metadata (viewport, keywords, description).

Displays a profile image (profile.jpg).Shows the name and a motivational quote and provides a LinkedIn link with an icon.

Uses Bootstrap for a responsive navbar.Includes dropdown menus for extra pages.

uses Bootstrap Carousel for a slideshow.Each slide has an image and caption.

Displays a copyright notice.

Uses jQuery and Bootstrap JS for interactivity and Included the contact page validation script.

Includes a contact form validation script.

This code snippet is a Bootstrap-based layout for a blog post item. Here’s a breakdown of what each part does:Container & Overall Layout: This creates a centered, responsive container with a white background and top padding (pt-5) to separate it from other content.Row and Blog Item: Inside the container, this row holds the blog item. It applies horizontal padding (px-3) and bottom padding (pb-5). The custom class blog-item might be used for additional styling in your CSS.mage Section. This column, which takes up 5 of 12 columns on medium devices and larger, is used to display an image.The image is made responsive with img-fluid, ensuring it scales with the viewport. The classes mb-4 add bottom margin on all devices, but mb-md-0 removes that margin on medium and larger screens, ensuring proper spacing depending on the device size.Content Section.This column takes up the remaining 7 of 12 columns on medium devices and larger and contains the blog post details.The heading uses margin (mt-md-4, mb-2) and padding (px-md-3, py-2) utilities to ensure proper spacing. It has a white background (bg-white) and bold text styling (font-weight-bold), making the title stand out.This flex container (d-flex) is used for layout, here to display the post’s date.

Download Git Bash

Select the OS version according to your conversation

Open GitLab account
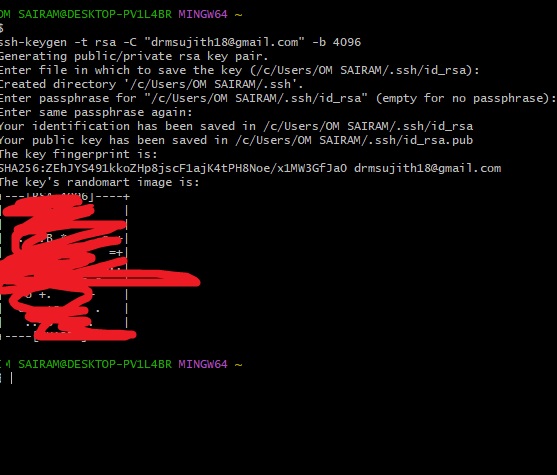
Step 3: Generate the key using the following command
ssh-keygen -t rsa -C "drmsujith18@gmail.com" ------// the command to generate the key

Step 4: Copied the key for paste in Gitlab by using the below command
cat ~/.ssh/id_rsa.pub | clip // copy the key

Paste key in Profile Settings---> SSH key
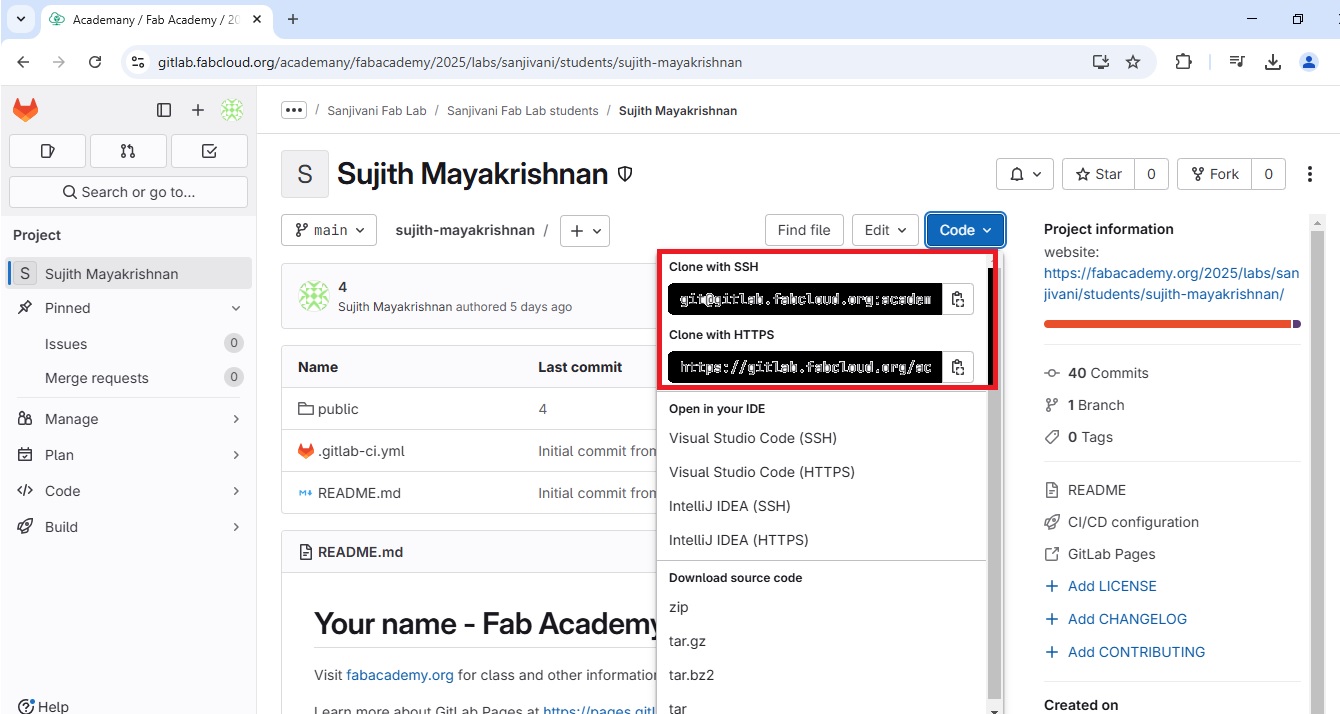
Step5 : Clone the gloabal folder to my system using the command:
ssh -T git@gitlab.fabcloud.org // welcome message

$ git clone Step 6: user name and and email will be given as input in the cmd window $ git config --global user.name "" $ git config --global user.email "" Step 7: replace the public folder content with my webpage and got to gitbas and performed this operations
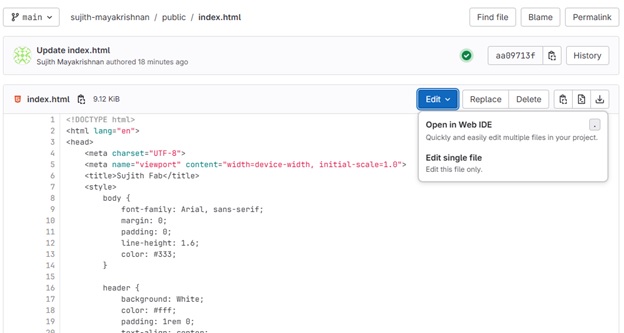
go to home folder run gitbash git pull git add --all git commit -m"any name" git push I have encountered an issue with image display and correcte with the help of Fab Cloud's default editor.


Edit HTML page in Fab Cloud

Downloaded the ganttProject

Add a Task: Click on the Task tab in the toolbar and then select New Task from the dropdown menu.
A new task will appear in the task list. You can double-click on it to edit its properties.

In the task properties window, you can set the task name, duration, start date, end date, priority, and other details.
final plan is created for the fab lab

😀
Learned to search and use free CSS template from https://www.free-css.com/.
😀😀 Learned from w3 schools https://www.w3schools.com/. to use the html codes and basic things to build the website #128512;
😀 Learned git bash and how to upload all content to git hub 😀
Happy Learning
😀 Suith Mayakrishnan 😀