Week 7: Computer-Controlled Machining
Group Assignment
We have completed the following tasks: lab's safety training, testing runout, alignment, fixturing, speeds, feeds, materials, toolpaths, and documentation of work on the group page with reflections on individual learning.
Visit our Group Assignment Page to explore our findings and methodologies.
Computer-Controlled Machining
Individual Assignment
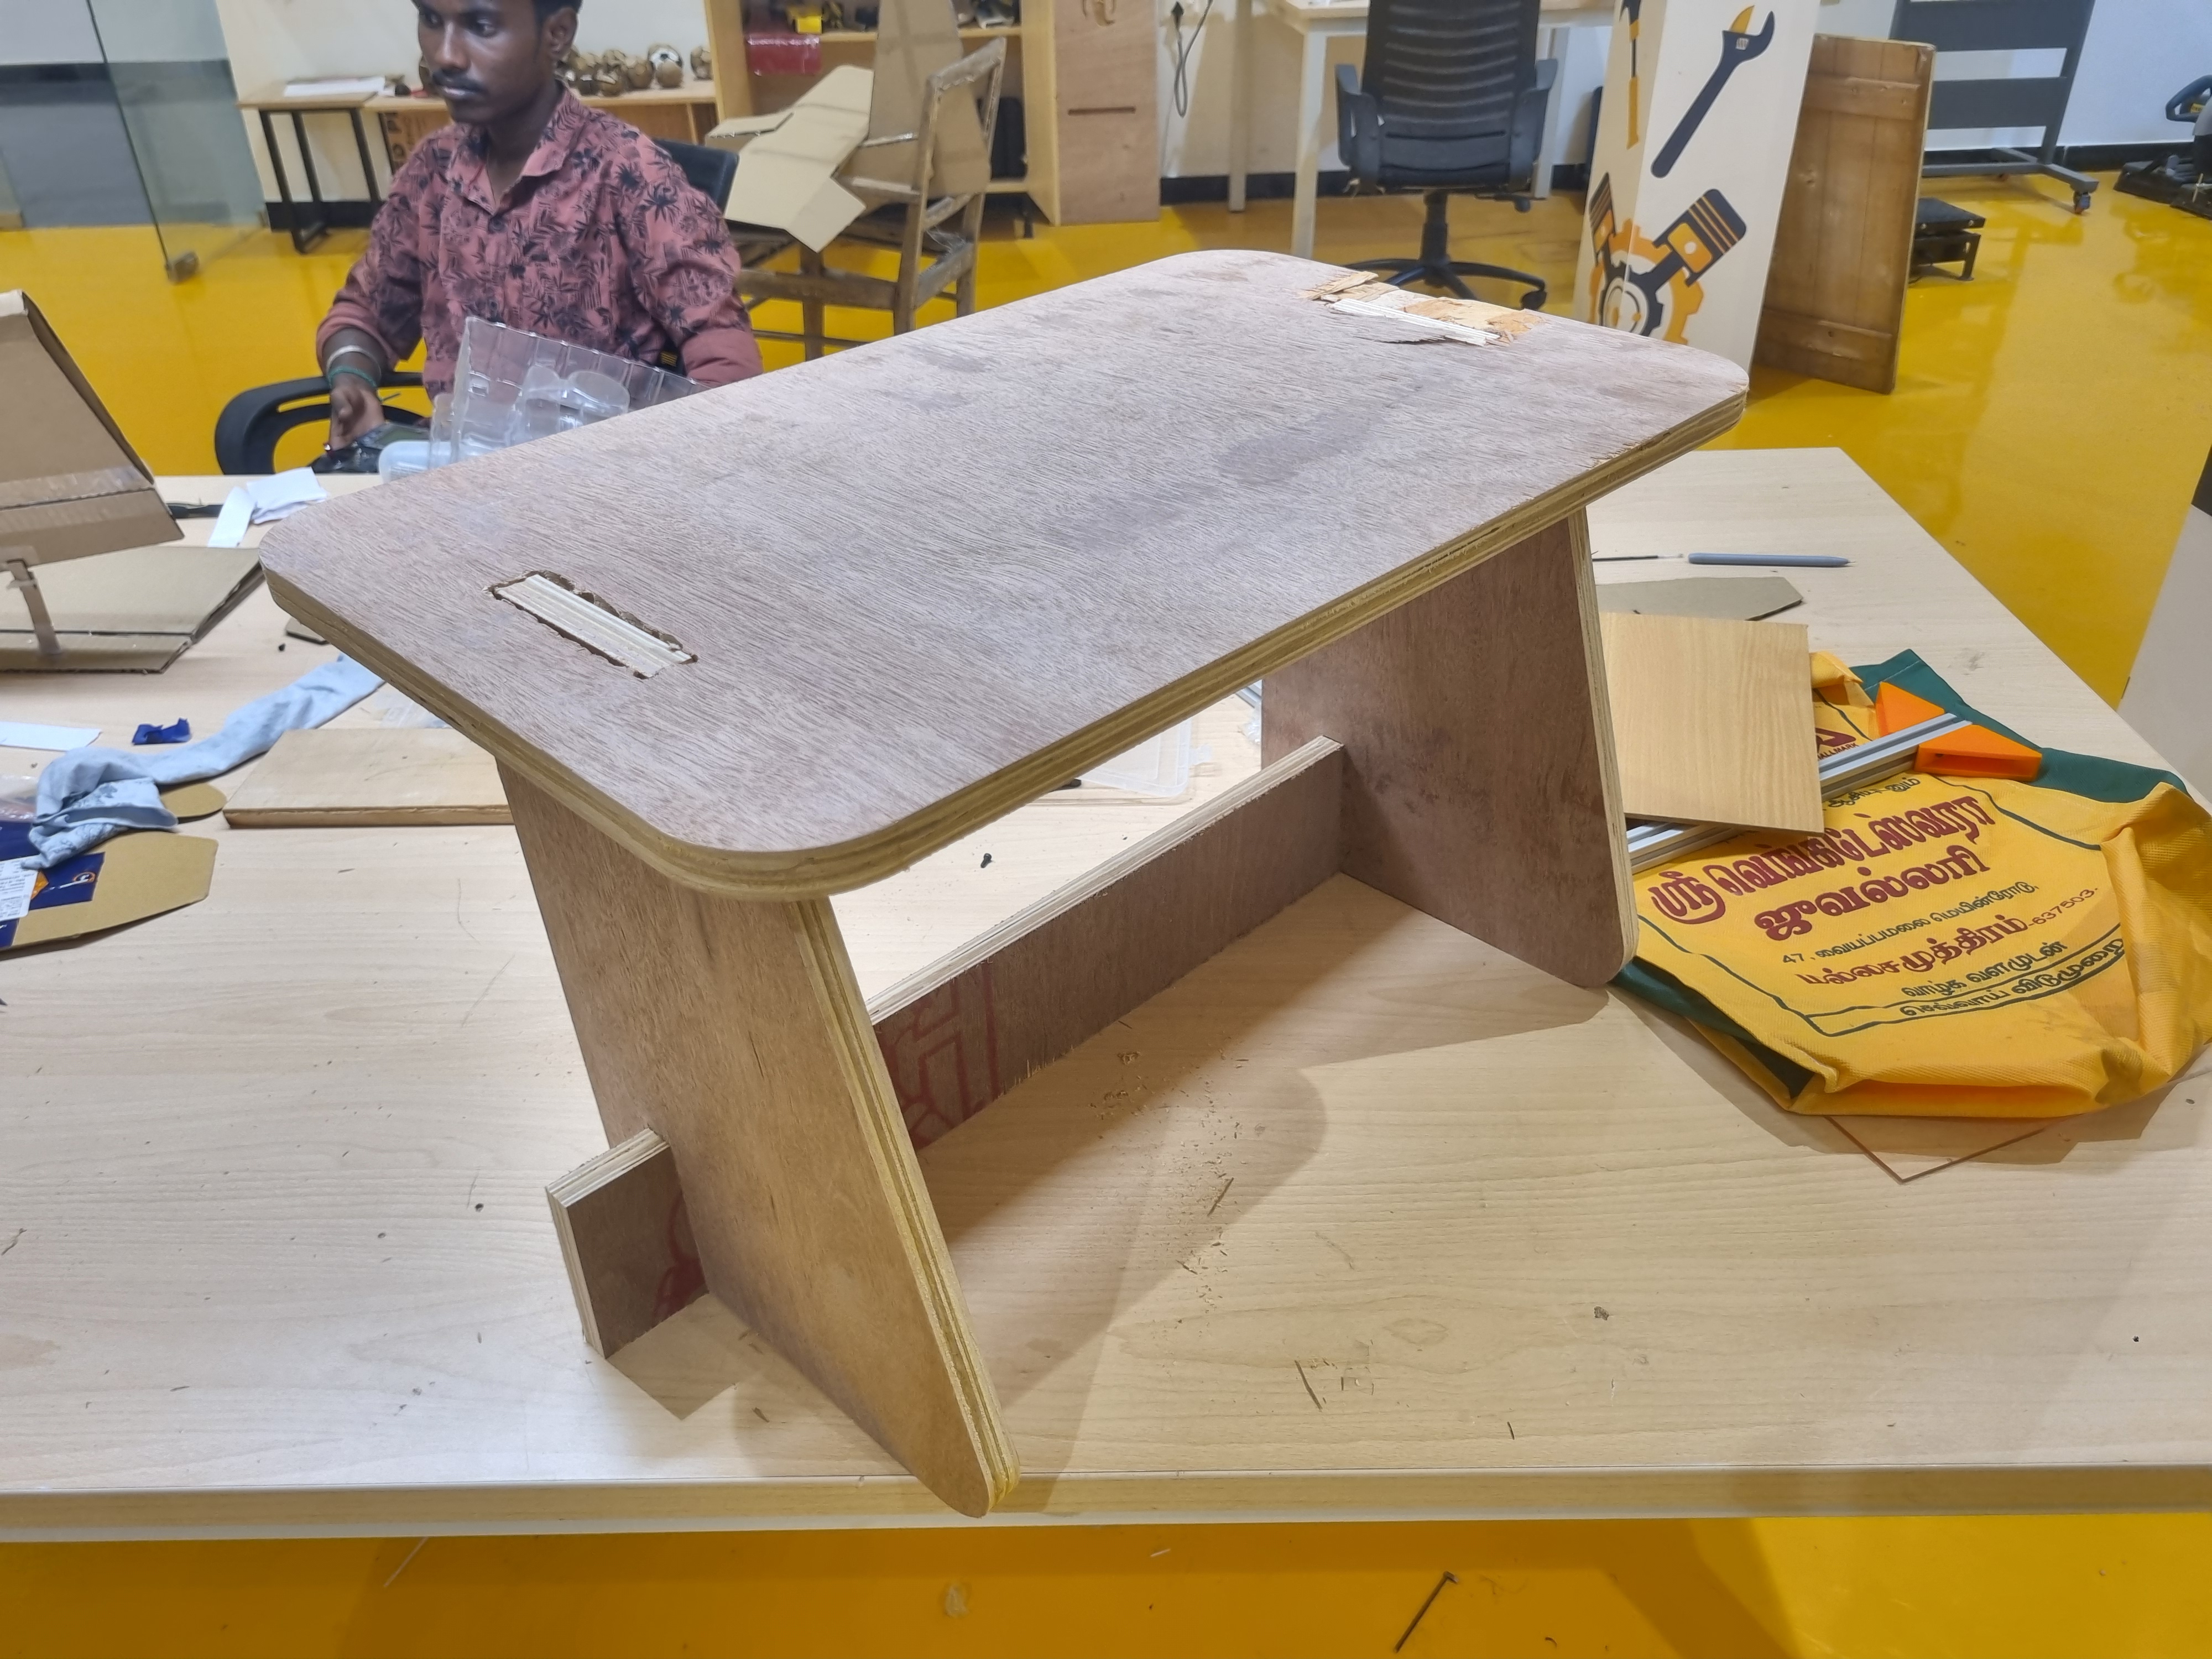
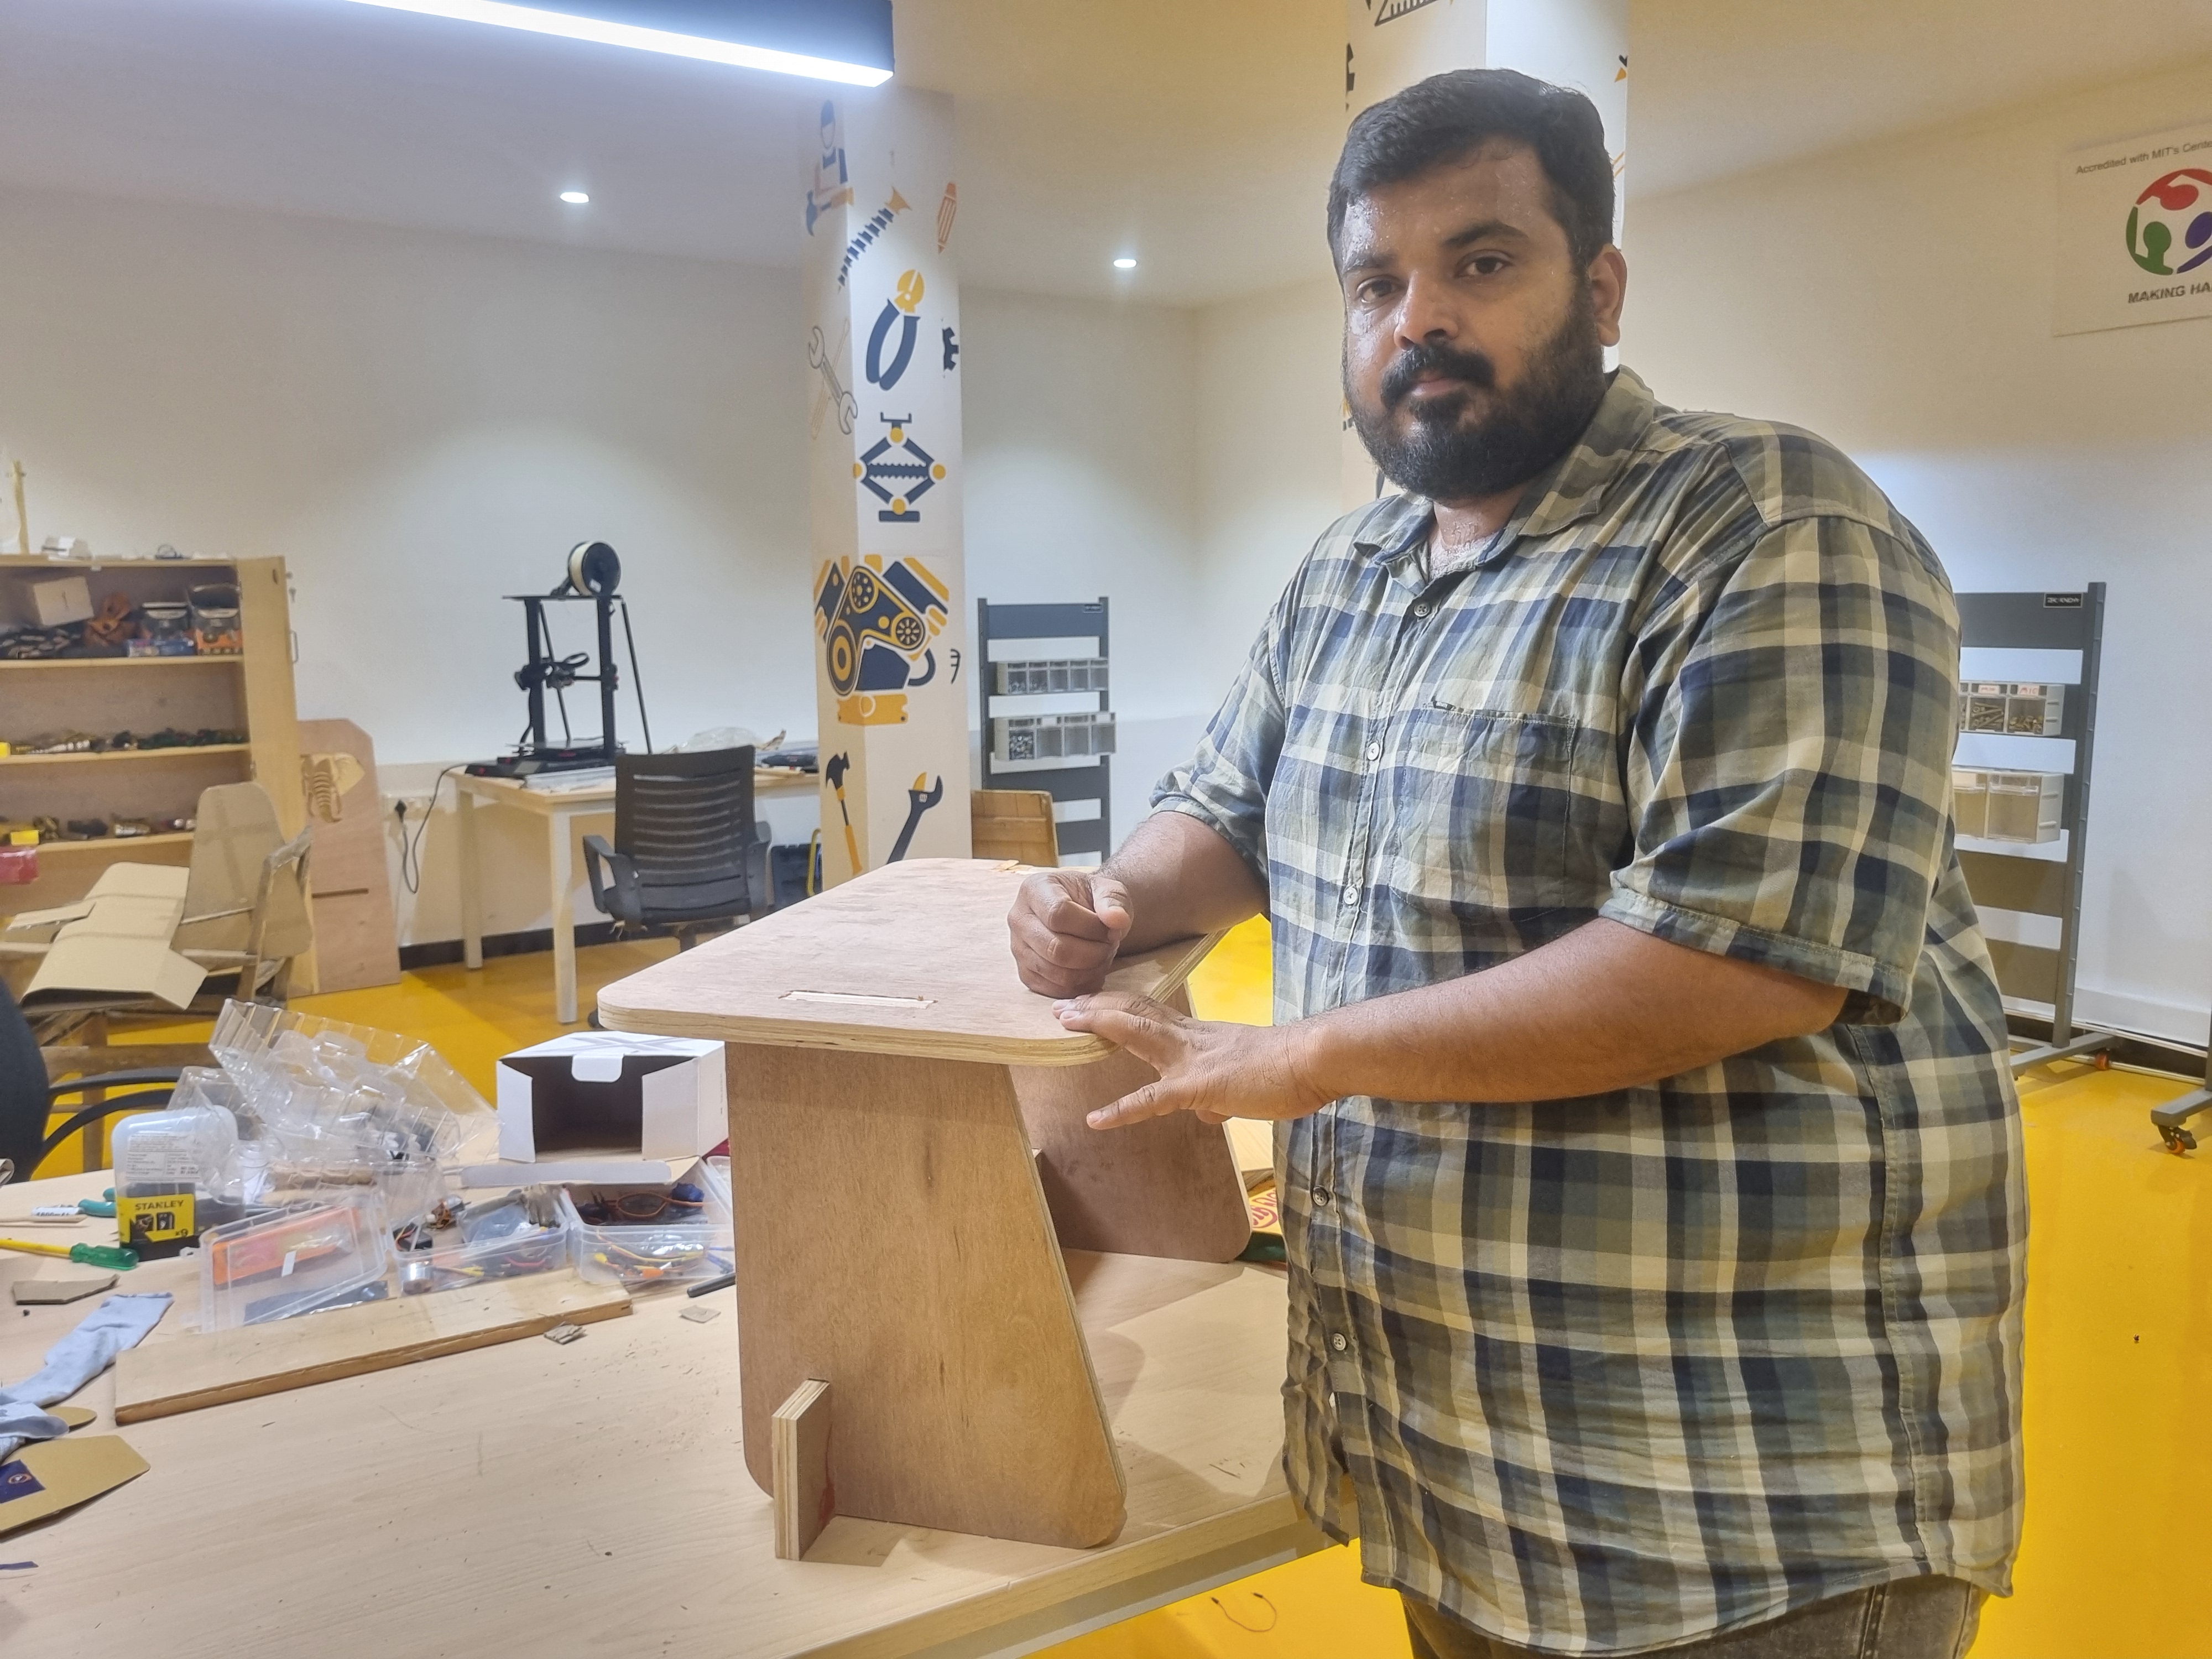
Designed, milled, and assembled a large (~meter-scale) project using computer-controlled machining.
- Design: Created a parametric model for a large-scale assembly.
- Milling: Used CNC milling for precision cutting.
- Assembly: Completed assembly without using fasteners or glue.
- Extra Credit: Incorporated curved surfaces for added complexity.
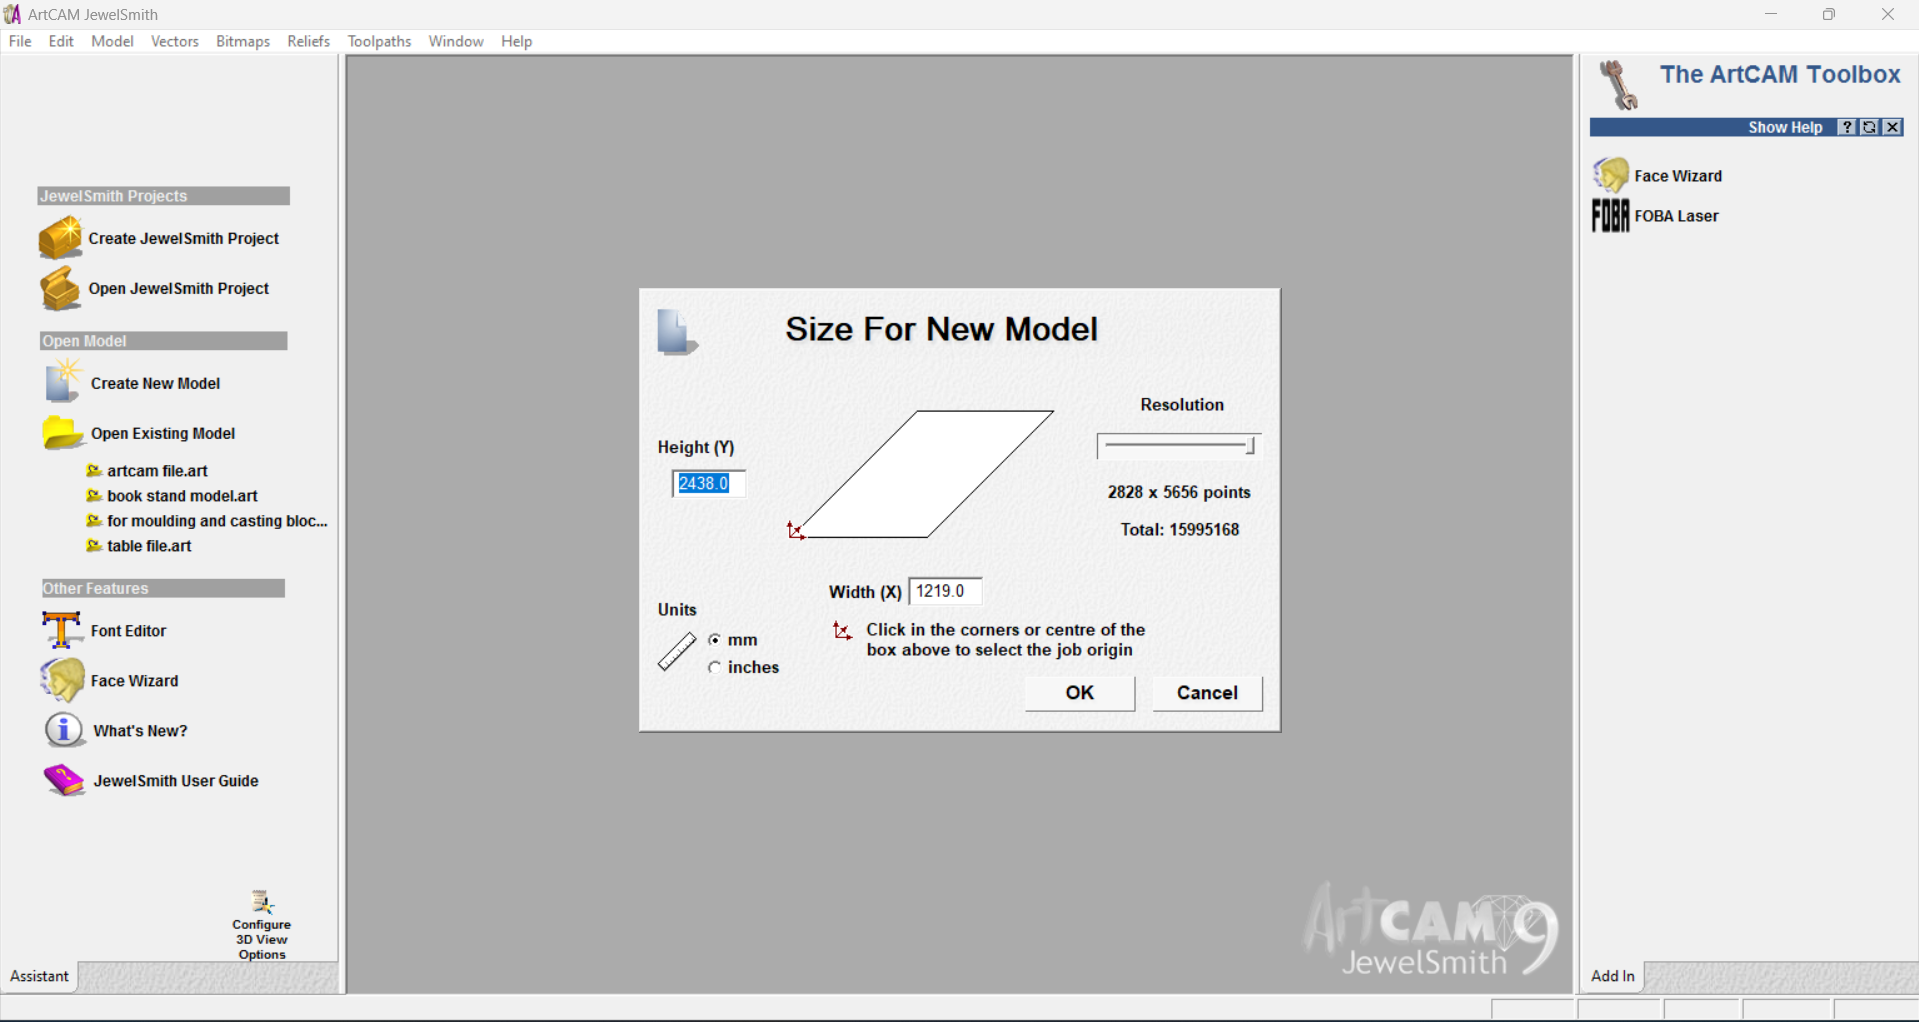
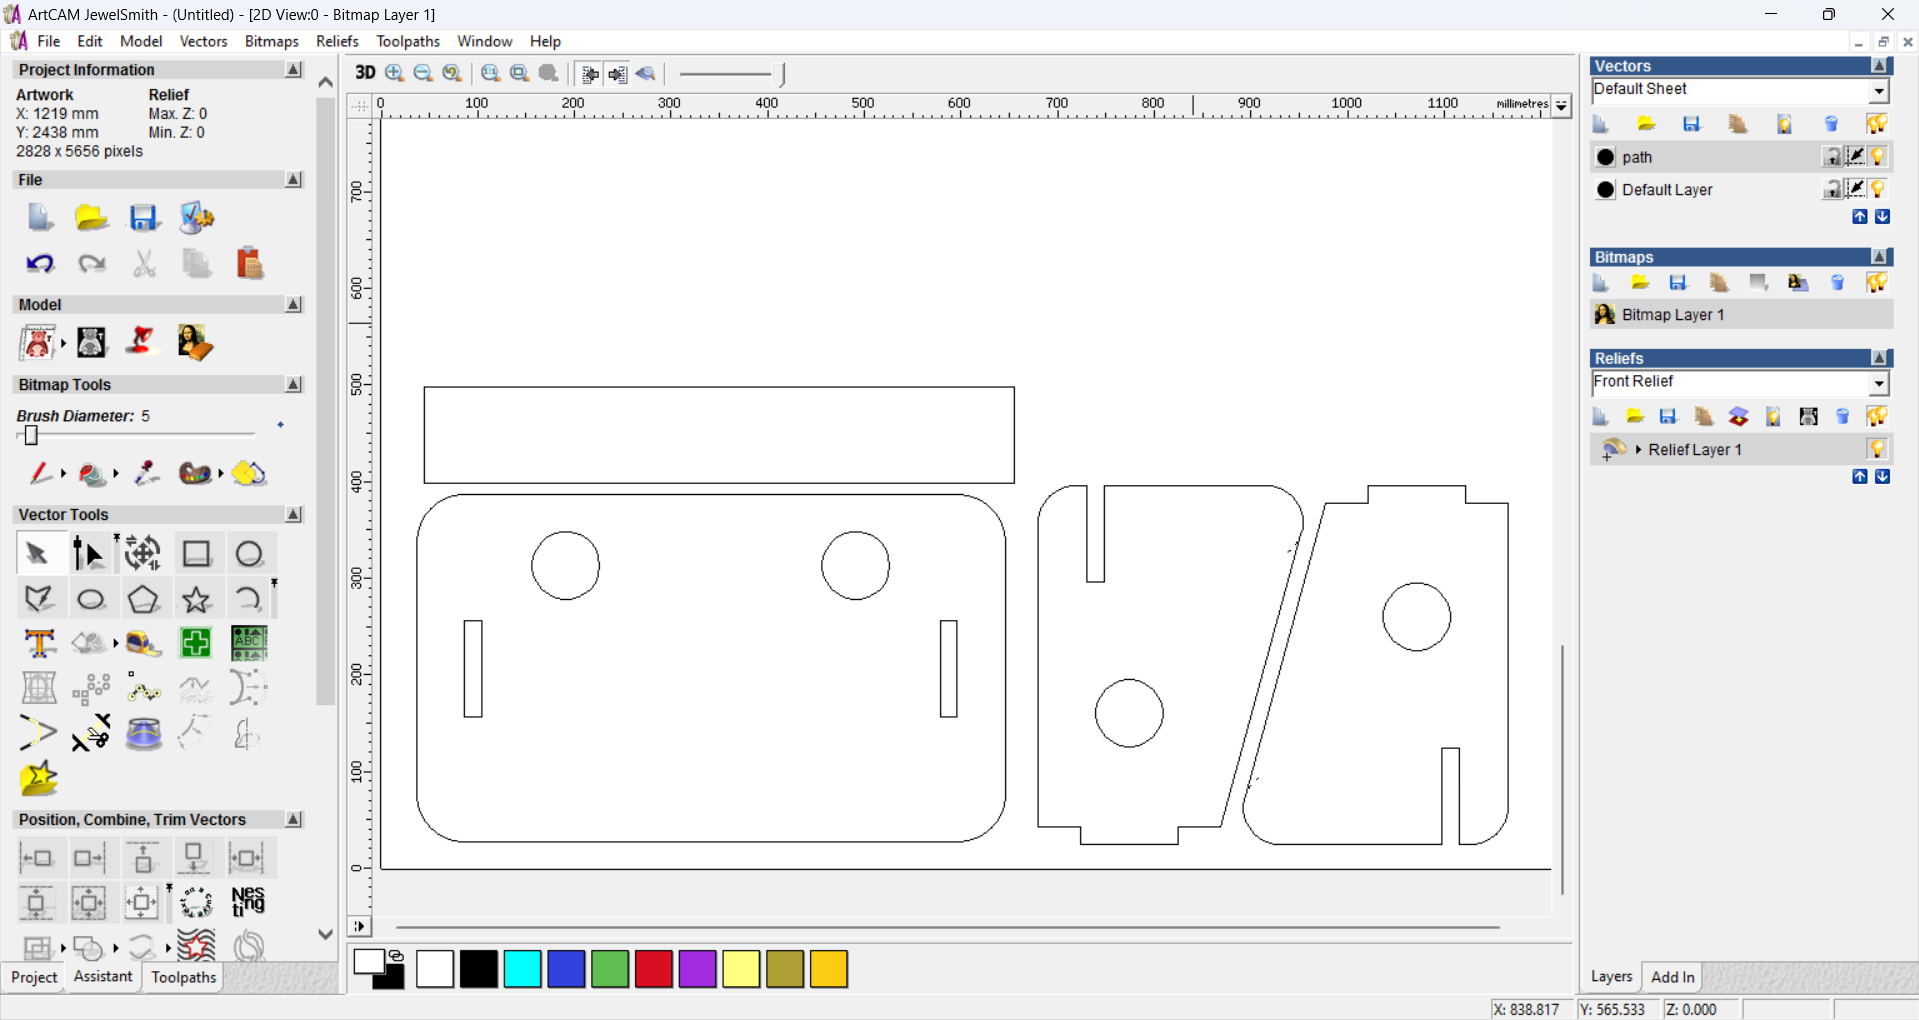
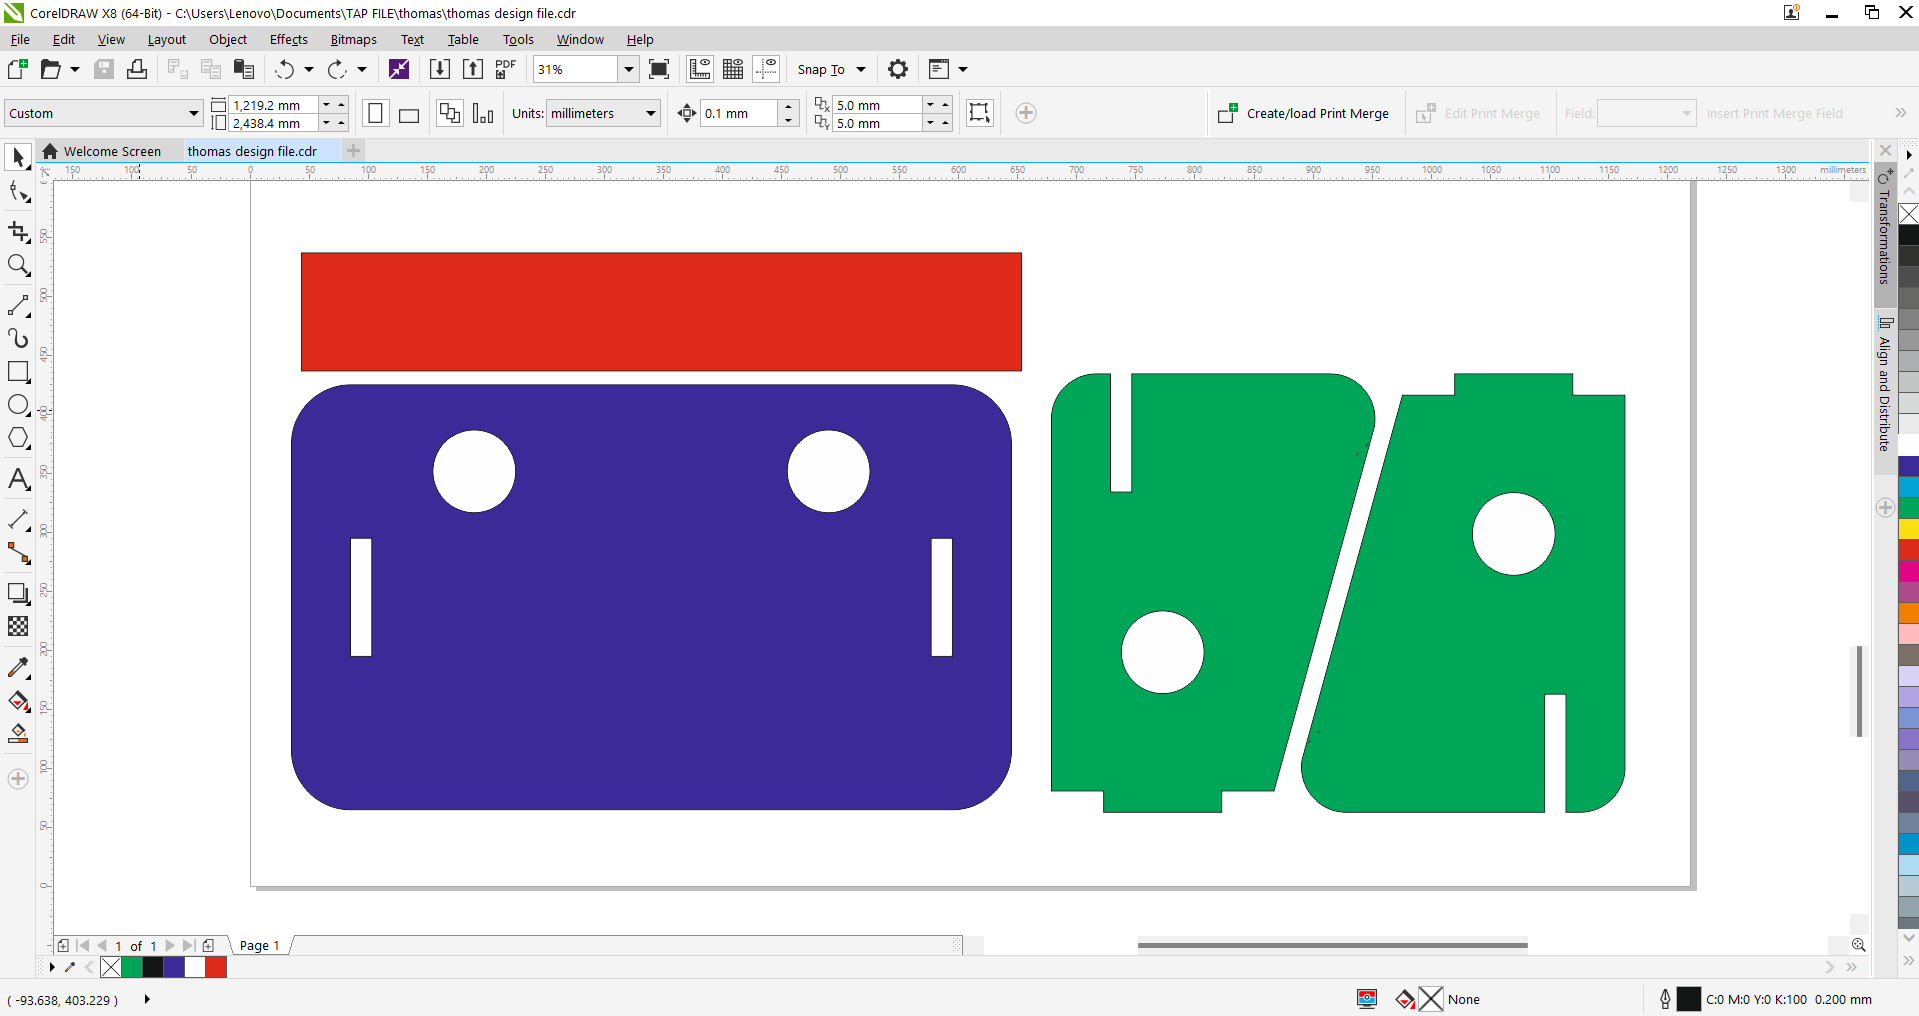
1. Designing My Object: Stool Using ArtCAM
Designing a stool with ArtCAM combines precision, creativity, and CAD/CAM functionality to create detailed designs for manufacturing. Below is a streamlined process of how the stool design was created:
- Conceptualization: Defined the stool’s purpose, dimensions, and style. Focused on creating a functional and versatile design suitable for various uses.
- Sketching Basic Shapes: Used ArtCAM’s drawing tools to create the stool’s primary shapes like rectangles and circles, establishing proportions and layout.
Detailing Components: Added details like curves, contours, and joinery using ArtCAM’s shaping and editing tools to enhance ergonomics and stability.-

Dimensioning and Scale: Applied precise dimensions to ensure the design could be constructed accurately, using ArtCAM’s measurement tools. -
Texture and Materials: Simulated textures and materials like wood or metal to preview the stool’s appearance in ArtCAM’s rendering tools. -
Layer Organization: Organized components like legs, seat, and fasteners into layers for clarity and efficient edits. -
Review and Refinement: Iteratively improved the design based on functionality and aesthetics, refining proportions and comfort. - Exporting for Manufacturing: Exported the final design in formats like DXF or STL for CNC machining or further processing.
ArtCAM’s capabilities streamlined the design process, ensuring high-quality, scalable outputs suitable for prototype development or production.
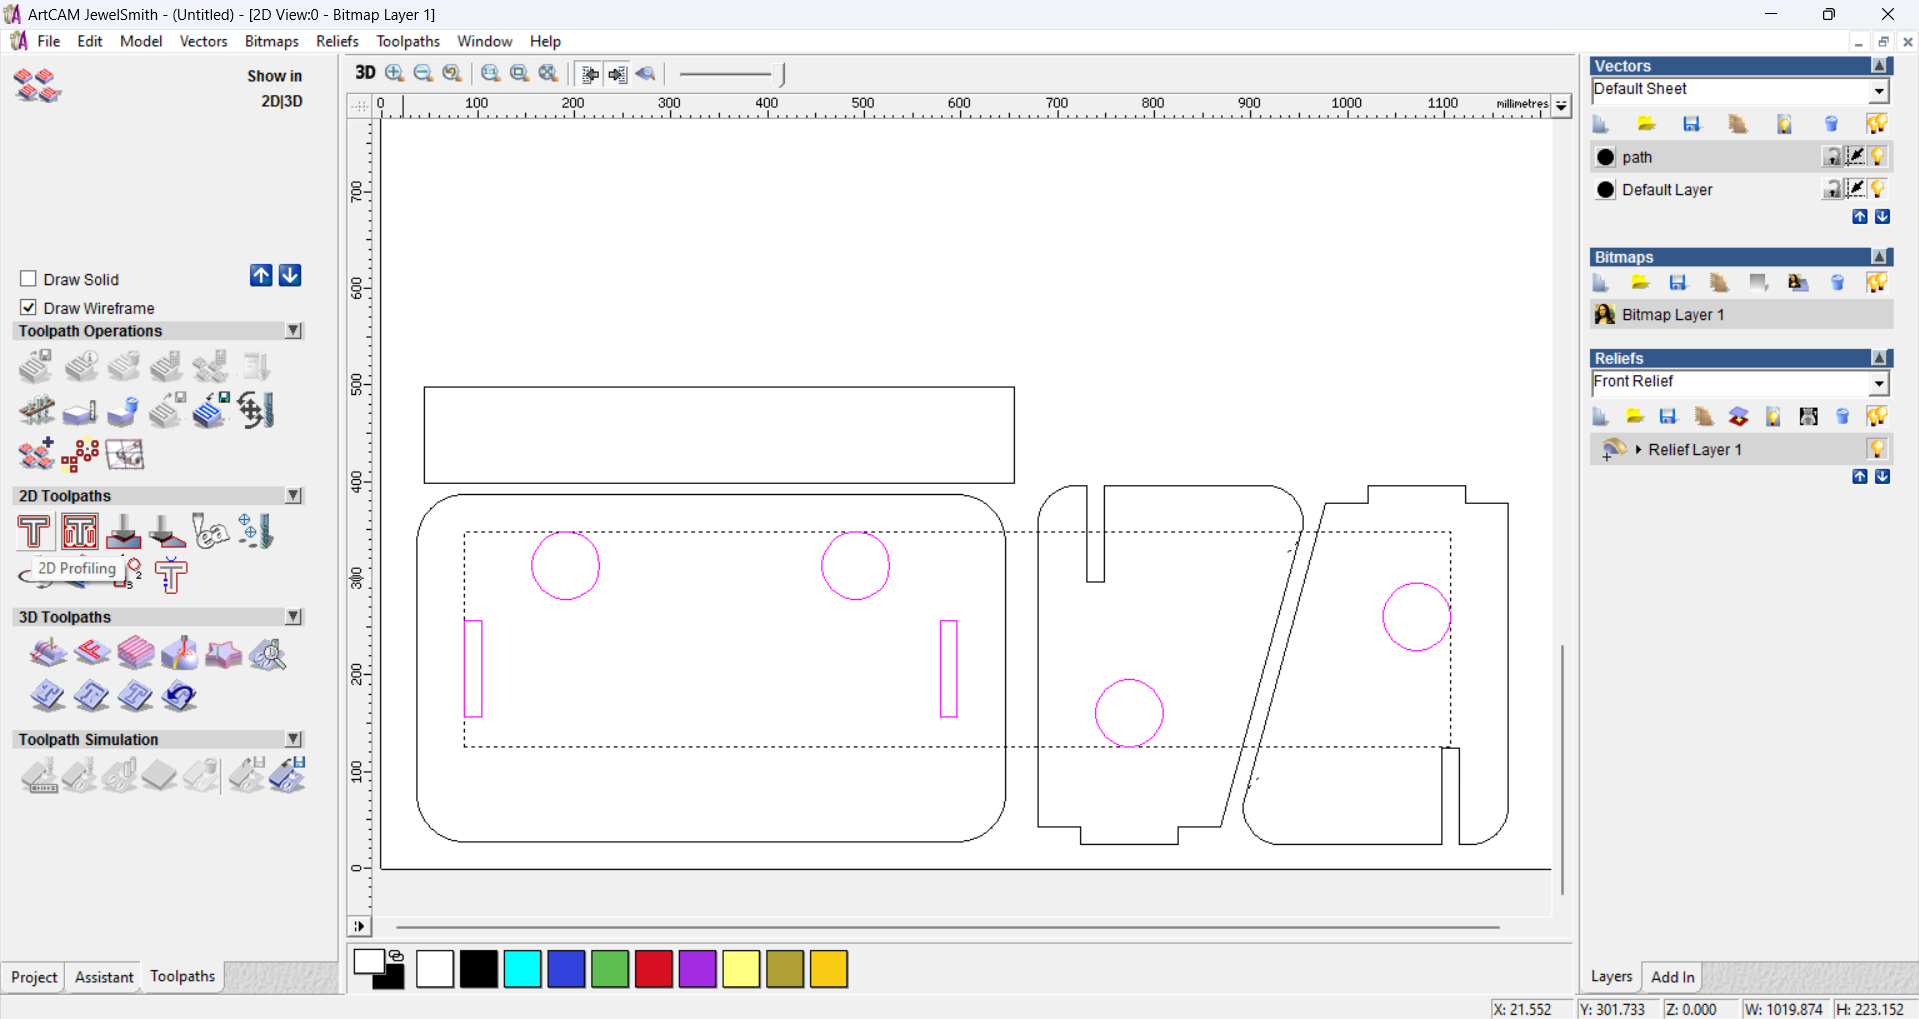
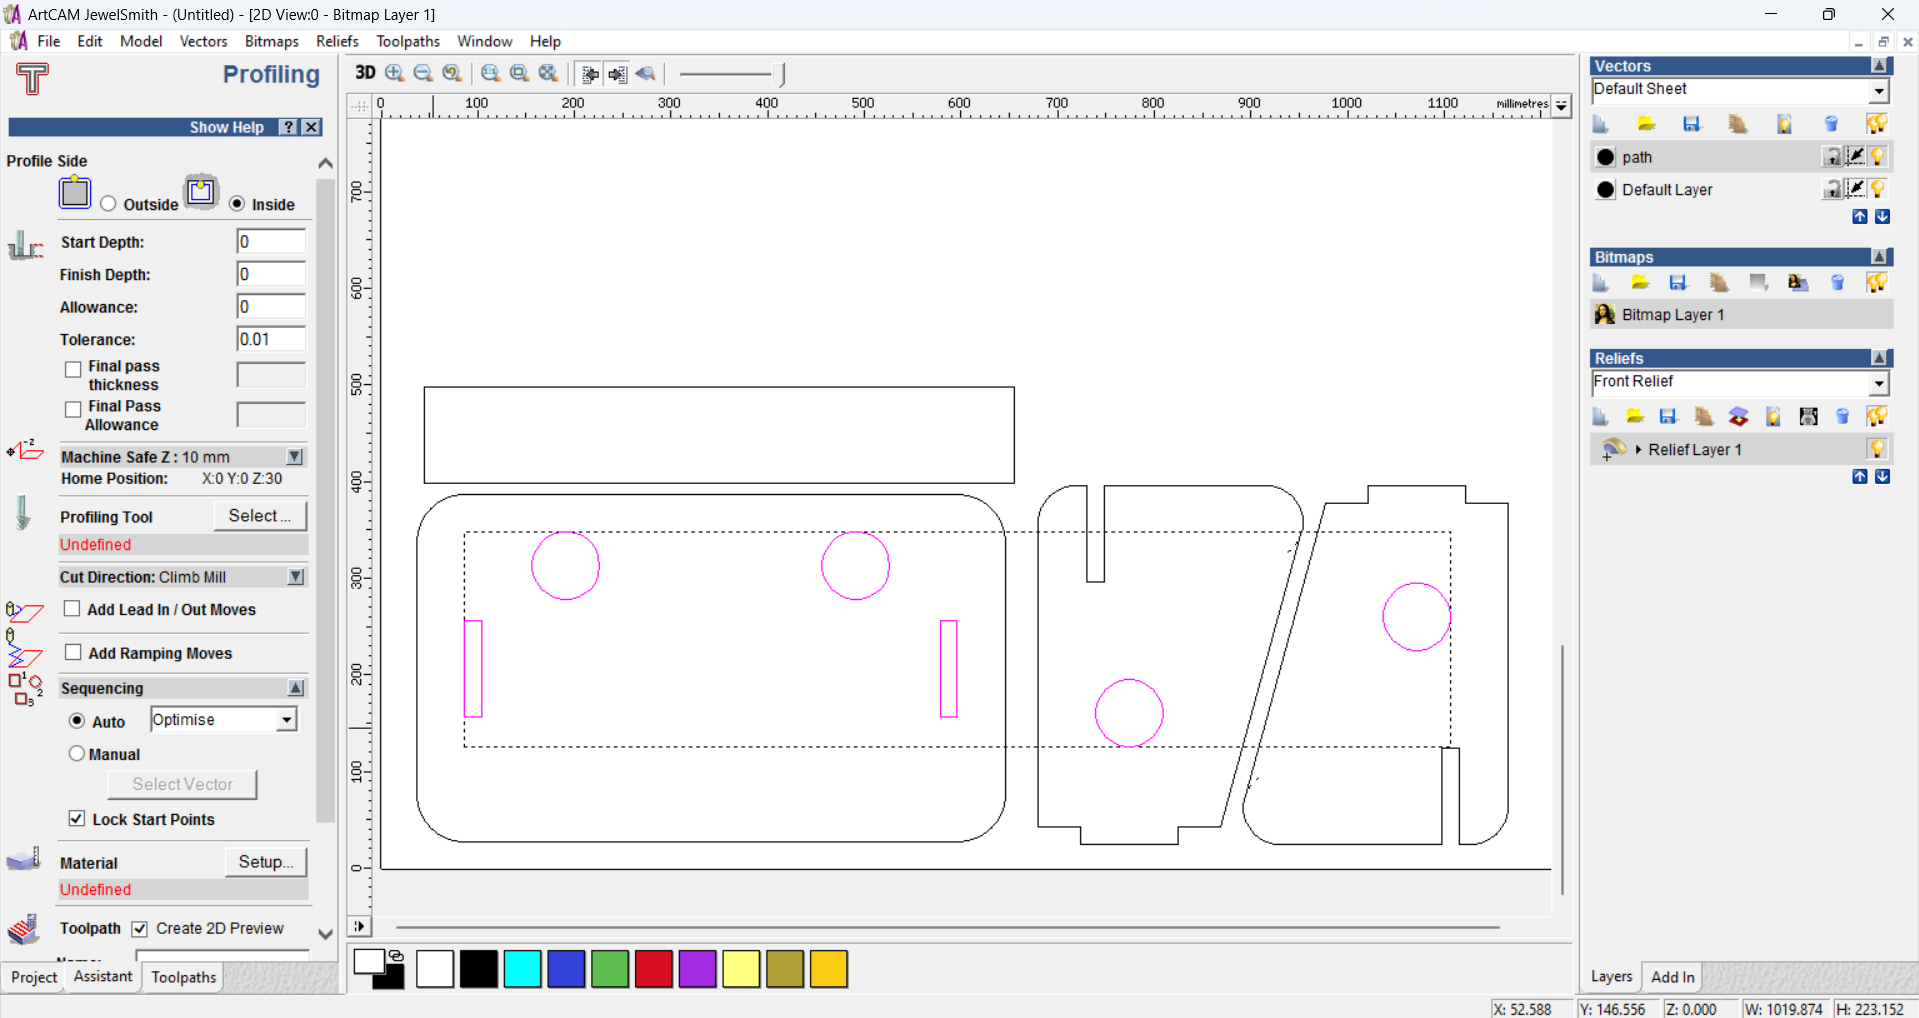
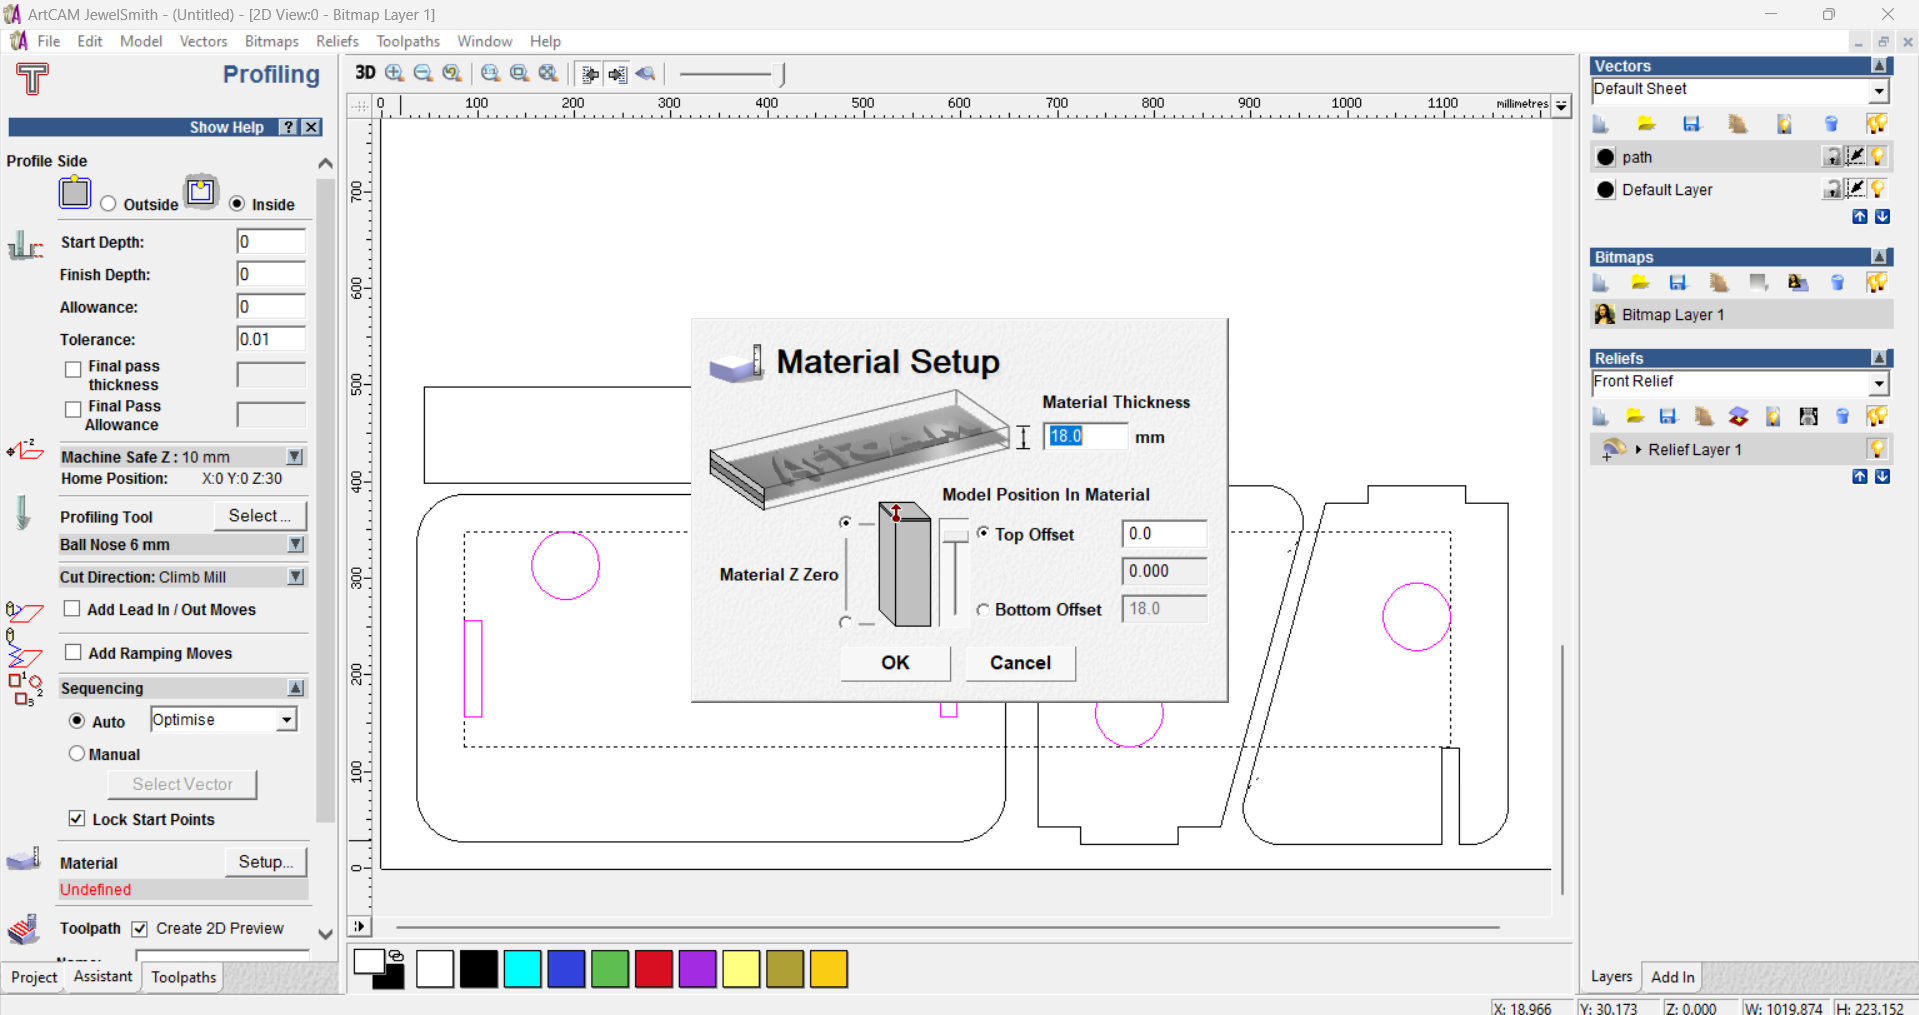
2. Documented How I Made My CAM Toolpath
Creating an effective CAM (Computer-Aided Manufacturing) toolpath ensures precision and efficiency in machining. Using ArtCAM, I followed a structured process to achieve accurate machining and a high-quality finish. Below is an outline of the process:
- Software Selection: ArtCAM was used to generate the CAM toolpath, leveraging its specialized machining strategies and simulation tools to plan the manufacturing process accurately.
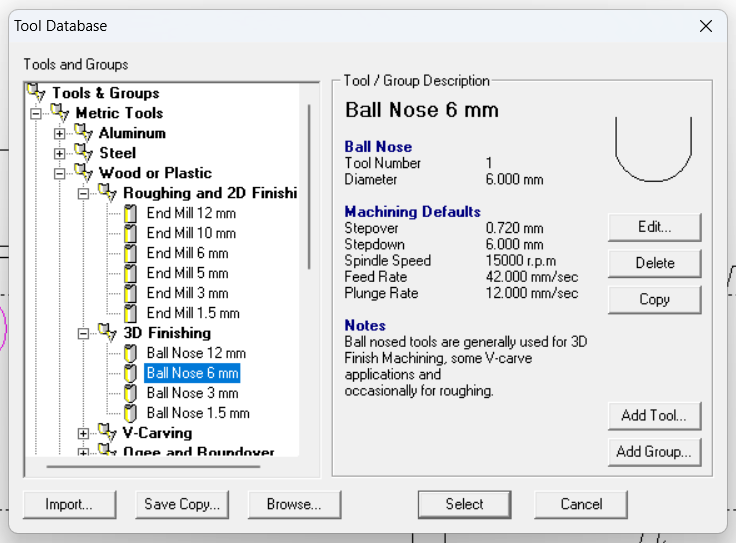
- Material Consideration: The material used was medium-density fiberboard (MDF), requiring specific cutting speeds and tools to prevent chipping and achieve a smooth finish.
- Tool Selection: Carbide end mills of various diameters were chosen—larger tools for roughing passes and smaller tools for detailed finishing, ensuring precision and durability.
- Toolpath Strategy: A multi-step approach was implemented. Roughing passes removed excess material quickly, followed by finishing passes for refining edges and surfaces. Contouring ensured accurate profiles and intricate cuts.
- Step-over and Depth Settings: Step-over and step-down values were optimized to balance machining speed and surface quality. Finishing passes used smaller step-overs for smooth surfaces, while roughing had deeper step-downs for efficient material removal.
Toolpath Simulation: The toolpath was simulated in ArtCAM to detect collisions or inefficiencies. Feedback from the simulation guided adjustments to improve efficiency and accuracy before machining.-
Post-Processing: ArtCAM generated G-code customized for the CNC machine, ensuring compatibility with specific machine and tooling requirements. - Machine Setup and Verification: The CNC machine was set up with the chosen tools and material. A dry run verified the toolpath, enabling final adjustments to tool offsets and zero points for precision.
- Execution and Monitoring: During machining, the process was monitored for tool wear, material shifting, or unexpected issues, ensuring quality and consistency in the final output.
By following this structured approach with ArtCAM, the machining process was efficient and predictable. Toolpath simulation, careful planning, and real-time monitoring ensured the final product met design specifications with minimal waste and high-quality finish.
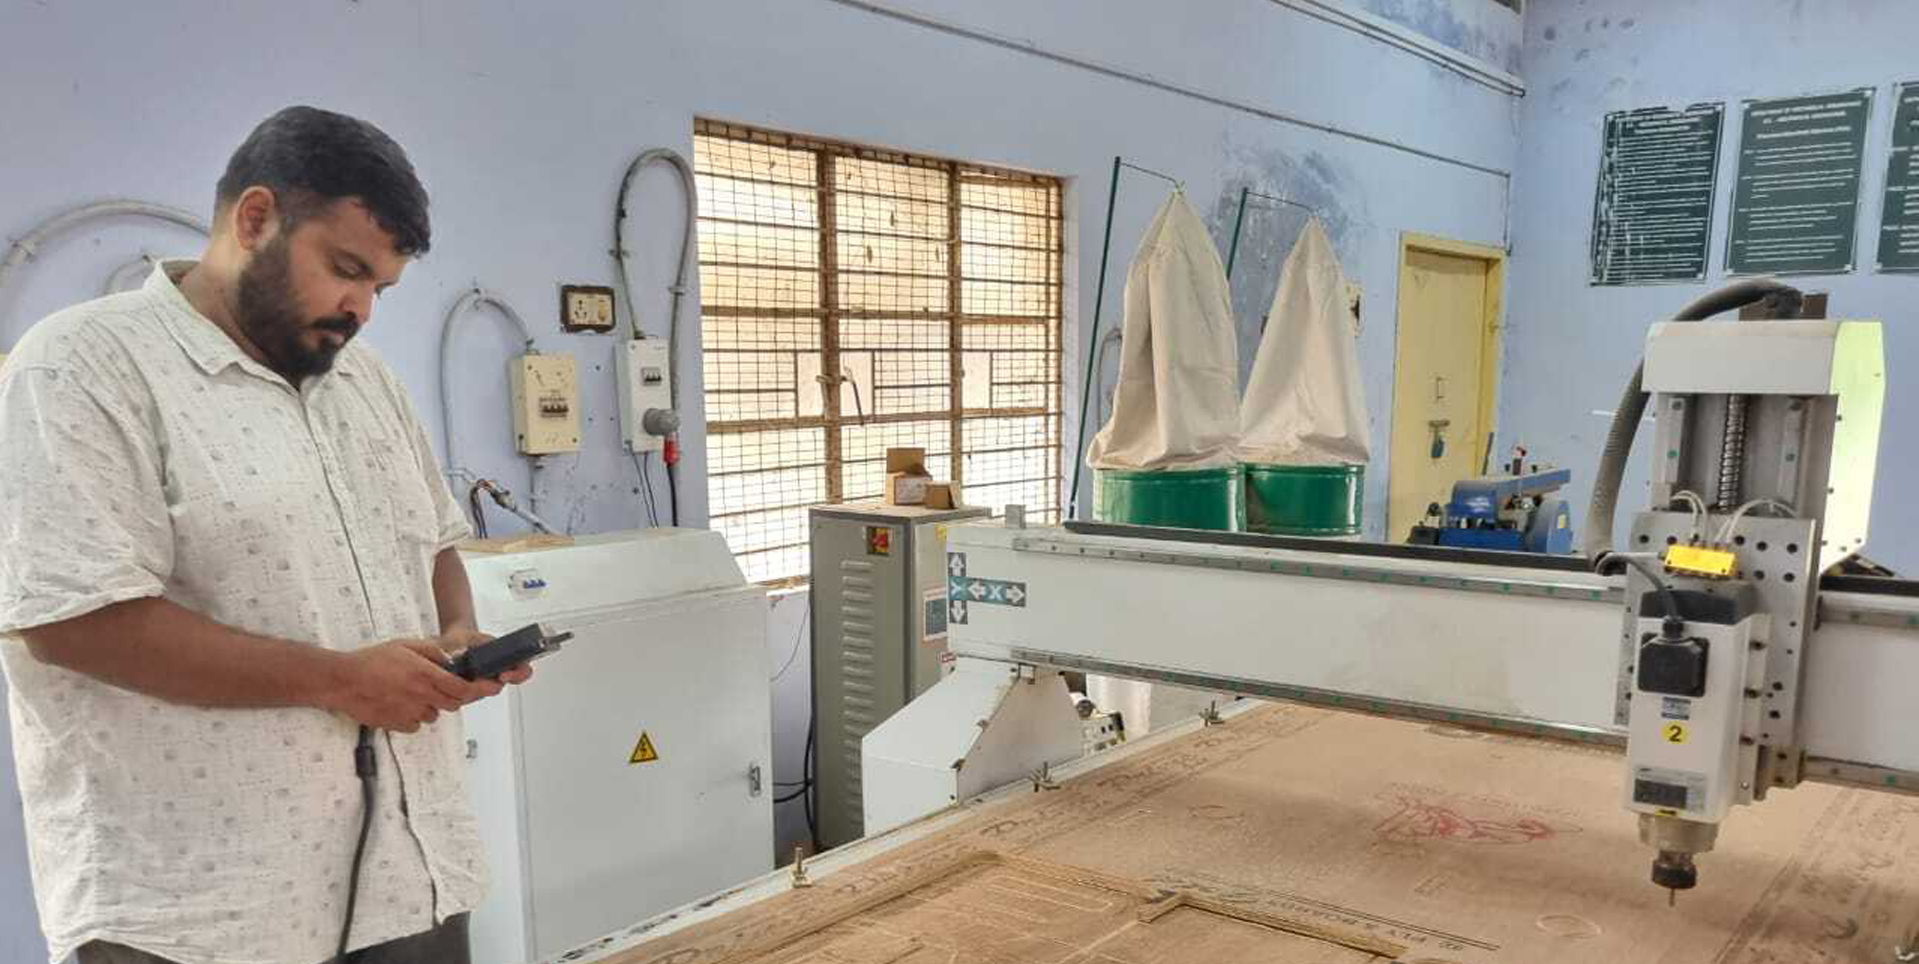
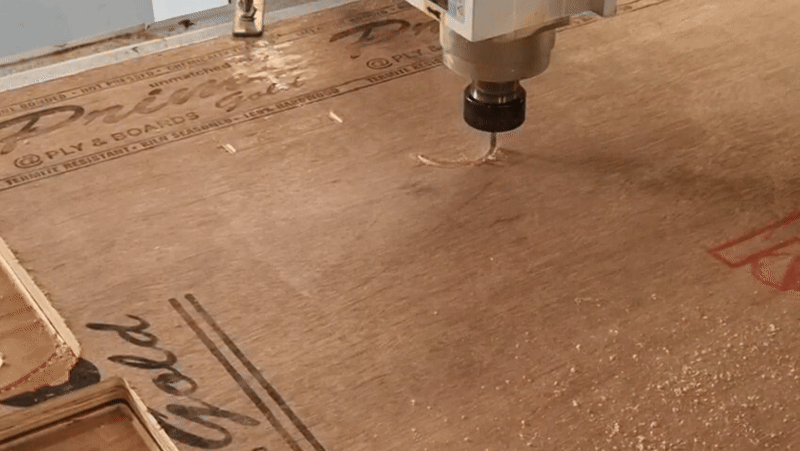
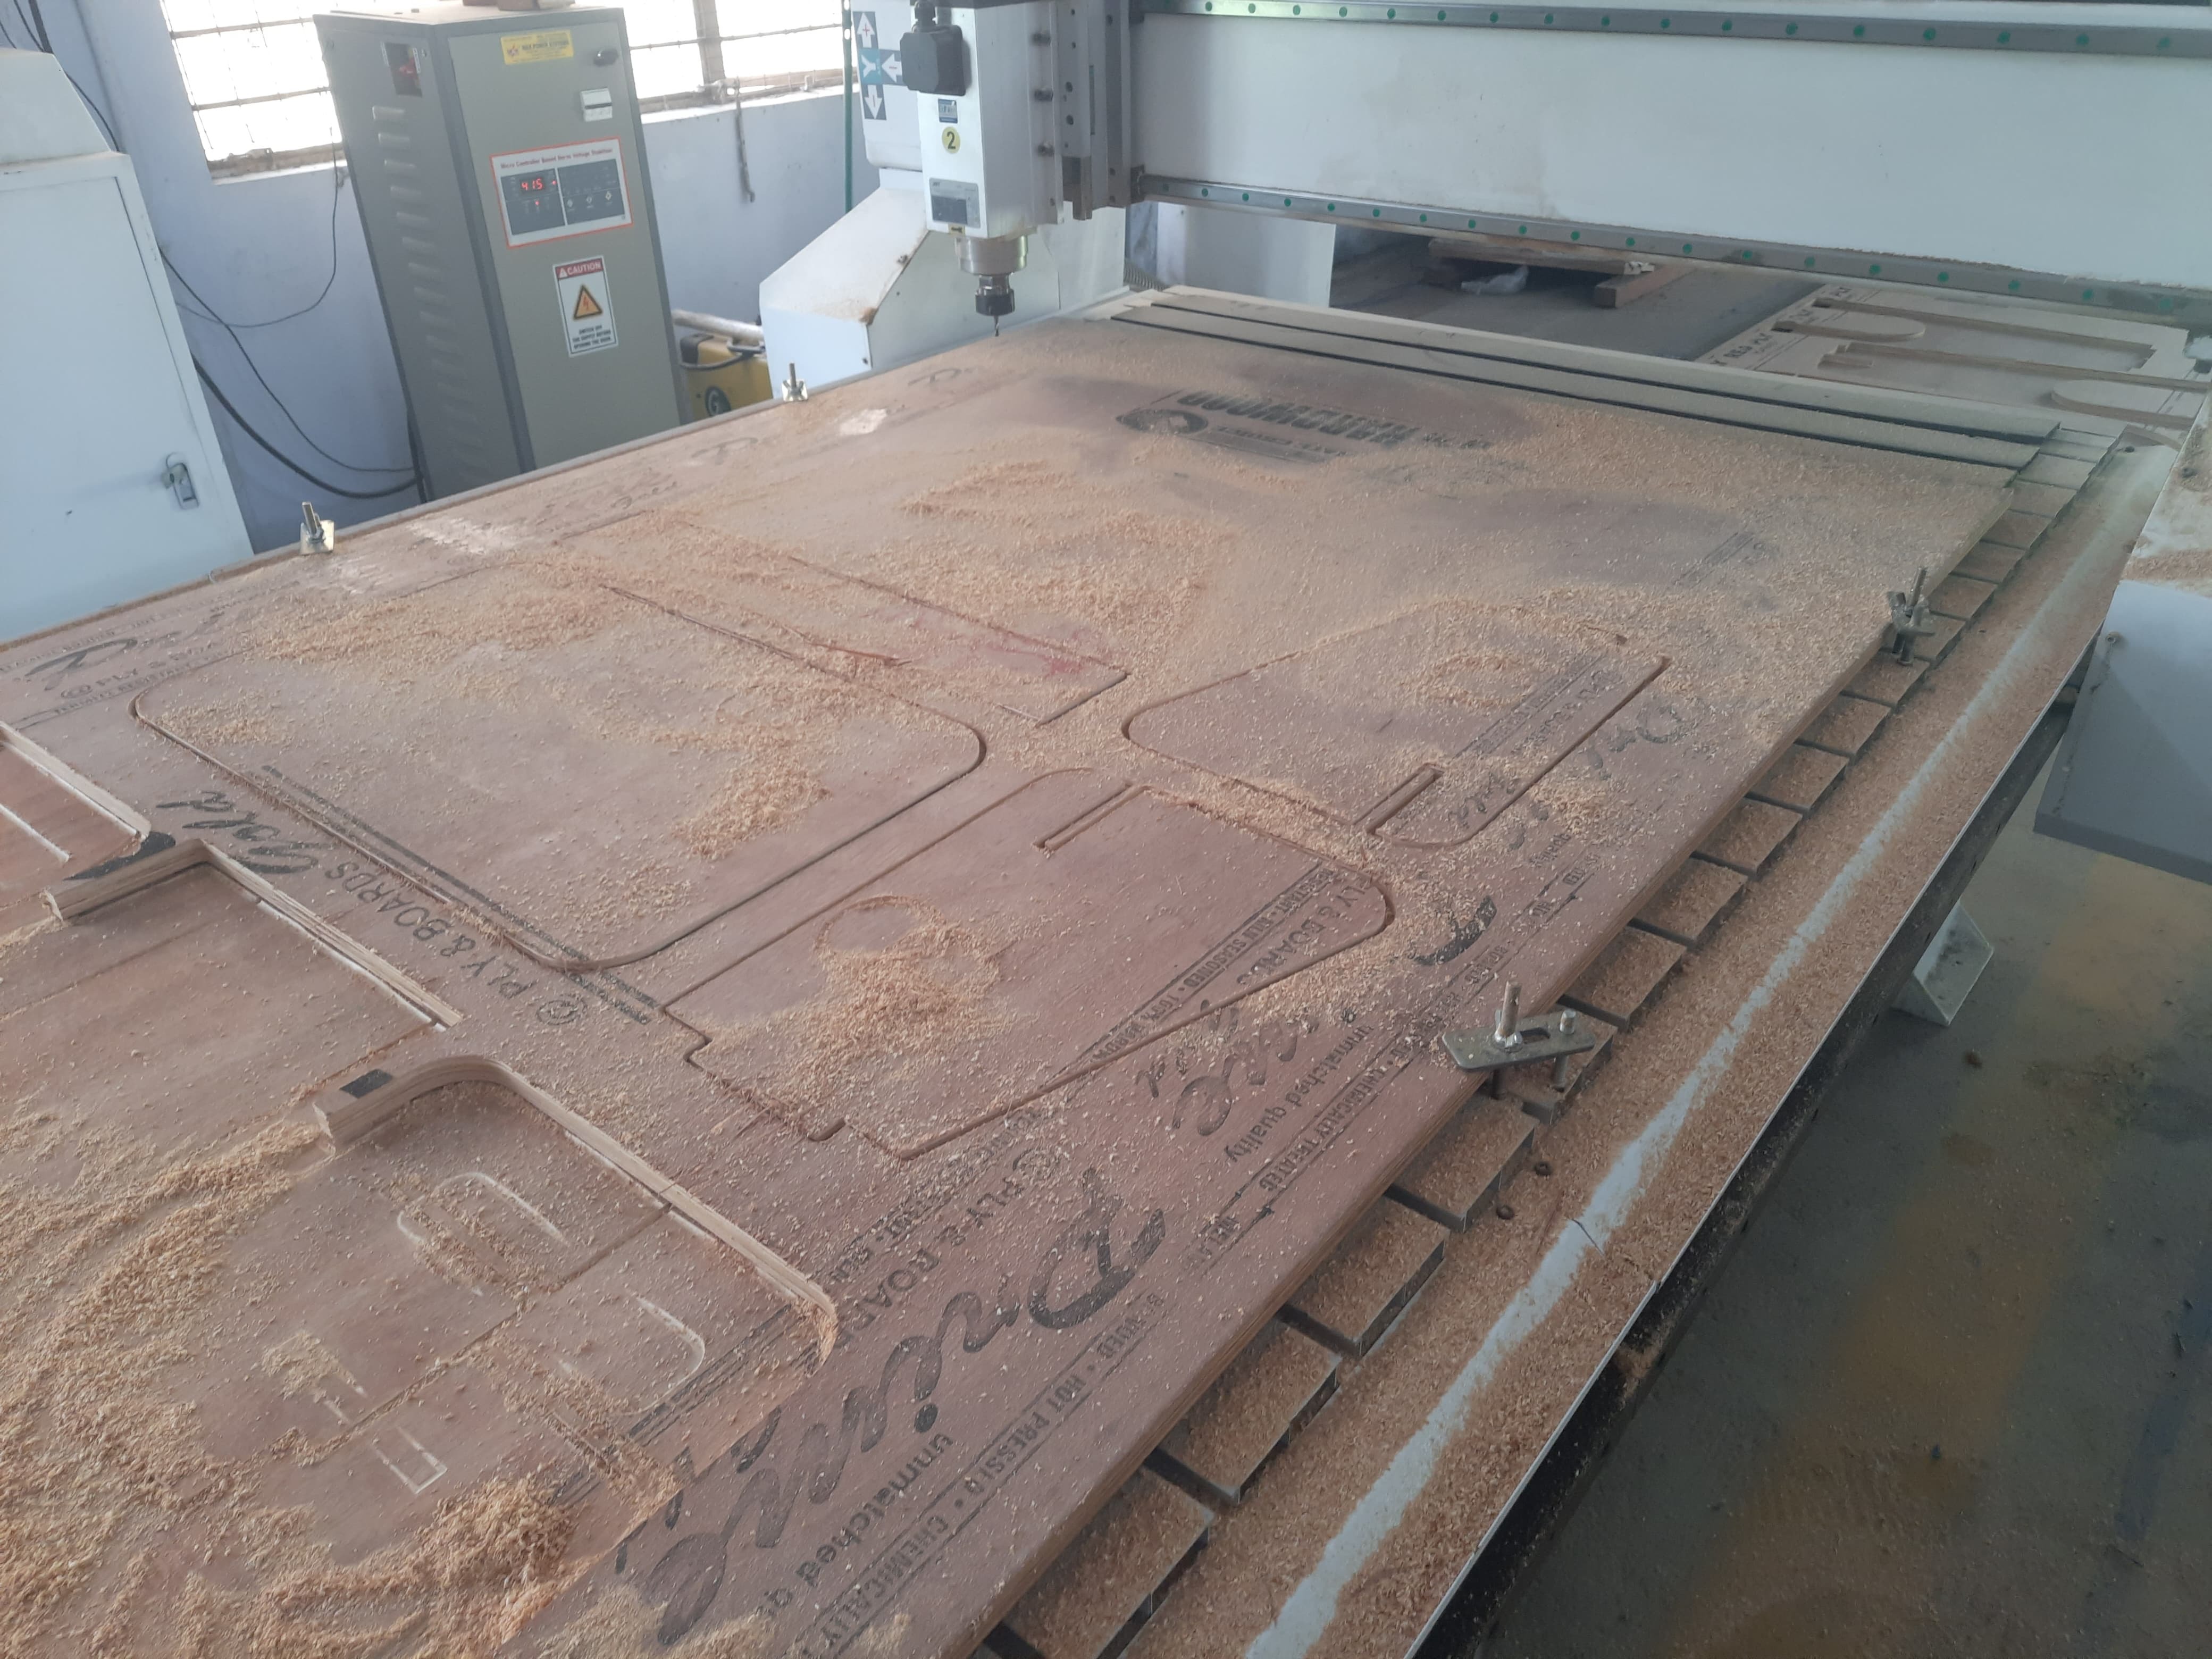
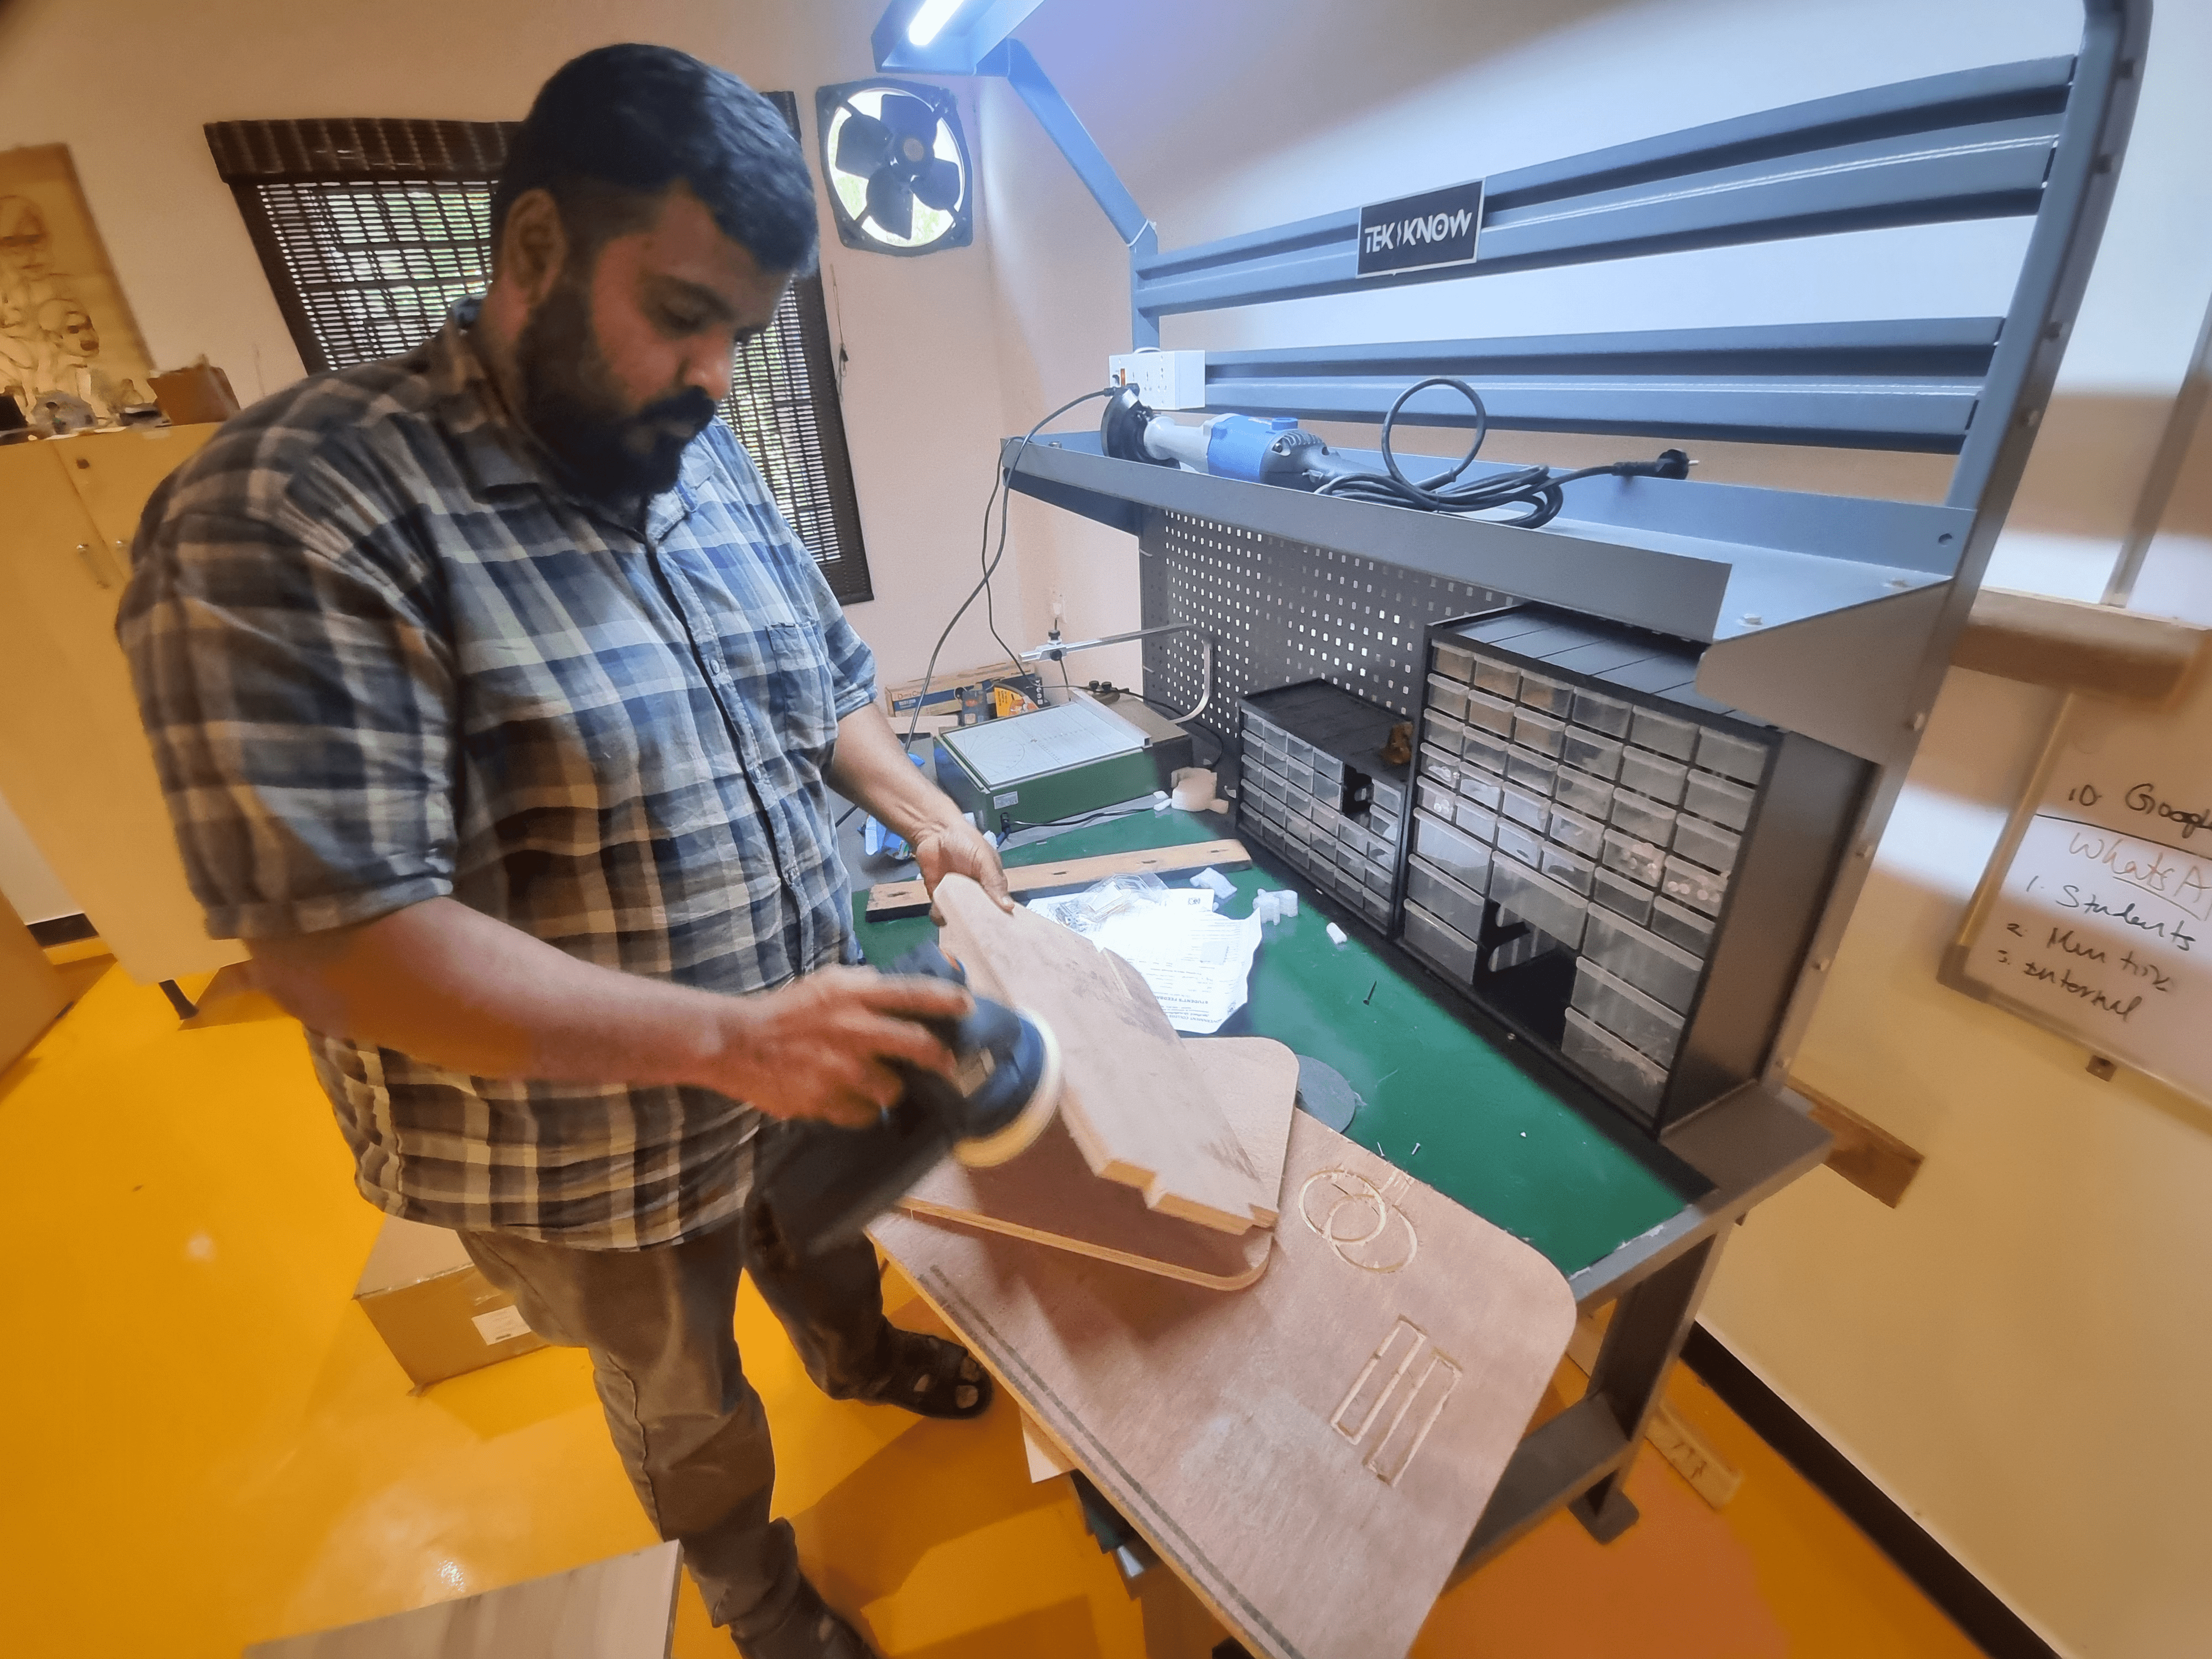
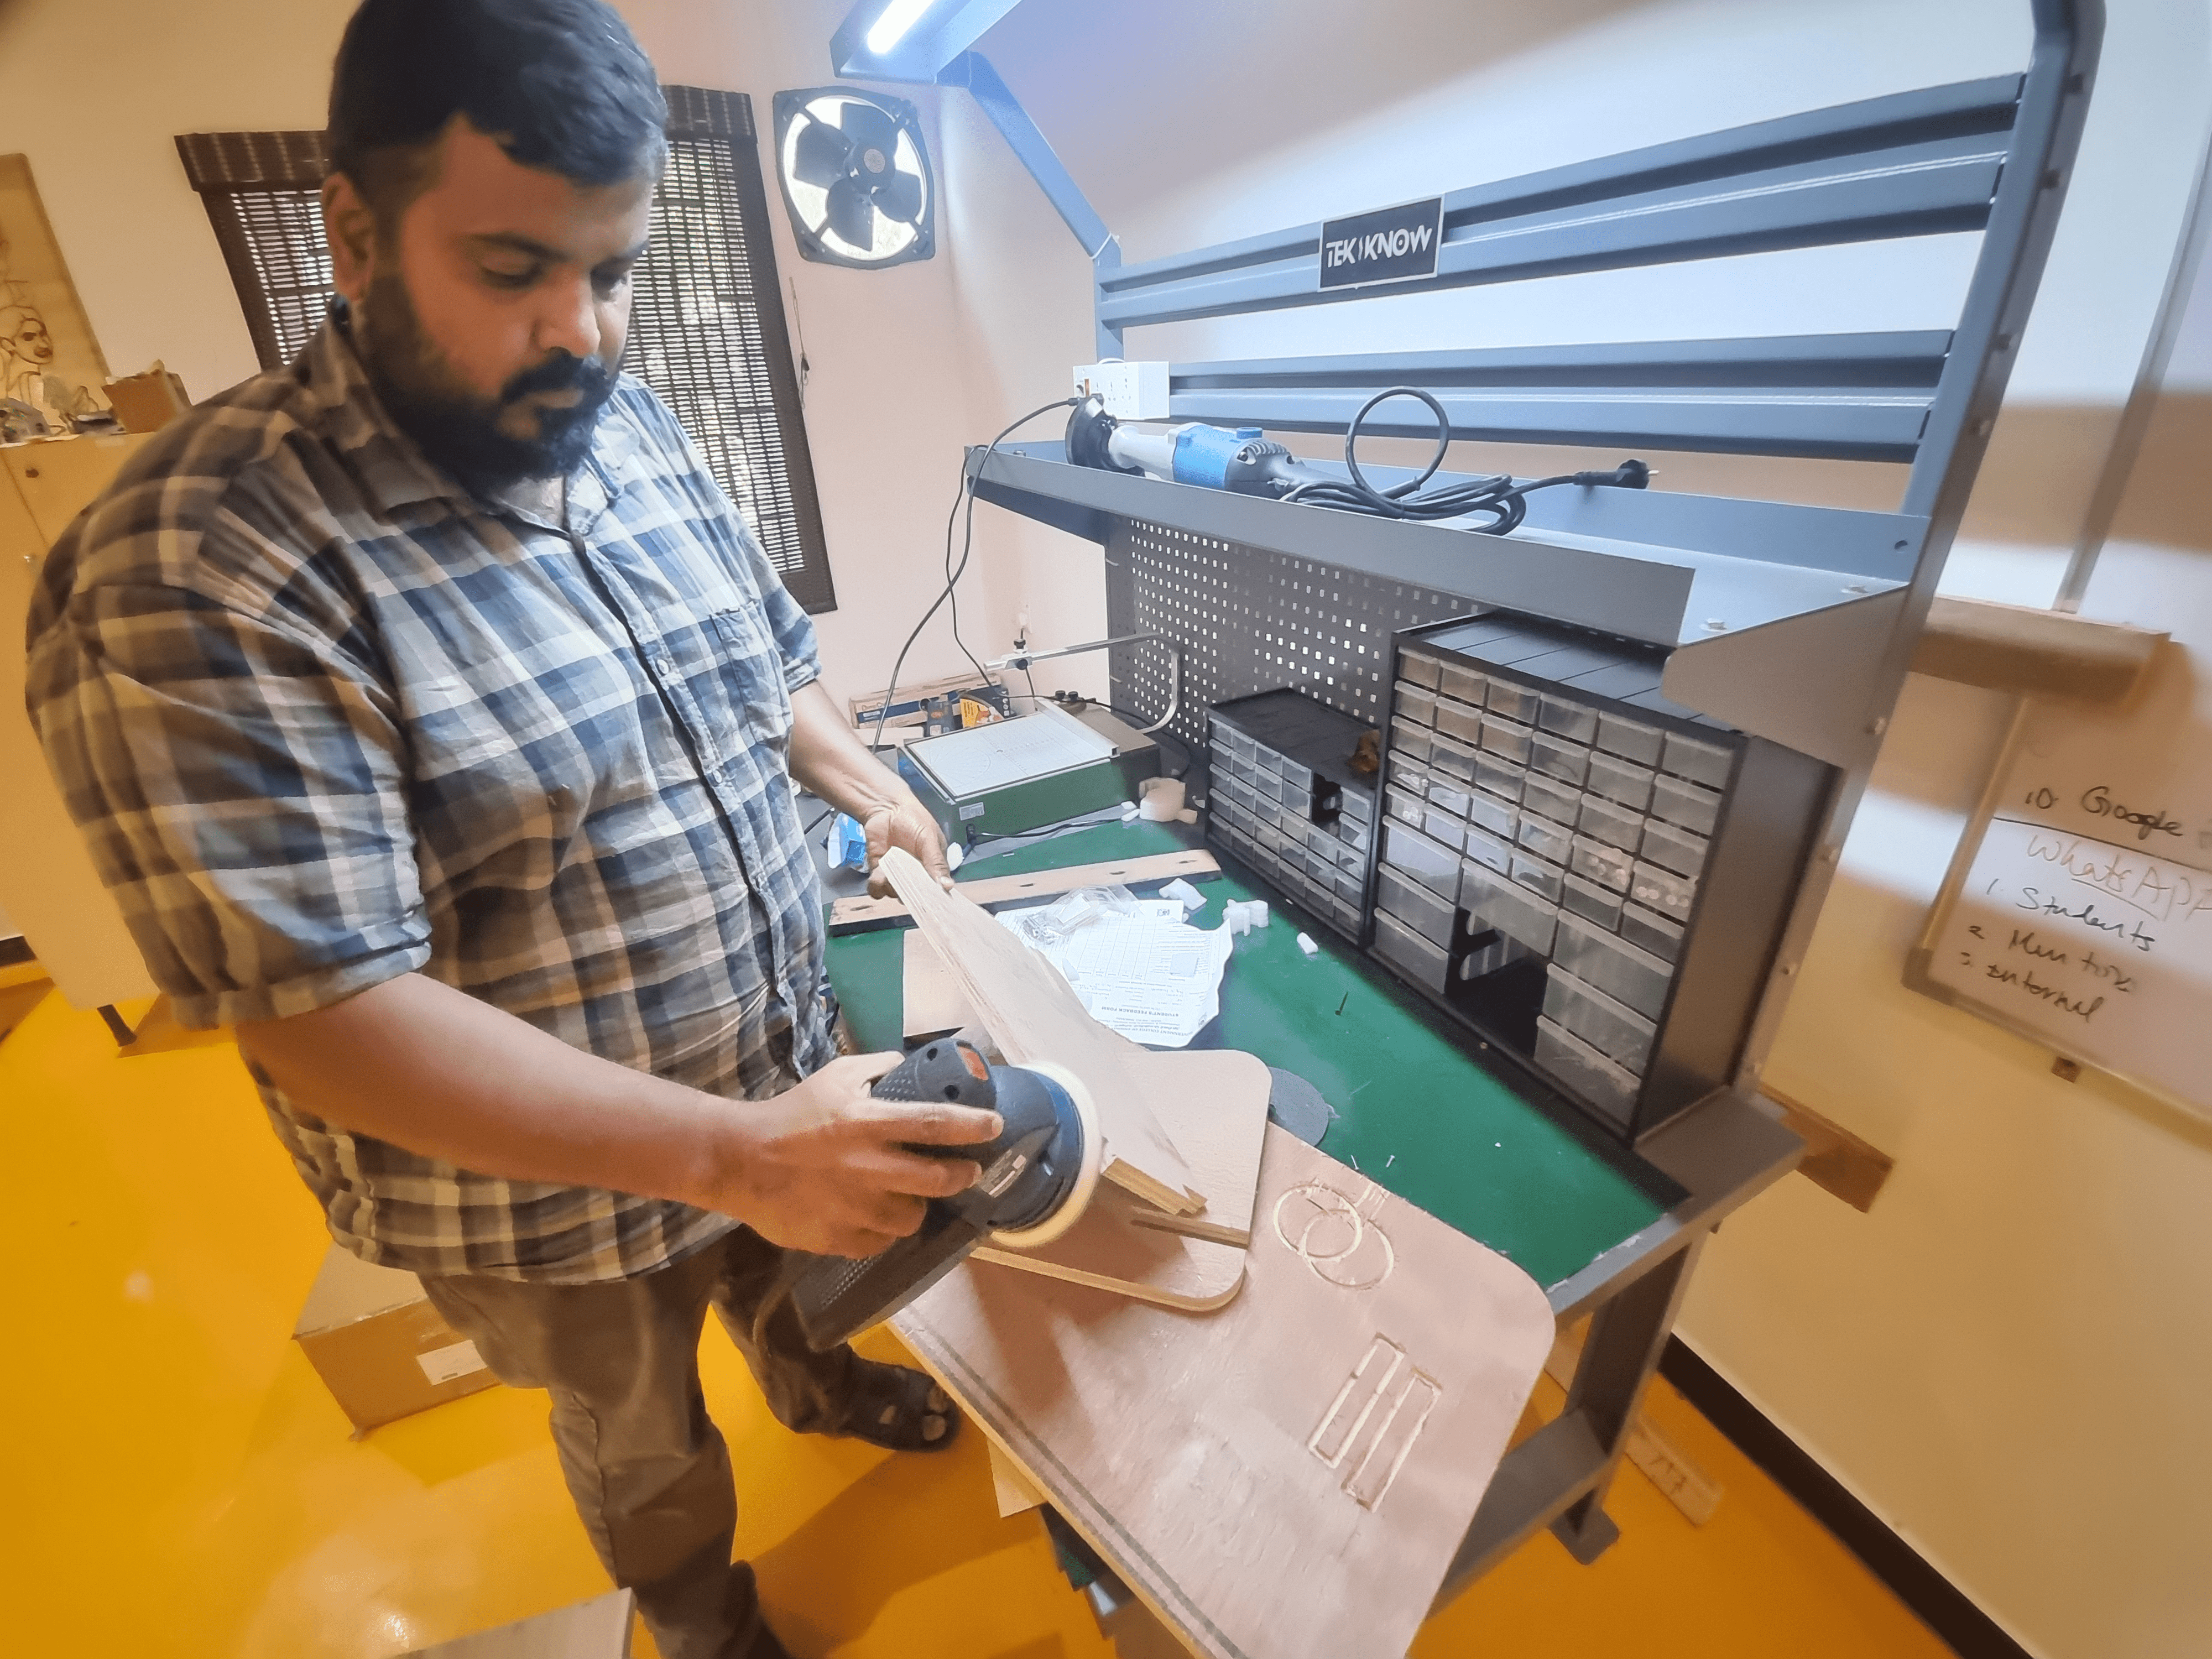
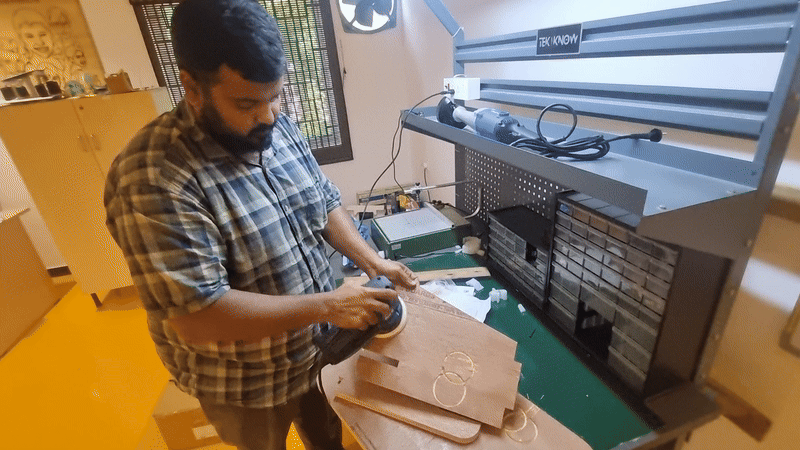
3. Here is How We Made It
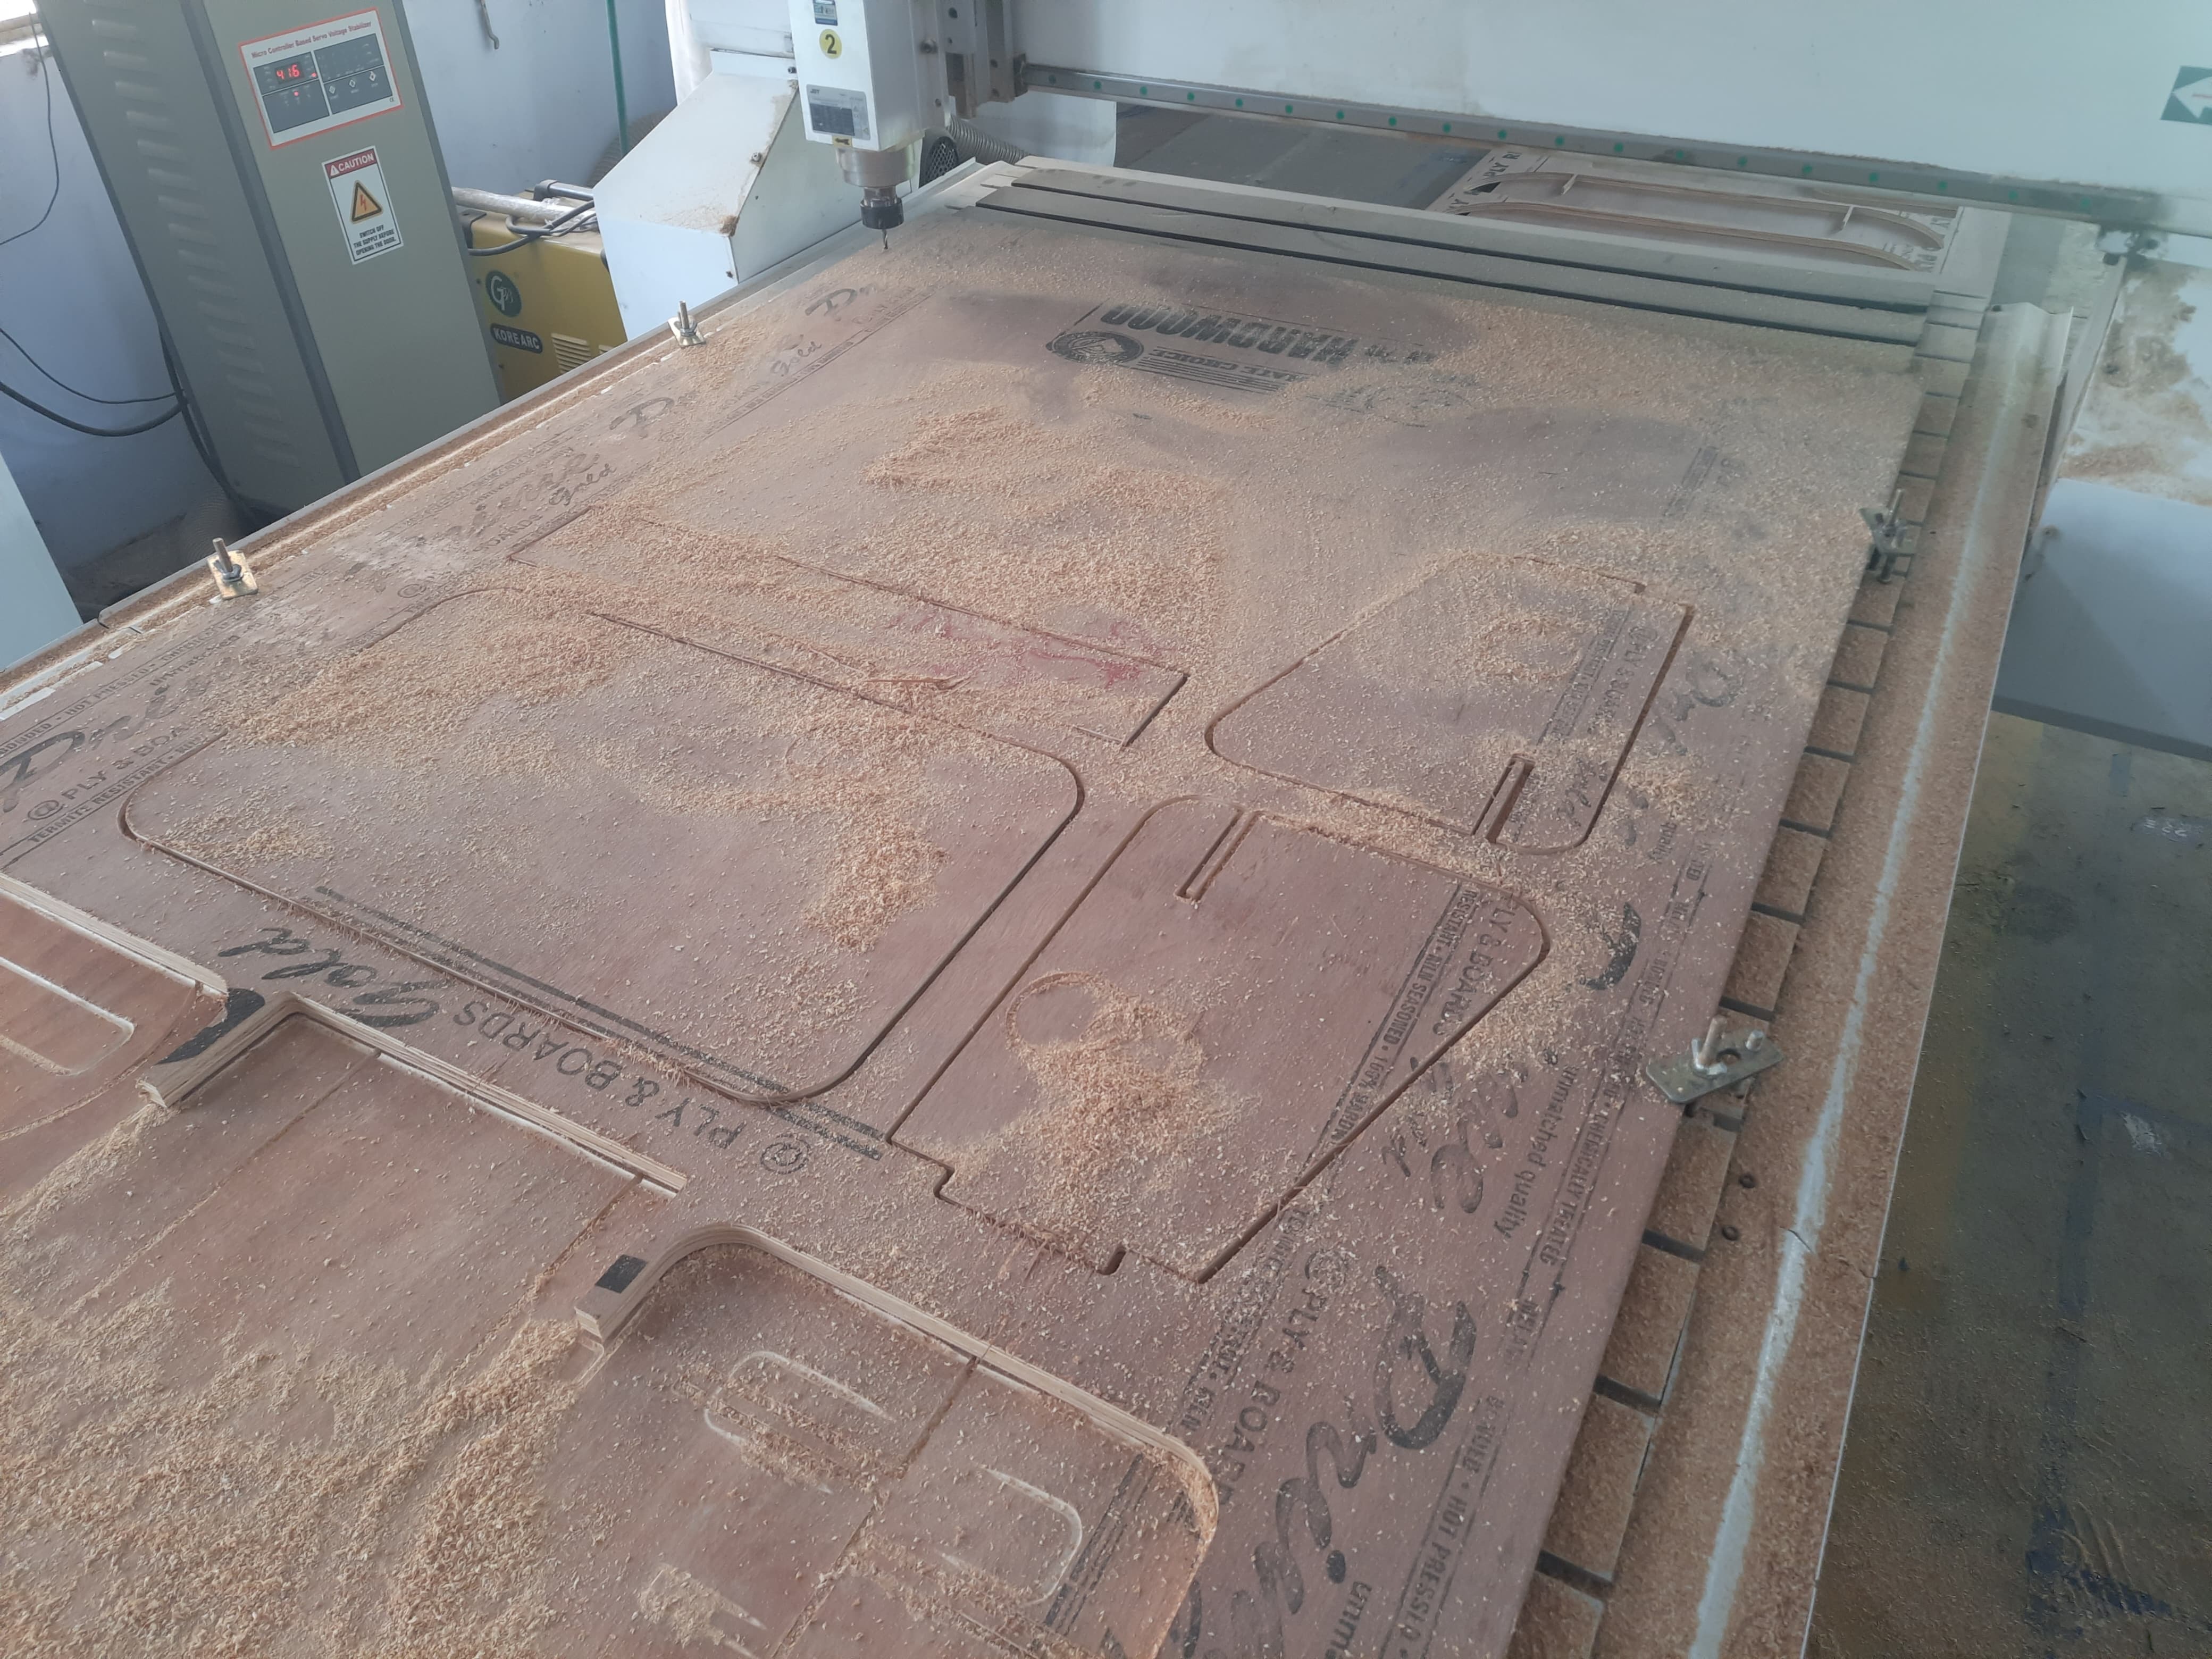
Fabricating a large object like the designed stool involves careful preparation and execution to ensure accuracy, safety, and quality. The process encompasses setting up the CNC machine, securing the materials, and managing the entire fabrication workflow efficiently. Below is an overview of the steps taken during the making process:
- Machine Setup: The CNC machine was configured according to the specifications of the project. This included clearing the workspace of any debris, installing the correct cutting tools, and calibrating the machine’s axes to ensure precise movement. Proper setup is crucial to avoid errors during machining and to extend tool life.
- Material Fixings: To keep the material stable throughout the machining process, various methods were used such as clamps and vacuum beds. Securing the stock material firmly prevents movement or vibration that could affect the quality of cuts and potentially damage the tool or workpiece.
- Feeds and Speeds: The feed rates and spindle speeds were carefully selected based on the type of material and the cutting tools being used. These parameters influence the machining efficiency, tool wear, and surface finish. Incorrect feeds or speeds could lead to tool breakage or poor quality results, so adjustments were made based on manufacturer recommendations and experience.
- Depth of Cut: Appropriate depth increments were set for each pass to balance effective material removal and tool longevity. Taking shallower cuts during finishing passes helped achieve a smooth surface, while deeper cuts during roughing removed the majority of the material efficiently without overloading the tools.
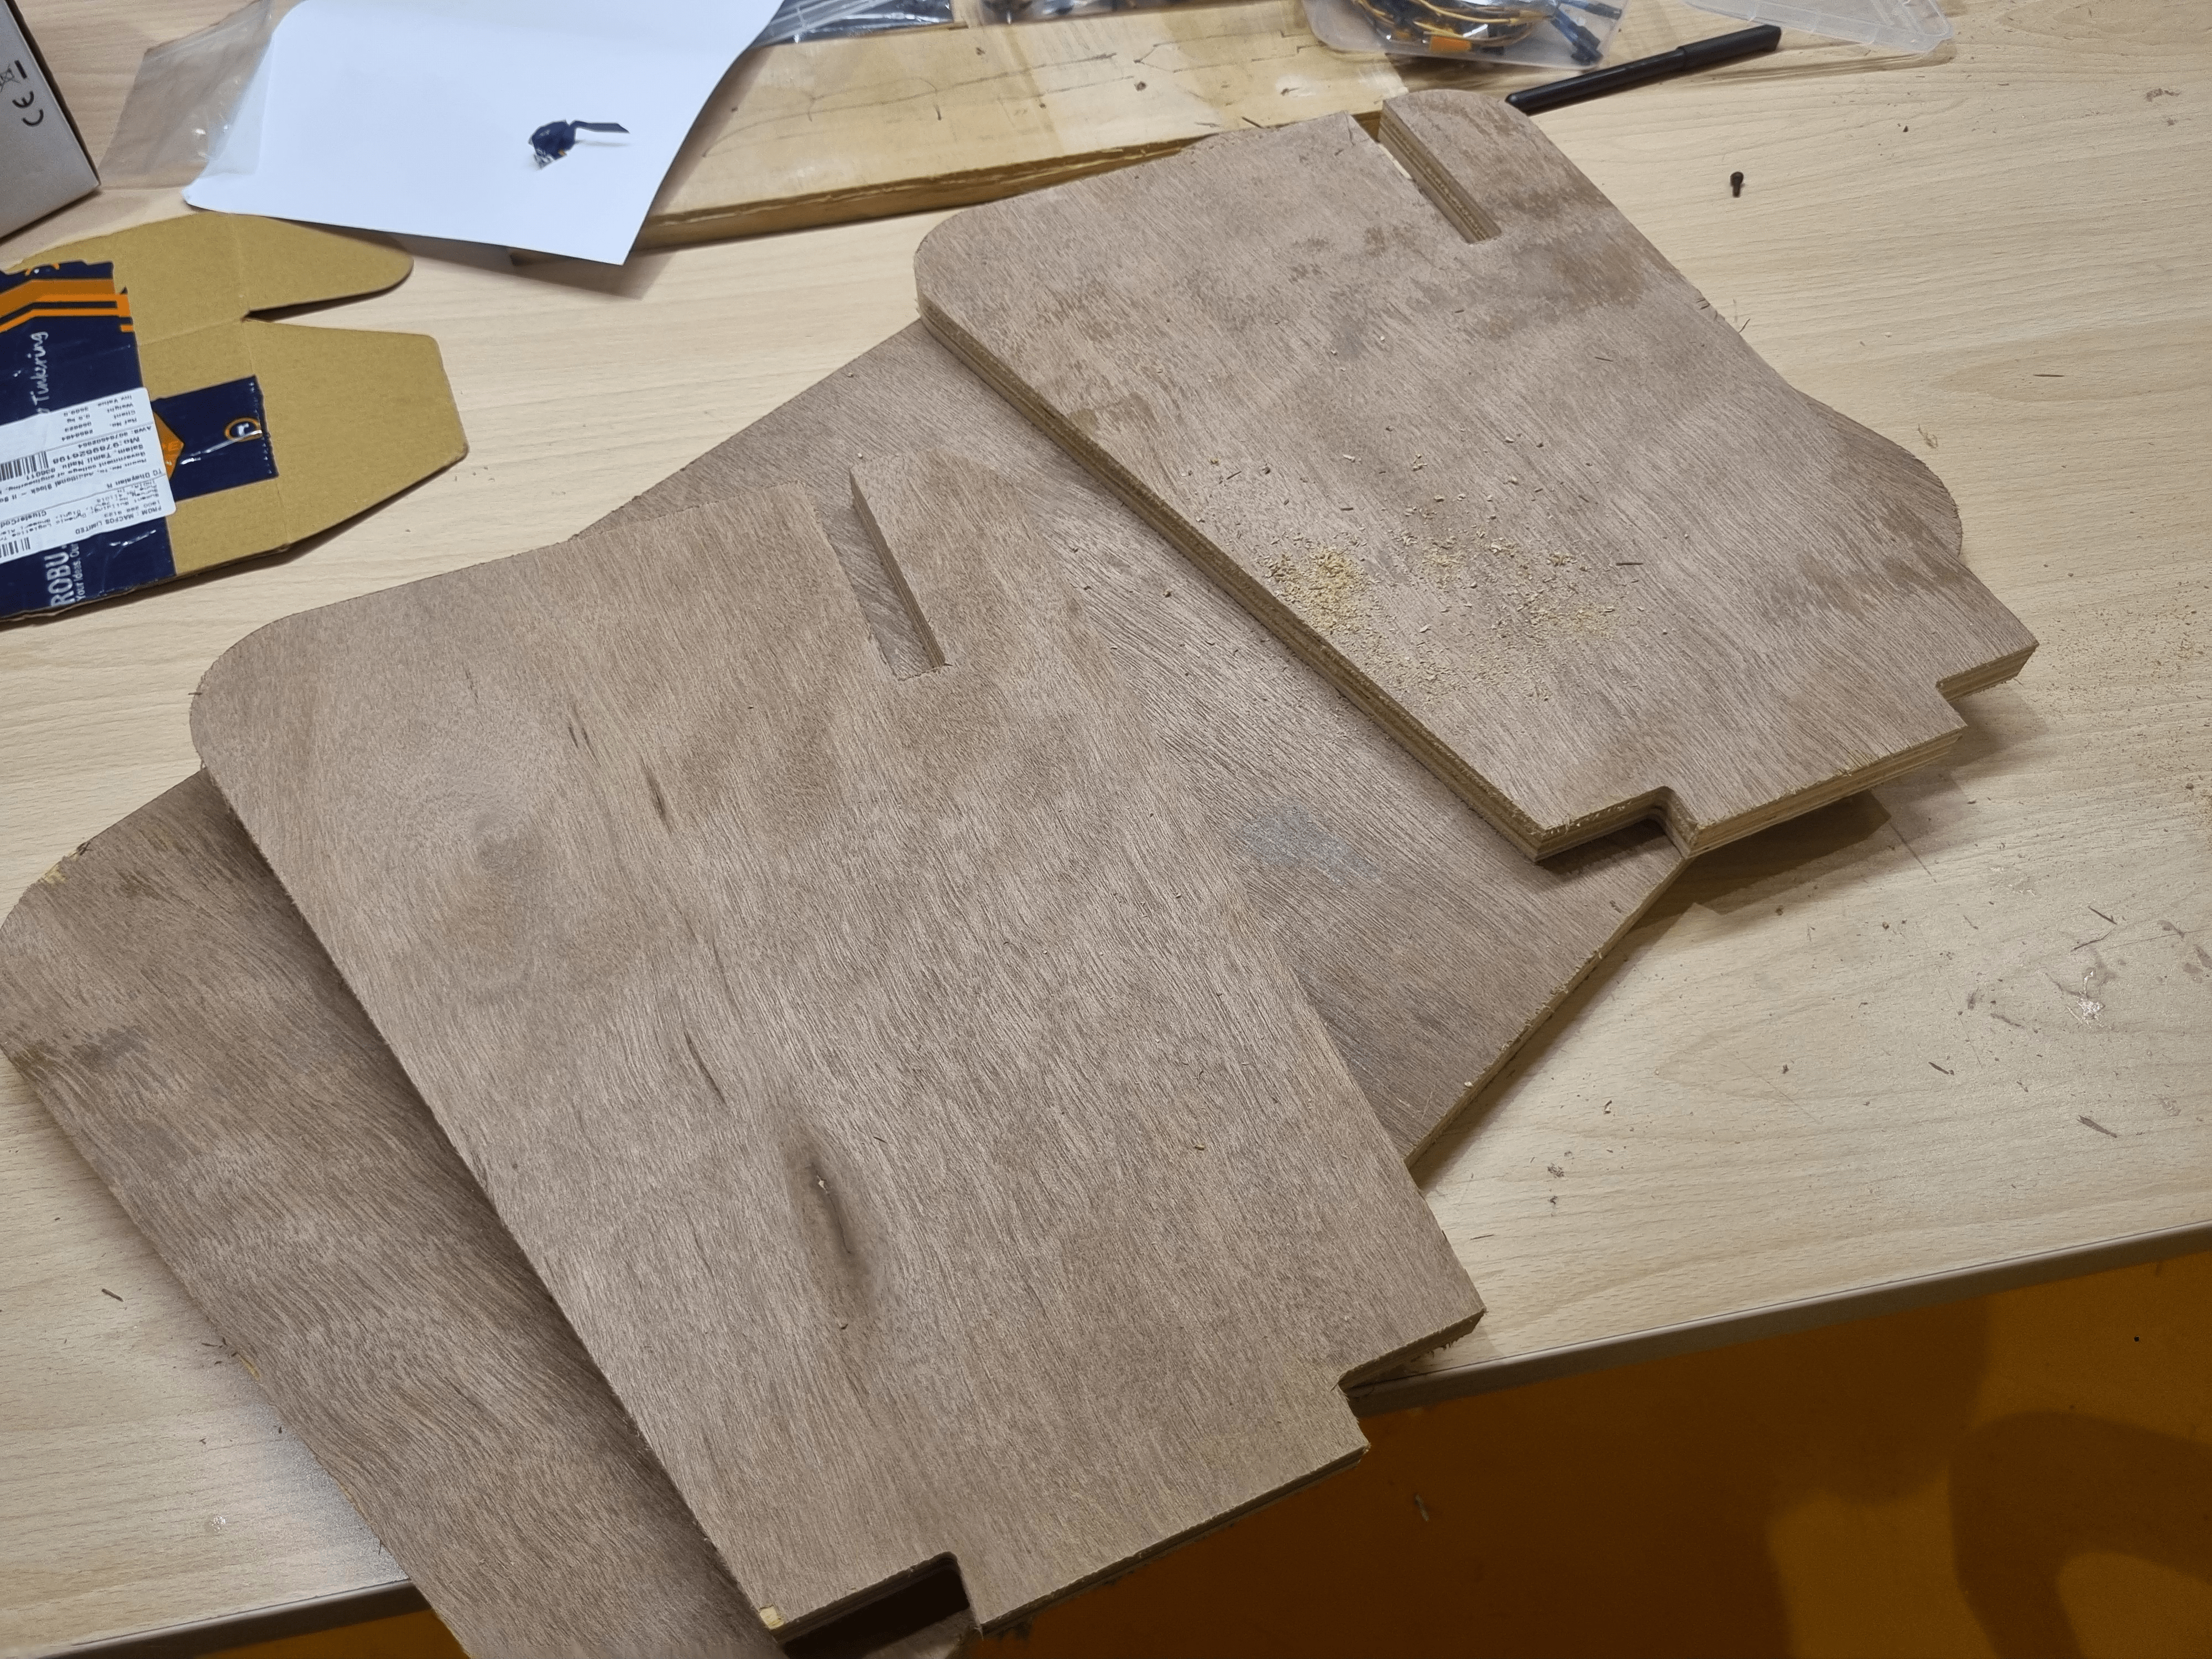
- Testing Joints and Assembly: After machining individual parts, they were assembled to check the fit and alignment of joints. This step was essential to verify that the tolerances set in the design were accurate and practical. Any necessary adjustments were made to improve the assembly quality, such as sanding or slight modifications to parts.
- Quality Checks: Throughout the fabrication, regular inspections were performed to ensure dimensions and finishes met the project requirements. Measurements were taken using calipers and micrometers, and visual inspections checked for any defects like burrs or rough edges.
- Final Finishing: Once assembly was confirmed, final finishing processes such as sanding, polishing, or painting were carried out to enhance both the appearance and durability of the stool. These steps add the finishing touches that make the product ready for use or presentation.

By carefully managing each stage of the fabrication process, we ensured the final product was both functional and aesthetically pleasing. This hands-on experience highlighted the importance of machine setup, material handling, and quality control in manufacturing large and complex objects.
4. Here Is How We Fixed Our Problems
Throughout the fabrication and design process, we encountered several challenges that required quick thinking and effective solutions to keep the project on track. Below is a detailed summary of the main problems faced and the approaches taken to resolve them:
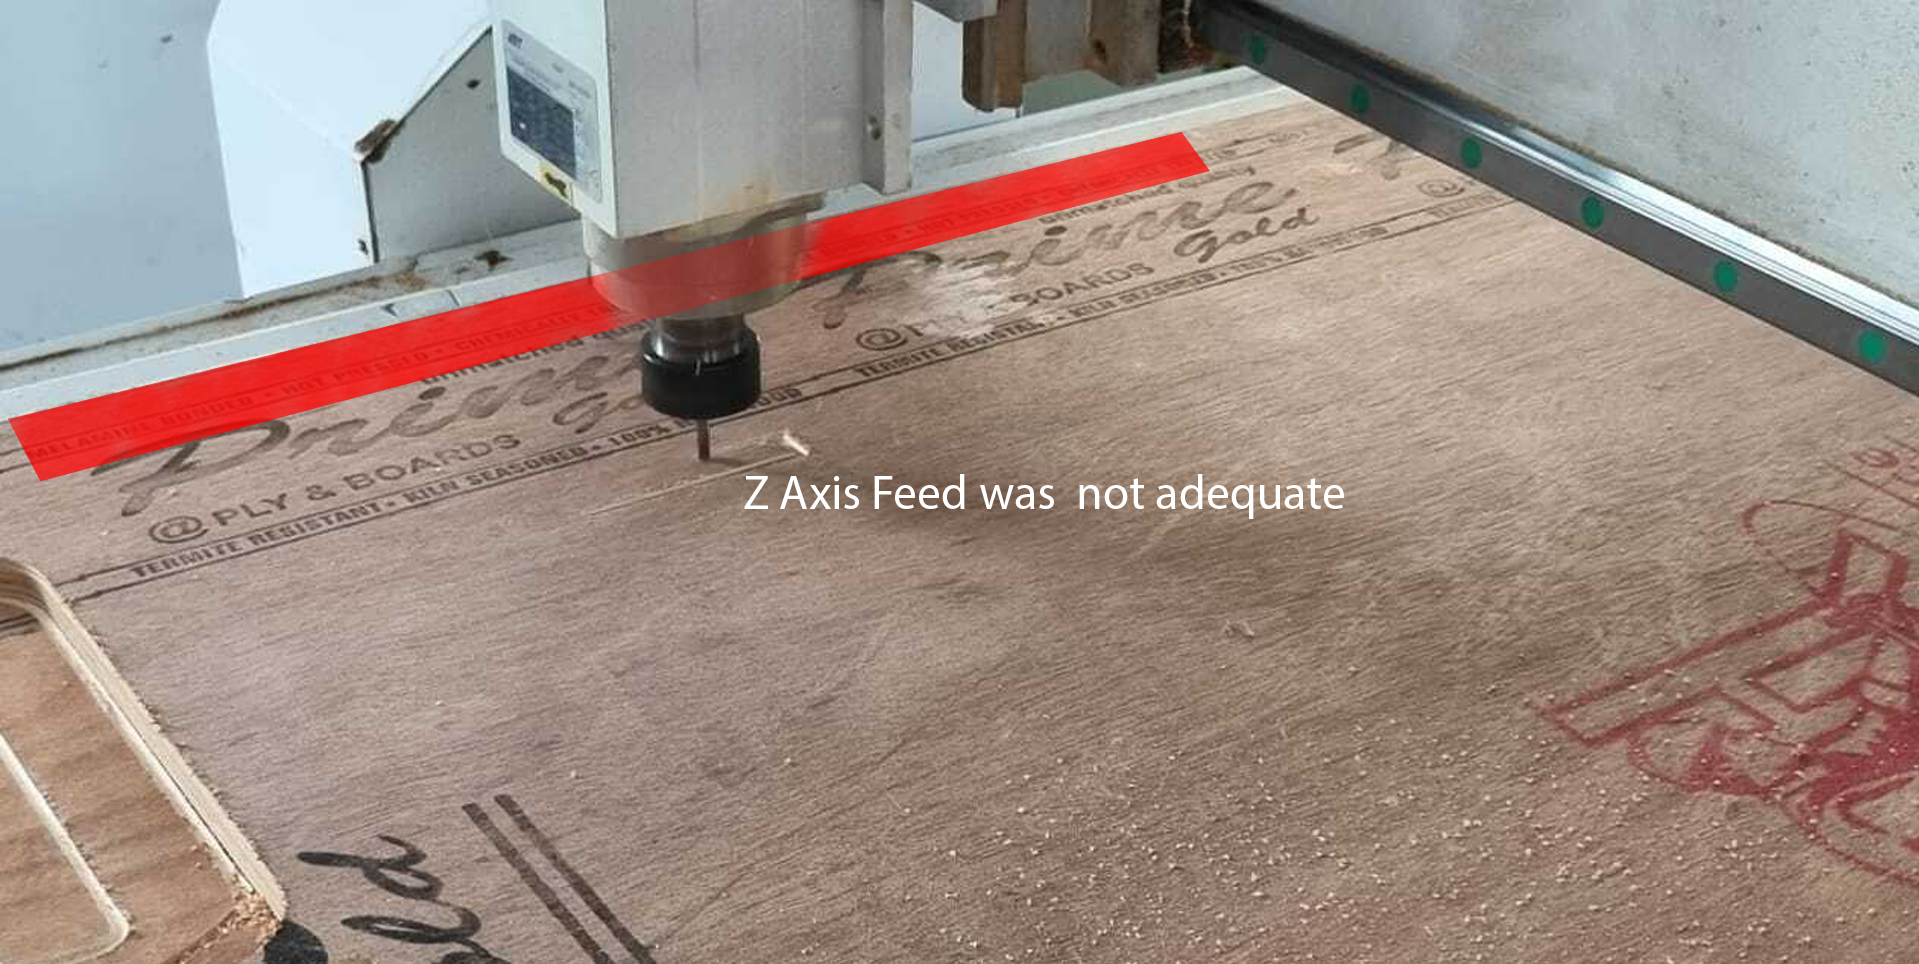
- Problem: Material shifting during machining.
Solution: During the initial cutting passes, it was noticed that the material was moving slightly, which could cause inaccuracies or damage. To address this, we added extra clamps around the workpiece and ensured all fixings were securely tightened. Additionally, we double-checked the vacuum bed suction (where applicable) and repositioned the material to improve stability before resuming the machining process. This adjustment helped maintain precise cuts and prevented further shifting. - Problem: Tool wear leading to poor surface finish.
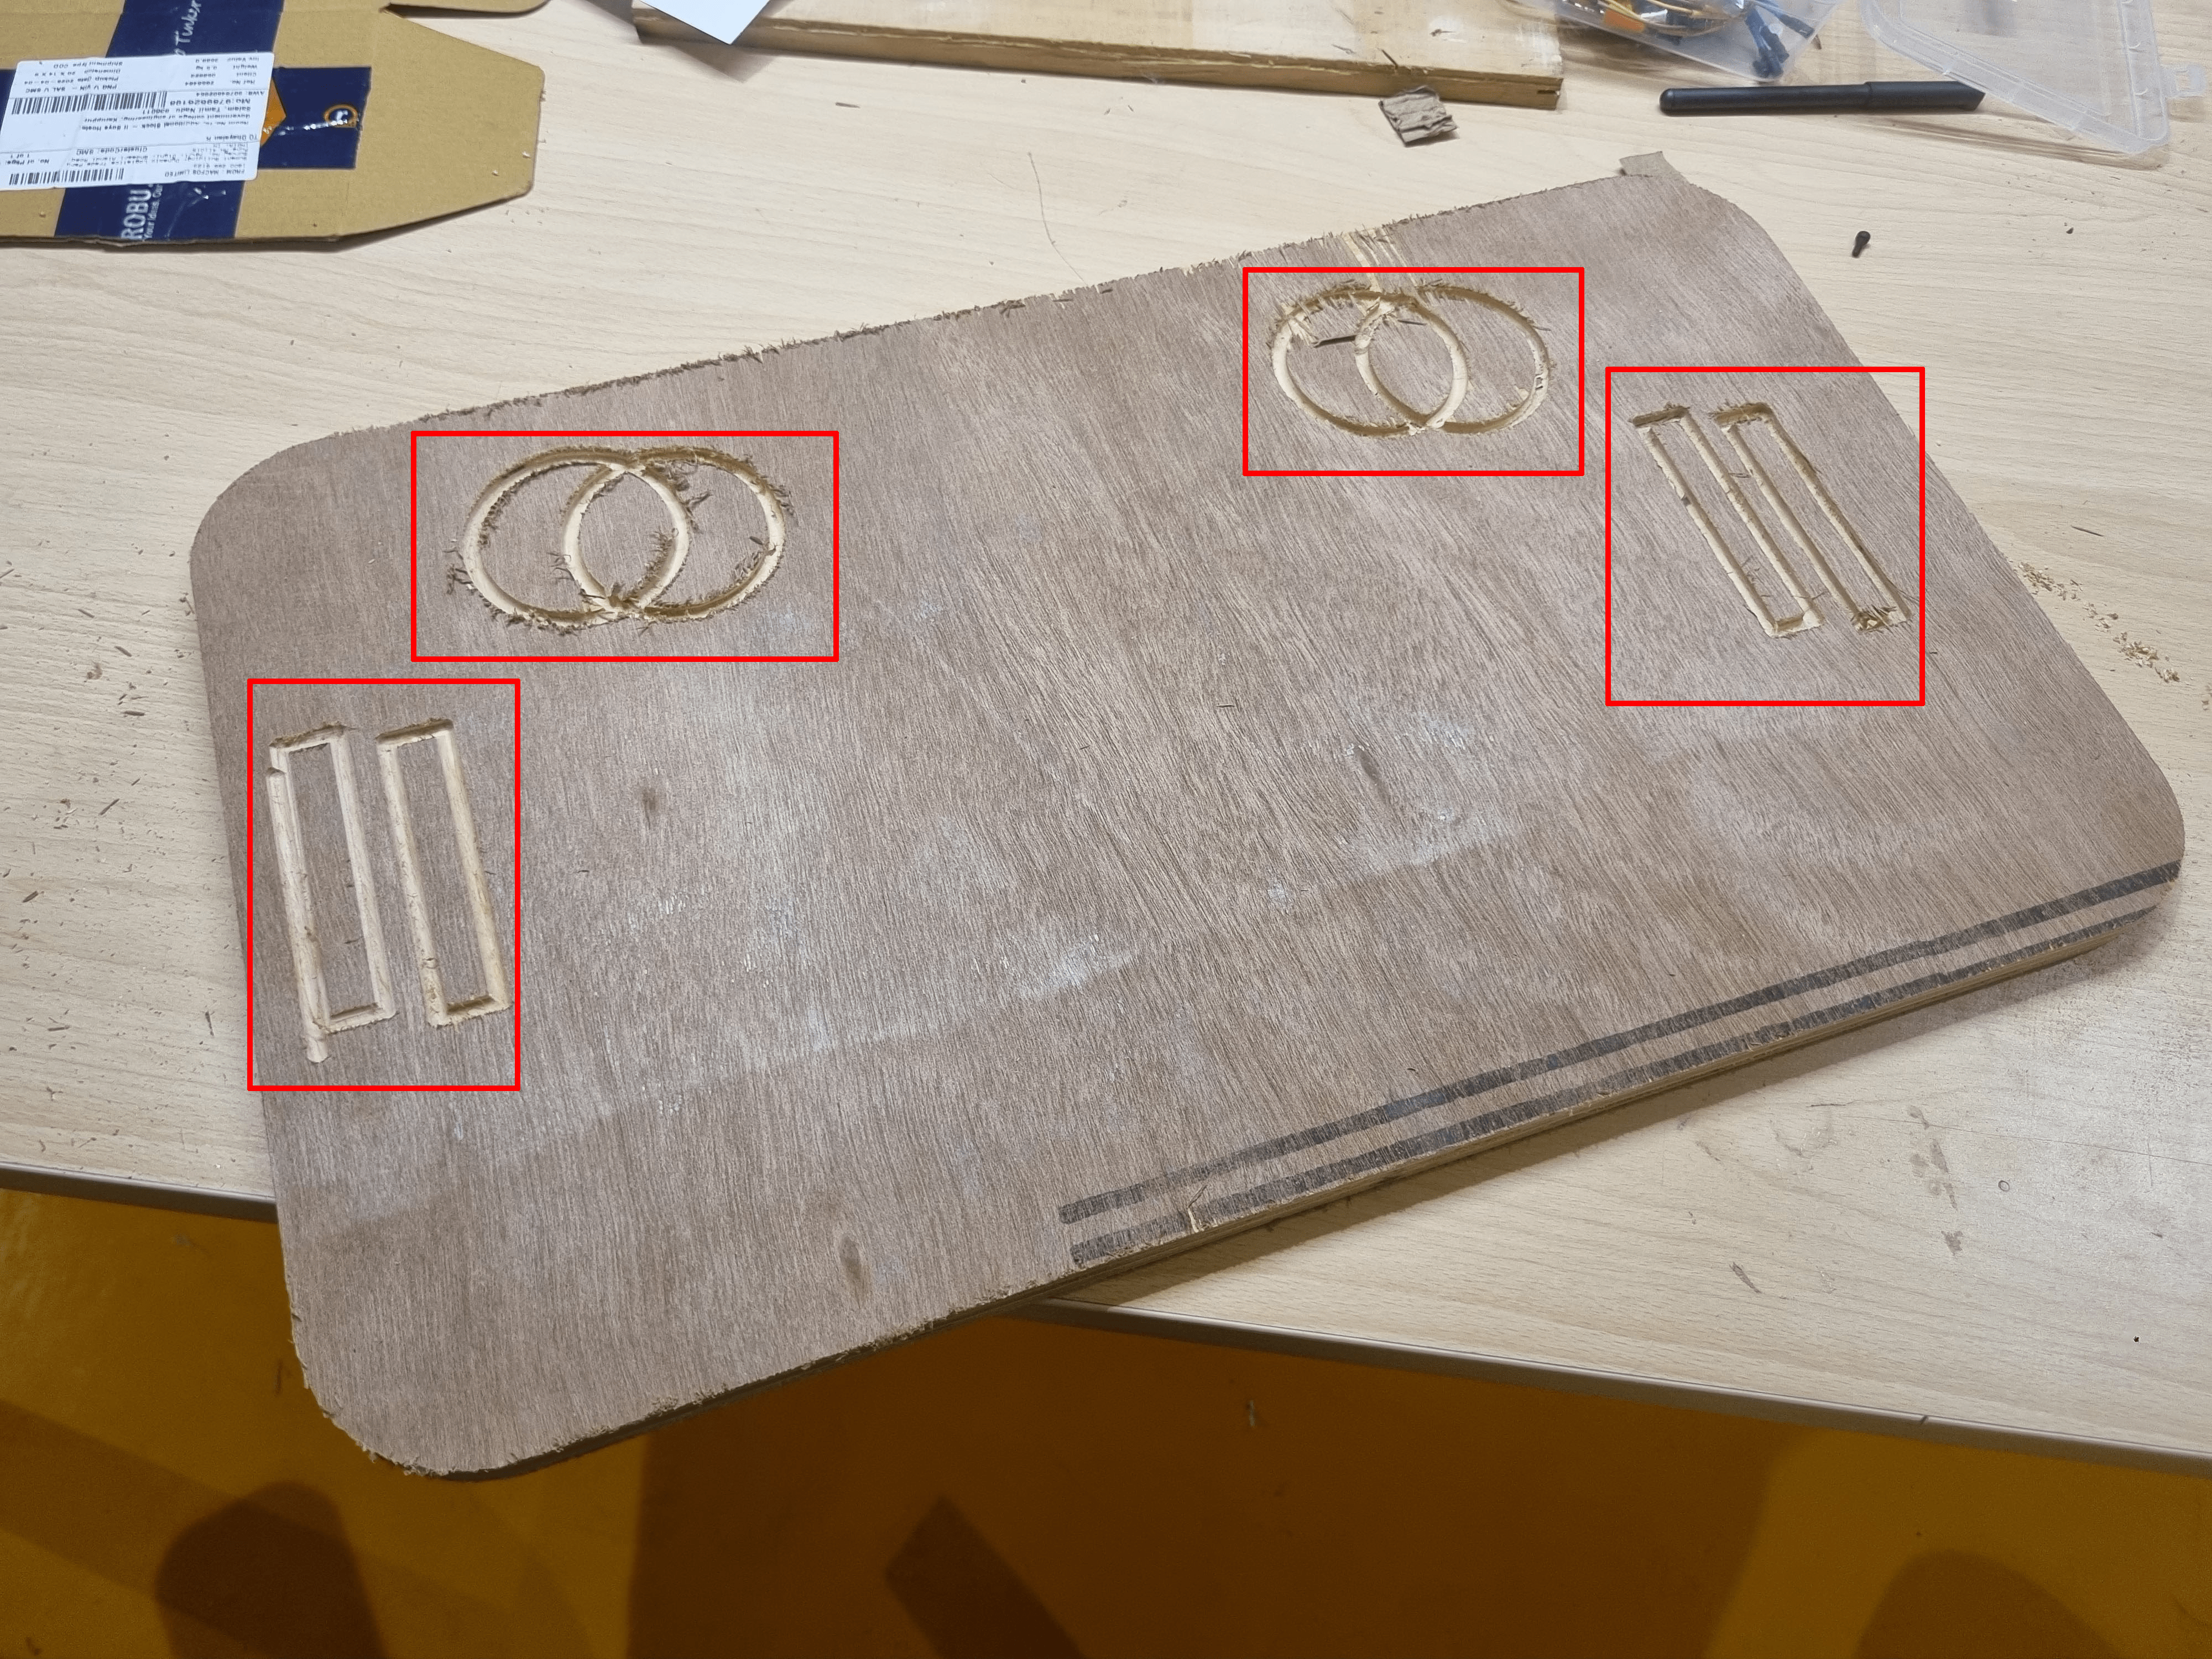
Solution: After several hours of machining, the cutting tool began showing signs of wear, resulting in rougher edges and inconsistent surface quality. We immediately paused the process to replace the worn-out end mill with a new, sharp tool. Furthermore, feed rates and spindle speeds were reviewed and optimized for the specific material to reduce tool stress and extend its life. These changes significantly improved the finish quality in subsequent passes. - Problem: Misaligned joints during assembly.
Solution: When assembling the machined parts, some joints did not fit as expected, causing gaps or uneven connections. This was traced back to small inaccuracies in the toolpath tolerances. To fix this, we carefully sanded the problematic edges to create a smoother fit and went back to the CAM files to slightly adjust the tolerances for future cuts. The next batch of parts was machined with these corrections, resulting in much better alignment and a sturdier final assembly. - Problem: Software compatibility issues during file export.
Solution: While exporting design files from CorelDRAW to the CAM software, some formats were not fully compatible, leading to missing details or errors. We resolved this by converting files to a more universally accepted format such as DXF and double-checking the import settings within the CAM software to ensure all elements were correctly recognized. - Problem: Unexpected machine pauses or errors.
Solution: At times, the CNC machine unexpectedly paused due to tool change prompts or safety triggers. We reviewed the machine setup and software settings, enabling automatic tool changes where possible and increasing the safety thresholds to prevent unnecessary stops without compromising operator safety.
Understanding Dogbone Joint for CNC Designs
When working with a CNC router, creating sharp 90° corners for press-fit designs is a challenge due to the rounded nature of the tool bit. To overcome this issue, we use a Dogbone. A Dogbone creates a circular arc that extends slightly beyond the corner. This allows the two parts to fit snugly together without additional manual adjustments.
How a Dogbone Works
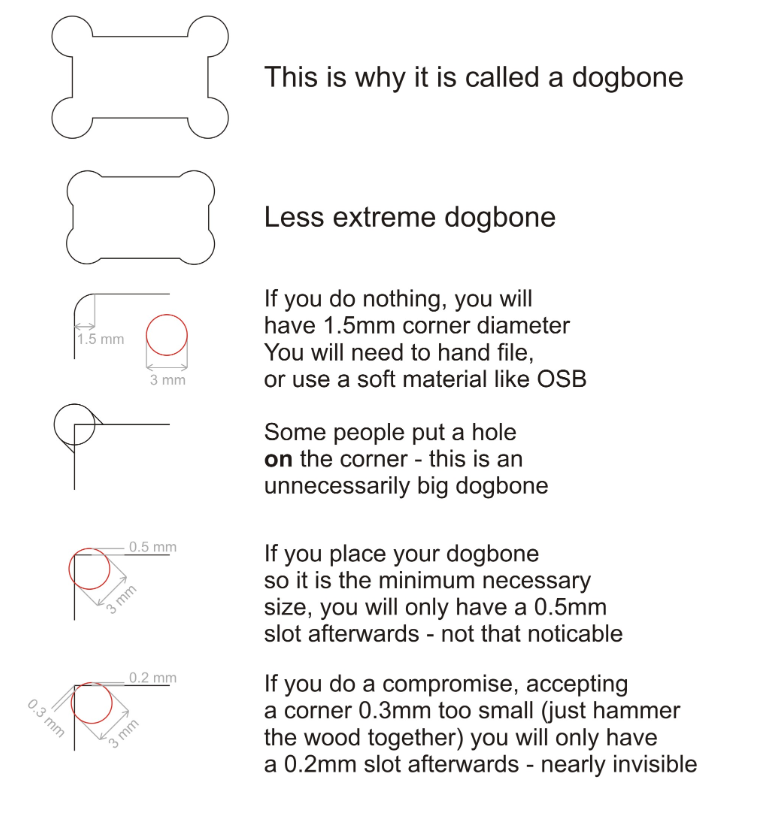
How to Use in Your Next Project
- Design the Dogbone feature in your CAD software by adding circular arcs at the corners of your press-fit joints.
Ensure that the radius matches the tool size of your CNC router.
- Include the Dogbone feature in your toolpath preparation when creating the G-code.
- The CNC router will automatically cut the Dogbone feature, eliminating the need for manual corner adjustments.
Benefits
- Saves time and effort by avoiding manual filing.
- Ensures precise fitting of parts.
- Leverages the full potential of the CNC machine's capabilities.
Each problem was an opportunity to learn and improve our workflow. By carefully analyzing issues and implementing practical solutions, we enhanced both the quality of our work and our understanding of the fabrication process. These experiences reinforced the importance of preparation, monitoring, and flexibility in managing complex projects.
5. Included Your Design Files and Hero Shot
Below are the design files for the project, along with a hero shot of the final product:
- Design Files: Download CAD Files
- Toolpath Files: Download Toolpath Files