Week 4: Embedded Programming
Individual Assignment
About SEEED Studio,
The Seeed studio was founded in 2008 by Eric Pan, an open-source hardware innovation and IoT platform for makers to build their ideas into prototypes. Inspired by makers' potential in open-source hardware, Eric Pan started Seeed studio in Shenzhen, China. Over the year Seeed Studio has developed a wide variety of development boards, modules, and other hardware tools that helps makers to develop products.
Wide Range of products
Development boards : Microcontroller boards like XIAO series, based on popular development boards like ESP32 and Arduino.
Modules : Sensor modules, communication modules like Wi-Fi, bluetooth and LoRaWAN.
Grove System: Modular prototyping systems that simplifies connecting sensors and actuators to development boards.
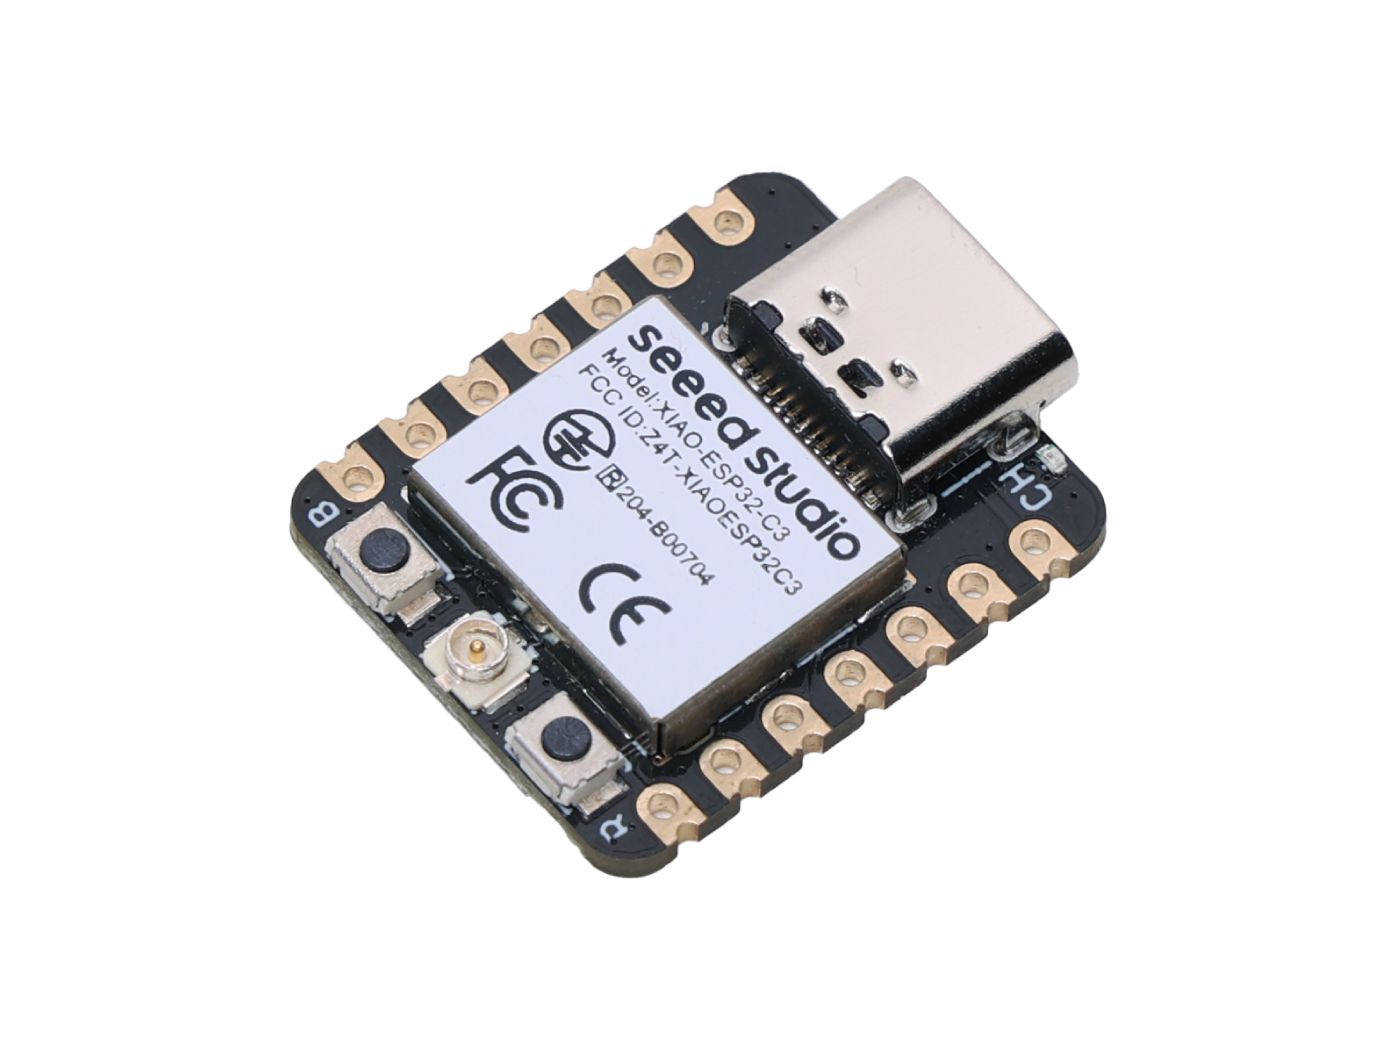
Development Board: Seeed Studio XIAO ESP32C6
A tiny microcontroller board based on ESP32C6 system-on-a-chip, used in applications like Smart home devices, Wearables, and IoT data collection projects. In chines XIAO represent “Tiny” & “Puissant”(Great power).
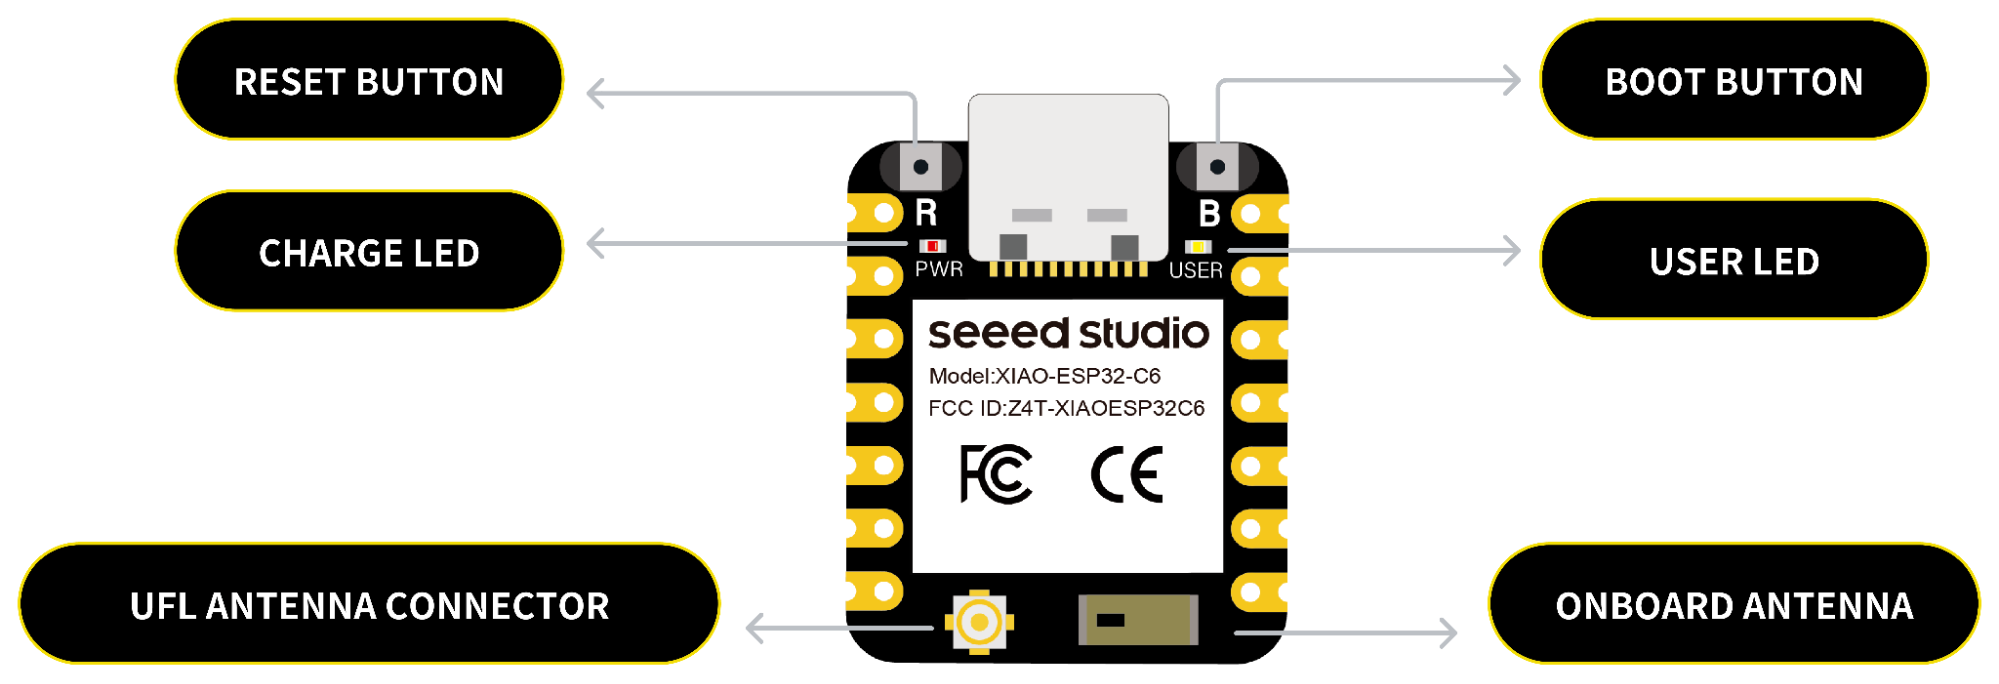
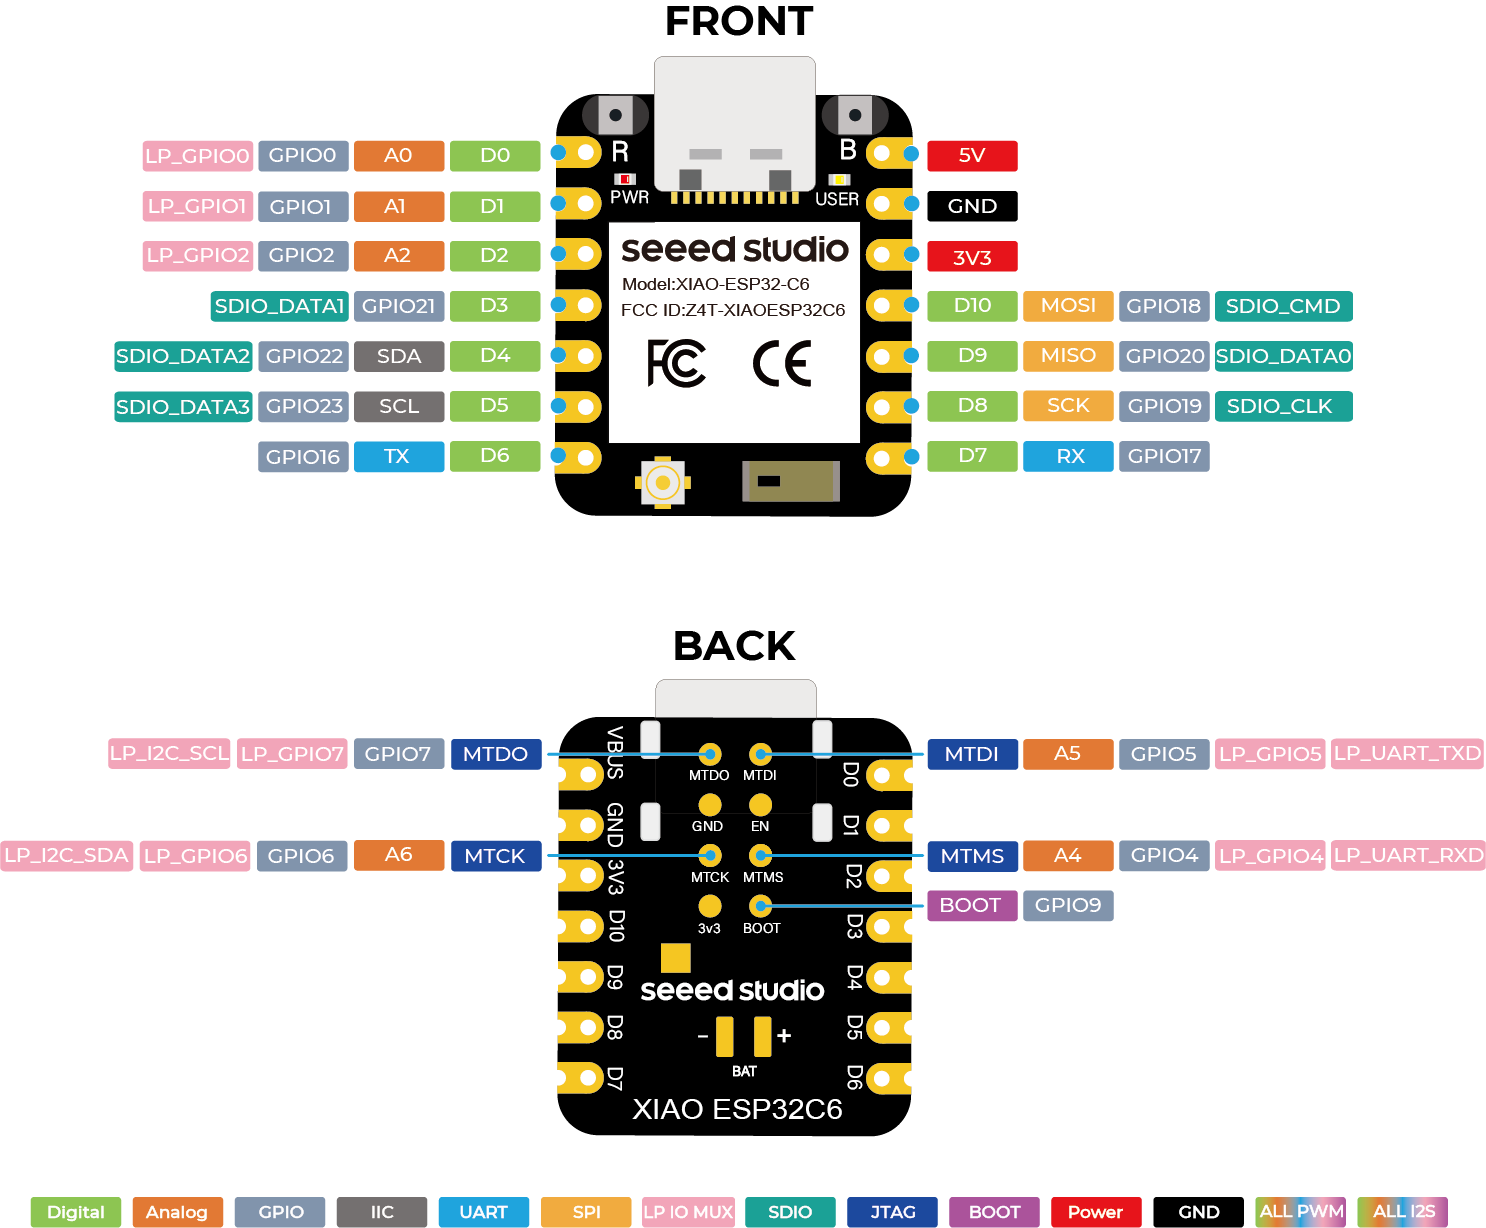
XIAO ESP32C6 pins and functions schematic
XIAO ESP32C6 indication diagram |
XIAO ESP32C6 Pin List |
Specifications
Chip | ESP32-C6 SoC (System-on-a-Chip) |
Processor | Dual-Core 32-bit RISC-V processors High-Performance core upto 160 MHz Low-power core upto 20 Mhz |
Memory | 512 KB SRAM 4 MB Flash |
Wireless Communication | Wi-Fi: 2.4 GHz Bluetooth 5.0 Zigbee: IEEE 802.15.4 |
Interfaces | Digital I/O: 11 GPIO pins Analog Input: 7 ADC channels Serial communication: UART, LP_UART, I2C, SPI |
Power | |
Operating Voltage | USB: 5V @ 9mA Battery: 3.8V @ 9mA |
Physical Characteristics | |
Dimensions | 21x17.5 mm |
About Arduino UNO
Arduino UNO is a microcontroller board based on ATmega328P, with 14 digital input/output pins, 6 analog input pins. Arduino UNO is a board for beginners in electronics and coding.
Features
Assignment Programming
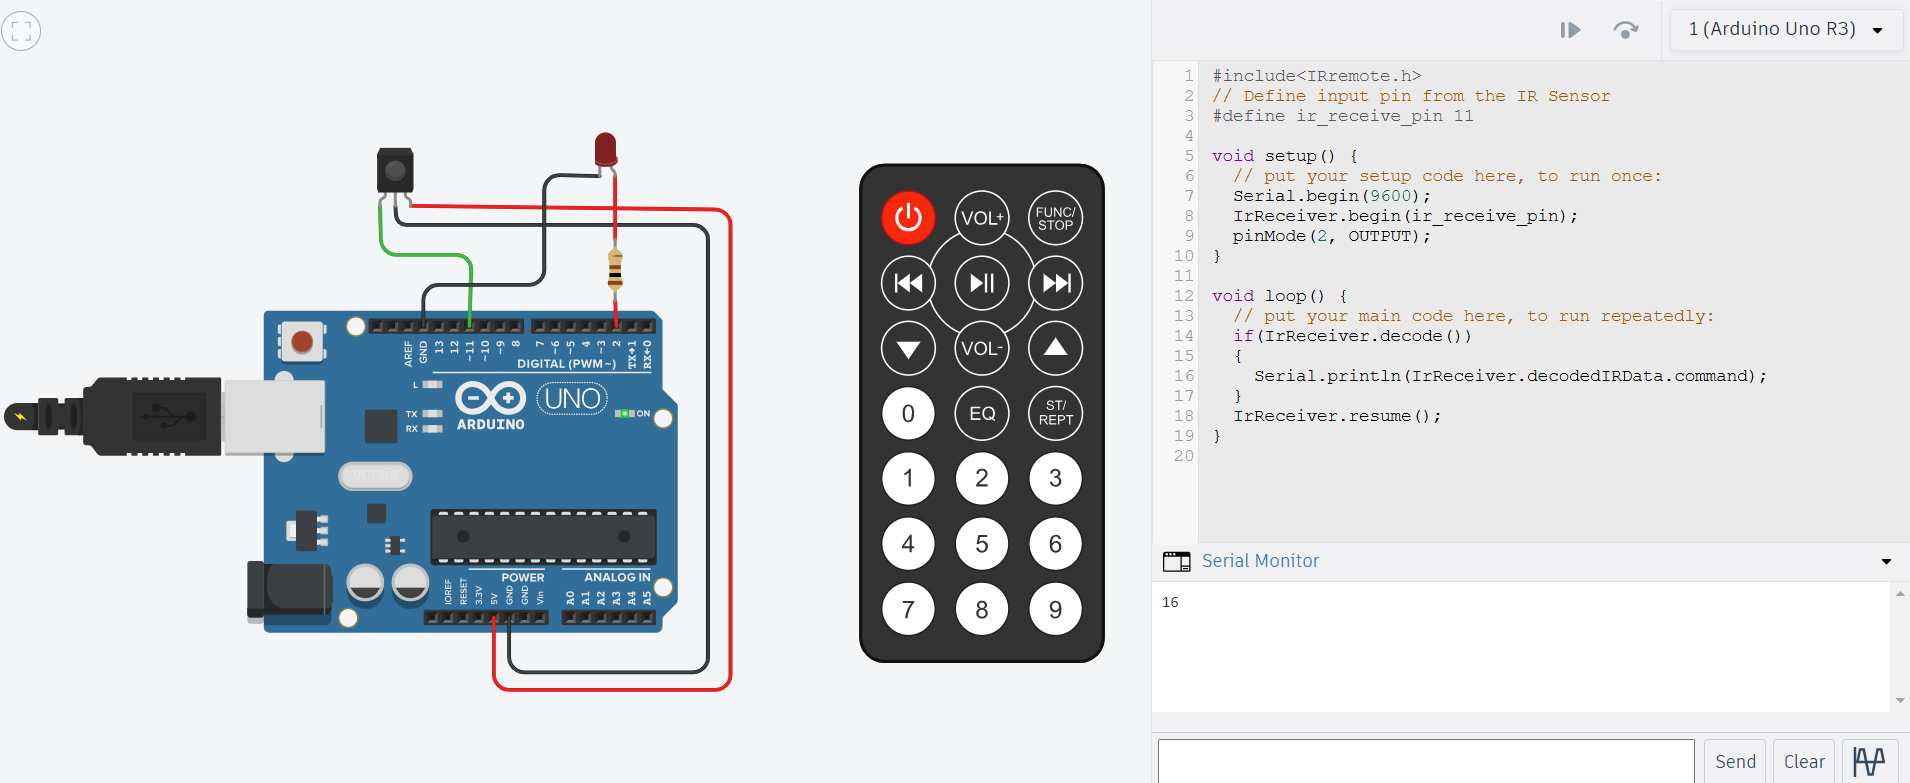
Simulation of reading input from IR Sensor and IR Remote using Tinker
Program to read IR input and
blink LED One time for 1, Two times for 2, and Three times for 3
#include<IRremote.h>
// Define input pin from the IR Sensor
#define ir_receive_pin 11
void setup() {
// put your setup code here, to run once:
Serial.begin(9600);
IrReceiver.begin(ir_receive_pin);
pinMode(LED_BUILTIN, OUTPUT);
}
void loop() {
// put your main code here, to run repeatedly:
if(IrReceiver.decode())
{
Serial.println(IrReceiver.decodedIRData.command);
int a=IrReceiver.decodedIRData.command;
if (a==16)
{
digitalWrite(2,HIGH);
delay (1000);
digitalWrite(2,LOW);
}
if (a==17)
{
for (int i=0; i<2; i++)
{
digitalWrite(2,HIGH);
delay (1000);
digitalWrite(2,LOW);
delay (1000);
}
}
if (a==18)
{
for (int i=0; i<3; i++)
{
digitalWrite(2,HIGH);
delay (1000);
digitalWrite(2,LOW);
delay (1000);
}
}
}
IrReceiver.resume();
}
Circuit diagram
Video Link:
Demonstration using the Arduino UNO,