Week11
Assignment: Embedded Networking and Communication
Individual Assignment:
Creating network communication between 2 devices. In this assignment, I combine the Input device and the Output device to communicate.
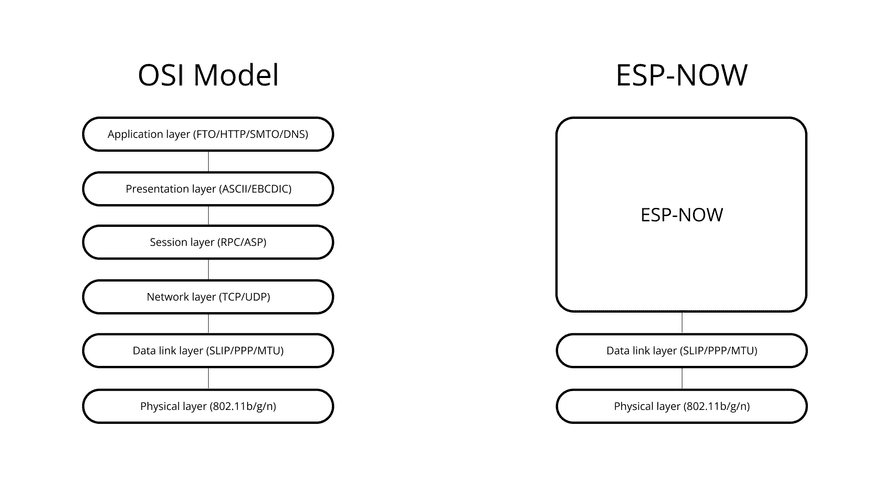
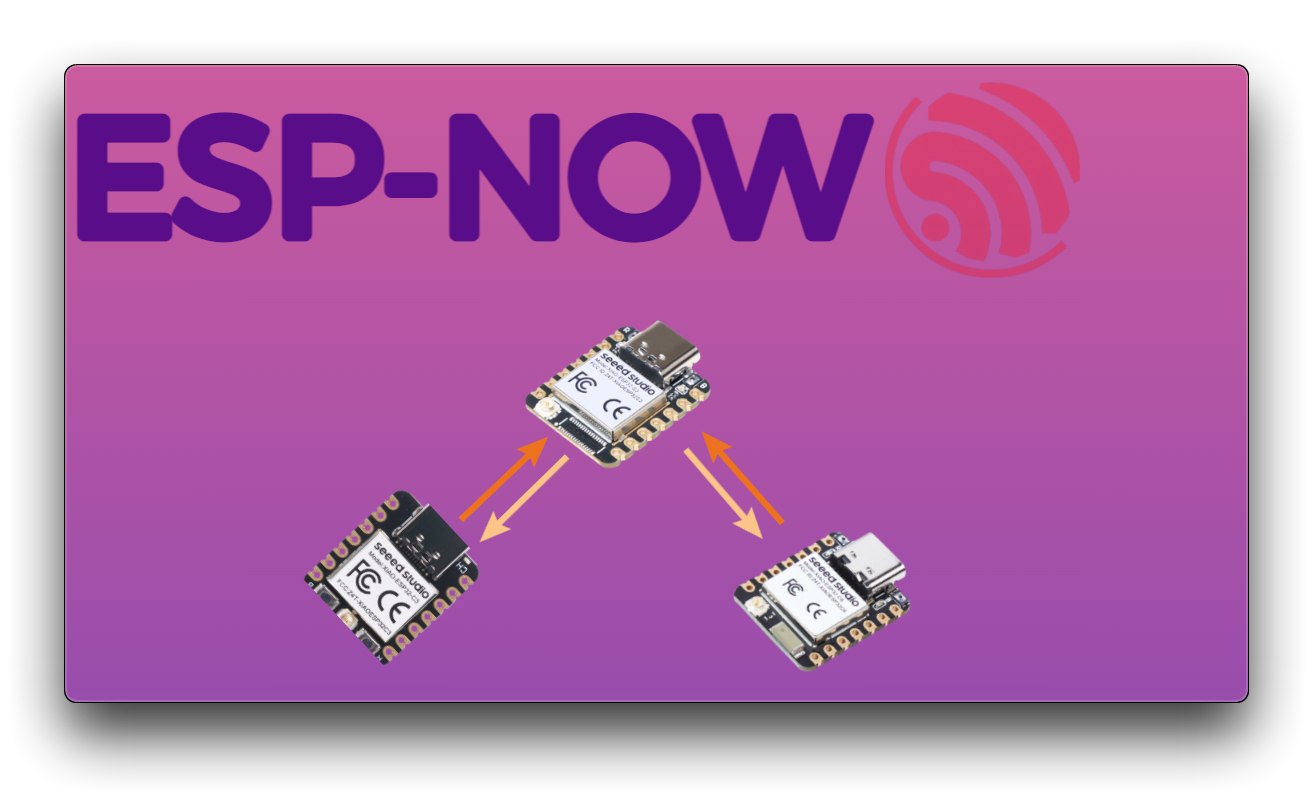
Assignment Focus: This assignment explores short-range, connectionless communication using ESP-NOW, a proprietary communication protocol developed by Espressif. We will implement a peer-to-peer communication system using the Seeed Studio Xiao ESP32-C3 development board, demonstrating its capabilities for efficient, low-power data exchange in embedded systems.
Learning Objectives:
Why ESP-NOW?
Traditional Wi-Fi communication involves significant overhead with connection establishment, IP addressing, and protocol stacks. For applications requiring fast, direct data exchange between a few devices, ESP-NOW offers a simpler, more efficient alternative. It's ideal for:
Seeed Studio Xiao ESP32-C3
The Xiao ESP32-C3 is an excellent choice for this assignment due to its:
Tutorial Generated using Gemini:
You will be implementing a two-part system: an ESP-NOW Sender and an ESP-NOW Receiver.
Objective: Develop a program for one Xiao ESP32-C3 that periodically sends a small data packet (e.g., a simple counter or a short string) to a designated receiver using ESP-NOW.
Hardware:
Software Requirements:
Example Data Structure (Optional but Recommended):
C++
typedef struct struct_message {
int id;
float value;
// Add more data fields as needed
} struct_message;
Objective: Develop a program for another Xiao ESP32-C3 that listens for and receives data packets sent via ESP-NOW from the sender.
Hardware:
Software Requirements:
Video Link1
Video link 2
Master and Slave devices:
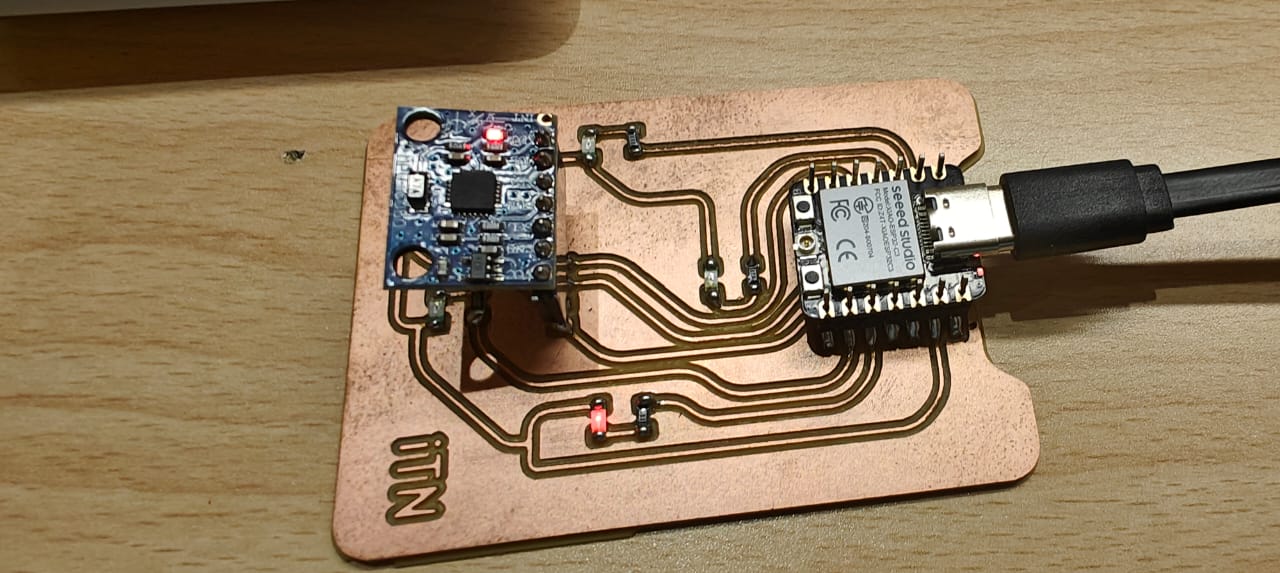
Master Input Device: Link
This input device has an MPU6050 added to the circuit, which can read the direction of turn. The turn direction is then sent to the slave output device, which can tilt itself with a command received from the master input device. Production details are added to the input week assignment. Follow the link to fabricate the PCB.
Code:
#include <esp_now.h>
#include <WiFi.h>
#include <Wire.h>
#define MPU_ADDR 0x68
#define Xreg 0x3B
#define Yreg 0x3D
// Structure to send
typedef struct {
int8_t direction; // Using smaller type
} Data;
Data data;
uint8_t receiverMac[] = {0xE4, 0xB3, 0x23, 0xC5, 0x6D, 0x4C};
// Calibration offset
int16_t xOffset = 0, yOffset = 0;
// Read axis function
int16_t readAxis(uint8_t reg) {
Wire.beginTransmission(MPU_ADDR);
Wire.write(reg);
Wire.endTransmission(false);
Wire.requestFrom(MPU_ADDR, 2, true);
return (Wire.read() << 8) | Wire.read();
}
// Determine direction
int8_t getDirection(int x, int y) {
if (abs(x) < 1000 && abs(y) < 1000) return -1; // Dead zone
if (y < -1000) return 3; // Back
else if (x < -1000) return 0; // Left
else if (y > 1000) return 1; // Front
else if (x > 1000) return 2; // Right
else return -1;
}
// ESP-NOW send callback
void OnDataSent(const uint8_t *mac, esp_now_send_status_t status) {
Serial.print("Send Status: ");
Serial.println(status == ESP_NOW_SEND_SUCCESS ? "Success" : "Fail");
}
void setup() {
Serial.begin(115200);
// // Enable internal pullups if needed (optional)
// pinMode(D4, INPUT_PULLUP); // SDA
// pinMode(D5, INPUT_PULLUP); // SCL
Wire.begin(D4, D5);
WiFi.mode(WIFI_STA);
WiFi.setSleep(false);
// Initialize ESP-NOW
if (esp_now_init() != ESP_OK) {
Serial.println("ESP-NOW init failed");
return;
}
esp_now_register_send_cb(OnDataSent);
// Register peer
esp_now_peer_info_t peerInfo = {};
memcpy(peerInfo.peer_addr, receiverMac, 6);
peerInfo.channel = 1;
peerInfo.encrypt = false;
peerInfo.ifidx = WIFI_IF_STA;
if (!esp_now_is_peer_exist(receiverMac)) {
if (esp_now_add_peer(&peerInfo) != ESP_OK) {
Serial.println("Failed to add peer");
return;
}
}
// Wake up MPU6050
Wire.beginTransmission(MPU_ADDR);
Wire.write(0x6B); // PWR_MGMT_1
Wire.write(0); // Wake up
Wire.endTransmission(true);
delay(1000); // Allow MPU to stabilize
// Get initial offsets
xOffset = readAxis(Xreg);
yOffset = readAxis(Yreg);
Serial.printf("Offsets → x: %d, y: %d\n", xOffset, yOffset);
}
void loop() {
int accX = readAxis(Xreg) - xOffset;
int accY = readAxis(Yreg) - yOffset;
data.direction = getDirection(accX, accY);
Serial.printf("X: %d, Y: %d, Direction: %d\n", accX, accY, data.direction);
esp_err_t result = esp_now_send(receiverMac, (uint8_t *)&data, sizeof(data));
if (result == ESP_OK) {
Serial.println("Send Success");
} else {
Serial.println("Send Error");
}
delay(500);
}
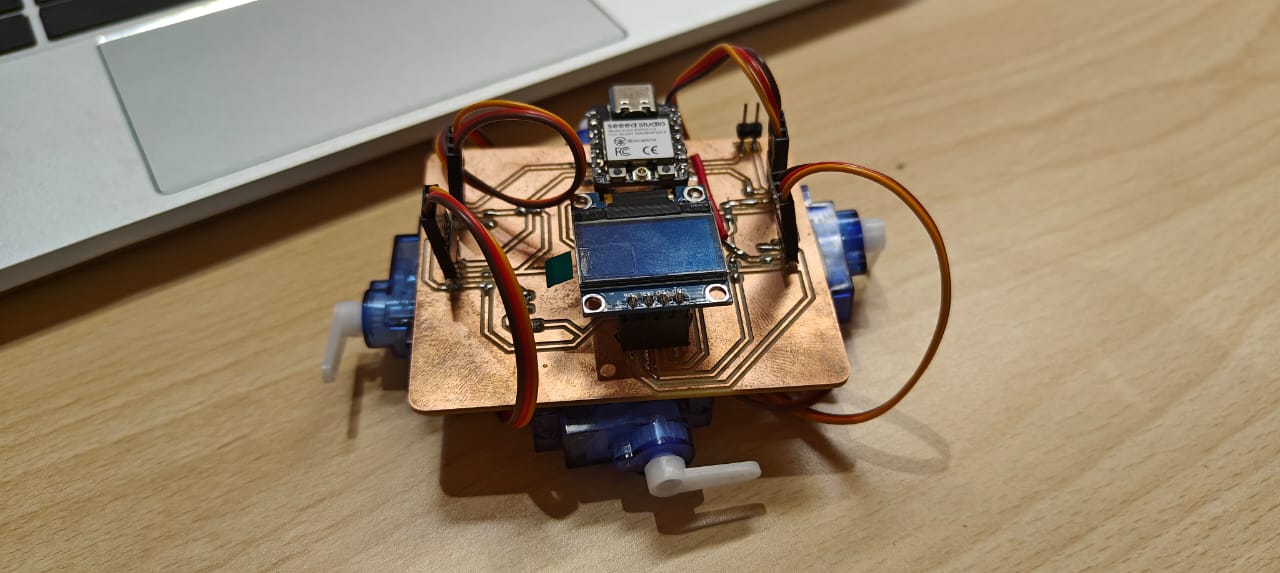
Slave Output Device: Link
Output device - Slave, collects input from the master device and moves the servo motor according to the direction of change.
Code:
#include <esp_now.h>
#include <WiFi.h>
#include <ESP32Servo.h>
typedef struct {
int8_t direction;
} Data;
const int servoPins[4] = {D0, D1, D7, D8}; // 0: LF, 1: RF, 2: LB, 3: RB
Servo servos[4];
void setServoDirections(int direction) {
// Reset all servos to neutral first
for (int i = 0; i < 4; i++) {
servos[i].write(90);
}
switch (direction) {
case 0: // Tilt Left → Move Right-side servos
servos[1].write(180); // Right Front CW
servos[3].write(180); // Right Back CW
delay(100);
break;
case 1: // Tilt Front → Move Back servos
servos[2].write(180); // Left Back CW
servos[3].write(180); // Right Back CW
delay(100);
break;
case 2: // Tilt Right → Move Left-side servos
servos[0].write(180); // Left Front CW
servos[2].write(180); // Left Back CW
delay(100);
break;
case 3: // Tilt Back → Move Front servos
servos[0].write(180); // Left Front CW
servos[1].write(180); // Right Front CW
delay(100);
break;
default:
// Idle: all at neutral
for (int i = 0; i < 4; i++) {
servos[i].write(90);
}
delay(100);
break;
}
}
void OnDataRecv(const esp_now_recv_info_t *info, const uint8_t *dir, int len) {
Data data;
memcpy(&data, dir, sizeof(data));
Serial.print("Direction: ");
Serial.println(data.direction);
setServoDirections(data.direction);
}
void setup() {
Serial.begin(115200);
WiFi.mode(WIFI_STA);
WiFi.setSleep(false); // Ensure ESP-NOW reliability
Serial.print("Receiver STA MAC: ");
Serial.println(WiFi.macAddress());
if (esp_now_init() != ESP_OK) {
Serial.println("ESP-NOW Init Failed");
return;
}
esp_now_register_recv_cb(OnDataRecv);
// Attach servos
for (int i = 0; i < 4; i++) {
servos[i].attach(servoPins[i]);
servos[i].write(90); // Neutral position
}
}
void loop() {
// Nothing in main loop – all handled via ESP-NOW callback
}
Working video
Working video
Working file link : LINK