Week 05
3D printing and Scanning :
Individual Assignment
Design and 3D print an object( small, few cm3, limited by printer time) that could not be easily made subtractively
3D scan an object (optionally print it)
Concept Design :
Design a functional whistle simple to 3d print in any FDM or other methods.
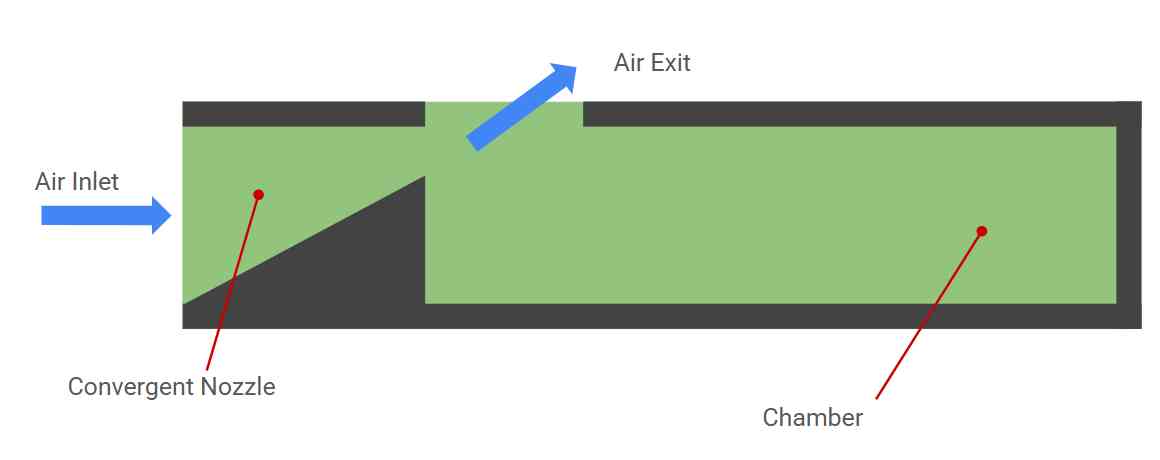
A whistle creates a distinct, single-pitch sound by manipulating airflow. When you blow into a whistle, the air is channeled through a narrowing passage called a convergent nozzle. This nozzle accelerates the air, creating a high-speed jet. The length of the whistle's main chamber determines the pitch of the sound produced. A shorter chamber results in a higher-pitched sound, while a longer chamber produces a lower pitch.
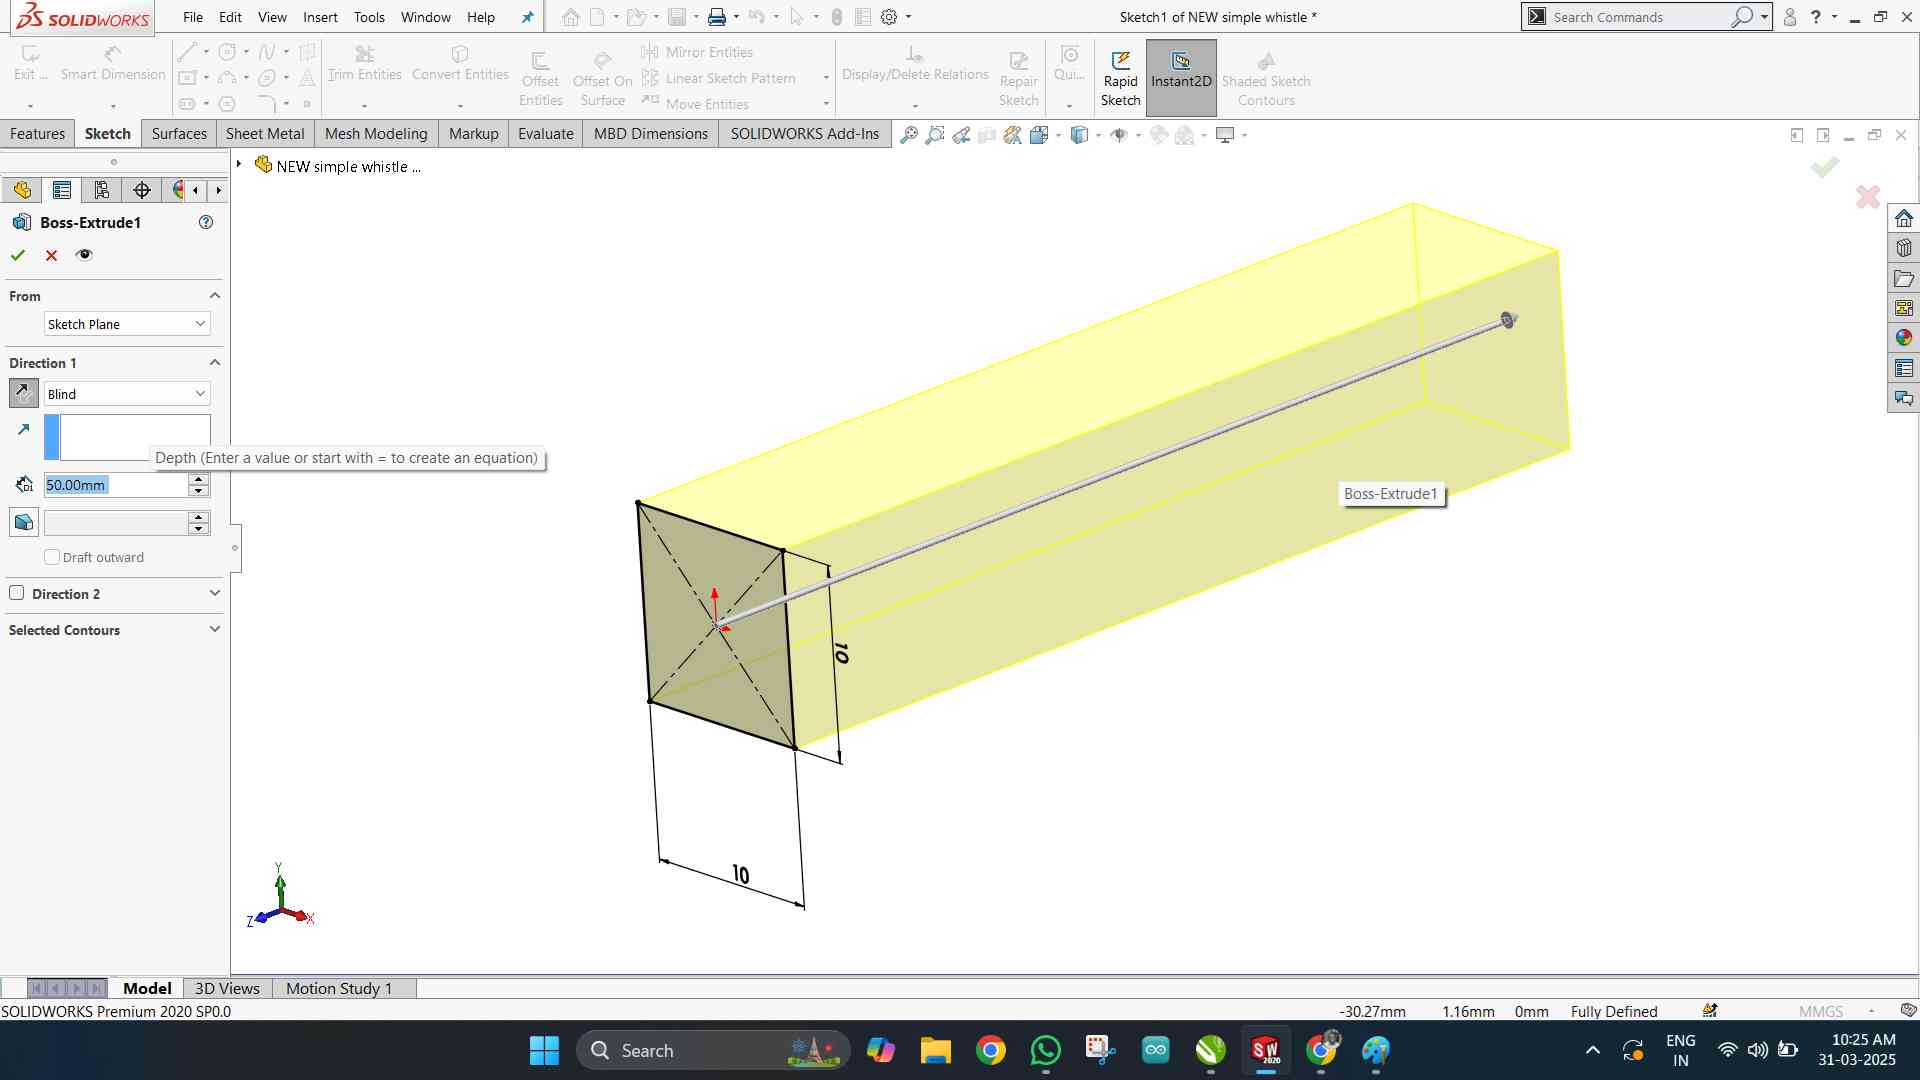
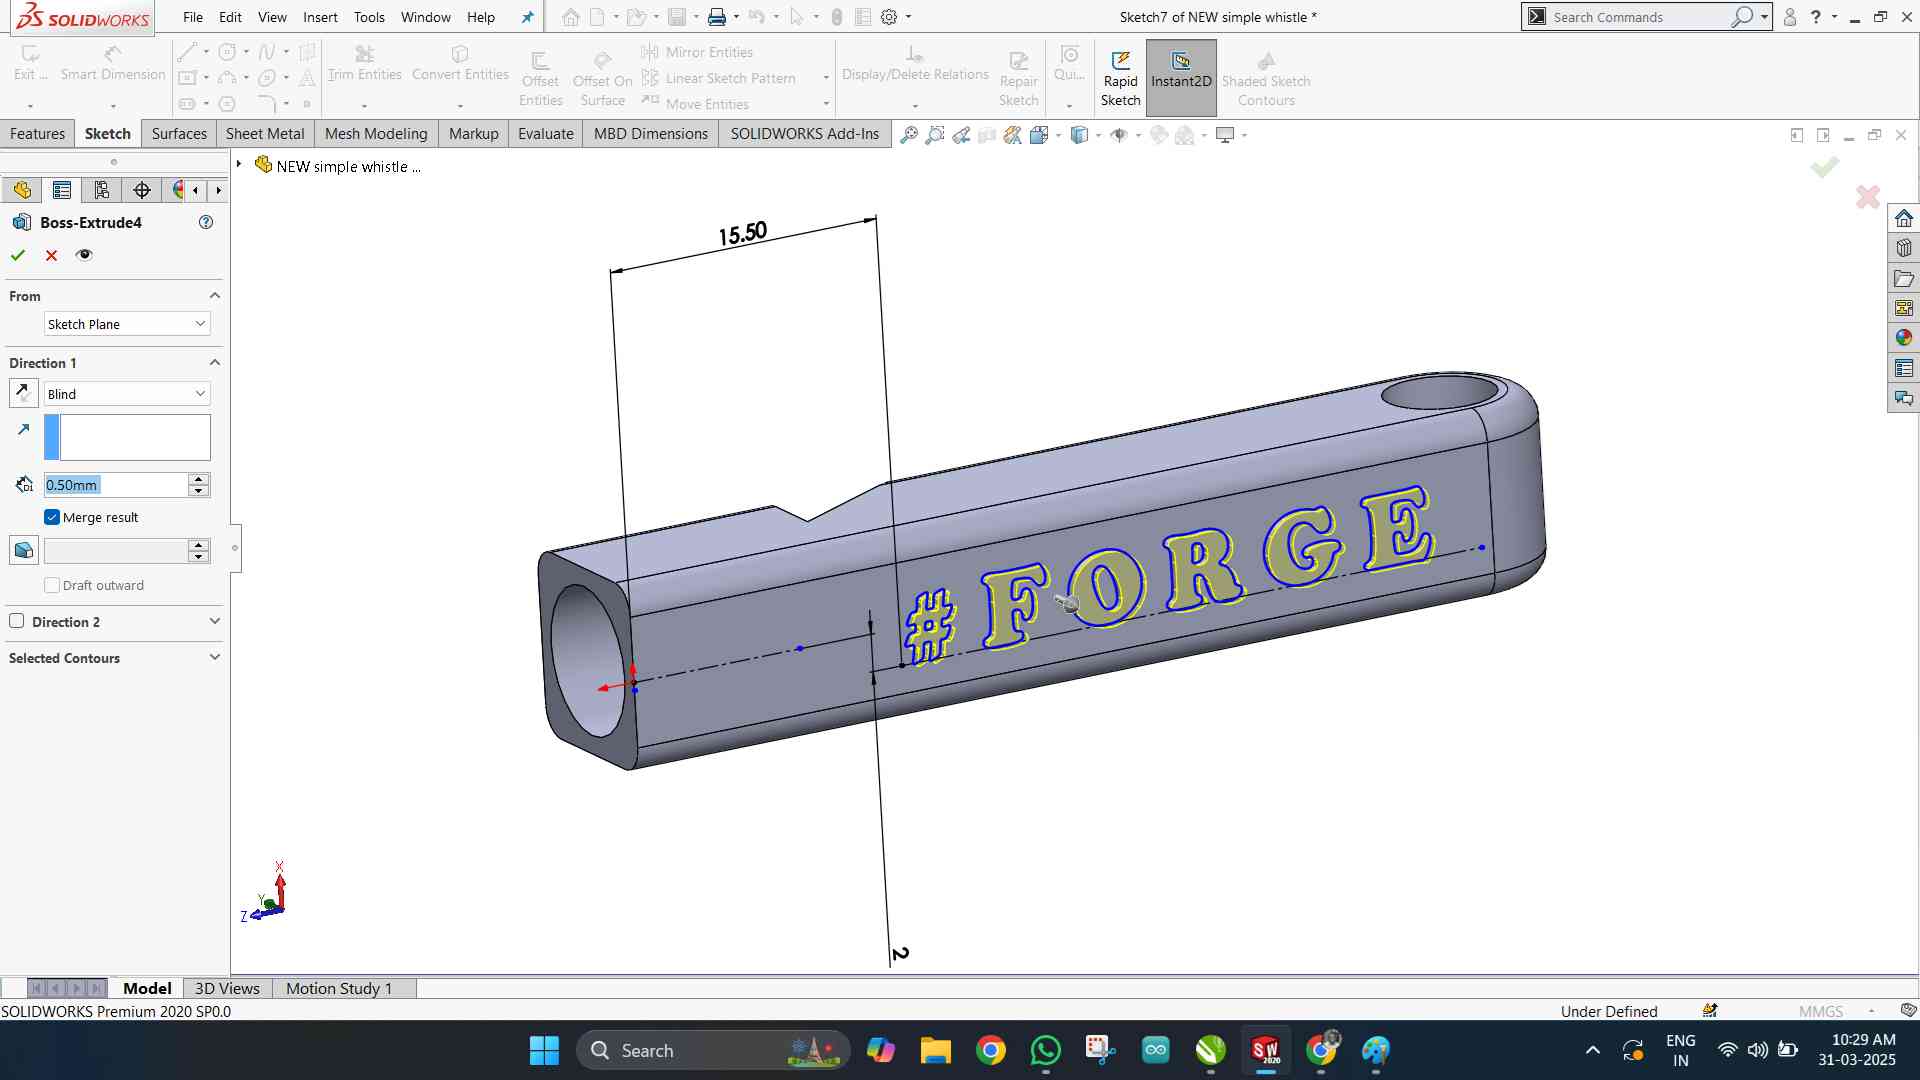
With the help of Solidworks software, let us create a simple whistle that can 3d printed,
Steps :
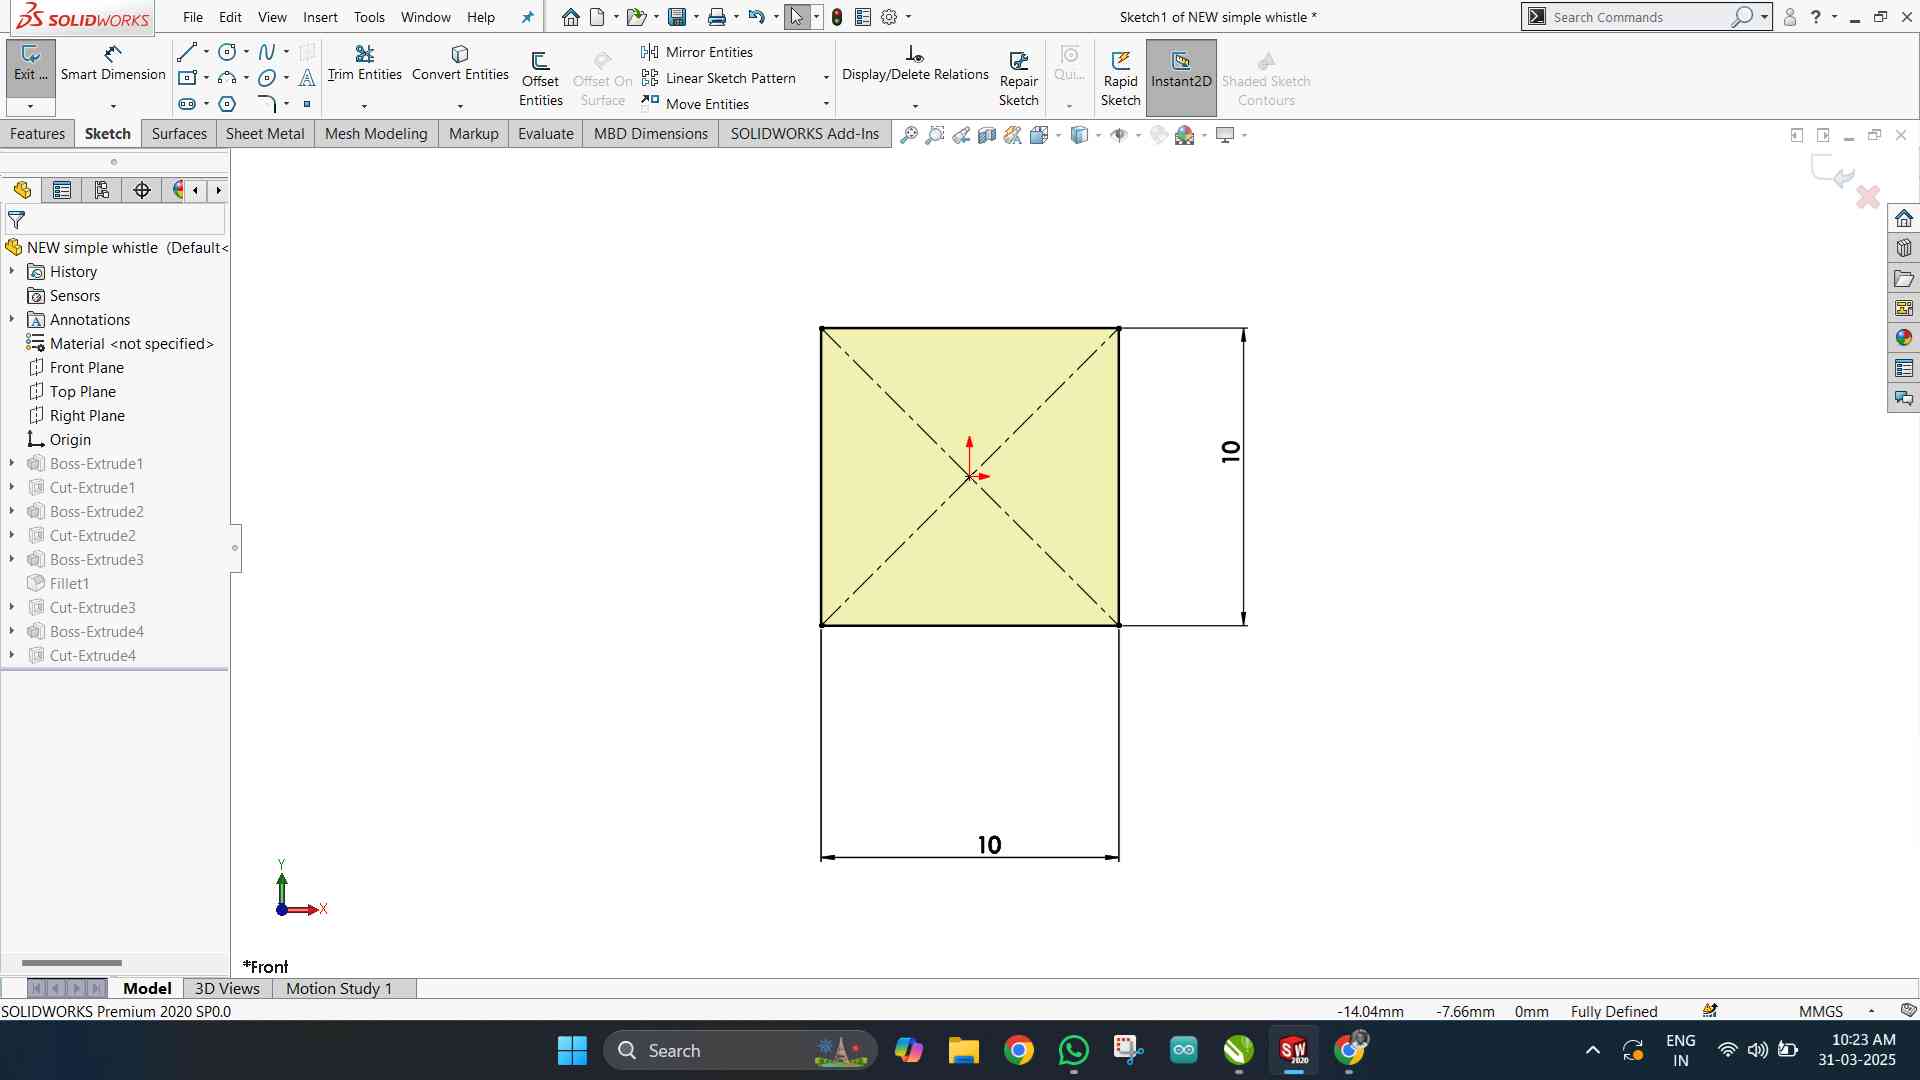
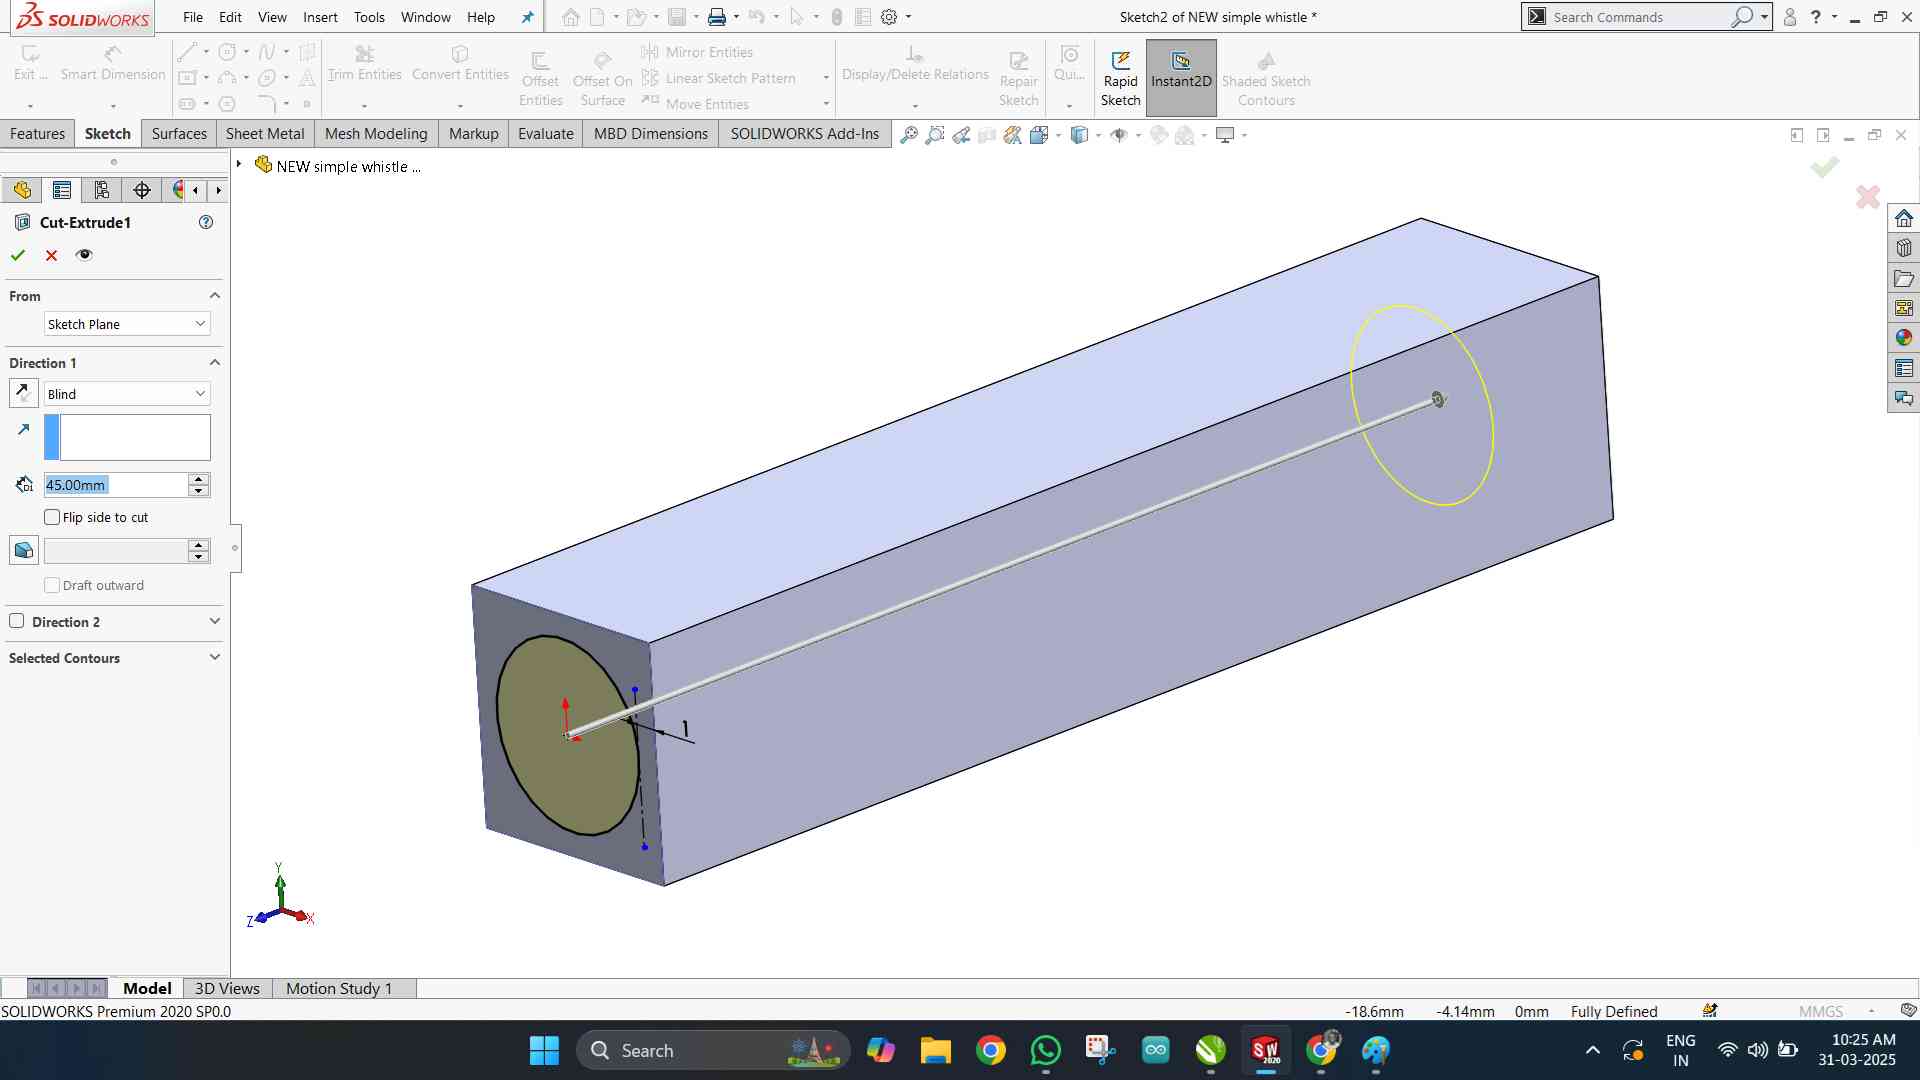
Sketch for the solid |
Extrude the solid |
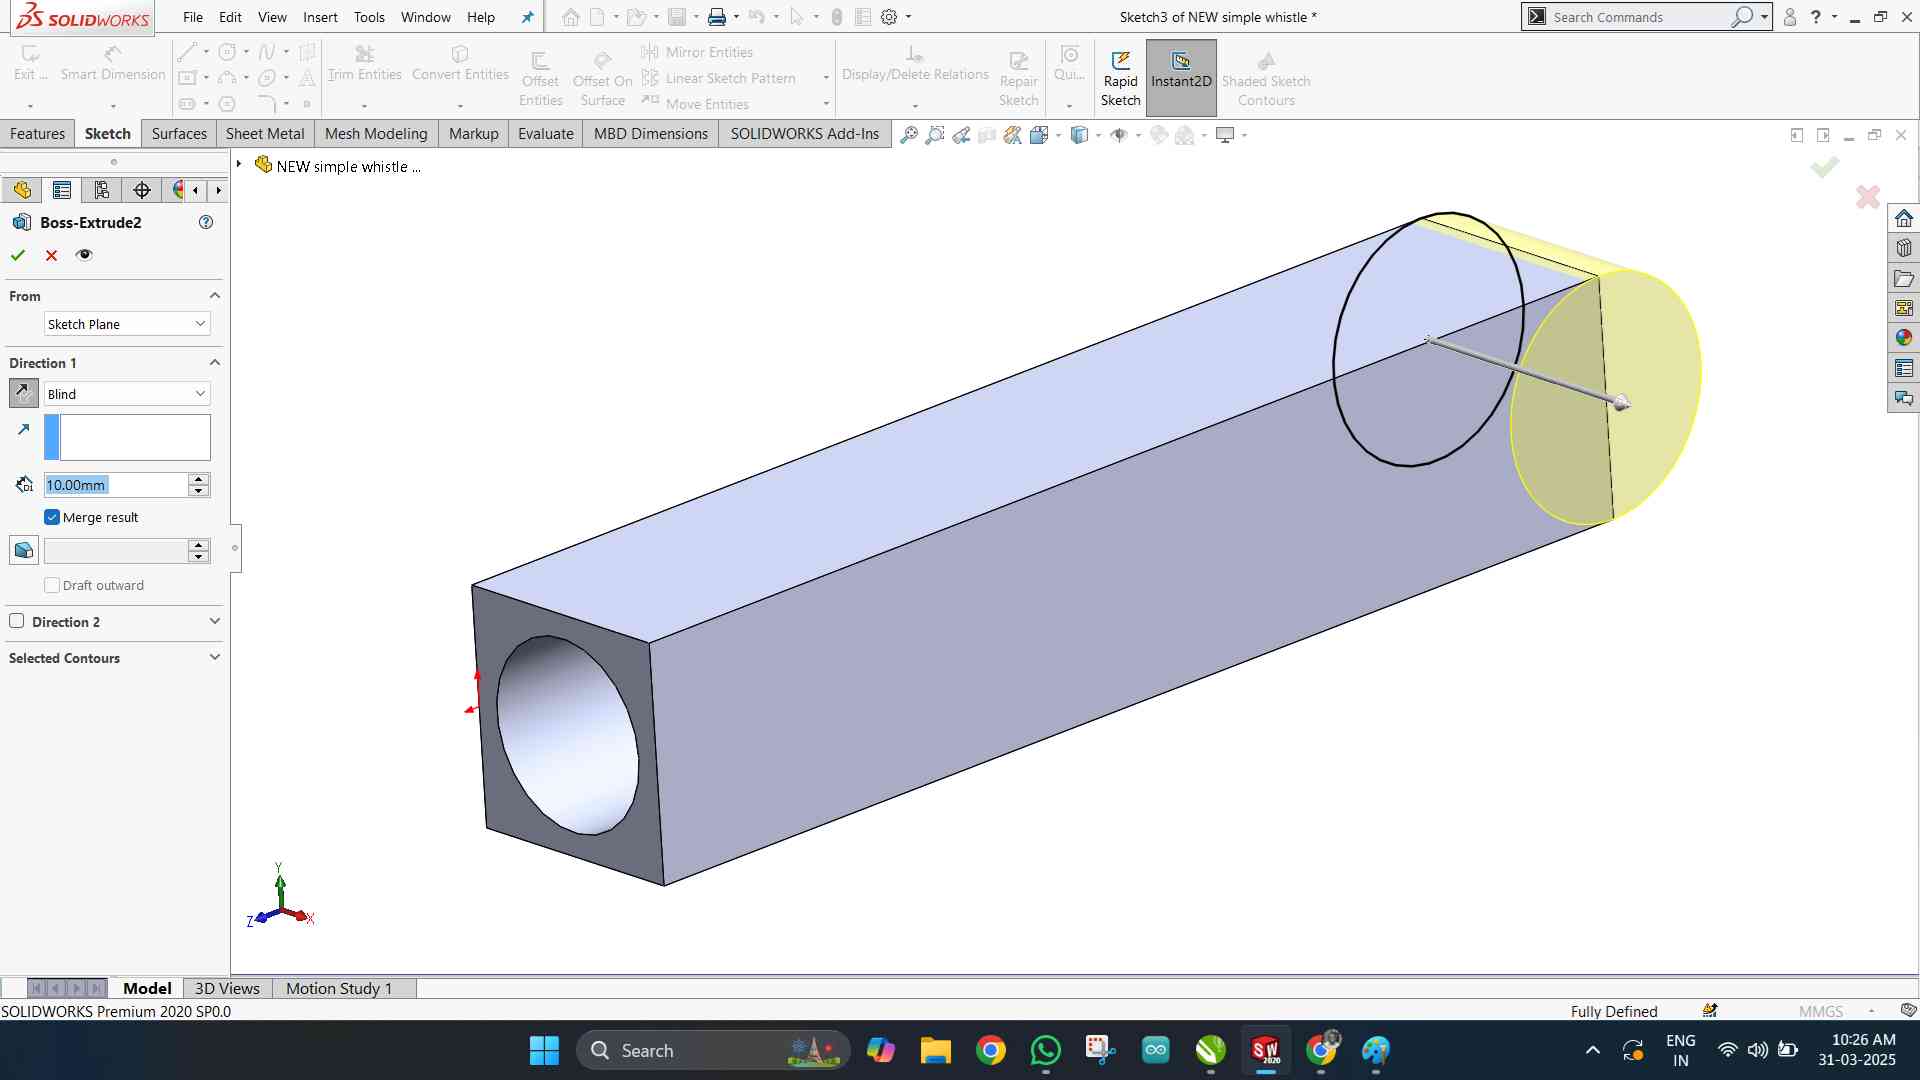
Extrude Cut - Chamber volume |
Loophole for the rope / key chain |
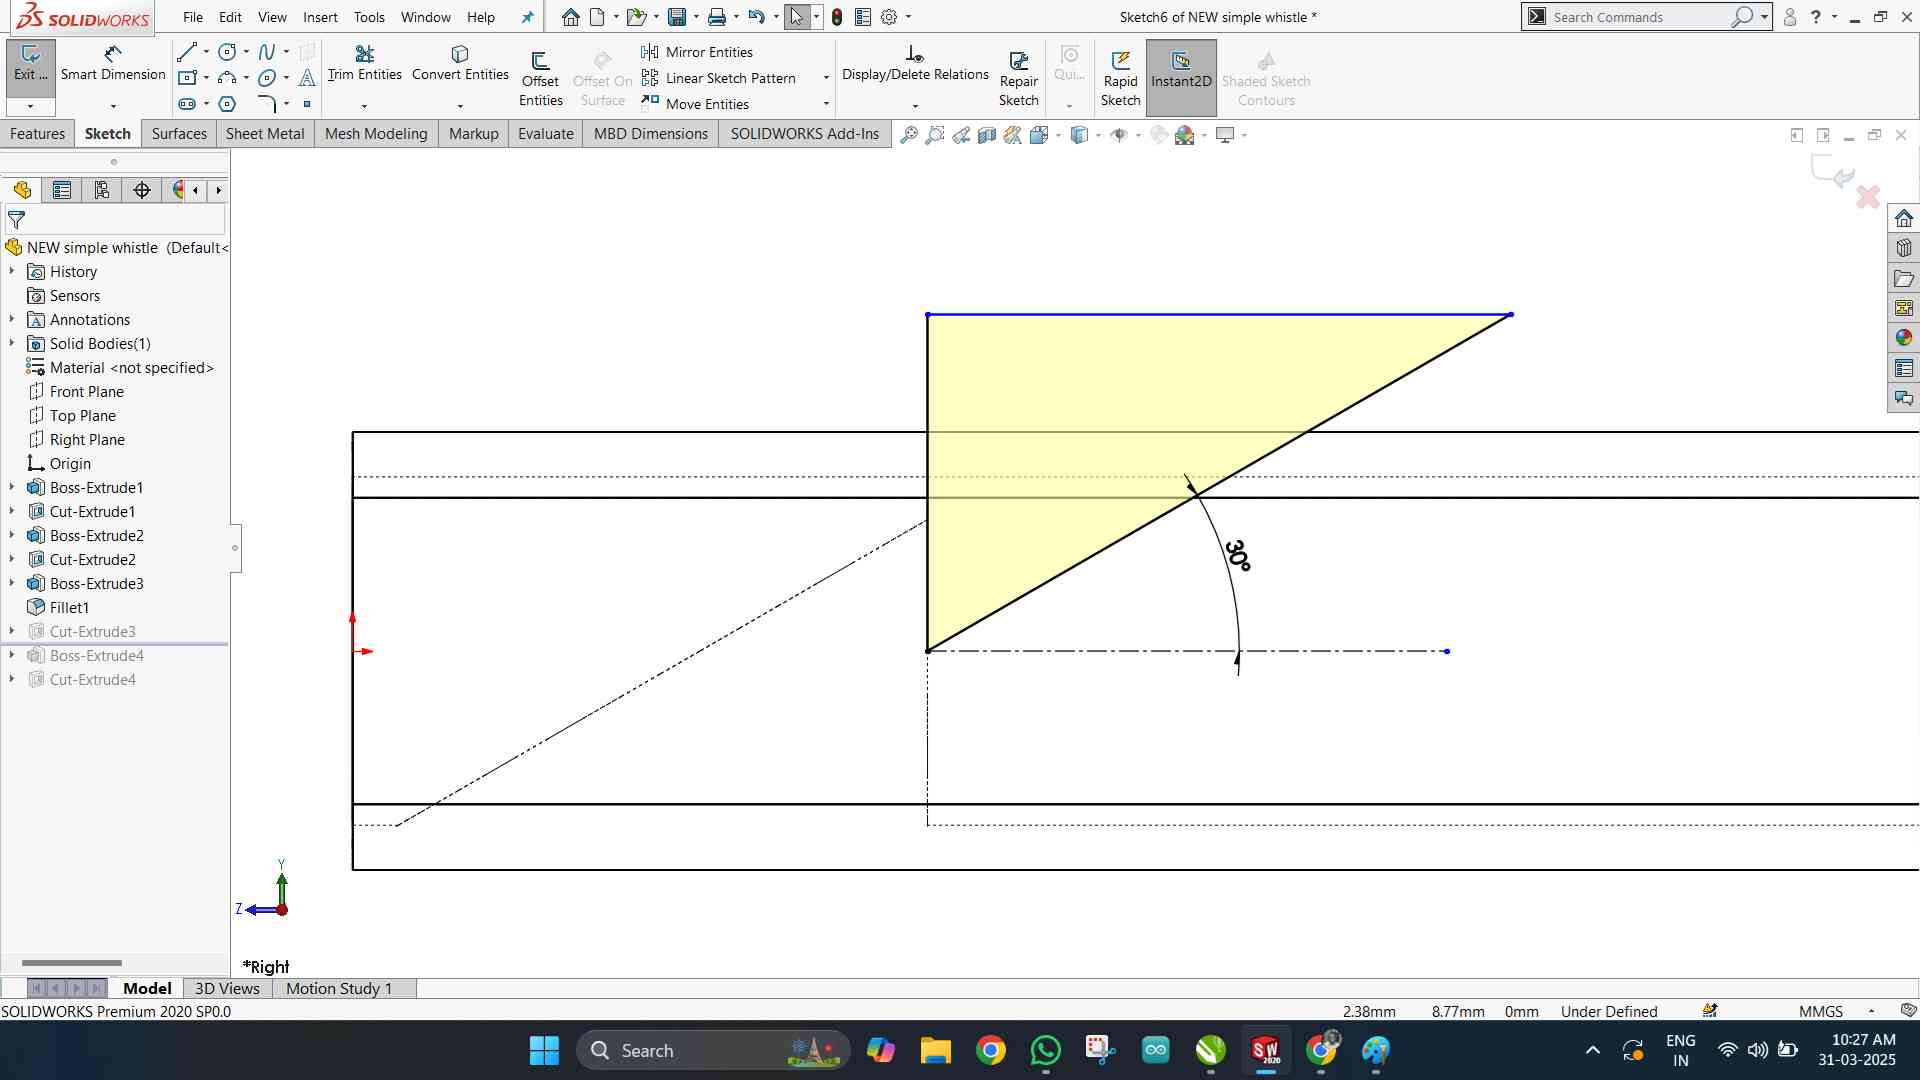
Convergent chamber sketch |
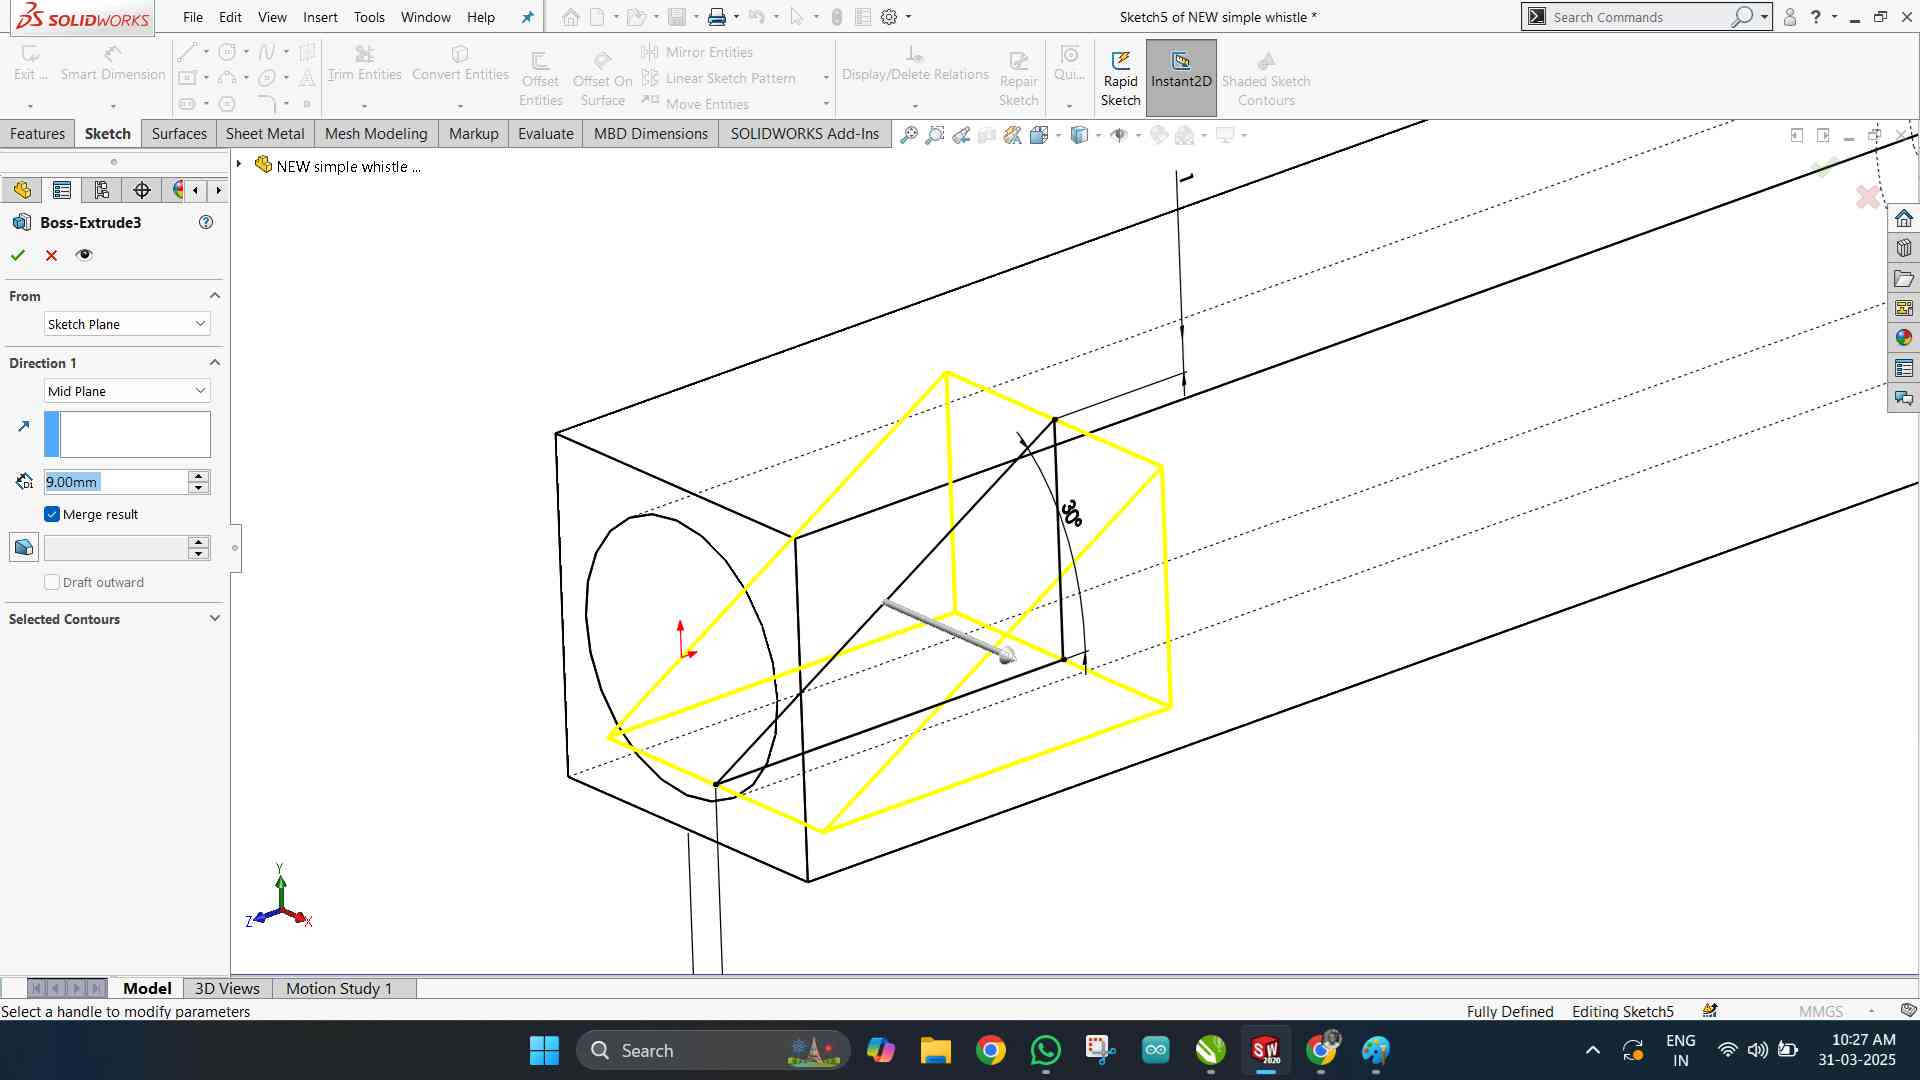
Extrude Convergent chamber |
Extrude cut Air Exit zone sketch |
Add words to the side |
Model |
Download link
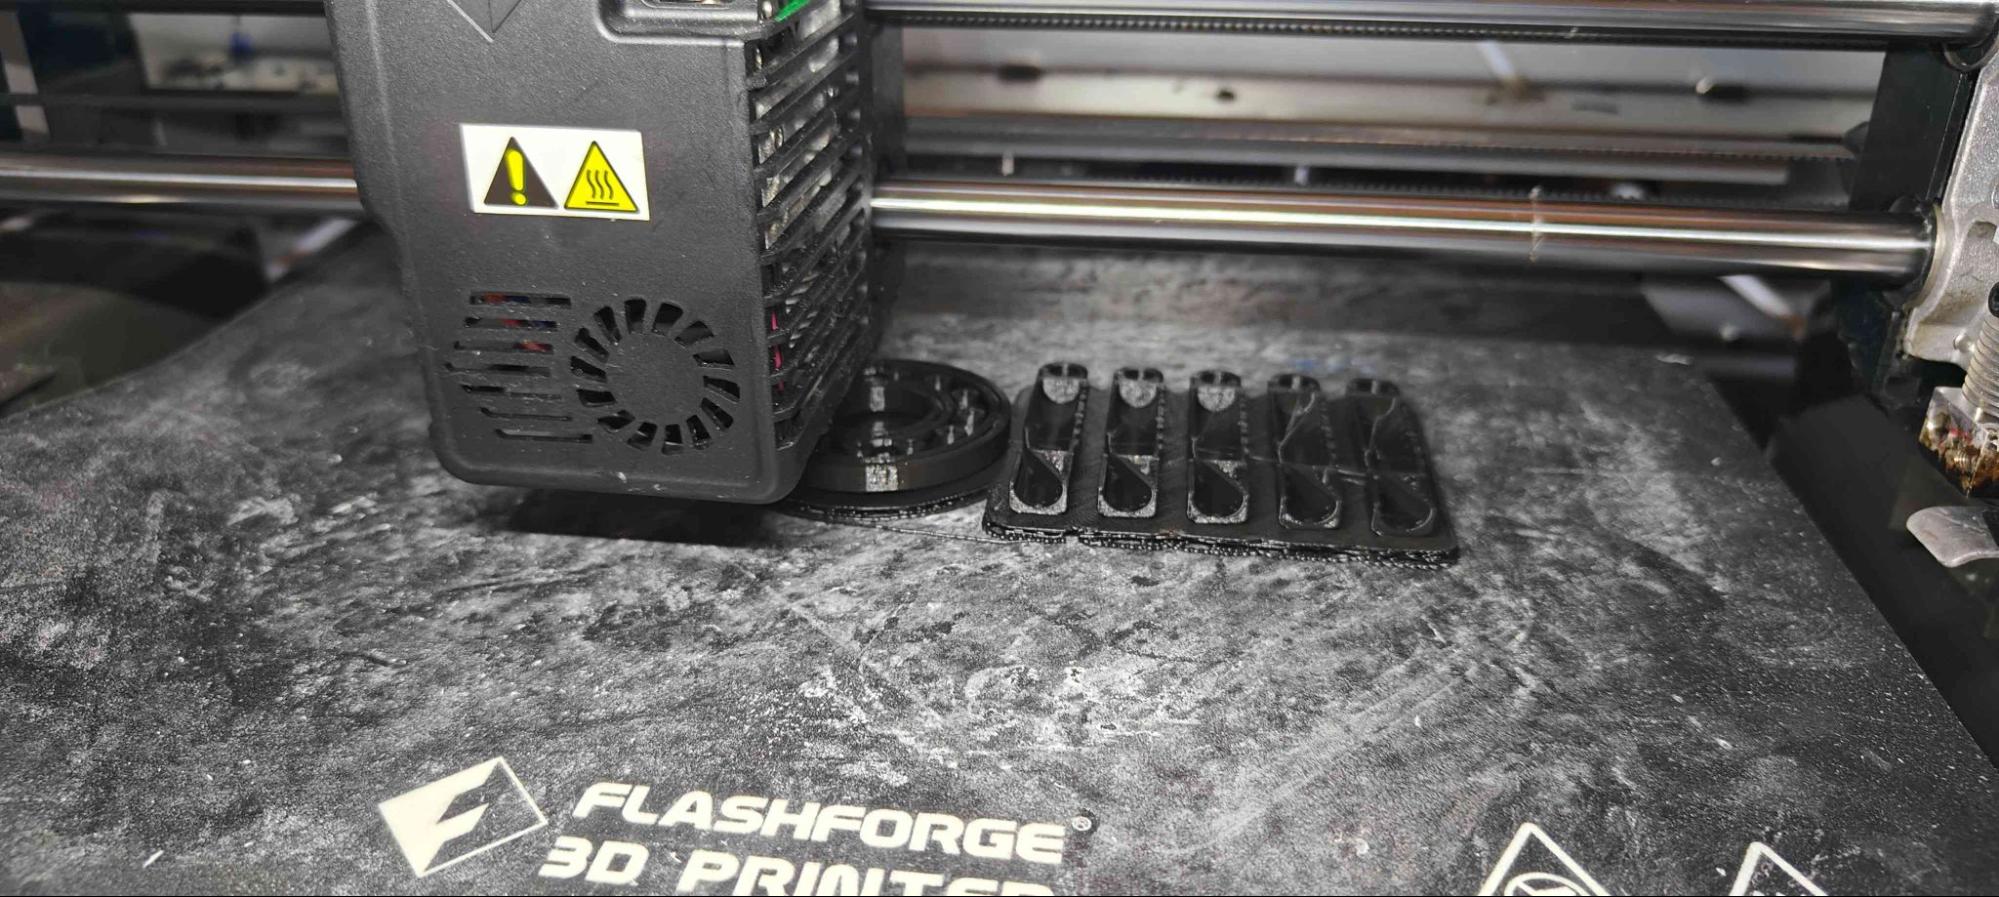
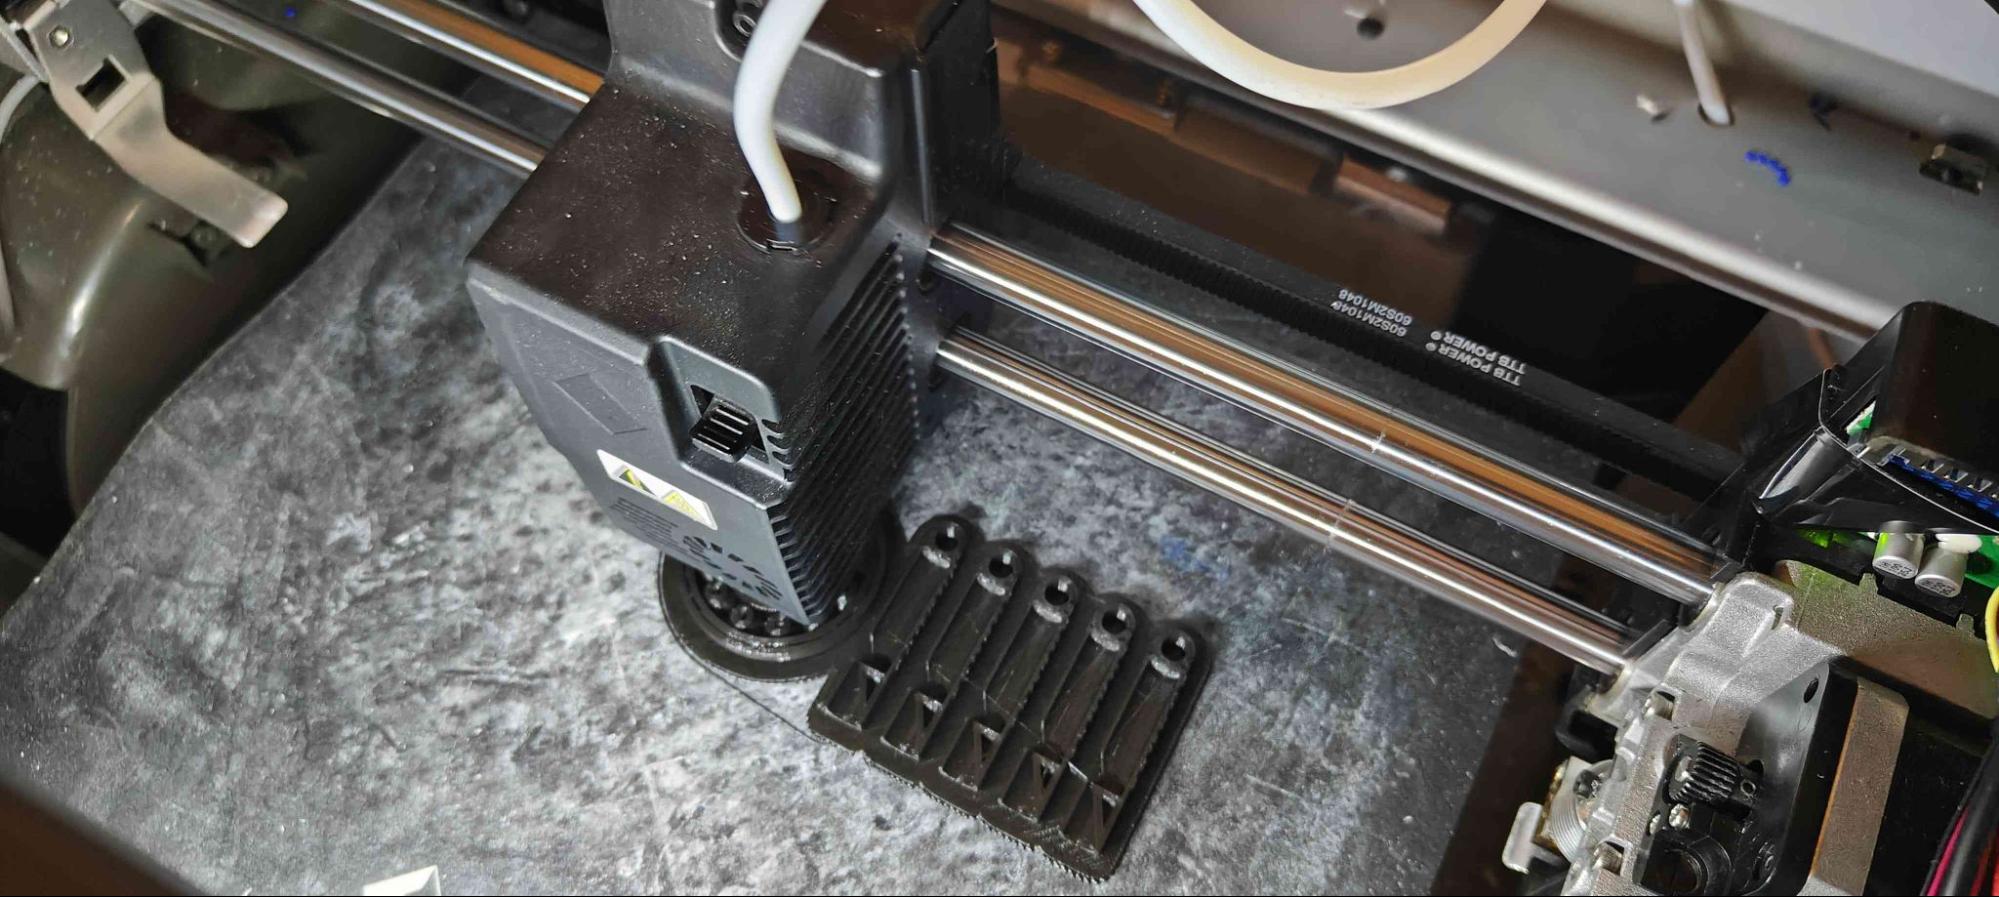
3D printed images
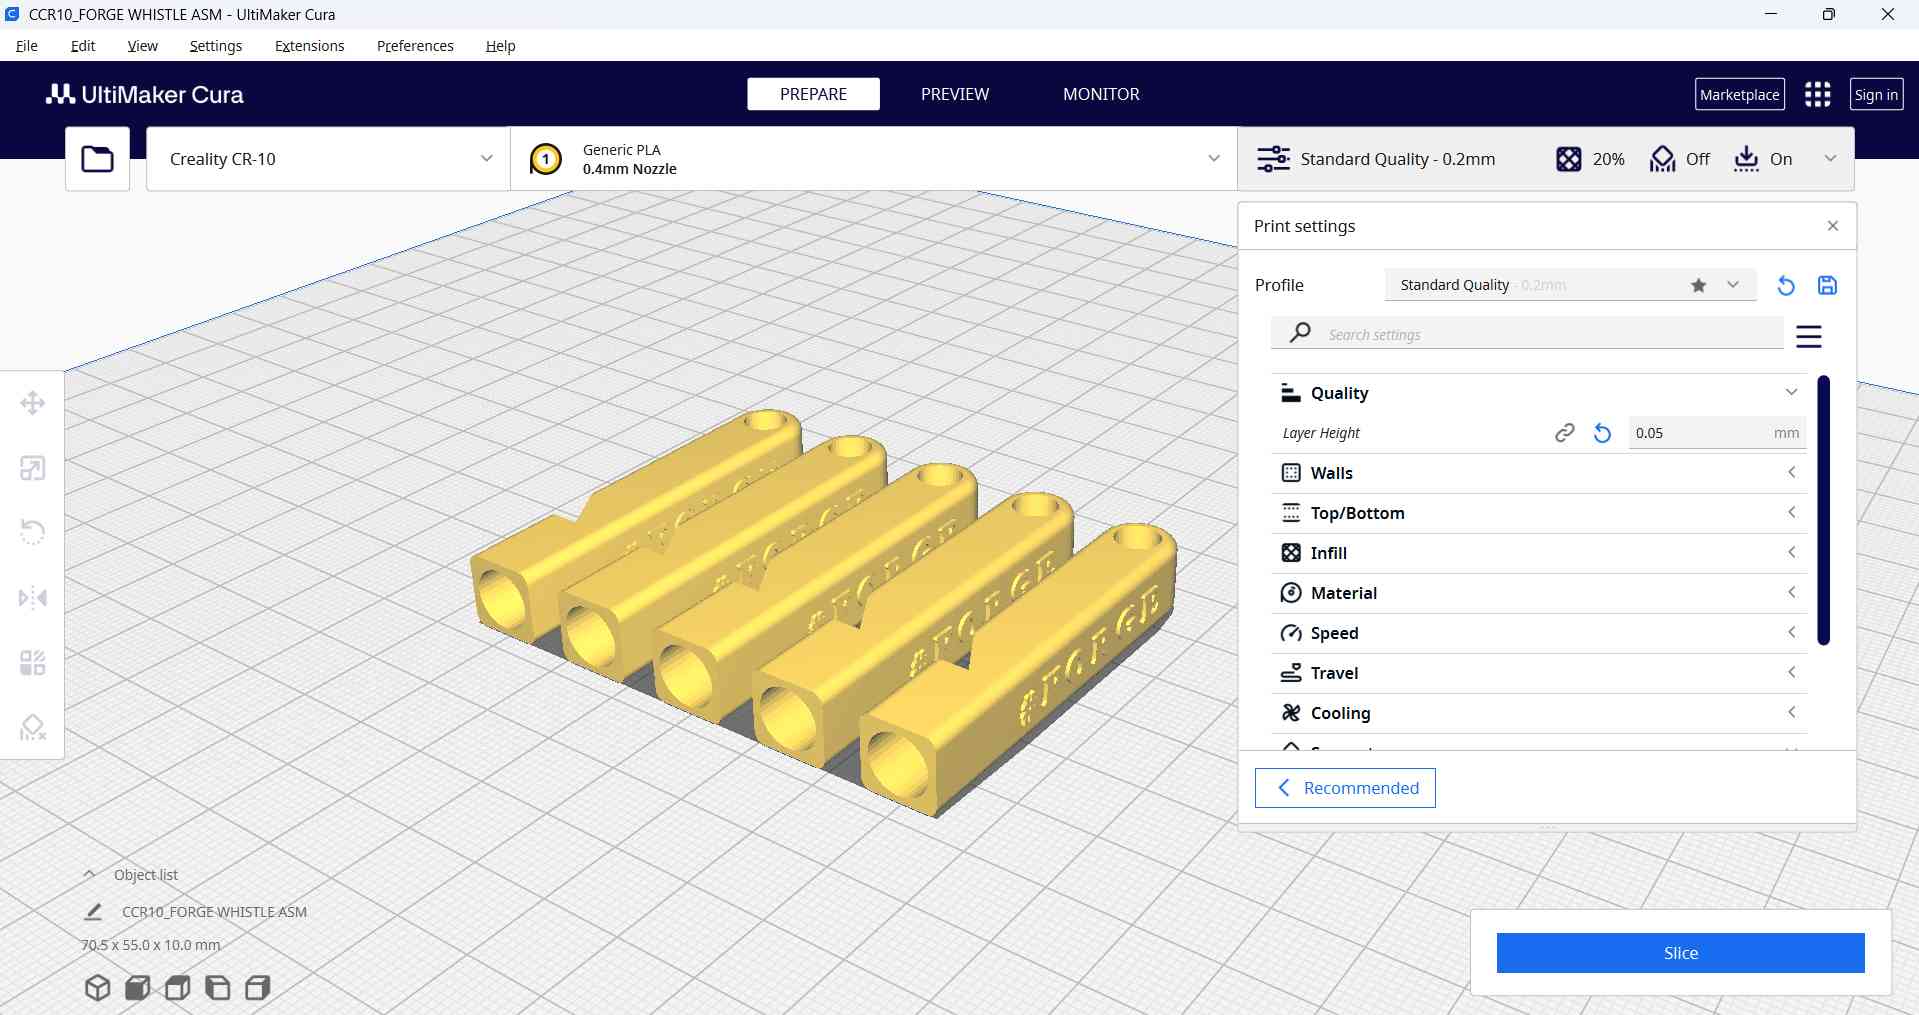
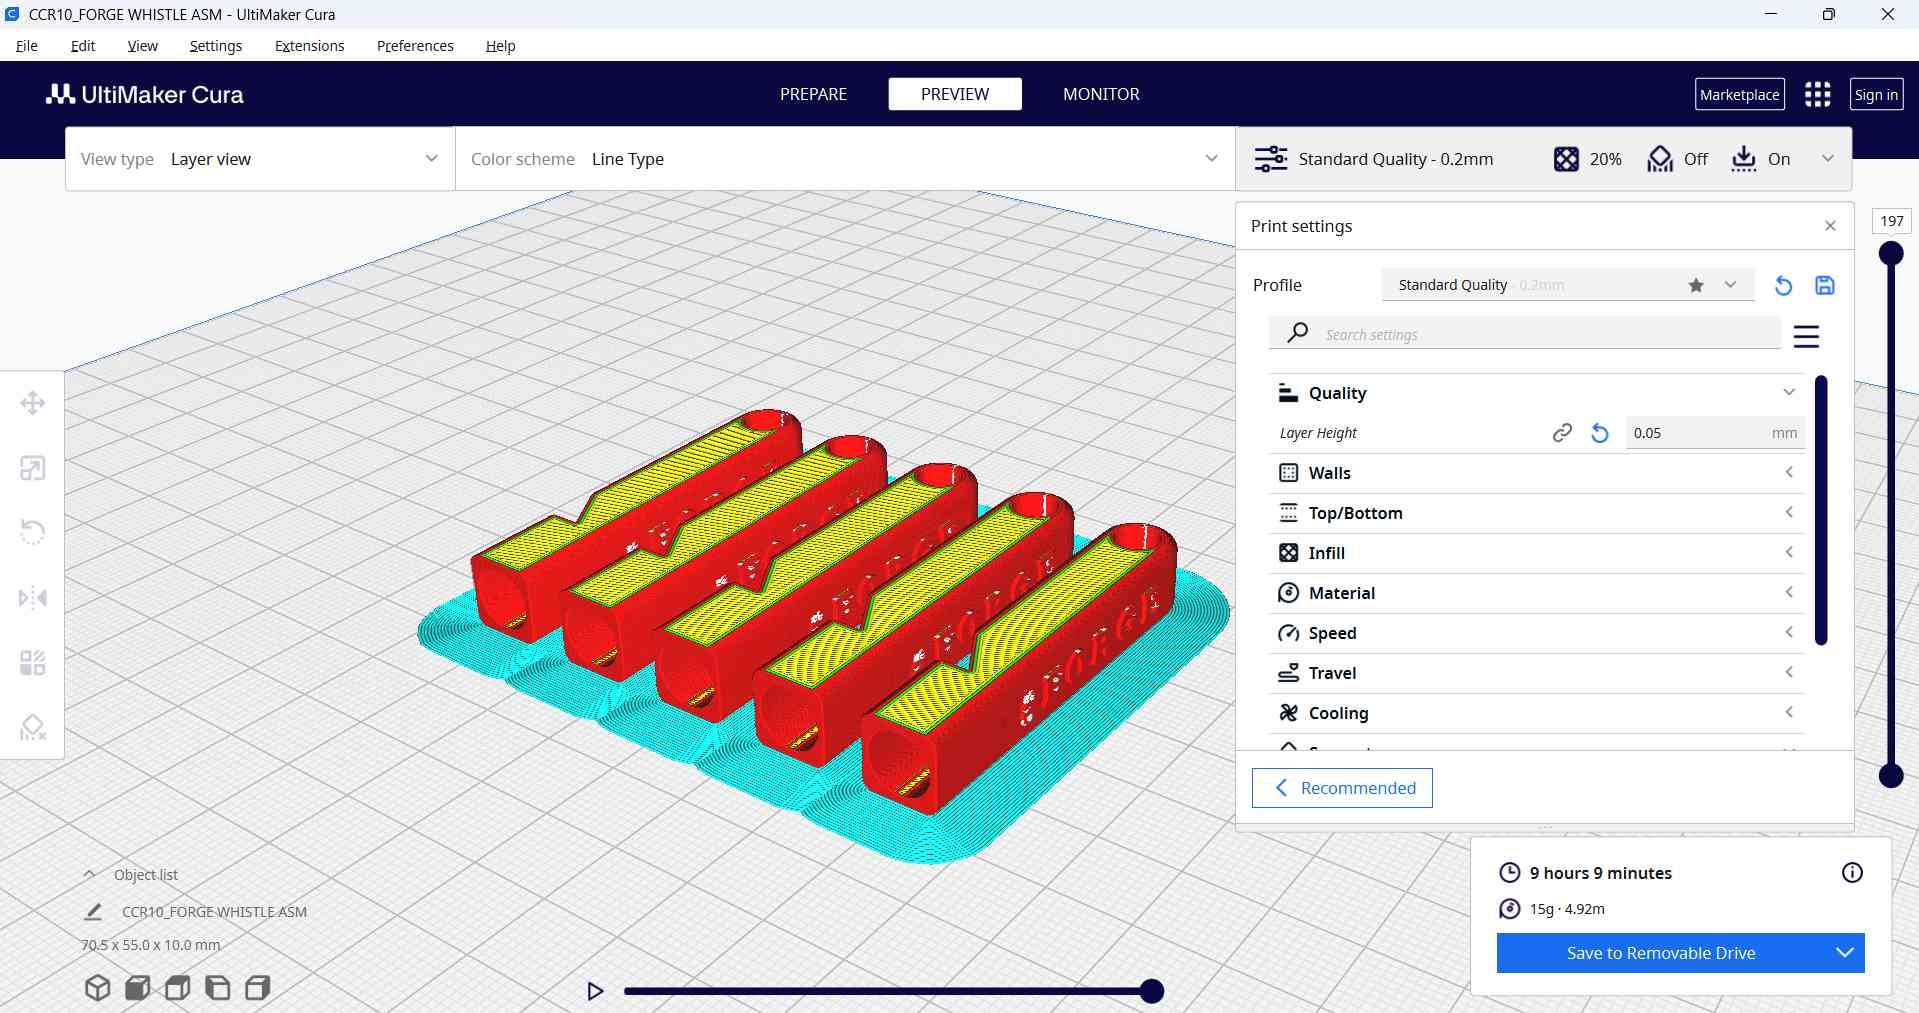
Cura Slicer | |
Layer height: 0.2mm Infill Density: 20% Material: PLA Print temperature: 200’C Build Plate temperature: 50’C Build Plate Adhesion Type: Brim No Support Align to the flat face Try to print multiple whistles at a time. | |
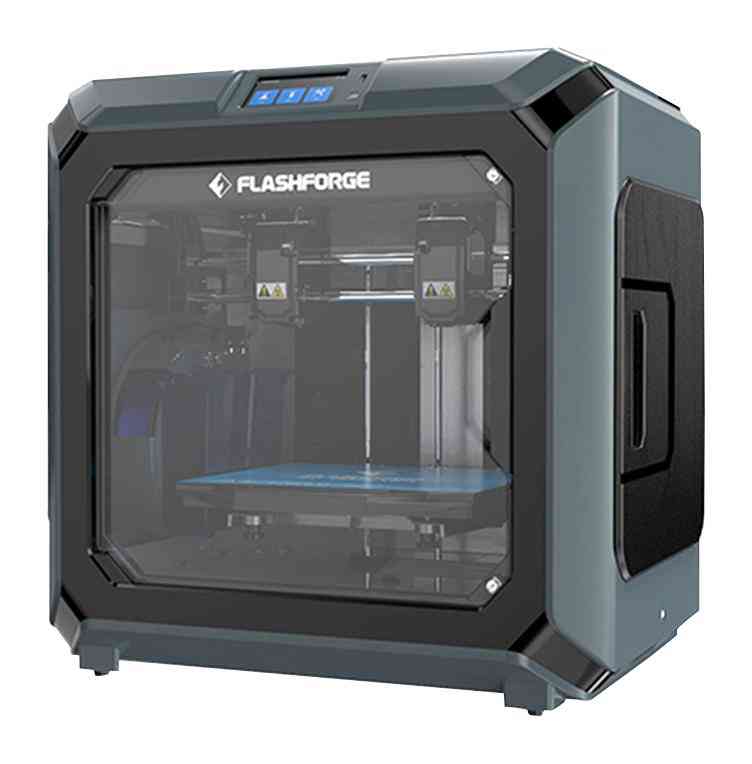
3D Printer Used: Flashforge Type: FDM printer Material: PLA - Black | |
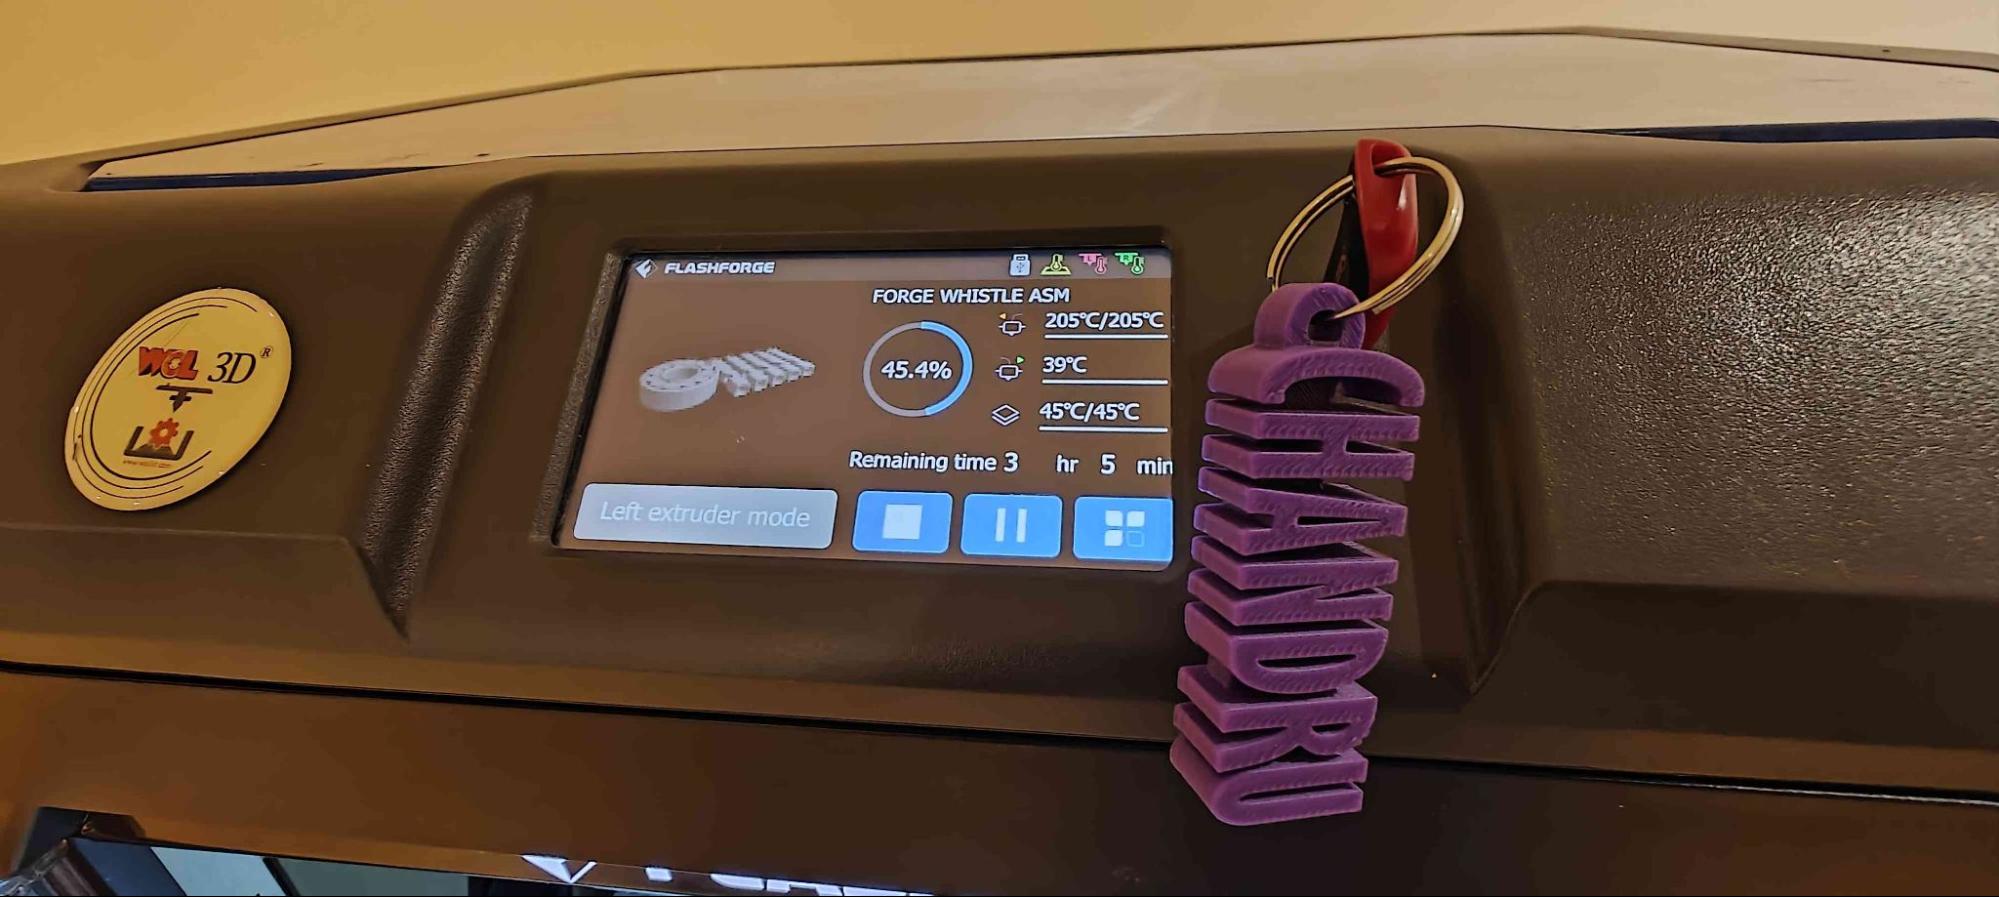
G Codes transferred using pendrive | |
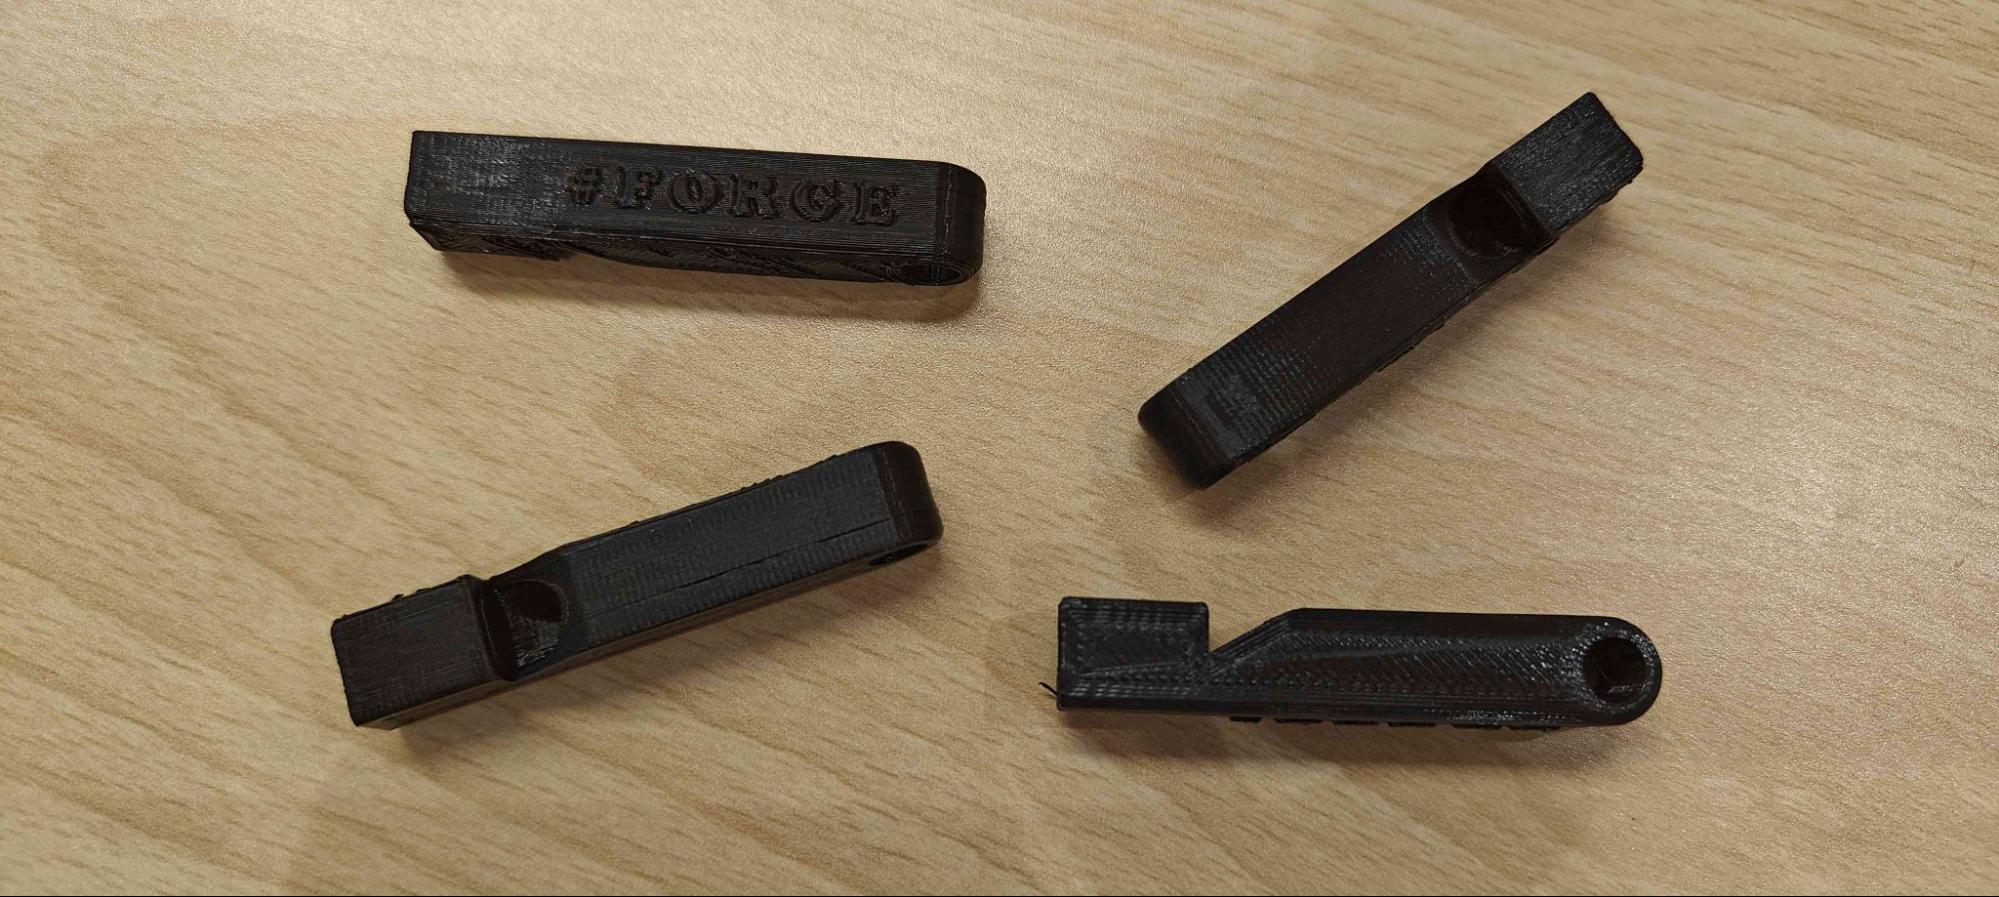
Final 3d Printed Whistle | |
3D Scanning
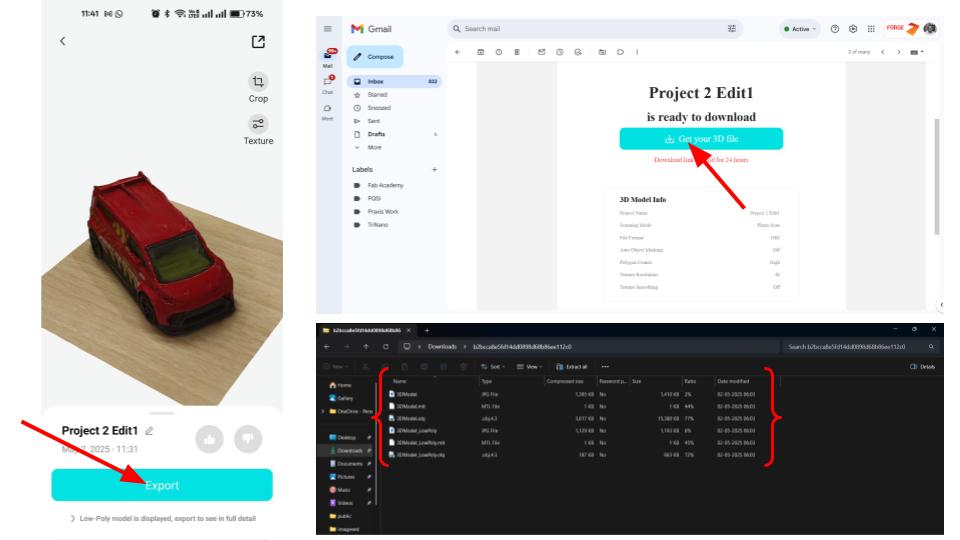
For 3D scanning, we used an Android mobile phone - Oneplus 6T and KIRI Innovation software to scan the models. KIRI Engine : 3D scanner app can be downloaded from Google Play Store. To start scanning click add symbol in the main screen |
Choose Photo Scan and Take photos/video. This will help you to capture multiple images and convert those images into 3d file. Minimum 20 pictures from different views are required to create the 3d model. |
After uploading the images, it will take few minutes based on the internet speed to generate and render the 3D model. Once generated, you can start editing the model using the crop option available in the top right corner. Move all boundaries to the required position and click Save Edit. |
To download the model, click export. Using a free application, you can download up to 5 models. The model will be sent to your email ID with a download option. The zip will be downloaded, will have file formats like *.obj and other formats. |
|
Model Download link: Link
<<Back to Home