Final Project :
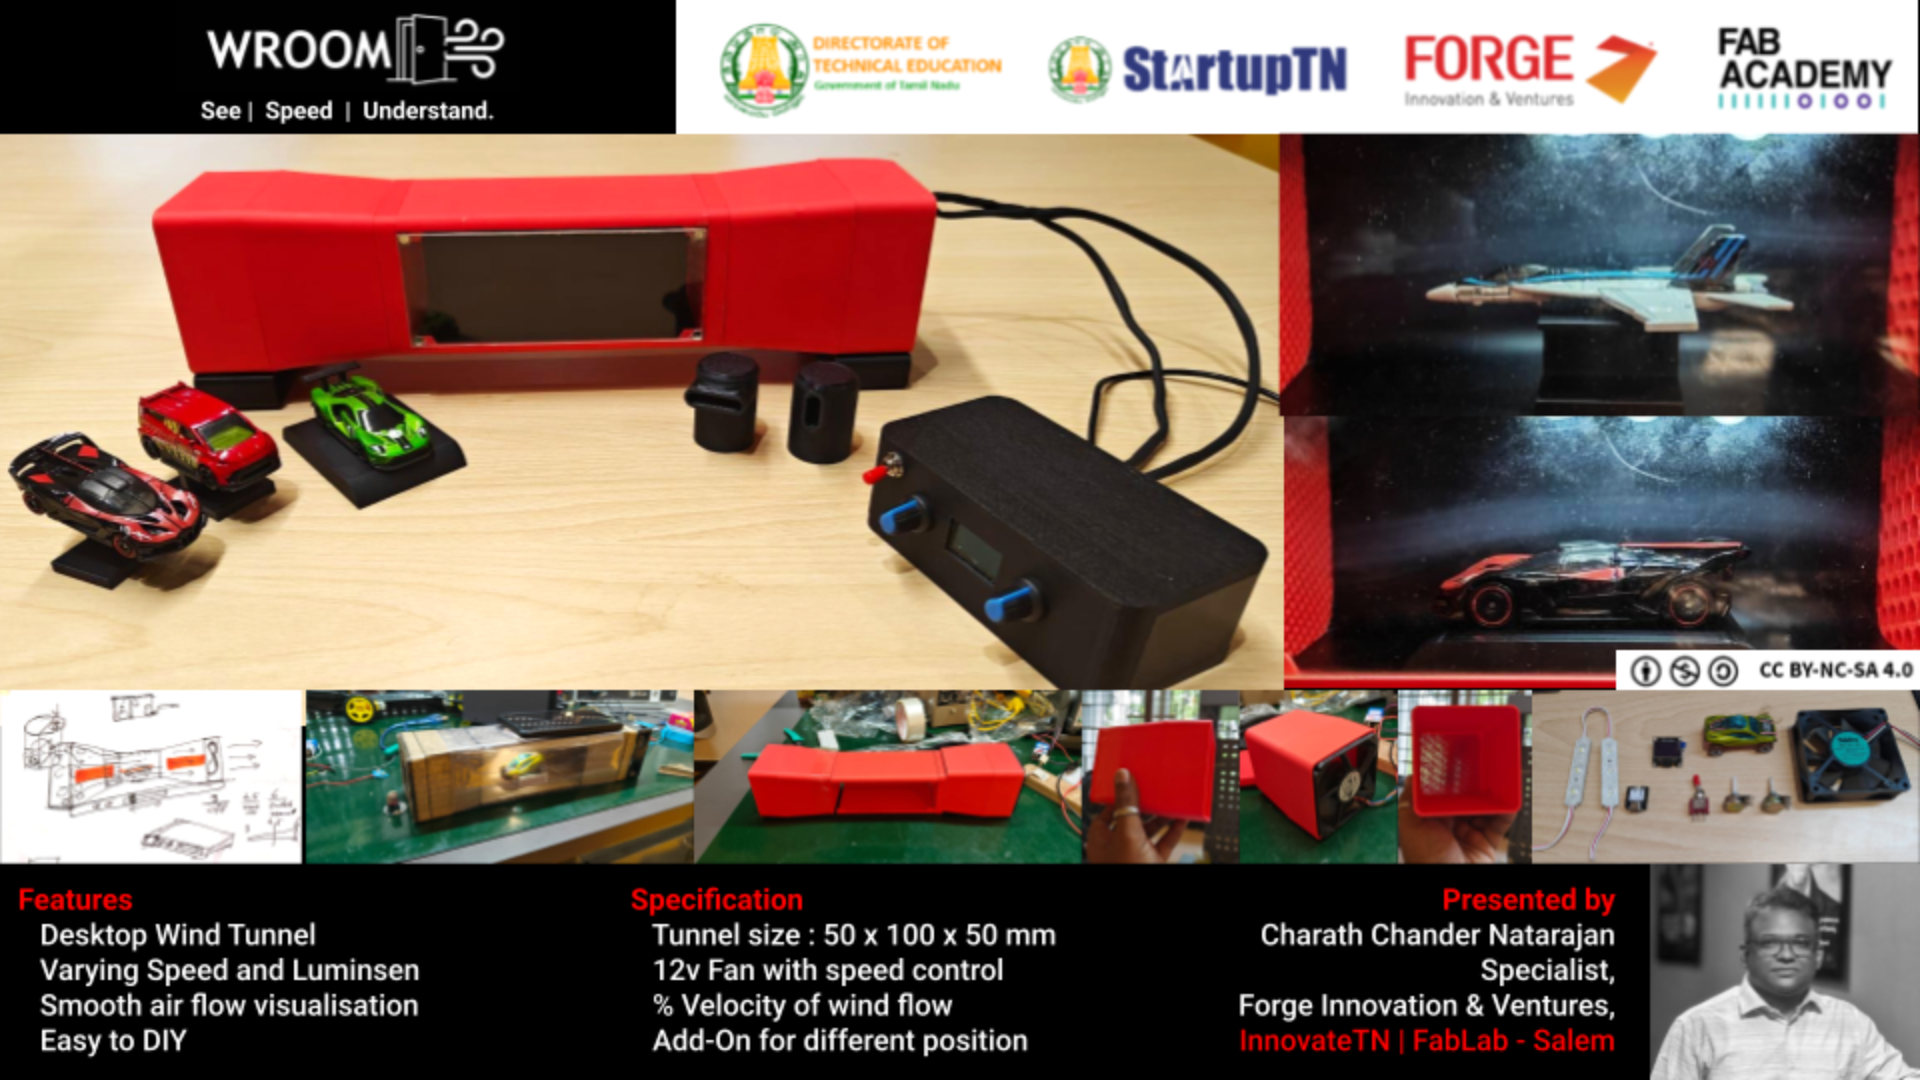
WROOM - See | Speed | Understand
1 Minute Video:
Project Slide
Concept Generation - What will it do?
This project aims to build a functional, tabletop wind tunnel specifically designed for testing the aerodynamic properties of 1:64 scale die-cast cars. It will allow users to visualize airflow patterns around the vehicles using smoke or tufts, and airflow at different angles to visualize basic aerodynamics (like drag and eddy) through a simple system. The primary goal is to provide an accessible and educational tool for understanding fundamental aerodynamic principles, particularly relevant to automotive design, and to offer a platform for experimenting with modifications to die-cast cars.
Who's done what beforehand?
Many hobbyists, educators, and even some professional designers have built small-scale wind tunnels.
YouTube References:
1. | https://www.youtube.com/watch?v=3isAe2h1FEs |
2. | https://www.youtube.com/watch?v=3isAe2h1FEs |
3. | https://www.youtube.com/watch?v=sK3EtlTI5Bc&t=233s |
4. | https://www.youtube.com/watch?v=Xa4YN12IiHg |
5. | https://www.youtube.com/watch?v=vAKTOPvPZa0 |
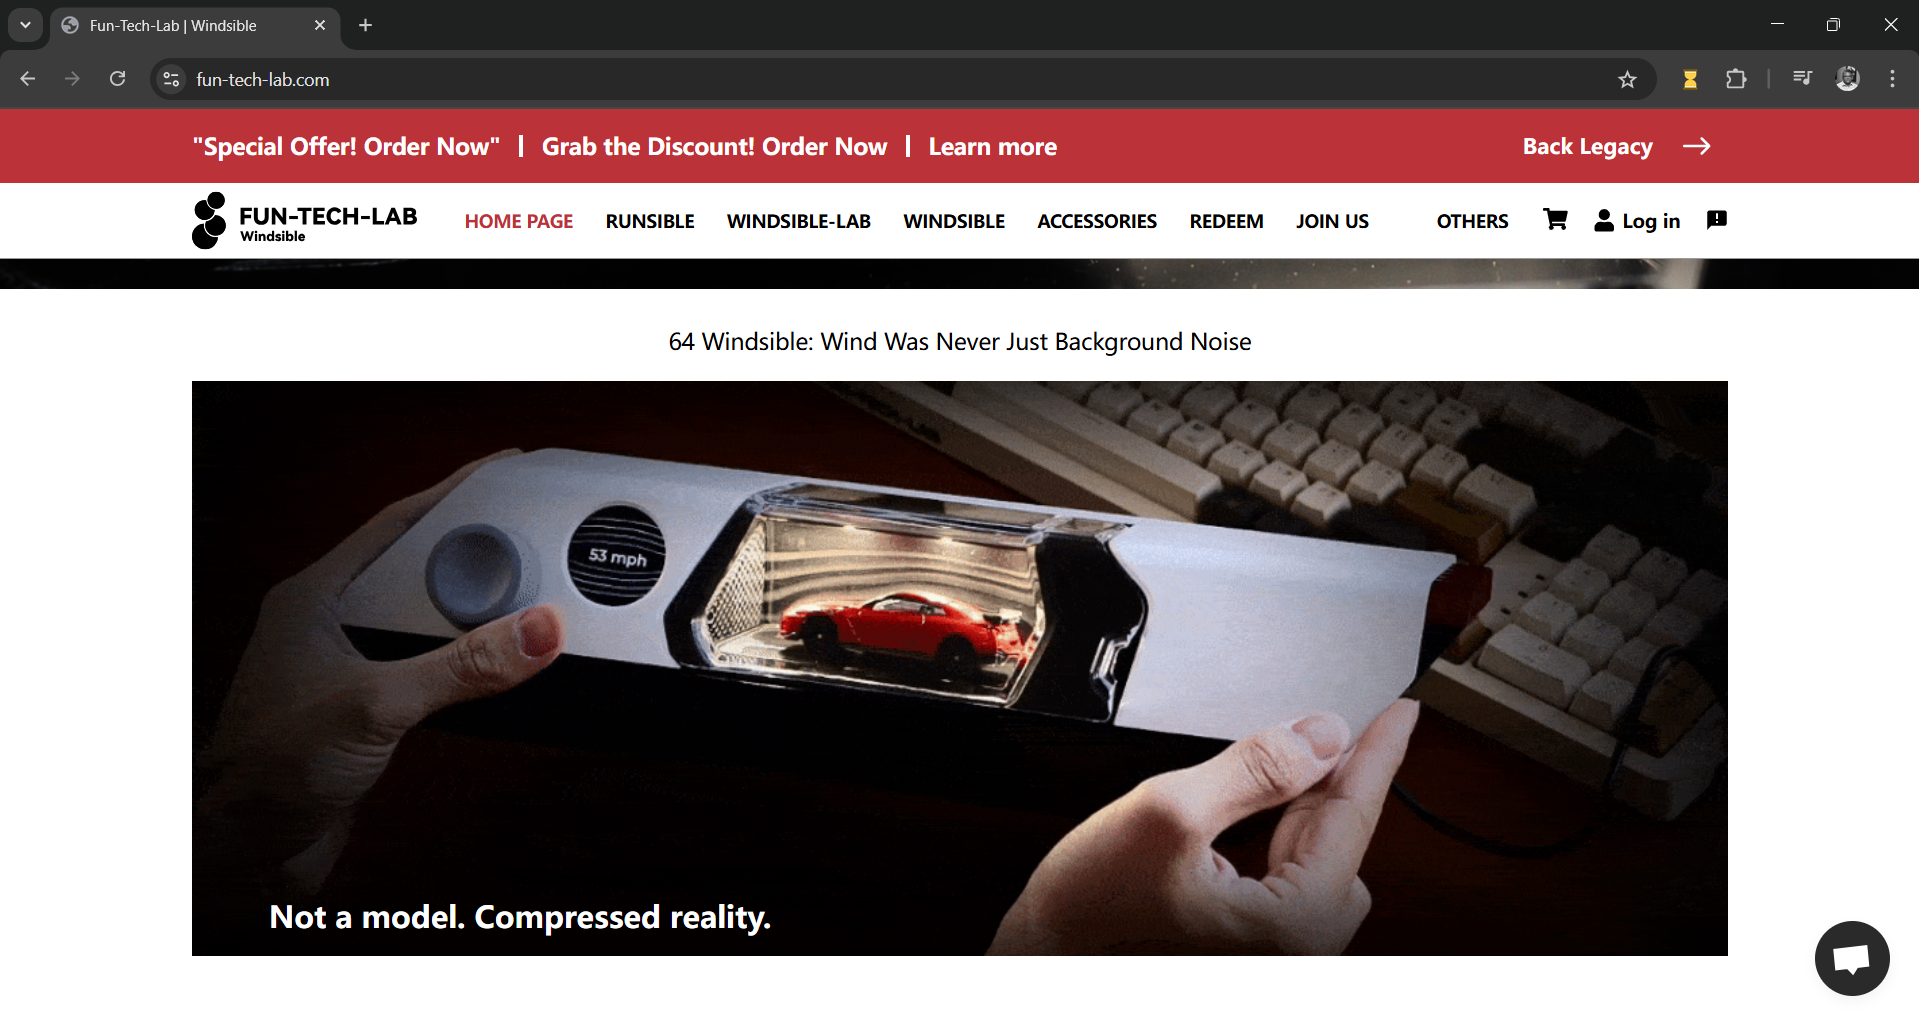
Fun-Tech-Lab | Windsible: Link
Fun-Tech-Lab is a UK-based company developing Windsible, a desktop version of a wind tunnel commercially available online. They have three variants of the wind tunnel that depends on the scale ratio of the die-cast models. Currently available for $239 for a 1:64 model ( in INR 20,449/-), which is a little expensive.
Milestones for this project development
M1 | M2 | M3 | M4 | M5 | M6 | Completed | |
Prototype | |||||||
Design & Fabrication | |||||||
Assemble | |||||||
Testing | |||||||
Documentation |
Hardware Exploration:
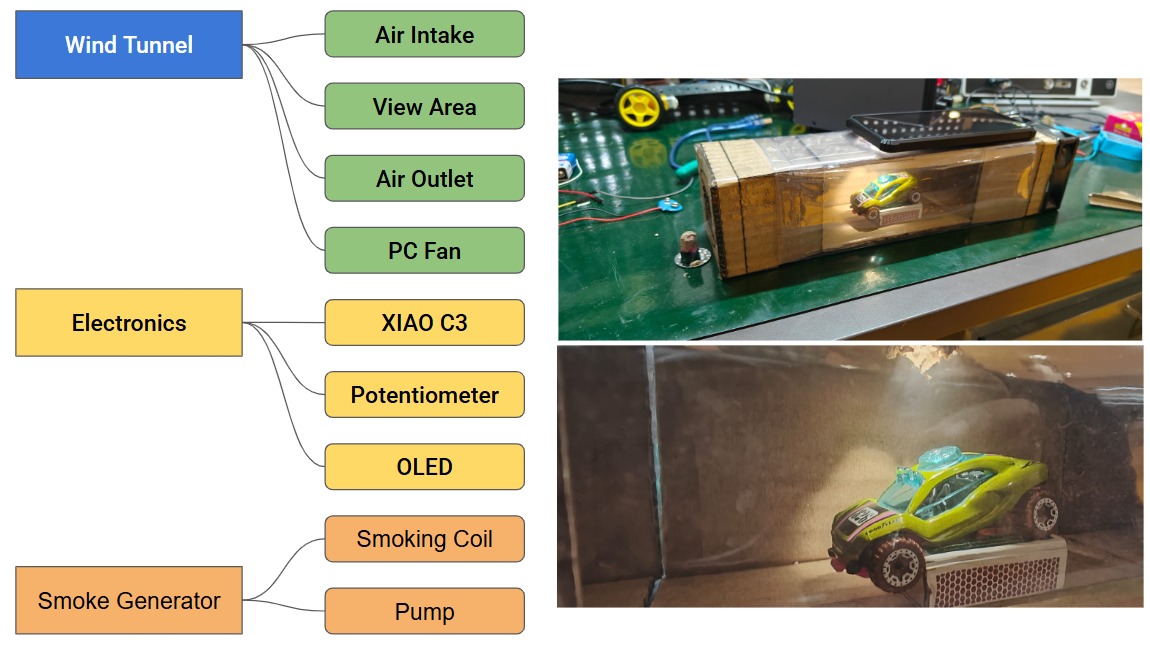
In this product development, simple techniques are used in such a way any body can download and recreate the wind tunnel using digital fabrication techniques., The system is divided into three sub-systems
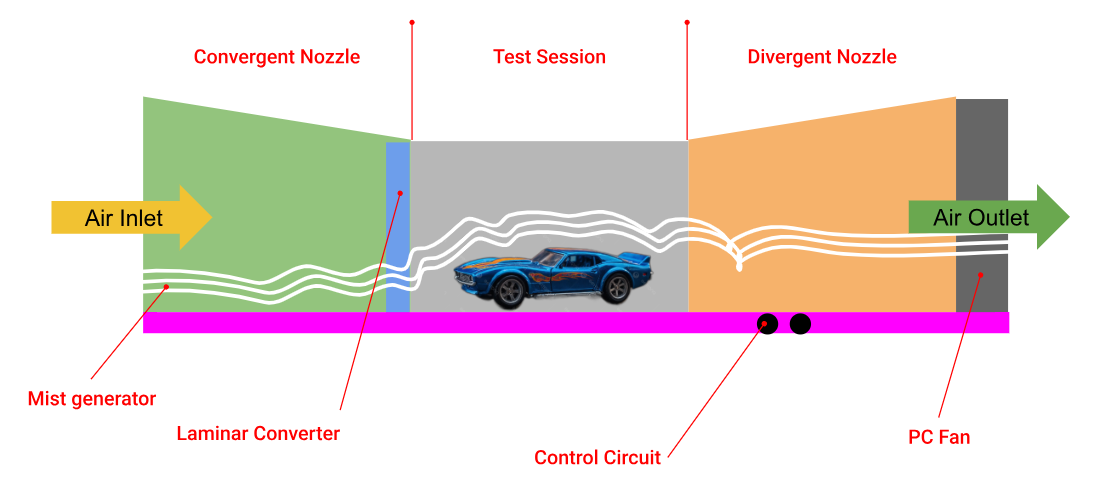
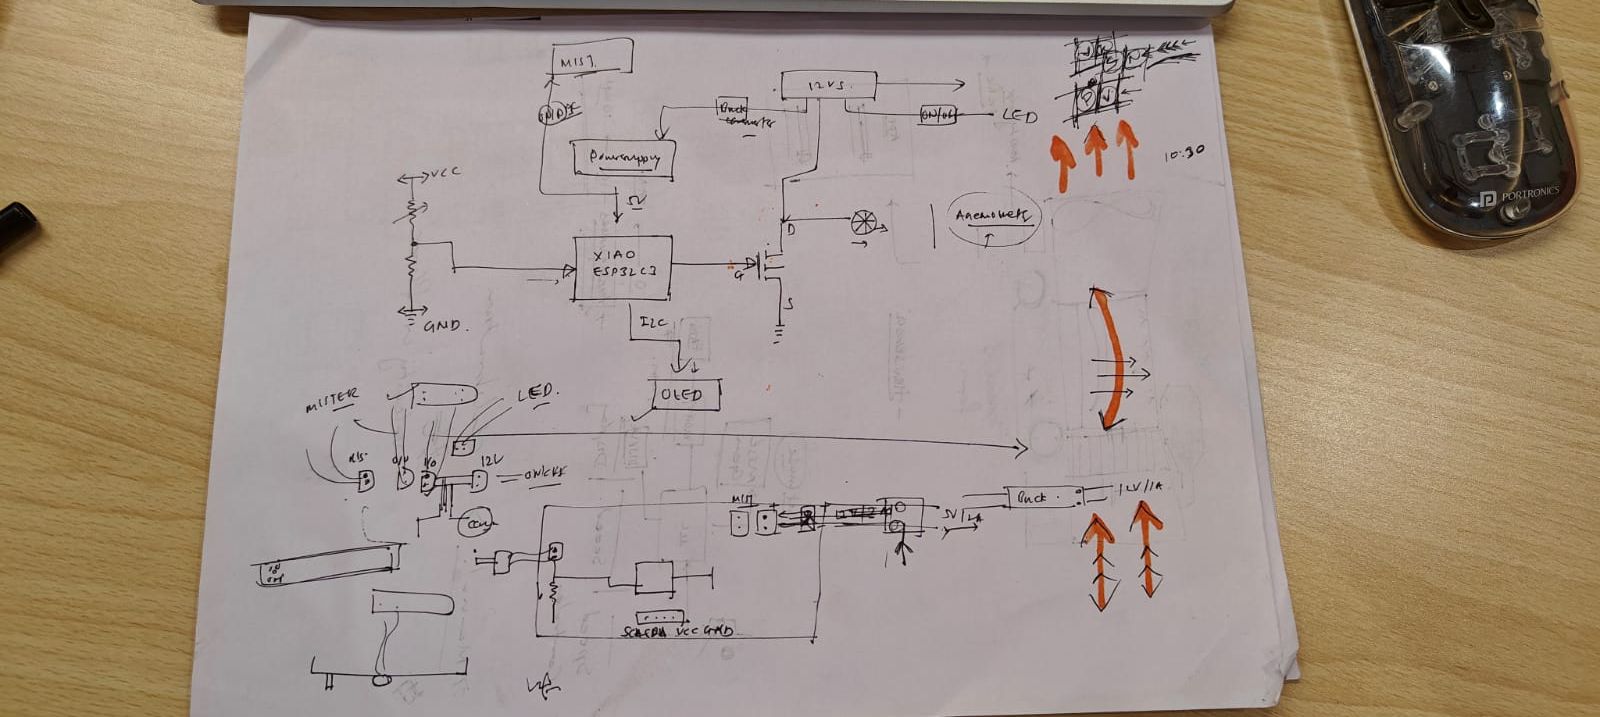
This is the basic sketch of the different systems integrated into this project. A wind tunnel chamber, an electronics control box, and a smoke generator.
Block Diagram:
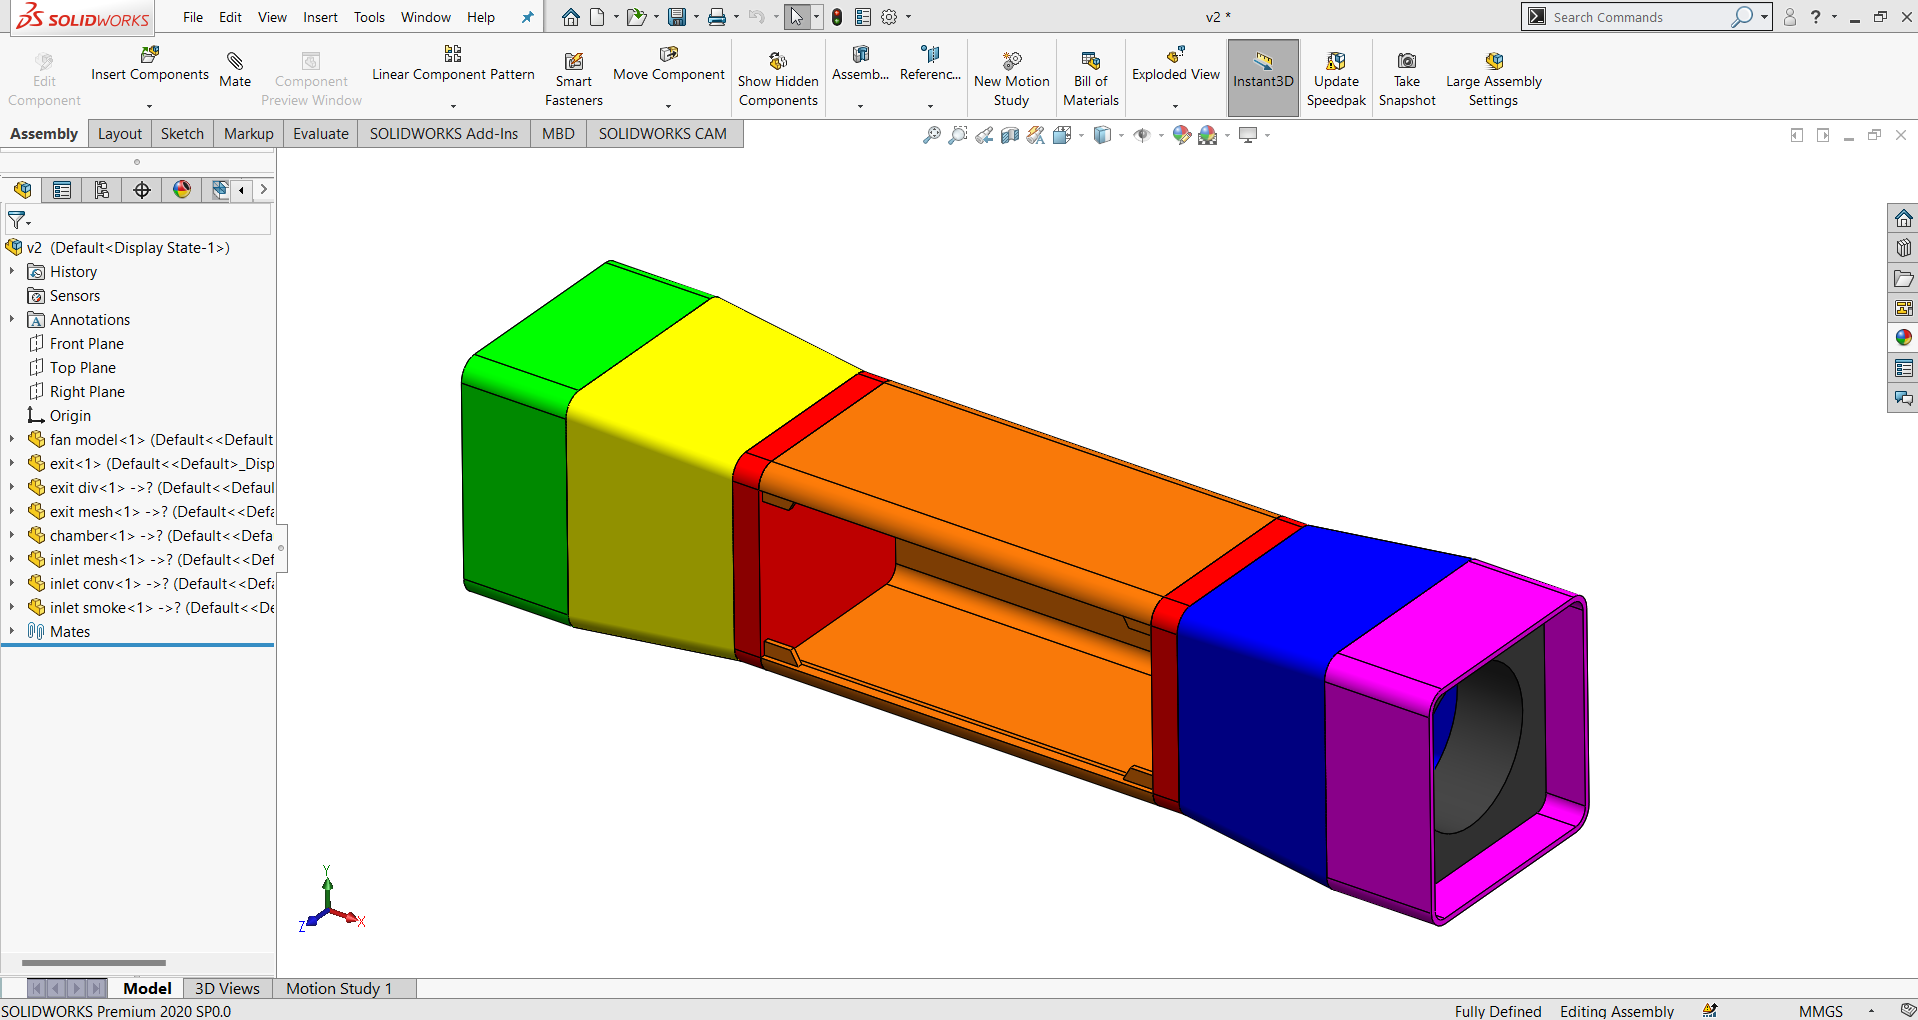
CAD Design
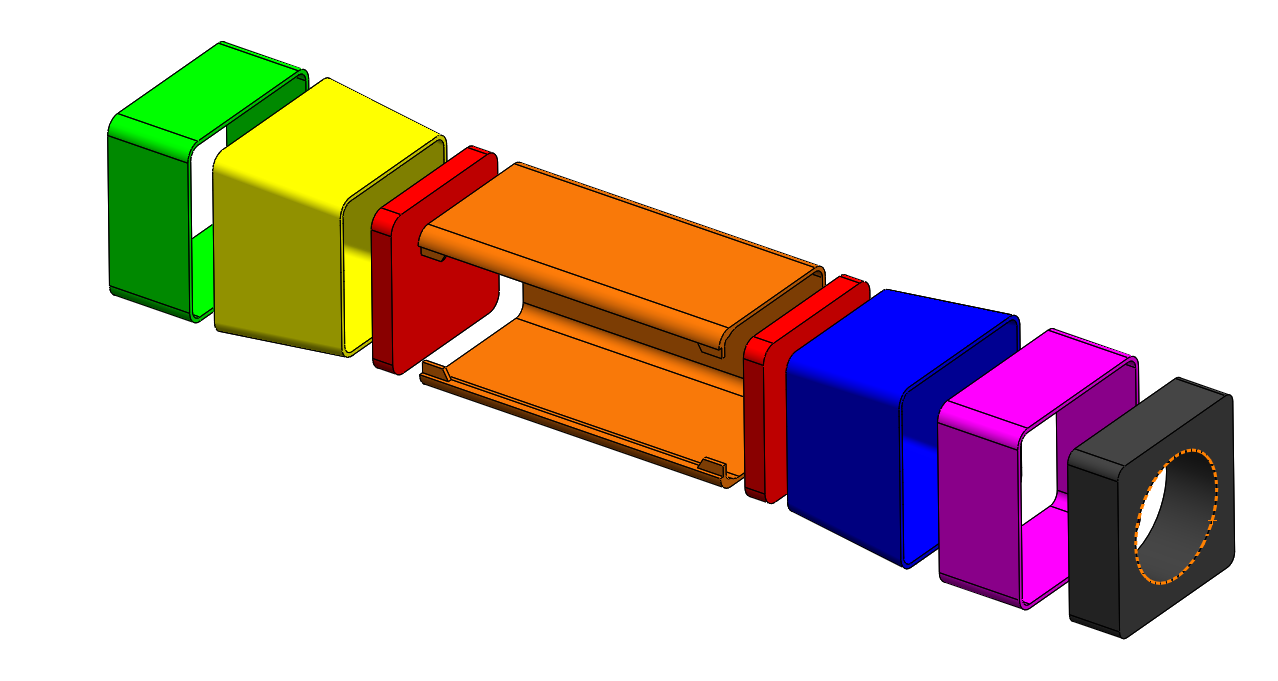
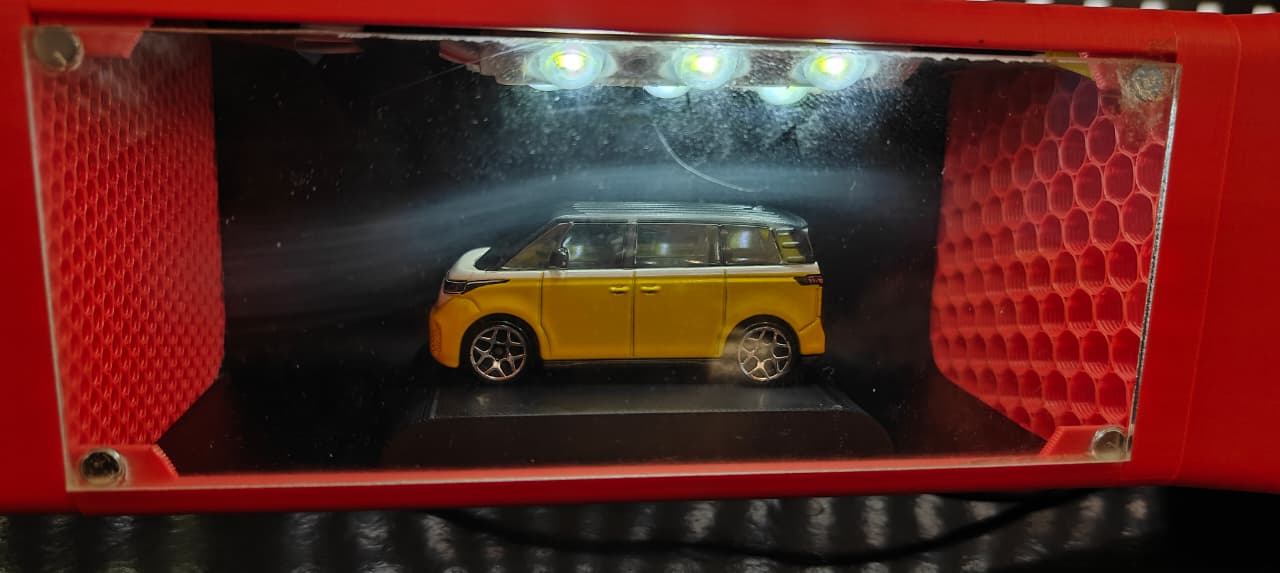
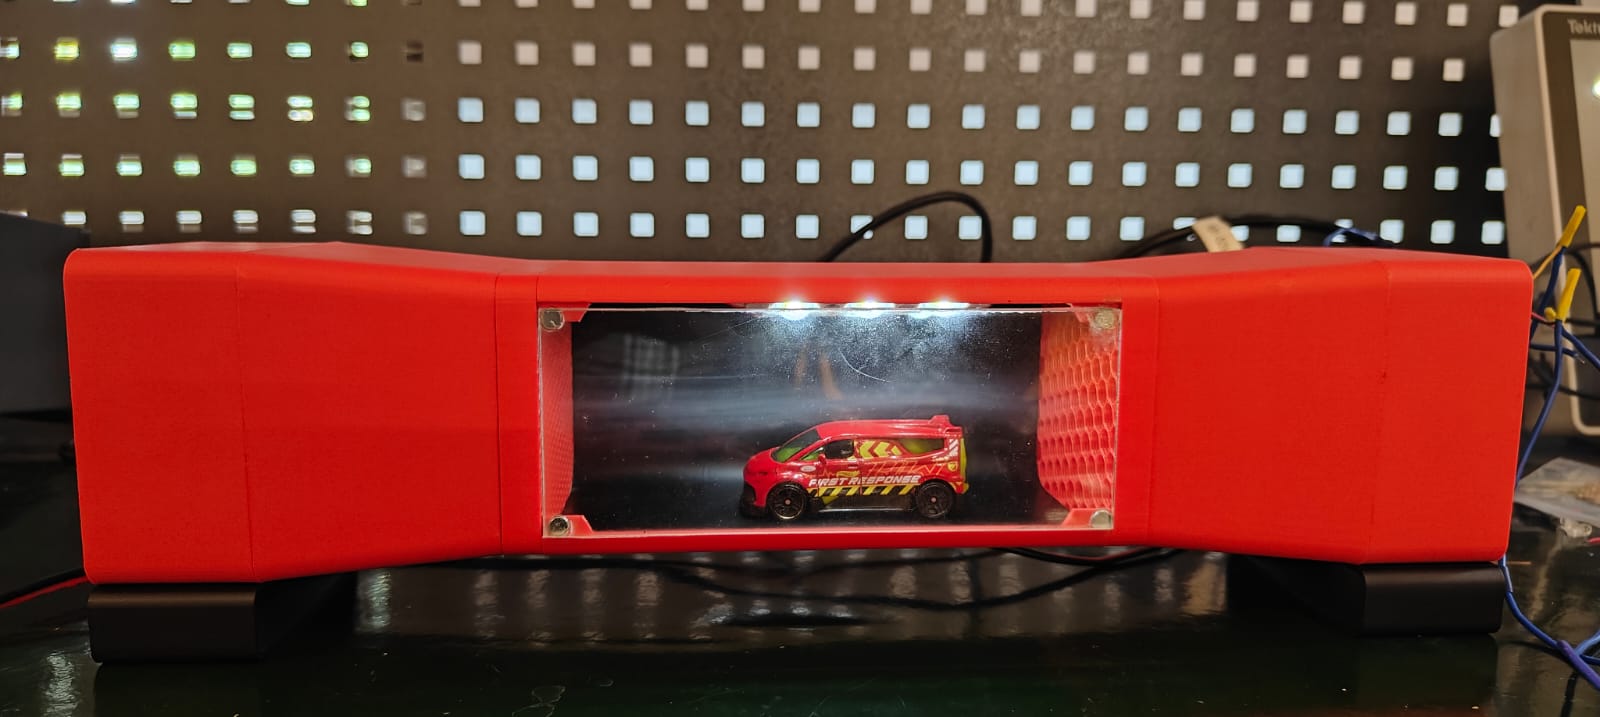
The wind tunnel is designed to hold 1:64-scale models and any object with a maximum dimension of 150x70x70 mm. The tunnel is divided into five zones: convergent nozzle, laminar flow section, display section, and divergent nozzle. All parts are 3D printed and joined using adhesive glues.
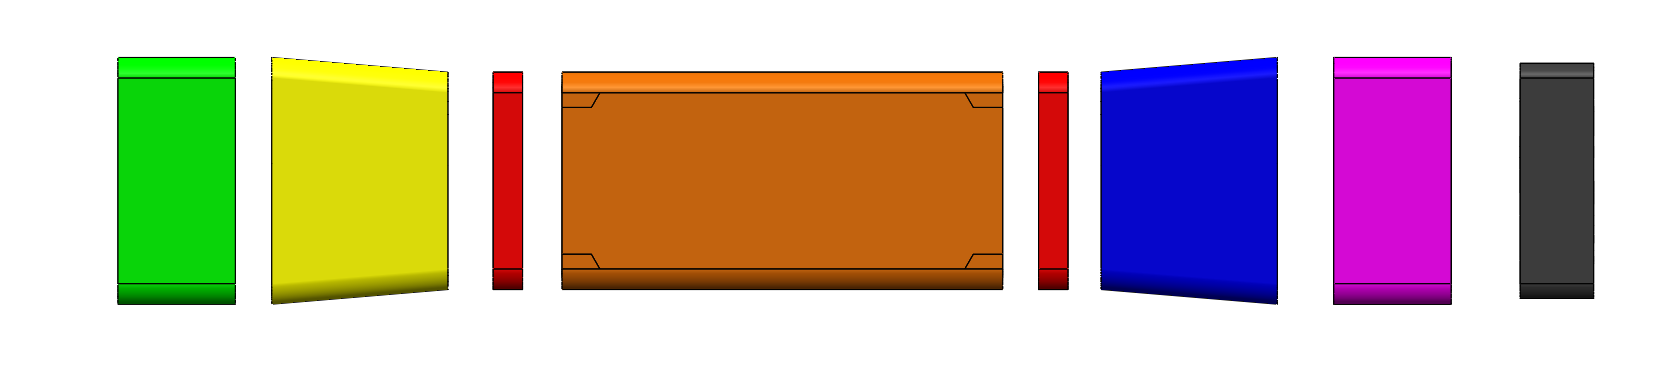
Exploded View of Wind Tunnel |
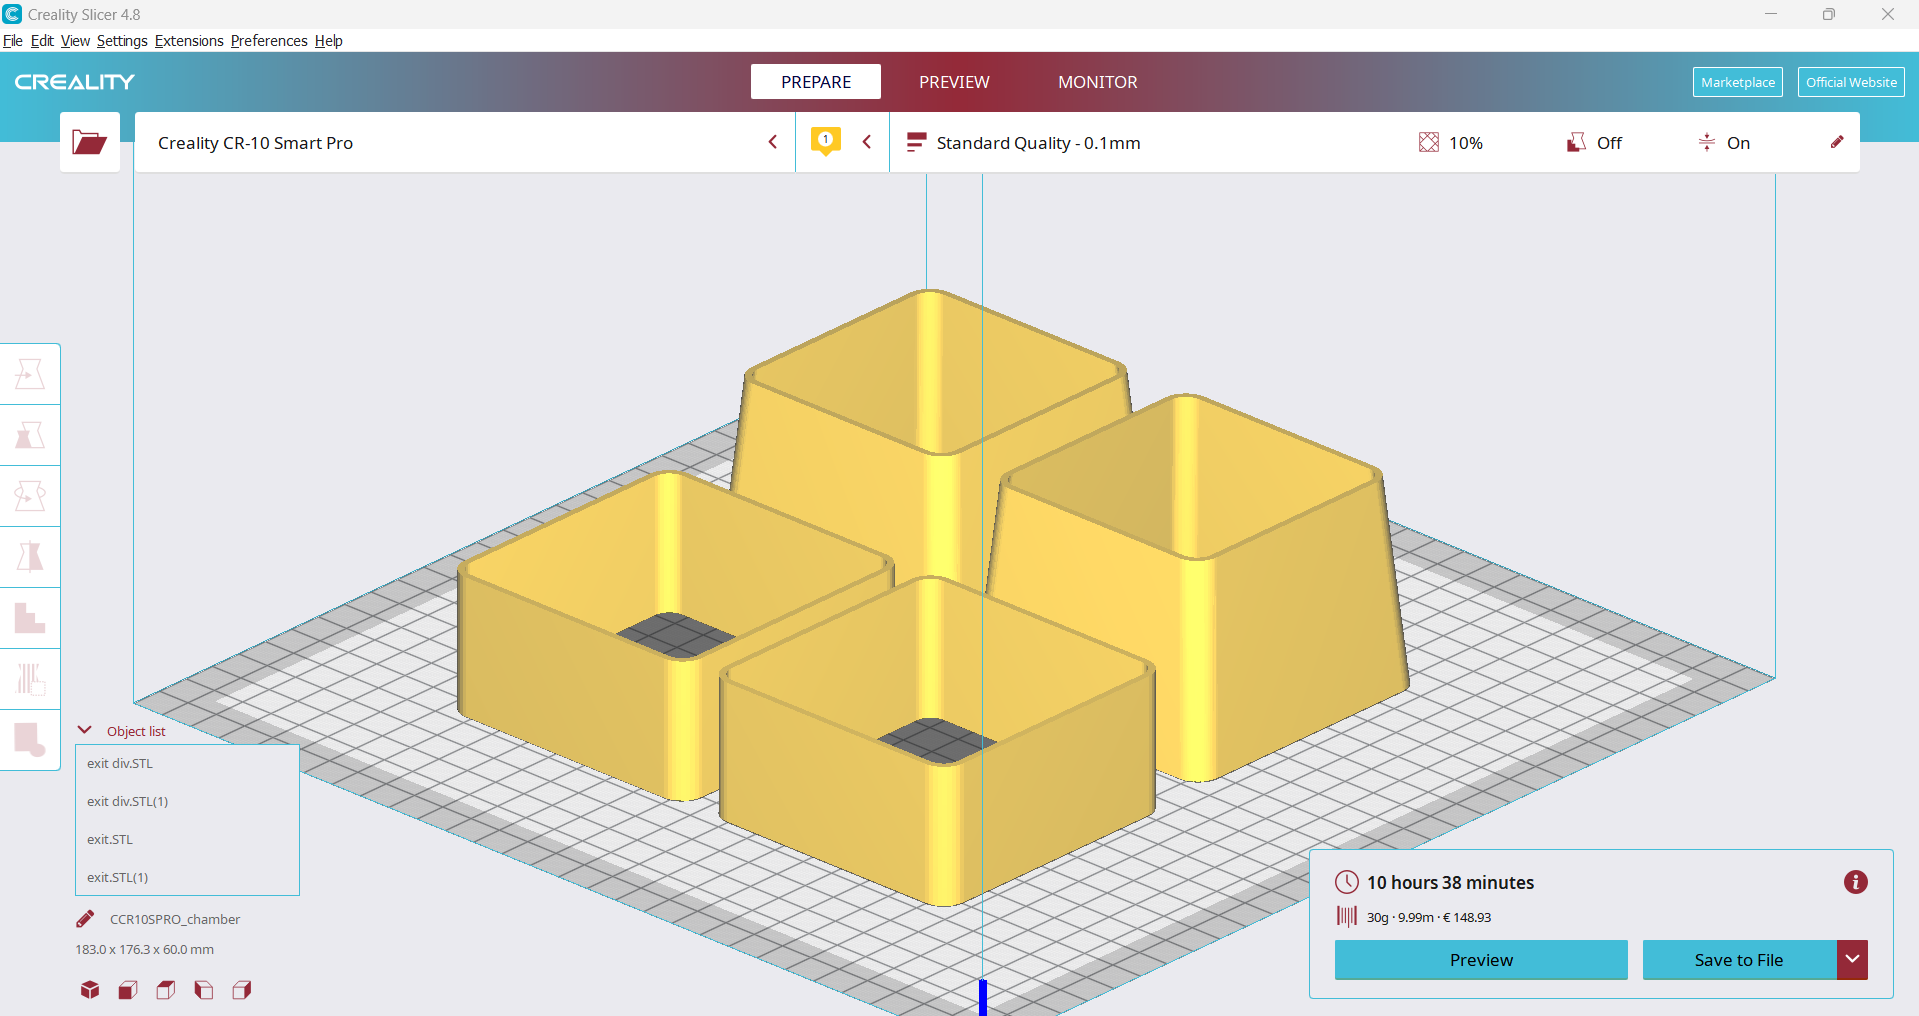
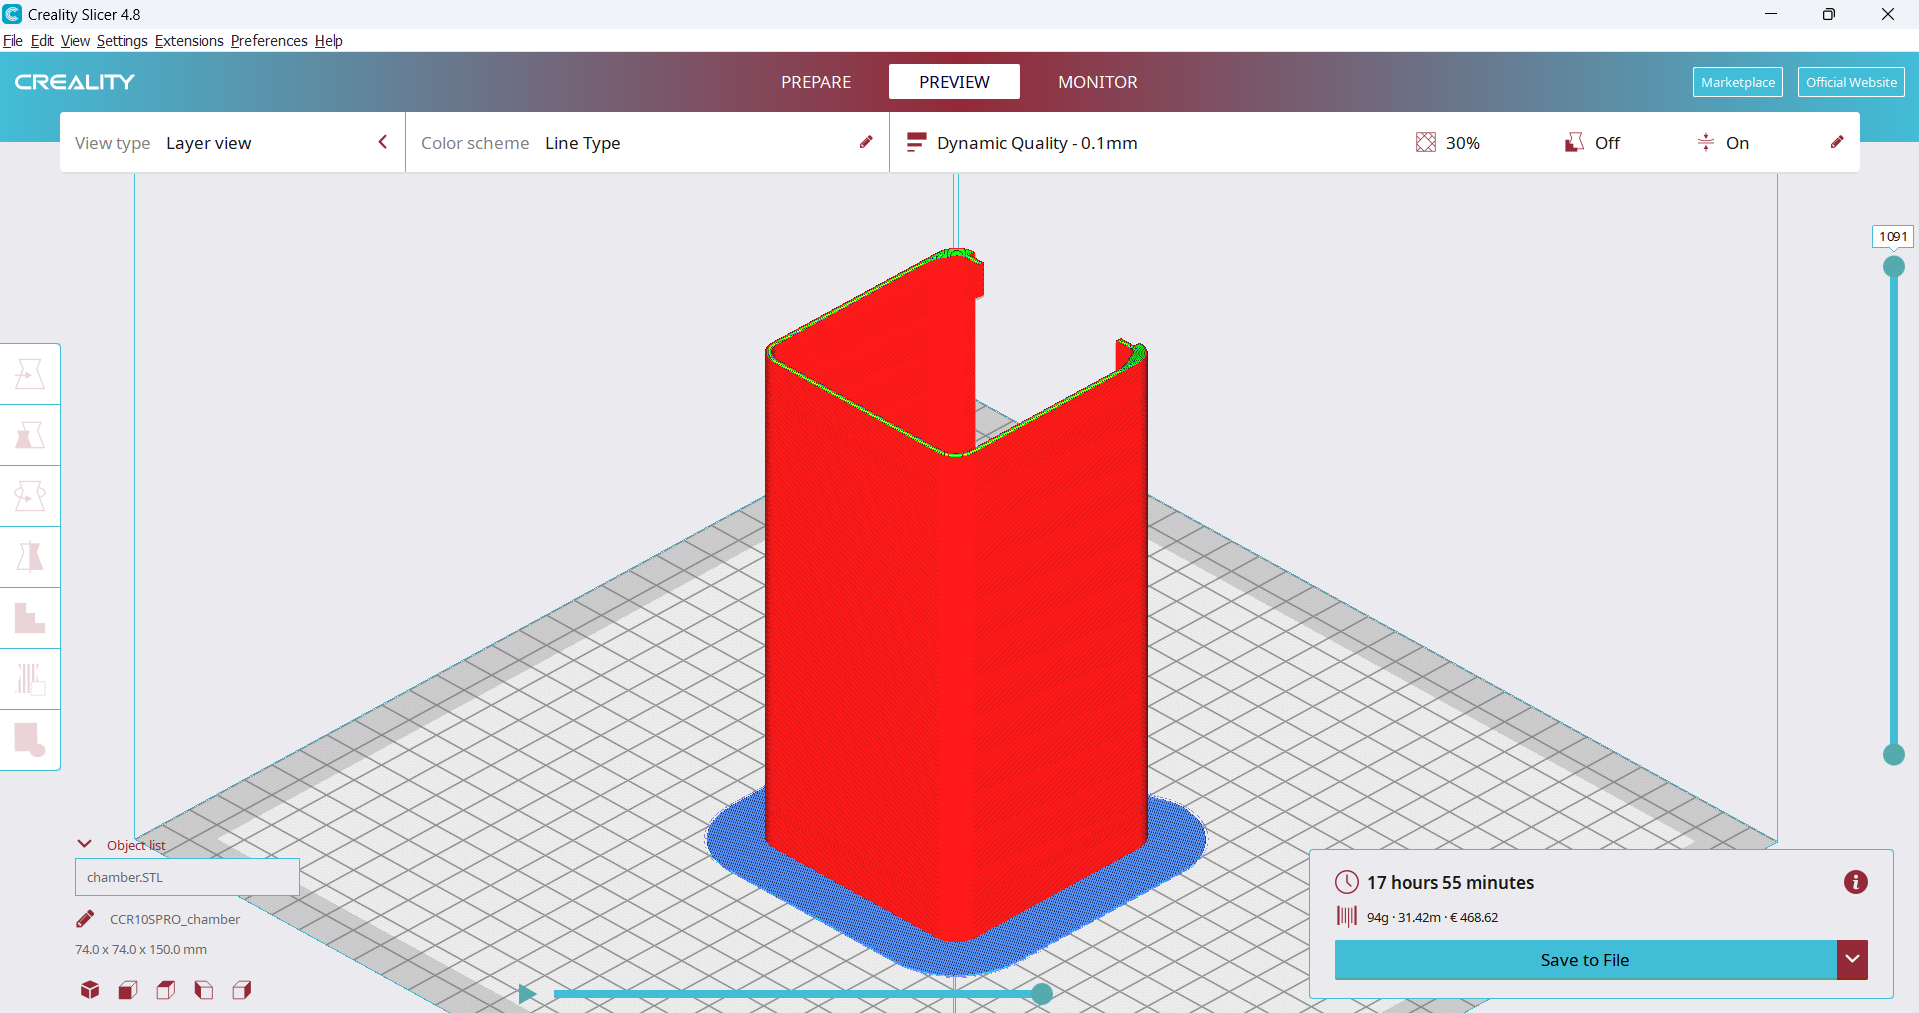
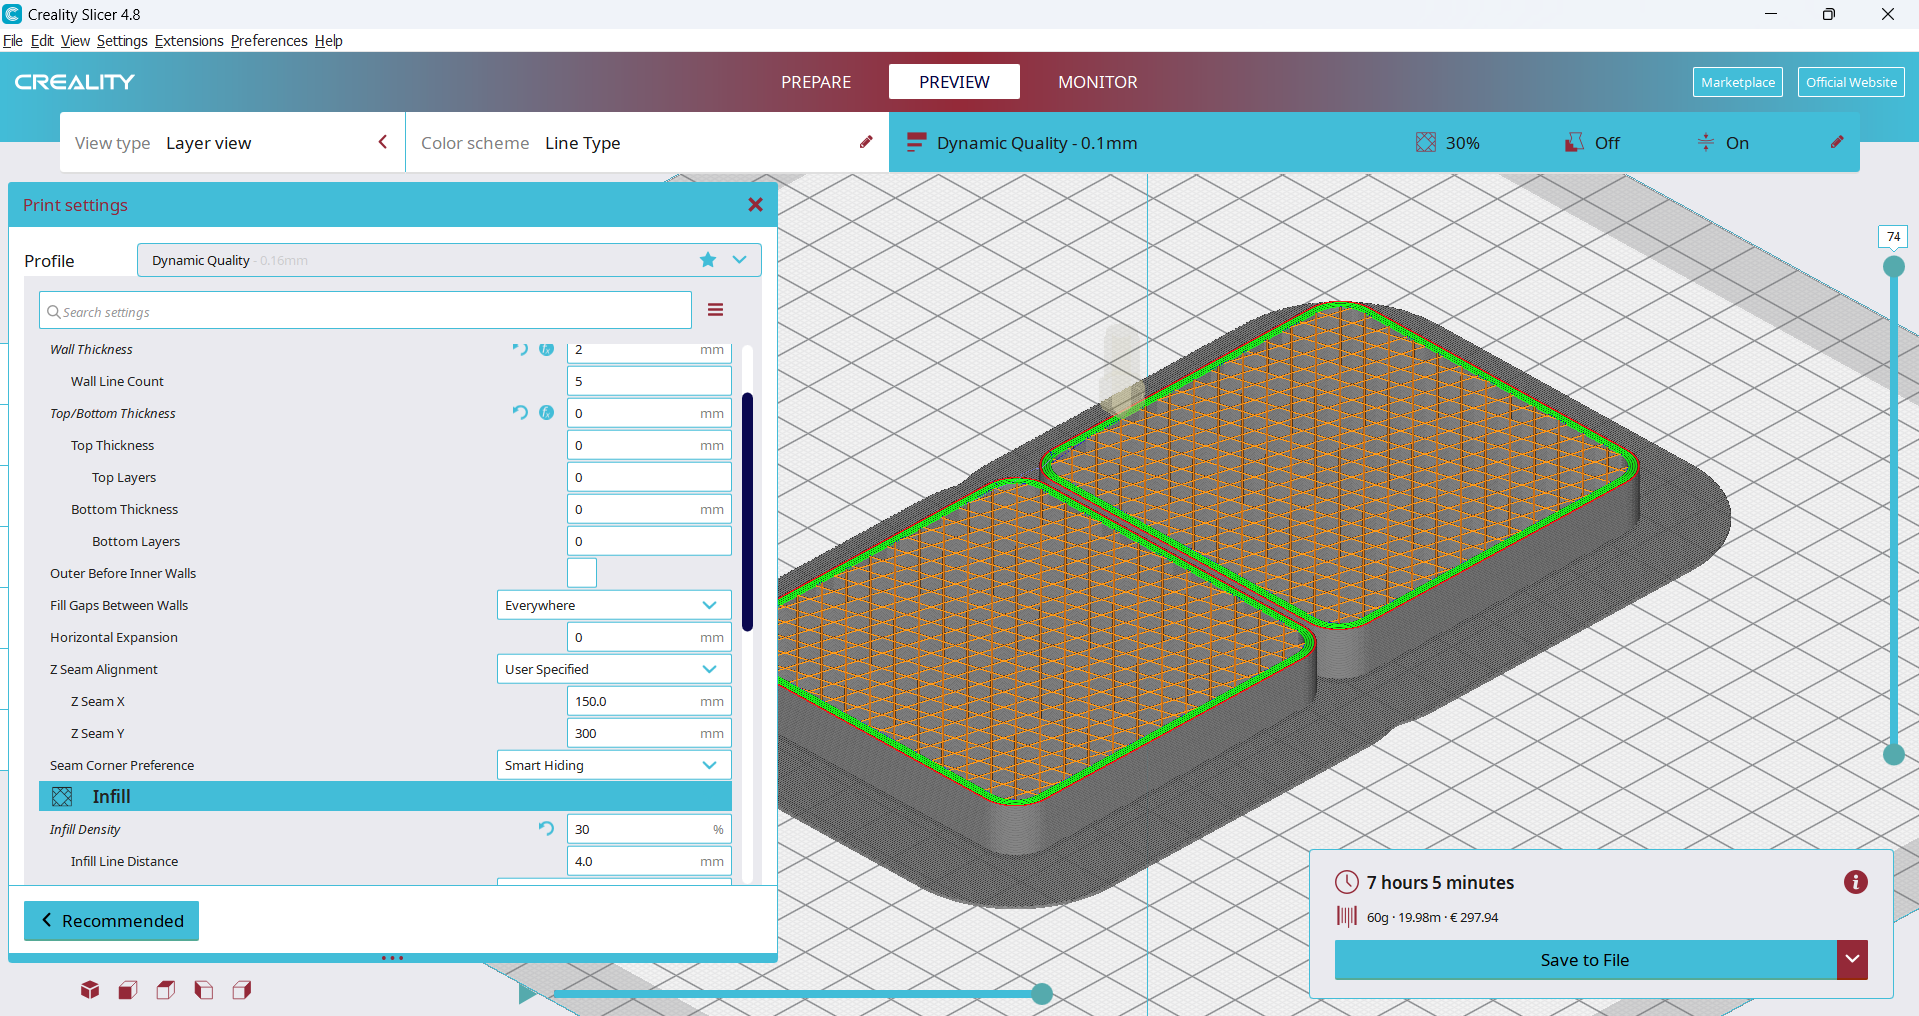
Slicing for 3d printing using Creality |
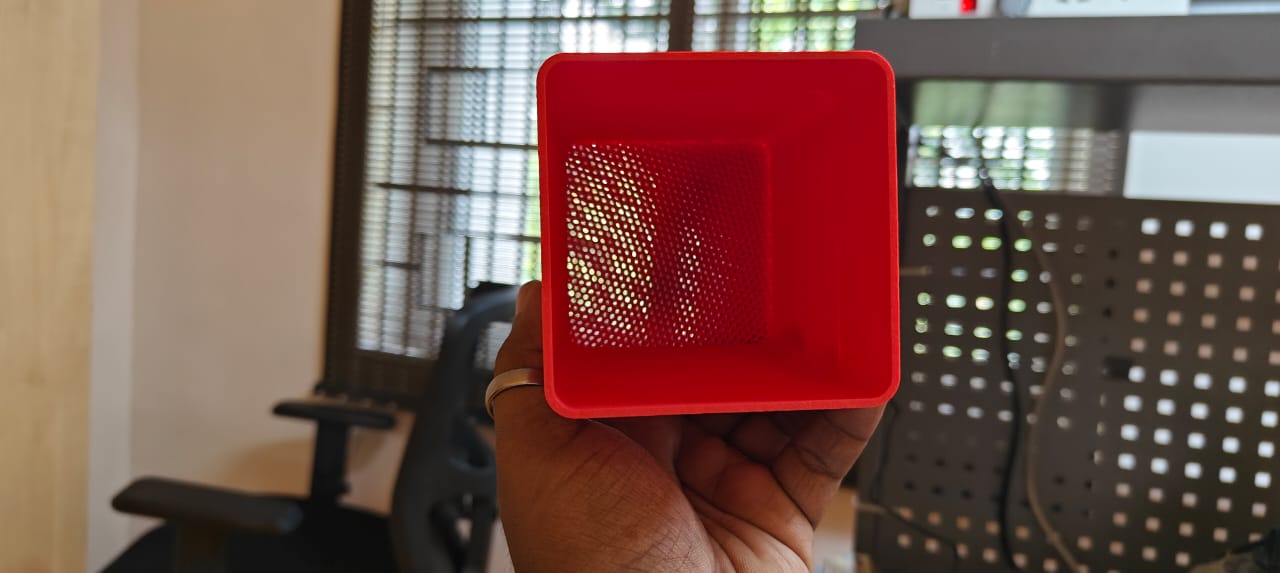
The center zone is the laminar flow zone, so printed without top and bottom layer, infill with 30%, and a hexagon pattern. |
The wind tunnel is designed to hold 1:64-scale models and any object with a maximum dimension of 150x70x70 mm. The tunnel is divided into five zones: convergent nozzle, laminar flow section, display section, and divergent nozzle. All parts are 3D printed and joined using adhesive glues. |
Electronics Design
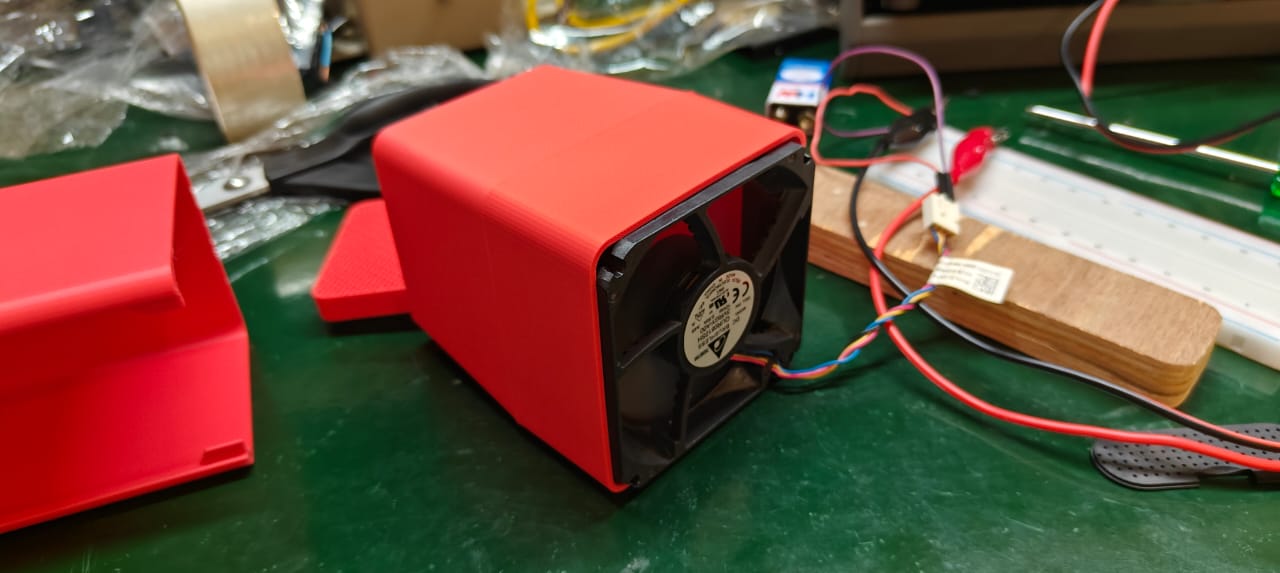
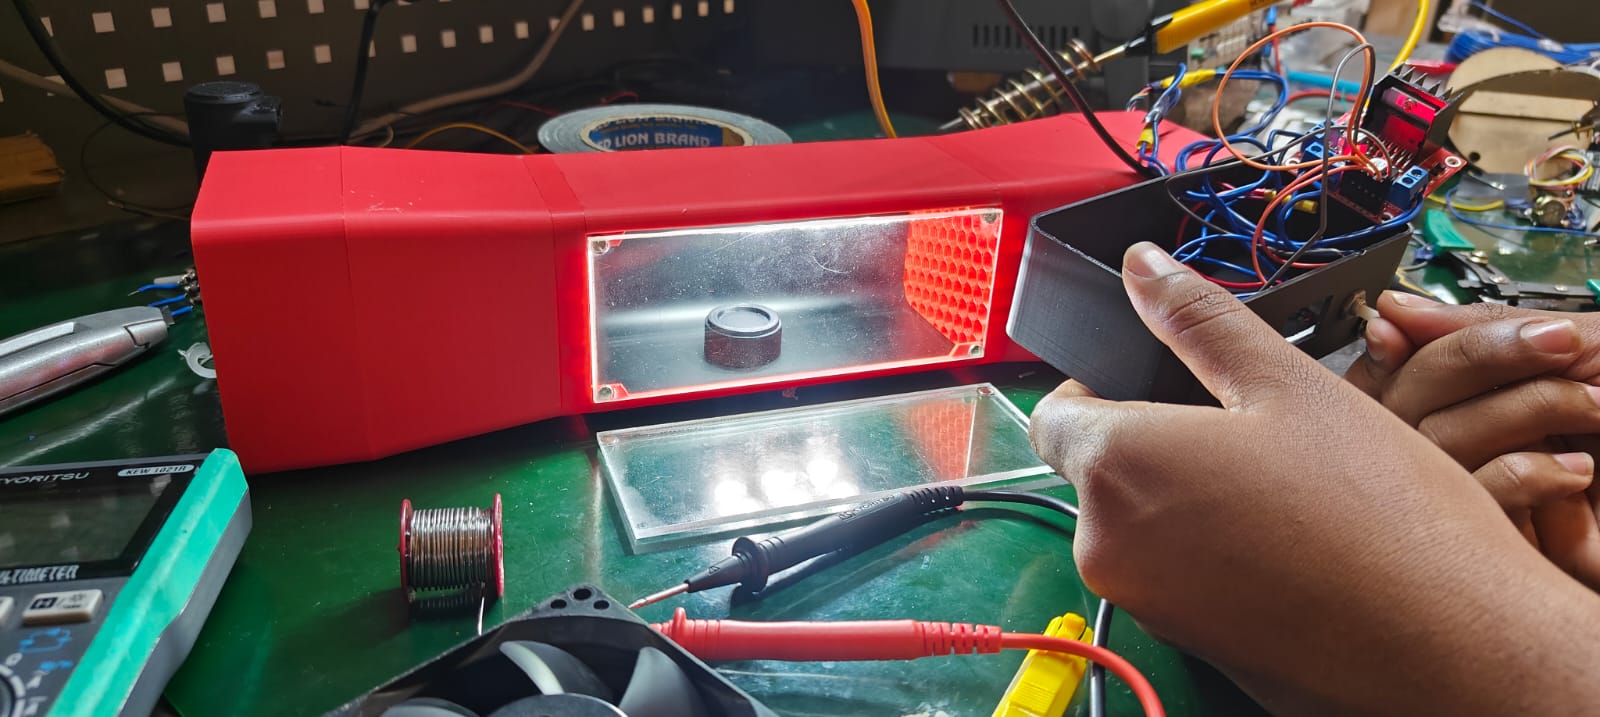
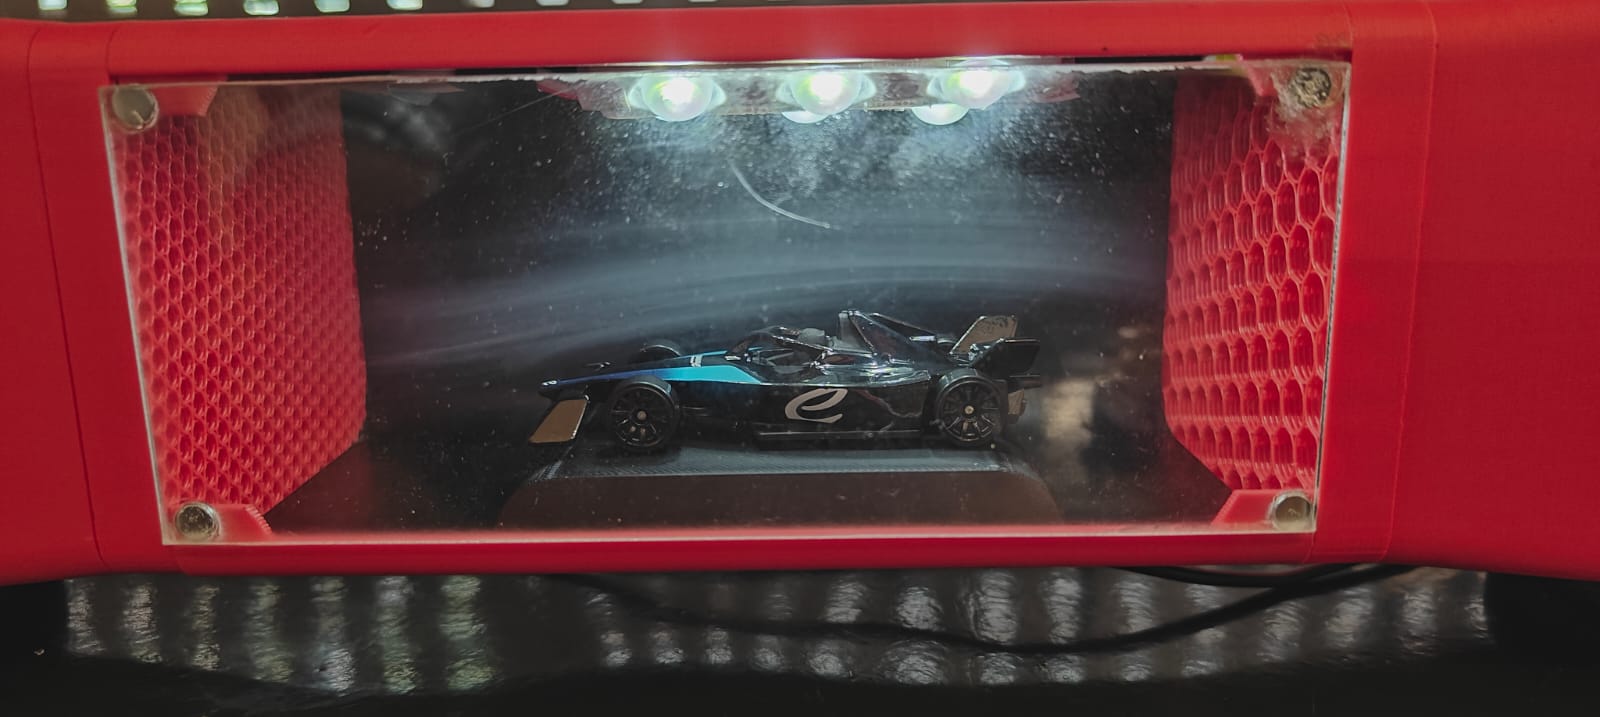
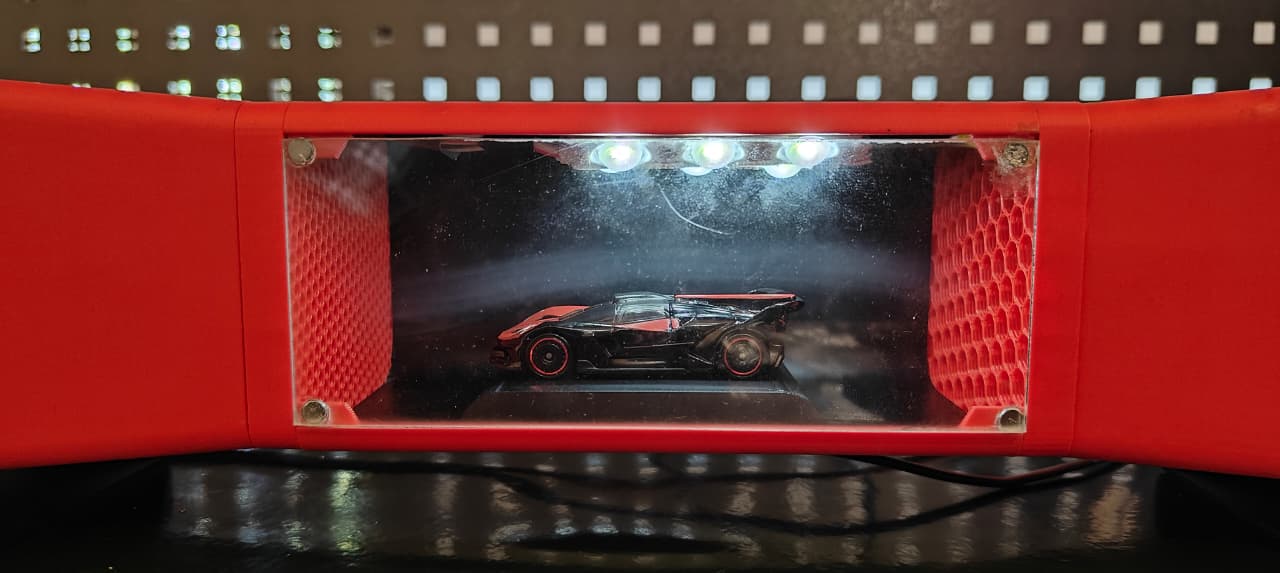
Major controllers in this tunnel include a 12V PC fan for varying airflow, LED lights for smoke visualization, and a display to show the values of light and wind flow intensity.
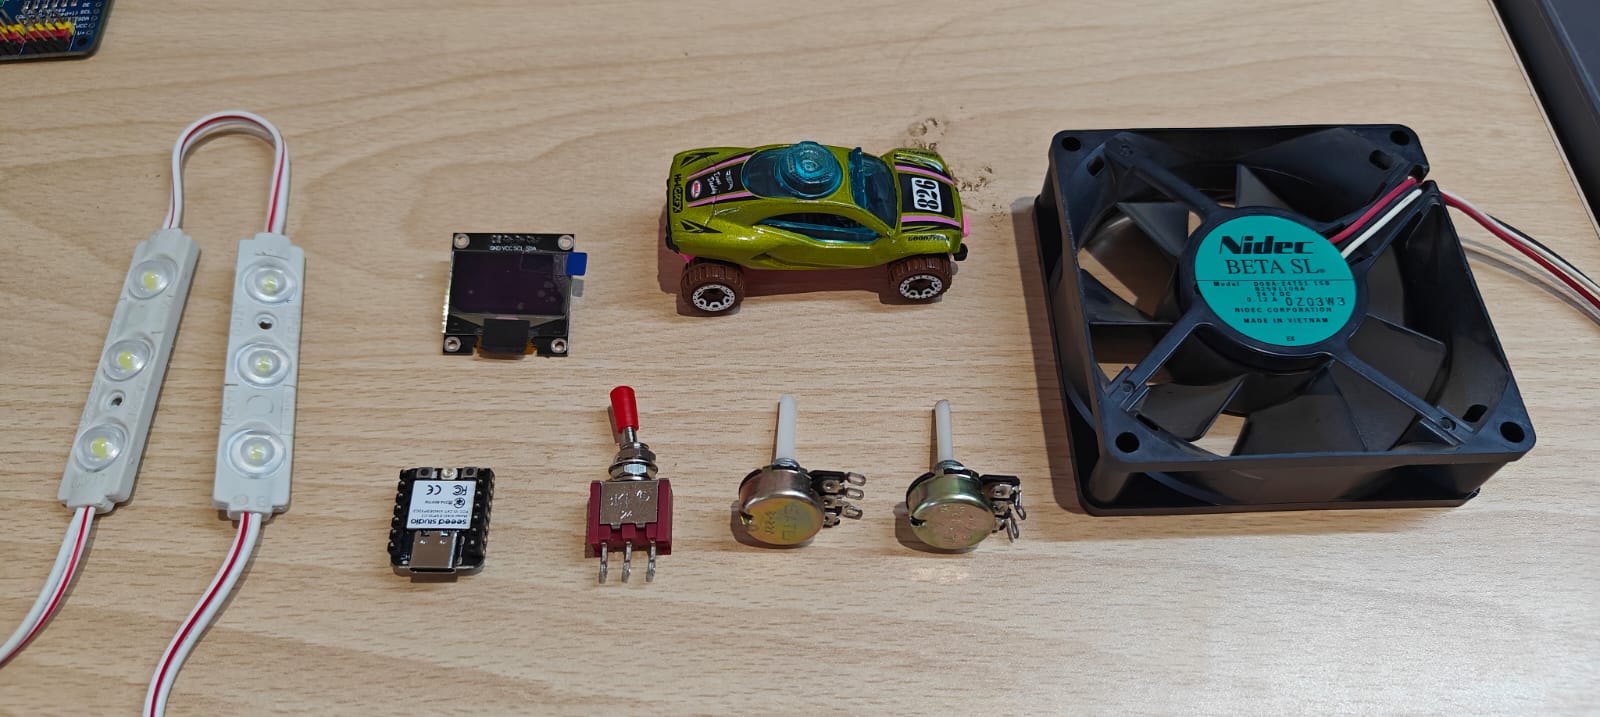
List of electronics components used in this project.
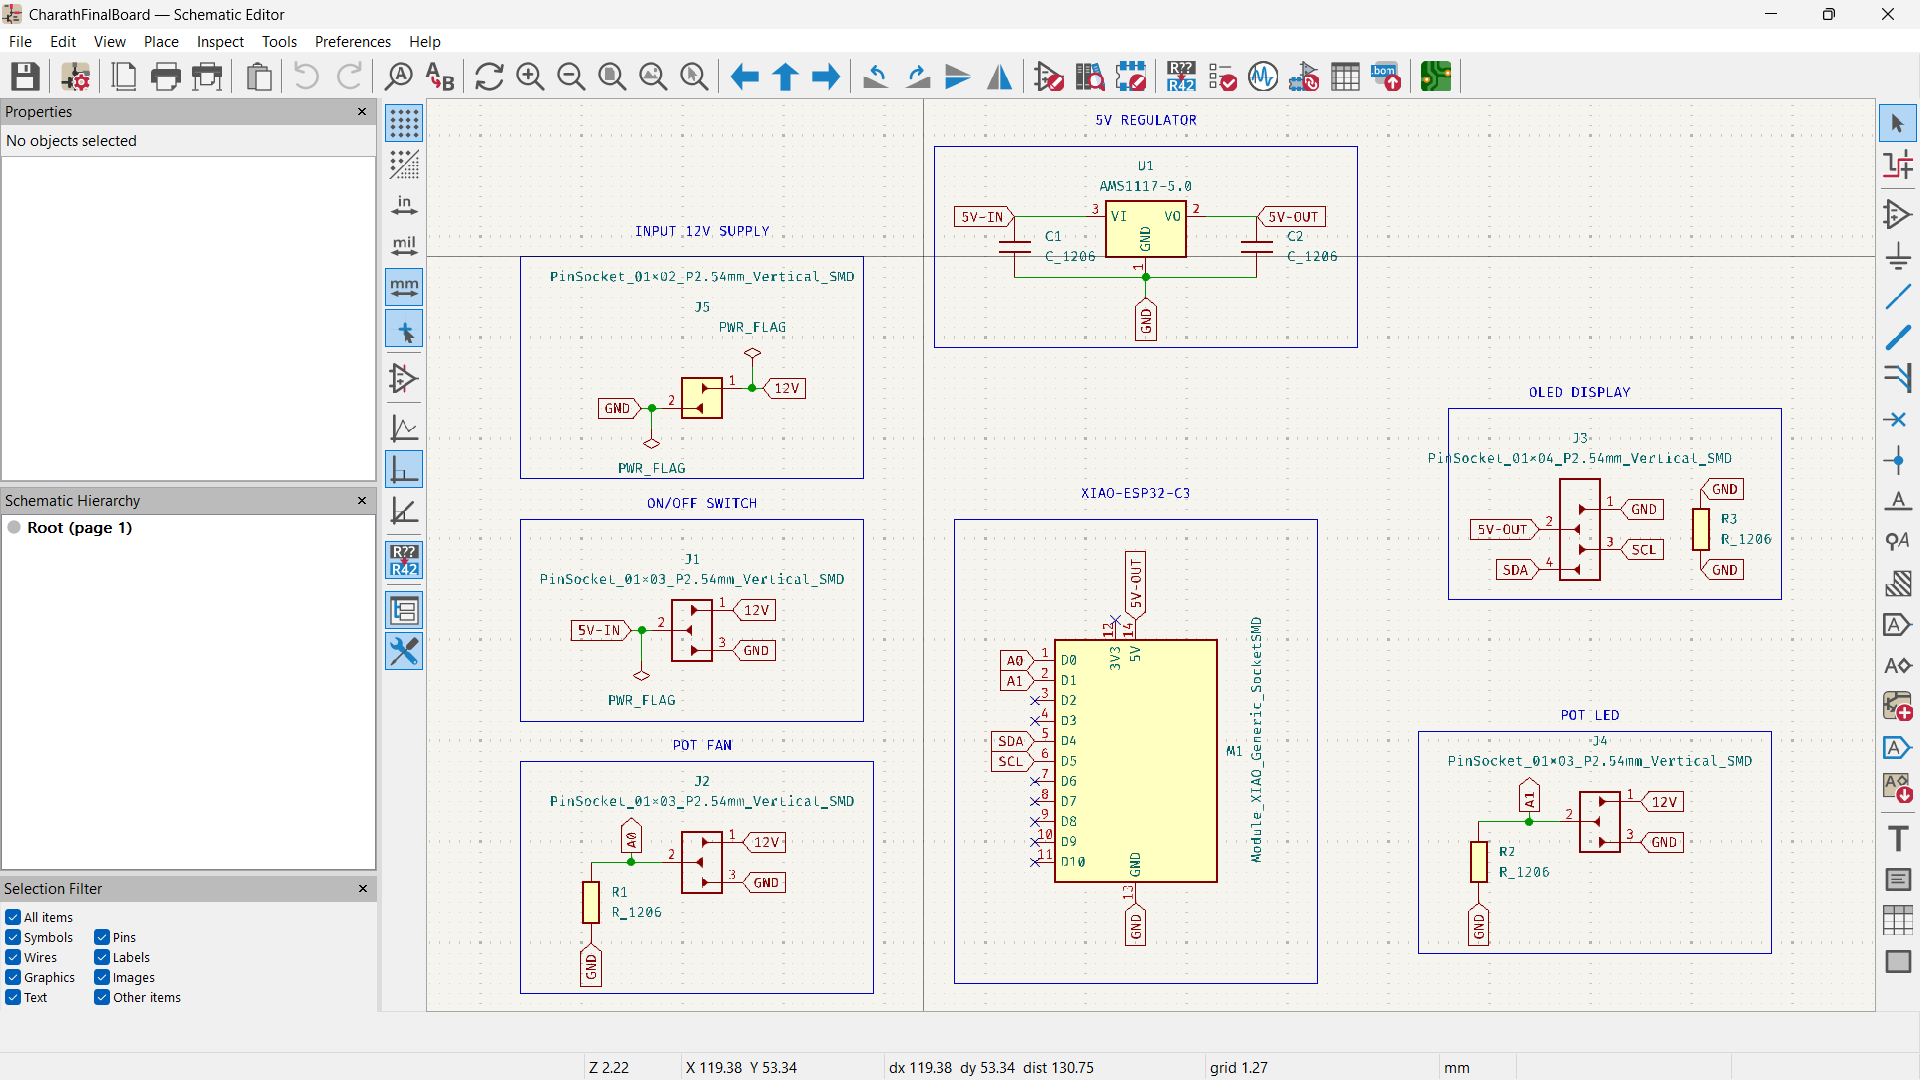
Schematics for the controller
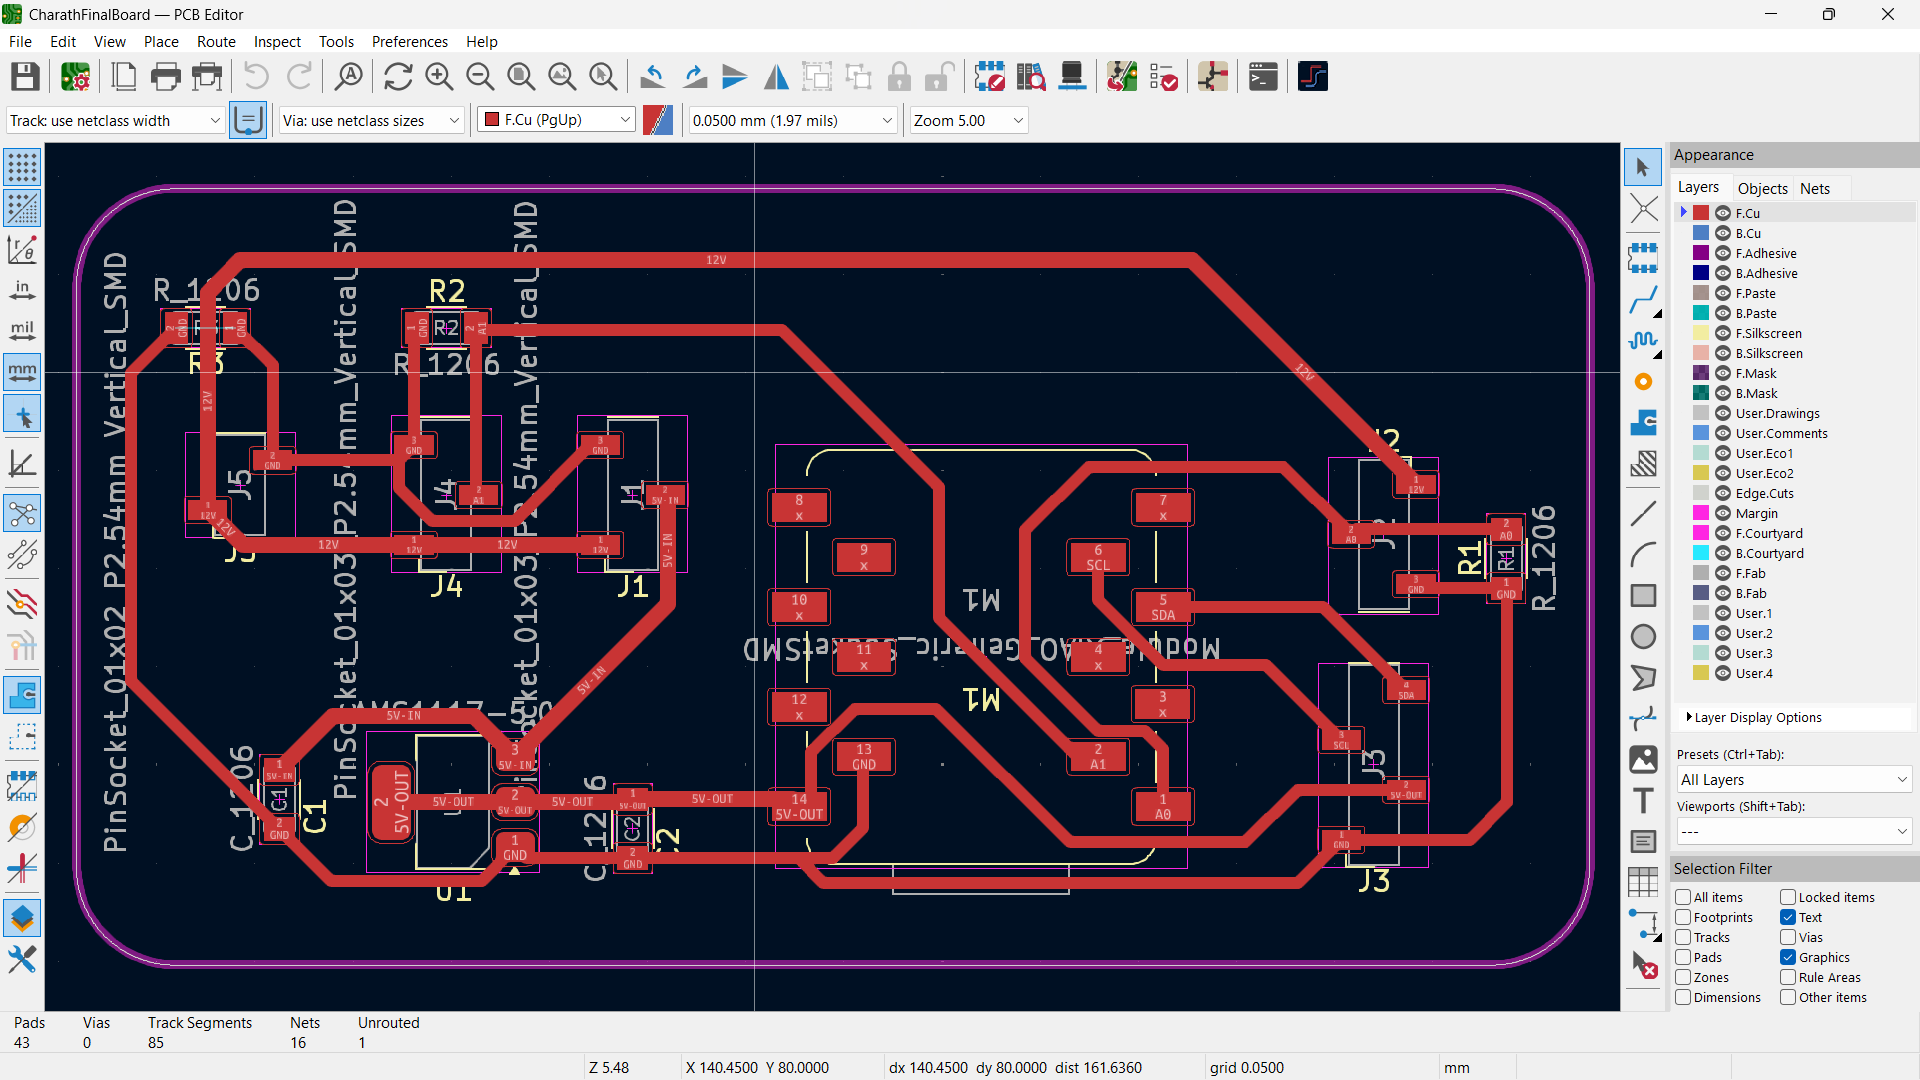
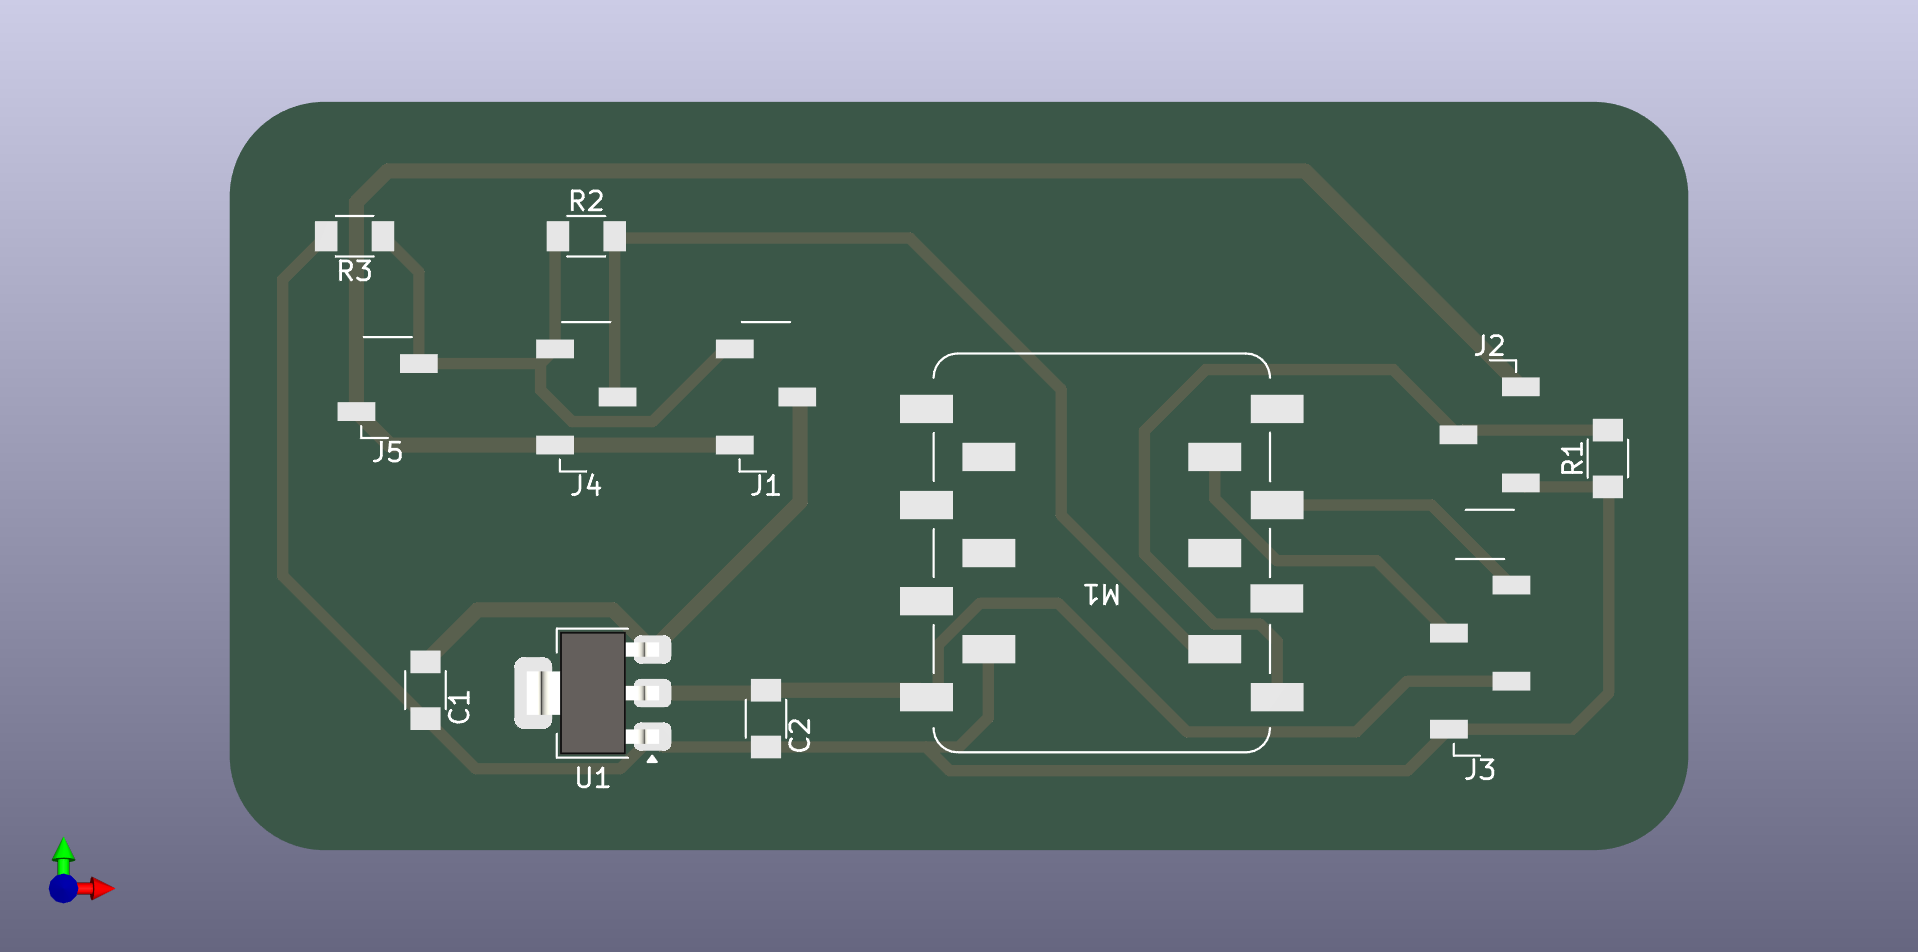
PCB design
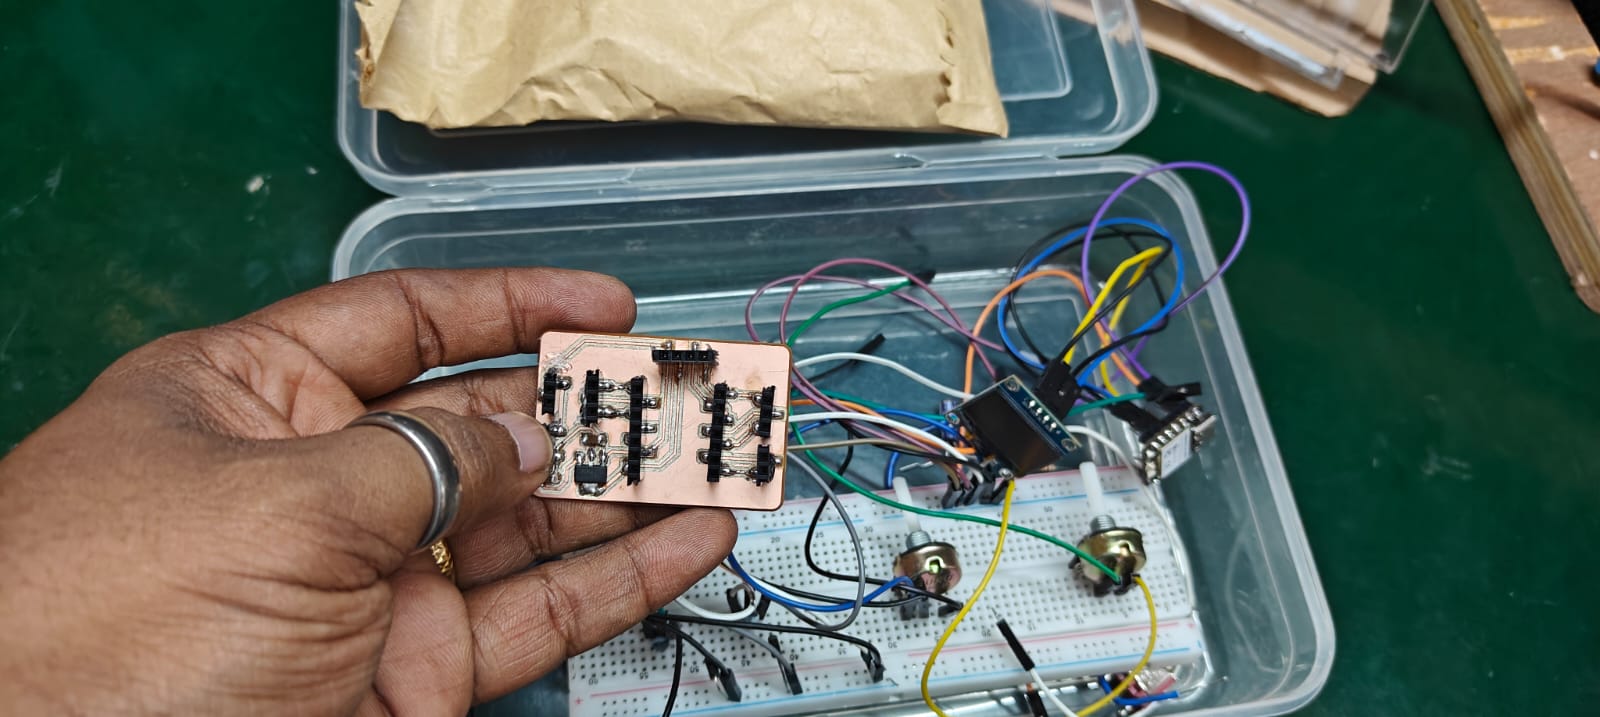
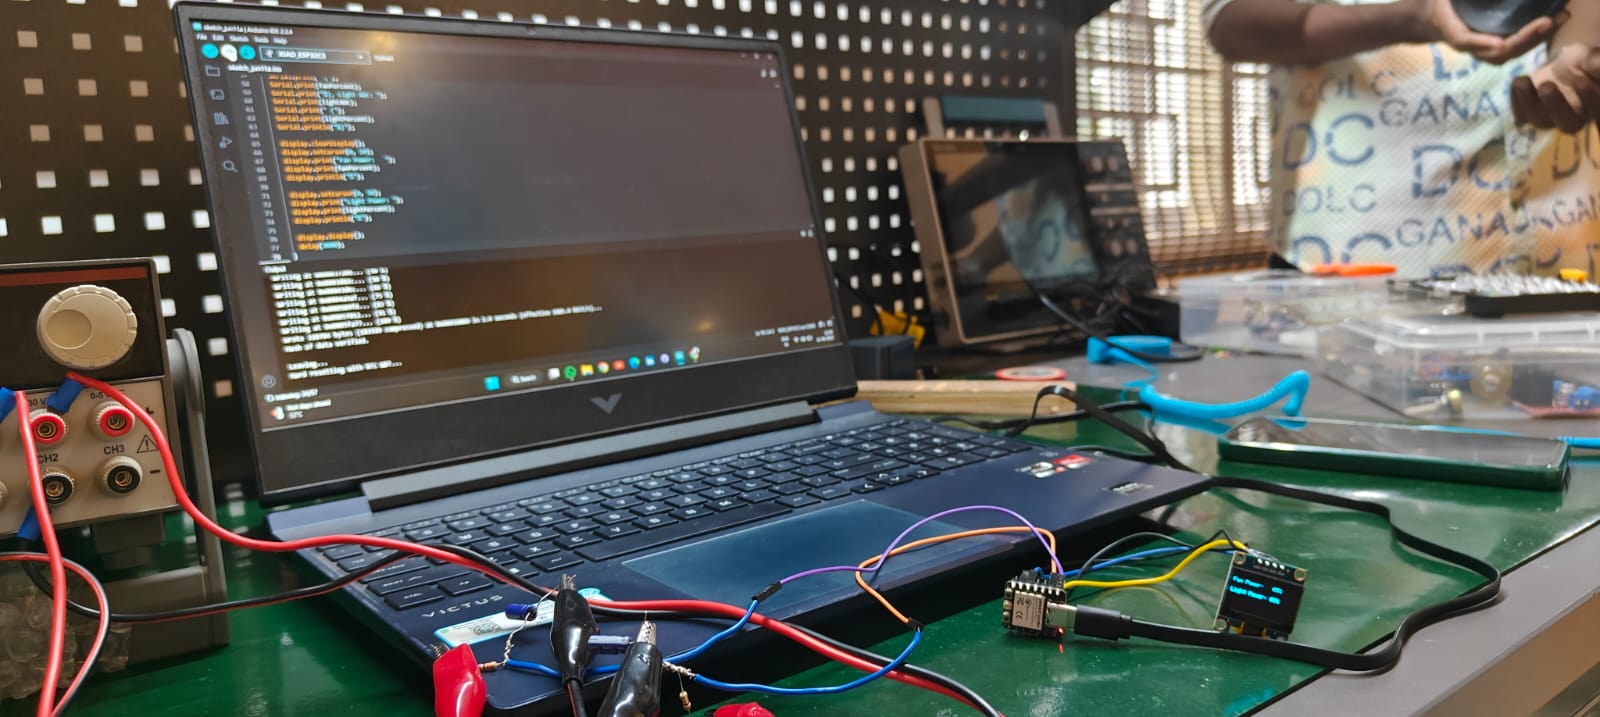
Electronics testing for fan control
What materials and components will be used?
# | Items | Count | Cost in Rs | Cost in $ |
1 | PLA | 250 grams | 300 | 3.5 |
2 | 3D printing | 12 Rs per gram | 3000 | 35 |
3 | PC 12v Fan | 1 | 70 | 1 |
4 | Switches | 2 | 100 | 1.25 |
5 | Potentiometer | 2 | 170 | 2 |
6 | Seeed Studio XIAO C3 | 1 | 449 | 5.5 |
7 | LED | 2 | 100 | 1.25 |
8 | Pump | 1 | 85 | 1 |
9 | Magnets | 10 | 20 | 0.25 |
10 | Miscellaneous | 500 | 6 | |
Total | Rs. 4772 | $56.5 |
Final imagesfp
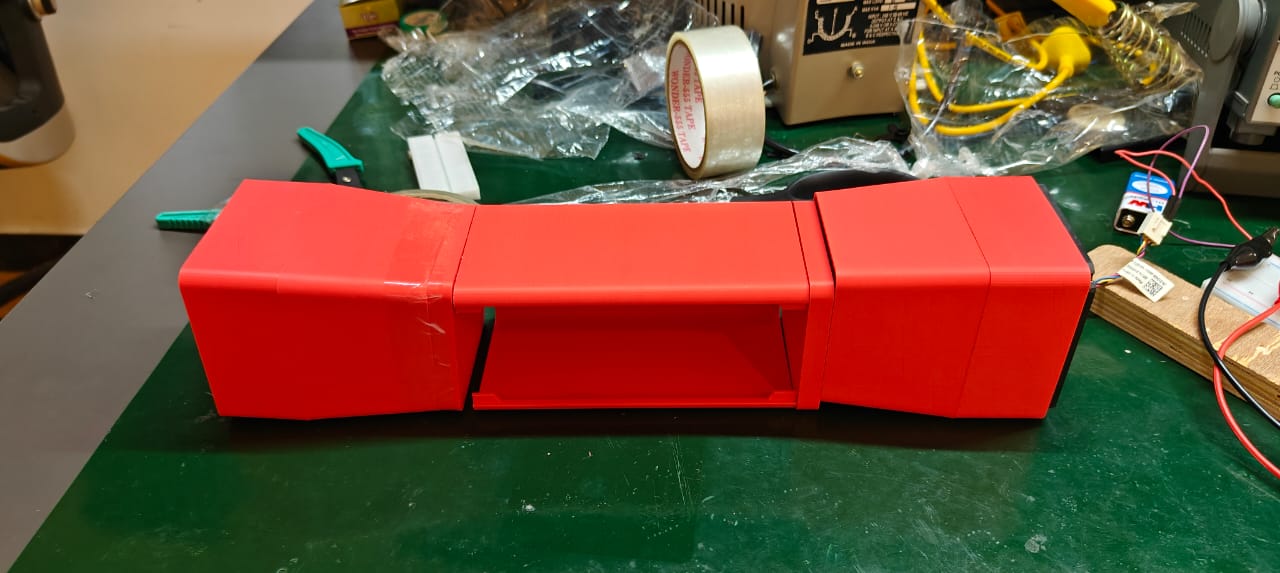
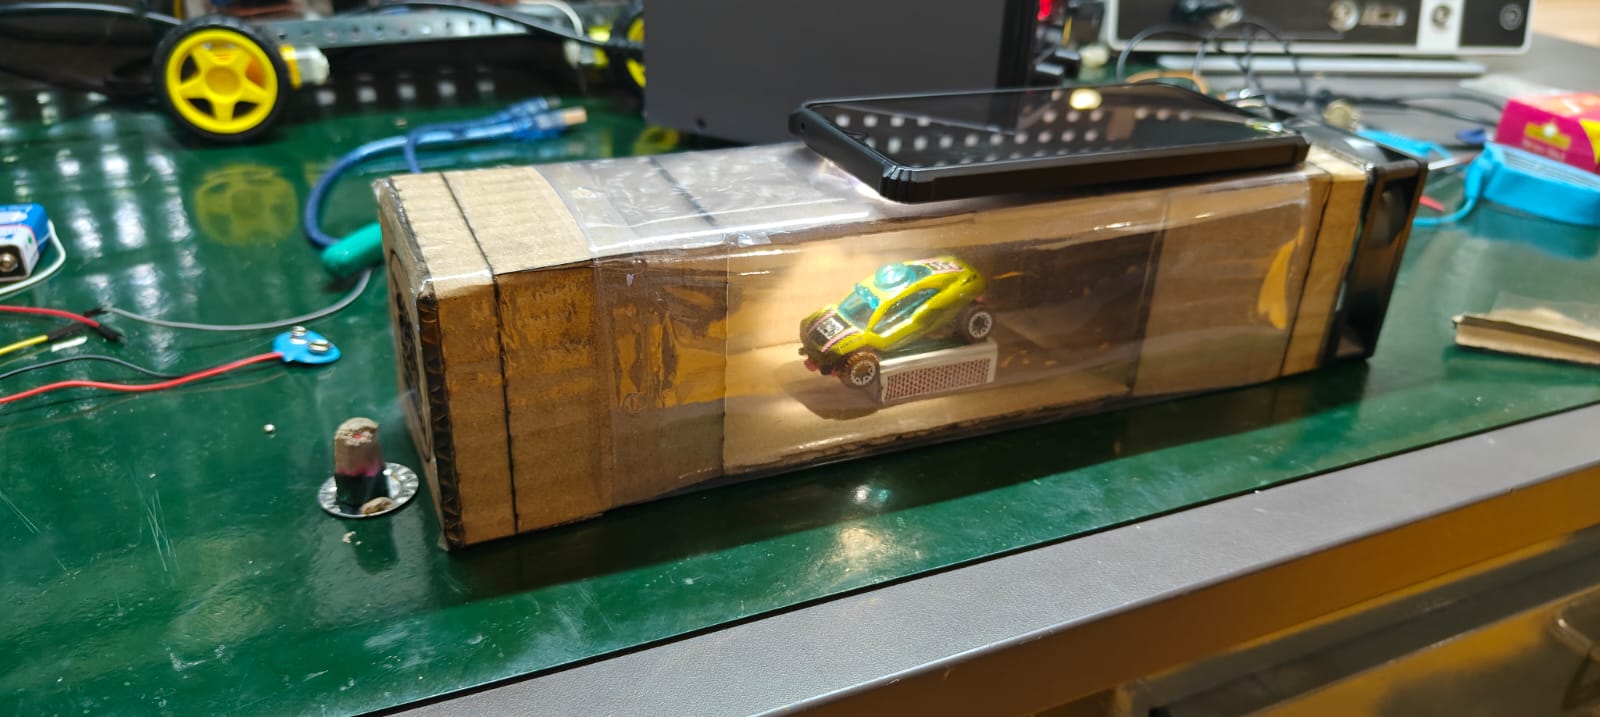
Pretotype |
3D printed Part |
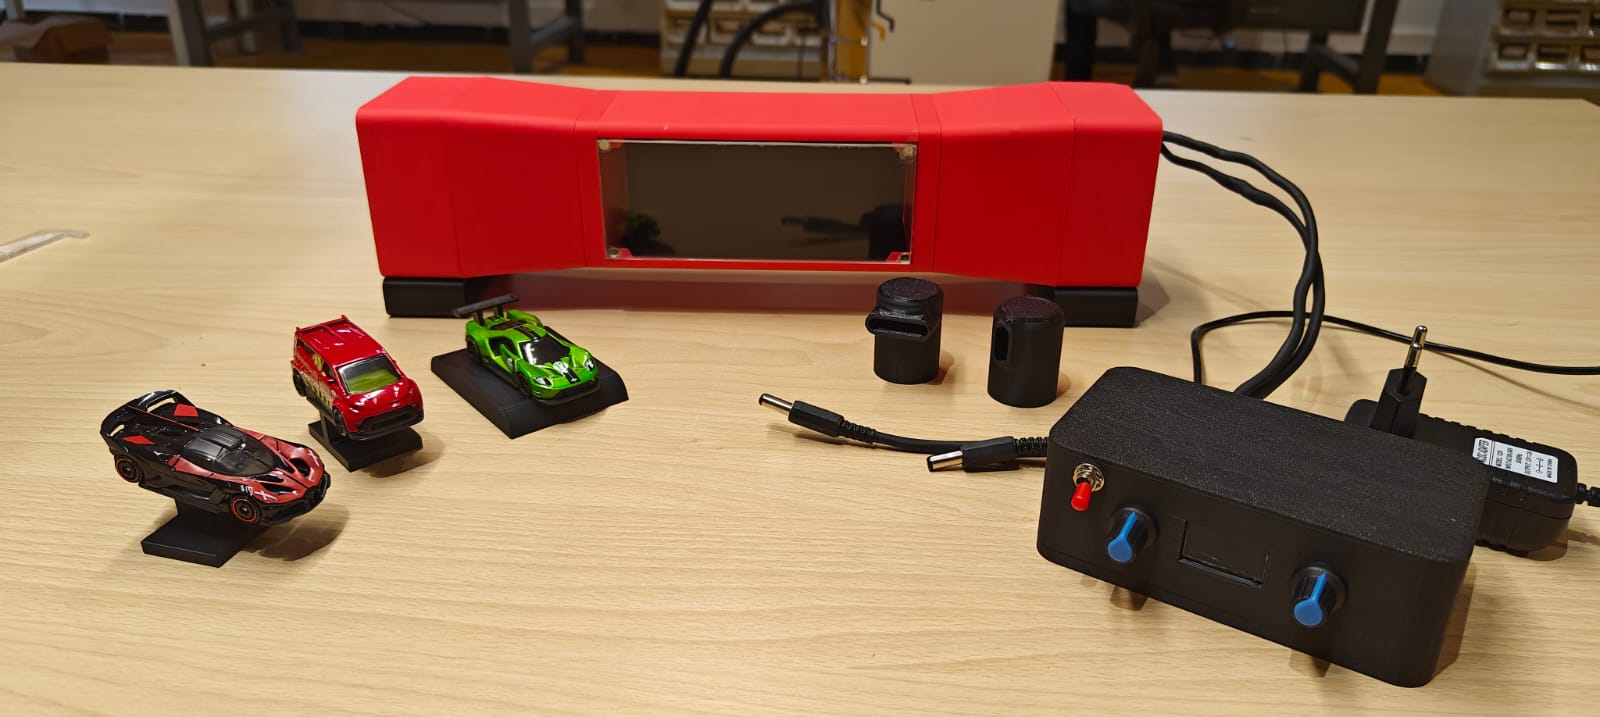
Final Assembled Version |
How much will they cost?
Commercial models are available at a cost of Rs 20,500/- or $249. But in this model, the total manufacturing cost will vary between Rs 4,500 ~ Rs 5,000/- ($55~$60), which can be recreated by others or our lab can sell at a cost of Rs 7,500 or $88. Which can be a potential revenue for the lab.
What processes were used in developing this project?
2D Design (CAD): For the enclosure panels using SolidWorks
3D Design (CAD): For 3D-printed parts and assembly visualization using SolidWorks
Laser Cutting: For precisely cutting acrylic panels.
3D Printing (FDM): For manufacturing custom plastic parts.
CNC Milling: For creating the custom PCB.
Electronics Soldering: For assembling the PCB and connecting components.
Assembly: Mechanical assembly of the enclosure, fan, and electronics.
Programming (Embedded C/Arduino): For controlling the microcontroller, fan, and reading sensors.
Testing and Iteration: Repeated testing of airflow, visualization, and any measurement systems, followed by design adjustments.
What have I learned?
Credits to students who have been a support during the product development
Link for files:
Link for working files: LINK
License: