Week17
Assignment: Application and Implication
What will it do?
This project aims to build a functional, tabletop wind tunnel specifically designed for testing the aerodynamic properties of 1:64 scale die-cast cars. It will allow users to visualize airflow patterns around the vehicles using smoke or tufts, and airflow at different angles to visualize basic aerodynamics (like drag and eddy) through a simple system. The primary goal is to provide an accessible and educational tool for understanding fundamental aerodynamic principles, particularly relevant to automotive design, and to offer a platform for experimenting with modifications to die-cast cars.
Who's done what beforehand?
Many hobbyists, educators, and even some professional designers have built small-scale wind tunnels.
YouTube References:
1. | https://www.youtube.com/watch?v=3isAe2h1FEs |
2. | https://www.youtube.com/watch?v=3isAe2h1FEs |
3. | https://www.youtube.com/watch?v=sK3EtlTI5Bc&t=233s |
4. | https://www.youtube.com/watch?v=Xa4YN12IiHg |
5. | https://www.youtube.com/watch?v=vAKTOPvPZa0 |
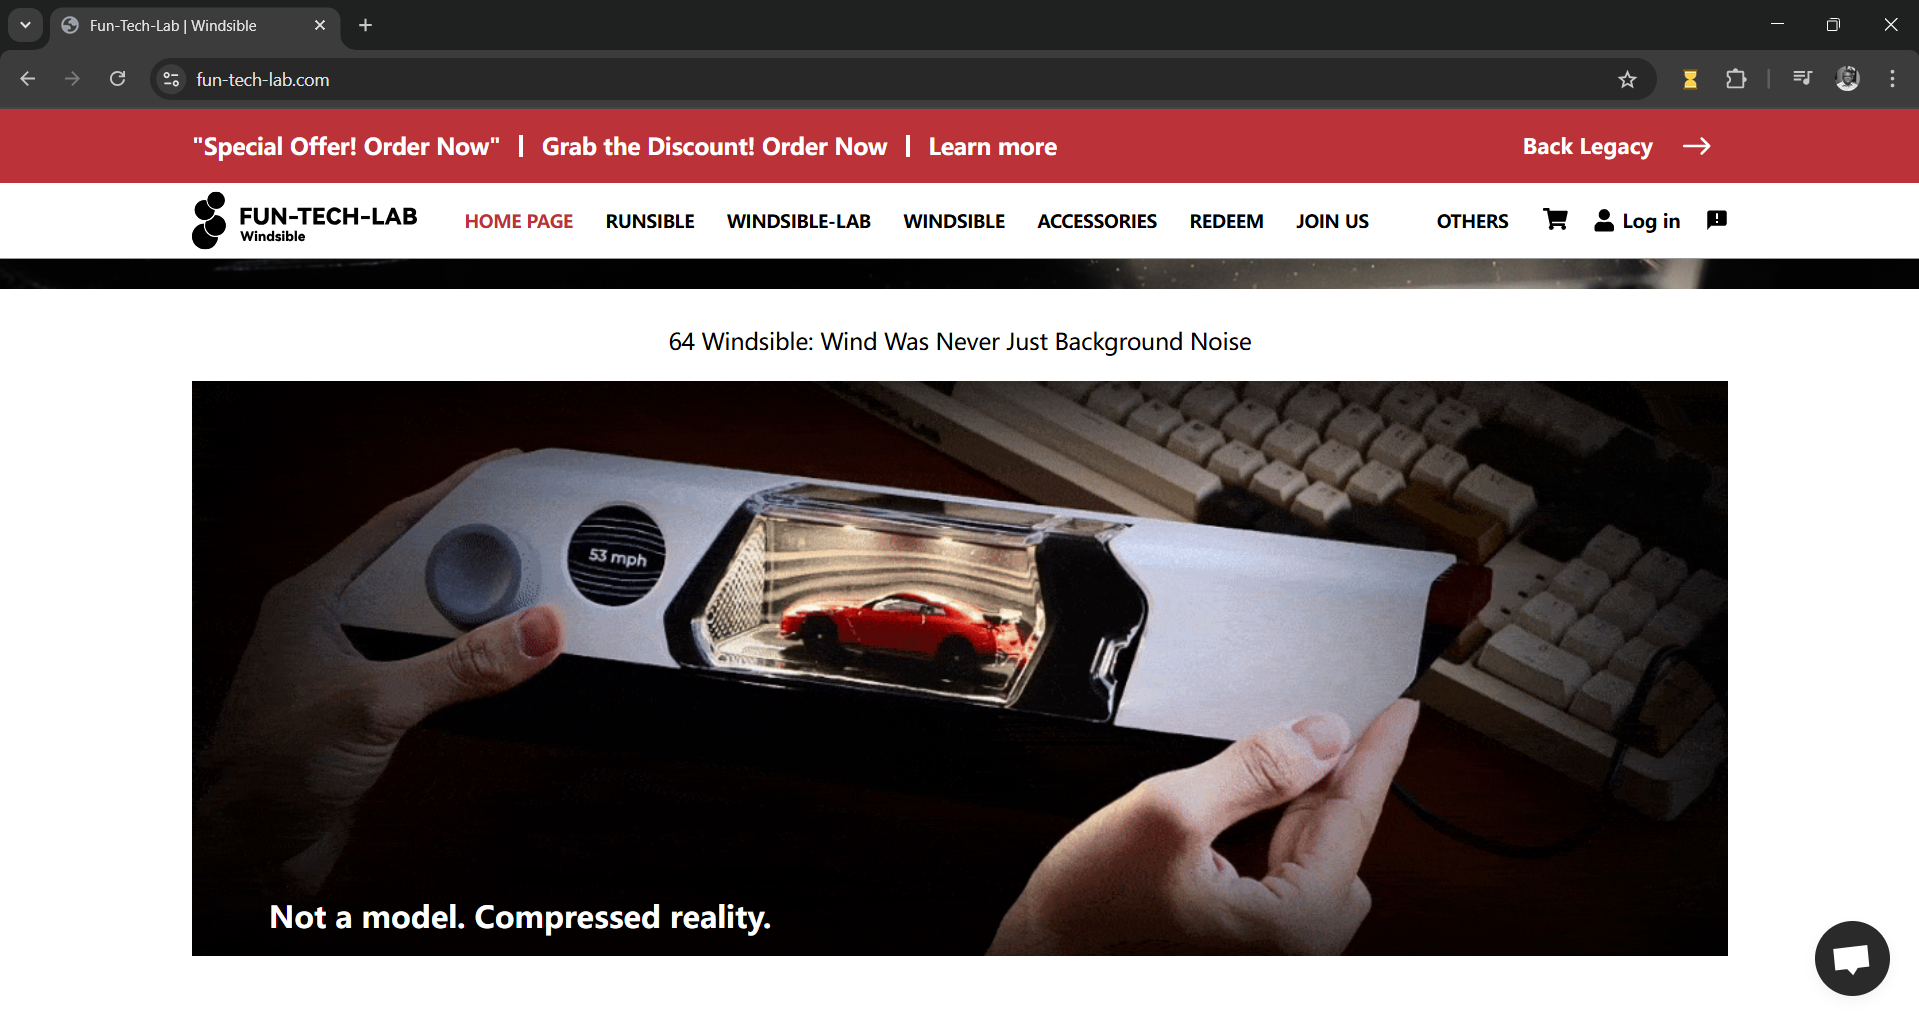
Fun-Tech-Lab | Windsible: Link
Fun-Tech-Lab is a UK-based company developing Windsible, a desktop version of a wind tunnel commercially available online. They have three variants of the wind tunnel that depends on the scale ratio of the die-cast models. Currently available for $239 for a 1:64 model ( in INR 20,449/-), which is a little expensive.
What sources will you use?
As mentioned above my source of inspiration is from Fun-Tach-Lab and other online resources from the internet.
What will you design?
In this product development simple techniques are used in such a way any body can download and recreate the windtunnel using digital fabrication techniques., the system is divided into three sub-systems
Windtunner:
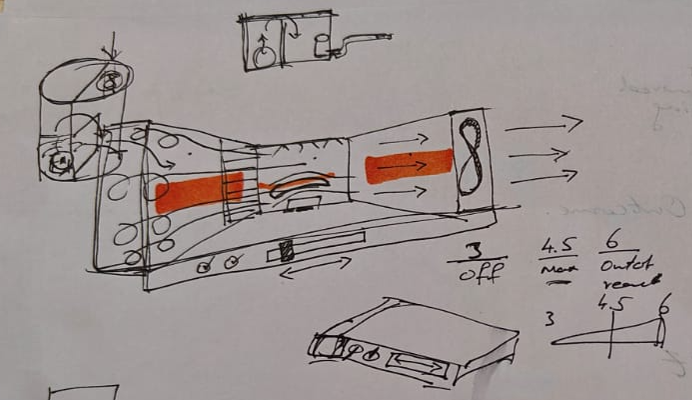
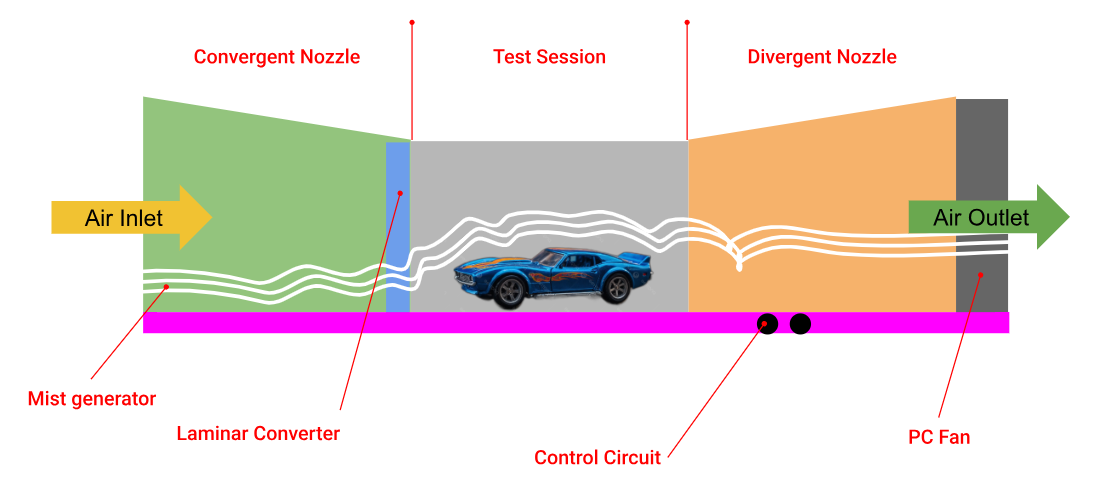
The wind tunnel is designed to hold 1:64-scale models and any object with a maximum dimension of 150x70x70 mm. The tunnel is divided into five zones: convergent nozzle, laminar flow section, display section, and divergent nozzle. All parts are 3D printed and joined using adhesive glues.
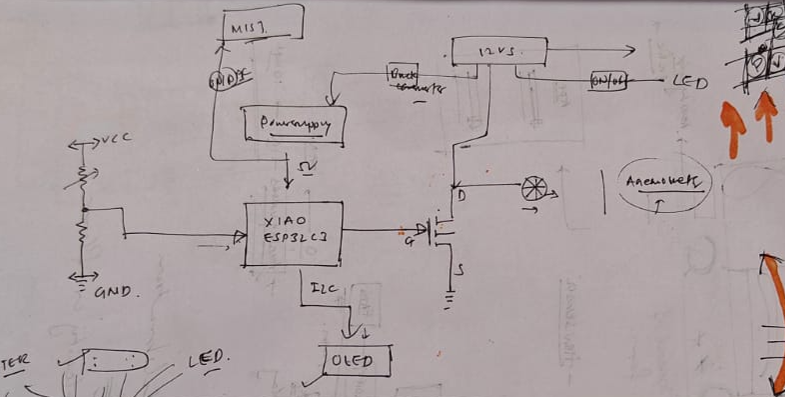
Controller:
Major controllers in this tunnel are varying airflow using a 12V PC fan, LED lights for smoke visualization, and a display to show the values of light and wind flow intensity.
Smoke Generator:
To visualise the wind flow, smoke is added using a smoke generator. The smoke generator consists of nichrome wire from a hair dryer, glycerine-soaked cotton, and a pump to force the air flow.
What materials and components will be used?
# | Items | Count | Cost in Rs | Cost in $ |
1 | PLA | 250 grams | 300 | 3.5 |
2 | 3D printing | 12 Rs per gram | 3000 | 35 |
3 | PC 12v Fan | 1 | 70 | 1 |
4 | Switches | 2 | 100 | 1.25 |
5 | Potentiometer | 2 | 170 | 2 |
6 | Seeed Studio XIAO C3 | 1 | 449 | 5.5 |
7 | LED | 2 | 100 | 1.25 |
8 | Pump | 1 | 85 | 1 |
9 | Magnets | 10 | 20 | 0.25 |
10 | Miscellaneous | 500 | 6 | |
Total | 4772 | 56.5 |
Where will it come from?
In this design, we tried to be very minimalistic so that the model can be recreated anywhere with common, locally available materials. Major components are available from the lab inventory and local electronics stores.
How much will they cost?
Commercial models are available at a cost of Rs 20,500/- or $249. But in this model, the total manufacturing cost will vary between Rs4,500 ~ Rs 5,000/- ($55~$60) which can be recreated by others or our lab can sell at a cost of Rs 7500 or $88. Which can be a potential revenue for the lab.
What processes will be used?
2D Design (CAD): For the enclosure panels using Solidworks
3D Design (CAD): For 3D-printed parts and assembly visualization using Solidwork
Laser Cutting: For precisely cutting acrylic panels.
3D Printing (FDM): For manufacturing custom plastic parts.
CNC Milling: For creating the custom PCB.
Electronics Soldering: For assembling the PCB and connecting components.
Assembly: Mechanical assembly of the enclosure, fan, and electronics.
Programming (Embedded C/Arduino): For controlling the microcontroller, fan, and reading sensors.
Testing and Iteration: Repeated testing of airflow, visualization, and any measurement systems, followed by design adjustments.
What parts and systems will be made?
All machines are available in the lab.
What questions need to be answered?
Fan selection: What specific fan type and size will provide sufficient and consistent airflow for 1:64 scale cars without excessive noise or power consumption?
Contraction ratio: What is the optimal contraction ratio for the intake cone to ensure smooth, uniform airflow in the test section?
Smoke generation: What is the most effective and safe method for generating visible, persistent smoke that doesn't interfere with airflow?
Measurement accuracy: How precise can the force measurement system be with readily available components? Is it feasible within the project scope?
Turbulence reduction: How can internal structures and design choices minimize turbulence and ensure laminar flow in the test section?
Safety considerations: How to ensure safe operation, especially with electrical components and potentially heated smoke generation?
Power supply: What are the power requirements for all components, and what type of power supply will be used?
What tasks have been completed?
(Assuming the project is just starting or in early stages, as per a typical Fab Academy project context)
Initial research: Explored existing wind tunnel designs, fan types, and airflow visualization methods.
Conceptual design sketching: Brainstormed various layouts and component placements.
Gathering of initial requirements: Defined the scale of cars, desired functionalities, and budget constraints.
Initial material sourcing ideas: Identified potential suppliers for key components.
What hasn't (anticipated challenges):
What questions need to be resolved?
What will happen when?
M1 | M2 | M3 | M4 | M5 | M6 | Completed | |
Prototype | |||||||
Design & Fabrication | |||||||
Assemble | |||||||
Testing | |||||||
Documentation |
What have you learned?
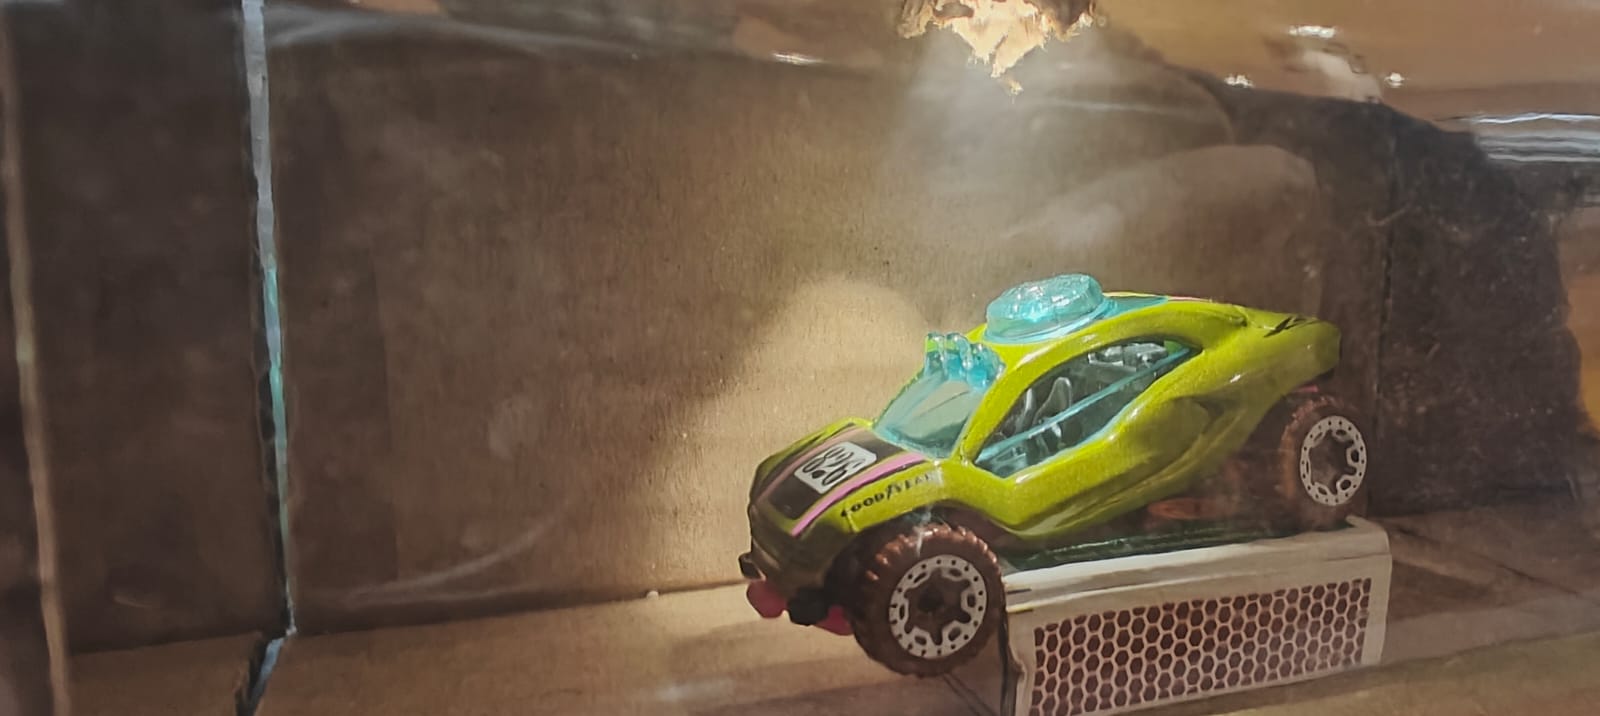
Prototype
Prototype made using cardboard for Proof of Concept (PoC)