Input Devices - Week 9
Description of group assignment
-
Probe an input device(s)'s analog levels and digital signals
-
Document your work on the group assignment page and reflect on your individual page what you learned.
Group Assignment
Group Assignment
As part of the Input Devices group assignment, we worked together to probe and analyze both analog and digital signals from different input sensors. Using an oscilloscope and serial monitors, we measured the behavior of various input devices in real-time. This helped us understand how signal levels vary with environmental changes and how to interpret sensor data accurately.
Through Our group documentation includes full details on our shared experimentation with multiple sensors. From this exercise, I learned how to use tools like an oscilloscope to observe signal variations, and how analog values can be read and converted by microcontrollers like Xiao or Arduino for real-world applications.
INDIVIDUAL ASSIGNMENT
Through this Week 9 of the Fab Academy, I explored input devices — sensors that collect data from the environment. My goal was to measure soil moisture using a moisture sensor and Seeed Studio Xiao board, with results displayed via the Arduino IDE. and by this I got to understand how to deal with input devices.
Components I Used
- Moisture Sensor (analog type)
- Seeed Studio Xiao microcontroller
- Water in a glass (to simulate moist and dry soil conditions)
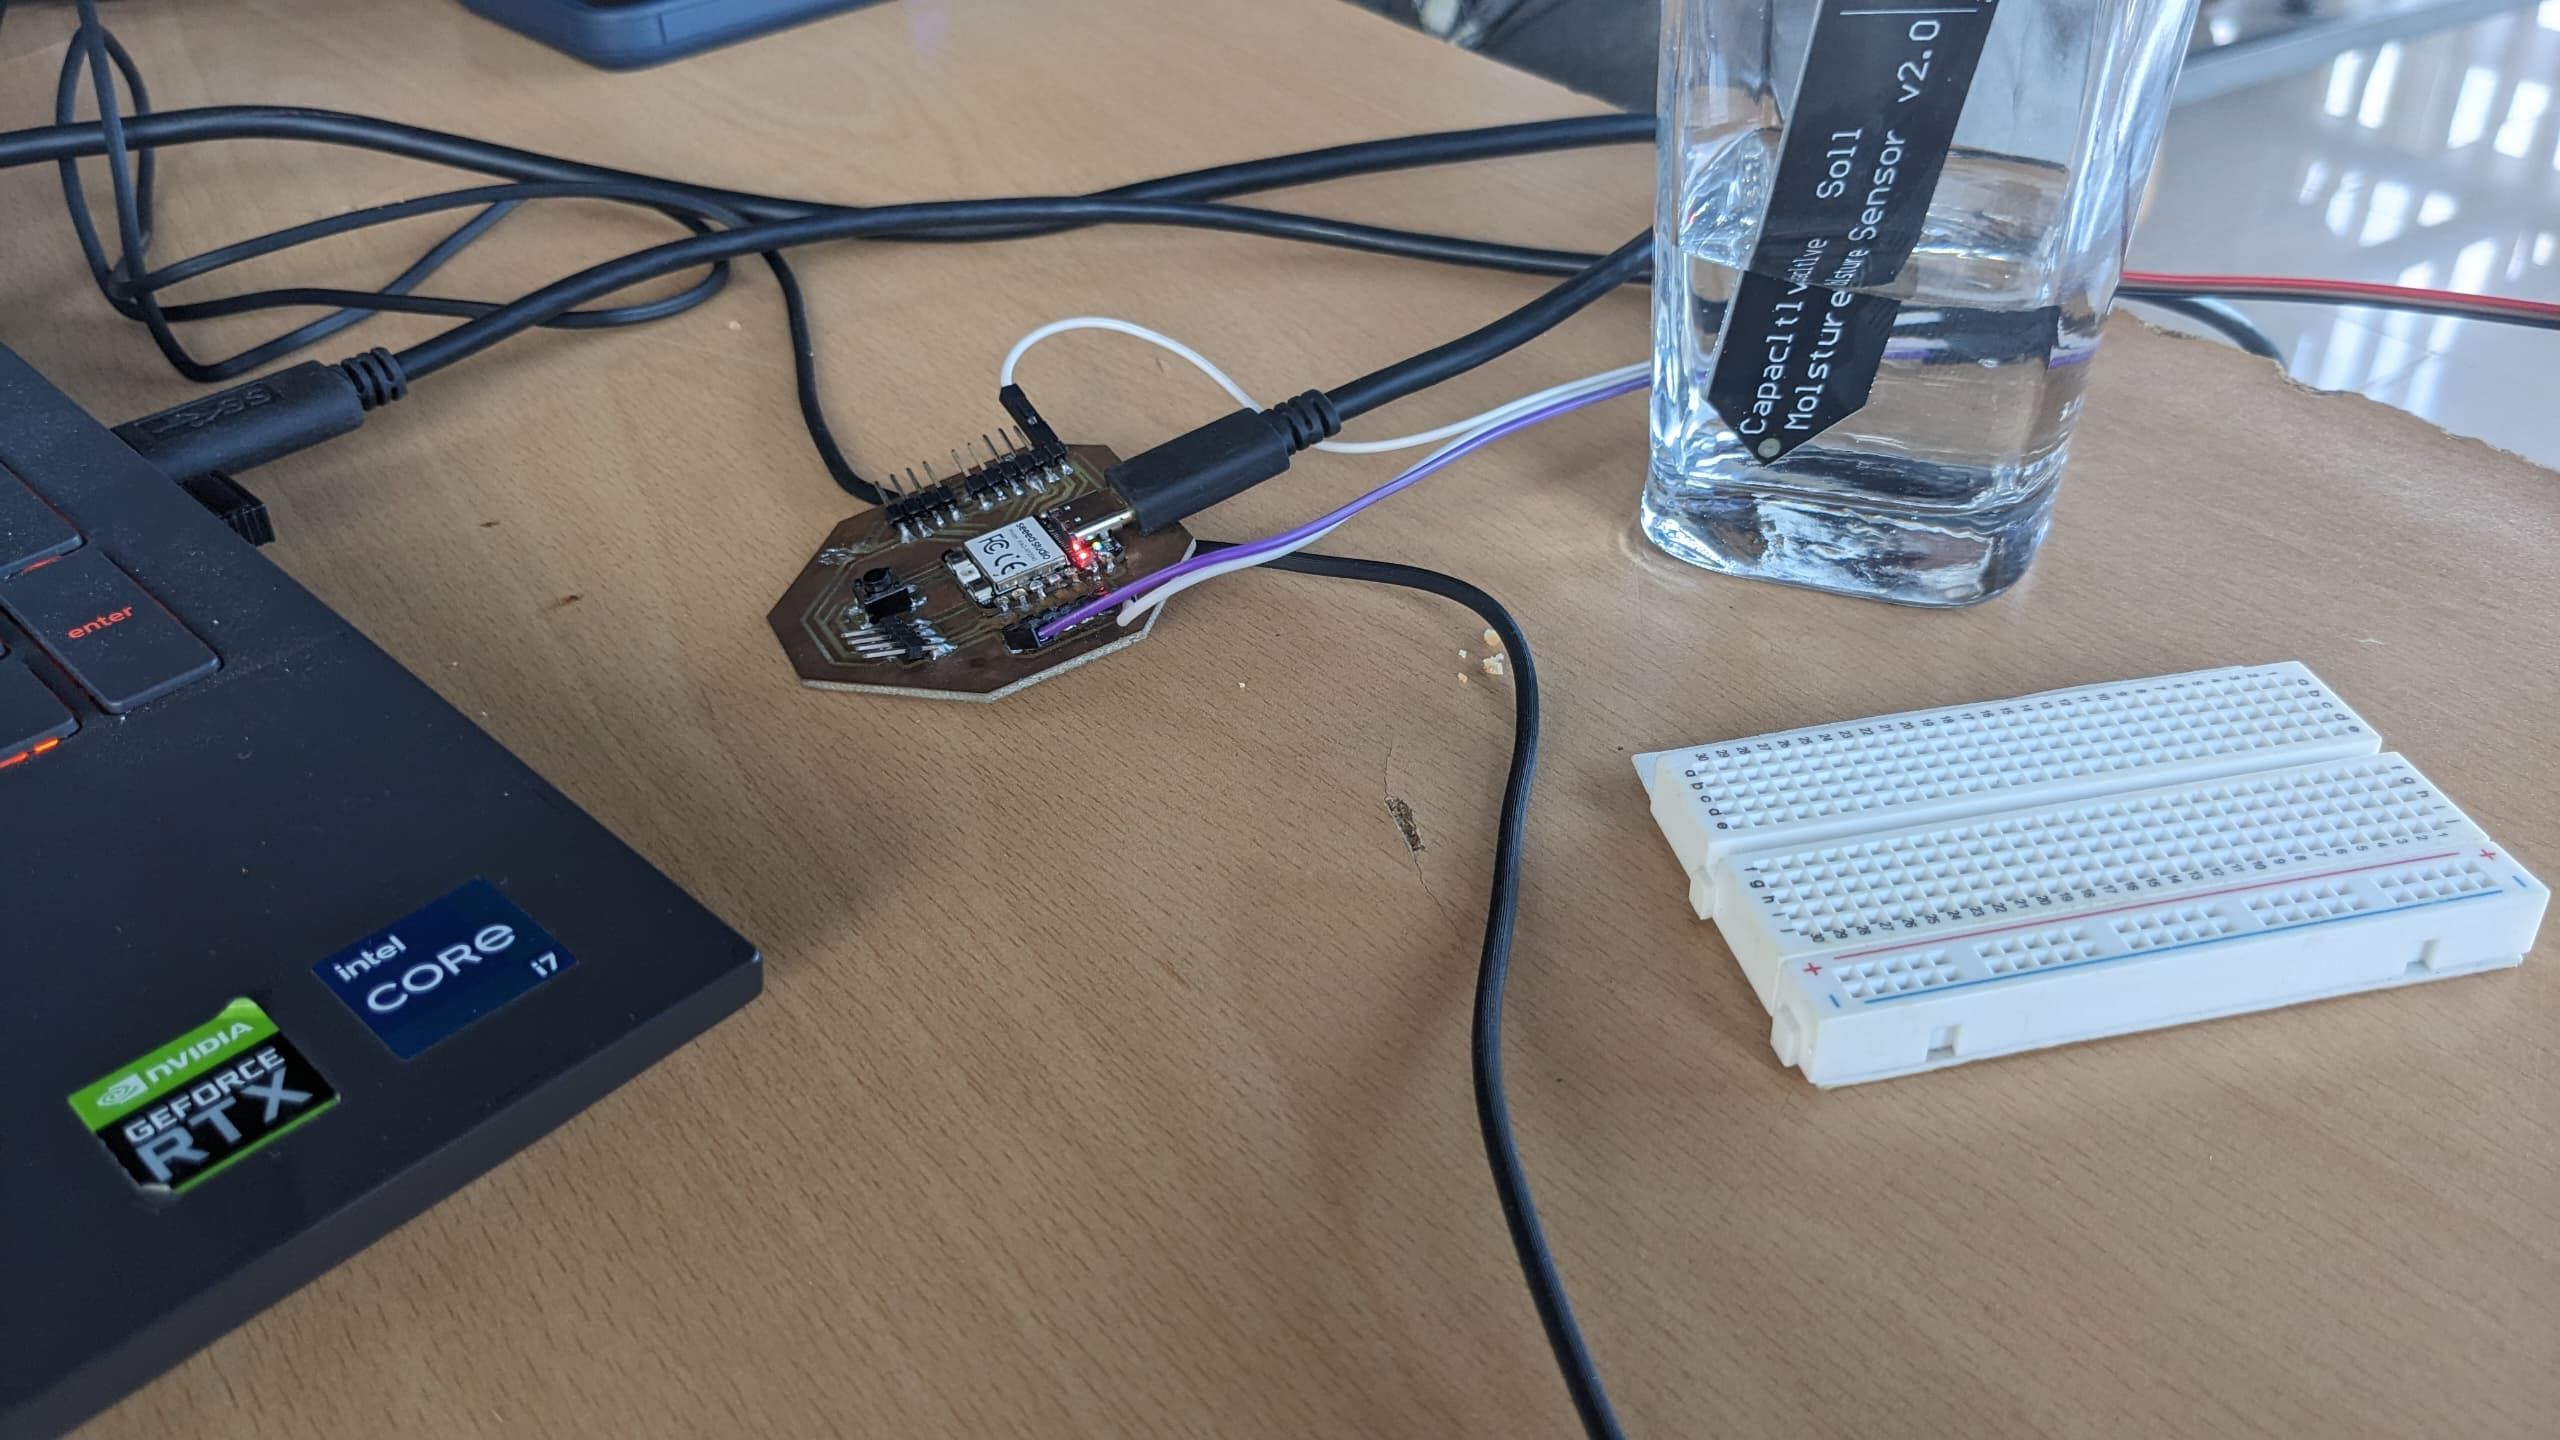
Wiring and Setup
The moisture sensor has three pins: VCC, GND, and A0 (analog output). I connected them to the Xiao board as follows:
- VCC → 3.3V on Xiao
- GND → GND on Xiao
- A0 → A0 on Xiao
I placed the sensor into a glass of water to test its reaction to high moisture levels, then removed it to test low moisture detection.
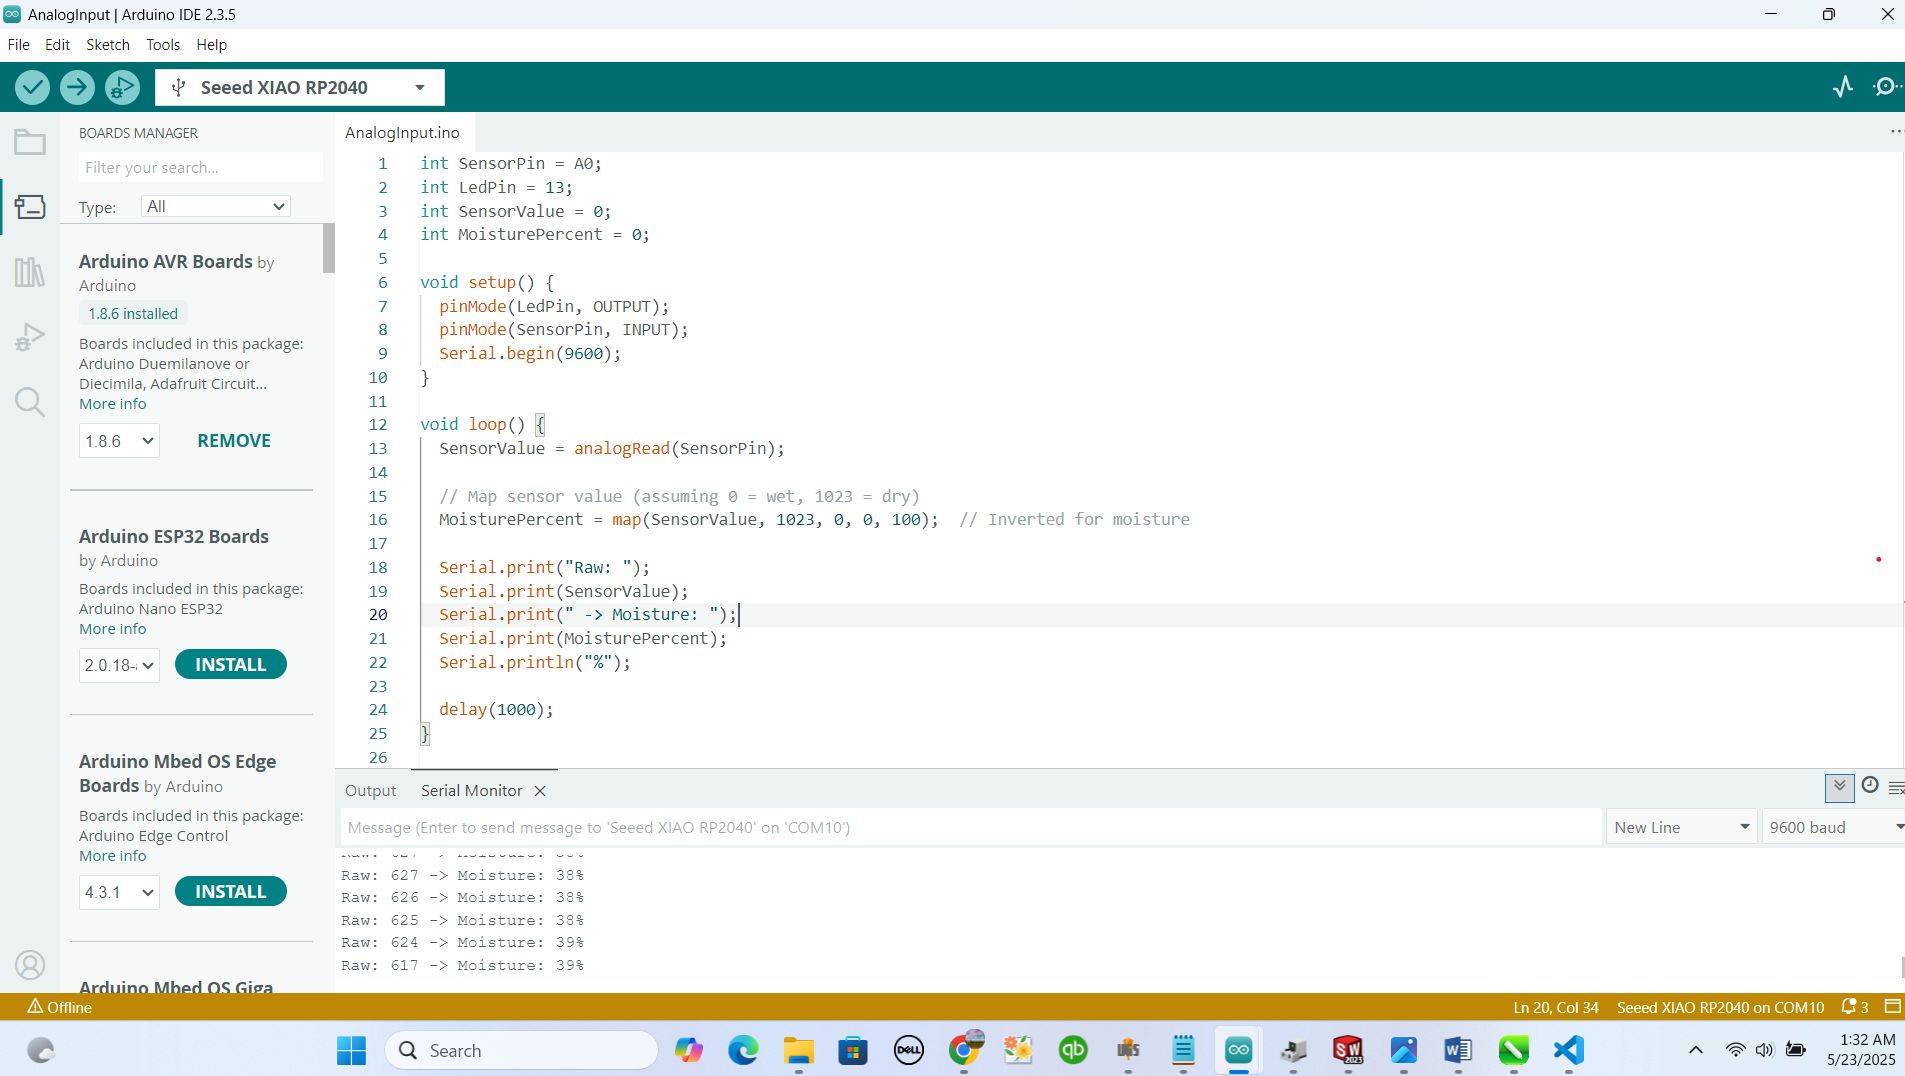
Arduino Code
Below is the code I uploaded using Arduino IDE to read analog values from the moisture sensor:
            int SensorPin = A0;
            int LedPin = 13;
            int SensorValue = 0;
            int MoisturePercent = 0;

            void setup() {
              pinMode(LedPin, OUTPUT);
              pinMode(SensorPin, INPUT);
              Serial.begin(9600);
            }

            void loop() {
              SensorValue = analogRead(SensorPin);

              // Map sensor value (assuming 0 = wet, 1023 = dry)
              MoisturePercent = map(SensorValue, 1023, 0, 0, 100);  // Inverted for moisture

              Serial.print("Raw: ");
              Serial.print(SensorValue);
              Serial.print(" -> Moisture: ");
              Serial.print(MoisturePercent);
              Serial.println("%");

              delay(100);
            }

from this codes I included map function that help to map the wortless values to proper mapping so that everyone can understand and communicate with data
Testing and Results
When I dipped sensor in water, the analog values dropped significantly, indicating high moisture. When I removed it and exposed to air, the values increased, showing low moisture which confirms the sensor’s ability to detect relative wetness in the environment.
outcomes I got from this week
This week helped me understand how analog sensors work and how microcontrollers can be used to read and interpret data. I gained confidence in connecting sensors and using serial communication, which will be key for integrating environmental data into my final project dashboard.
Here is the original code
You can download the Arduino code used for this experiment below:
Download Moisture Sensor Code