Interface and Application Programming
Description of Group Assignment
Measure the power consumption of an output device.
Document your work on the group page and reflect on your individual page what you learned.
Group Assignment
Group Assignment
Individual Assignment
For the individual assignment, I decided to control a Servo motor using a Seeed Studio XIAO RP2040. I also developed a basic web interface using the Web Serial API to send commands to the board via USB, allowing bidirectional motor control from a web browser.
Components Used
- servo motor
- Seeed XIAO RP2040
- Jumper wires
- USB cable
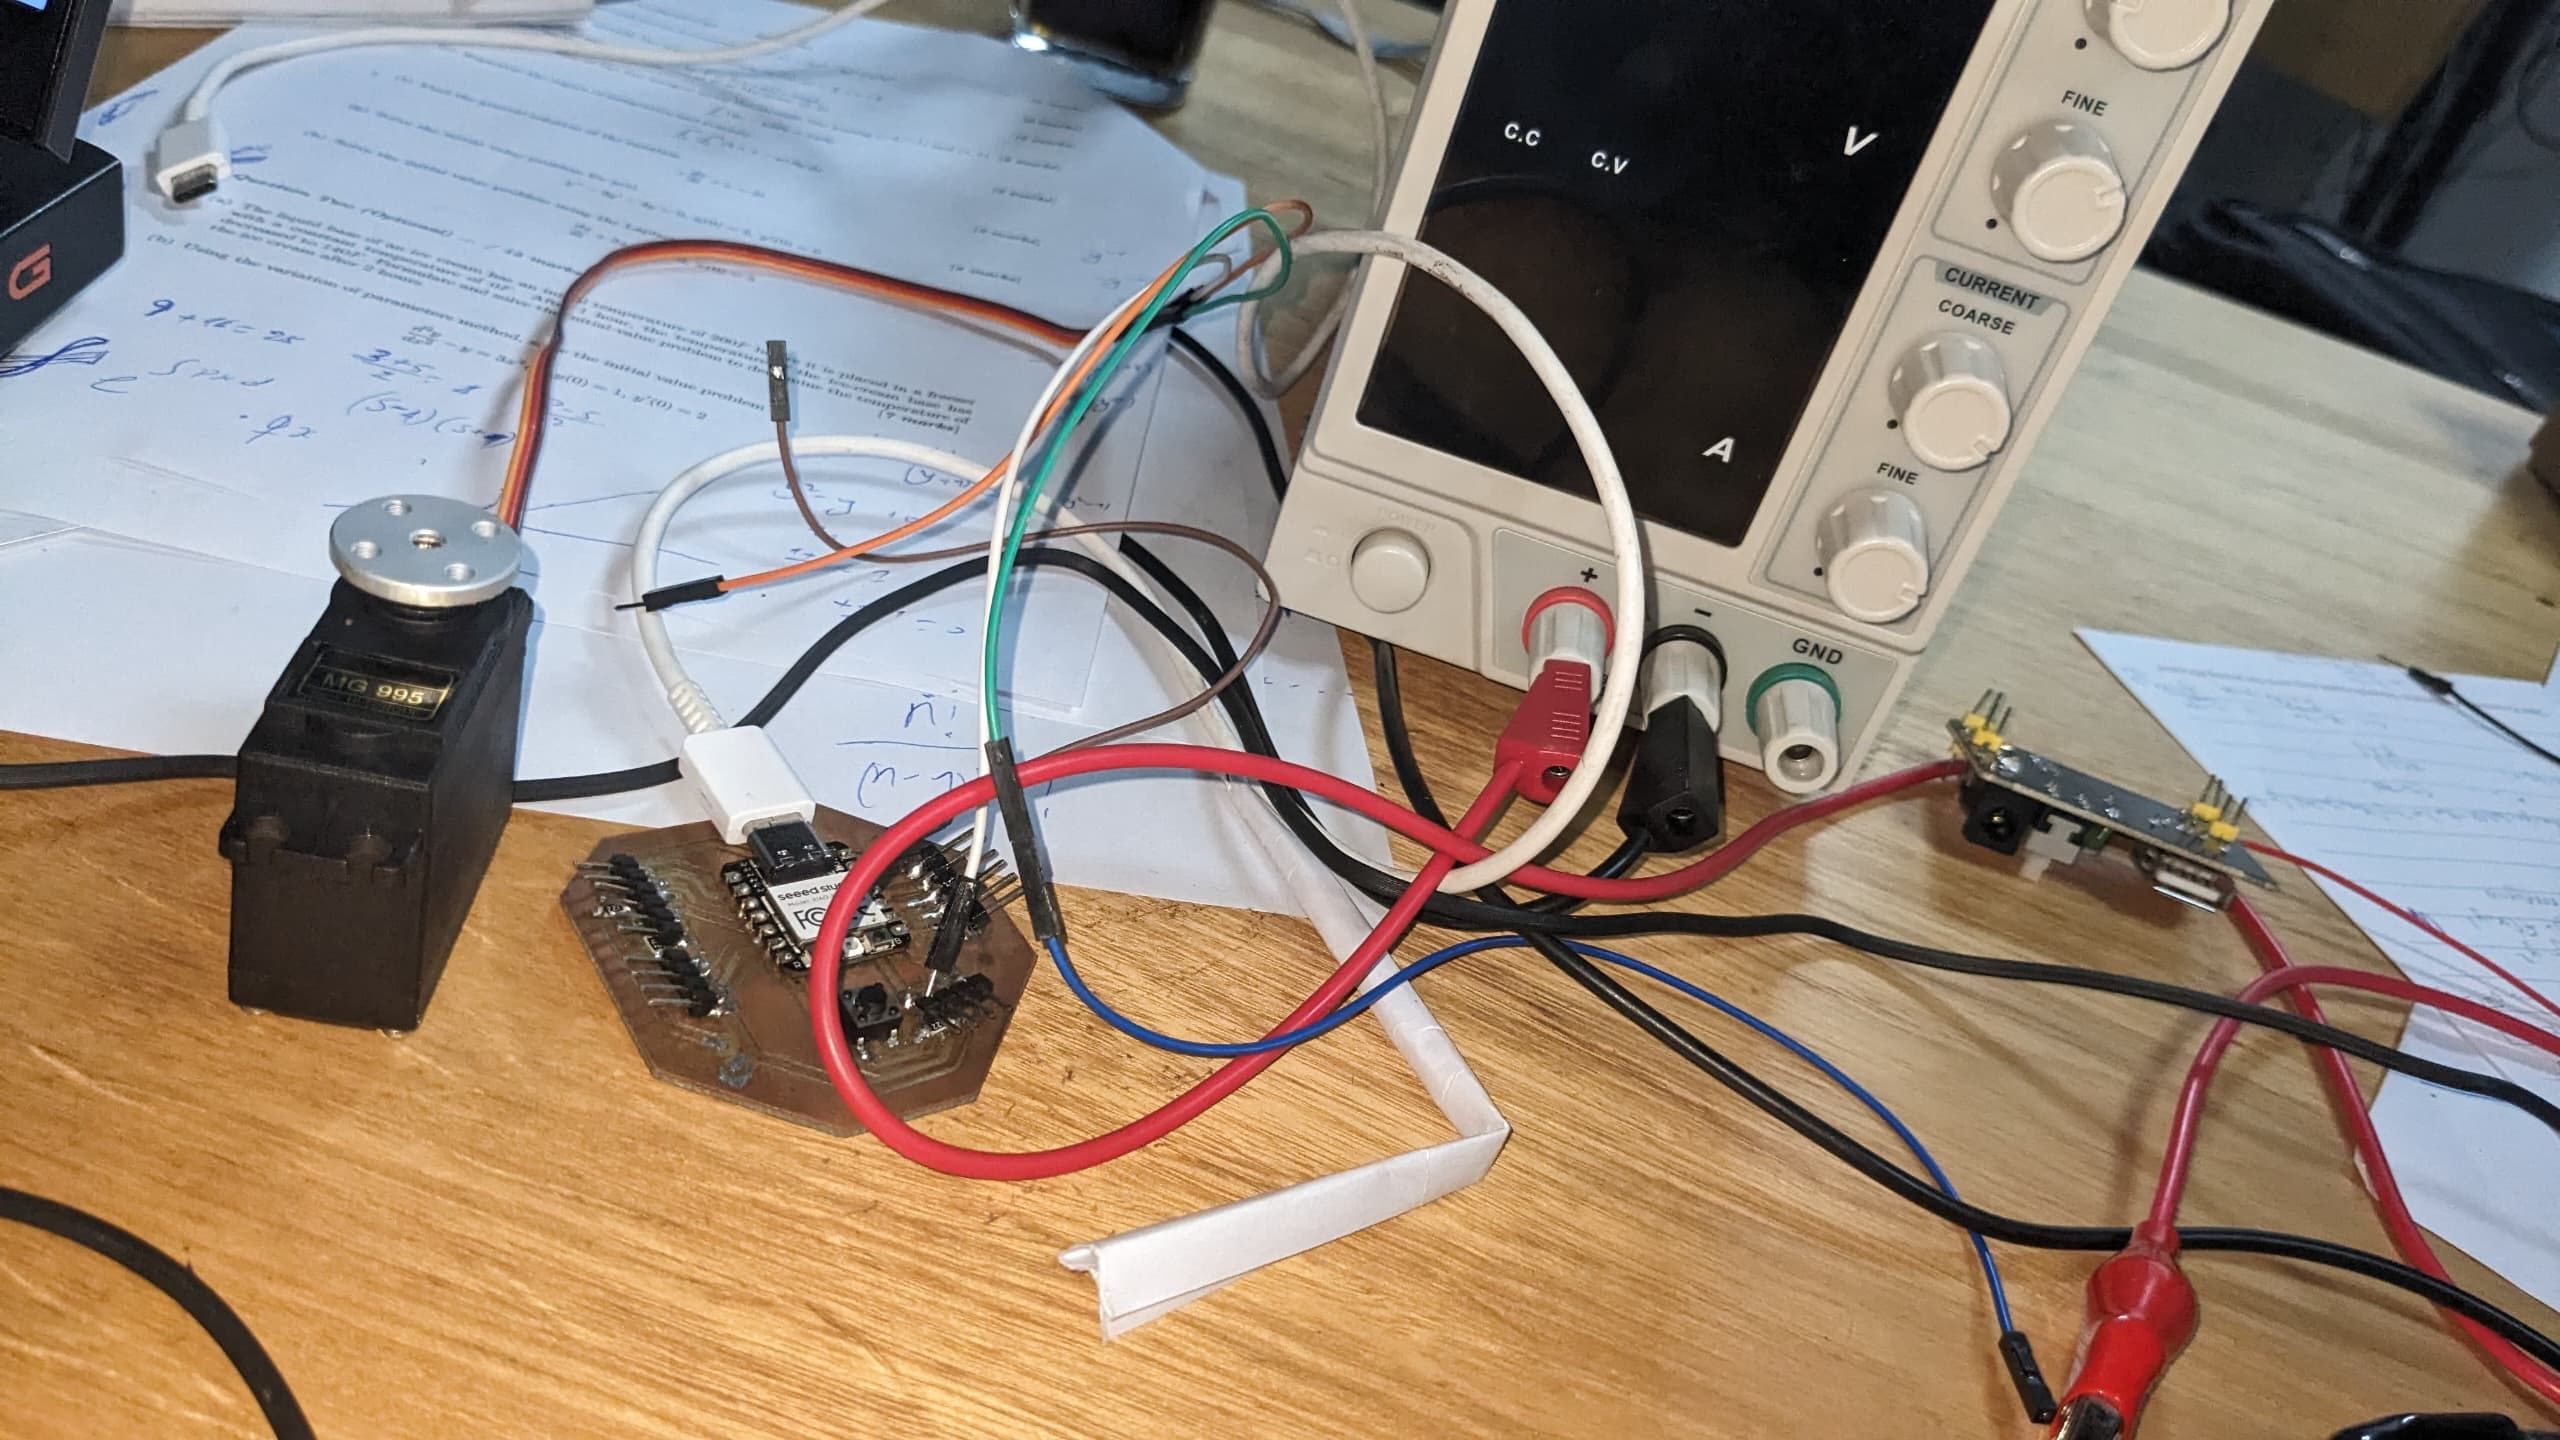
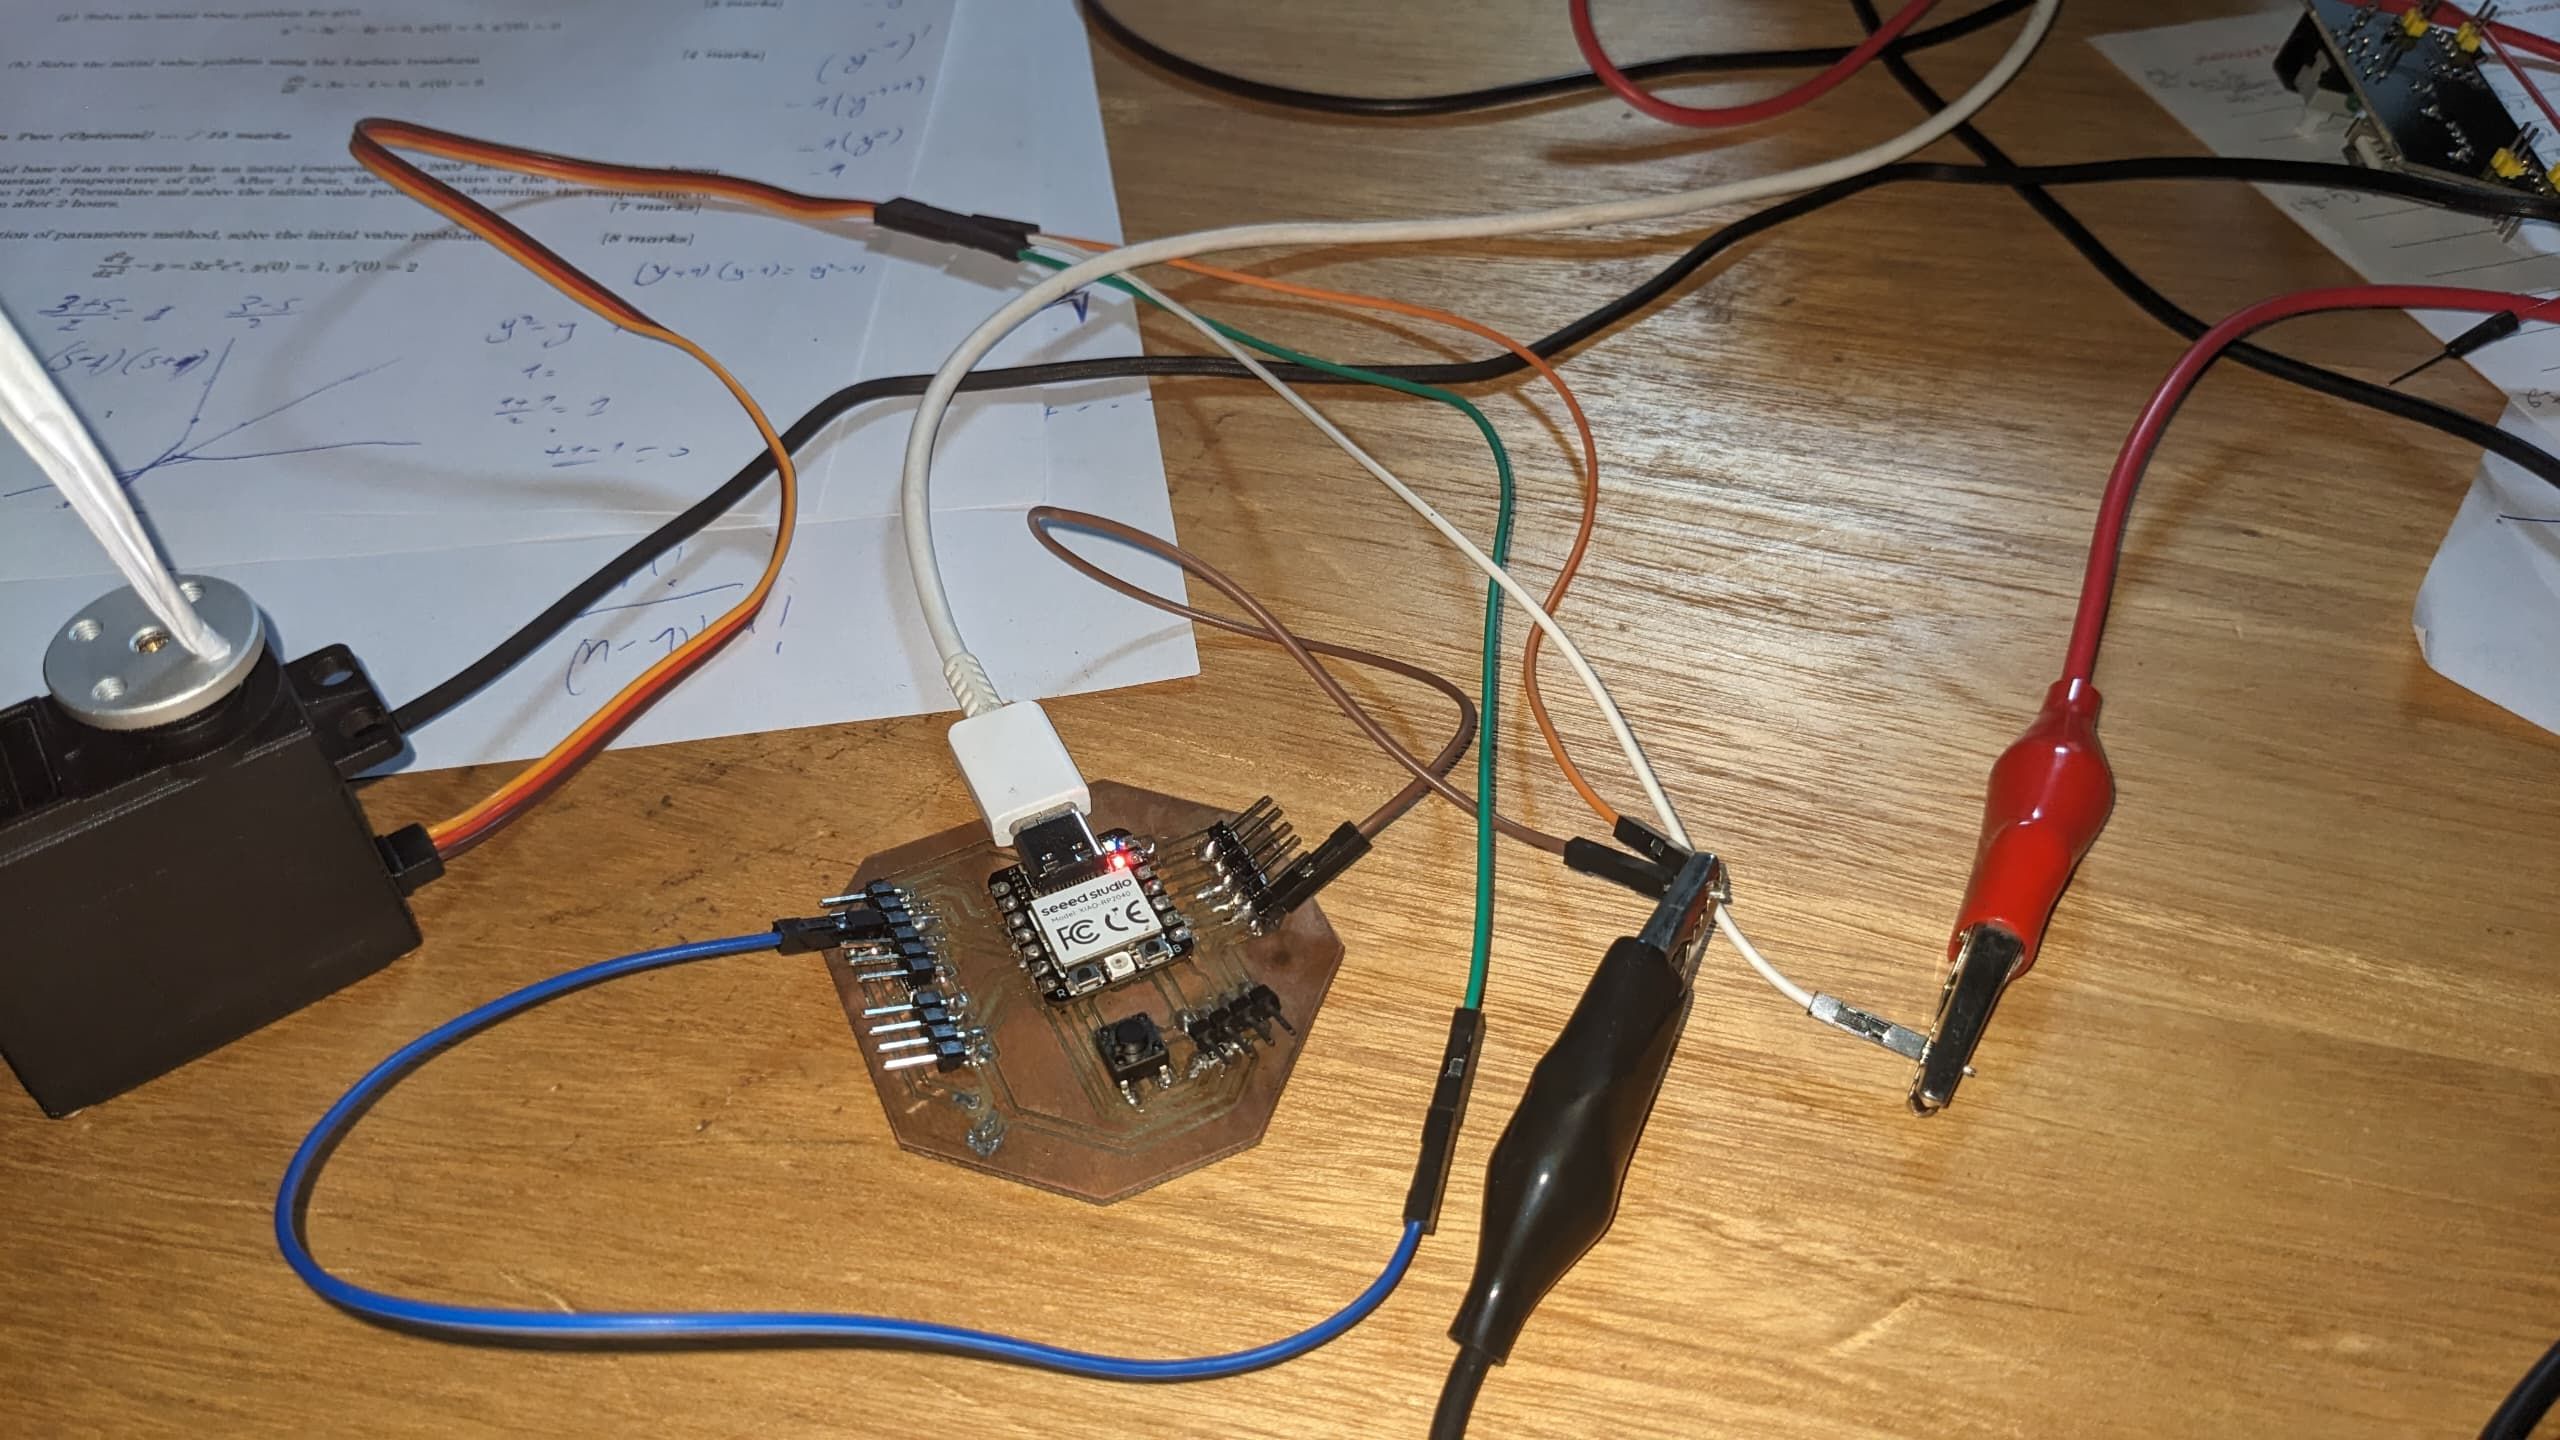
Wiring and Setup
this is how I connected servo motor pins to seeed Xiao rp2040
- signal pin → D2
- VCC → 5V
- GND → GND
Firmware Code (C++)
The firmware code below controls the motor steps based on the number sent via serial. If the number is positive, it rotates forward, if negative, it rotates backward.
#include <Servo.h>

Servo h;
String input = "";

void setup() {
  Serial.begin(9600);
  h.attach(D2);
}

void loop() {
  while (Serial.available()) {
    char ch = Serial.read();
    if (ch == '\n') {
      input.trim();
      int angle = input.toInt();
      if (angle >= 0 && angle <= 180) {
        h.write(angle);
        Serial.println("Moved to: " + String(angle));
      } else {
        Serial.println("Invalid angle");
      }
      input = "";
    } else {
      input += ch;
    }
  }
}
HTML + Web Serial Control Interface
Below is the HTML/JavaScript code I wrote to create a simple browser-based UI that connects to the XIAO board over USB using the Web Serial API:
<!DOCTYPE html>
<html lang="en">
<head>
  <meta charset="UTF-8">
  <title>Servo Motor Control via USB</title>
  <style>
    body {
      font-family: "Segoe UI", Tahoma, Geneva, Verdana, sans-serif;
      background-color: #f0f2f5;
      color: #333;
      display: flex;
      flex-direction: column;
      align-items: center;
      padding: 40px;
    }

    h2 {
      color: #2c3e50;
      margin-bottom: 20px;
    }

    .card {
      background: #fff;
      padding: 30px 40px;
      border-radius: 12px;
      box-shadow: 0 4px 20px rgba(0, 0, 0, 0.1);
      width: 360px;
      text-align: center;
    }

    label {
      display: block;
      margin: 20px 0 10px;
      font-weight: 600;
    }

    input[type="number"] {
      padding: 10px;
      width: 100%;
      font-size: 16px;
      border-radius: 8px;
      border: 1px solid #ccc;
      box-sizing: border-box;
    }

    button {
      margin-top: 20px;
      padding: 12px 20px;
      font-size: 16px;
      font-weight: bold;
      color: #fff;
      background-color: #007bff;
      border: none;
      border-radius: 8px;
      cursor: pointer;
      transition: background-color 0.3s ease;
    }

    button:hover {
      background-color: #0056b3;
    }

    #connectBtn {
      background-color: #28a745;
    }

    #connectBtn:hover {
      background-color: #1e7e34;
    }

    pre {
      text-align: left;
      margin-top: 20px;
      background-color: #f9f9f9;
      padding: 15px;
      border-radius: 8px;
      border: 1px solid #ccc;
      max-height: 200px;
      overflow-y: auto;
      white-space: pre-wrap;
    }
  </style>
</head>
<body>

  <h2>Servo Motor Control via USB</h2>

  <div class="card">
    <button id="connectBtn">Connect to RP2040</button>

    <label for="angle">Enter Angle (0–180°):</label>
    <input type="number" id="angle" min="0" max="180" value="90">

    <button id="sendBtn">Send</button>
  </div>

  <pre id="log">Waiting to connect...\n</pre>

  <script>
    let port, writer, reader;

    document.getElementById("connectBtn").onclick = async () => {
      try {
        port = await navigator.serial.requestPort();
        await port.open({ baudRate: 9600 });

        const textDecoder = new TextDecoderStream();
        port.readable.pipeTo(textDecoder.writable);
        reader = textDecoder.readable.getReader();

        const textEncoder = new TextEncoderStream();
        textEncoder.readable.pipeTo(port.writable);
        writer = textEncoder.writable.getWriter();

        readLoop();

        log("✅ Connected to RP2040");
      } catch (err) {
        log("❌ Connection error: " + err);
      }
    };

    document.getElementById("sendBtn").onclick = async () => {
      const angle = document.getElementById("angle").value;
      if (writer) {
        await writer.write(angle + "\n");
        log("📤 Sent: " + angle);
      } else {
        log("⚠️ Not connected");
      }
    };

    async function readLoop() {
      while (true) {
        const { value, done } = await reader.read();
        if (done) break;
        if (value) {
          log("📥 RP2040: " + value.trim());
        }
      }
    }

    function log(message) {
      const logElement = document.getElementById("log");
      logElement.textContent += message + "\n";
      logElement.scrollTop = logElement.scrollHeight;
    }
  </script>
</body>
</html>
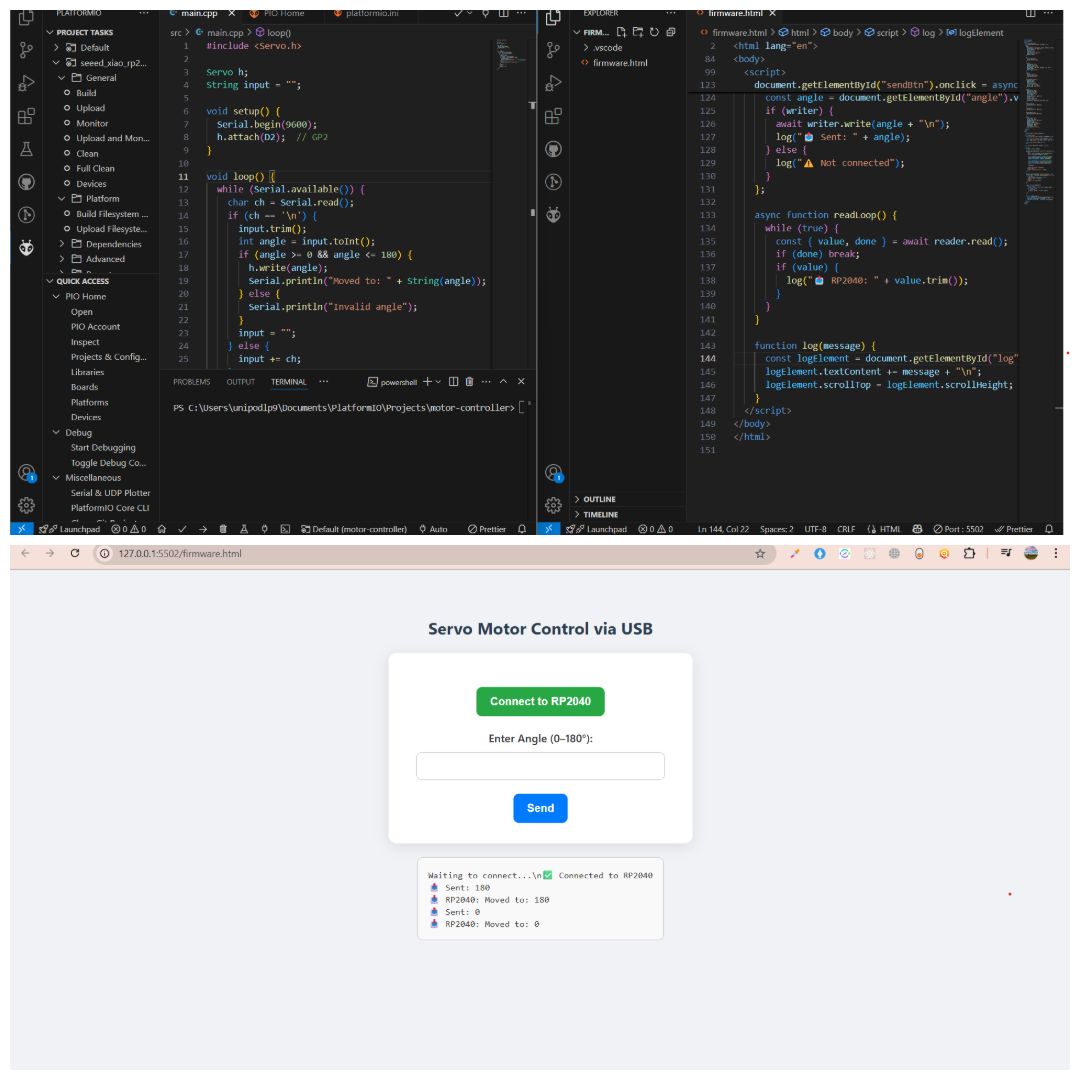
Testing and Results
I was able to control the servo motor directly from the browser. After clicking "Connect" and entering degrees to rotate, the motor would rotate at a certain angle based on the input. Here's a short demo:
Key Learnings and Outcomes
- I learned how to interface output devices (servo motors) using microcontrollers.
- I experimented with Web Serial API, which allows browser-based serial communication—an exciting interface method.
- I developed a full system with both firmware and user-facing interface to control hardware easily.
Download original files
You can download the full code (C++ + HTML) used for this assignment here:
Download Project Files for motor controllerDownload Project Files for UI