PCB Design Process
1. Schematic Design
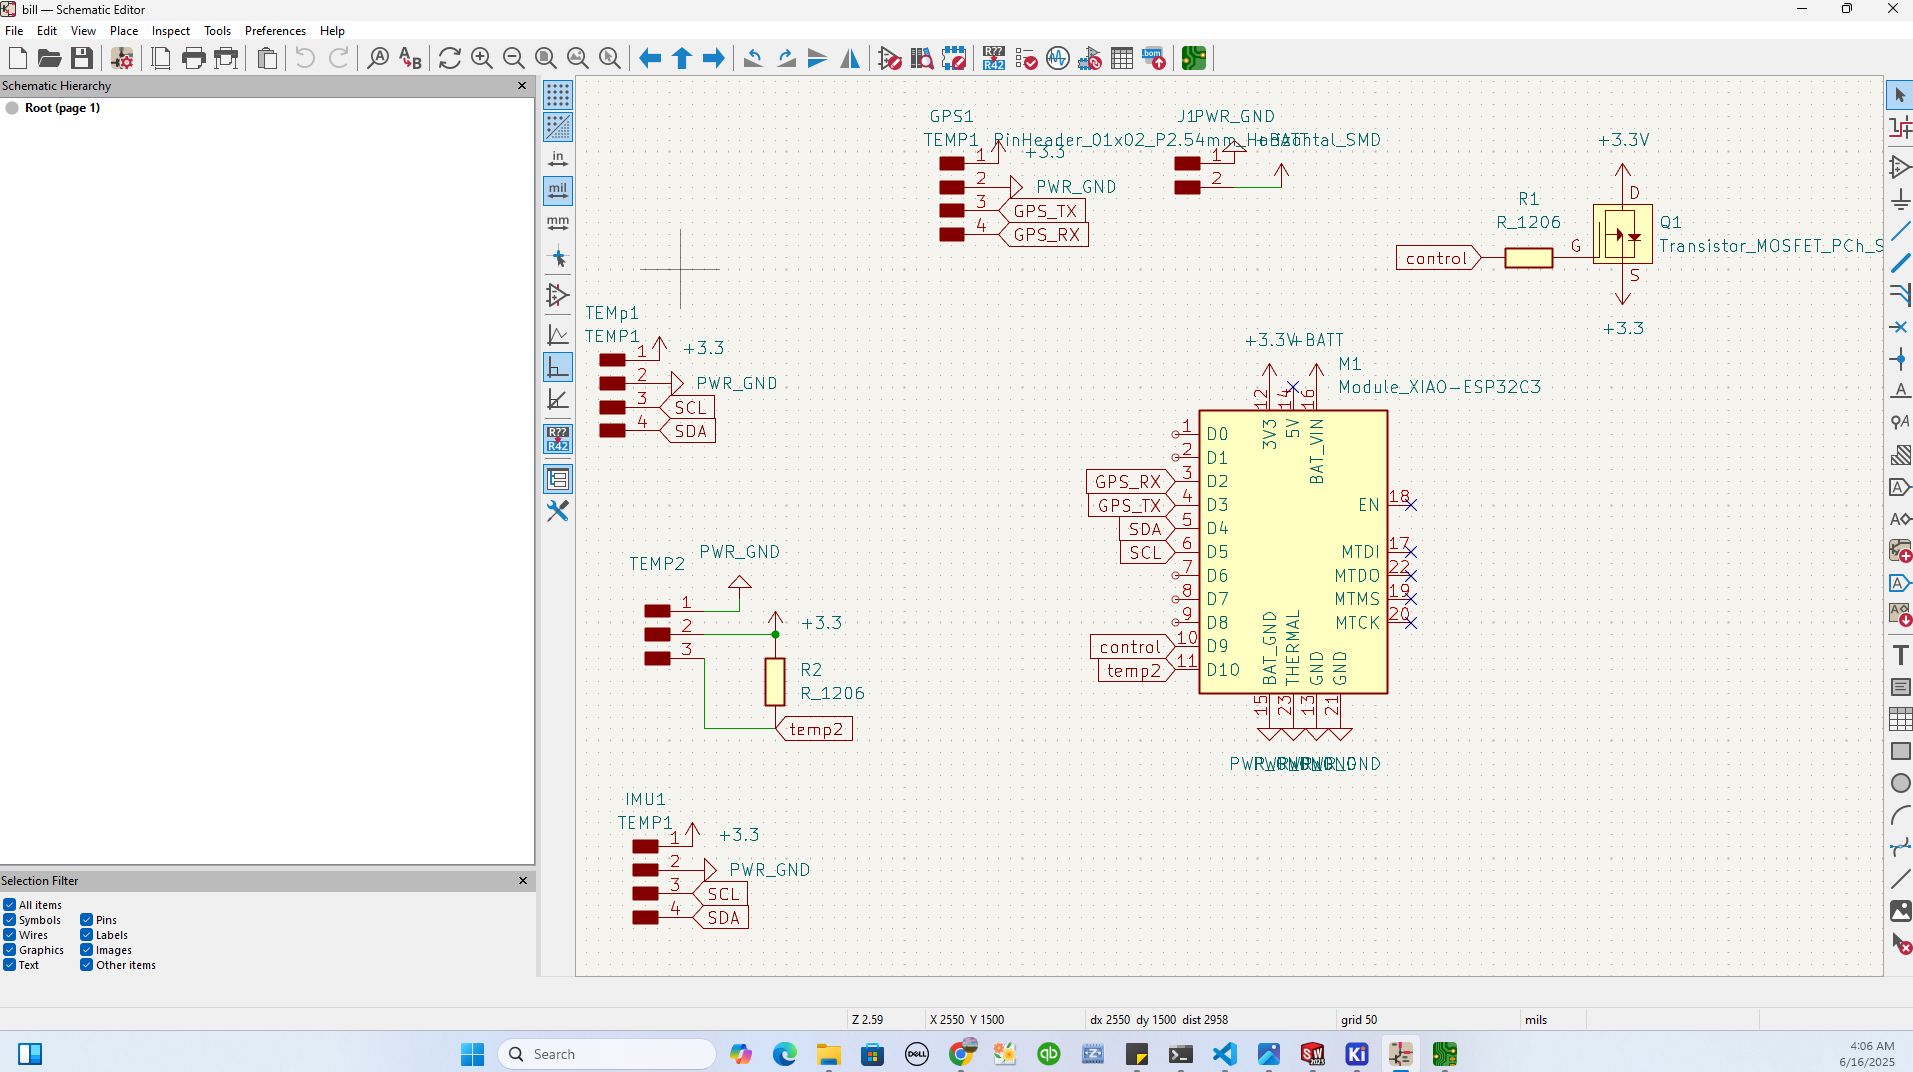
I started by drawing the schematic in KiCad. This included placing components like the Seeed XIAO microcontroller, LEDs, resistors, N-Channel MOSFET, and pin headers. I connected all the components using nets and ensured correct labels and ground connections.
2. Assigning Footprints
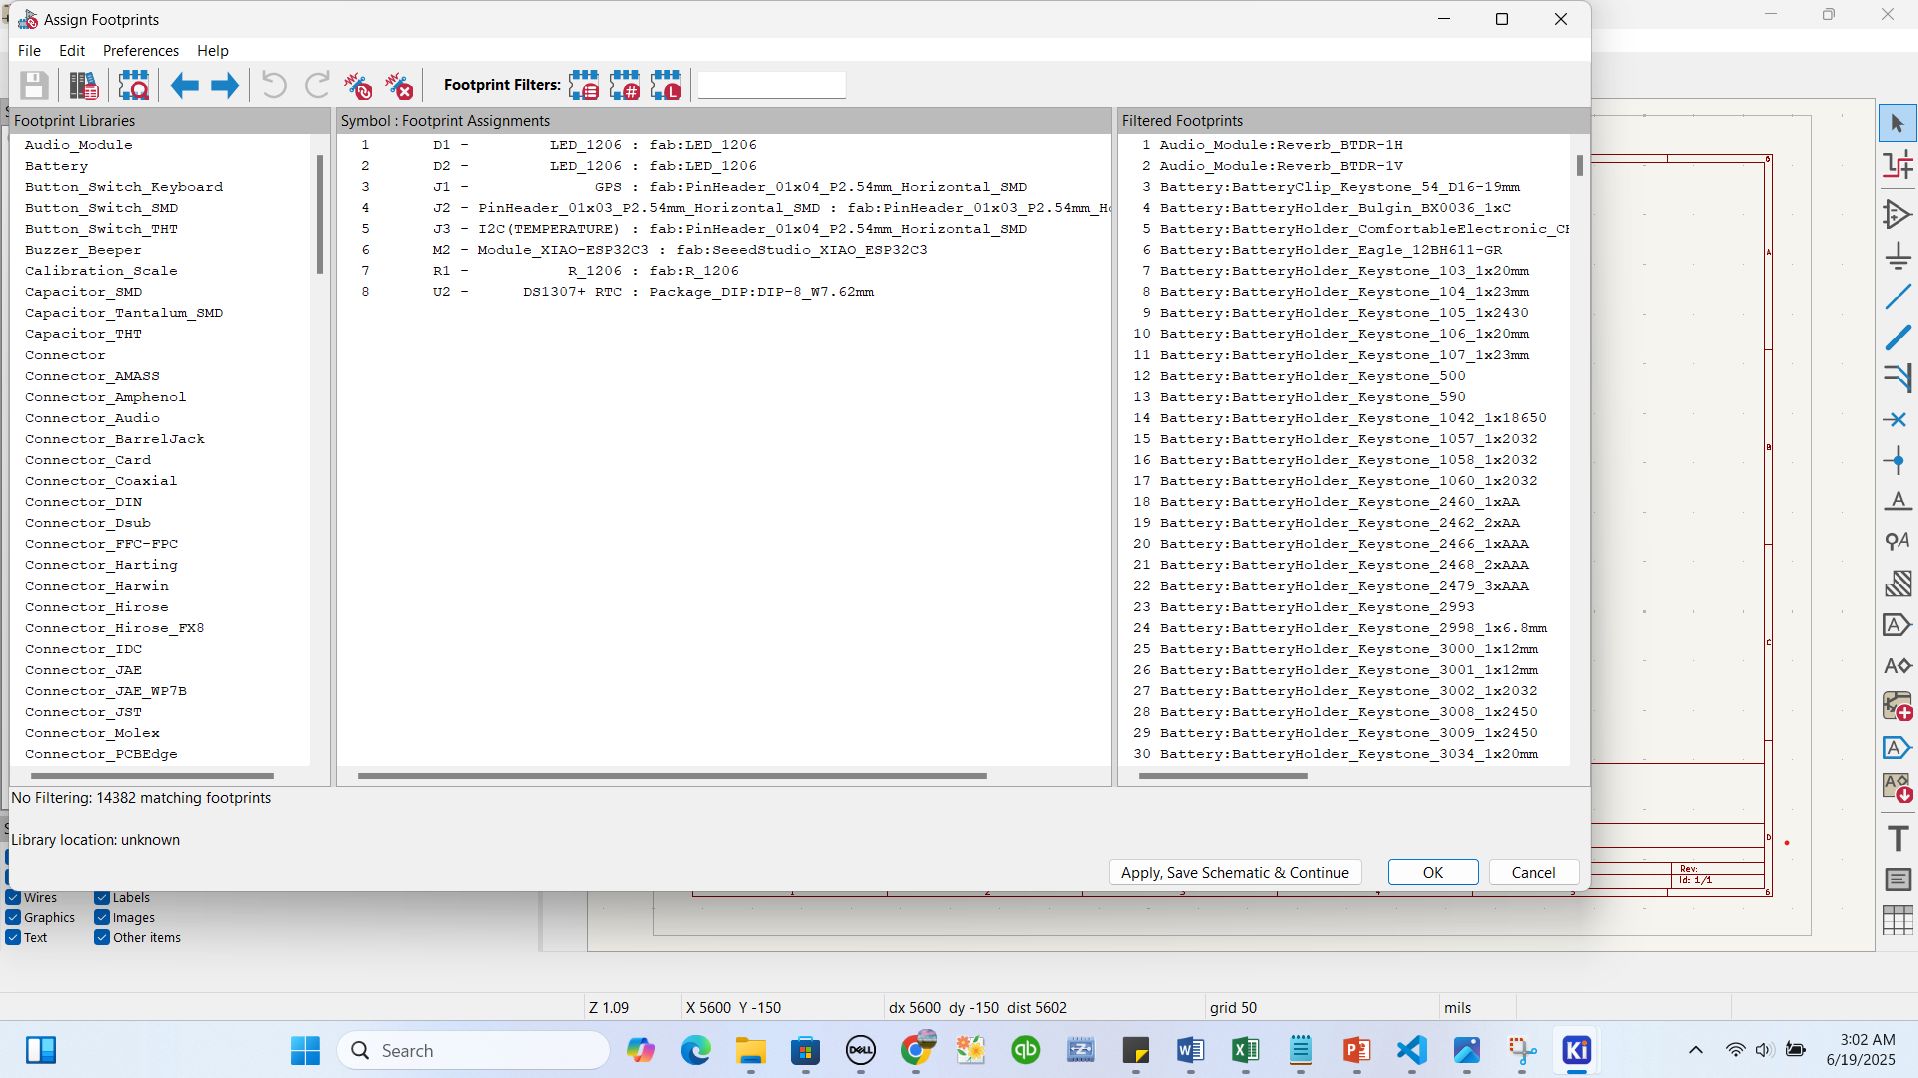
After completing the schematic, I moved to assign footprints for each component. I used KiCad's footprint libraries from fab to select suitable footprints for all components used in the schematic, ensuring they match the physical parts I would solder.
3. PCB Layout & Editing
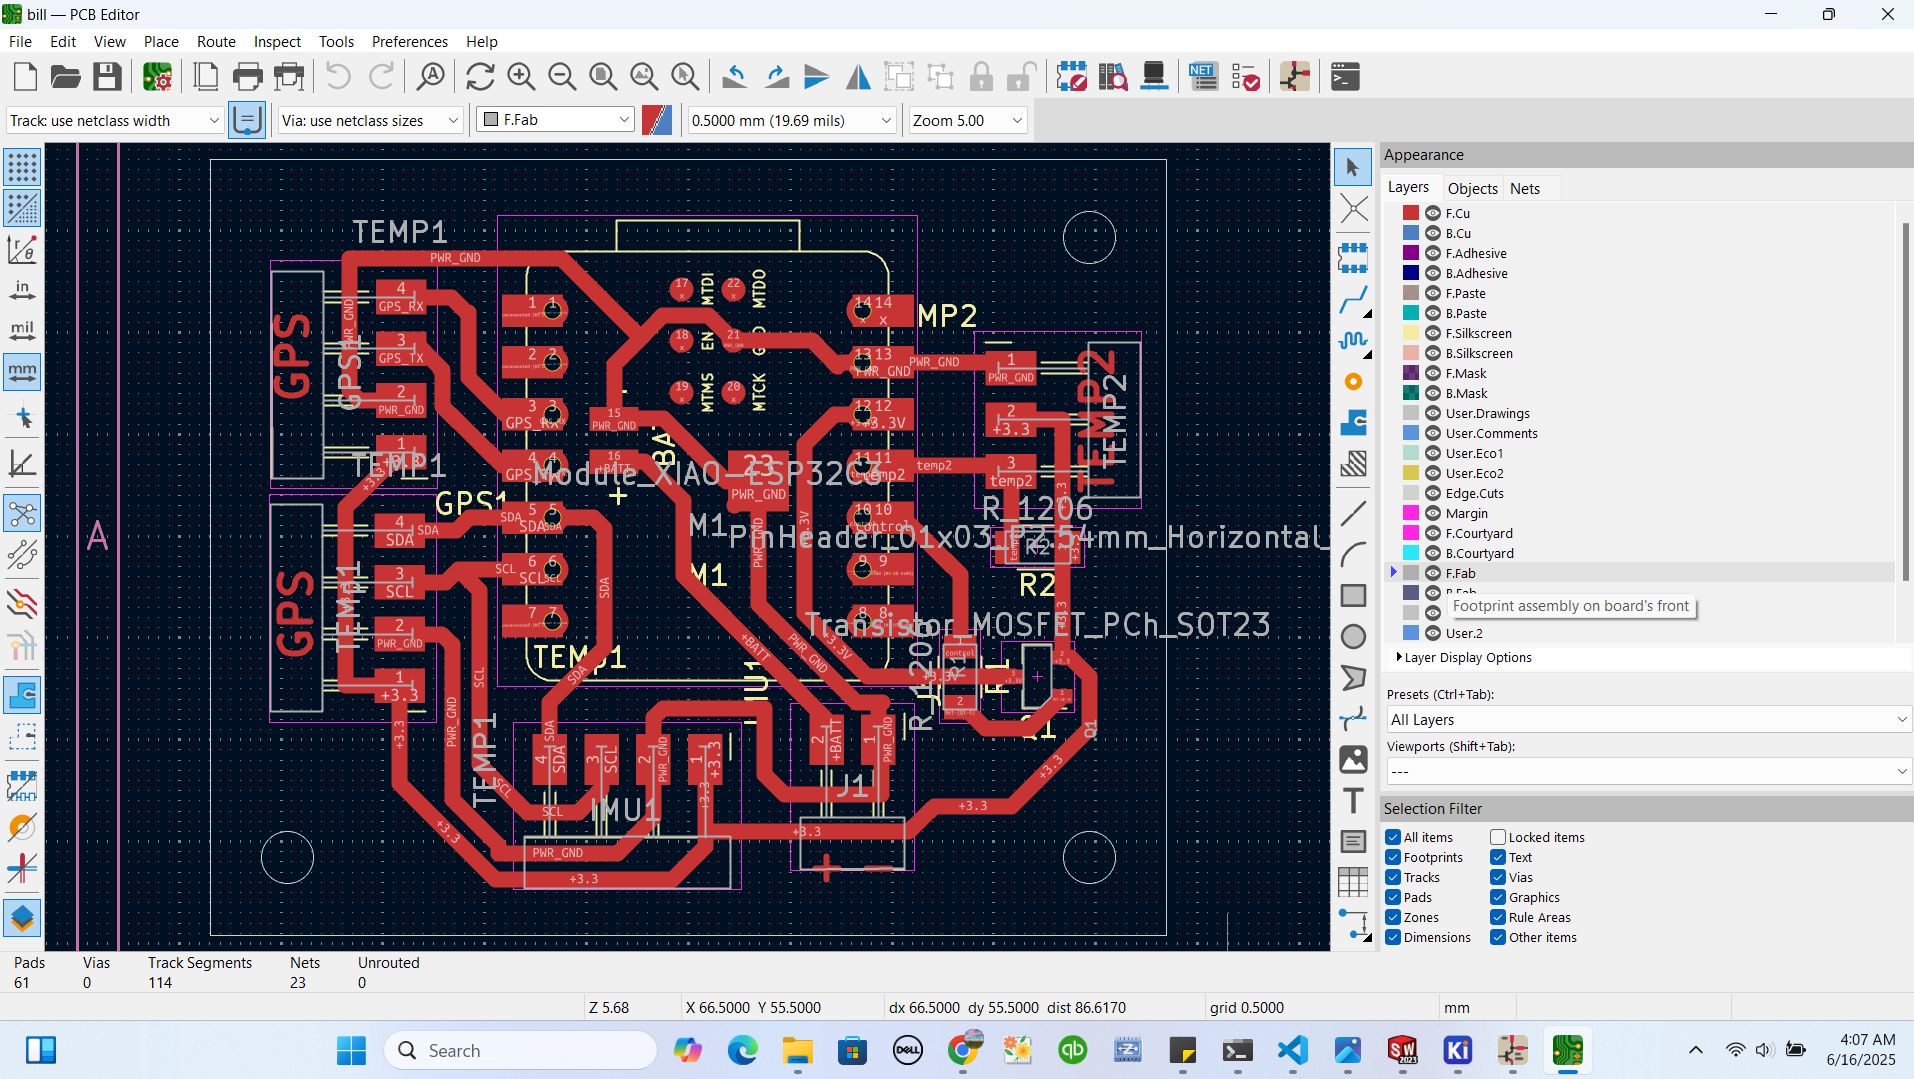
With the footprints assigned, I switched to the PCB editor. I arranged components, set design rules, and routed the traces manually to ensure signal integrity and good spacing. I also added labels and ground fills.
4. 3D Viewing and Presentation
KiCad’s 3D viewer allowed me to preview the board in a realistic format. This helped check for any visual design flaws and confirm component orientation before fabrication.

5. Plotting and Saving as SVG
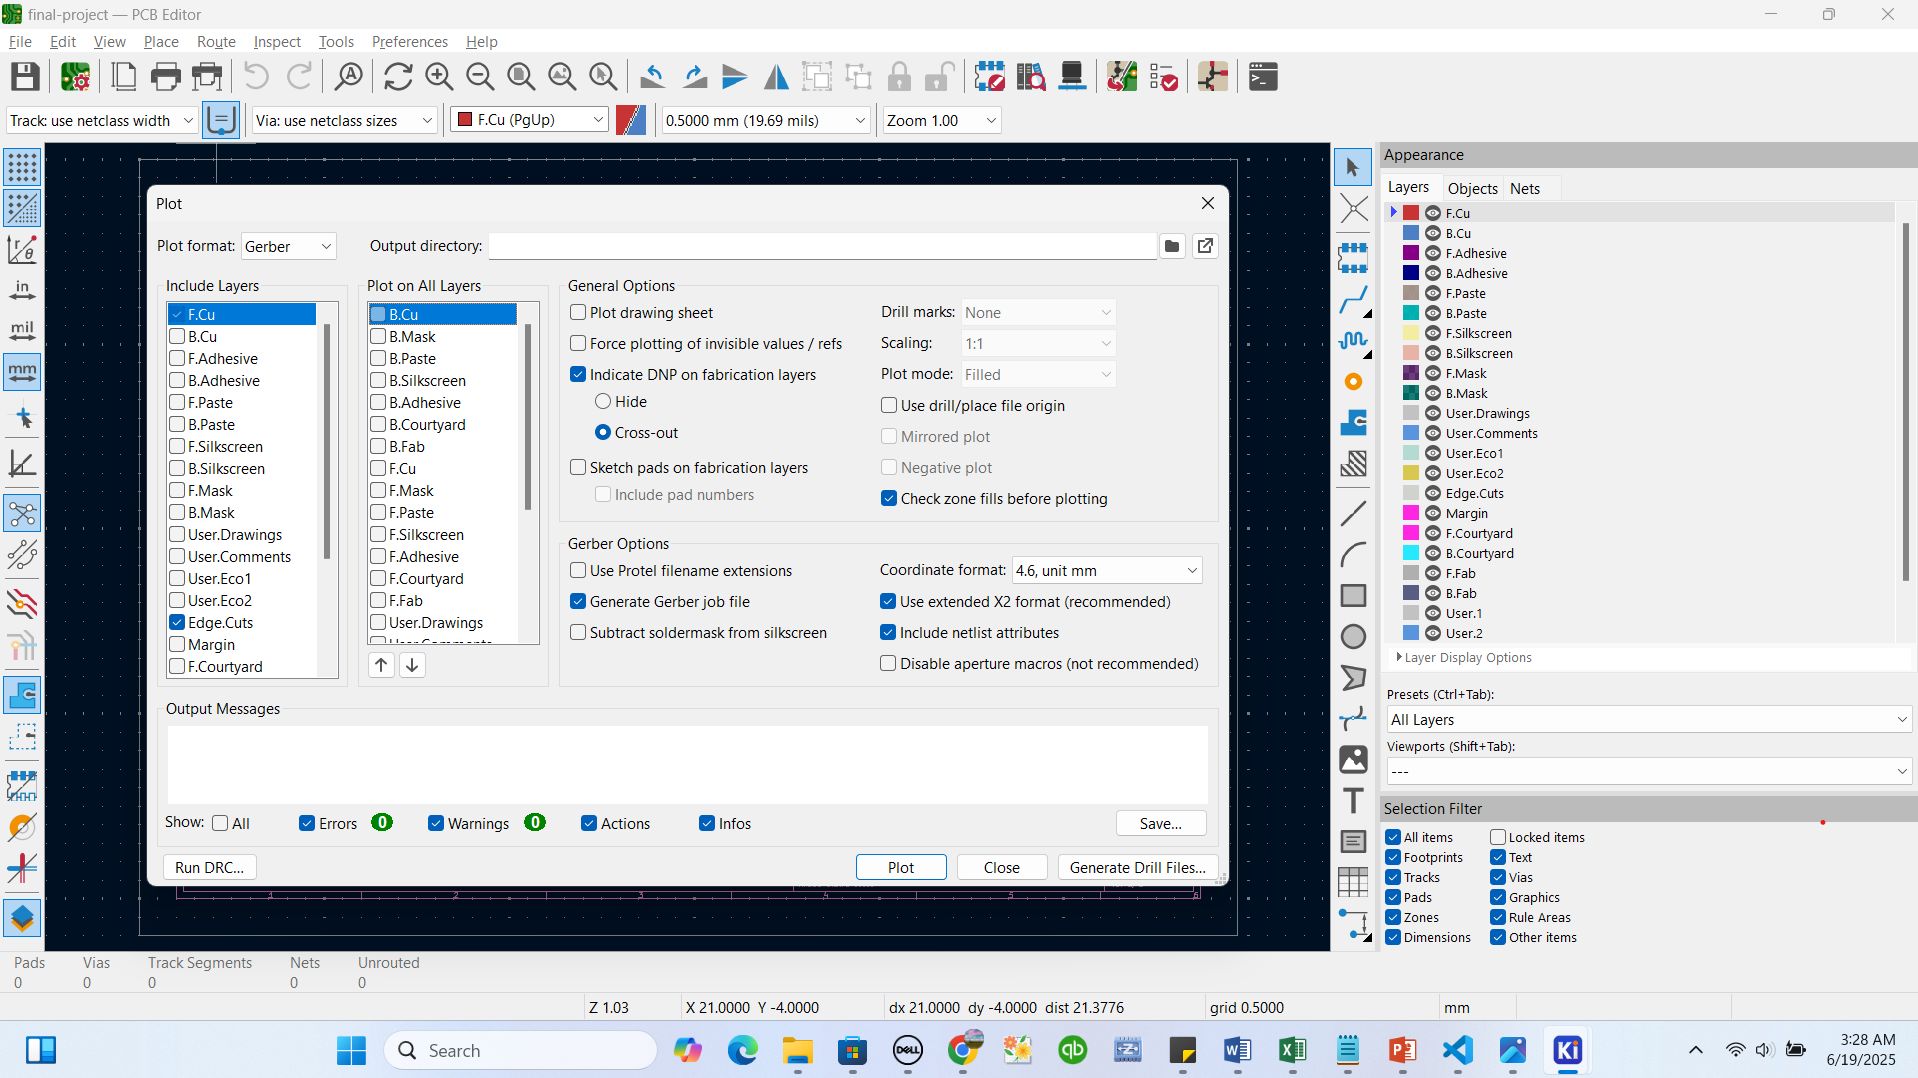
Finally, I plotted the PCB layers (top copper, outline, drill) and exported them as SVG files. These were used for milling the board using the SRM-20 milling machine.
6. Generating G-code Using ModsProject
My file was ready to be converted to G-code so our SRM-20 printer could understand the plotted lines. I joined http://modsproject.org platform to perform this task. Mods CE is a modular, cross-platform tool designed for fab labs, enabling tasks like CAD, CAM, machine control, and automation through interconnected modules.

I right-clicked on the icon in the top corner and navigated through programs > open program.

From there, I selected the SRM-20 mill section and navigated to "Mill 2D PCB".
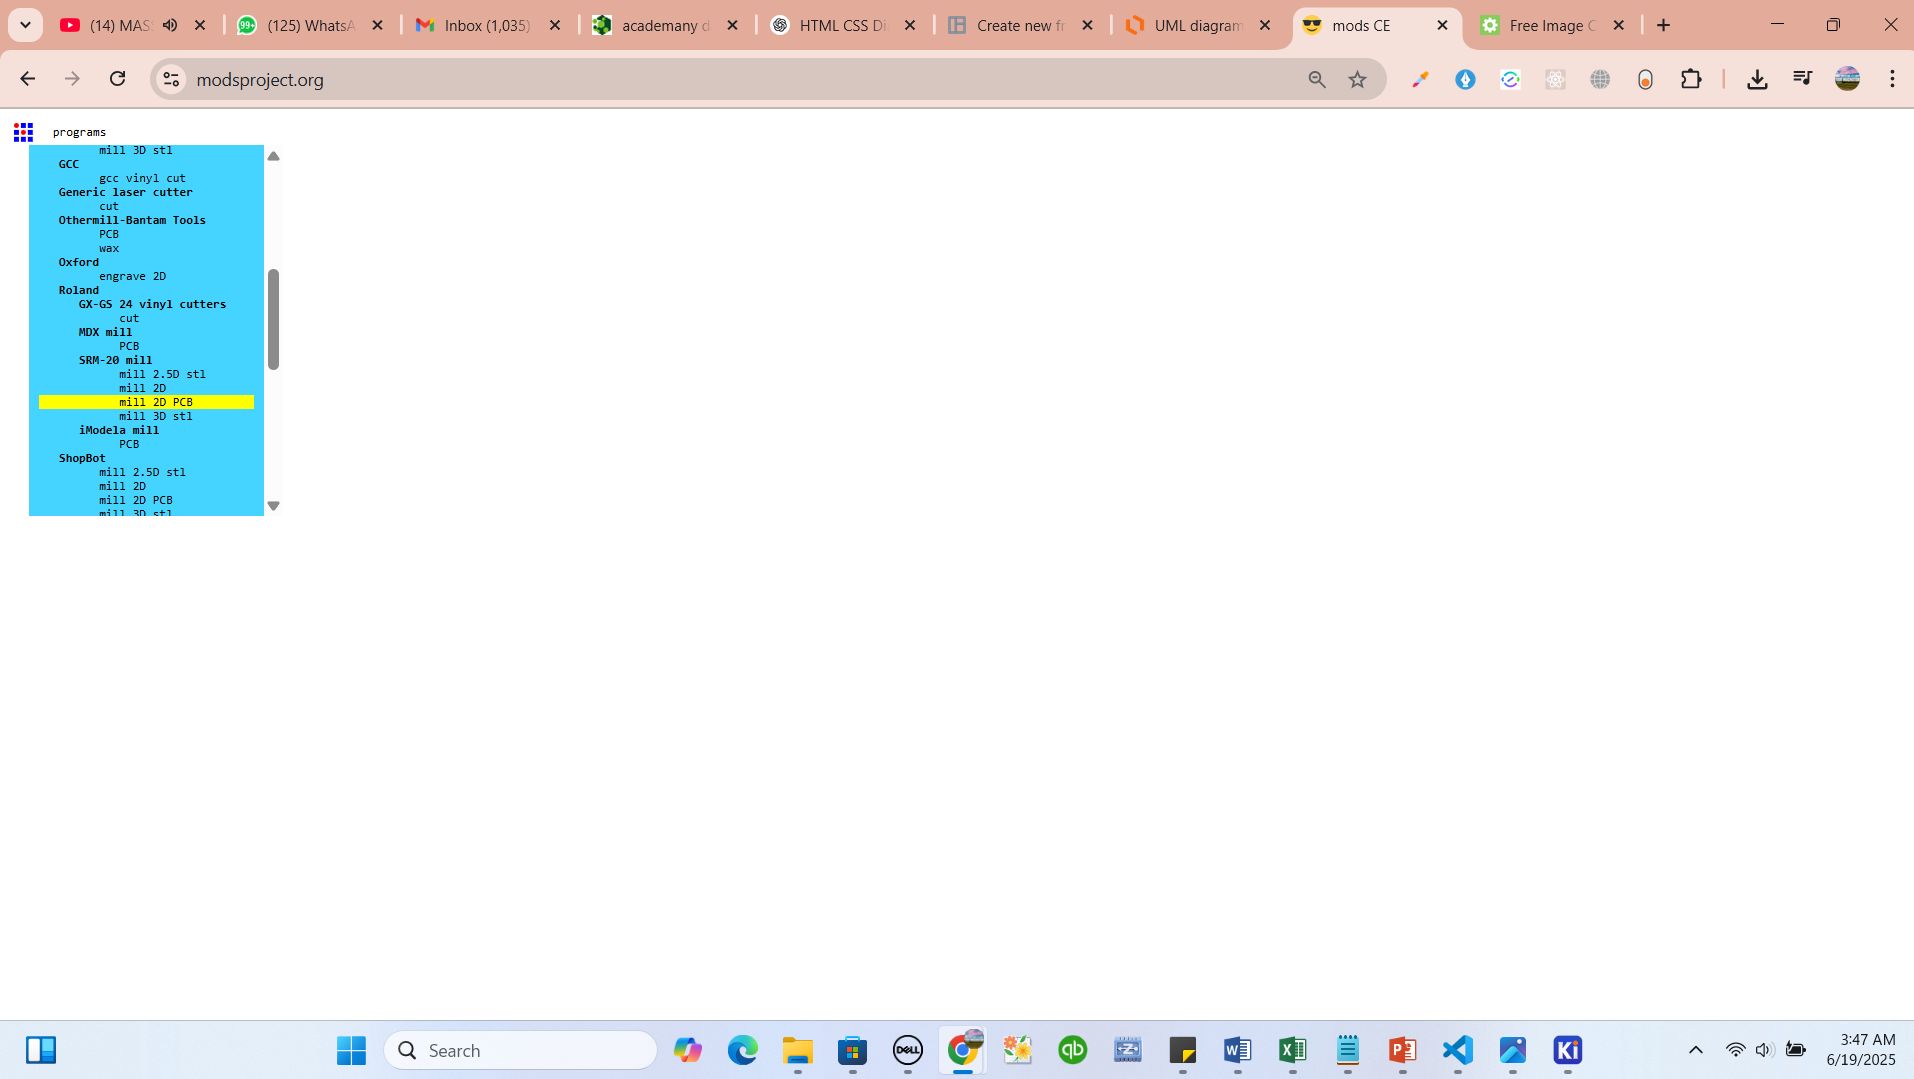
The page contained many modules and tasks. The main step was uploading my SVG file and following each step.
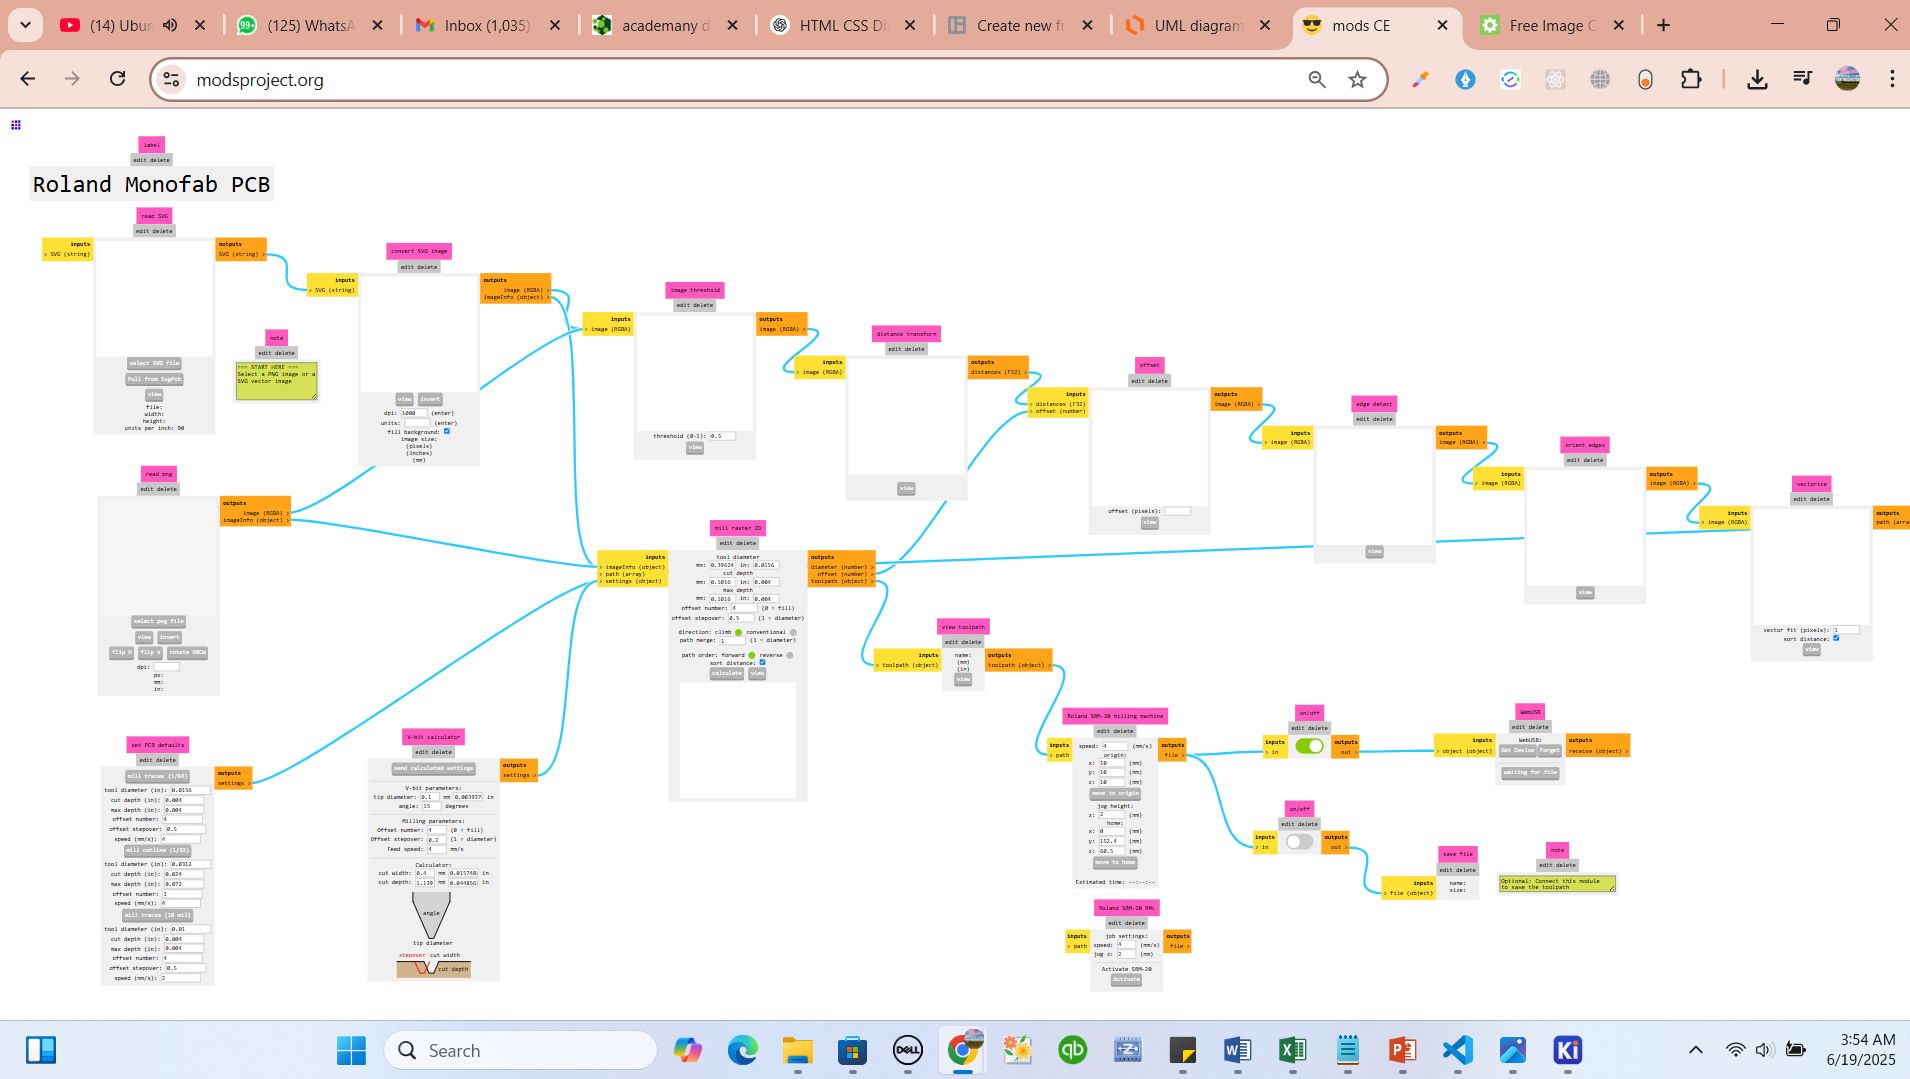
I clicked "select SVG file" to upload my SVG from local storage.

After uploading, I adjusted settings such as inverting image and choosing the appropriate milling tool and trace depth.
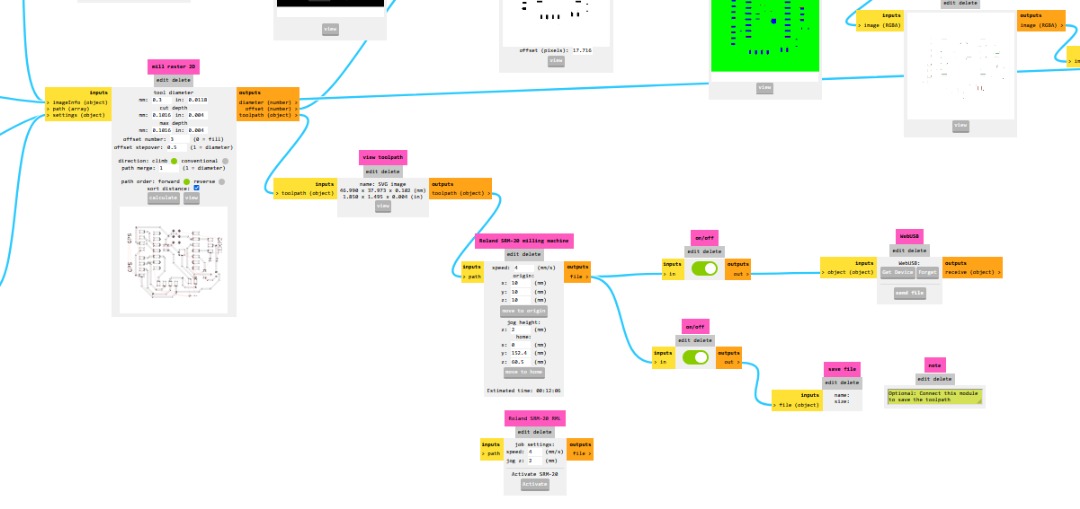
Finally, I clicked the export button to generate G-code and previewed the file using the "view" option.
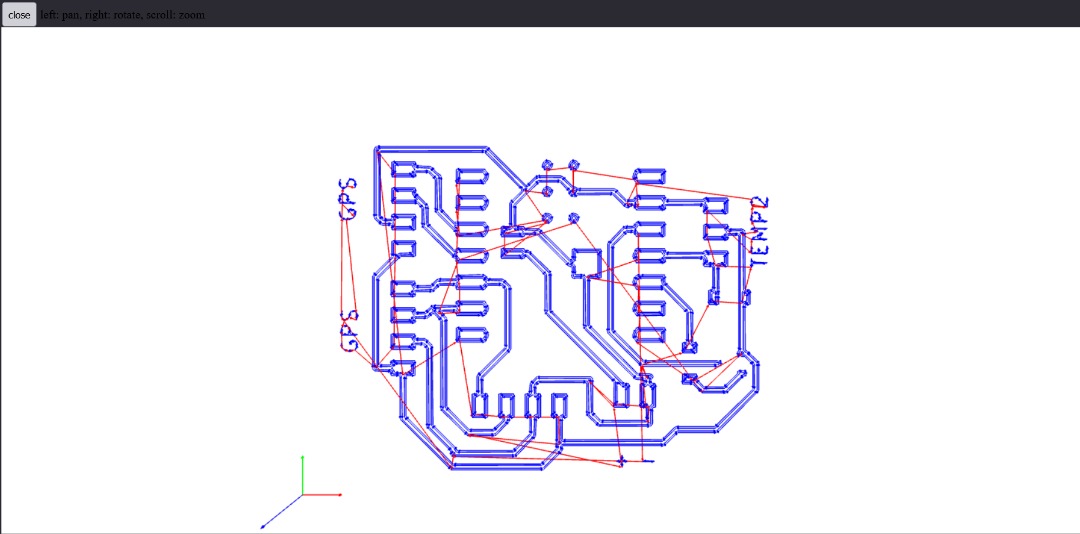
then from this part I was ready to print and that was my next move
here is the video showing how I printed it