7. Computer controle machining
this weeks assignments
Group assignment:
Complete your lab’s safety training Test runout, alignment, fixturing, speeds, feeds, materials and toolpaths for your machine Document your work to the group work page and reflect on your individual page what you learned Individual project
Make (design+mill+assemble) something big
Progress
- Grupp assignment
- Do safety training
- Document the saftey training
- Design the test piece
- Cut out the test piece
-
Induvidual assignment
- Design something big
- Cut out somthing big
- Document something big
Induvidual assignment
This week the induvidual assingment was to make something big design, mill and assemble.
I started by designing a chair in Fusion, i have before in week 2 document how i did use Fusion designing things and export the sketch in to DXF file then import that DXF in to inkscape and then make the cuting file from that so im not going to do that again here.
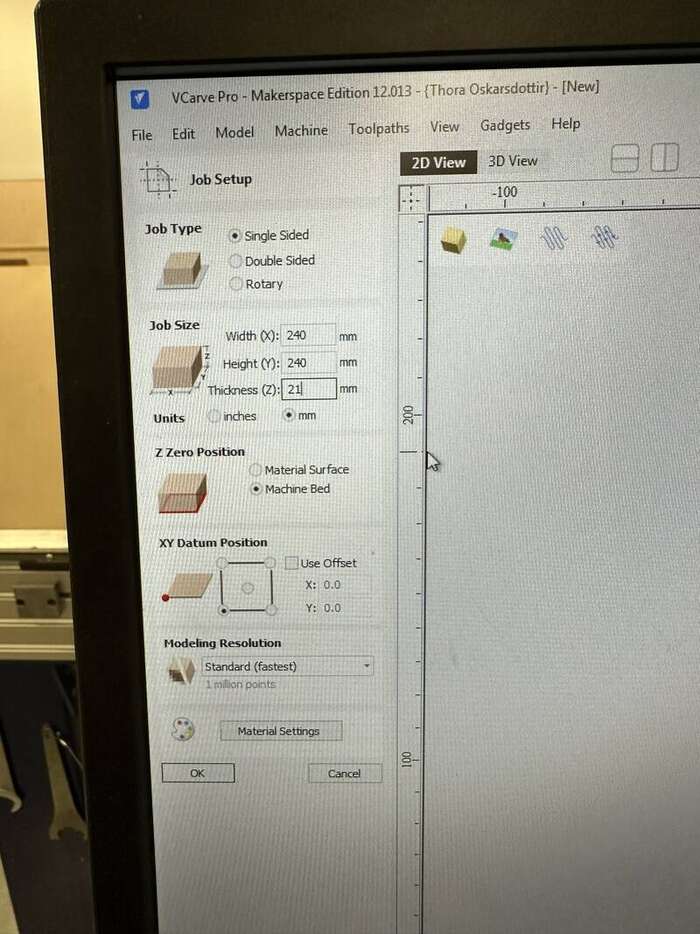
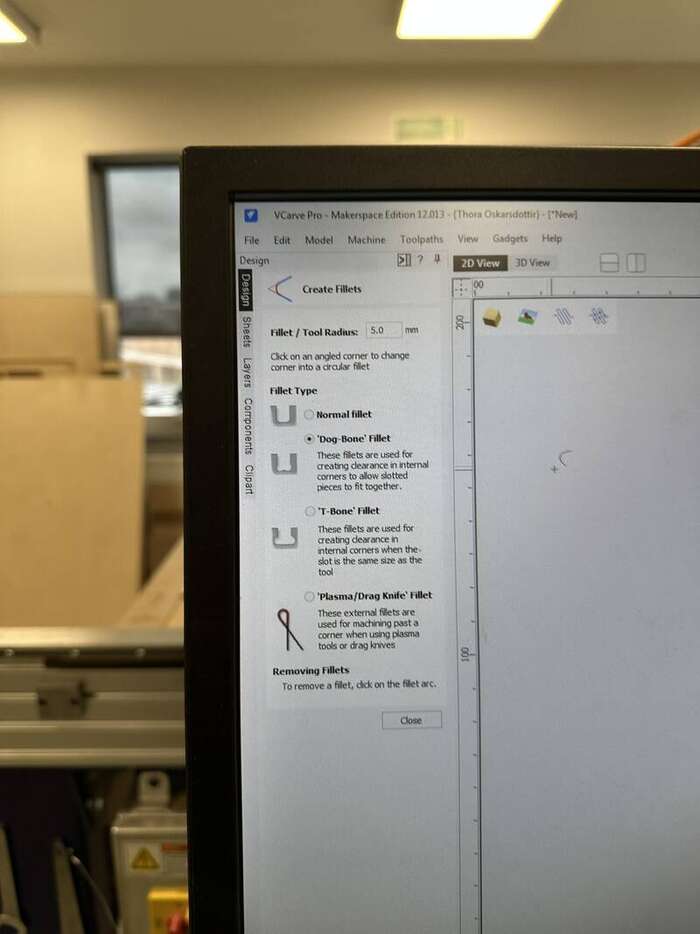
But new in this week is a program called vcarf that is the program we use to make the file ready to cut in the shopboot mill.
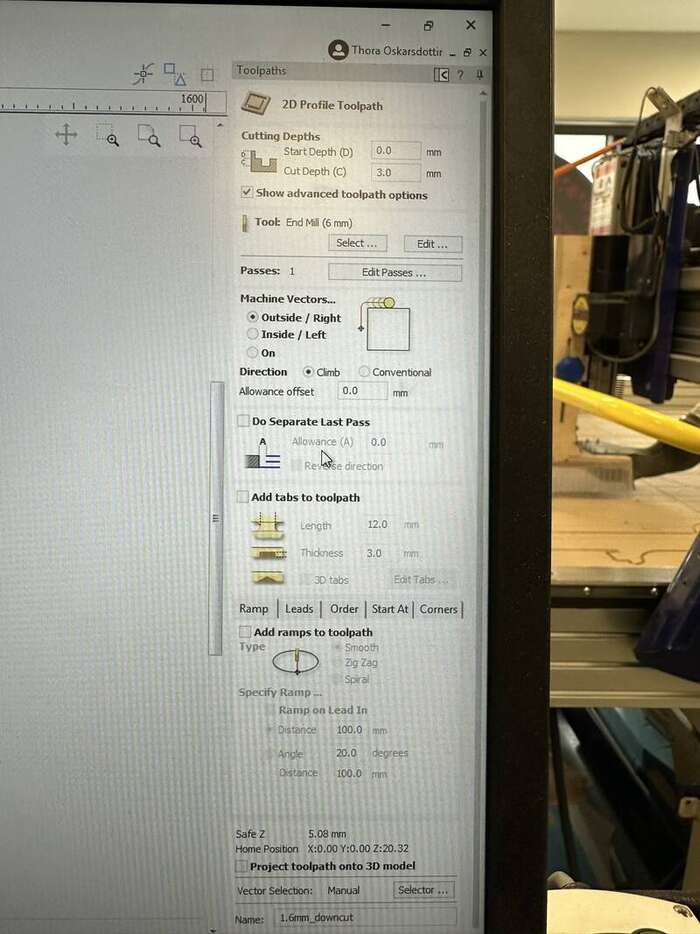
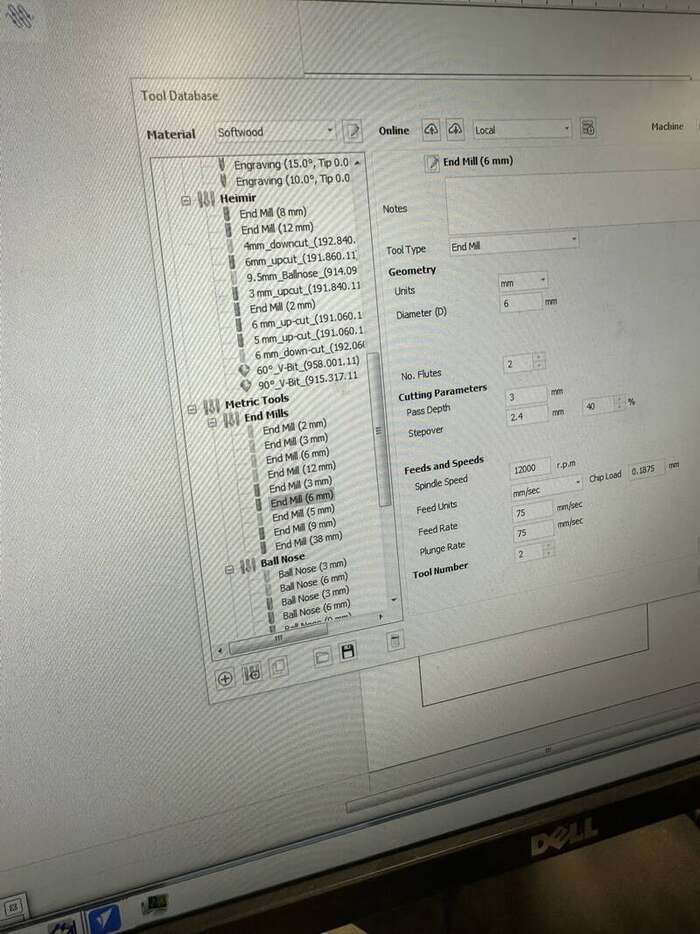
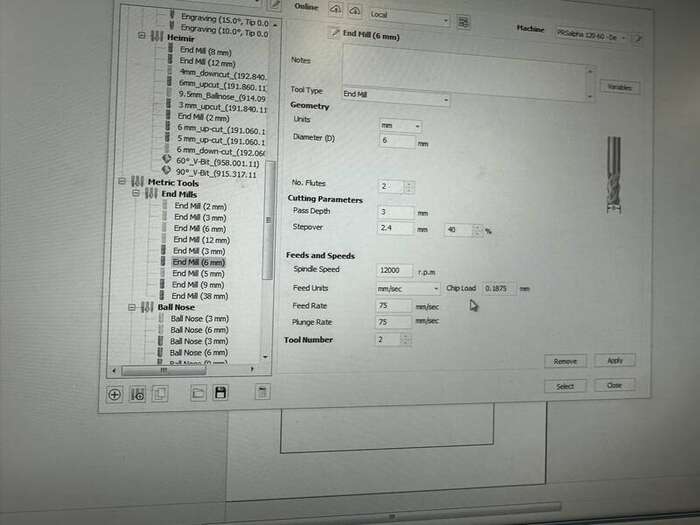
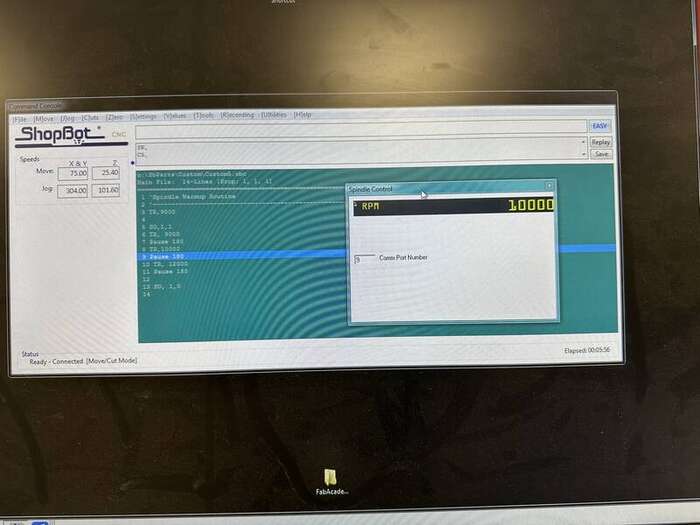
Here is the documentasion of how i used the Vcarf and the shopboot mill it self.Here are the main settings for the machine in this project:
- speed 12000 rpm/m
- feed 1.5 IPS (90 IPM)
- cuting
- 6mm endmill downcut the first 3mm
- 6mm endmill uppcut 3mm every round until 12mm total have been cut
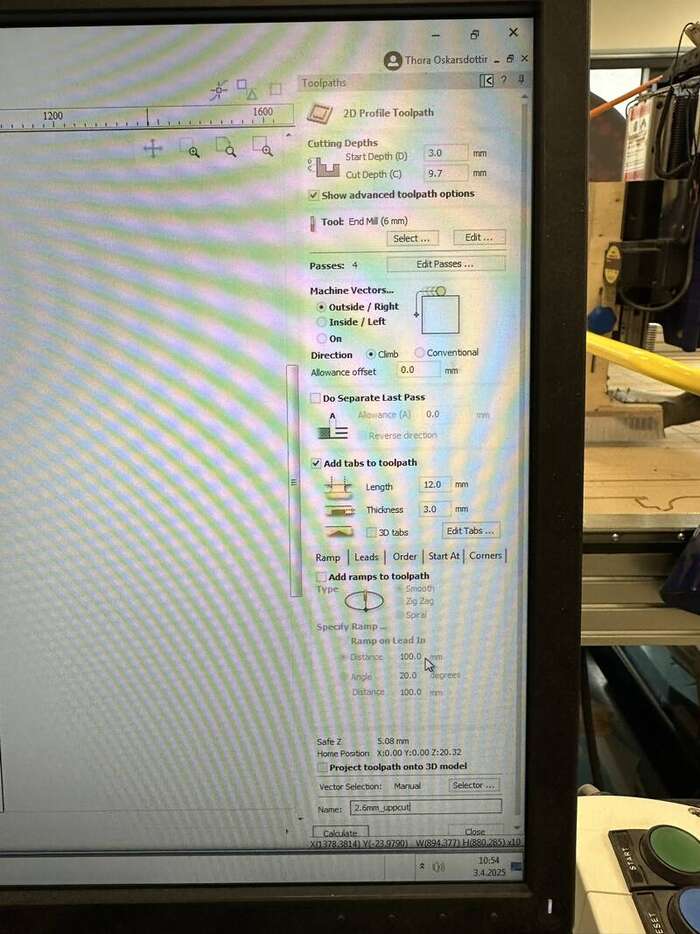
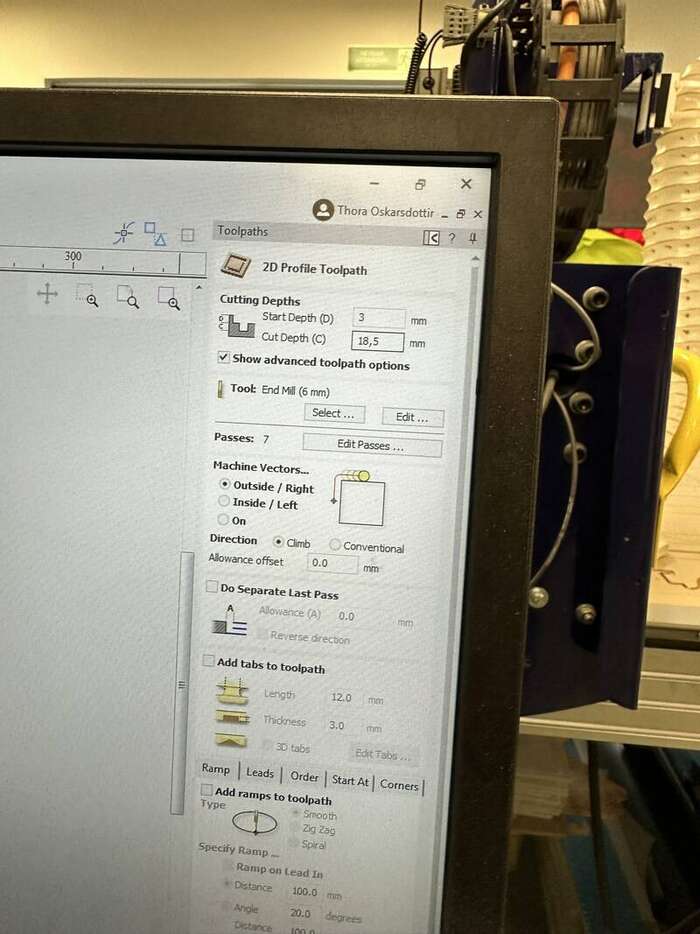
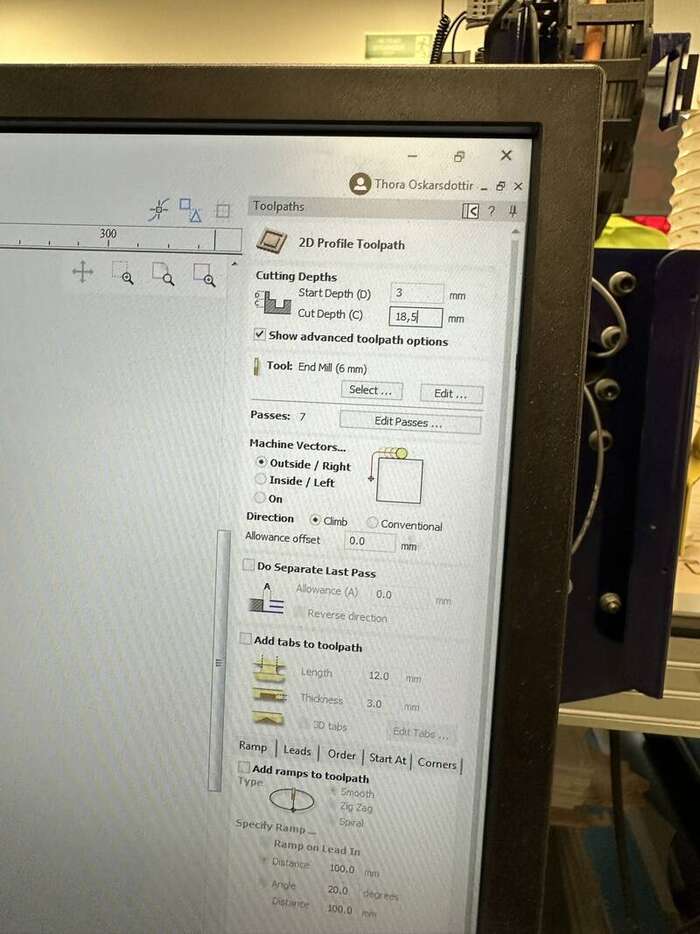
On this pictures you can seee how to setup the file in Vcarf before it send to the shopbot machine, first one show how you setup the page/working area, second one show how you setup the toolpath and the third one how you add tabs so the peices will not get lose when the machine cut throug

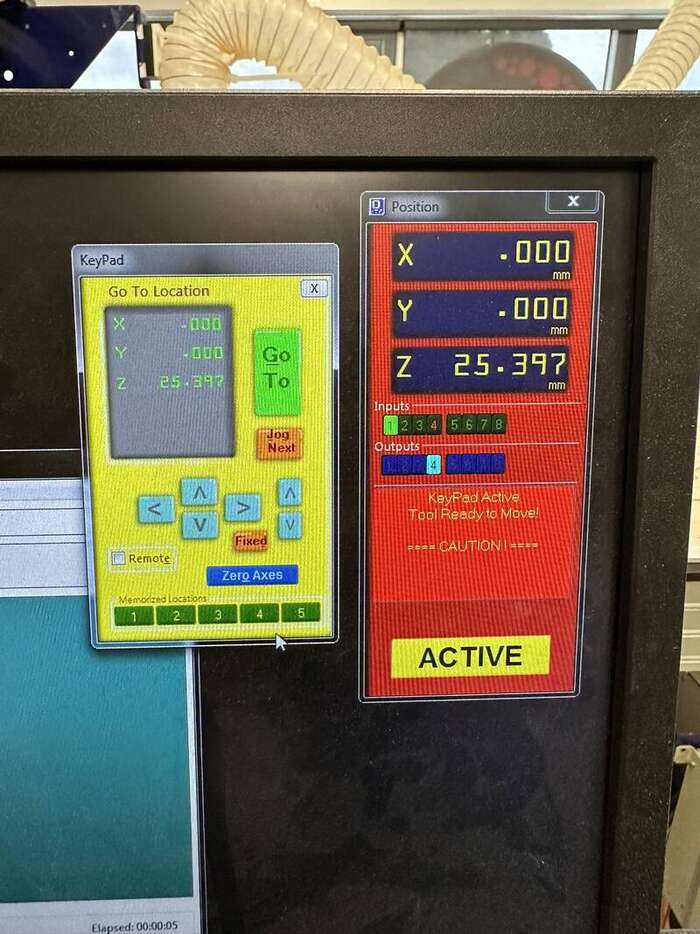
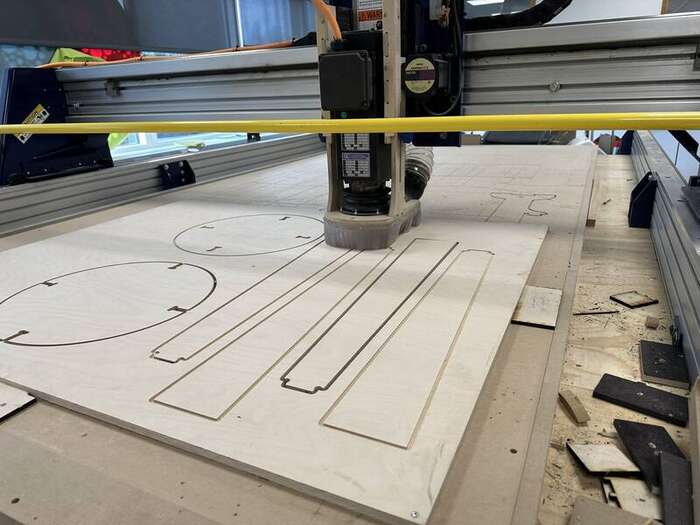
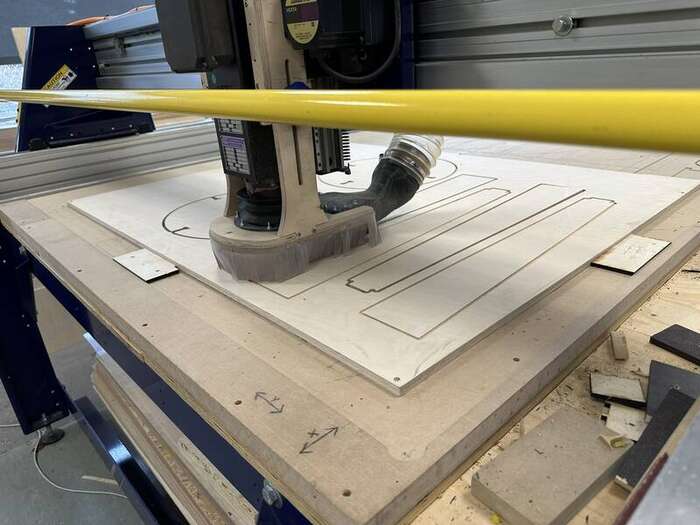
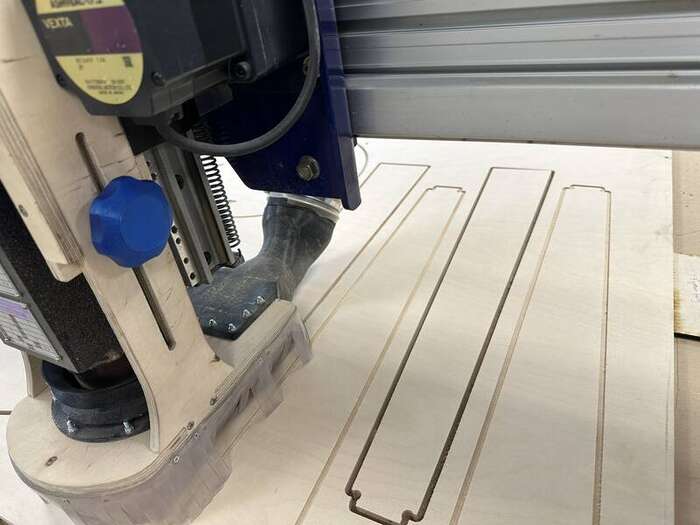
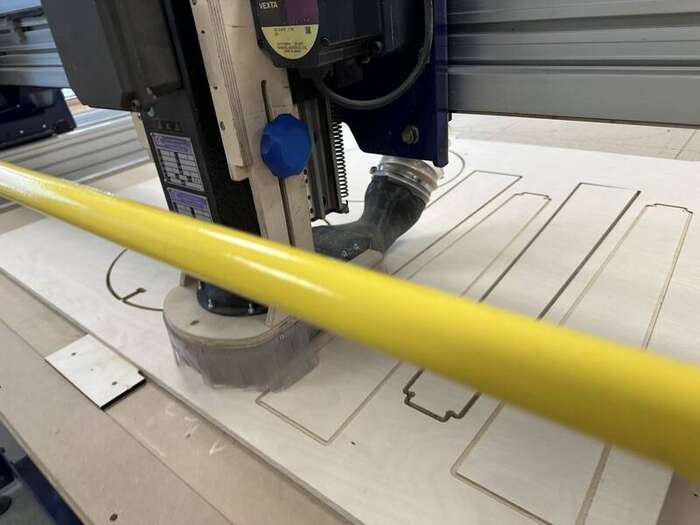
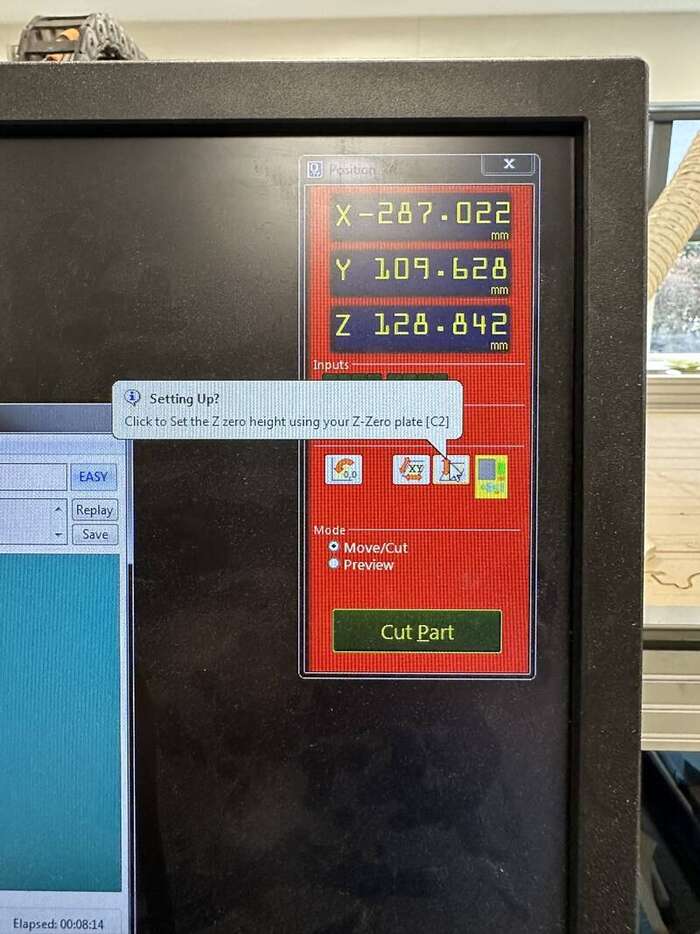
Then here are some picture of the milling process. First we see how tha machin is sett up then the milling process it self. First we see some pictur of how to set up the shopbot , how to zero the axes, then few pictures of the milling process.


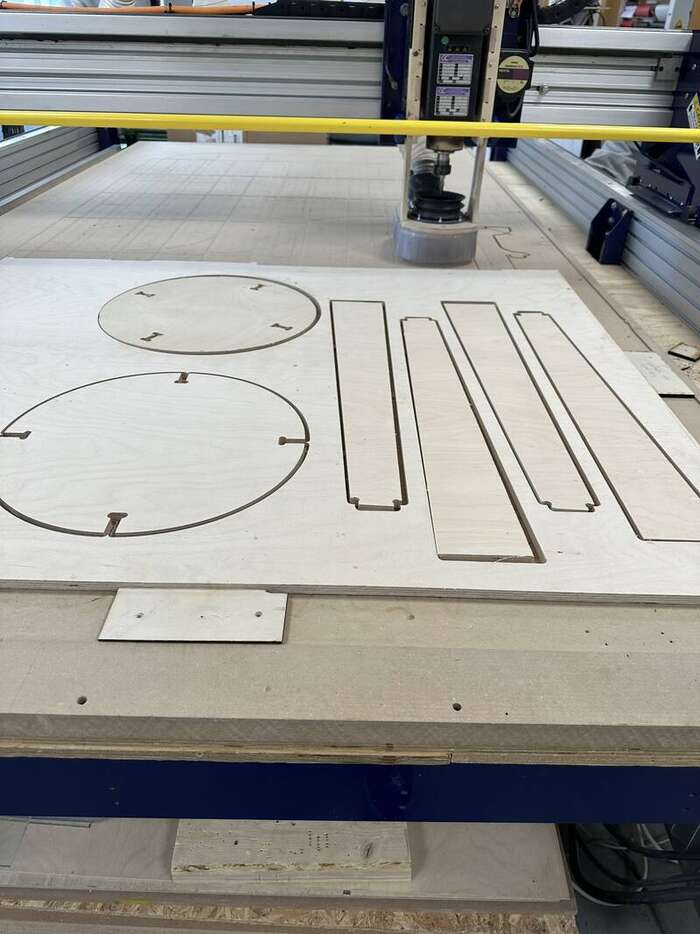
Here we see when the Shoopboot machine is working on cuting out the chair.

And here we have little video of the milling process.
Then after this i sand down little bit the material to get rid of the rough edge that was on the down side of the material, i also had to sand down little bit the edge of the feets that was going in the hole on the seet to get it in there it was maybe half a mm to big. After i did put the feet and the seat to geather i decided not to use the lower plate on the chair cause i thought it looked better with out it. here is picture of the final product.
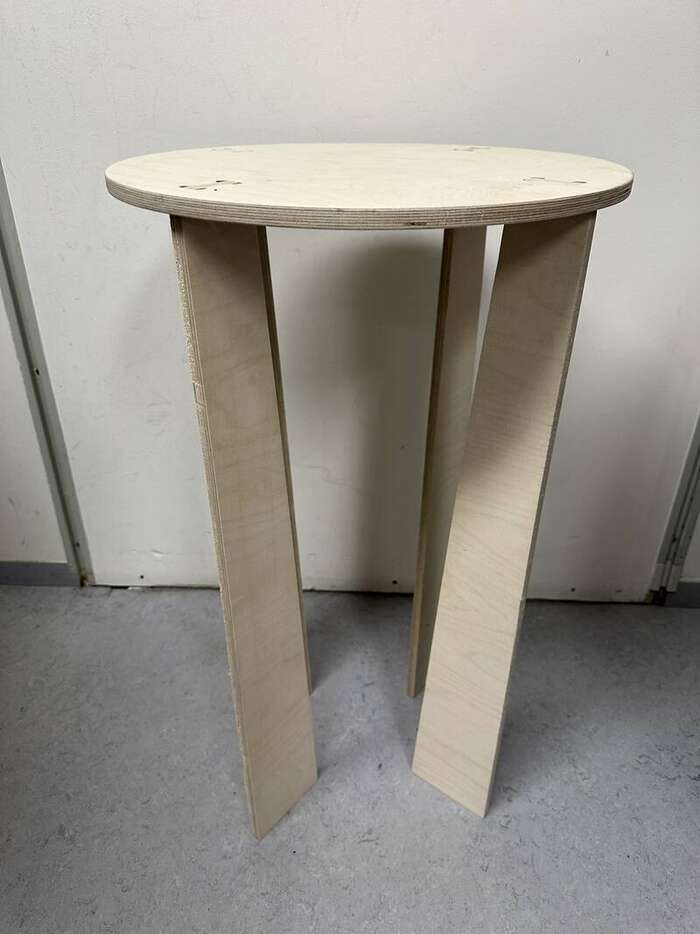
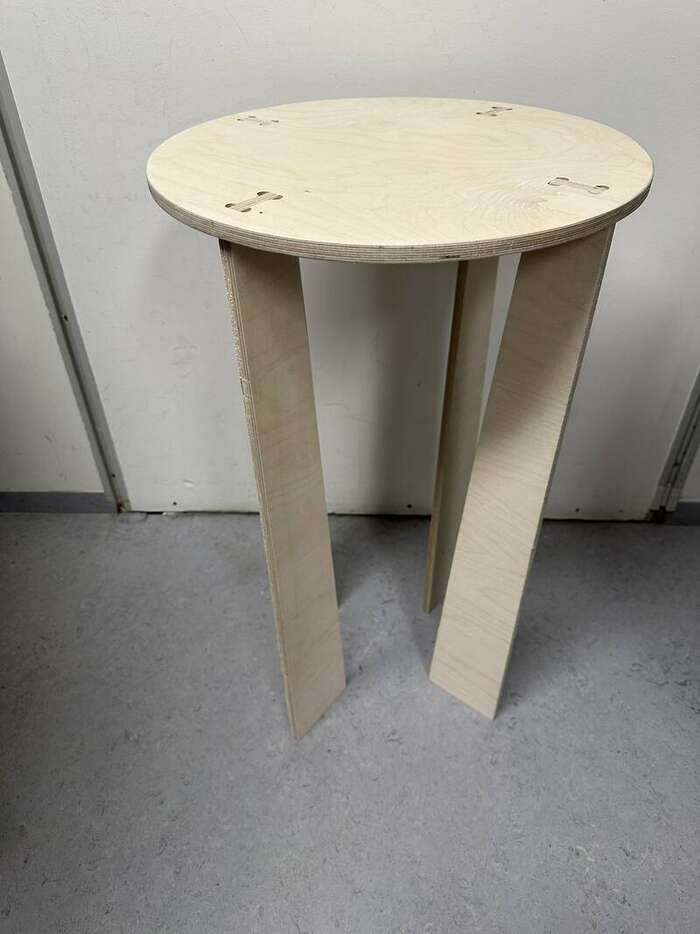
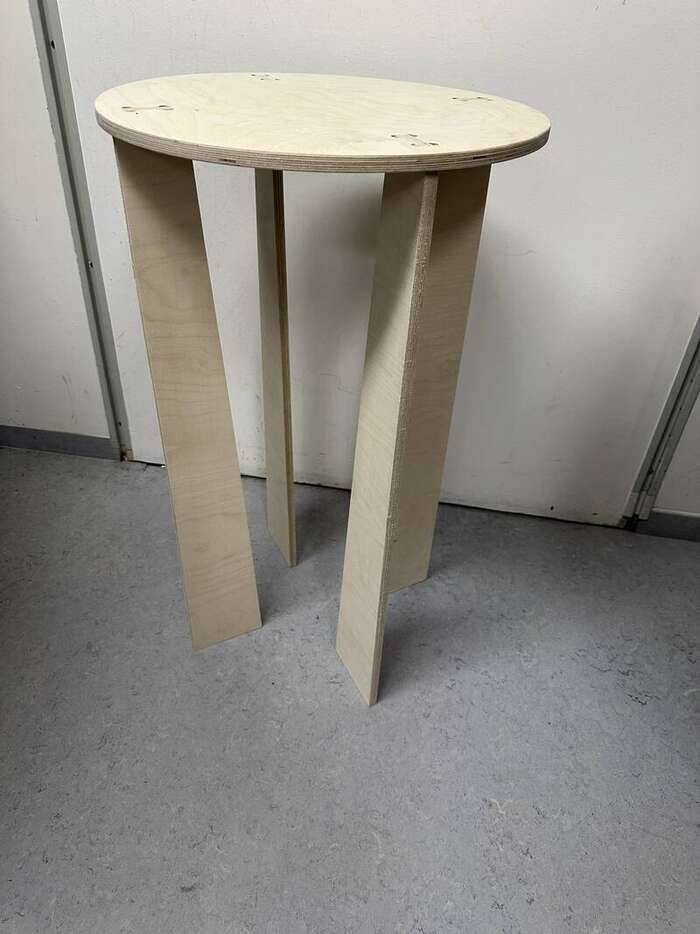
This chair is little bit high there fore many people that have seen it thinks its rather table than chair. I think that might be right so from now on i think i call it the a TABLE
I am also planing to use this table in my final project.
Grupp assignment
This week grupp assignment is to complete the safety training in the lab. test the mill ruout, alignment, fixturing, speeds, feeds, materials and toolpaths and document in grupp page and reflect in the induvidual site.
Safety training
In Fablab reykjavik we are four students, one day wi did gather in the lab and did go over the safety instruction for our Lab

There are allways few thing we need to be aware off
    1. Were eye protection
    2. Were ear protectjon
    3. Always protect long hair by having hair net or pull it back
    4. No open shoes, always were close shoes; (here im little troubled caus i have been alot around big machinses in my lifetime then we always were safety shoes with hard to like steel or kevlar, and i think it should be used all time around this machine were you are working with heavy material and tools)
    5. NO loose clhoting(always make sure your clohts are tide and can not be grabed by the machine)
    6. Keep hands away always, if needed to bring your hands near the machin make sure the machin si stopp and cannot be started by taking out the safty key
    7. Were safety gloves. **ONLY WHEN MOVING PLATES NOT WHEN WORKING ON THE MACHINE**
Then after we did go over this few points our instructor Andri Sæmundsson showed us how the machine works, He did show os how to setup the machin in the computer how to preaper the file for cuting, how to change the mill bits how to zero all the axis how to start up the machine and the vacum. how to and how importand it is to make sure the wood you working with is stuck on the machine, how importand is to make sure that nails and screws wont get in conntact whil the mill bits and if that happens then we need to check out the vacum to make sure no sparks have go in there as the materila in the vacum bag is highly flamable and could be to a big fire in seconds. He did also explane why it´s important to make sure the bit sit stuck in it´s place. The biggest danger in the prossess of using this machine is fire cause we are working with highly flammable material and heat so it´s not hard to get fire if we are not carefull.
Other danger is moving parts that can easily grab things like hair, cloths and gloves and cause serious injury or death, so always be carfull around the machine never work on it while:
    1. Tierd
    2. Alone in the lab
    3. Never leave the machine unattended
    4. Always use the vacuum
Group project
Link to group page This week group project we were supposet to test the shopboot machine in our lab, i got the task of testing the runout in tha shopbot we have in our lab.
About the machine

Working area: 2760x1500x180mm
Files: SBP
Working the project
Machin settings:
- speed 12000 rpm/m
- feed 1.5 IPS (90 IPM)
- cuting
- 6mm endmill downcut the first 3mm
- 6mm endmill uppcut 3mm every round until 12mm total have been cut
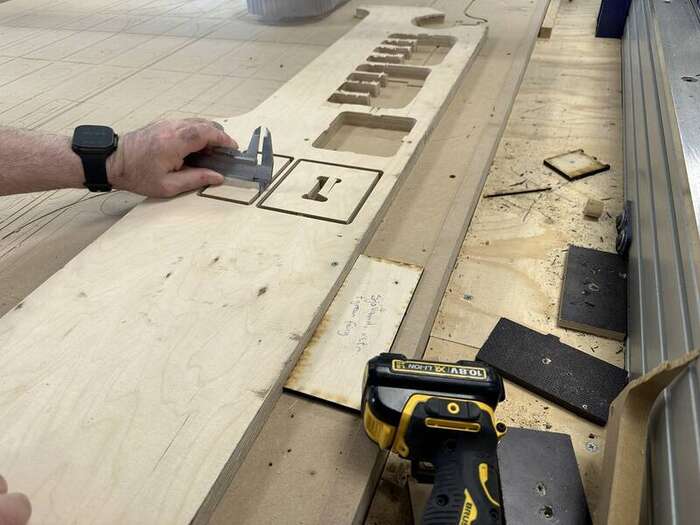
I was going to test the Runout and the alignment, runout is to test how the machine will mill if anything will be abnormal in making hole and an end that will get in that hole, that means if the acuracy of the milling process is on or off. alignment is to test if the machine can make squre with solid 90° corners or not.
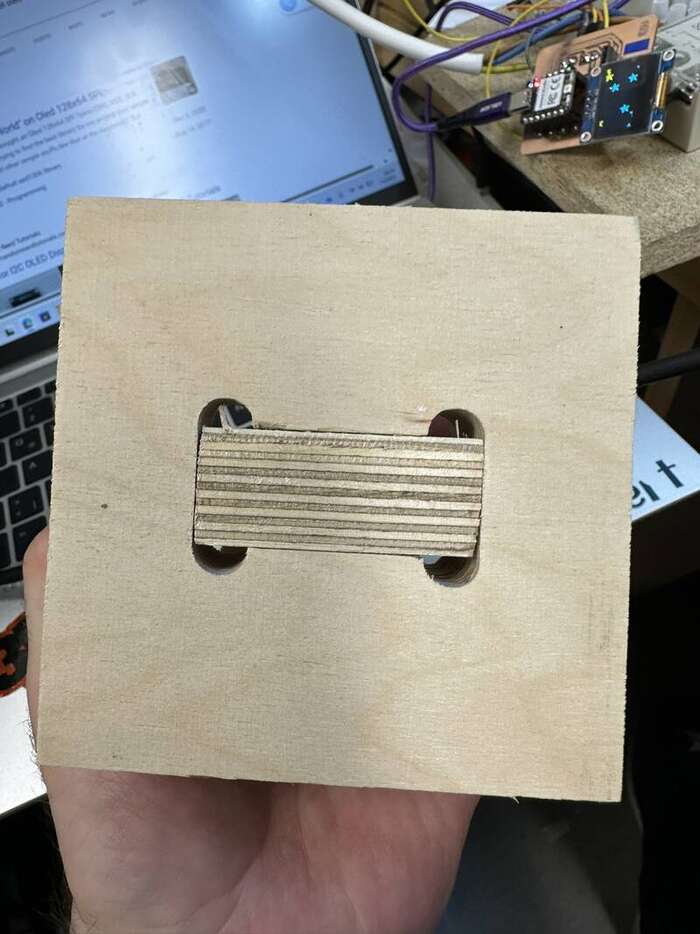
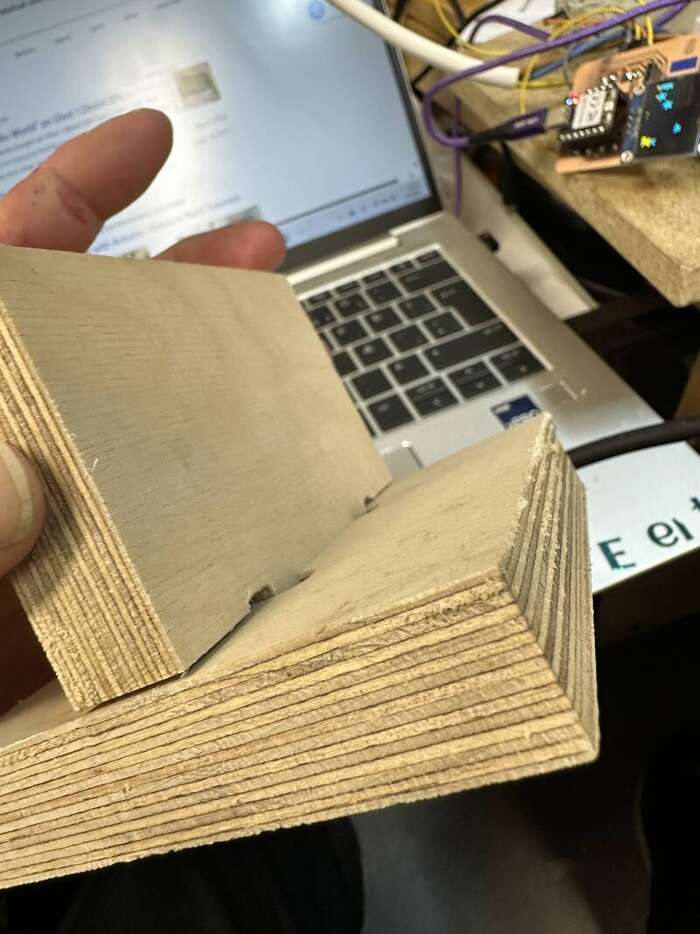
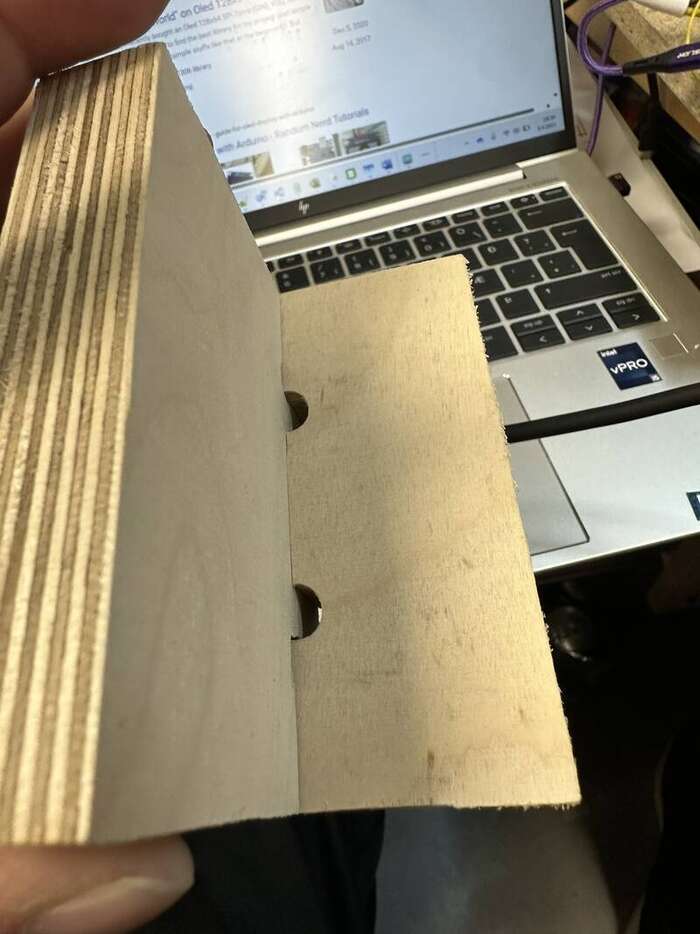
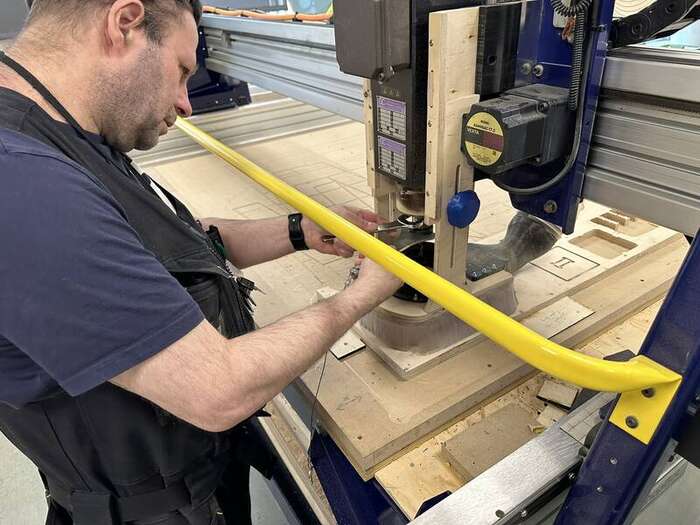
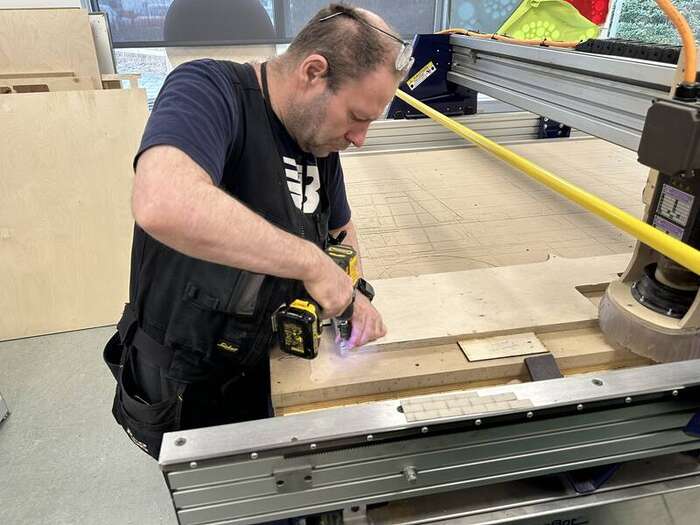
i startet by making the file in vcarf that i was goin to cut out. after that i went on prepering the file for cuting, in this serie of pictures we can se how the setings and toolpath was done, we can also see how we told the machine what endmill bit it was using. in the third row we see how we did the spindel warm up, zero the Zaxes and me working on changeing endmill bit, in the fourth row there is me securing the material befur milling, then i am measuring the runout.
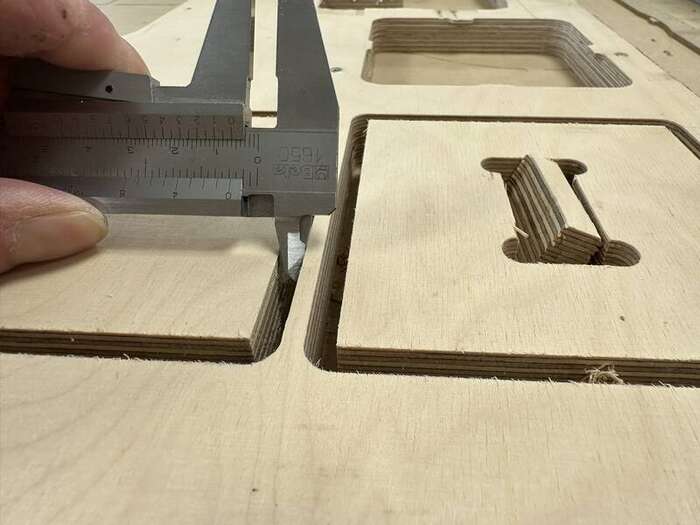
Like we can see on the last to pictures we measure 6mm as this was cut out with 6mm endmill we now know that there is no runout on the machine if it was runout we would most likely measure more than 6mm gap there, we can also see on this pictures that the peice is cut out in good and nice squere whit good corners so then we can be quite sure the alignment on the machine is good.
Here are some picture of the final test.