5. 3D Scanning and printing
Assignment
Task: 3D Scanning and Printing
Group assignment:
- Test the design rules for your 3D printer(s)
- Document your work on the group work page and reflect on your individual page what you
- learned about characteristics of your printer(s)
Individual assignment:
- Design and 3D print an object (small, few cm3, limited by printer time)
- that could not be easily made subtractively
- 3D scan an object (and optionally print it)
Research
This week i had alot of totaly new things to work with, only thing that is not new this week is the 3 printer i own my self a Bambulab A1 printer with AMS, fantastic machine i had since october 2nd 2024 it has already run over 600 hours. never had any problem with it that is not user related. i have done alot of things with that printer. About the research work this week i did make a google search on 3D scanners and found out there is a wide range of scanners on the market, i also found out there is many 3D scanner apps out there that realy do works. After a long time looking through all the apps, i was down to 2 apps that i had to choice beetween scaniverse and Kiri engine, in the end i choice Kiri because it was referd to me by people i kvew.
Then it was the design i used Fusion to make a hings, i have very little experiense in Fusion and othe 3D programs. so i had to find out how to do this, so i started by asking Copilot How to make things in Fusion, i got script that works until makeing the joint it was useless for me as a beginer. Then i went in to Bing search engine and found few videos that explain how to make hings with joints some of them more basic and other more advance. one of this videos was very good and lead me to the goal of making hings in Fusion.
This week i also did make reasherce on how to add HTML code in Markdown to get 3 pictures side by side, there i got great help from chat gpt and webpage calles w3school
Grupp assignment
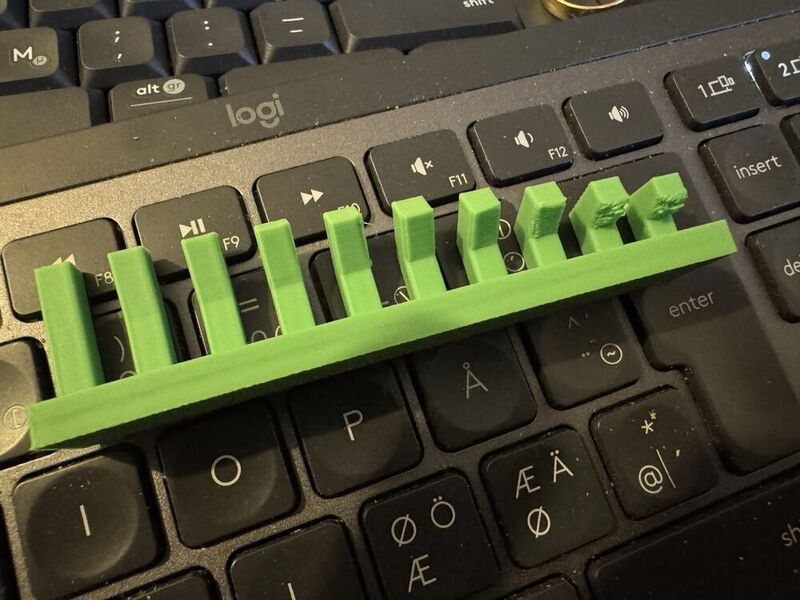
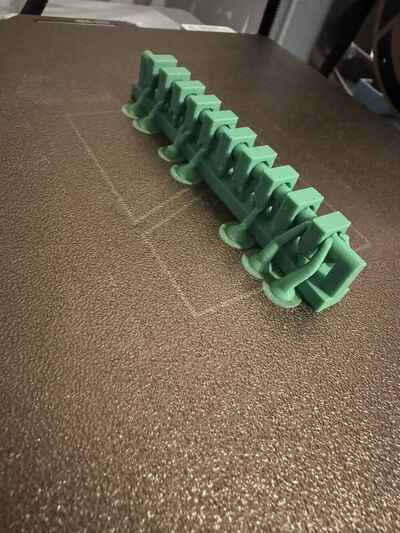
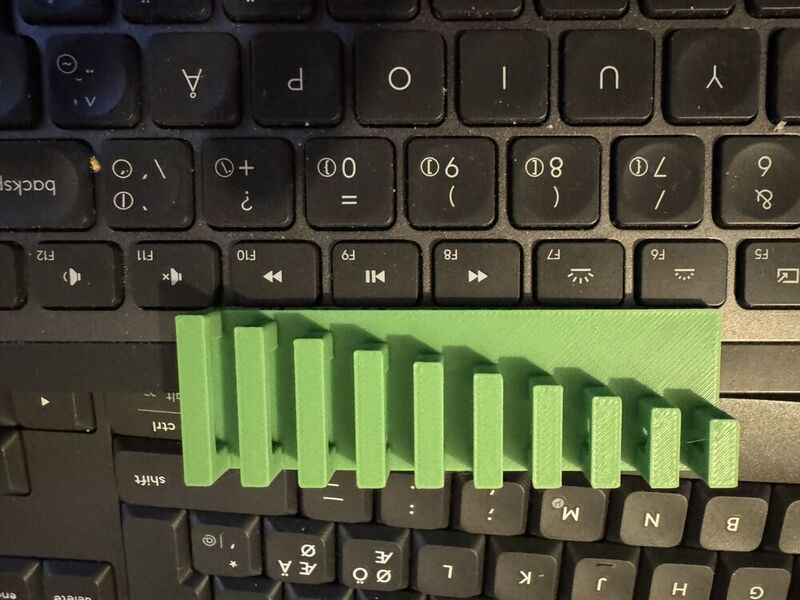
This week it was responsible to test bridging and angle on my bambulab A1 printer, i decided to test my printer and printet out all the files that Neil showed oss on the Fabacademy site. I printed them all one by one to get the best result, not sure if it will be good or not to print them all layer by layer on the same build plate. but thought it would be better to print it one by one.
here is sample of my test print it will be coverd better on the gruppe class site
3D design and print
In this part of the assignment did i decided to make simple hings. I started by finding a video that shows how to make hings with movable parts that i could print out as one piece.
I found few some good other bad but in the end i used this video from Bing search enginge
I followed the instruction in that video and could use it all the way. This was realy good instruction.
- Open Fusion > New Design
- Make new sketch:
- I used rectangular tool making rectangular that was 150 x 70mm.
- Then press E on keybord and extrude that 5mm upwards
- choice new component in extruder window

- Then i made new sketch to make the cylinder on top of the plate.
- Extruded firts cylender.
- Then used rectangular pattern to make the two other cylender

4. Then i used the same sketch i used to make the first plate to make the second plate, i had that plate in same size and the first one.
- Then i used extrude and offset function in extrud to make the tvo cylinder on the second plate.
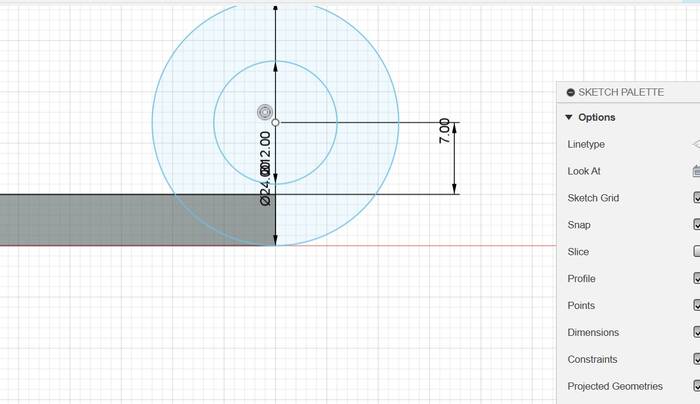
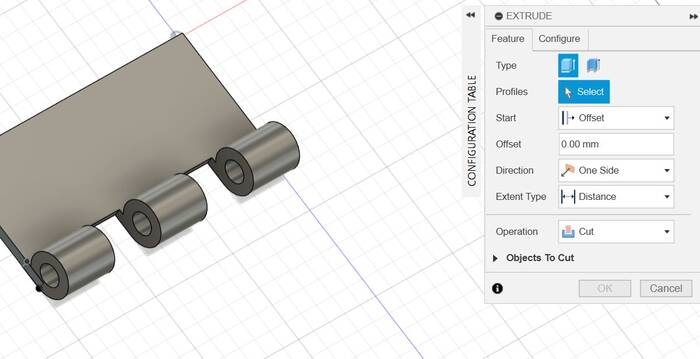
- Then i made the to cylender things on the second plate from the cylynder sketch. i used extrude and offset function to do that.
- Then i did cut out from the plates beetween the cylinders. using extrude and cut settings, as the picture above shows.
- Then i did make the cylinder in the middle new sketch and extrude i used the hole in the middle of the cylinders i already had to make that sketch and had it little bit smalller diameter that the cylinder i refered to.
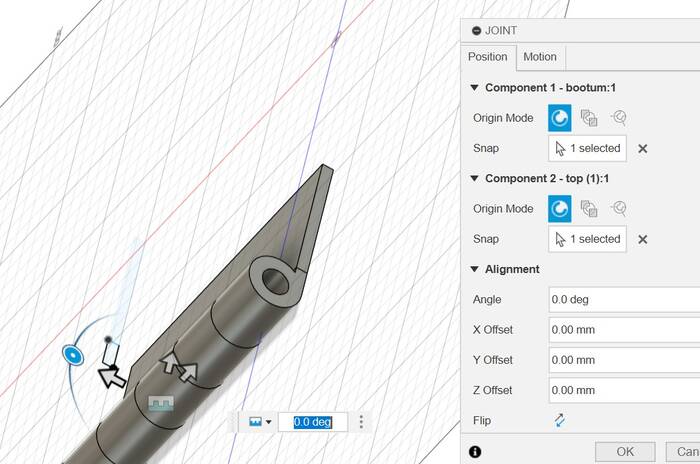
- Then i made joint, i did use revelution joint.
- In the end then i went to assemble - As-Build joint to tie it all to geather.
Then i ended up with this, it`s not perfect but my fyrst attempt to make something in fusion that have Joints. I am relativly happy with the result but i found out i needed little bit more clerance between moving parts i did fix that mostly but in the end when i printet it out it was stuck to geater in one place about a 0,5cm big area and i manage to cut thrug that with a knife and then that hings worked great. I think this was do to a flaw in designe were i didint make right clerance in all places, it was the extrusion that i did fail on, beetween the plates it selfs, its needs minimum clerance of 0.15-0,2mm beetween parts so it will not fusion to geather. as we can see on the picture below in the red circle is were it got stuck to geather and only in thes to spots cause i didint extrude thes to hole in the plate long enough in that direction.


Finally i have video of the whole prosess
Here is video of printed hings and how they work.
here is the designe file for the Hings .f3d Hings .3mf
3D scanning and printing
I have never used 3D scanning tools before i find it facinationg that its posible to even scan things in and print out. I decided to use app called Kiri engine to do this task this app you can find here Kiri engine or in apple store i guess you can also find it in google stor i just didint check cause i dont have android platform.
This app is very simple to use, it is some limitation in free version, i did by the pro version just to test the price for one year was not so hige and is really affordable or only 54 dollars a year, that is not much if it something you use it.
But how its
When you are scanning things its quite important to have good light around the object that you are scanning. The object also need to be placed on a surface that will secure the bacground is not like the object it self so its easier for the scanner ti identify the object from it envirement.
I did try to 3d scann 3fase industrial electrical outlet i did 6 attempts 4 with Kiri engine and 2 with Creality CR-Scan Ferret Pro 3D scanner that Fablab Reykjavík owns
One of the Kiri scanns came out best i used photo scann to do that scann.
This was the prossess:
- open Kiri app on the phone.
- press the * sign on the buttom on the phone
- photo scan
- take photos/video
- choice auto then start walking around the object the phone will take photos automatic. becarefull hold the phone same distance from the object and dont go tu fast. in my case i took over 200 photos.
- press arrow on the right buttom
- now the kiri engine will make 3d model from the pictures.
This video show the best outcome i had from scanning with Kiri engine on the 3 fase outlet
I also did scann normal electrical outlet whit Kiri engine this was the outcome, i am realy happy with that outcome.
Here are the pictures of the things i scanned.


Here is a picture of scanning in progress

I will not put the files here they are just to big.
## Useful links