My Final Project
Old Idea...Temp/Humidity Sensor (3D Printed case)
After lots of trial and error, and changing my min several times. I have decided for my final project
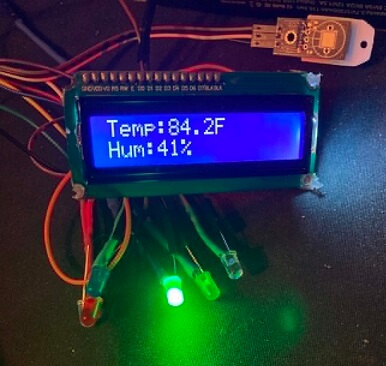
that I will create a temperature/humidity detection device. This device will read and display the current
temperature as well as the current humidity. The Lcd screen will provide this visible information with both
numerical values, as well as text to identify the status of the current temperature.
In addition to the information being displayed on screen, this device will also feature five 5mm led lights
that will respond according to the current temperature. If time provides I will add a humidity icon to the
right of the led array which will also alert user if humidity has reached an undesirable preset threshold.
Future iteratons of this device would feature rain detection as well as measure rain accumulation. These values
would be sent to a user's phone via text or by way of wifi through the weather app associated with this device.
This device would ideally be placed on a desk or a window seal.
What's inside ???
I will be using an arduino uno r3 board to run this device. The pcb's that were designed to go with this project
were not able to be used and configured in time. This was a result of bad planning on my part, and changing ideas
on what the final project would actually consist of. Most of the ideas were good and a degree of progress was made in
each project. But in the end, when considering time, cost, troubleshooting & replication of parts or entire device.
The most logical and effective approach would be to just go with this weather device.
Items:
=======
- Arduino Uno R3
- DHT 11 Temp/humidity sensor
- 16x2 lcd display w/ i2c adapter
- (5) Led array [white, blue, green, yellow, red]
- 5x 220Ω resistors
- 3D printed cases (using 1.75mm black PLA filament)
How everything was made
I used chatGPT to help me stitch some of the code pieces together. I already knew how to power on an LED, and send data
to the lcd screen, but I had a tough time getting the temp sensor to work. I tried 2 different sensors. The first one didn't
work. The 2nd one I tried worked fine but I disconnected a wire during testing, so I thought that this sensor did not work.
The sensor worked fine, I just overlooked a cable that I pulled out by accident. This made it rough trying to pull everything
together in a timely manner. So I called upon chat gpt to help me organize the code. I still made changes to make it work
which is expected with using A.I. So I surely leaned upon A.I. to make sure I was lined up all of my sensors using correct
power pins on the arduino board, because I struggled with choosing the correct ones. I had questions about power consumption
so I asked chat gpt if my setup would run without any major power draw from one sensor. But everything worked out great.
Here is access to the files and code used to create this device
Cinema 4D native file
Weatherbox stl file
J's Weather Box
Here are a few renders of my weatherbox. It displays current temp & humidity.
There are also messages on screen as well as color indicator lights that will illuminate
based on the current room temperature. The Final version isn't pretty by any means & I
really wanted to show of a better looking version of this device to show that I have learned
alot with 3d printing and machine cutting and carving. My 3d printer fell apart a few days
before upload deadline so I had to use my protype sketch model as my actual show piece.
I should have been more prepared, but I wasn't.
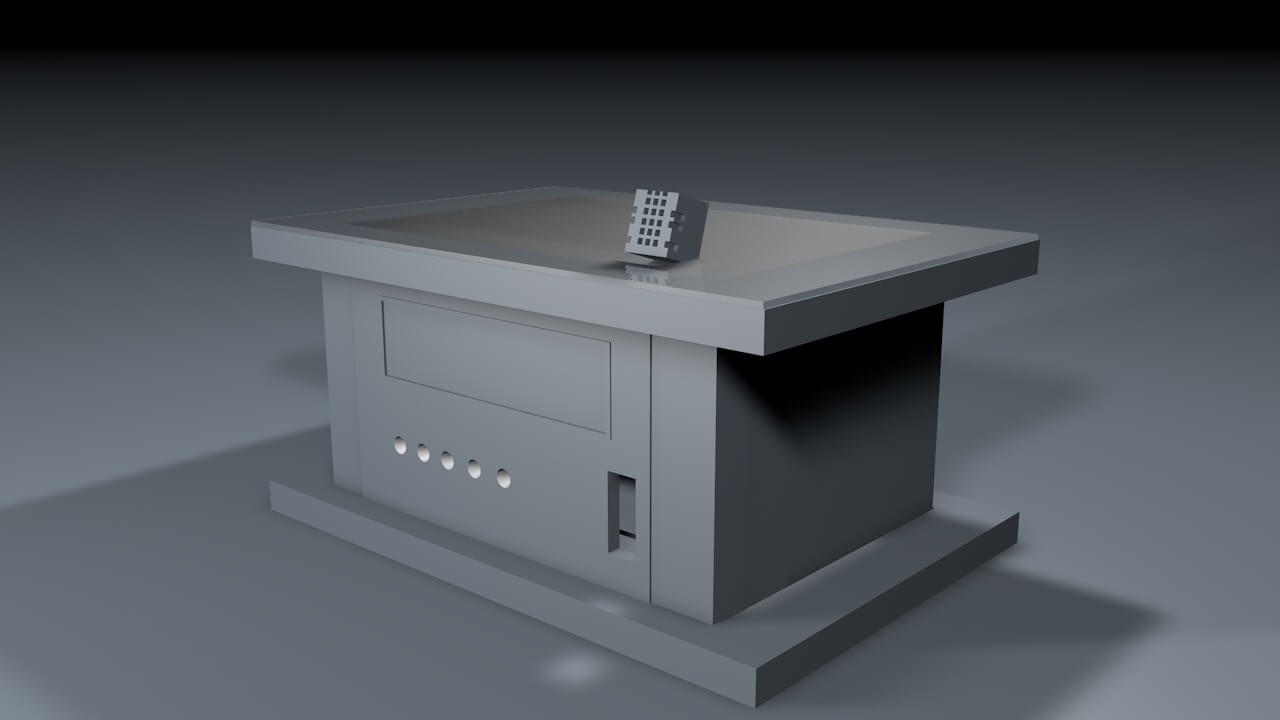
Grey Render
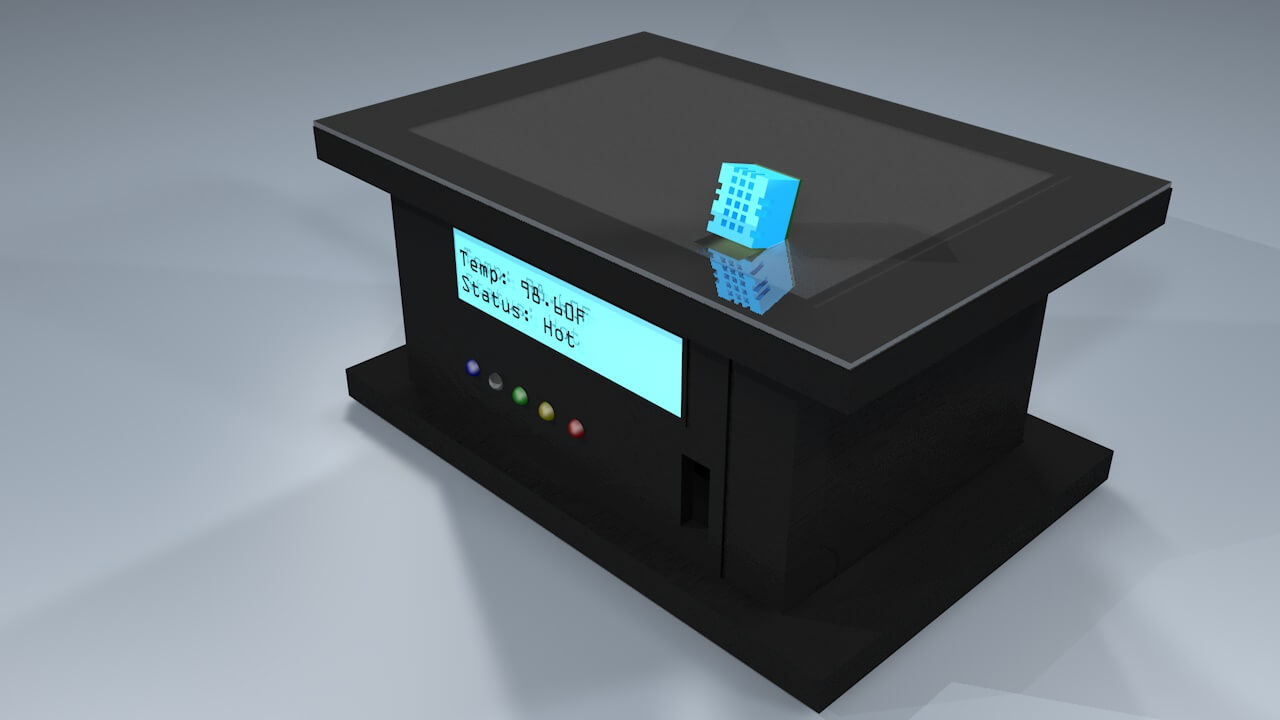
Color Render
New idea on older concept
I will rebuild the device using a different type of case. Originally I used 3d printed
(PLA) filament. This time I will be using wood. The goal is a cleaner, more sleaker look.
Functionality is still the same. Which is to read the current temperature and humidity
in the room where the sensor is placed. If time allows I will add a sensor to detect
the current time and calender date. Maybe add colorful rgb led sequences during
certain temps. This will make it a nice desktop piece.
Time is winding down and the end is near. I looked to my ai assistant Jadzia to help me
frame and structure the next few weeks with completing this project, I provided a sketch
and the dimensions a much better sketch was generated. Below are a couple of
images that will provide both insight and direction to what I am building as my final
and exactly how I will go about it. I have daily list to complete, tons of info
and I also have a pre-rendered model to use as a visual example to which I will build.
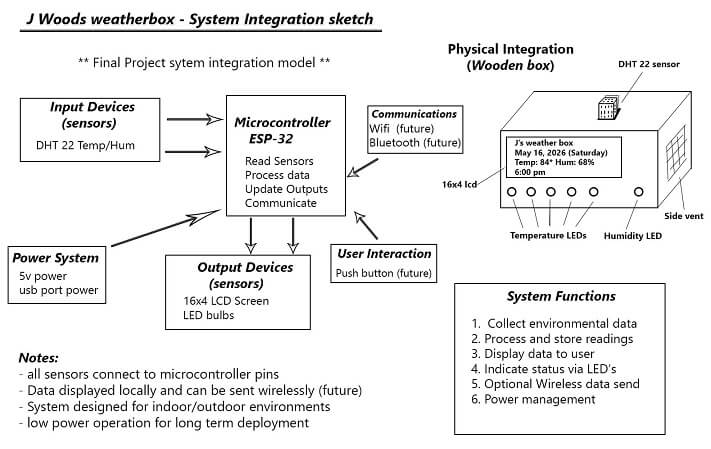
System Integration sketch
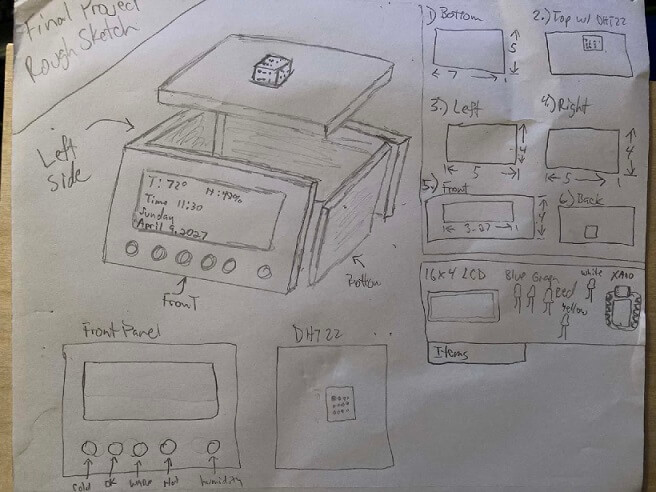
1st sketch of final project
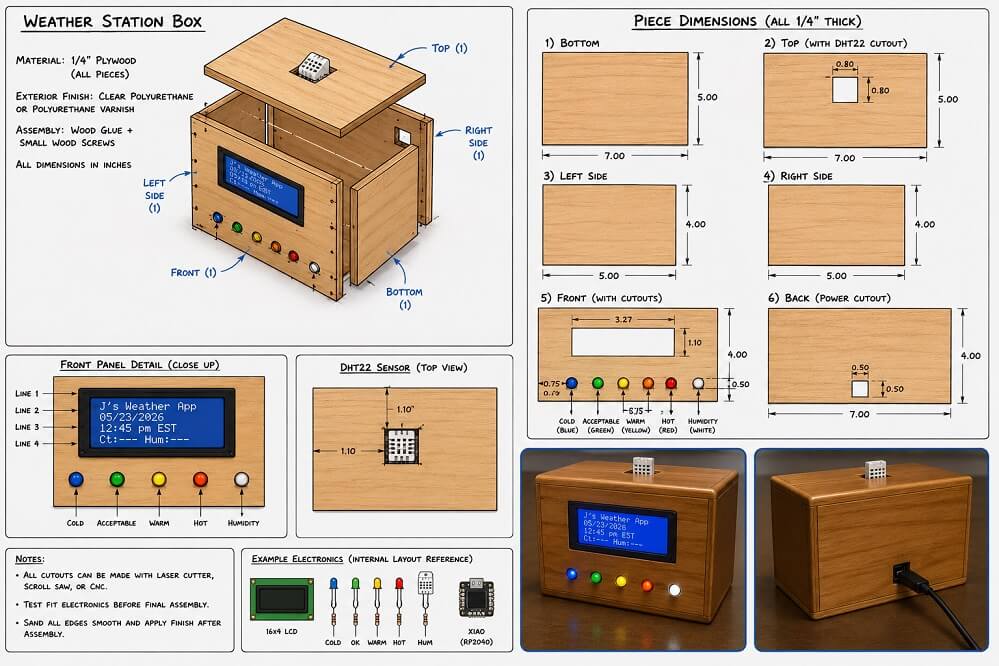
Sketch of final project
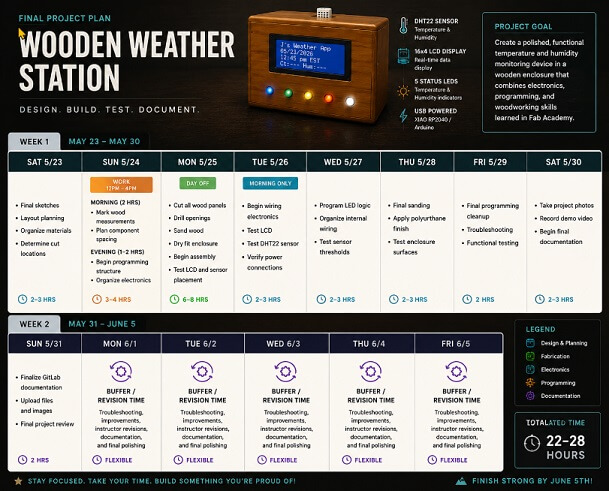
2 week planner
Video Clips
The video details details what the device will do and it also contains a 3d render
that will resenble the final product
Files
Below are the files associated with this project
Lasercut Riser for Esp32 gCodeLasercut usbc port for Esp32 gCode
Code for Weatherbox
Faceplate gCode
Extended Gallery

ESP32 Wroom32 Pinout
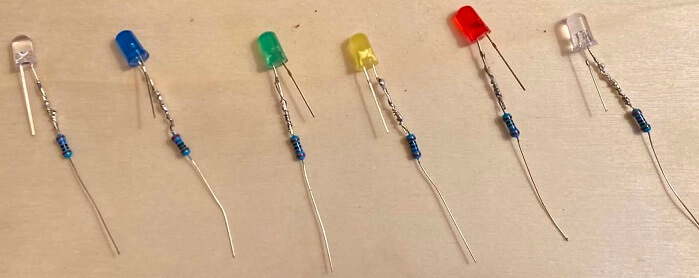
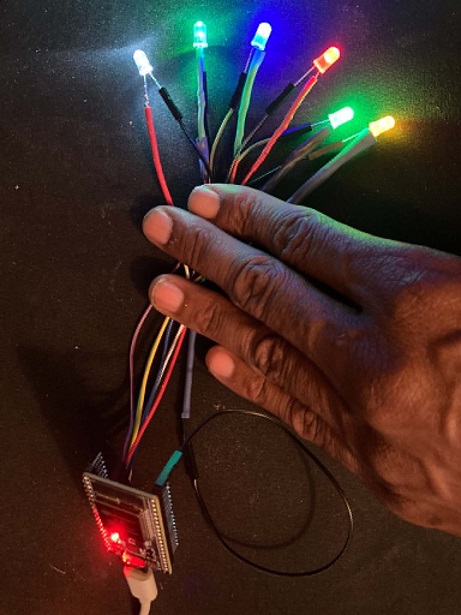
Leds are ready for testing
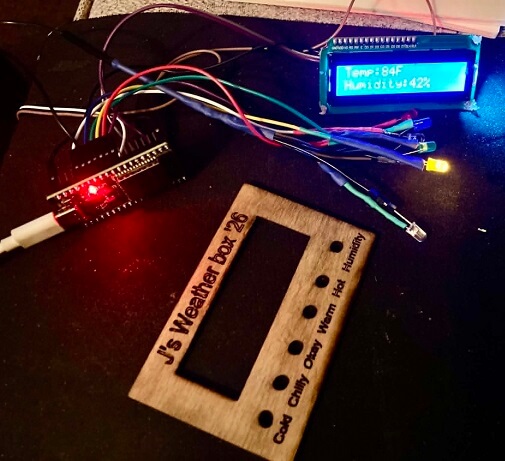
Quick test before assembling it
Sensors working together

Faceplate being laser cut...
Early led test...
It works !!!!!!
I am happy to see this device working....I'm dancing inside my head right now
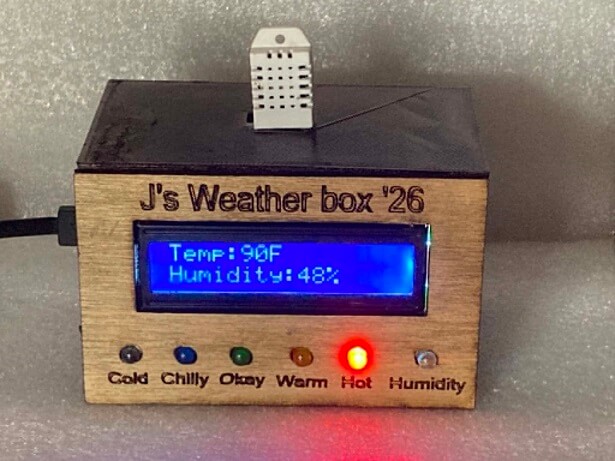
It's hot in here...
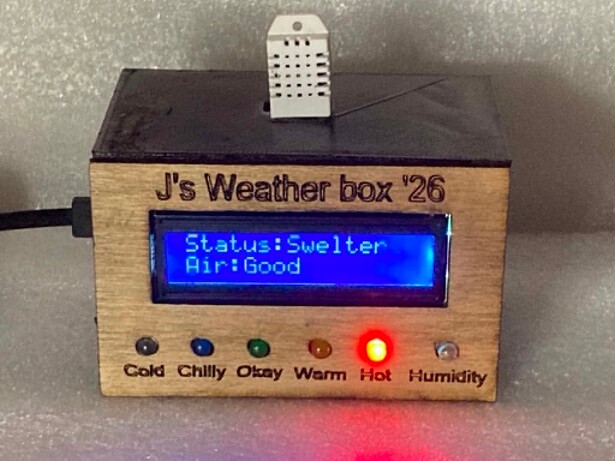
Sweltering is an understatement...
Hot off the workbench !!!