Added a page with your sketch and description of your final project idea(s)
Documented steps for setting up your Git repository and adding files to it
Pushed to your class Gitlab repository
Signed and uploaded Student Agreement
Initial Idea
This week I began working with gitlab and getting up to speed
on how it functions as well as sketching out ideas for my Final
project. Which is a cat cabin, a small dresser size outside shelter
for stray cat families.
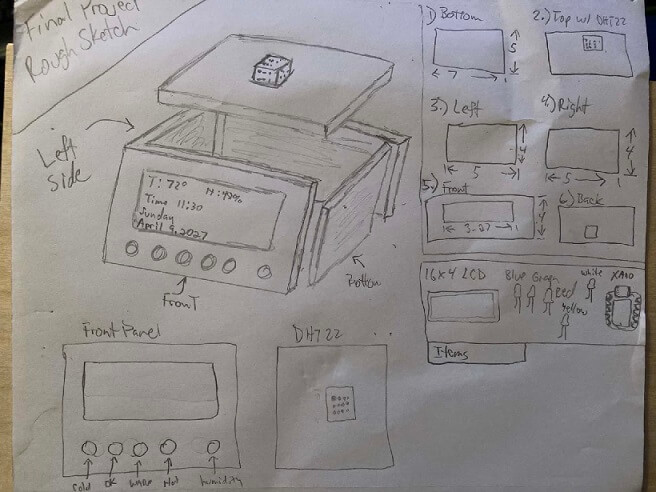
After going over several ideas and tests I decided what to build
for my final project. I 3d printed and made a device that displayed
temp & humidity on a 16x2 lcd screen. Adding a few 5mm led's,
a DHT22 connected to an Arduino Uno microcontroller. The new
one will look more polished and will be made from wood.
Download & Clone Git repo
I went to the site https://git-scm.com/download/win?utm_source=chatgpt.com and downloaded
GItlab on to my desktop pc. Keep pressing the next button during installation as the default
settings are fine for right now. Now that gitlab is installed I have to login so that I can
begin downloading and copying my repo.
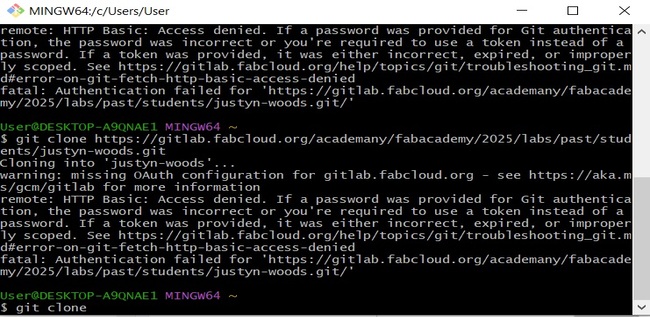
Well I ran into an issue. I was prompted by gitlab program to sign in. I usually have auto sign-in.
So I entered what I believed to be th proper login information, it was not. I got an error. I had
to google this error. When I was signing in, I entered the wrong password and or my token had
expired. So I had to fix my login by clicking on forgot my password. I changed my password.
Then I tried to sign in and still couldnt get it, this time it was the token. So I had to create
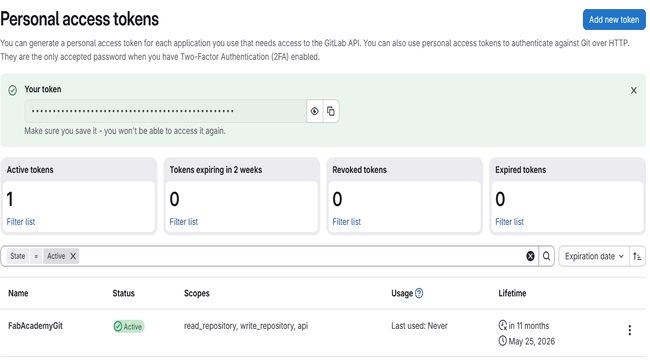
a new personal access token. To do this I had to
- Log into GitLab normally in browser
- Look in the top right corner for your avator or icon and click it
- In the dropdown menu called preferences Sometimes called: edit profile, settings, preferences
- On the left side of the menu look for access tokens or personal access tokens. (click it)
- Now click on the button that creates token
- When it asks for a name enter this: FabAcademyGit
- Enter an expire time for the token anywhere from 30 days to 365 days.
- Under the Scopes/Permission are there are a few items that you need to click to add a checkmark
- Click on " read_repository, write_repository, and api"
- Click reate personal access token
- Gitlab will now show something like: glpat-83hajshsjsjsh...
- Copy it immediately and save it in notepad or similar app for easy retrieval
- Token is created and Gitlab actions are now authorized
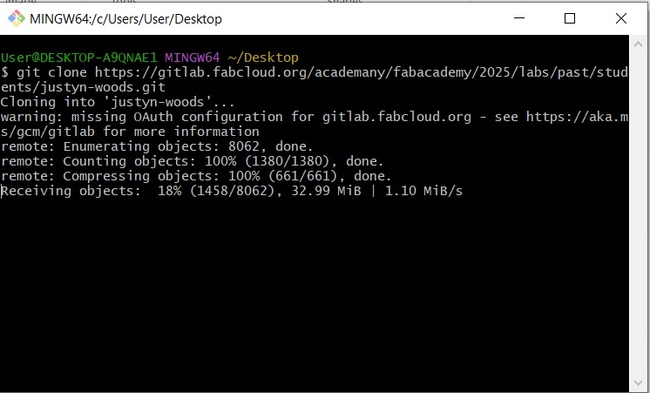
Now that I have my token, I can clone my repo. Here's how I
will continue this process:
- Go back to Gitlab repo page
- Find and click on the blue "Code" button
- Choose "HTTPS" and click the "copy" button to the right
- You should see something like "https://gitlab.fabcloud.org/academy2026/labs/yourname.git"
- Open gitbash by either right clicking on desktop area and choosing
open gitbash here or hitting windows button and typing git and
gitbash program will appear, start the gitbash program.
- Once in gitbash type this 'git clone' then right click to paste your repo
- Press enter to begin the process
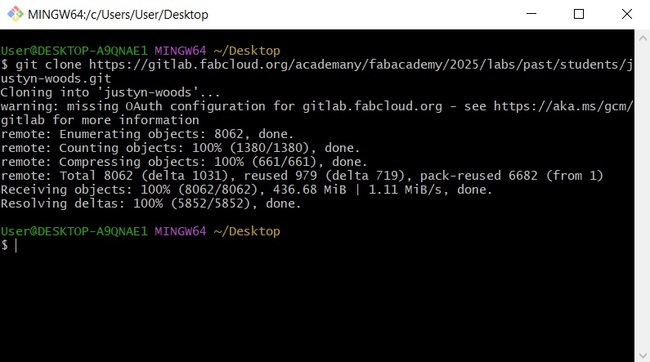
- After everything finishes you are done. Look on your desktop for a
folder with your repo name on it.
- Double click on the folder and look at the setup of folders. It should look like
the setup that you would see on the website.
Pushing git:
- Inside git bash type this: cd your-repo-folder-name (type in actual folder name)
- git add .
- git commit -m "Updated Week 1 documentation"
- git push
- If asked for username & password, enter gitlab username & token
- That is all
Git Gallery
Token created
Didn't have a token or correct login
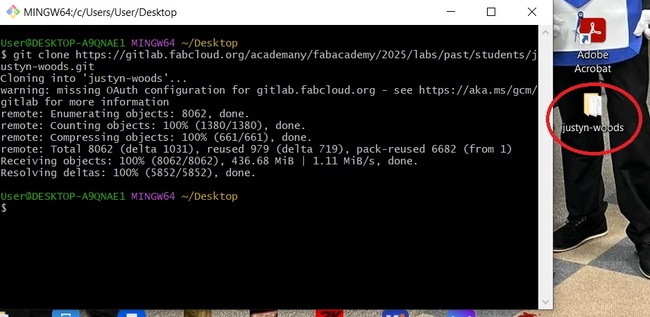
Got everything fixed and cloning process has started
Cloning has completed !
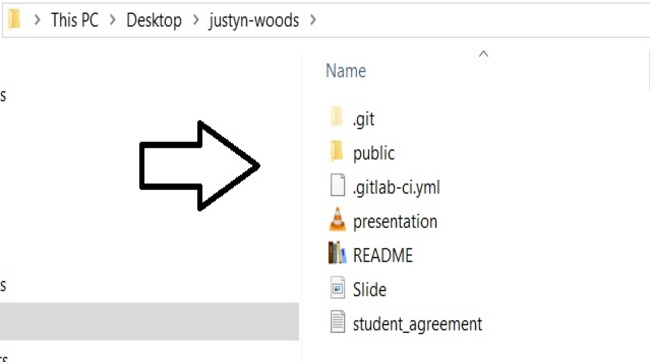
Repo on desktop
Inside repo folder on desktop
How did I get to git this done?
At the beginning of Fab Academy, the Git and GitLab setup process was introduced through instructor
demonstrations and guided tutorials. Since the initial setup happened many months ago, I do not remember
every exact command or configuration step, but I do remember the general workflow used to connect my
local files to the Fab Academy GitLab repository and begin building the documentation site.
From what I remember, the process started by logging into the Fab Academy GitLab environment and
locating my assigned student repository. I then copied the repository URL and used Git tools to clone
the repository onto my computer so I could work on the website files locally instead of only through the browser.
After cloning the repository, I opened the project folder using Visual Studio Code and began exploring
the website structure, including HTML pages, image folders, and assignment directories. I learned how
the index.html page controlled the homepage layout and how additional assignment pages could be linked
together throughout the site.
Some of the common workflow steps I used included:
- opening the project folder in Visual Studio Code
- editing HTML pages and navigation links
- creating folders for assignments and images
- saving and organizing website assets locally
- committing changes with Git
- pushing updates back to GitLab so the live website would automatically update
As I continued working on weekly assignments, I became more comfortable with the overall workflow
and better understood how Git, repositories, commits, and GitLab Pages worked together to manage
and publish the documentation website online. Although I am still learning some of the deeper
technical aspects of Git, repeated use throughout the course helped me develop a practical
understanding of maintaining and updating a version-controlled website.
My GitLab Workflow and Website Update Process
When I first started using GitLab for Fab Academy, I honestly found the entire workflow confusing.
Even after successfully updating my website multiple times, I still did not fully understand
which parts of the process were technically considered “Git.” Over time, I became more comfortable
with the workflow simply by repeatedly updating assignments, uploading images, and experimenting
with the Web IDE.
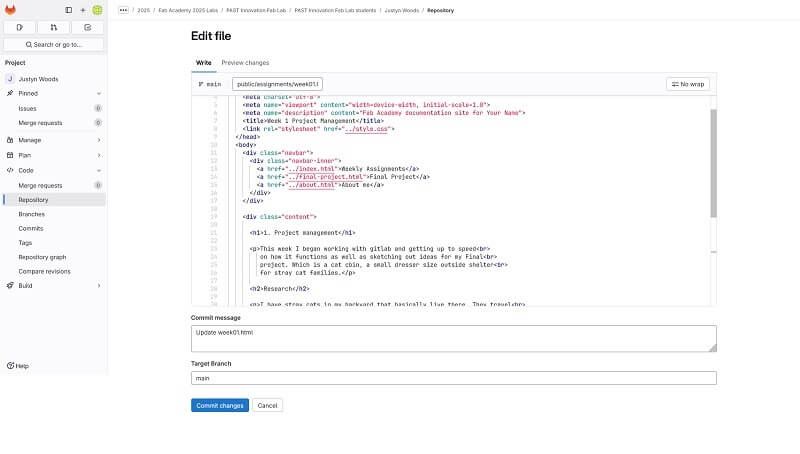
Most of my workflow was done directly through the GitLab Web IDE. I would log into my Fab Academy
GitLab page, navigate to my student repository, and open the Web IDE to edit my assignment pages.
From there, I could directly modify HTML files, create folders, upload images, and push commits
that updated my website online.
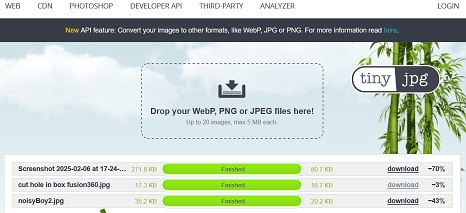
One thing I quickly learned was that image size management was important because large images slowed
down page loading times. My workflow usually started by taking project photos on my phone or camera
and transferring them to my computer. Before uploading them to GitLab, I used TinyJPG to compress
the images and reduce file size while still keeping acceptable visual quality.
After compressing the images, I uploaded the smaller versions into my GitLab repository using the
upload feature inside the Web IDE. To stay organized, I created separate directories and folders
for assignments and images so that each week’s documentation remained easier to manage.
Once the images were uploaded, I added them into my HTML pages using image tags and relative file
paths. This allowed the images stored inside my repository folders to appear directly on my website pages.
Example of adding an image:
Using image source I search the directory for the file named "pic of image source".
After making updates to the HTML pages, I reviewed the changes in the Web IDE and then created a commit
message describing the updates. Once the commit was pushed, GitLab automatically updated my Fab Academy
website online.
My general workflow became:
Take project photos
Compress images using TinyJPG
Upload optimized images into GitLab directories
Edit HTML pages in the Web IDE
Add image paths and documentation text
Commit and push updates
Refresh website to verify changes appeared correctly
One challenge I encountered early on was understanding image paths and folder organization. If an image
was placed in the wrong directory or the file path was incorrect, the image would not display properly
on the website. I also learned that moving image files later required updating all associated file paths
inside the HTML pages.
Another challenge was understanding how commits worked. At first, I did not realize that changes would
not appear online until the commit was pushed successfully through GitLab. Over time, repeating the
workflow helped me better understand how local edits, repositories, commits, and website publishing
all connected together.
Although I am still learning the deeper technical side of Git, this process helped me better understand
how GitLab can be used as a documentation platform that combines file management, HTML editing, image
hosting, and automated website publishing into one workflow.
Other challenges I encountered during this process included:
understanding the relationship between local files and the online repository
learning how website file structures worked
figuring out why some updates did not immediately appear online
understanding how GitLab automatically rebuilt the website after updates
At first, Git terminology such as repositories, commits, pipelines, and deployment felt overwhelming.
However, after repeatedly updating weekly assignments, the workflow gradually became easier to
understand through practice and repetition.
This process helped me better understand how GitLab Pages can be used as a digital documentation
platform that combines website development, file management, and automated publishing into a
single workflow.
A few shots of Gitlab
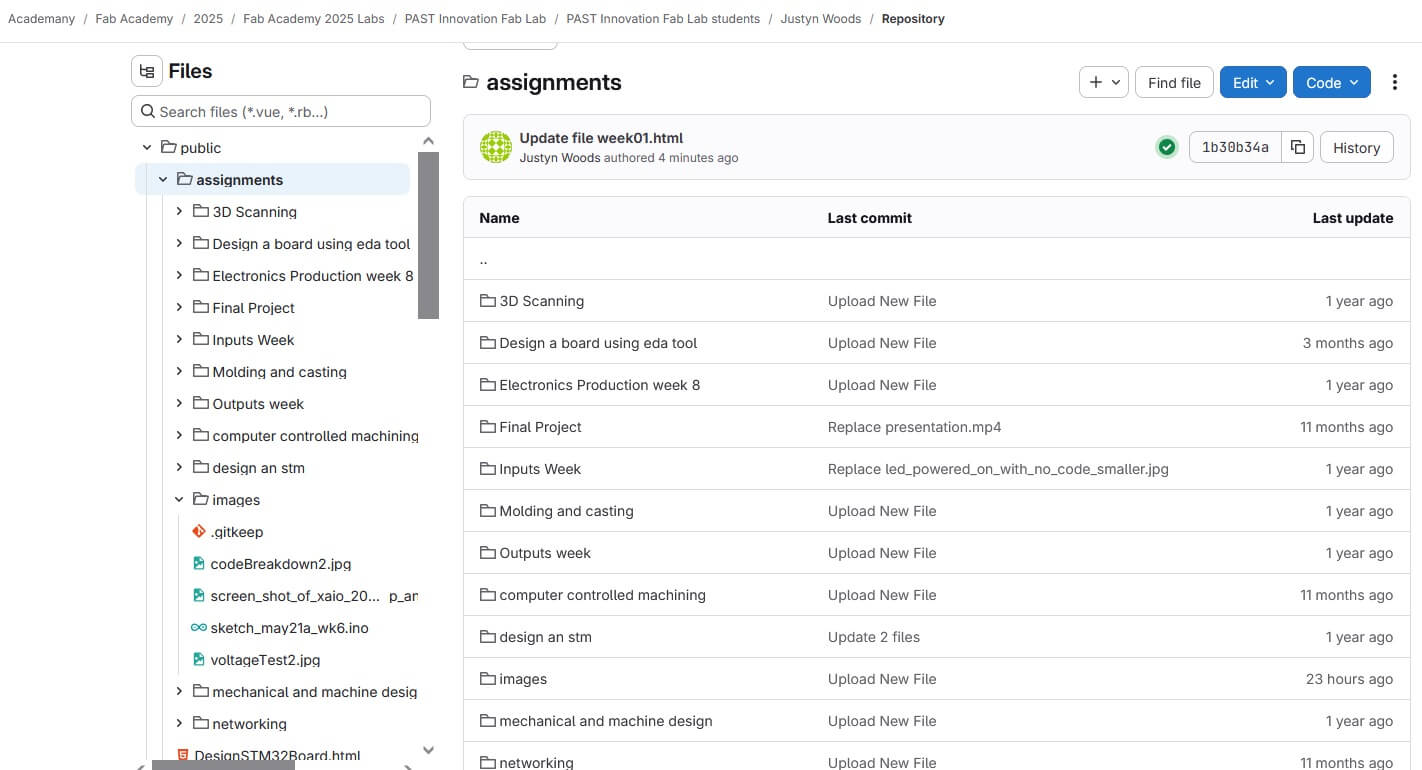
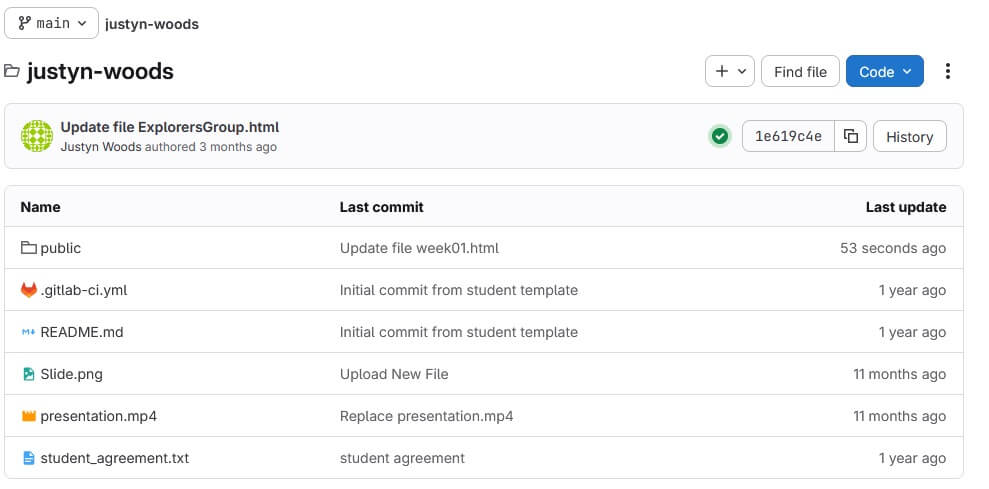
My assignment directory
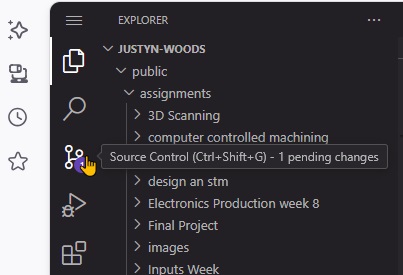
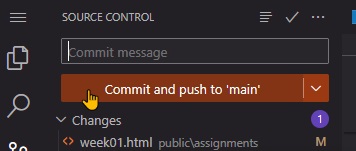
Site editing and commit is waiting
This pushes the update to the website
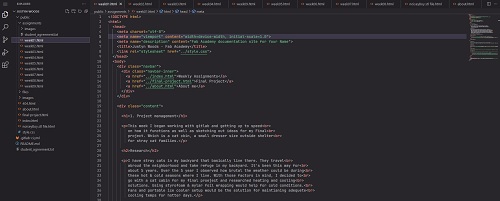
Coding week1 in IDE mode
Coding in GITlab
My main directory
This is the website that I used to compress my images