Week 3 Group: Computer-Controlled Cutting
Assignment Objectives This week's assignment focused on exploring computer-controlled cutting technologies and understanding howdigital designs can be transformed into physical objects using automated fabrication equipment.
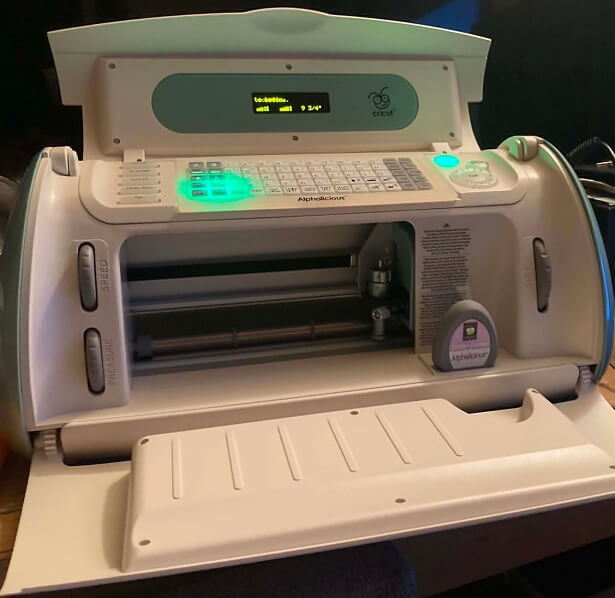
For this assignment, I explored both vinyl cutting and laser cutting technologies. I used an older Cricut
Create machine to investigate vinyl and cardstock cutting, and I used a Creality Falcon 5W laser cutter
to characterize laser cutting parameters and fabricate a press-fit construction project.
Vinyl Cutting with the Cricut Create
ObjectiveThe objective was to evaluate the capabilities of the Cricut Create as a computer-controlled cutting device
and determine its usefulness for cutting adhesive vinyl and cardstock materials.
Equipment
- Cricut Create
- Cricut cutting mat
- Adhesive vinyl
- Cardstock paper
- Computer-generated vector designs
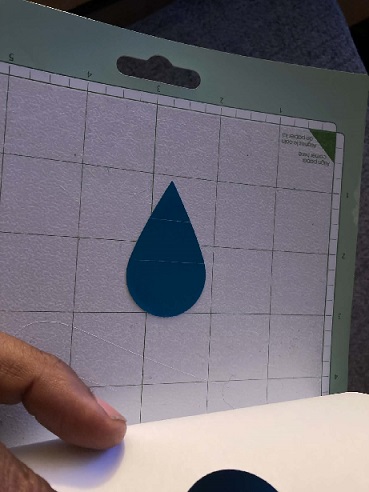
Process
A digital design was created and prepared for cutting using Cricut-compatible software. The design was mounted
to a cutting mat and cut using adhesive vinyl. Multiple test cuts were performed to determine the proper blade
depth and cutting settings.
After successful vinyl testing, additional cuts were performed using cardstock paper to evaluate the machine's
ability to create clean and accurate shapes.
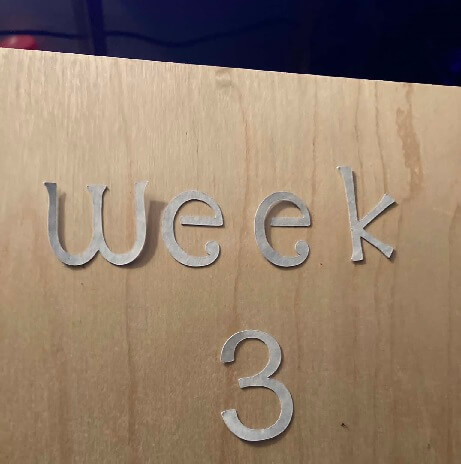
Results
The Cricut Create successfully produced vinyl graphics and cardstock cutouts. The machine demonstrated acceptable
accuracy for lettering, simple graphics, and geometric shapes. Cardstock testing showed that the machine could
also be used for lightweight construction-style projects.
Observations
- Proper blade depth was important for clean cuts.
- Material adhesion to the cutting mat significantly affected cut quality.
- Small details required careful testing and adjustment.
- Cardstock produced cleaner cuts than expected.
- Despite its age, the Cricut remains a useful introduction to computer-controlled cutting.

Characterizing the Creality Falcon 5W Laser Cutter
The primary focus of this assignment was characterizing the performance of my Creality Falcon 5W diode laser cutter.
Unlike the Cricut, the laser cutter is capable of both engraving and cutting a variety of materials. Because laser
cutting plays an important role in digital fabrication, understanding the machine's capabilities and limitations
is essential.
Equipment
- Creality Falcon 5W Laser Cutter
- LightBurn Software
- Plywood
- Cardstock
- MDF test material
- Digital calipers
- Safety glasses
- Ventilation system
Machine Overview
The Creality Falcon 5W is a diode laser cutting and engraving machine controlled through LightBurn software.
The machine is capable of engraving images, text, and vector graphics while also cutting thin materials such
as wood, cardboard, paper, and other non-metallic materials.

Characterizing Laser Parameters
Power
Power controls the amount of laser energy delivered to the material.
Observations:
- Lower power produced lighter engravings.
- Higher power produced darker engravings and deeper cuts.
- Excessive power increased burning and edge discoloration.
Speed
Speed controls how quickly the laser head moves across the material.
Observations:
- Faster speeds reduced engraving depth.
- Slower speeds increased cut depth.
- Extremely slow speeds increased charring.
Focus
Proper focus is critical for achieving accurate cuts and sharp engravings.
Observations:
- Proper focus produced cleaner cuts.
- Improper focus increased kerf width and reduced engraving quality.
- Focus had a significant effect on overall cutting performance.
Passes
The number of passes determines how many times the laser follows the same toolpath.
Observations:
- Additional passes increased cutting depth.
- Multiple passes improved cutting performance on thicker materials.
- Excessive passes increased edge charring.
Kerf Testing
Kerf is the amount of material removed by the laser beam during cutting.
Understanding kerf is important because it directly affects the accuracy of parts and the fit of press-fit assemblies.
Test pieces were cut and measured using digital calipers to evaluate material removed during cutting operations.
These measurements were later used when creating press-fit joints and slot dimensions.
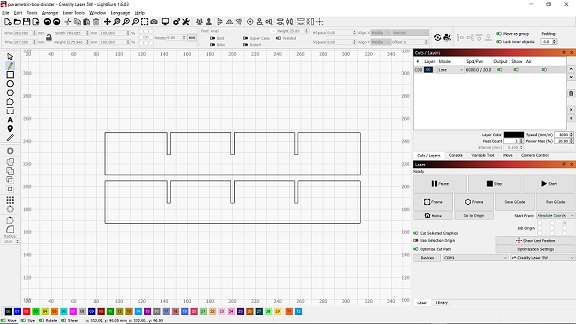
Designing the Laser Cut File For the fabrication portion of the assignment, I selected a press-fit construction design that I found online and recreated
from scratch in LightBurn.
Rather than importing an existing file, I used the reference image as a guide and redrew the geometry using vector shapes
suitable for laser cutting.
Modifying the Design
After redrawing the design in LightBurn, I adjusted the slot dimensions to account for both material thickness and laser kerf.
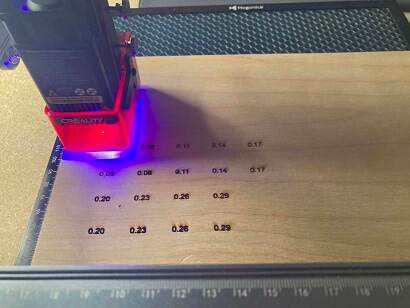
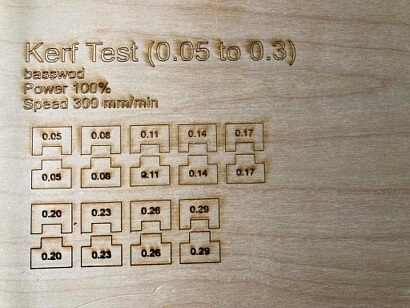
To characterize the laser cutter and determine the optimal press-fit tolerance, a kerf test pattern was generated and
cut using the Creality Falcon 5W.
The test included the following kerf compensation values:
- 0.05 mm
- 0.08 mm
- 0.11 mm
- 0.14 mm
- 0.17 mm
- 0.20 mm
- 0.23 mm
- 0.26 mm
- 0.29 mm
LightBurn Workflow
After completing the design, the file was imported into LightBurn.
The workflow included these 6 steps:
1. Importing the vector design.
2. Assigning cut and engraving layers.
3. Setting power and speed values.
4. Positioning the material.
5. Performing test cuts.
6. Running the final cut.
Laser Safety Procedures
Because laser cutters generate heat, smoke, and potential fire hazards, several safety procedures were followed:
- Safety glasses were worn when appropriate.
- Adequate fan & ventilation was maintained at all times.
- The machine was never left unattended while operating.
- Flammable materials were kept away from the cutting area.
- Test cuts were performed before final production.
Conclusion
Through the use of both the Cricut Create and the Creality Falcon 5W laser cutter, I gained experience
with multiple forms of computer-controlled cutting.
The Cricut was useful for vinyl and cardstock applications, while the laser cutter provided significantly
greater flexibility for engraving, precision cutting, and fabrication projects.
This assignment helped me better understand machine characterization, kerf compensation, material thickness
considerations, design modification, and fabrication workflow. By measuring materials, testing slot dimensions,
and adjusting the design before fabrication, I was able to produce a successful press-fit assembly while
gaining a deeper understanding of digital fabrication processes.