Embedded Programming
Group Assignment
In this group assignment, we will explore two different types of microcontrollers: the Atmega328p (AVR architecture) and the Raspberry Pi RP2040 (ARM architecture). Below is a detailed documentation of the workflows and processes we followed for each microcontroller.
Comparison of AVR and ARM Architectures
| Feature | Atmega328p (AVR) | Xiao RP2040 (ARM) |
|---|---|---|
| Architecture | Harvard Architecture | Von Neumann Architecture |
| Bit Width | 8-bit | 32-bit |
| Clock Speed | Up to 20 MHz | Up to 133 MHz |
| Memory | 32 KB Flash, 2 KB SRAM | 264 KB SRAM, external Flash support |
| Programming Language | C/C++ (Arduino IDE) | MicroPython, C/C++ |
| Ease of Use | Requires bootloader and fuses setup | Direct USB programming |
| Power Consumption | Low | Moderate |
AVR Workflow: Atmega328p
The Atmega328p is an 8-bit microcontroller based on the AVR architecture and follows the Harvard Architecture model, which separates program memory and data memory. This allows for faster execution of instructions. We used Atmel Studio and the Atmel-ICE programmer to program the Atmega328p.
Tools and Setup
- Atmel Studio: An integrated development environment (IDE) for programming AVR microcontrollers.
- Atmel-ICE: A powerful debugging and programming tool for AVR microcontrollers.
- ISP Interface: In-System Programming (ISP) is used to program the microcontroller directly on the board.
Steps to Program the Atmega328p
Hardware Setup:
- Plug the Atmega328p (DIP version) into an Arduino board.
- Connect the Atmel-ICE to the Atmega328p using the ISP interface (6-pin connector).
- Ensure proper alignment of the ISP 6x2 connector (the notch has to face to the center of the board).

Software Configuration:
- Open Atmel Studio and choose tools, program device.
- Configure the project settings, including the microcontroller type, clock speed, programming tool (Atmel-ICE).
- We have a preloaded hex file with the bootloader especially to set-up a common Arduino Uno flavored Atmega328 (octorobot).
Program the Bootloader:
- Click on program. This will use the Atmel-ICE to upload the bootloader to the Atmega328p.
- The bootloader allows the microcontroller to be programmed via a USB connection.

Program the Fuses:
- Configure the fuse bits to set the clock source, enable/disable features like brown-out detection, and set other hardware options.
- We refer to the sticky note that is stored in the box, and it comes directly from the time when Saverio was a student in Fab Academy (2015).
- Be cautious when setting fuses, as incorrect settings can render the microcontroller unusable.

Upload Code via Arduino IDE:
- Once the bootloader is programmed, the Atmega328p can be programmed directly from the Arduino IDE using a USB programmer (e.g., FTDI or USB-to-Serial adapter).
- Test the setup by uploading a simple Blink program to toggle an LED.
- Cross your finger.
Testing:
- Verify that the LED blinks as expected.
- Uncross your finger and celebrate!
ARM Workflow: Seeed Studio Xiao RP2040
The Seeed Studio Xiao RP2040 is a compact microcontroller based on the ARM Cortex M0+ architecture. It is powered by the RP2040 chip, which is designed by Raspberry Pi. For this workflow, we used MicroPython and the Thonny IDE.

Tools and Setup
- The workflow is perfectly describerd by this guide by Seeed Studio.
- Thonny IDE: A lightweight and open-source Python IDE that supports MicroPython.
- MicroPython: A Python implementation optimized for microcontrollers.
- Seeed Studio Xiao RP2040: A small yet powerful microcontroller board.
Steps to Program the Xiao RP2040
Install Thonny IDE:
- Download and install the Thonny IDE from the official website.
Connect the Xiao RP2040:
- Press the BOOT button on the Xiao RP2040 and connect it to the computer via USB.
- The device will appear as an external drive named RPI-RP2.
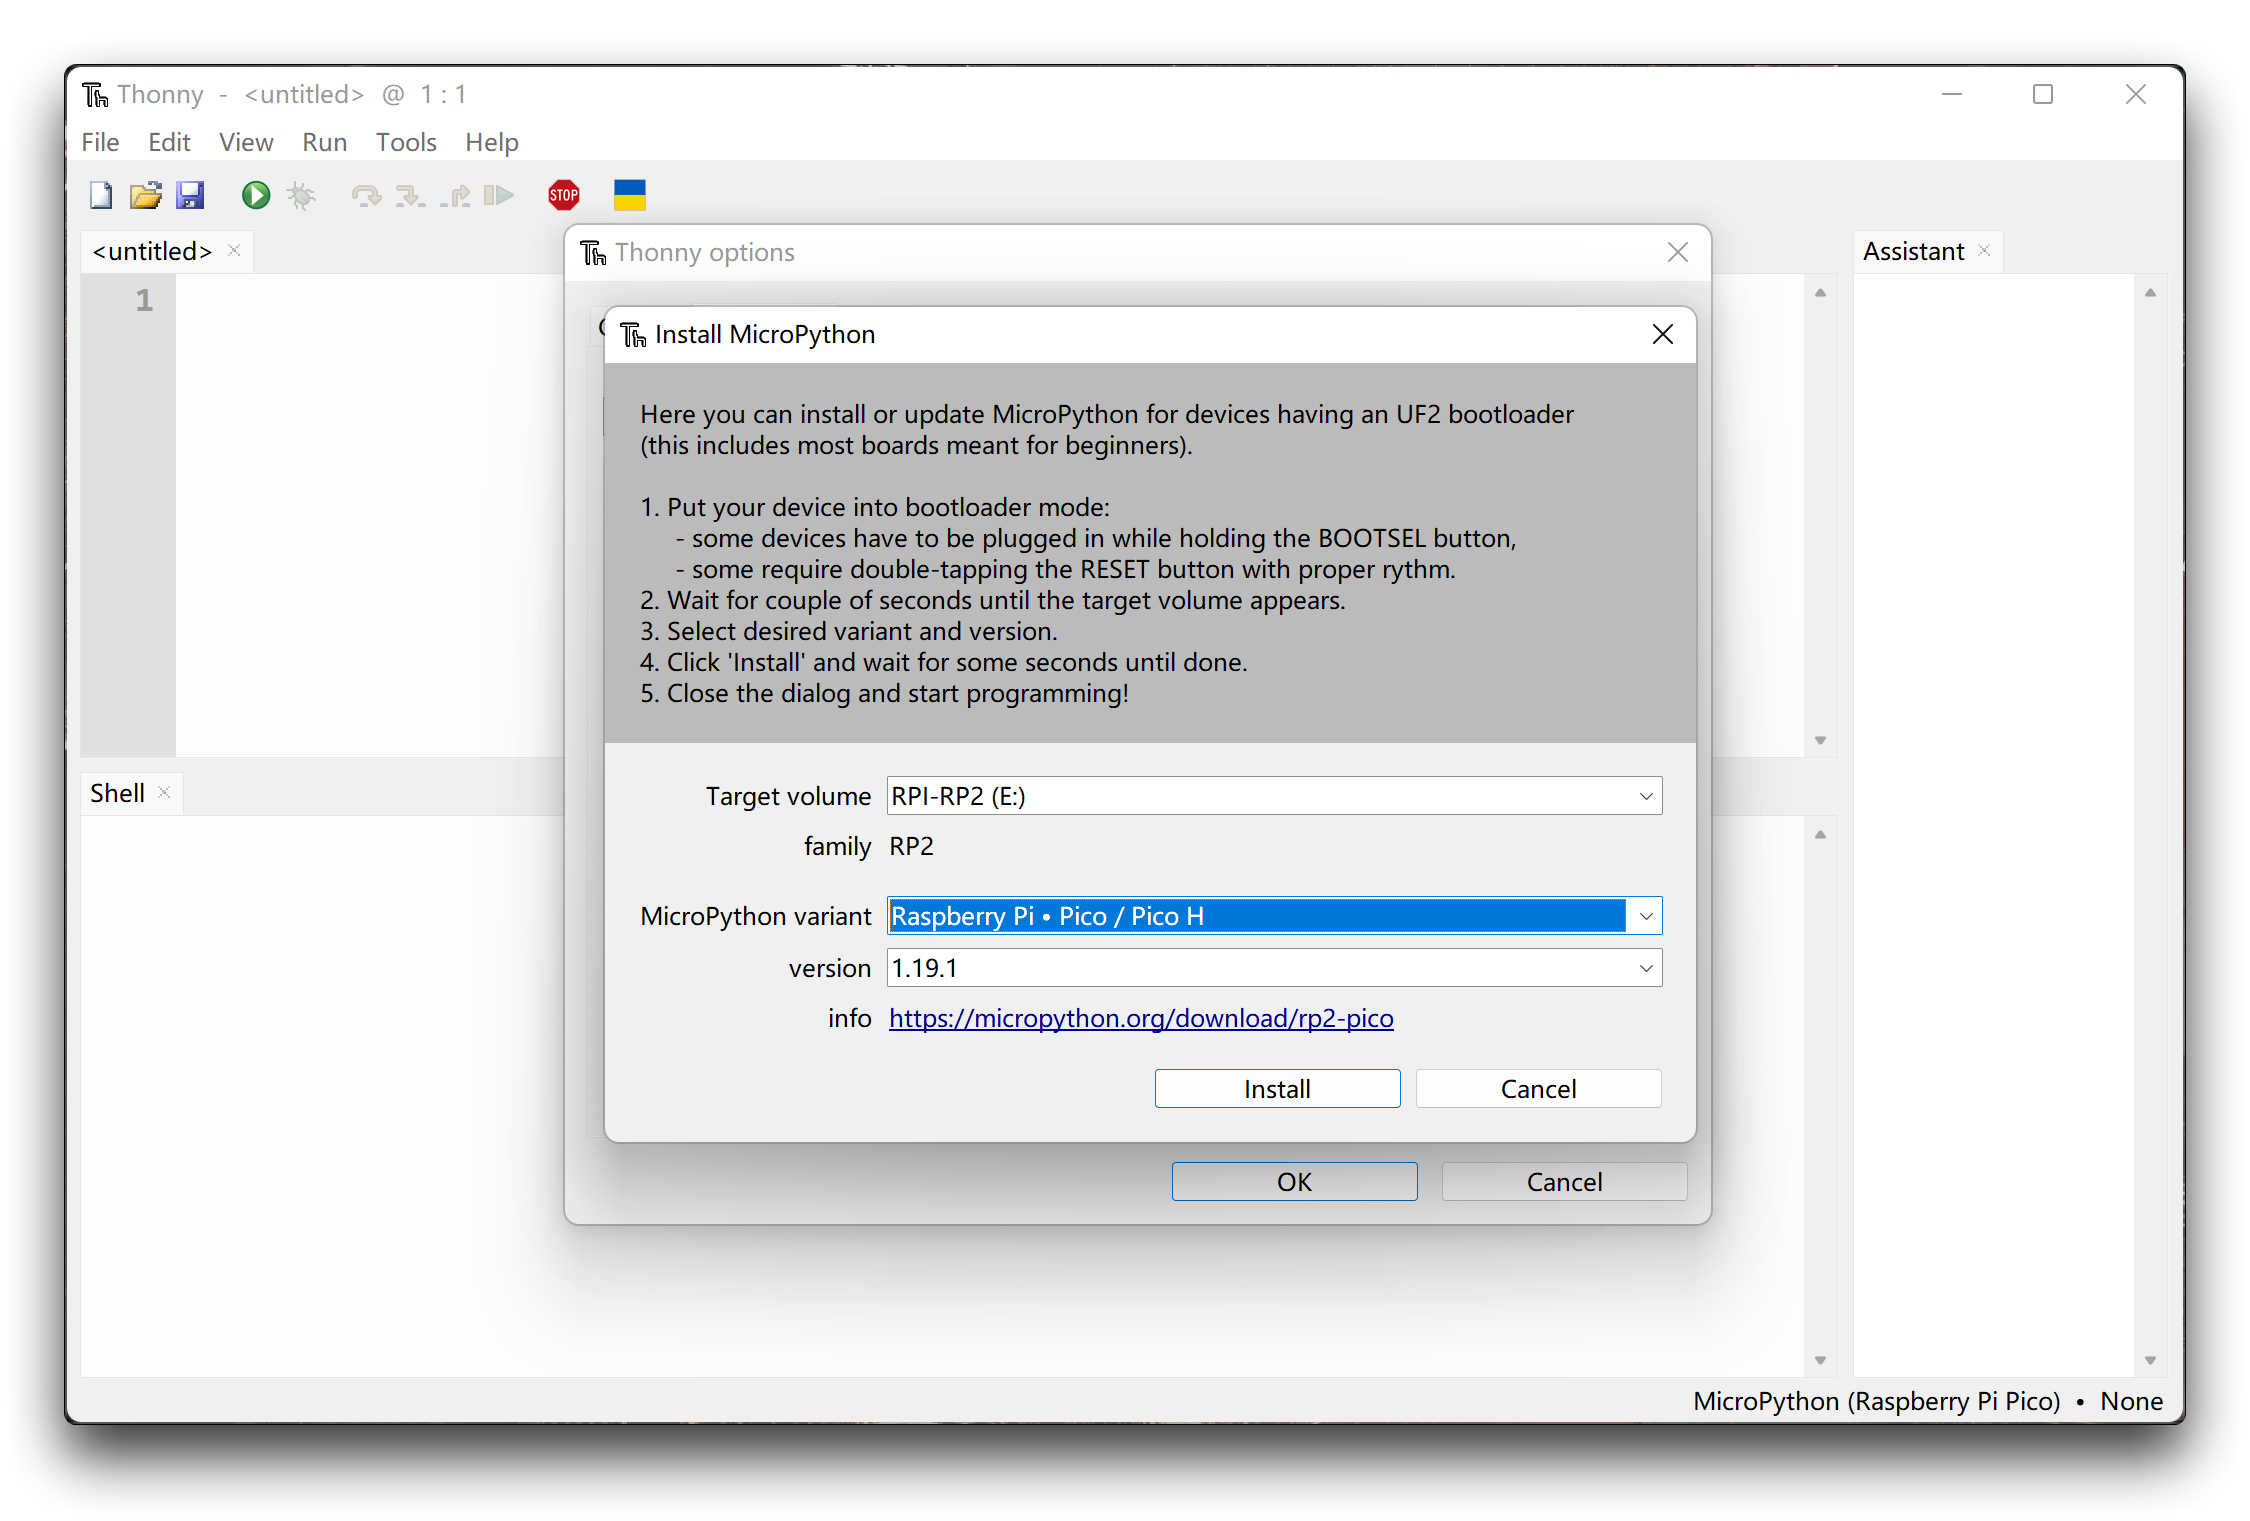
Upload MicroPython Firmware:
- In Tools>Options>Interpreter install the MicroPython firmware on the Xiao.
- Keep all settings as default.
Write and Run a Blink Program:
- Copy and paste the following MicroPython code into the editor:
from machine import Pin, Timer
led = Pin(25, Pin.OUT)
timer = Timer()

def blink(timer):
 led.toggle()

timer.init(freq=2.5, mode=Timer.PERIODIC, callback=blink)
- Cross your fingers.
- Run the script and observe the LED blink onboard .
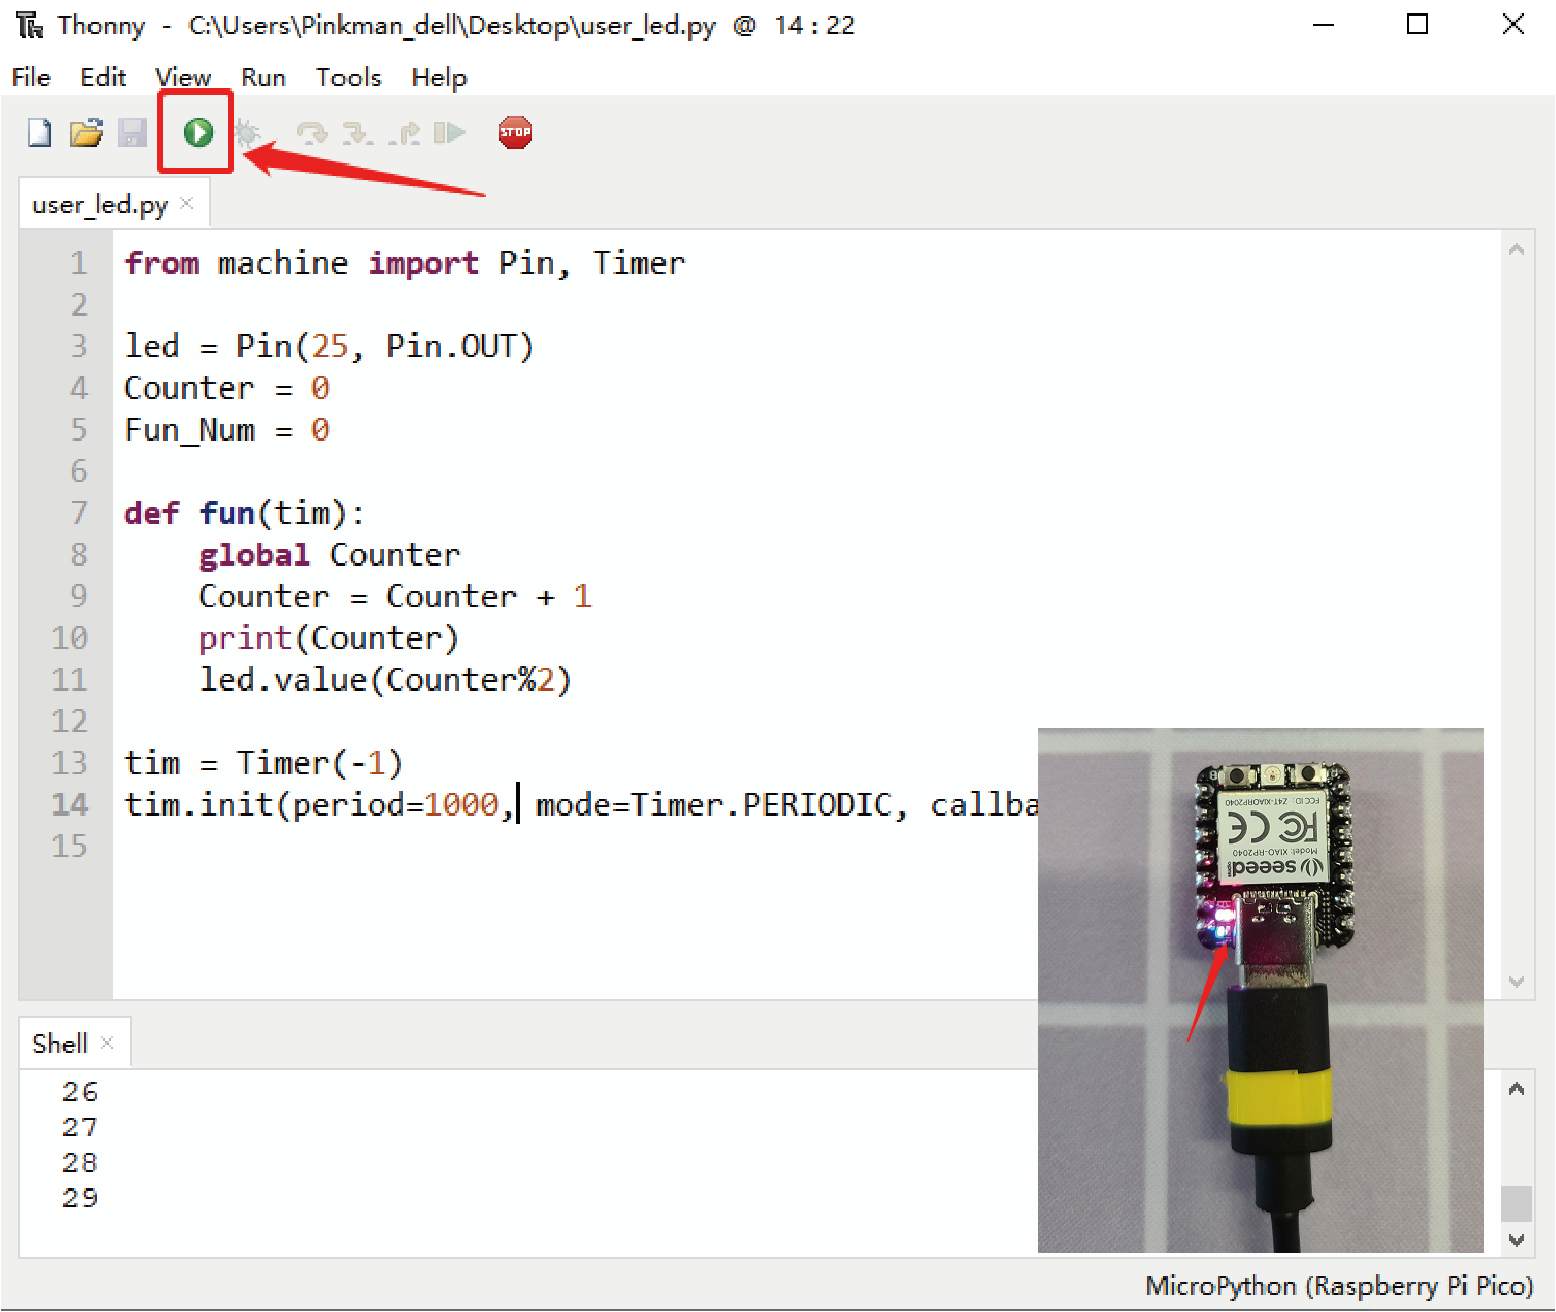
Monitor Output:
- The Xiao RP2040 will blink the LED and send a counter of numbers to the serial monitor in Thonny.
- Verify the output in the Thonny shell.
- Uncross your finger and celebrate!