WEEK 1: Principles and Practice
Introduction
The first assignment in Fab Academy focuses on Project Management, where we learn to document our work, use version control systems, and create a structured workflow for managing our projects efficiently. As part of this, we explored Git, a widely used distributed version control system that helps track changes in code, collaborate with others, and maintain a history of modifications. Git allows developers to work on different branches, merge changes seamlessly, and revert to previous versions if needed, making it an essential tool for project management. As a part of this assignment, I also created a web page about myself, which serves as an introduction to my background, research interests, and journey in Fab Academy.
Fab Academy Student AgreementGit Lab
I have previously worked with the GIT, which has given me valuable experience in using GitLab for version control and collaborative development. Based on this knowledge, I have outlined the key aspects of GitLab, including what GIT LAB is, how to login, how to create an SSH key, and how to commit our work effectively.
GitLab is a github like service that organizations can use to provide internal management of git repositories. It is a self hosted Git-repository management system that keeps the user code private and can easily deploy the changes of the code.
This assignemnt provides a step-by-step guide on installing GitLab on a Linux system, logging in, and configuring SSH for secure authentication. These steps ensure a smooth setup and efficient use of GitLab for version control and project management.
Step 1: Installing GitLab
1.1 Installing Dependencies
Before installing GitLab, update your system and install necessary dependencies:
| Command |
|---|
sudo apt update |
sudo apt install ca-certificates curl openssh-server postfix tzdata perl |
1.2 Installing GitLab
Navigate to the directory where GitLab should be installed:
cd ~/Documents |
Download and install GitLab:
url -LO https://packages.gitlab.com/install/repositories/gitlab/gitlab-ce/script.deb.sh |
sudo bash script.deb.sh |
sudo apt install gitlab-ce |
Step 2: Logging into GitLab
Access GitLab through your web browser.
Sign-up Page: https://gitlab.com/users/sign_up
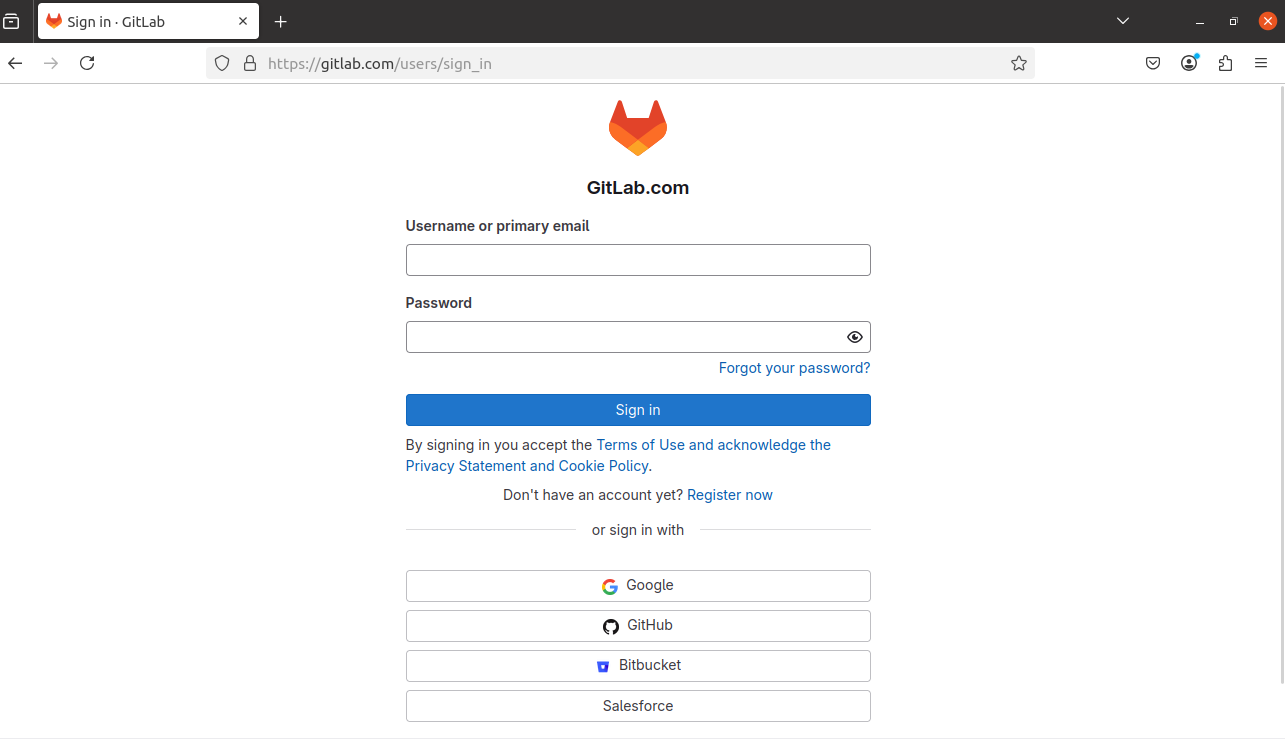
Enter your details, such as username, password, and email ID, as requested in the registration form.
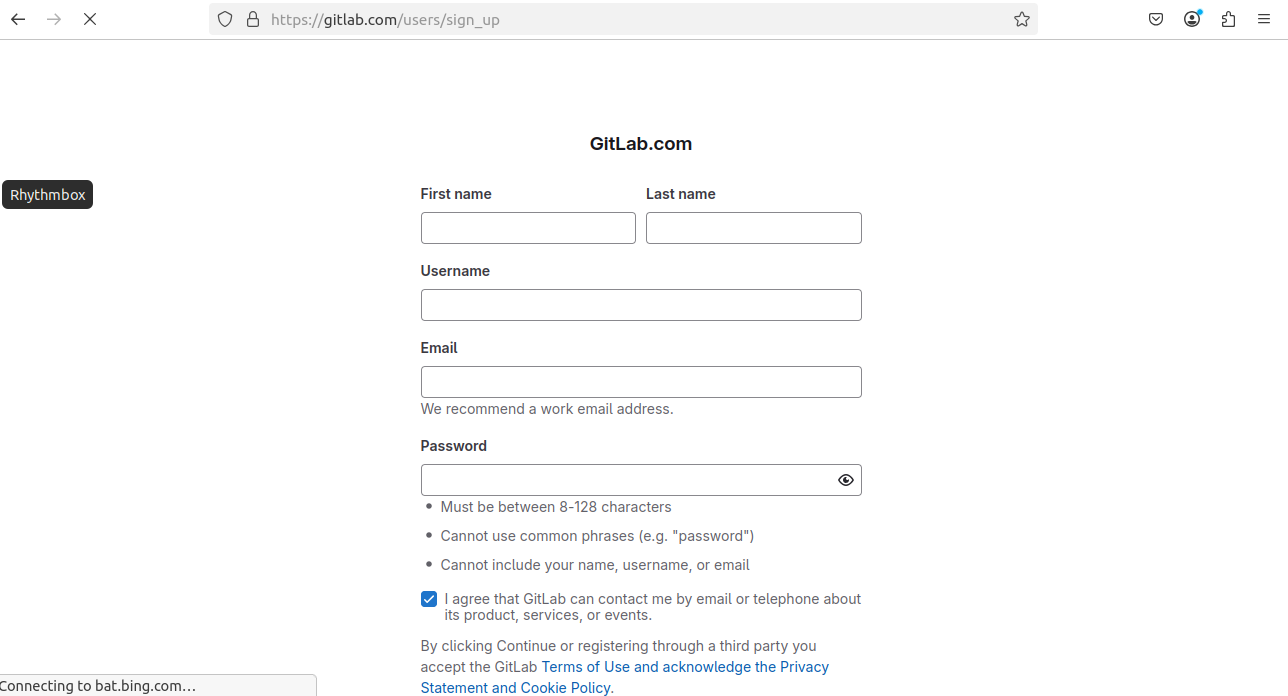
After registration, It redirects you to log in page.
Login Page: https://gitlab.com/users/sign_in
Now enter your user name and password it redirects to project creation page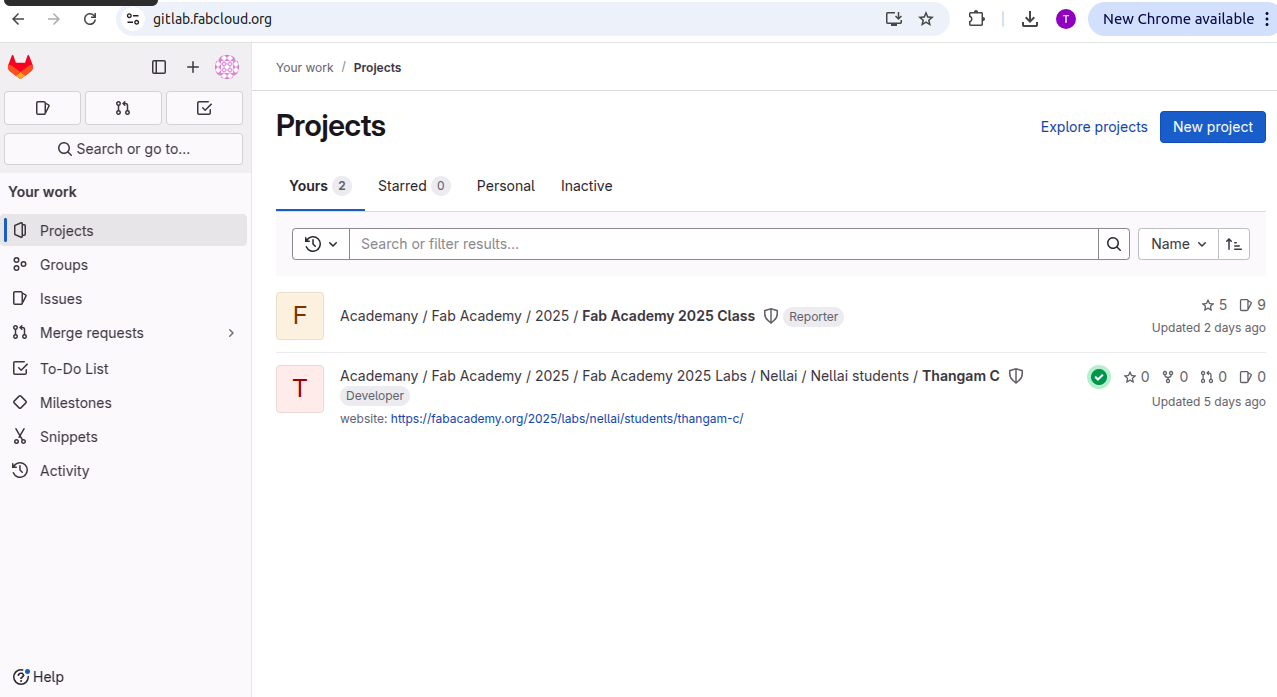
In the left navigation bar, select SSH Keys.,
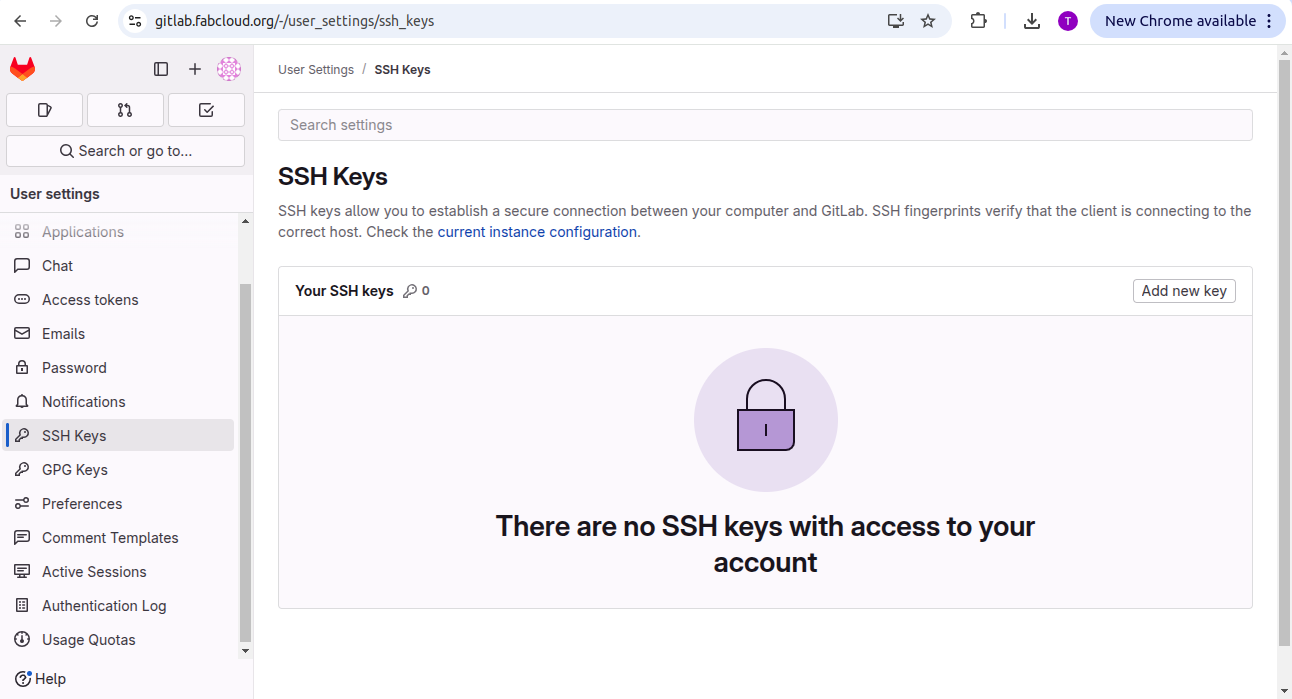
If you do not yet have an SSH key pair configured on your machine, generate one using the following command
ssh-keygen |
Display your public key with:
cat ~/.ssh/id_rsa.pub |
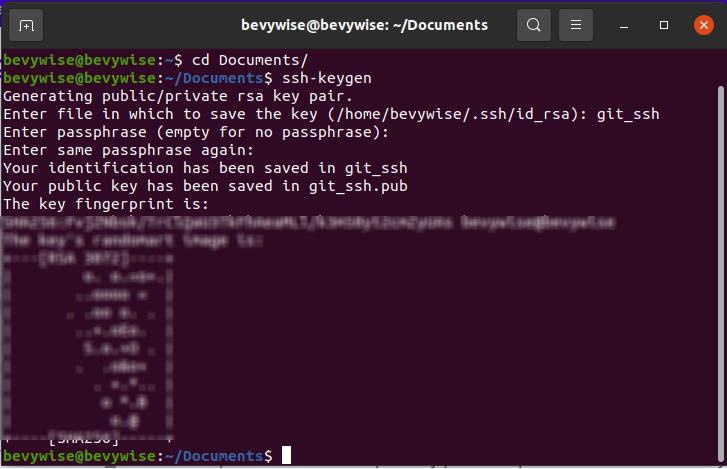
3.2 Adding the SSH Key to GitLab
- Log in to your GitLab account.
- Go to SSH Keys in the left navigation bar.
- Copy the contents of your public key and paste it into GitLab.
- Give it a title and click Add Key.
By following these steps, you have successfully installed GitLab, logged in, and configured SSH authentication. You can now efficiently manage repositories and collaborate on projects with secure and seamless access.
This process not only helped me understand how Git works but also gave me hands-on experience with real-world web development workflows.

Challenges Faced
Understanding of Git Commands
With the help of online Git tutorials, I learned Git commands and successfully added my profile webpage's HTML and CSS code to my Git repository.
This is how I uploaded my profile webpage to GitLab.
Step 1: Initialize a Git Repository
If your project folder is not already a Git repository, initialize it using:
git init |
Step 2: Add a Remote Repository
Replace your-gitlab-repo-url with your actual GitLab repository URL:
git push -u origin main |
Step 3: Add Files to Staging
Add all files in the project folder to the Git staging area:
git add |
Step 4: Commit the Changes
Create a commit message to describe your changes:
git commit -m "Initial commit" |
Step 5: Push the Project to GitLab
Push your project to the GitLab repository:
git push -u origin main |
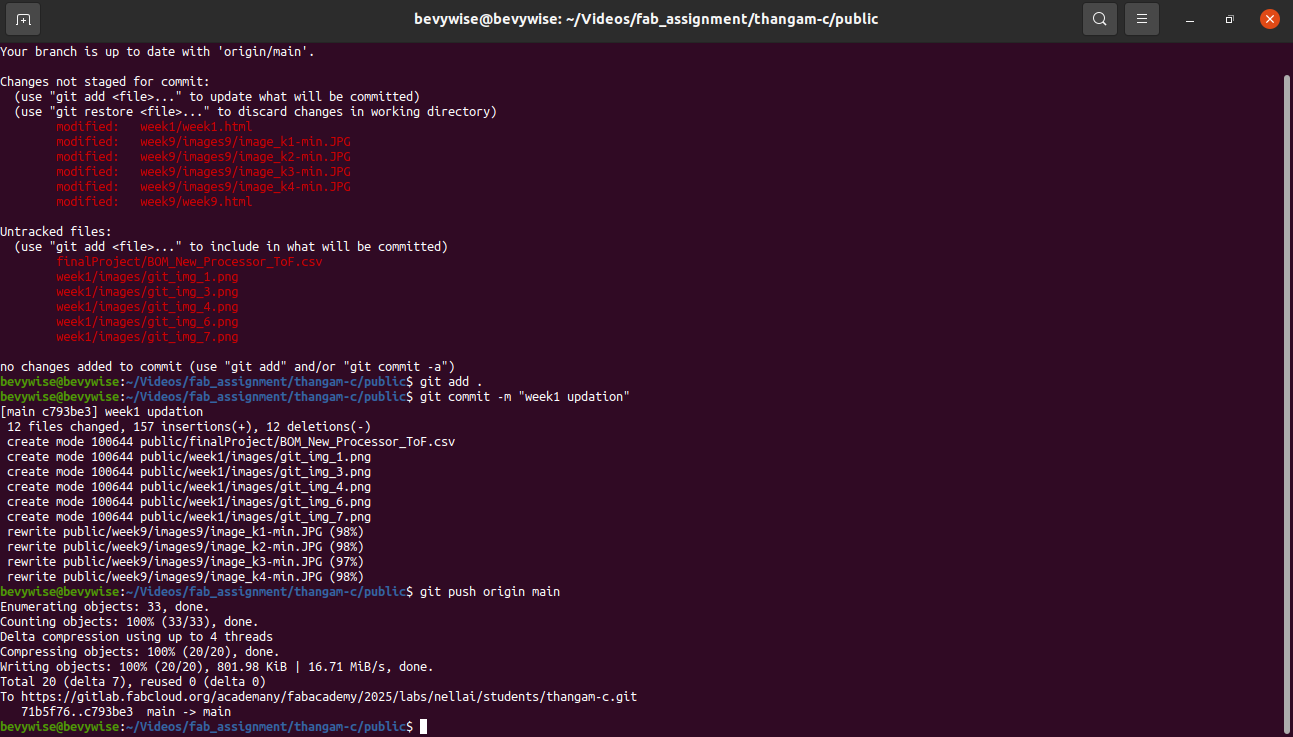
The profile and final project web pages have been created, and the files have been uploaded to GitLab.

web page design
I have developed my Fab Lab webpage using HTML, CSS, and JavaScript in VS Code. Since I have some experience in web page creation, I built the website from scratch without using any templates. This allowed me to customize the design and structure according to my needs. I used VS Code as my coding environment due to its flexibility and extensive features for web development. For those interested in setting up VS Code and learning how to program with it, you can refer to this link: VS Code Installation and Guide.
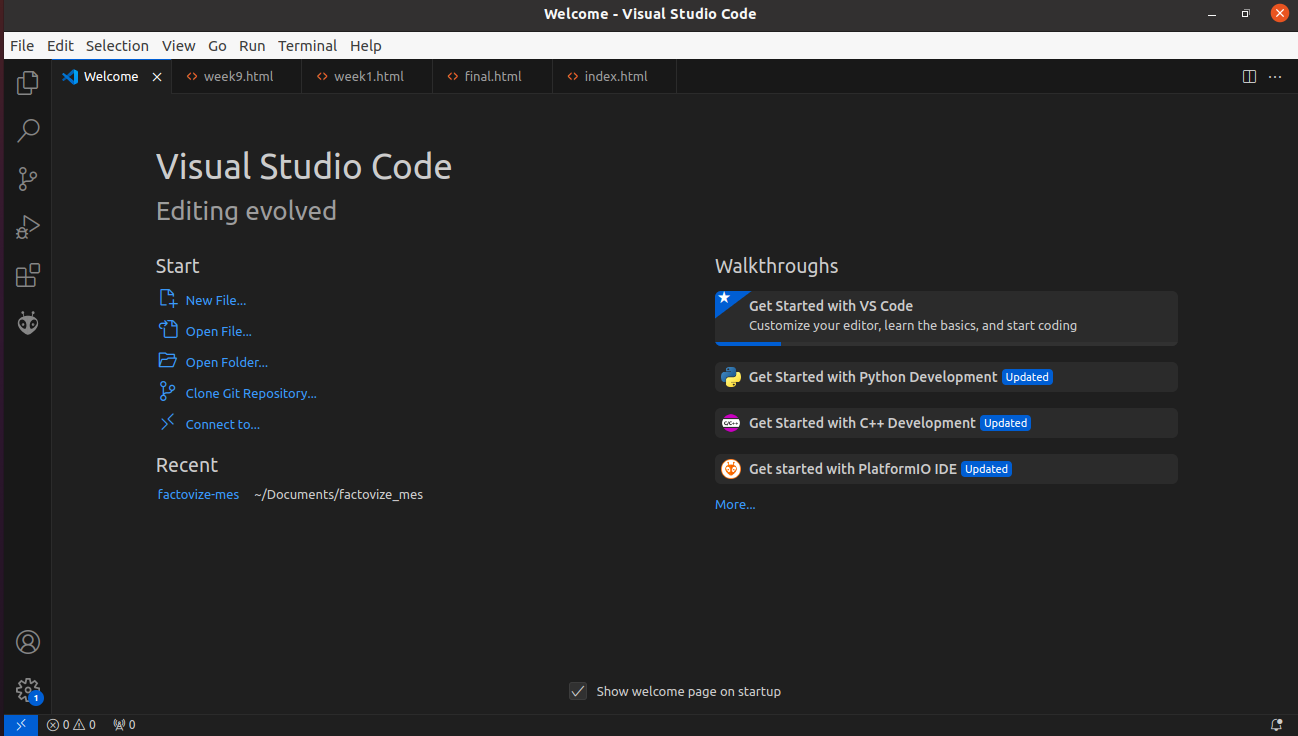
I have written simple html and css code in vs code. The code is uploaded into the git lab.
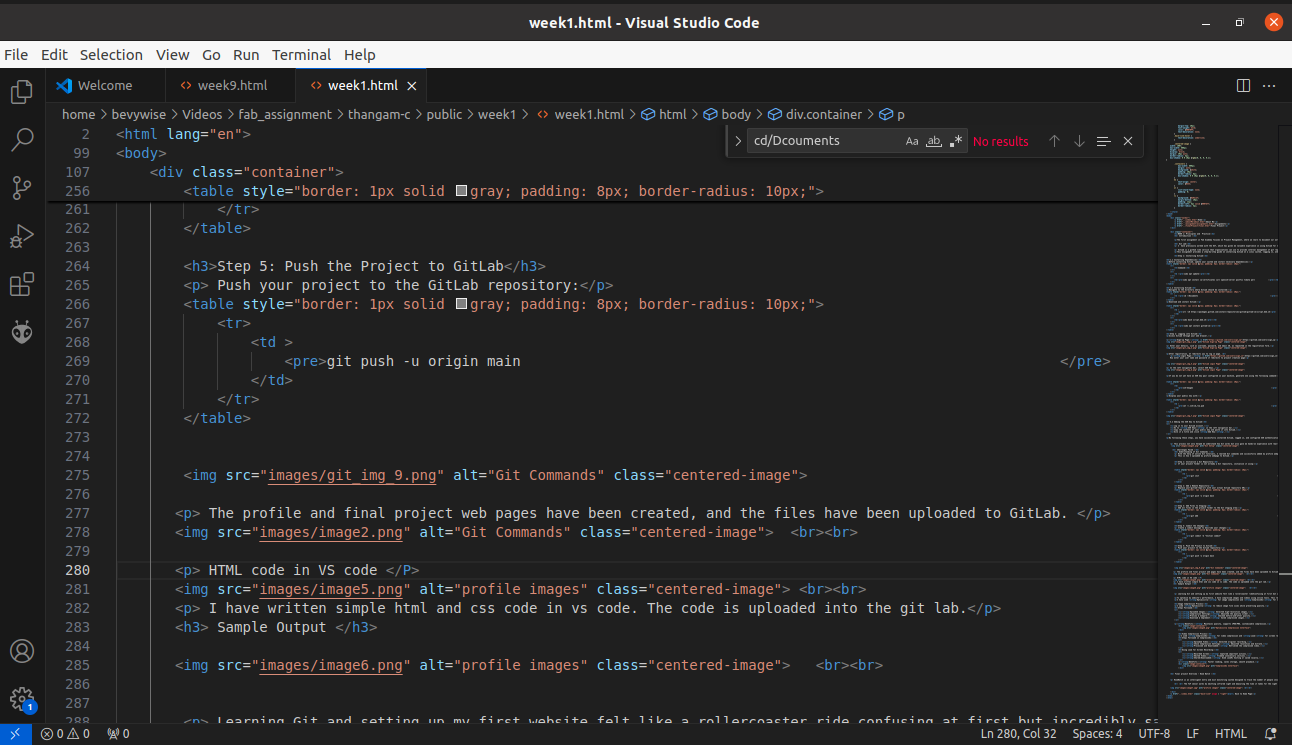
Sample Output

Learning Git and setting up my first website felt like a rollercoaster ride—confusing at first but incredibly satisfying once I got the hang of it. I started by setting up a GitLab account and creating my first project. Then, I installed Git and VS Code, making sure my local setup could communicate with GitLab.
To optimize my website's performance, I have compressed images and videos using online tools. This reduces file sizes while maintaining quality, ensuring faster page loading times and efficient storage usage.
I have used Optimizilla for image compression and Compress2Go for video compression. Additionally, I used Loom as a free screen recorder to capture screen recordings.
Image Compression Process
I used Optimizilla to reduce image file sizes while preserving quality.
Steps Followed:
- Uploaded Images: Selected high-resolution images.
- Compression Settings: Adjusted the quality slider.
- Preview & Compare: Checked before-and-after quality.
- Download & Implement: Saved compressed images.
Benefits: Maintains quality, supports JPEG/PNG, customizable compression.

Video Compression Process
I used Compress2Go for video compression and Loom for screen recording.
Steps Followed in Compress2Go:
- Uploaded Video: Selected original recording.
- Chose Compression Settings: Adjusted resolution and bitrate.
- Processed and Downloaded: Retrieved the compressed video.
Using Loom for Screen Recording:
- Recorded Screen: Captured important actions.
- Edited Video: Trimmed unnecessary sections.
- Shared/Downloaded: Used Loom’s hosting or saved locally.
Benefits: Faster loading, saves storage, smooth playback.

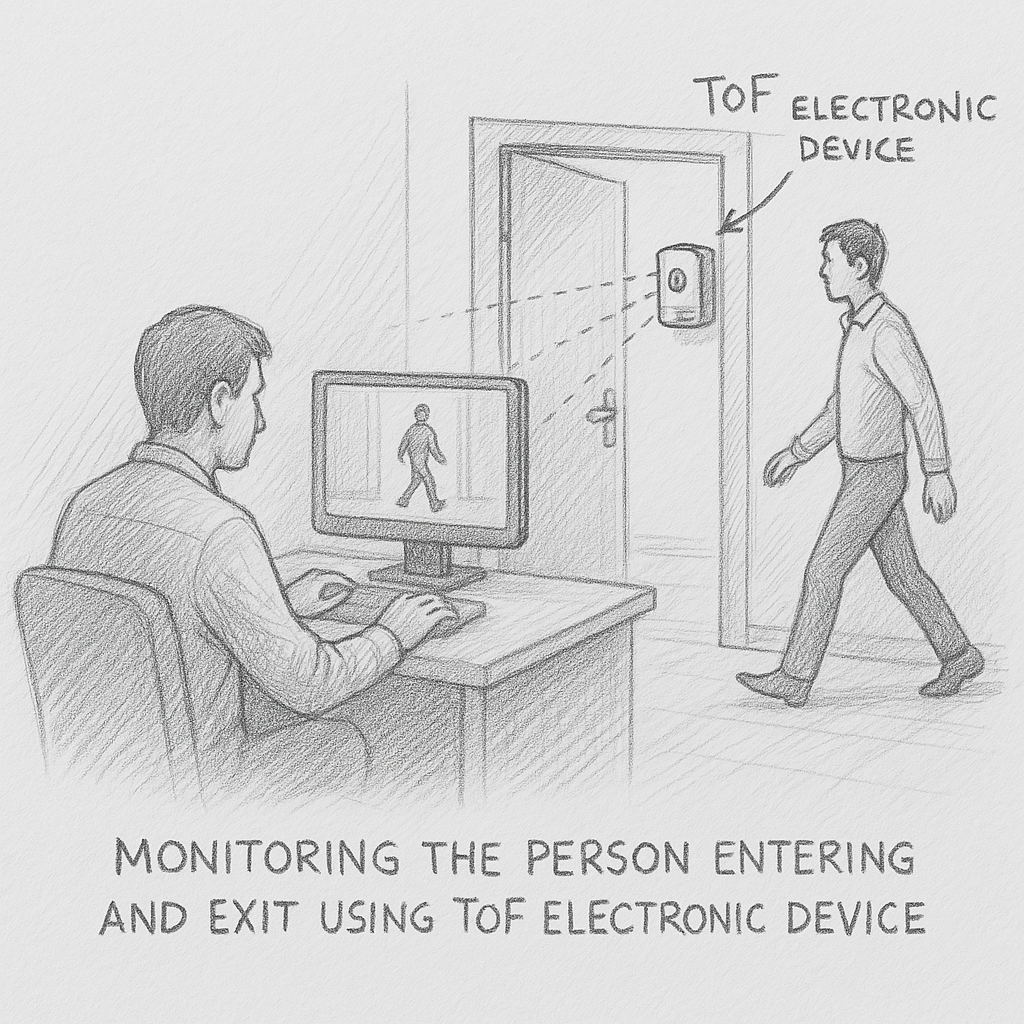
Final project Overview - Room Watch
RoomWatch is an intelligent entry and exit monitoring system designed to track the number of people inside a
room in real time. Using a Time-of-Flight (ToF) sensor, it accurately detects when a person enters or exits
and updates the total occupancy count with high precision. The system operates efficiently with minimal
power consumption and can transmit data wirelessly for remote monitoring. RoomWatch is ideal for
applications in offices, libraries, labs, and smart buildings, enhancing security, space utilization, and
resource management.
The ToF sensor works by emitting infrared light and measuring the time it takes for the light to
reflect back from objects, enabling highly accurate distance measurement. This technology allows RoomWatch
to differentiate between individuals and filter out false triggers, ensuring precise occupancy tracking. The
system can be integrated with IoT platforms for real-time data visualization, alerts, and analytics. With
wireless connectivity, administrators can monitor occupancy levels remotely, improving building safety and
energy efficiency. Additionally, RoomWatch is designed to be scalable and adaptable for various
environments, making it a reliable solution for modern smart spaces.
Final Project
Reference Link