Group Assignment - 3D Scanning and Printing
In this Week, I have Contributed in the understanding characteristics of My 3D Printer
Objectives of the Week
- Test the design rules for your 3D printer(s)
- Document your work on the group work page and reflect on your individual page what you learned about characteristics of your printer(s)
Characteristics of my 3D Printer
In our Lab we have two Printers one is from Creality and another one is from Flash Forge
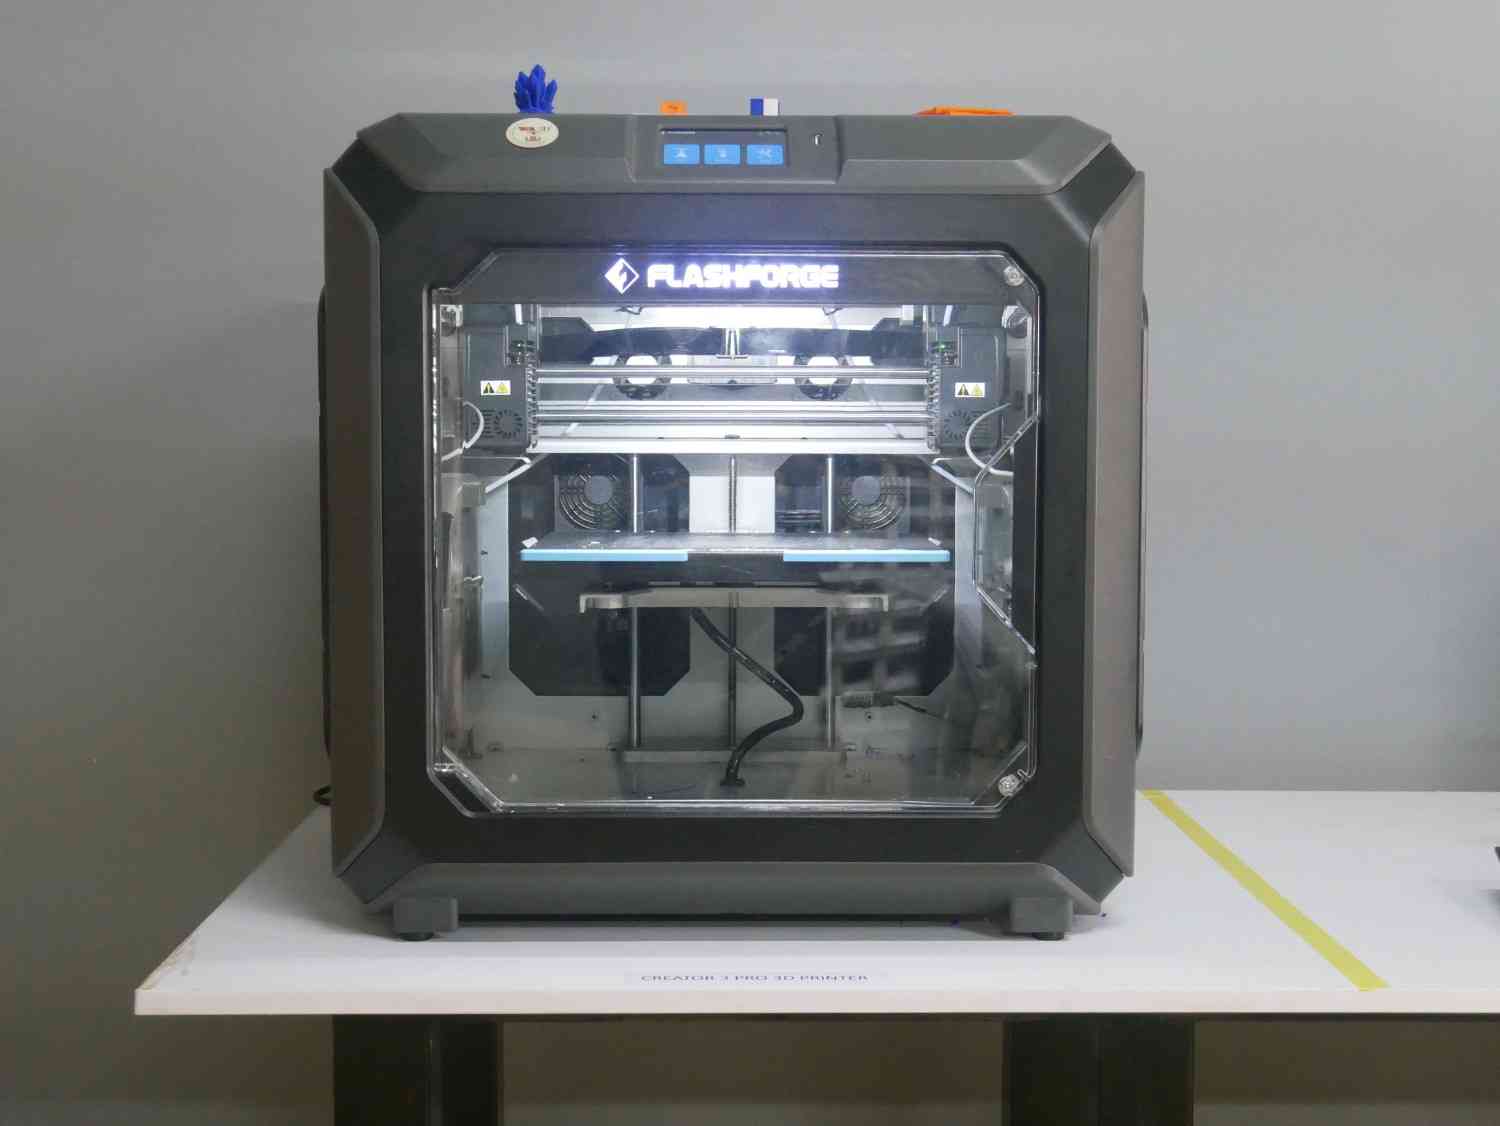
About FlashForge Creator 3 Pro
The FlashForge Creator 3 Pro is a professional IDEX (Independent Dual Extruder) 3D printer, allowing dual-material and multi-color printing. It has a 300°C high-temperature extruder, enabling compatibility with a wide range of filaments like PLA, ABS, PETG, PC, and Nylon. The heated flexible build plate improves adhesion and makes print removal easy. With an enclosed chamber, it maintains stable temperatures for better print quality. The active leveling system ensures precise calibration. It features Wi-Fi, USB, and Ethernet connectivity for remote operation. It cost comes around Rs. 2L
Specifications
| Feature | Specification |
|---|---|
| Printing Technology | Fused Filament Fabrication (FFF) |
| Build Volume | 300 x 250 x 200 mm |
| Layer Resolution | 0.05 - 0.4 mm |
| Nozzle Diameter | 0.4 mm (Standard) |
| Printing Speed | ≤ 150 mm/s |
| Filament Diameter | 1.75 mm |
| Extruder Type | Independent Dual Extruders (IDEX) |
| Compatible Materials | PLA, ABS, PETG, TPU, PVA, Nylon, Carbon Fiber |
| Heated Bed | Yes (Max Temp: 120°C) |
| Nozzle Temperature | Max 320°C |
| Enclosure | Fully enclosed for temperature stability |
| Connectivity | USB, Wi-Fi, Ethernet |
| Power Supply | 24V / 500W |
| Display | 4.3-inch Touchscreen |
| Supported File Formats | STL, OBJ, 3MF, G-code |
| Compatible Software | FlashPrint, Simplify3D, Cura |
| Weight | 40 kg |
3D Printer Design Rules
1. Overhangs and Bridging
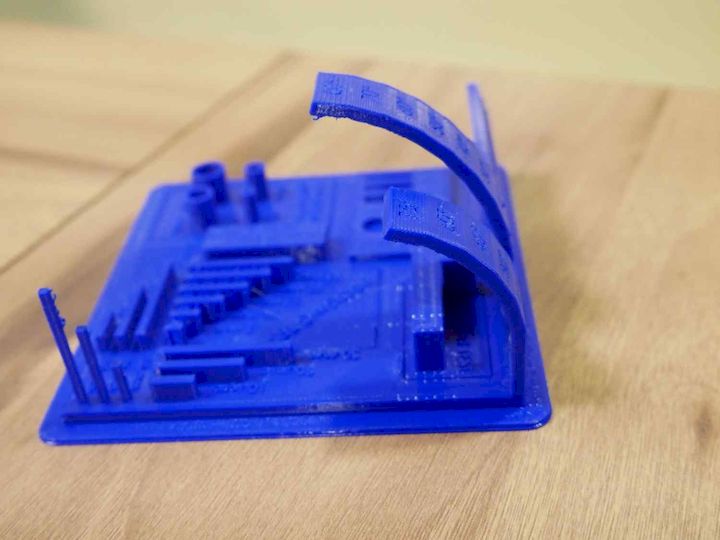
Limit overhangs to less than 45° to avoid sagging. Bridges should span no more than 10–15 mm unless the printer is tuned. Prefer chamfers over unsupported edges.
2. Clearance and Tolerances
- Friction fit (tight): 0.1 – 0.2 mm clearance
- Slip fit (loose): 0.3 – 0.6 mm clearance
Always test interlocking or moving parts before final printing for correct fit.
3. Minimum Hole Diameter
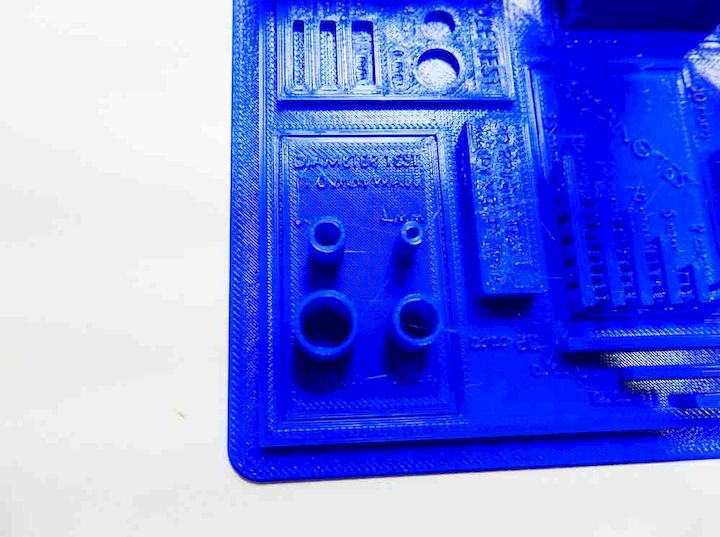
Holes smaller than 2 mm may not come out clean. For precise fits, oversize the hole by 0.2–0.5 mm or drill after printing.
4. Supports and Orientation
Minimize support structures by orienting flat surfaces downward. Self-supporting features such as arches and chamfers are preferred for clean prints.
5. Minimum Text Size
- Embossed (raised) text: Minimum 6–8 pt (≈1.2 mm)
- Engraved (cut-in) text: Minimum 8–10 pt (≈1.5 mm)
Use bold fonts with simple geometry to maintain legibility during printing.
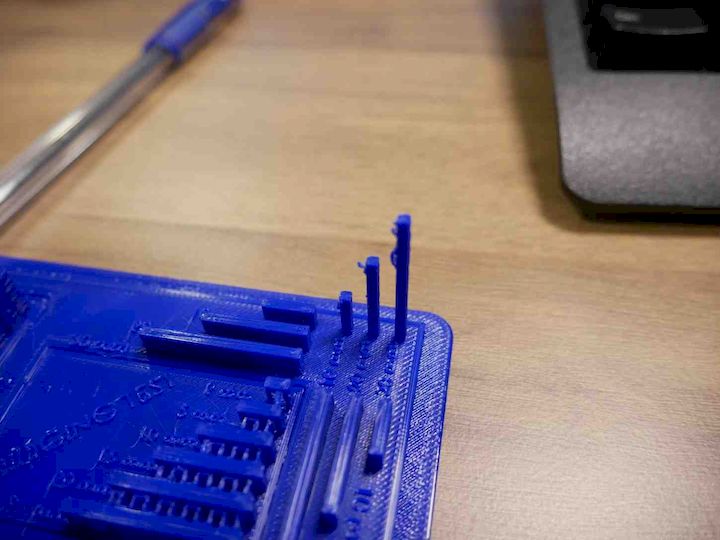
6. Aspect Ratio and Tall Structures
Avoid designing tall, thin structures with a height-to-width ratio greater than 10:1. Add brims or supports for stability during printing.
7. Fillets and Chamfers
Fillets strengthen corners and reduce stress. Chamfers help with printability and easier part removal. Use both for functionality and aesthetics.
8. Build Volume Limitations
Stay within your printer’s maximum dimensions. Standard desktop printers typically offer 220 × 220 × 250 mm. For larger models, split the design into parts with snap-fit or glue joints.
Why These Rules Matter
Following 3D printer design rules ensures parts print successfully, are dimensionally accurate, require less support material, and minimize post-processing. It helps you achieve higher quality results while saving time and filament.