Week 13 : Molding and Casting
This week we take a little break from electronics and move to molding and casting. For our individual task, we need to design a mold with a smooth surface finish that doesn’t show the production process toolpath, and use it to cast parts. As a group we need to review the safety data sheets for each of our molding and casting materials. Then we need to make and compare the test casts based on the process used for mold making.
Design
Whether or not I end up using cast pieces in my finale project, I wanted to cast a design that could possibly be used. I decided to make a leaf to add more dimension to the art nouveau style linework/vines. To keep the same organic feel, I decided to go back to Sculptgl to model my leaf.
-Due to the smaller size of my model, I thought 3D printing the mold would be better than milling it to try to retain as much detail as possible. Before making the full mold, I wanted to test print the model to see how it would look and if I would need to make any adjustments to the file before making the full mold.
- I’m glad I ran the test print because there was an area of the leaf that was too thin. I quickly edited the file to have a little more material and ran another test.
- Once I was happy with my leaf design, it's time to design the mold. As a side note, even though I haven't done molding and casting before I did consider at this point that my design might be too small or small enough to make it more difficult to execute, but I really wanted to try out this scale, just to try it out and for purposes of final project application.
- Since my design has 360 dimension, I plan on making a split mold. To create the mold, I initially tried to use more "sophisticated" software, fusion 360.
- I struggled with cutting my model in half in fusion. I know there is a split body tool, but the command would not let me select my imported model as a body. I watched multiple YouTube tutorials and checked different forums but I still could not figure out how to get it to work.
- I then moved to Onshape and struggled to just be able to load my model into the program. I did get my model to finally load, but if I'm being honest, I was tired of wasting time trying to work with different programs, that I jumped ship one last time to tinkercad, where I knew I could get the job done.
- In tinkercad I added alignment pieces and divided my design in half. I then built a case around each half. I included a ridge to hopefully help with removal of the silicone when cured.
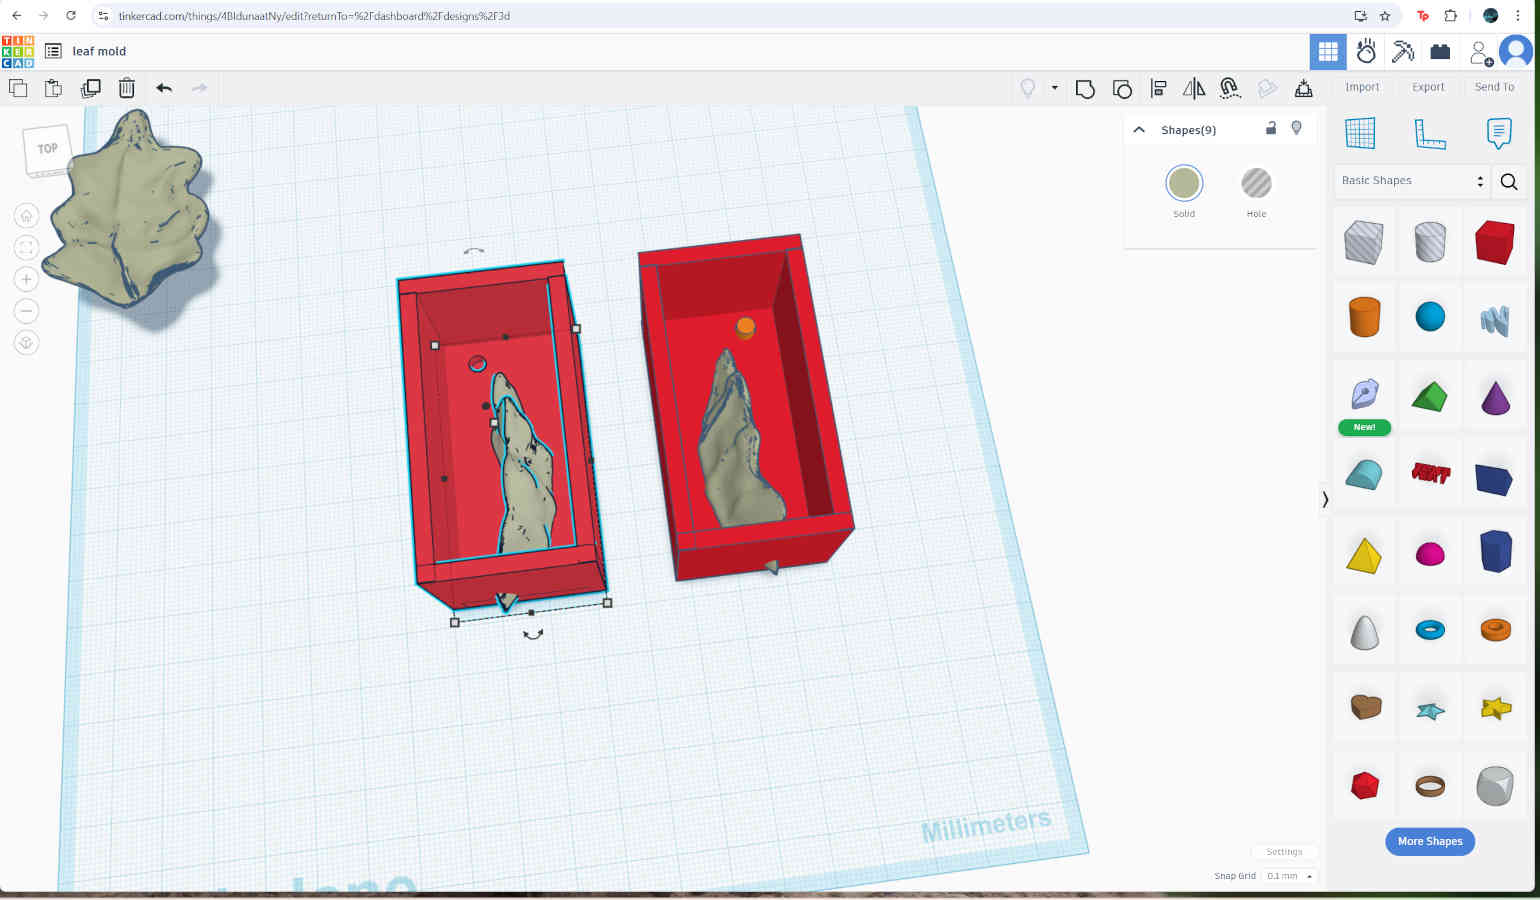
- I also added a channel to pour in the liquid plastic.
Molding and Casting
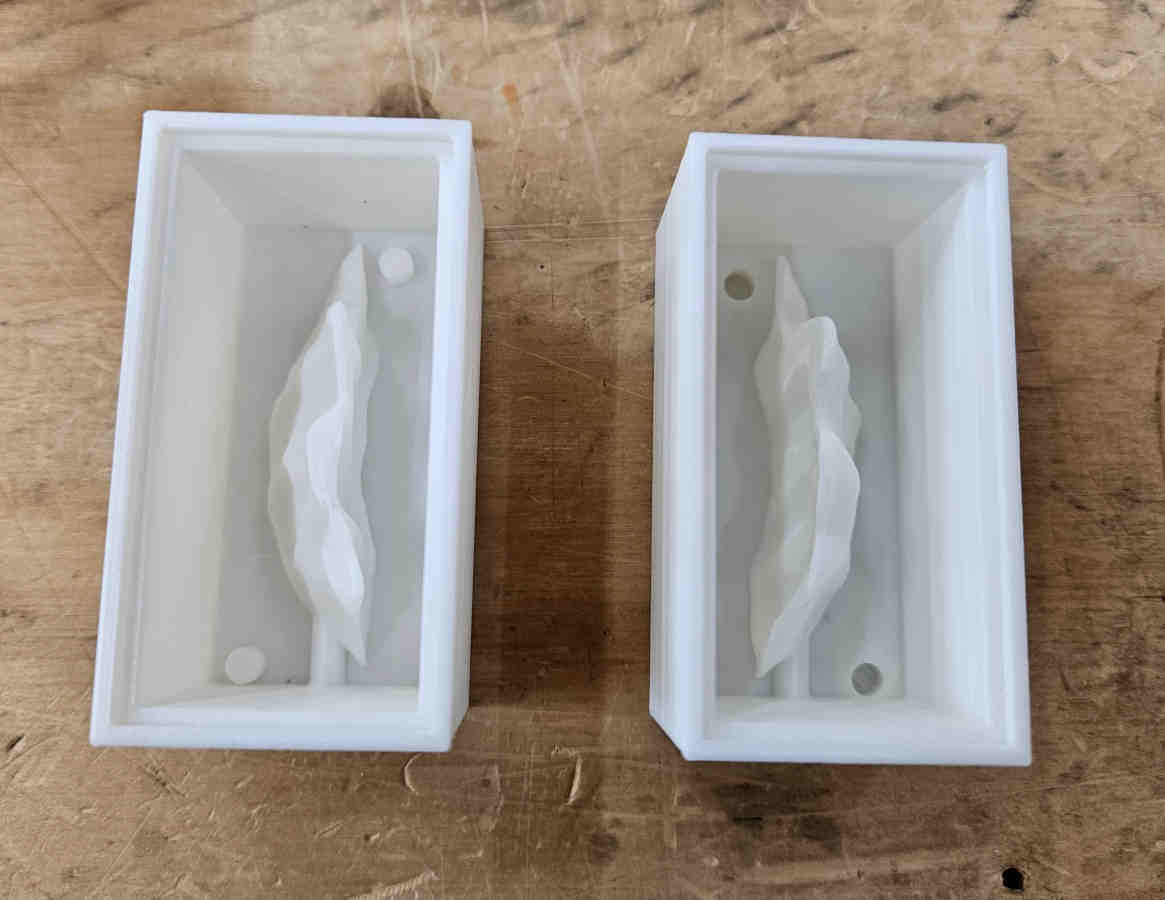
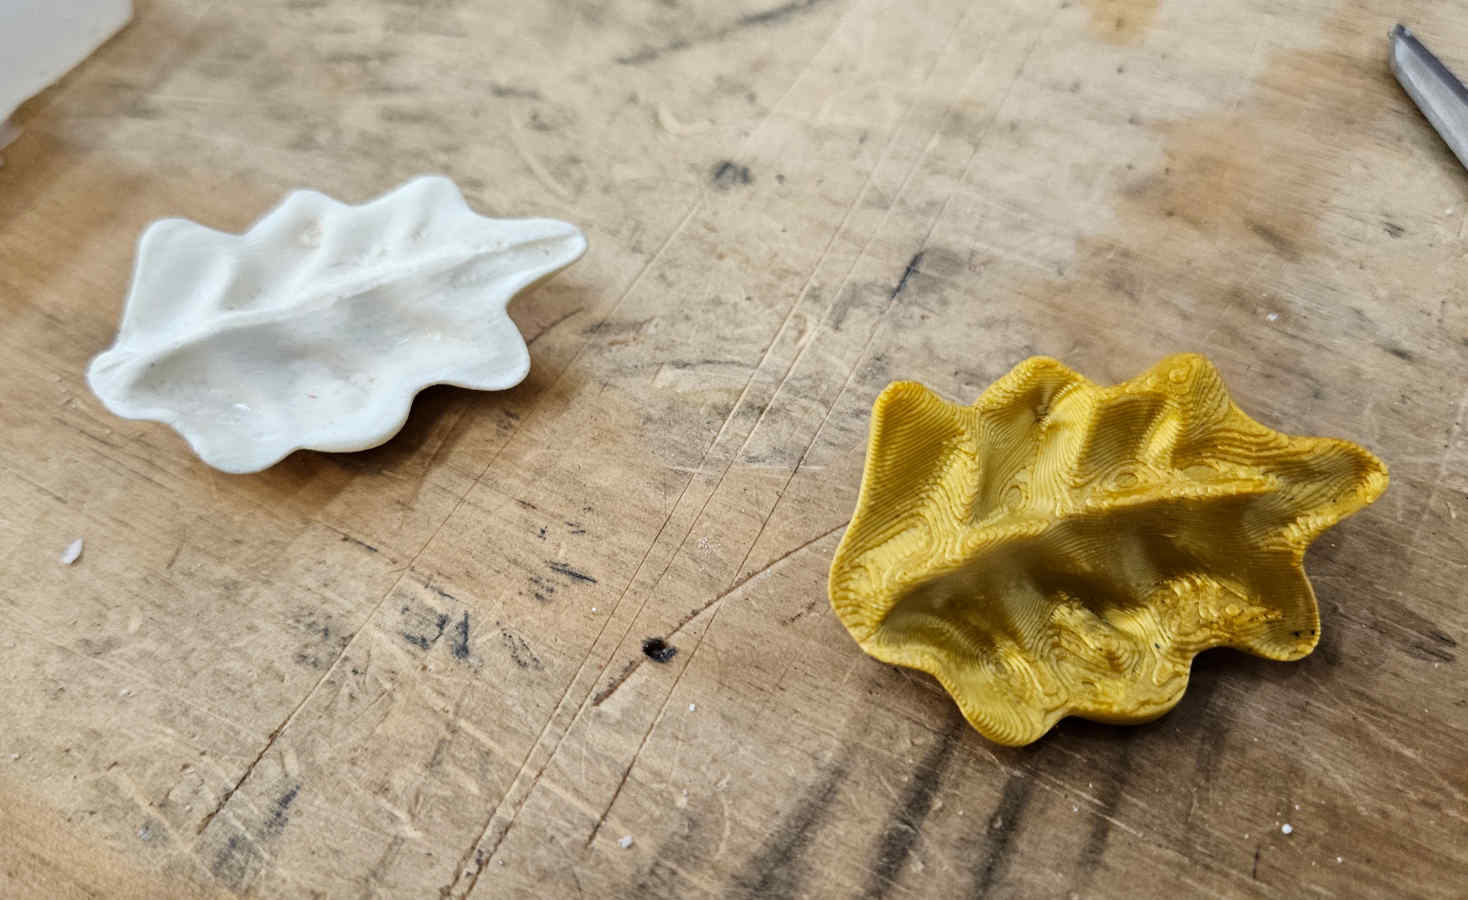
- From here we 3D printed the mold. Cutting the leaf longways on the y axis down the middle, really minimized obvious stepping between printing layers. I was shocked and surprised how smooth the print turned out with the default BambuStudio settings for PLA filament. You can still see slight filament layer lines, but overall, pretty smooth. Because of the smooth outcome of the print, I thought postprocessing wouldn’t be necessary.
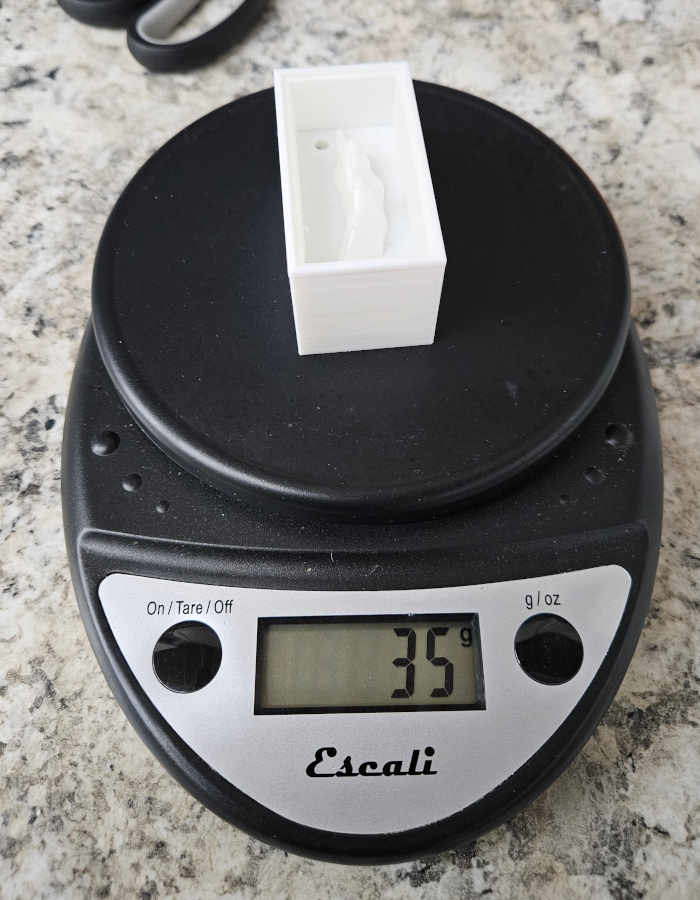
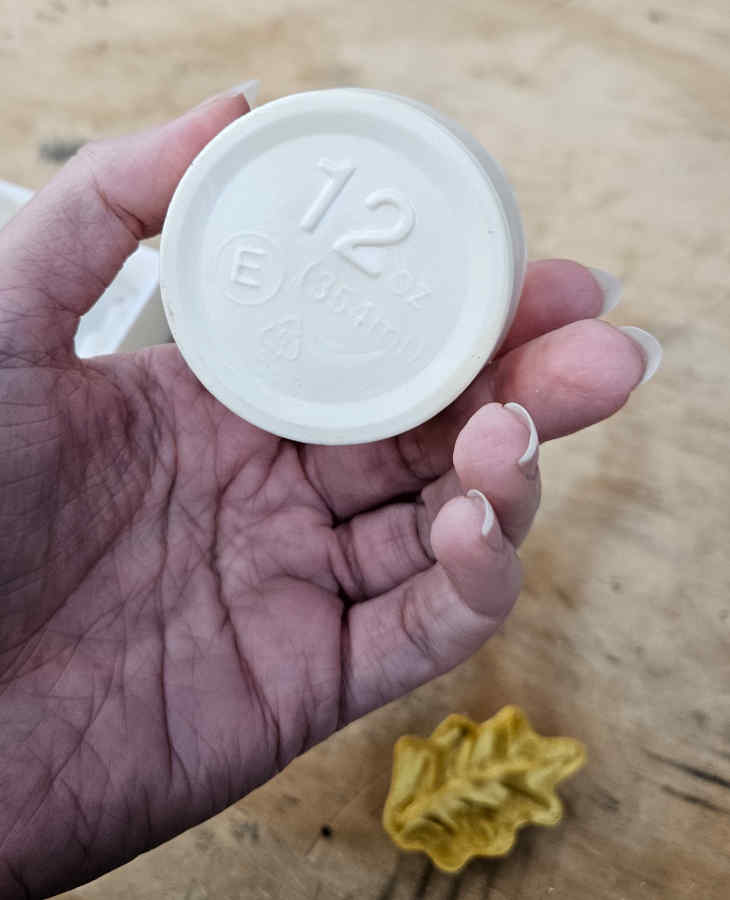
- Then I proceeded to check the volume amount of the mold with water.
- Before mixing and pouring the silicone, I brushed the 3D print with diluted dish soap.
- Measure out parts A and B in separate cups. Mix the two parts together by stirring, NOT SCOOPING. Make sure you stir the parts enough to be properly combined.
- Pour the silicone into the molds. Try to pour it nice, smooth, and evenly to try to avoid bubbles. This is where I messed up, I was trying to be mindful at this part but I was thrown off but how quick the silicone was starting to cure so I rushed the pouring process and knew there would be bubbles.
- Also the advice I've read and received was very adamant about not mixing more silicone than needed to avoid wasting material. With the fear of mixing too much I ended up not mixing enough. It was enough to cover the mold, which I thought was fine, but it wasn't enough to make removing it from the mold easy.

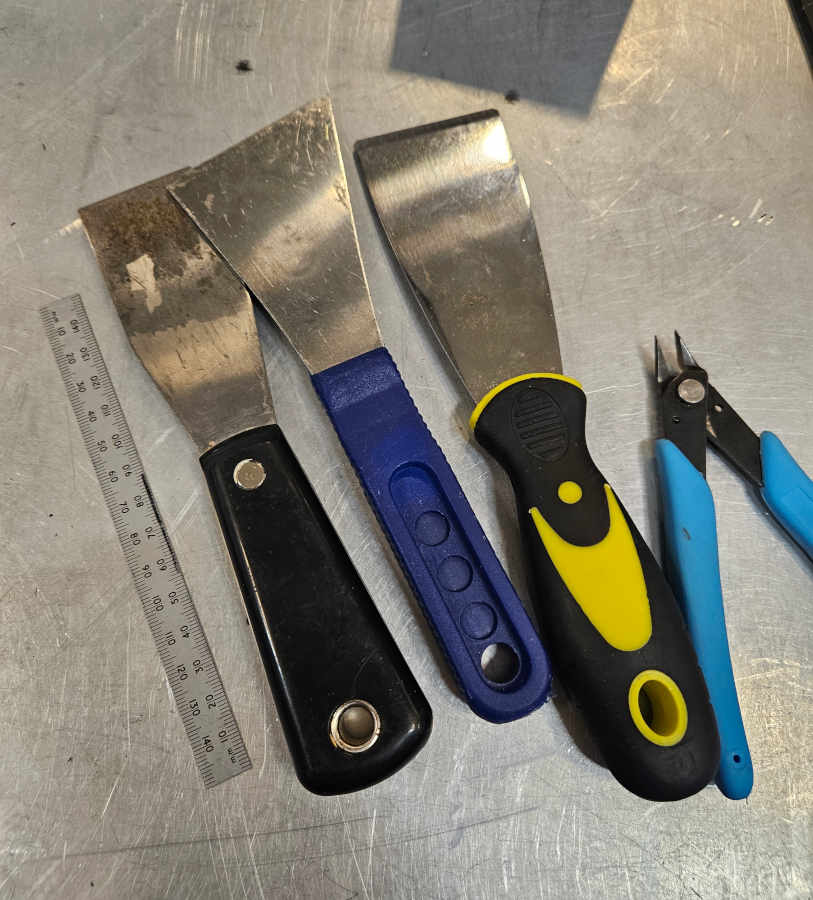
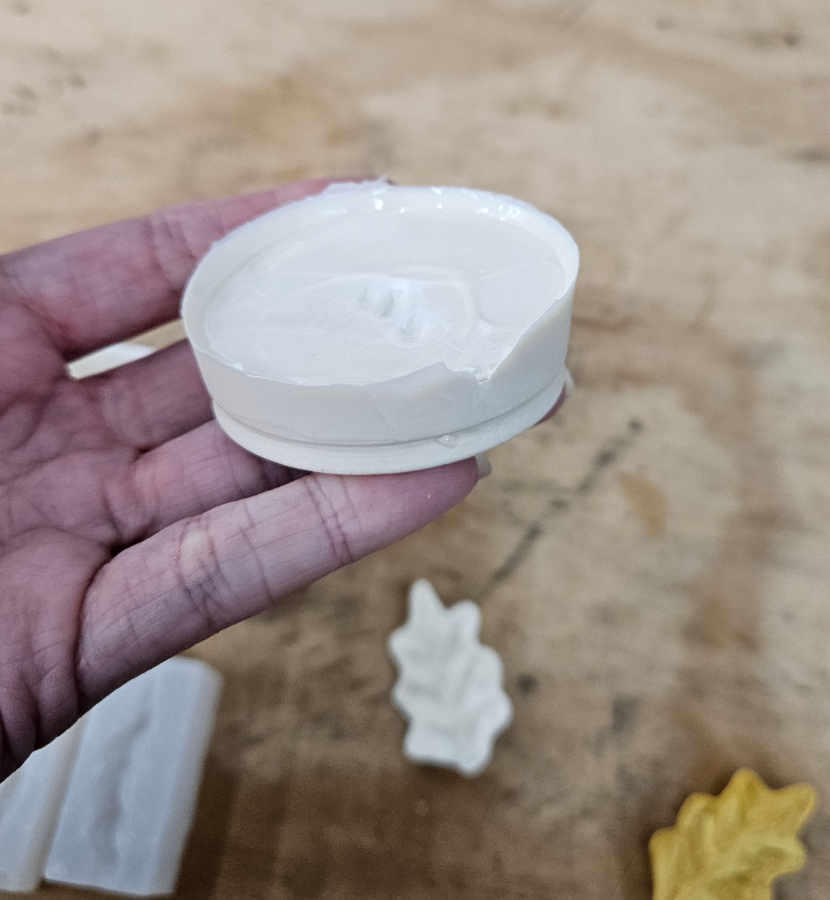
- Since I didn't pour enough silicone to reach the top of the mold. I had nothing to help pull the silicone out. I knew I could cut the mold case but my stubbornness prevailed and I wanted to get it out without destroying the case. I wedged spatulas along the edges of the mold and after some time, I eventually pride out the silicone without it breaking!
- It's evident that there are bubbles but they looked small and didn't think they would impede the cast very much. The biggest bubble issue I had was one of my alignment nubs didn't form due to a bubble.

- I proceeded to cast, using the silicone mold I made. I brushed the inside of the mold with diluted dish soap and tied two rubber bands to hold the two halves closed together. Similar to the silicone, when using liquid plastic as casting material, you need to mix parts A and B together.
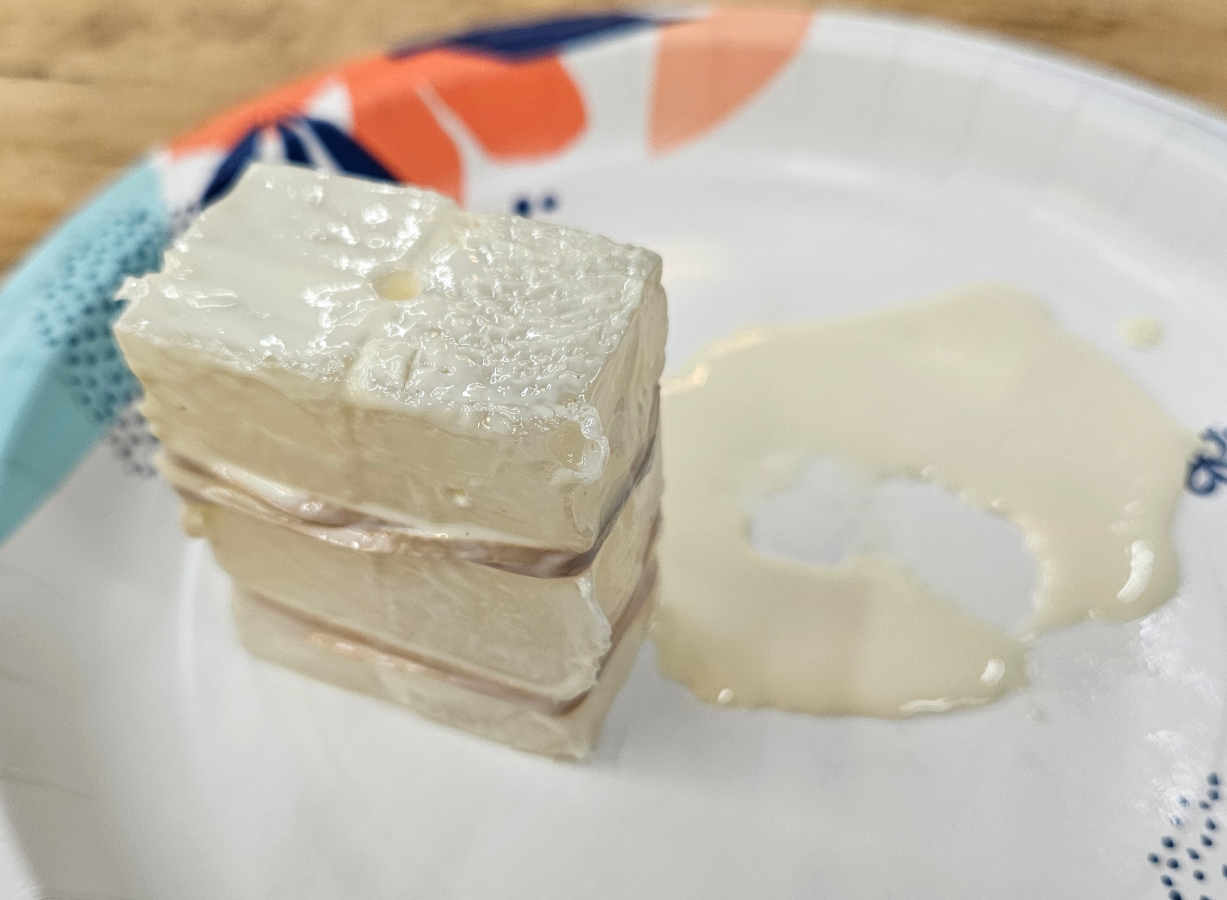
- To my surprise, liquid plastic dries even faster than the silicone and faster than what the instructions suggested. I stirred the two part mixture together, turned my back for a total of 2 seconds, turned back around, and I apparently made a beautiful cast of the cup the plastic was mixed in haha.
- Round two, I am now prepared for how fast it will dry. I began pouring the material into my mold using the channel, and as I suspected, it was a bit too small to work well. I still managed to make it work, but not without making a mess. The channel would back up very quickly and I was getting the liquid all over the mold, inside and out. With a little patience and luck, I was able to fill the mold.
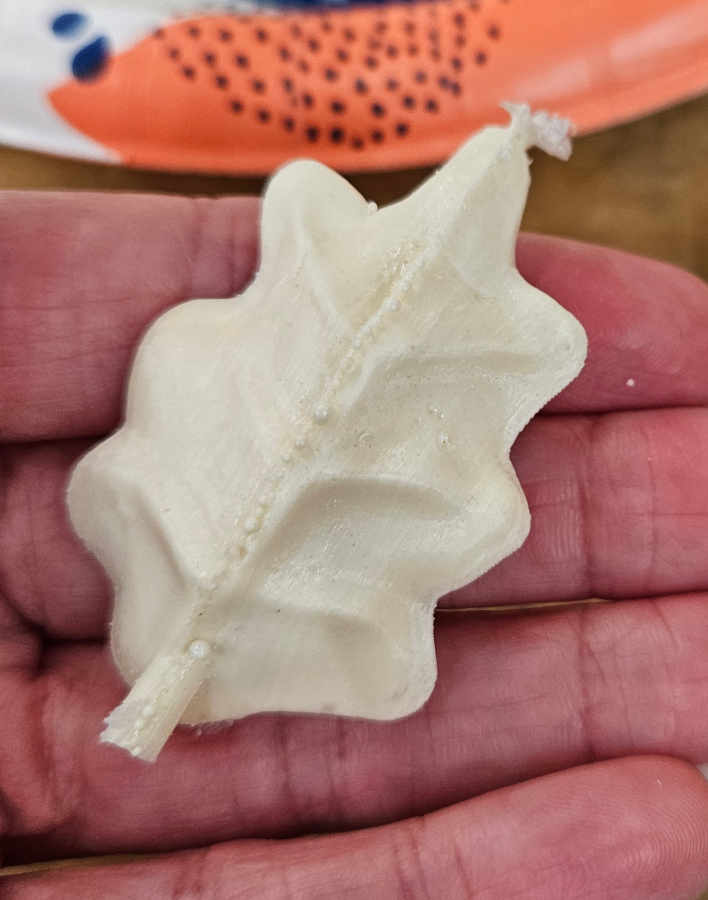
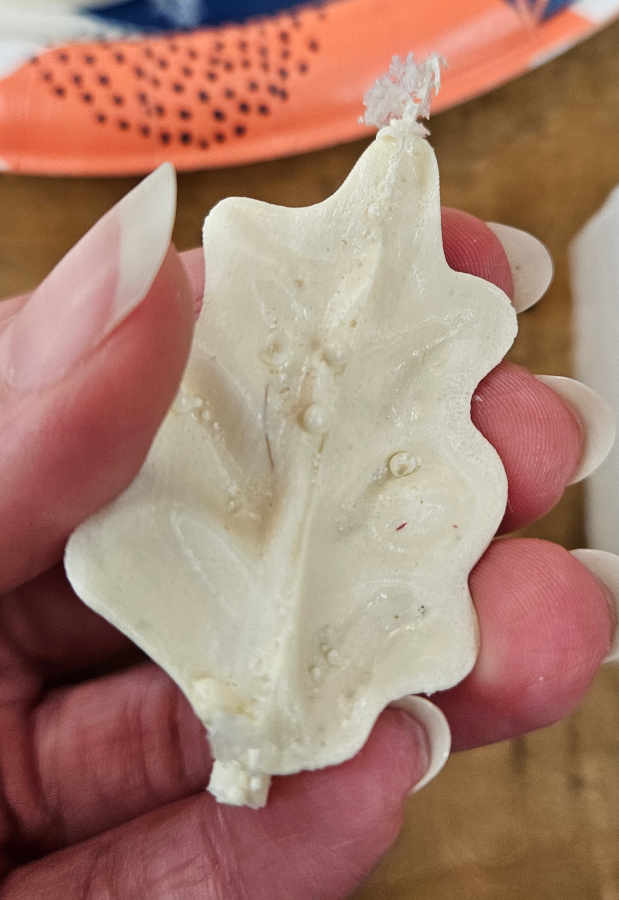
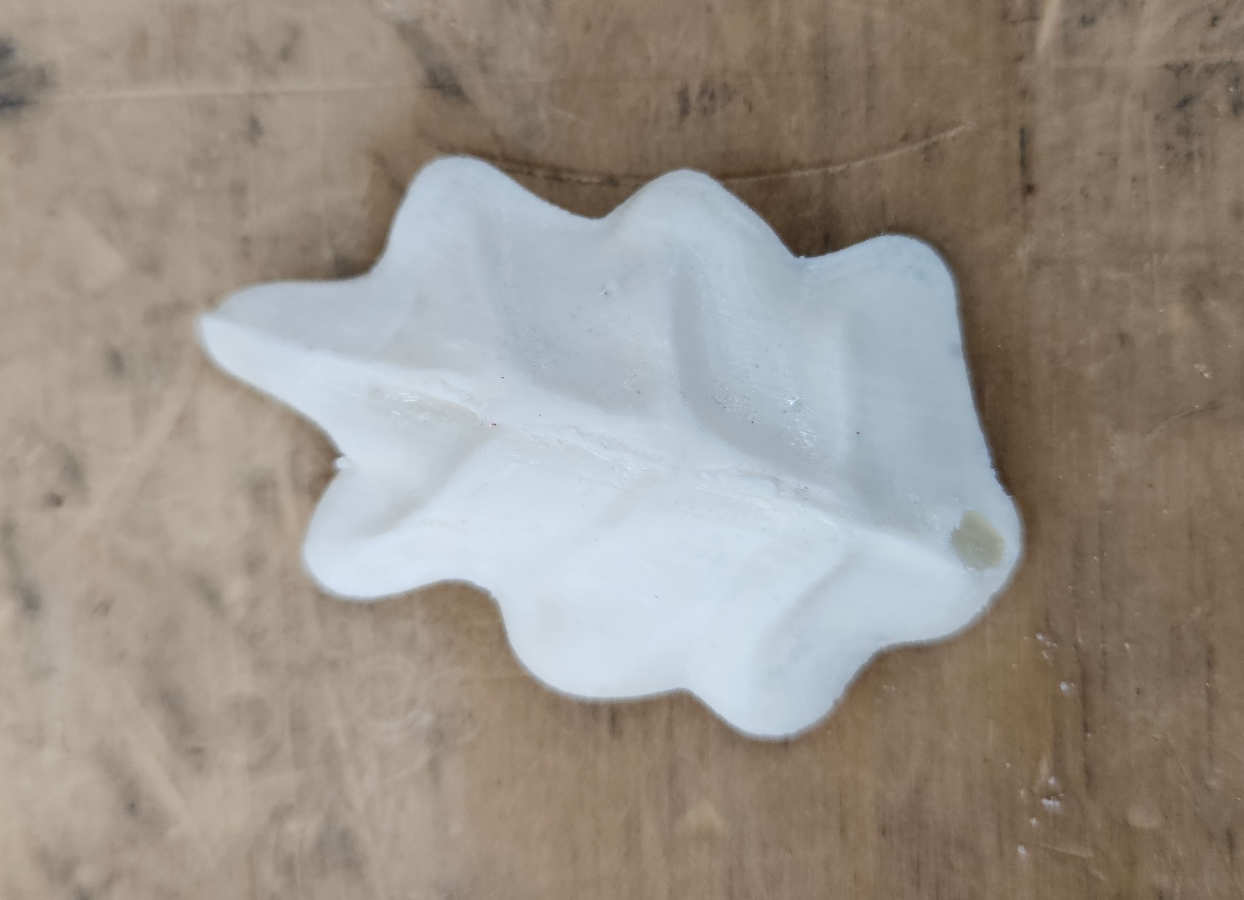
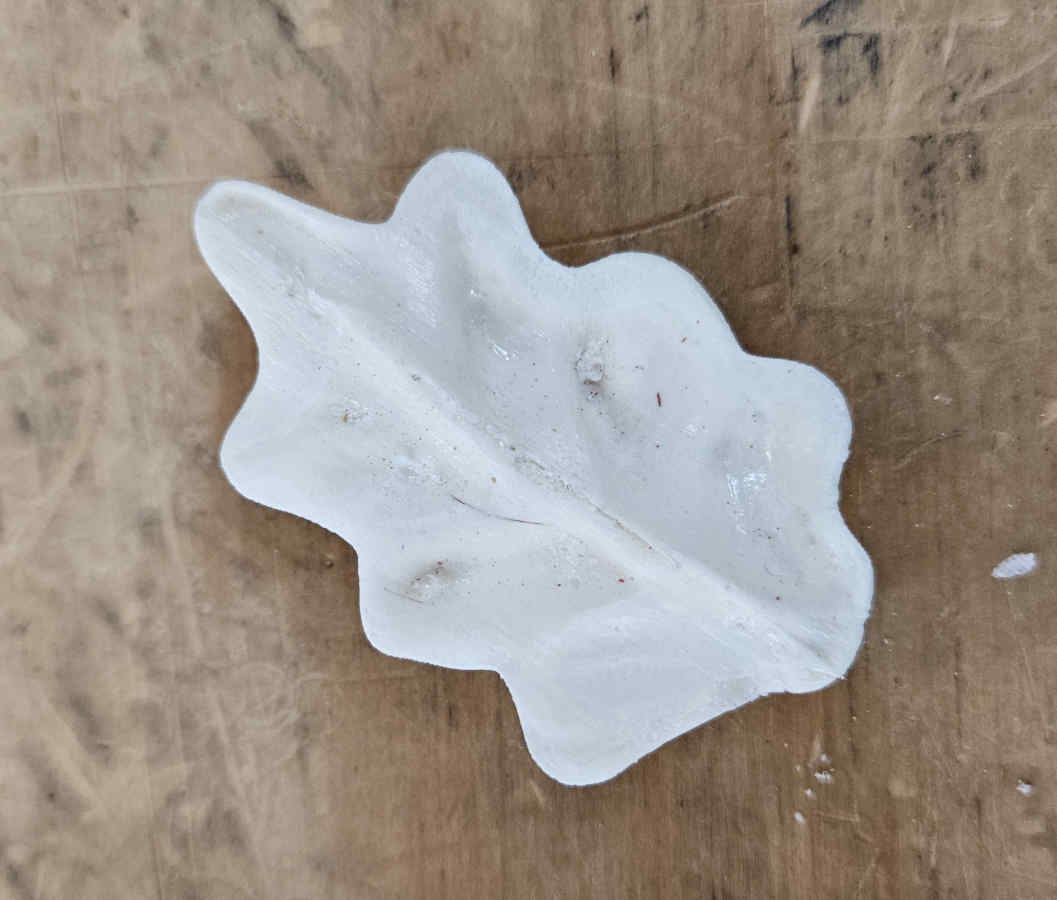
- There were a few tiny little spheres on the cast, due to the tiny bubbles in the mold, but they were so small, once I ran my fingernail over them, they all fell off. I trimmed off the channel part and behold, my little leaf! The cast of my leaf barely showed the layer lines as I had suspected, but there is still a very faint impression of them. I feel the quality of the cast shows little need for postprocessing. I do think if you need your cast to be PERFECTLY smooth, FDM 3D printing would still pose challenges and require some form of postprocessing. For future input, when making a small object, I would open up and make the printed surrounding encloser of the mold larger, so if postprocessing is needed, one could easily fit their hands and maneuver around the mold and have less concern for damaging it.

3D Files

Group Assignment
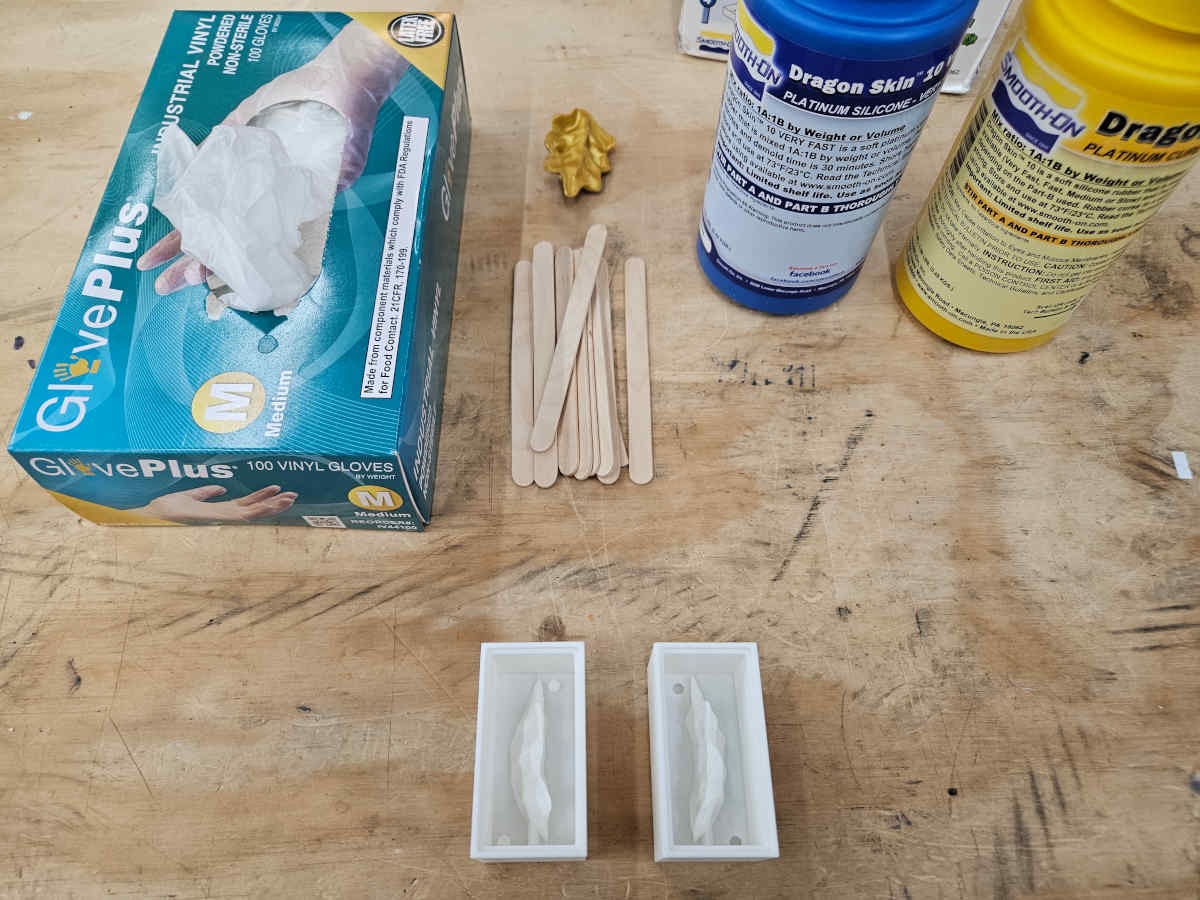
For this week’s group assignment, we reviewed the safety data sheets for both our molding material (Dragon Skin 10 Very Fast Platinum Silicone Rubber) and our casting material (Smooth-Cast 320 - Off-White, Ultra Low Viscosity Liquid Plastic).
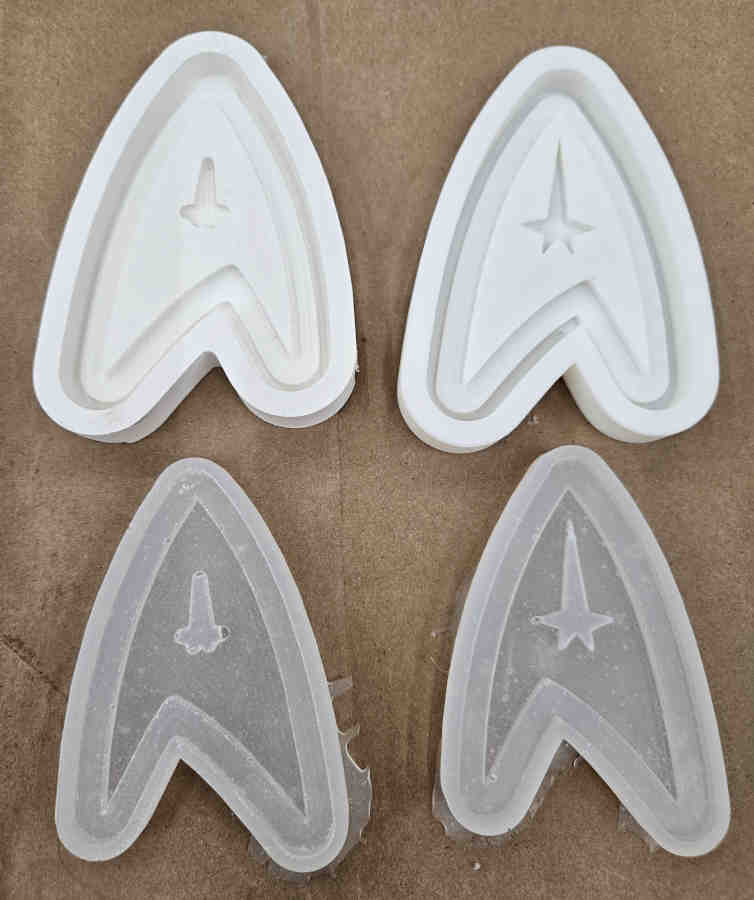
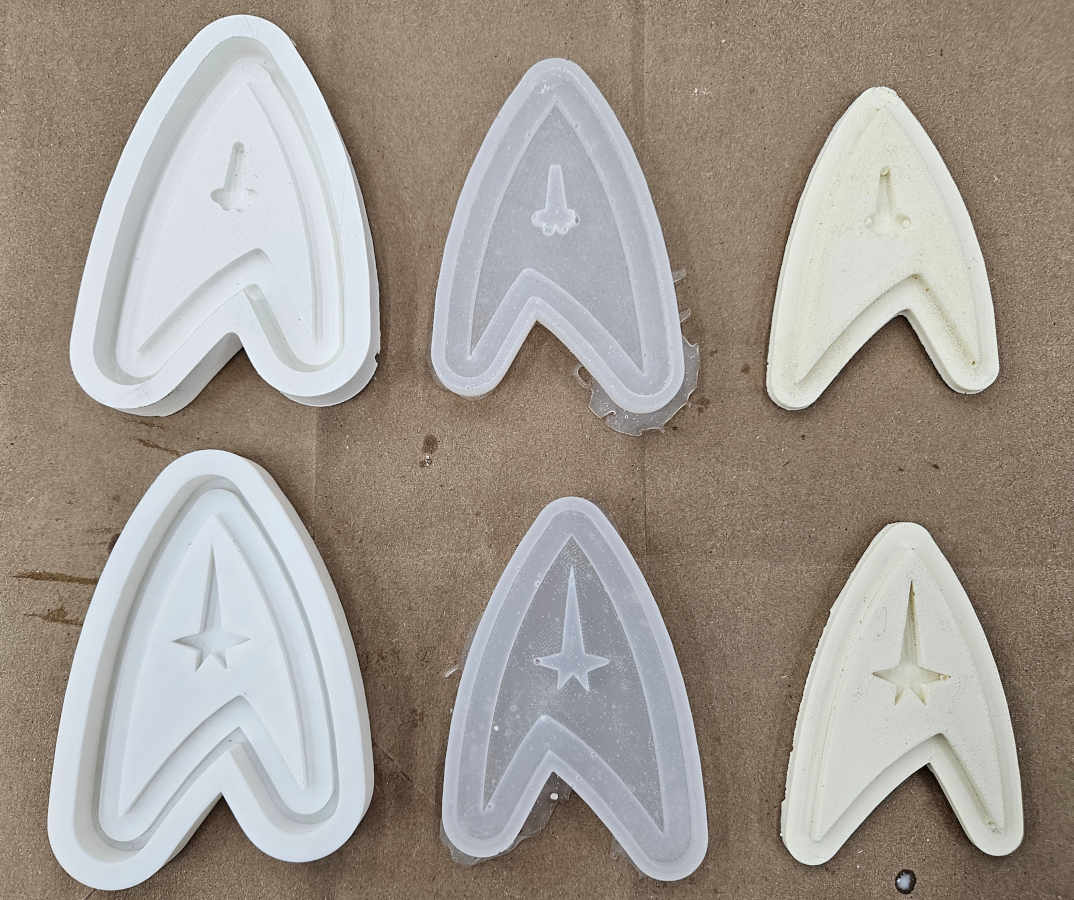
As for means of producing a mold, we decided to compare 3D printing, using PLA with a .4mm nozzle, and CNC milling, using LDPE with an 1/8in bit. Design wise, we went with something fairly simple, but would cover quite a few features to highlight differences within the methods of production. With both of us being fans of Star Trek, we went with the Starfleet Insignia. To accurately compare, the scale will be the same for both at about 4.2”H x 3”L .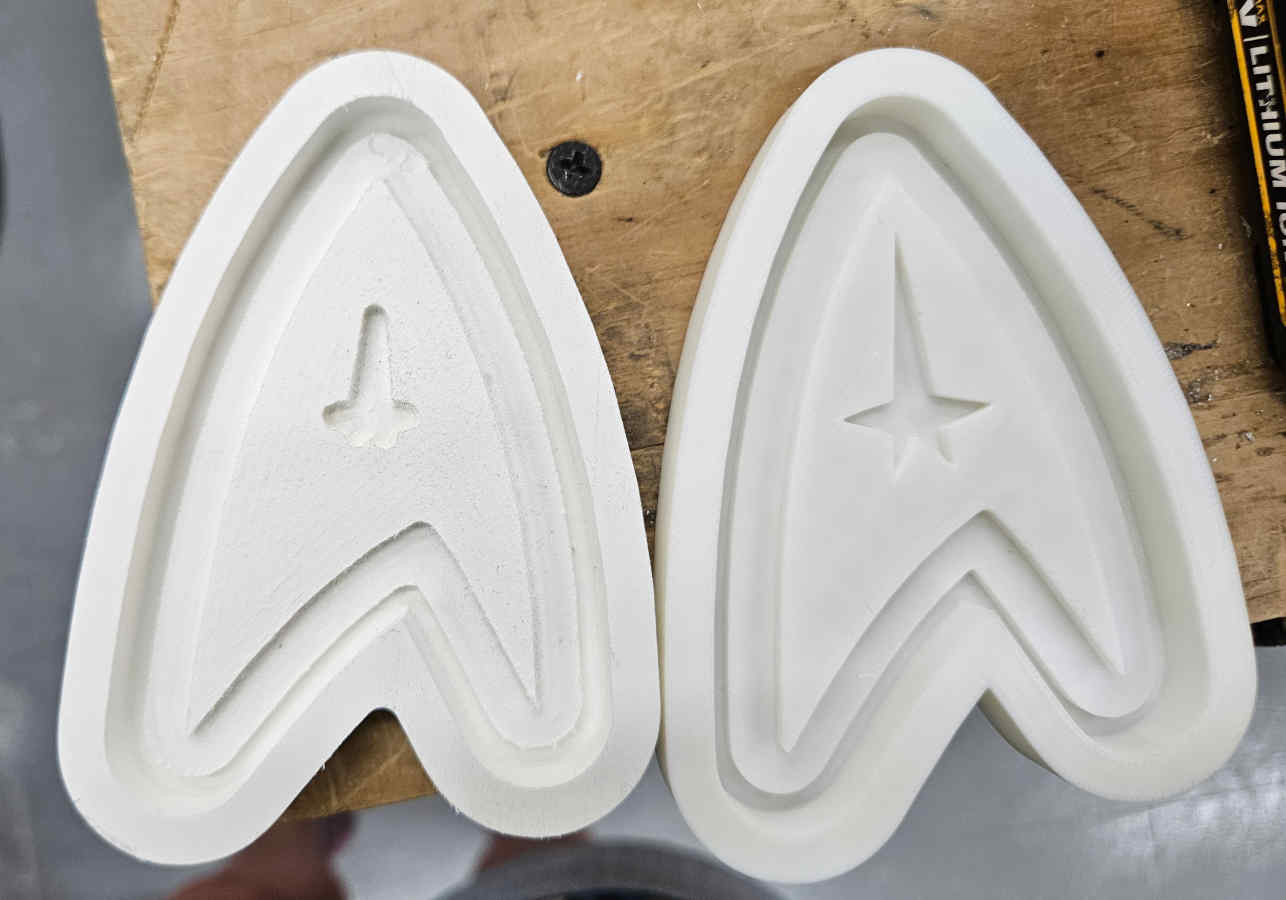
- To start, 3D printing the mold took about an hour to print while the CNC took about 20 minutes. But at this smaller scale, when dealing with sharp vertices it is very evident that you lose detail with the CNC mill due to the dimension of the bit. Even if we had switched to a smaller bit for inside angles, we would never get a perfectly sharp point. Yes, at a larger scale and smaller bit, the difference in the vertices might be miniscule but the milling time would take longer, in exchange.
- Both machines handle curves well. Both machines also seem to leave traces of the production process. We’ll see how evident the traces will show up when casted.
Silicone Mold
To create the silicone mold, we used Dragon Skin 10 Very Fast Platinum Silicone Rubber.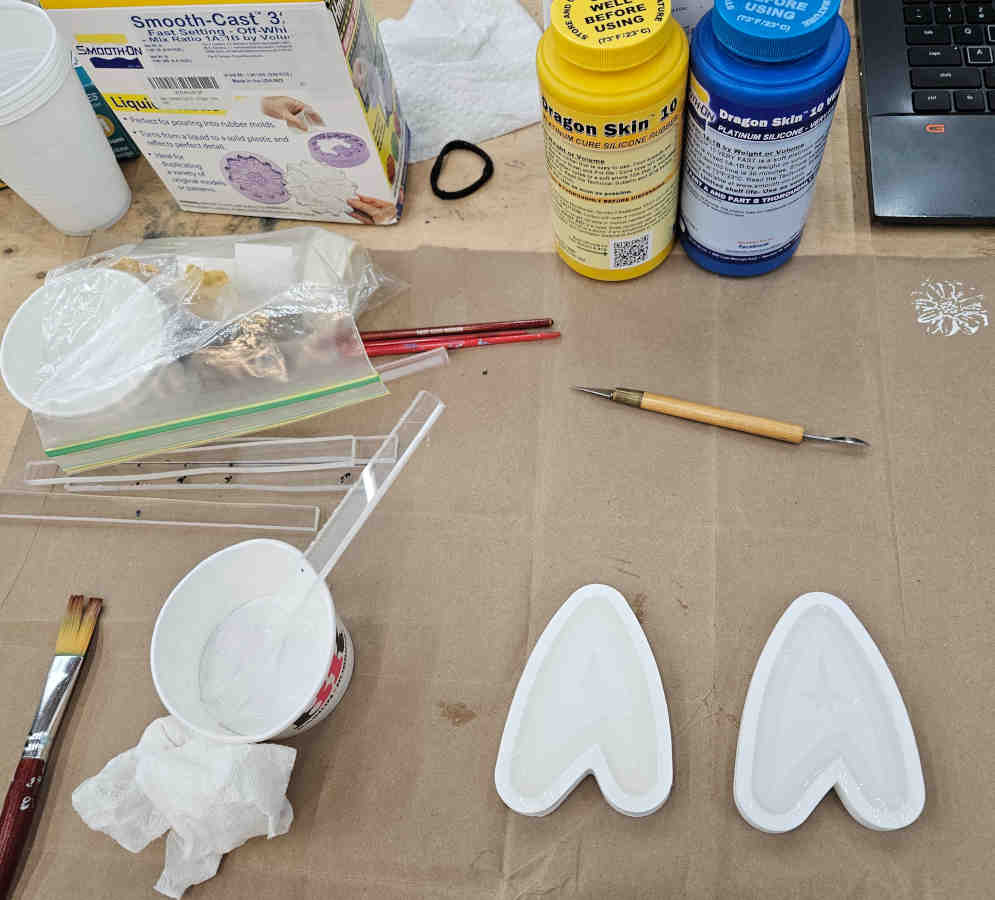
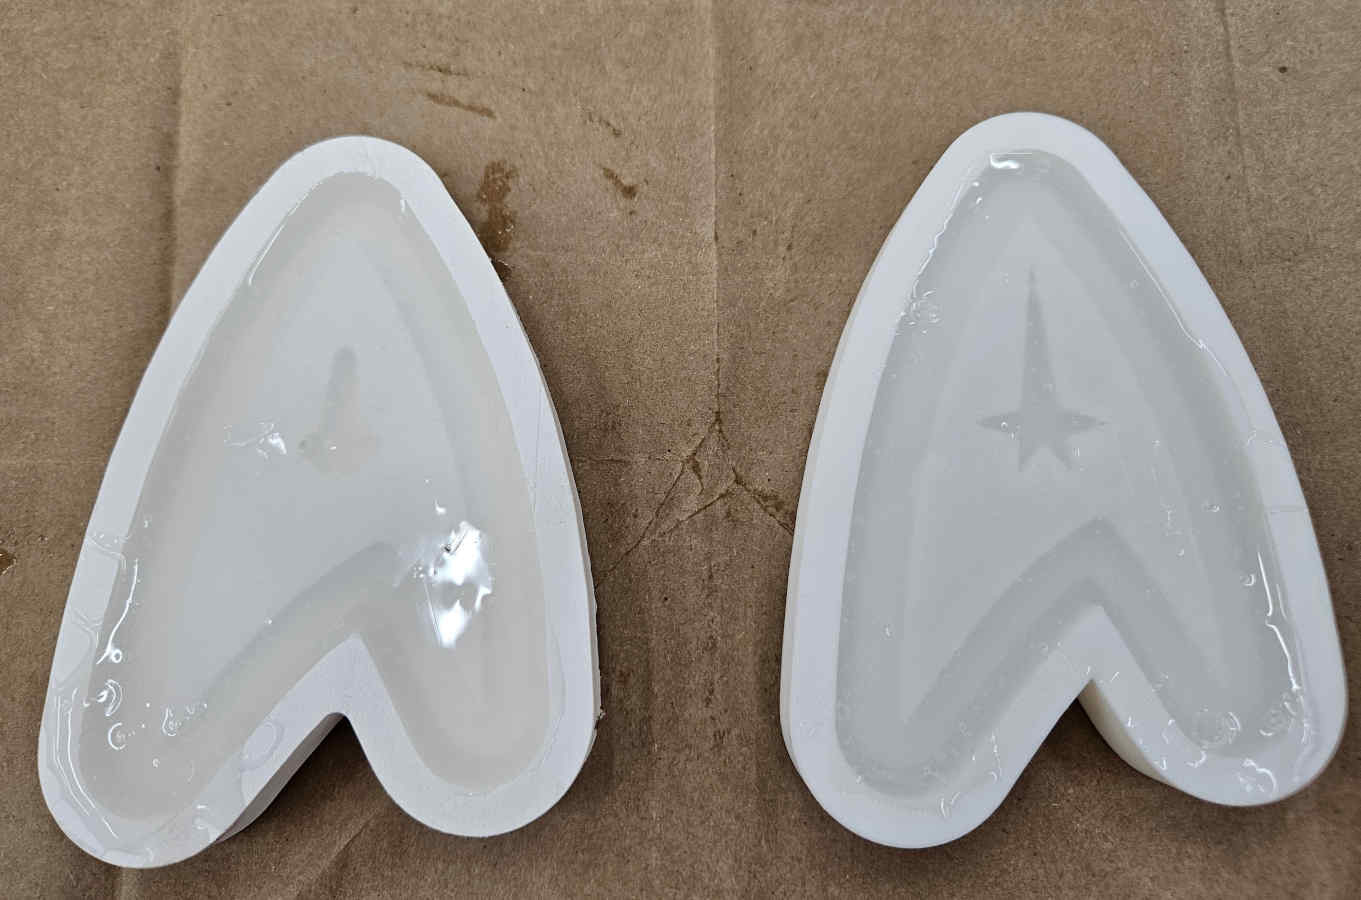
- Removing the molds from both shells were relatively easy. If anything, the silicone was slightly easier to remove from the LDPE, which is most likely due to having rounded edges instead of sharp vertices for the silicone to be wedged into.
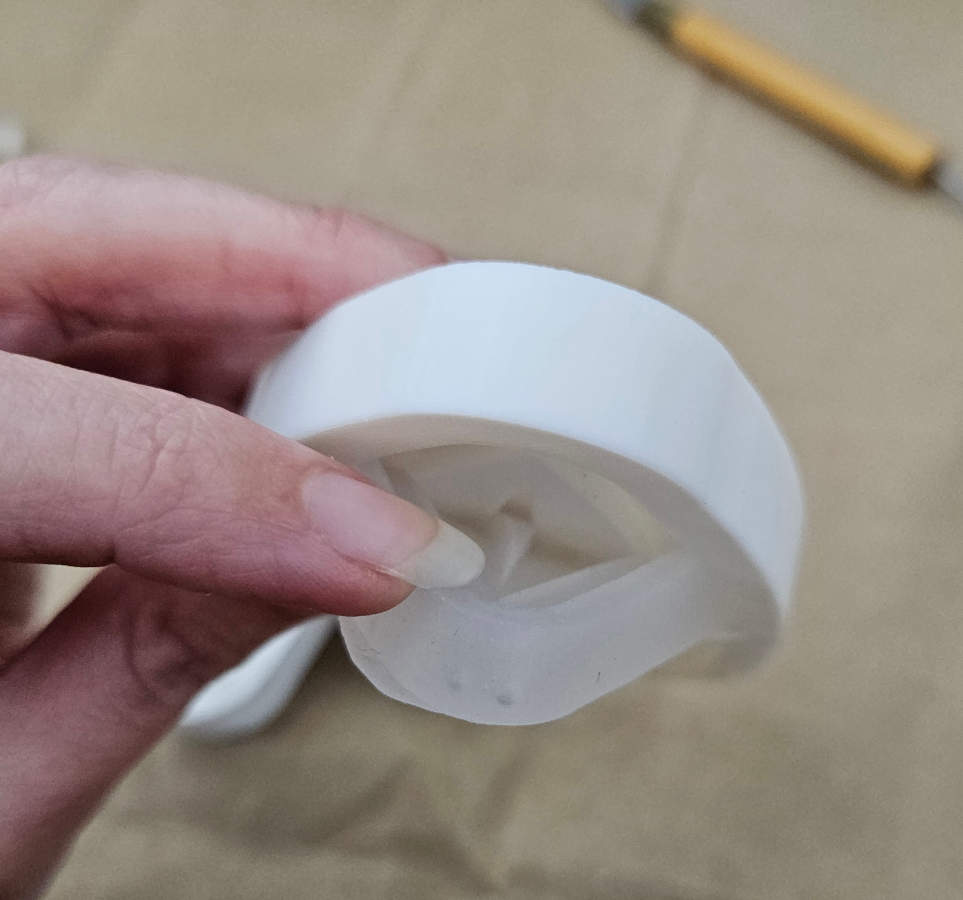
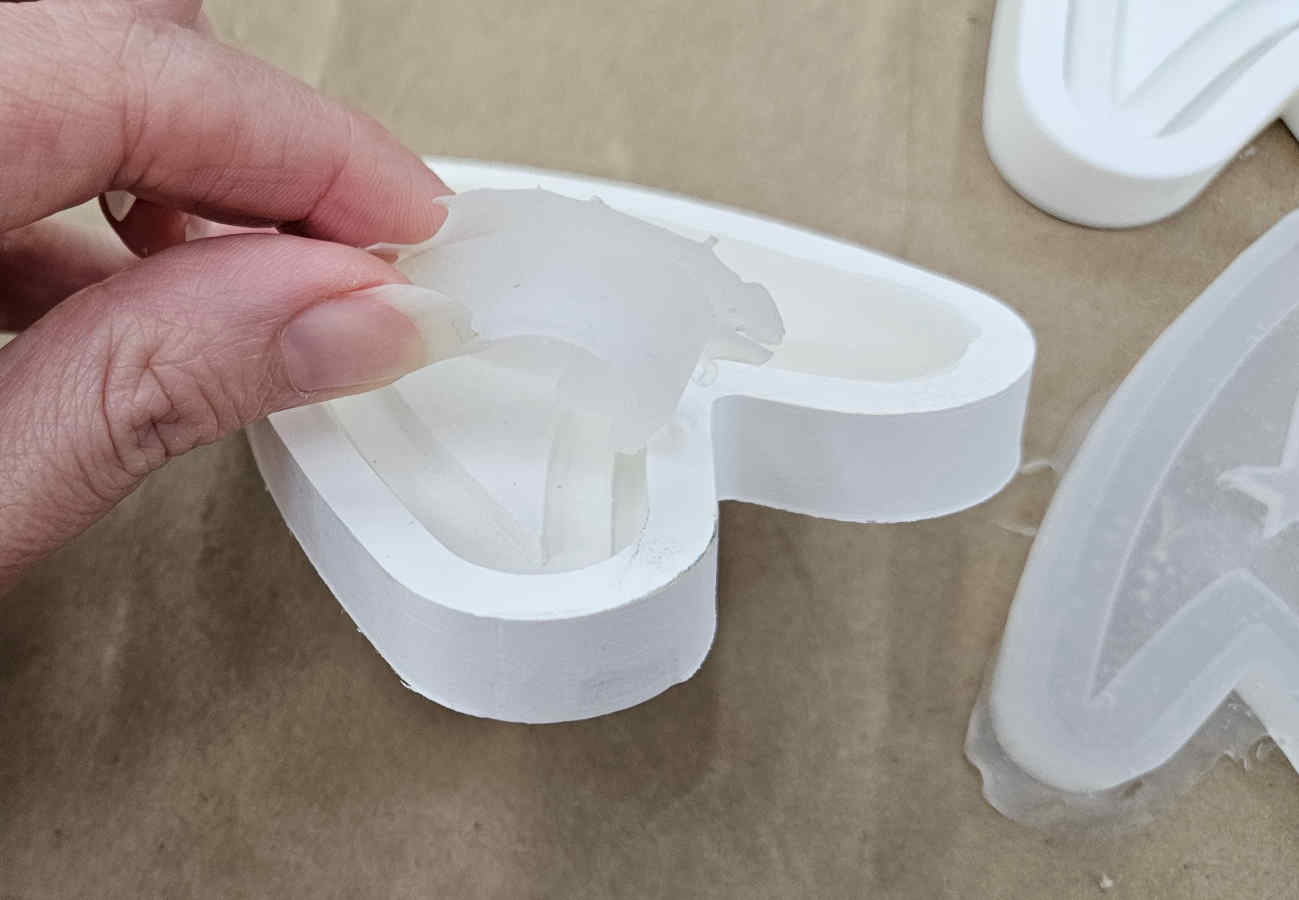
- Side Note – We unfortunately did get some bubbles in the silicone molds. We stirred the mixture gently without scooping and didn’t have any really evident bubbles forming until after the pour. Since we do not have a Vacuum Pump to degas entrapped air, for future projects we plan to use Dragon Skin NV, which is made to not require vacuuming. We could also purchase a thinning agent to make the mixture less viscous and smoother to pour.
Here are the general instructions for use from the manufacturers, Smooth-On.
Preliminary Instructions:
- SAFETY - Use in a properly ventilated area (“room size” ventilation). Wear safety glasses, long sleeves and rubber gloves to minimize contamination risk. Wear vinyl gloves only. Latex gloves will inhibit the cure of the rubber.- SHELF LIFE/STORAGE - Store and use material at room temperature (73°F/23°C). Warmer temperatures will drastically reduce working time and cure time. Storing material at warmer temperatures will also reduce the usable shelf life of unused material. These products have a limited shelf life and should be used as soon as possible.
- CURE INHIBITION - Addition-cure silicone rubber may be inhibited by certain contaminants in or on the pattern to be molded resulting in tackiness at the pattern interface or a total lack of cure throughout the mold. Latex, tin-cure silicone, sulfur clays, certain wood surfaces, newly cast polyester, epoxy or urethane rubber may cause inhibition. If compatibility between the rubber and the surface is a concern, a small-scale test is recommended. Apply a small amount of rubber onto a non-critical area of the pattern. Inhibition has occurred if the rubber is gummy or uncured after the recommended cure time has passed.
To prevent inhibition, one or more coatings of a clear acrylic lacquer applied to the model surface is usually effective. Allow any sealer to thoroughly dry before applying rubber. Note: Even with a sealer, platinum silicones will not work with modeling clays containing heavy amounts of sulfur. Do a small-scale test for compatibility before using on your project.
- RECOMMENDATIONS - Because no two applications are quite the same, a small test application to determine suitability for your project is recommended if performance of this material is in question.
- RELEASE AGENT - Although not usually necessary, a release agent will make demolding easier when pouring into or over most surfaces. Ease Release™ 200 is a proven release agent for making molds with silicone rubber. Mann Ease Release™ products are available from Smooth-On or your Smooth-On distributor.
To ensure thorough coverage, lightly brush the release agent with a soft brush over all surfaces of the model. Follow with a light mist coating and let the release agent dry for 30 minutes.
If there is any question about the effectiveness of a sealer/release agent combination, a small-scale test should be made on an identical surface for trial.
Instructions:
- MEASURING AND MIXING - Before you begin, pre-mix Part B thoroughly. After dispensing required amounts of Parts A and B into mixing container (1A:1B by volume or weight), mix thoroughly for 60 seconds making sure that you scrape the sides and bottom of the mixing container several times. After mixing parts A and B, vacuum degassing is recommended to eliminate any entrapped air in liquid rubber. Your vacuum pump must pull a minimum of 29 inches of mercury (or 1 Bar / 100 KPa). Leave enough room in container for material expansion. Vacuum material until it rises, breaks and falls. Vacuum for 1 minute after material falls.- POURING - For best results, pour your mixture in a single spot at the lowest point of the containment field. Let the rubber seek its level up and over the model. A uniform flow will help minimize entrapped air. The liquid rubber should level off at least 1/2” (1.3 cm) over the highest point of the model surface.
- CURING / POST CURING - Allow rubber to cure as prescribed at room temperature (73°F/23°C) before demolding. Do not cure rubber where temperature is less than 65°F/18°C. Optional: Post curing the mold will aid in quickly attaining maximum physical and performance properties. After curing at room temperature, expose the rubber to 176°F/80°C for 2 hours and 212°F/100°C for one hour. Allow mold to cool to room temperature before using.
- IF USING AS A MOLD - When first cast, silicone rubber molds exhibit natural release characteristics. Depending on what is being cast into the mold, mold lubricity may be depleted over time and parts will begin to stick. No release agent is necessary when casting wax or gypsum. Applying a release agent such as Ease Release™ 200 (available from Smooth-On) prior to casting polyurethane, polyester and epoxy resins is recommended to prevent mold degradation.
- SIDE NOTE – There are available products for thickening or thinning Dragon Skin silicones for different application purposed, such as applying to vertical surfaces or for easier pouring and vacuum degassing.
Dragon Skin Full Data Sheet
Casting
To create the final plastic part, we used Smooth-Cast 320 - Off-White, Ultra Low Viscosity Liquid Plastic.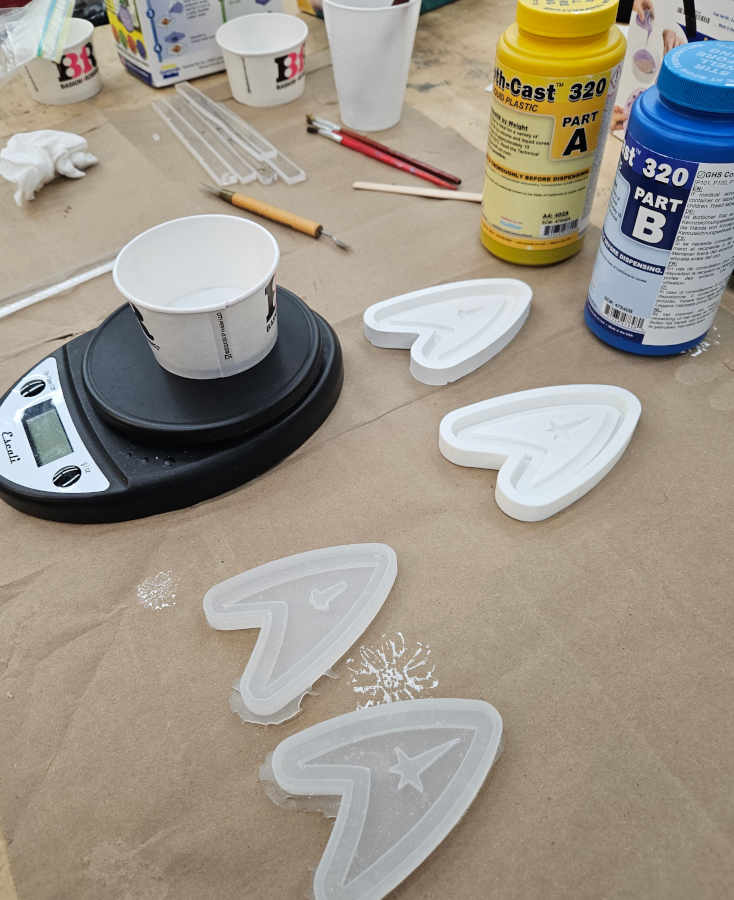
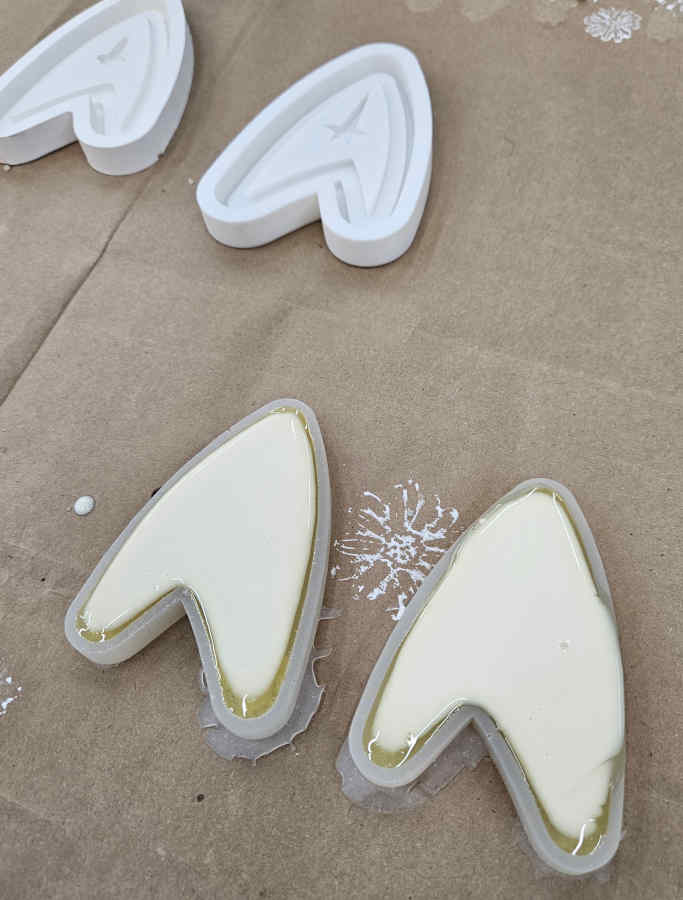
- The casted pieces reveal even more details than expected. The 3D printer cast does reflect the visual of the filament lines within the print. Other than that, it is relatively smooth and clean. The CNC milled cast very slightly shows the milled path lines, but also the texture of the tiny pores within the LDPE. Looking at the mold itself, you can’t really tell the material is porous, but the liquid plastic really pronounces it. This aspect is less about the production process and more about material choice but still a great observation and experiment!
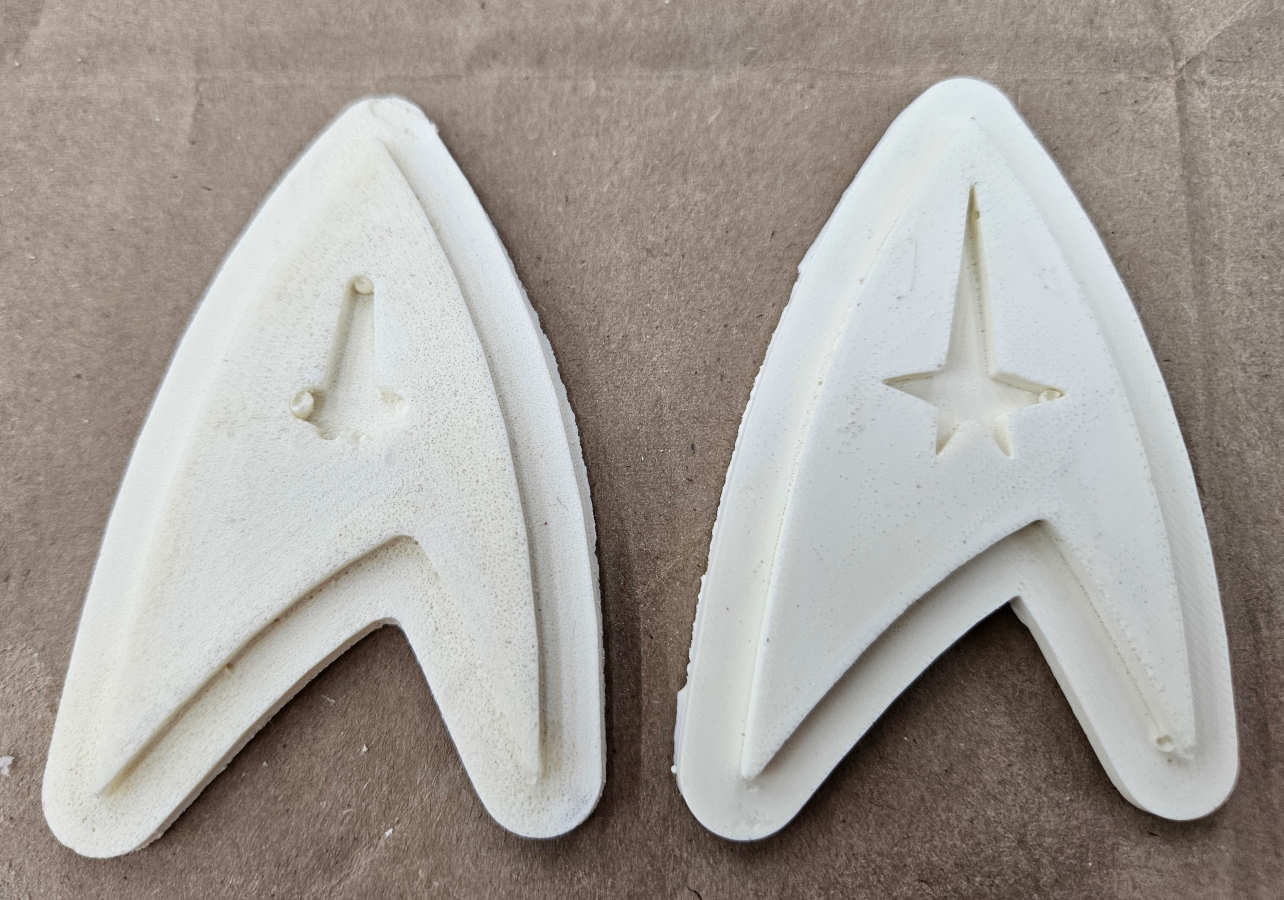
- Overall, the milled process would have a cleaner mold (dependent on material choice) and would be better for larger molds. The mill is not best for small designs or vertices within a design. 3D printing is better for smaller designs with the capability of capturing vertices and corners. However, it is a much longer process and would need post production to smooth out the filament ridges.
Here are the general instructions for use from the manufacturers, Smooth-On.
Preliminary Instructions:
- SAFETY - Materials should be stored and used in a warm environment (73° F / 23° C). These products have a limited shelf life and should be used as soon as possible. All liquid urethanes are moisture sensitive and will absorb atmospheric moisture. Mixing tools and containers should be clean and made of metal, glass or plastic. Mixing should be done in a well-ventilated area. Wear safety glasses, long sleeves and rubber gloves to minimize contamination risk.- RELEASE AGENT - A release agent is necessary to facilitate demolding when casting into or over most surfaces. Use a release agent made specifically for mold making (Universal™ Mold Release or Mann’s Ease Release™ 200 available from Smooth-On or your Smooth-On distributor). A liberal coat of release agent should be applied onto all surfaces that will contact the plastic.
To ensure thorough coverage, apply release and brush with a soft brush over all surfaces. Follow with a light mist coating and let the release agent dry for 30 minutes. Smooth-On silicone rubber molds usually do not require a release agent unless casting silicone into the mold. Applying a release agent will prolong the life of the mold.
- SHELF LIFE/STORAGE - Shelf life of product is reduced after opening. Remaining product should be used as soon as possible. Immediately replacing the lids on both containers after dispensing product will help prolong the shelf life of the unused product. XTEND-IT™ Dry Gas Blanket (available from Smooth-On) will significantly prolong the shelf life of unused liquid urethane products.
Instructions:
- MEASURING AND MIXING - Liquid urethanes are moisture sensitive and will absorb atmospheric moisture. Mixing tools and containers should be clean and made of metal, glass or plastic. Materials should be stored and used in a warm environment (73°F/23°C).Stir or shake both Part A & Part B thoroughly before dispensing. After dispensing equal volumes of Parts A and B into mixing container (100A:90B by weight) and mix thoroughly. Stir deliberately making sure that you scrape the sides and bottom of the mixing container several times. Be careful not to splash low viscosity material out of the container.
- POURING - Pour your mixture in a single spot at the lowest point of the containment field and let the mixture seek its level. This will help minimize air entrapment.
For best results use a pressure casting technique. After pouring the mixed compound, the entire casting assembly (mold, dam structure, etc.) is placed in a pressure chamber and subjected to 60 PSI (4.2 kg/ cm2) air pressure for the full cure time of the material.
- CURING - Use this product with at least room size ventilation or in proximity to a forced outlet air vent and do not inhale/breath fumes. Fumes, which may be visible with a significant mass concentration, will quickly dissipate with adequate ventilation. Castings with significant mass may be hot to the touch and irritate skin immediately following cure. Let casting cool to room temperature before handling.
Demold time of the finished casting depends on mass and mold configuration. Low mass or thin-walled castings will take longer to cure than castings with higher mass concentration. Smooth-Cast™ 320 will cure in 7 - 10 minutes (Smooth-Cast™ 321 in 30 – 40 minutes and Smooth-Cast™ 322 in 2 - 4 hours) depending on mass and mold configuration.
If making rotational or hollow castings, backfilling with a rigid foam (Foam-iT!™ 5 or other) will provide lightweight reinforcement. Foam backfilling is recommended if castings will be subjected to temperatures above 85°F / 30°C.
- POST CURE - Castings will reach “full cure” faster and achieve maximum physical properties if post cured. Allow material to cure for recommended cure time at room temperature followed by 4 - 6 hours at 150°F/65°C. Allow casting to come to room temperature before handling.
- PERFORMANCE - Cured castings are rigid and durable. They resist moisture, moderate heat, solvents, dilute acids and can be machined, primed/painted or bonded to other surfaces (any release agent must be removed). If machining cured material, wear dust mask or other apparatus to prevent inhalation of residual particles. Castings can be displayed outdoors after priming and painting. Unpainted castings will yellow over time - more quickly when exposed to ultra-violet light.
- RECOMMENDATIONS - Because no two applications are quite the same, a small test application to determine suitability is recommended if performance of this material is in question.
Smooth-Cast 320 Full Data Sheet