Molding and Casting
Back to HomeGoals
group assignment
- review the safety data sheets for each of your molding and casting materials, then make and compare test casts with each of them compare mold making processes
Individual Assignment
- design a mold around the process you'll be using, produce it with a smooth surface finish that does not show the production process toolpath, and use it to cast parts extra credit: use more then two mold parts
Group Assignment
Assignment Description
According to the Fab Academy course schedule, we completed the following group tasks:
- Reviewed the Safety Data Sheets (SDS) of all molding and casting materials we used, and understood the associated risks and protective measures during use;
- Selected three materials excluding epoxy resin for actual casting tests, and compared their usability and final product performance;
- Explored and compared three mold-making methods excluding CNC machining, including 3D printed molds, silicone mold replication, and hand-carved molds;
- Took photos, documented the process, and analyzed the advantages and disadvantages of each method and material to build a systematic understanding.
Material Overview Table
| Material Name | Type | Brand/Source | Application |
|---|---|---|---|
| OOMOO 25 | Silicone molding material | Smooth-On | Used for making flexible molds |
| Smooth-Cast 300 | Polyurethane resin (PU) | Smooth-On | Quick casting, fast curing |
| Plaster Powder | Gypsum-based casting material | Local hardware store | Low-cost casting |
SDS Review Summary
We carefully reviewed the SDS (Safety Data Sheets) for each material, and summarized the key points as follows:
| Material Name | Health Risk | Toxicity/Irritation | Recommended PPE | Special Notes |
|---|---|---|---|---|
| OOMOO 25 | Low | Mild skin sensitivity | Gloves, safety goggles | Does not require release agent; store in dry conditions |
| Smooth-Cast 300 | Moderate | Can irritate skin and eyes | Gloves, mask, safety goggles | Operate in a well-ventilated area; cures quickly after mixing |
| Plaster | Moderate | Dust inhalation may irritate respiratory tract | Gloves, mask | Avoid inhaling dust; do not dispose into sink |
During the entire process, we wore nitrile gloves, safety goggles, and disposable masks, and worked in a well-ventilated space near windows.
2. Casting Tests and Material Performance
① Smooth-Cast 300 (Fast-Curing Polyurethane Resin)
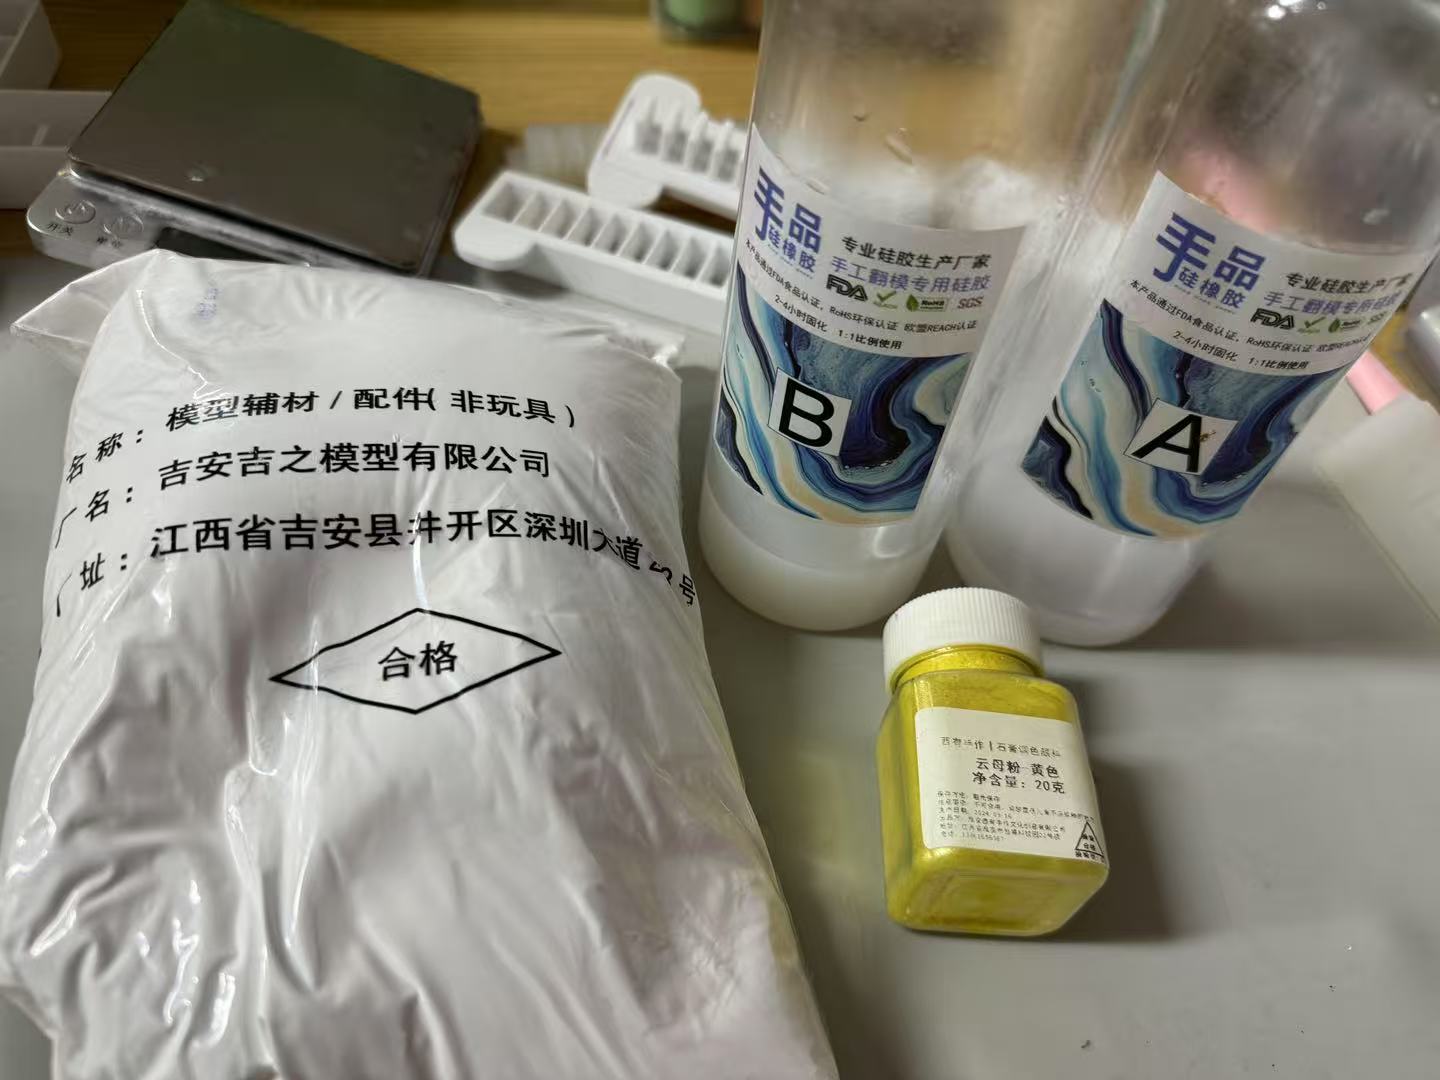
Material Info:
- Brand: Smooth-On
- Type: Two-part polyurethane
- Mix Ratio: Volume ratio A:B = 1:1
- SDS Rating: Moderate irritant (gloves + mask required)
Procedure:
- Prepare two clean plastic measuring cups in advance;
- Measure equal volumes of Part A and Part B (approx. 30 ml each);
- Pour both parts into a third cup and stir quickly for 20 seconds;
- Immediately pour the mixture slowly into the silicone mold, from one corner;
- Let it sit for about 10 minutes and observe the curing process;
- Once cured, gently demold; the finished part is immediately touchable.
Observations:
- Begins to heat up about 30 seconds after stirring;
- Few bubbles during pouring, though tiny bubbles remained at the bottom;
- Excellent fluidity, fully fills mold details;
- Final casting is very hard, with a smooth plastic-like surface;
- No release agent needed; silicone mold releases cleanly.
Summary:
- Advantages: Fast curing, high strength, excellent detail reproduction
- Disadvantages: Very short working time; beginners may struggle with speed
- Suggestion: Suitable for fast batch production, but requires familiarity with the process
Project Showcase
I purchased a light bulb-shaped silicone mold and created a forest-themed light bulb pendant.


② Plaster of Paris
Material Info:
- Source: Local hardware store
- Type: Traditional construction plaster
- Mix Ratio: Water:Plaster = 1:2 (by weight)
- SDS Rating: Dust irritant (mask required)
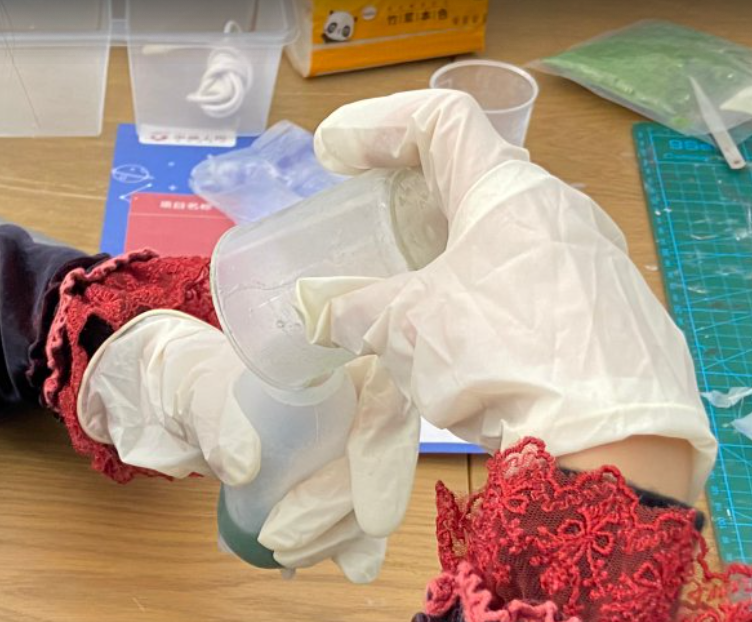
Procedure:
- Pour 50g of plaster powder into a clean container;
- Add 25g of clean water;
- Stir slowly with a stick until fully mixed and lump-free;
- Immediately pour the slurry into the mold, tapping the mold edges to release bubbles;
- Let it cure at room temperature for 30–40 minutes;
- The cast will still be moist—demold carefully and air dry for 24 hours in a ventilated area.
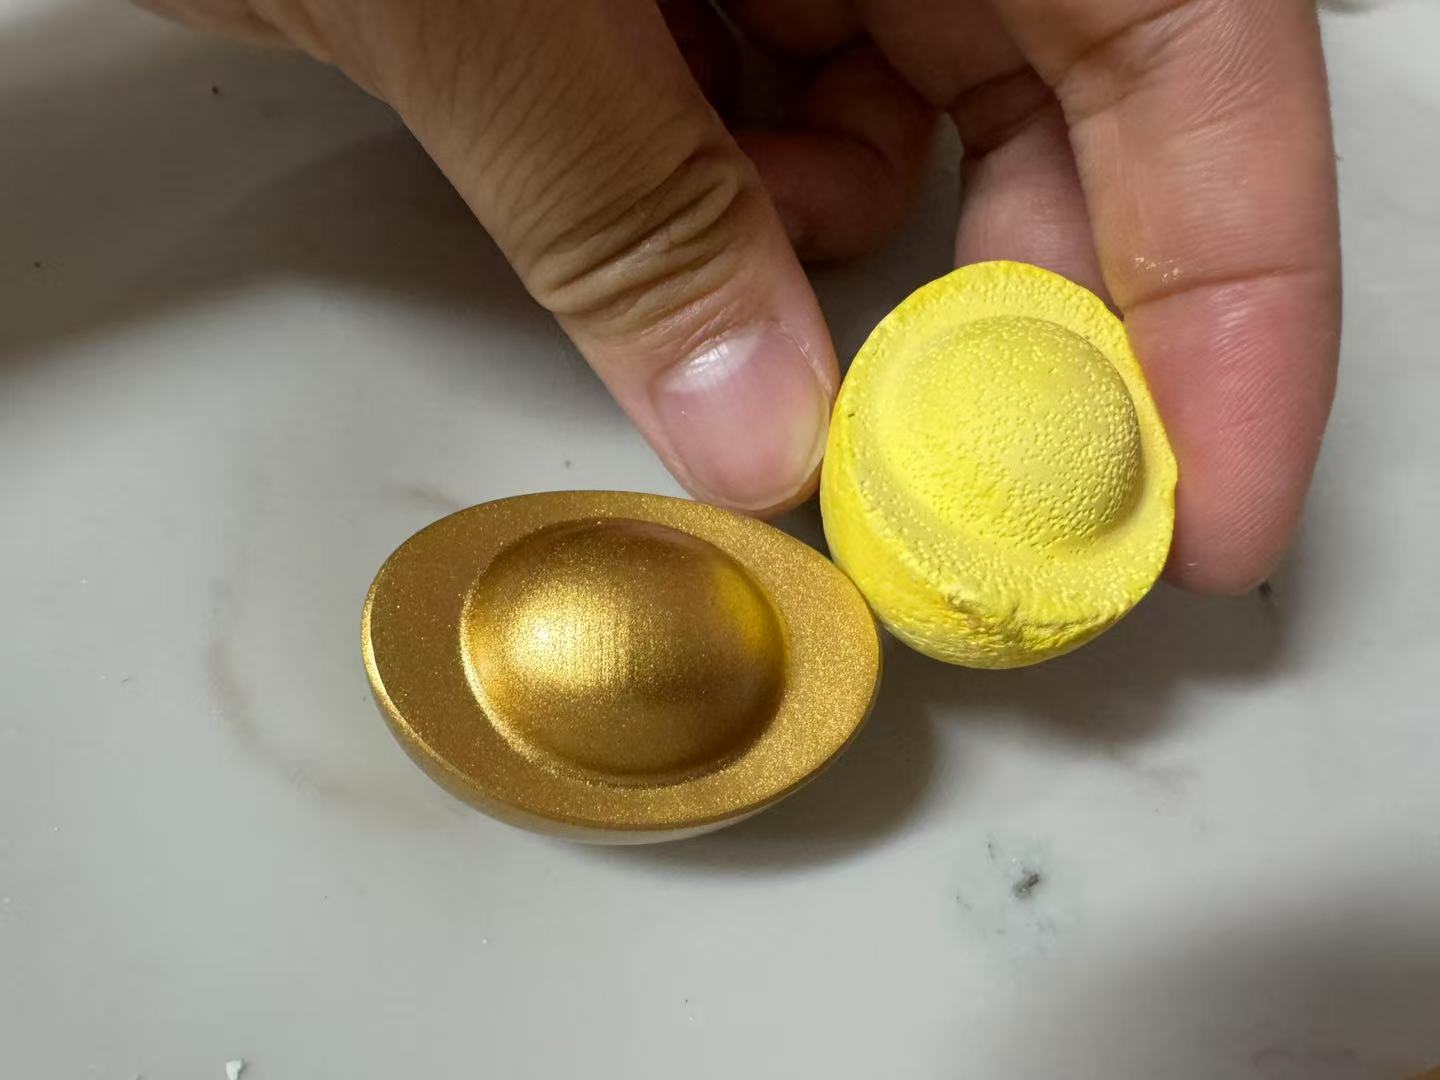
Observations:
- Initial slurry was moderately thick, with average flowability;
- Surface showed many bubble marks, especially in recessed areas;
- Poor detail resolution for small text and lines;
- Corners chipped easily after drying; brittle when lightly impacted;
- Final casting had a white matte finish with powdering on the surface.
Summary:
- Advantages: Extremely low cost, easy to use, ideal for teaching and quick experiments
- Disadvantages: Low strength, weak detail reproduction, prone to bubbles, long drying time
- Suggestion: Not suitable for functional parts; recommended for shape/proportion verification only
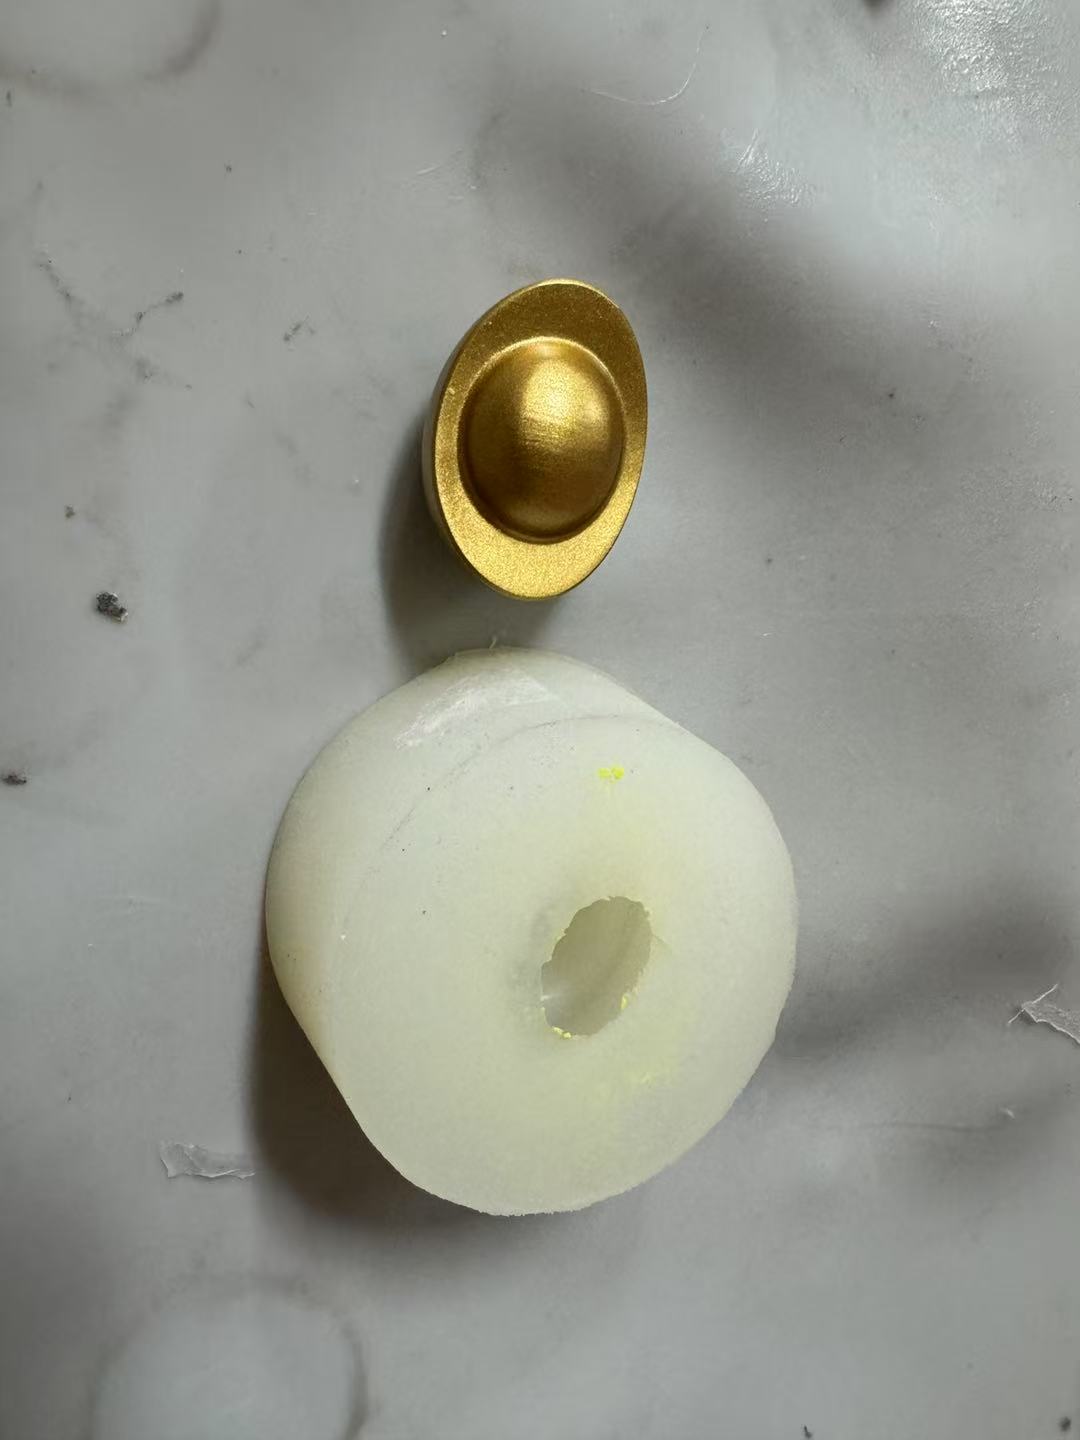
I used a brass ingot as the positive master to create a silicone mold. Then I poured plaster slurry into the mold. By adding yellow pigment to the slurry, I produced a yellow plaster ingot.
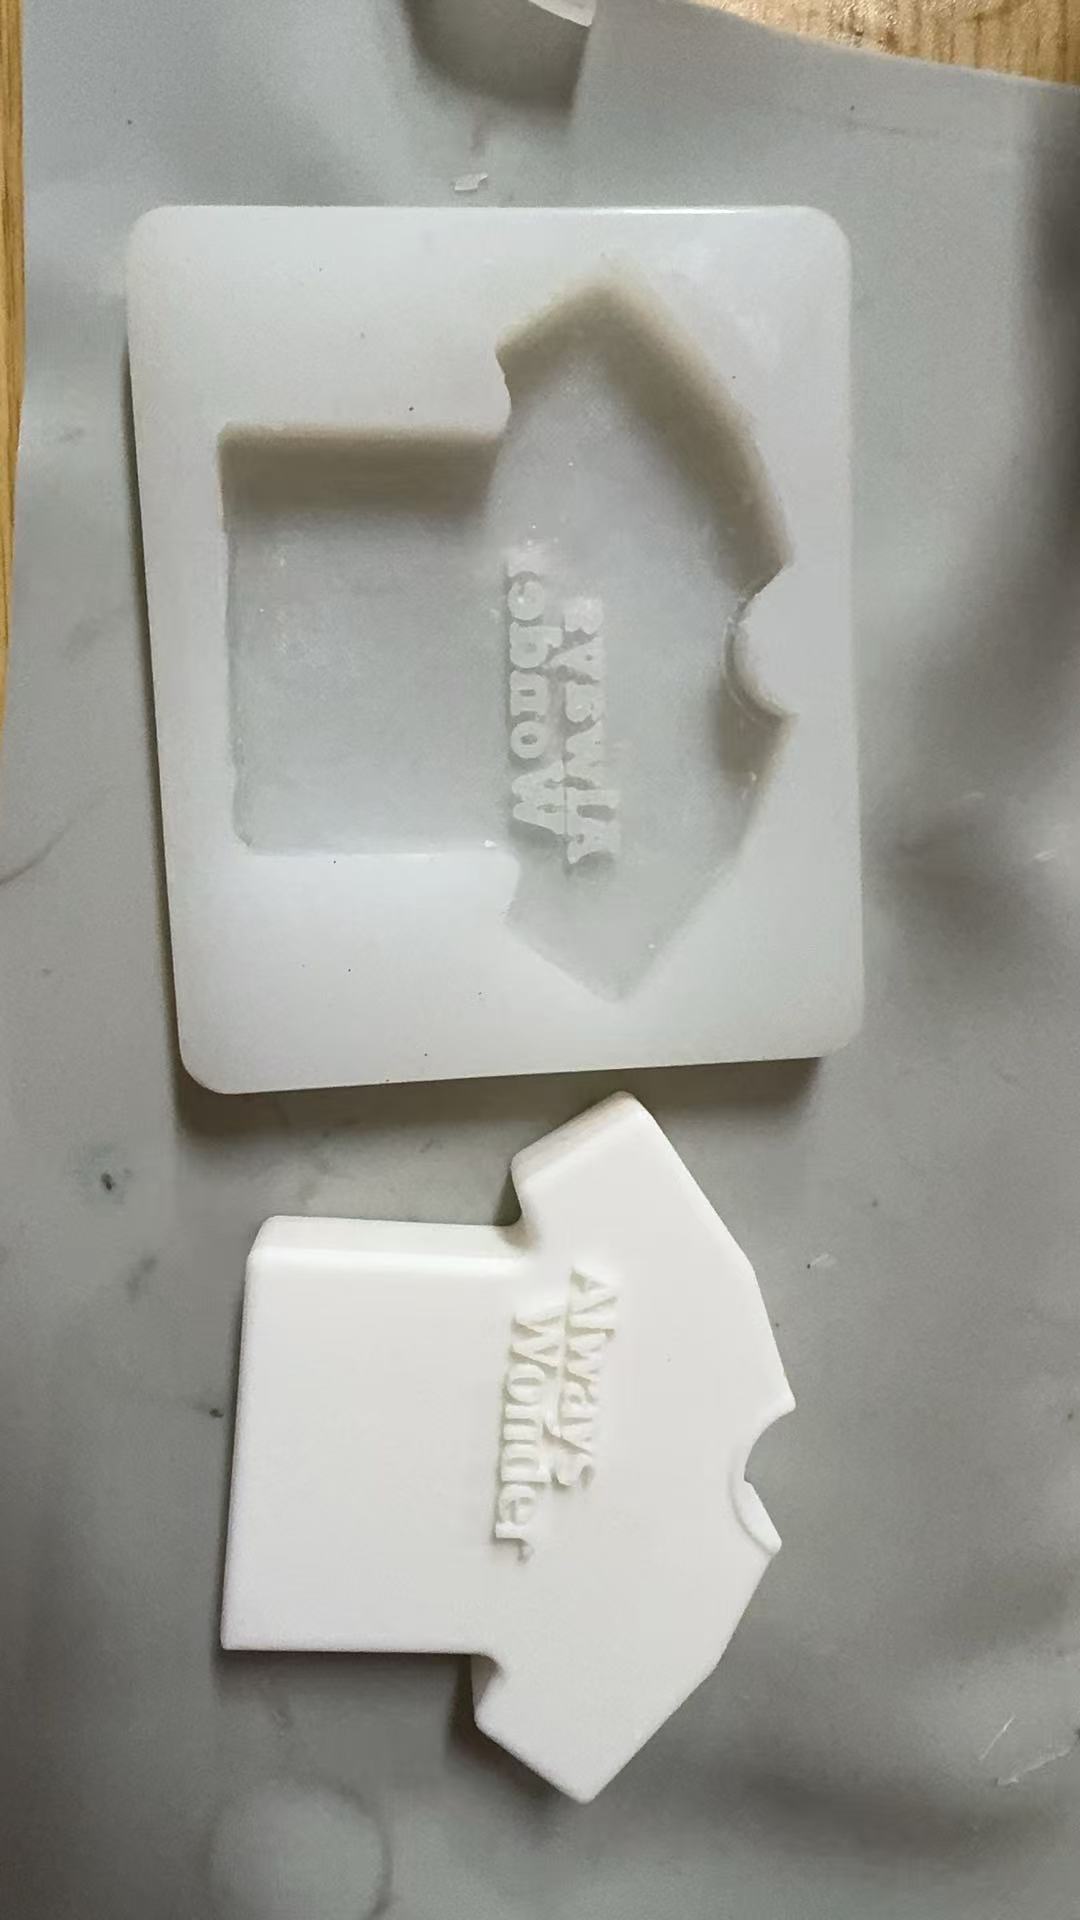
③ OOMOO 25 (Silicone)
Material Info:
- Brand: Smooth-On
- Type: Platinum-cure silicone (1:1)
- Mix Ratio: Volume ratio A:B = 1:1
- SDS Rating: Low (safe to handle, avoid skin contact)
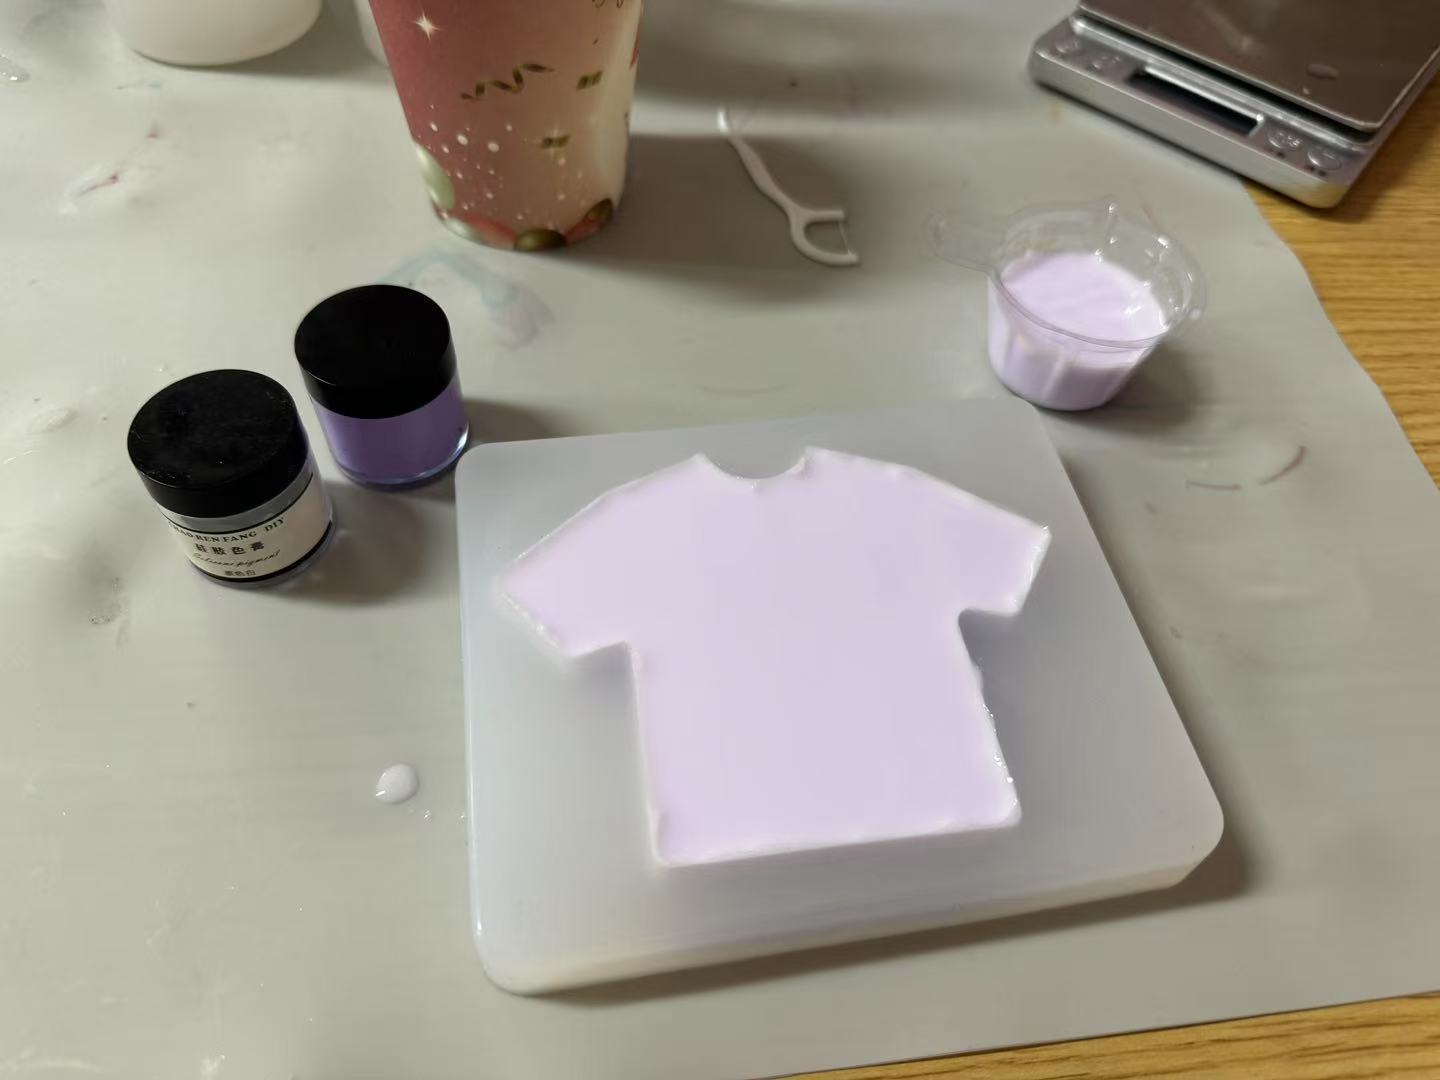
Procedure:
- Measure 30 ml of Part A and 30 ml of Part B into separate cups;
- Pour both into a third container and stir for about 4 minutes until fully mixed;
- Slowly pour into the mold;
- Let sit for approximately 120 minutes until fully cured;
- Demold directly; clean the mold with dish soap if needed.
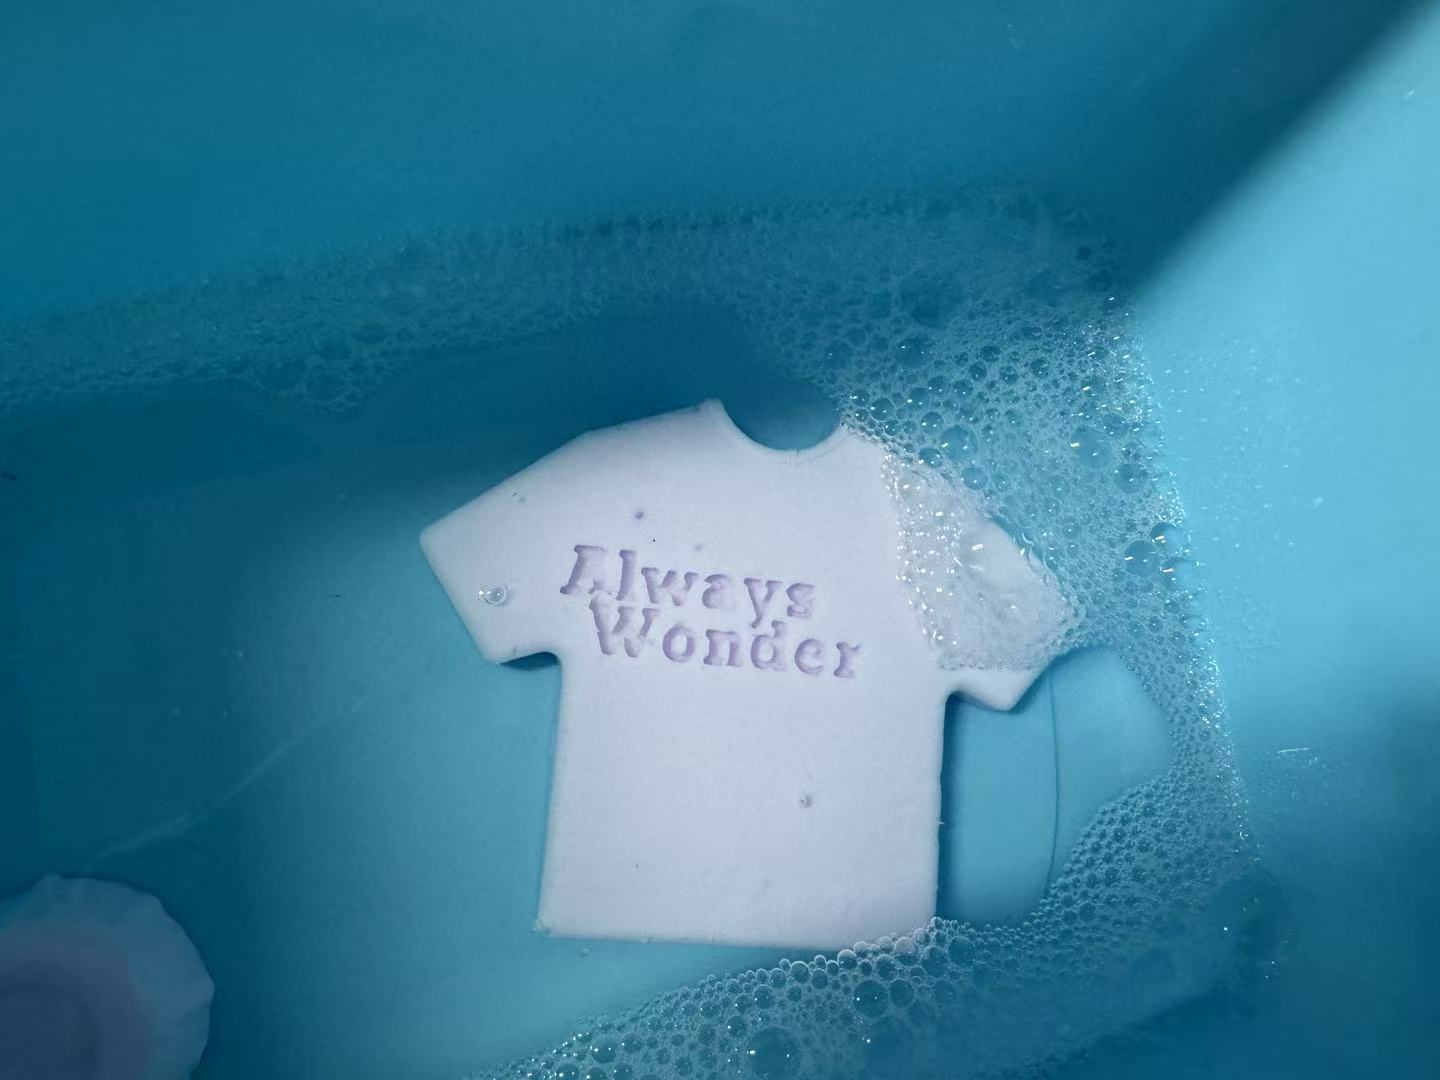
Observations:
- Good flowability, though not as fluid as PU resin;
- Pours with a nice self-leveling surface finish;
- Cured part is extremely soft and flexible, bendable without cracking;
- Decent detail capture, fine features are clearly replicated;
- The softness is suitable for bumpers or toy-like products.
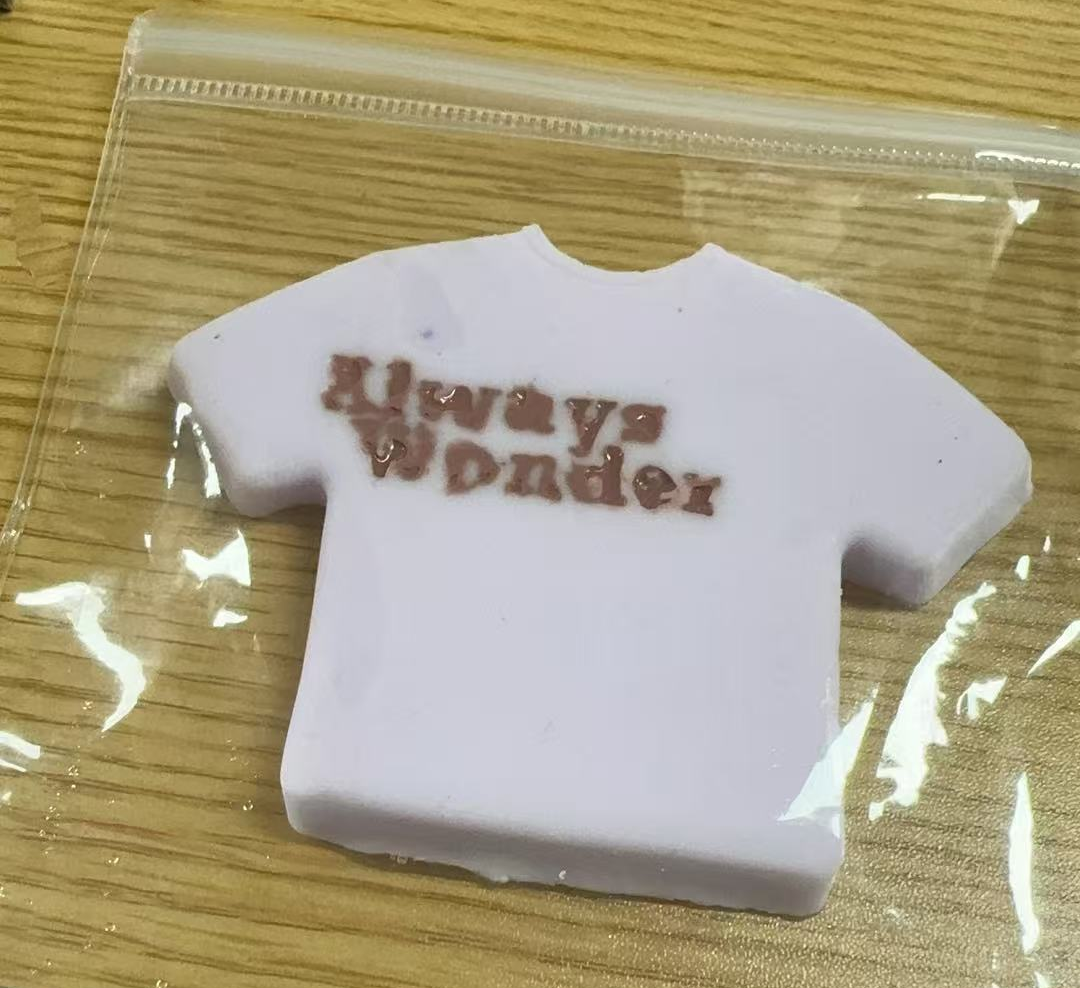
Summary:
- Advantages: Excellent elasticity; final product is non-toxic and safe
- Disadvantages: Too soft to support weight; longer production time
- Suggestion: Ideal for children’s toys, soft souvenirs, or duplicating complex geometries
I designed this part of the test to create a squishy toy, which is a very popular stress-relief product.
For the positive mold, I used the 3D print from Week 3's assignment. I then made a silicone mold based on that model.
Since both the mold and the final product were made of silicone, I had to manage the hardness levels carefully:
- Mold: Harder silicone (Shore A10) to maintain structural integrity
- Squishy toy: Ultra-soft silicone (Shore 0) for a soft, squeezable texture
Important: Because both the mold and the cast are silicone-based, I applied Vaseline as a release agent to prevent them from sticking together.
Casting Material Performance Comparison Table
| Material Name | Surface Finish | Detail Reproduction | Strength | Flexibility | Curing Speed | Cost | Ease of Use |
|---|---|---|---|---|---|---|---|
| Smooth-Cast 300 | ★★★★★ | ★★★★★ | ★★★★☆ | ☆☆☆☆☆ | ★★★★★ | ★★☆☆☆ | ★★★★☆ |
| Plaster | ★★☆☆☆ | ★★☆☆☆ | ★★☆☆☆ | ☆☆☆☆☆ | ★★★☆☆ | ★★★★★ | ★★★☆☆ |
| OOMOO 25 | ★★★★☆ | ★★★★☆ | ★☆☆☆☆ | ★★★★★ | ★★☆☆☆ | ★★☆☆☆ | ★★★★★ |
3. Comparison of Mold-Making Methods
| Method | Process Description | Advantages | Disadvantages |
|---|---|---|---|
| 3D Printed Mold | FDM printing of a positive or mold cavity (PLA) | Low cost, easy to iterate designs | Obvious layer lines affect surface quality |
| Silicone Mold Replication | Encapsulating the master with OOMOO silicone | Easy demolding, good for complex geometry | Expensive material, long curing time |
Detailed Comparison: 3D-Printed Mold vs CNC-Milled Mold
In this Molding and Casting assignment, I conducted a detailed comparison between two popular mold-making methods: 3D printing and CNC milling, analyzed across multiple dimensions:
| Comparison Aspect | 3D-Printed Mold | CNC-Milled Mold |
|---|---|---|
| Model Complexity | Excellent for complex geometries like hollows, overhangs, fine details | Best for simple and regular shapes; internal features are harder to machine |
| Production Time | Slower, especially under high-resolution settings | Faster for simpler geometries |
| Surface Finish | Layer lines visible depending on resolution | Generally smoother finish, good for precision casting |
| Material Options | Limited to printable materials (PLA, resin), may deform under heat | Supports wax, MDF, hardwood, etc., better adaptability |
| Process Limits | Supports almost any geometry, but surface may be affected by supports | Tool diameter limits details like sharp corners or deep slots |
| Cost | Material cost is moderate, printer maintenance may be high | Material is inexpensive, but setup time may be longer |
In my experiment, I used 3D printing to create a positive mold. It offered excellent detail and design freedom, but required careful handling during demolding due to visible layer textures. In contrast, CNC milling gave me faster and cleaner surface results, but struggled with complex concave details and sharp curves in my design.
Through this comparison, I not only learned the technical workflows of both methods, but also developed a clearer understanding of their appropriate use cases. In future molding tasks, I will select the mold-making method based on design complexity and functional requirements to improve both quality and efficiency.
Summary
Through this molding and casting experiment, I gained a deeper understanding of how different materials and processes perform in practice. I tested Smooth-Cast 300 (polyurethane resin), plaster powder, and OOMOO 25 (silicone), and compared their characteristics in terms of detail reproduction, strength, flexibility, curing speed, and more. I documented both their advantages and limitations.
In addition, I explored two common mold-making methods: FDM 3D printing and silicone molding. 3D-printed molds are cost-effective and easy to iterate but have limited surface quality due to layer lines. Silicone molding, on the other hand, offers excellent reproduction of complex shapes and easy demolding, but it involves higher material costs and longer curing times.
As a special experiment, I created a squishy toy using silicones with different hardness levels. This helped me experience the fun and tactile comfort of soft castings. I also learned the importance of applying Vaseline as a release agent when both the mold and the cast are silicone-based.
Overall, this assignment helped me master the basic techniques of molding and casting, and more importantly, it enhanced my understanding of material selection, process matching, and user experience—laying a solid foundation for future product prototyping.
Individual Assignment
Assignment Objectives
- Design a mold based on a real-world manufacturing process;
- Use non-CNC methods to create a high-quality, replicable mold and casting;
- The final product should have a smooth surface with no visible toolpaths;
- Perform at least one complete casting using the mold to produce a tangible, displayable object.
In this Molding and Casting individual assignment, I initially chose the mythical Chinese beast “Mengmo” as the design subject. The Mengmo model featured intricate details, refined surface textures, and complex curves. I originally hoped to showcase the casting process's capability by replicating such a high-resolution shape.
After completing the 3D model using Rhino, I found that traditional FDM printing could not fully reproduce the complex surface details of the Mengmo model due to its layer height limitations. Based on my instructor’s suggestion, I tried using the lab’s LCD-type resin 3D printer to create a high-precision Mengmo model as the positive mold. The print came out with exceptional detail and a smooth surface, showing almost no visible layering marks—making it theoretically ideal for silicone mold making.
However, I encountered a serious failure during the molding process: after pouring liquid silicone over the resin-printed Mengmo model and letting it rest overnight, I found that the silicone had not cured at all. It remained in a semi-liquid, sticky state.
After researching, I learned that improperly treated resin prints can lead to silicone inhibition, often referred to as “poisoning.” The main reasons include:
- Residual uncured resin left on the surface of the print;
- Some commercial resins contain platinum catalyst inhibitors, which interfere with the cross-linking process of addition-cure silicone;
- Even with alcohol washing and post-curing, trace contaminants may remain on the surface and prevent proper silicone curing.
This material incompatibility made me realize that while high-resolution resin prints offer superior surface quality, chemical compatibility with molding materials must be considered carefully.
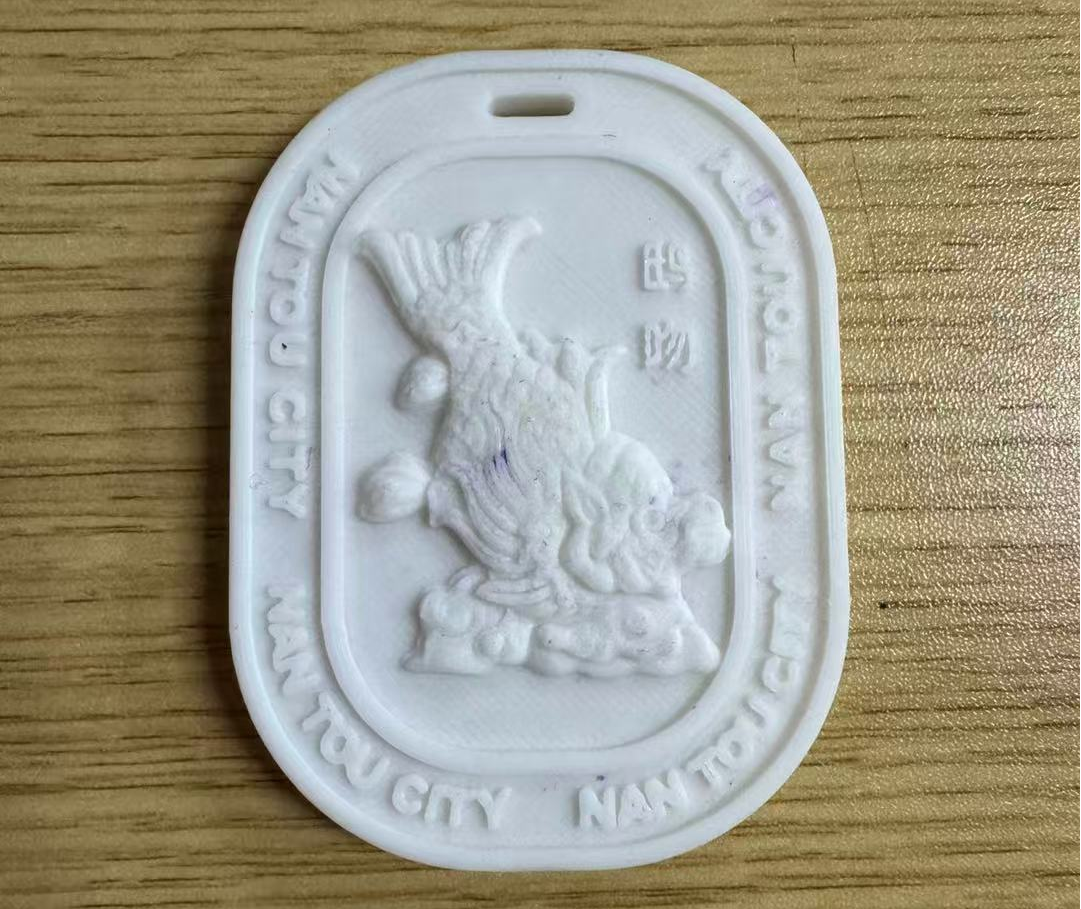
To ensure successful molding, I eventually abandoned the Mengmo model and instead chose a simpler but still culturally rich subject—Chiwen, a traditional Chinese roof ridge beast with elegant lines and historical significance.
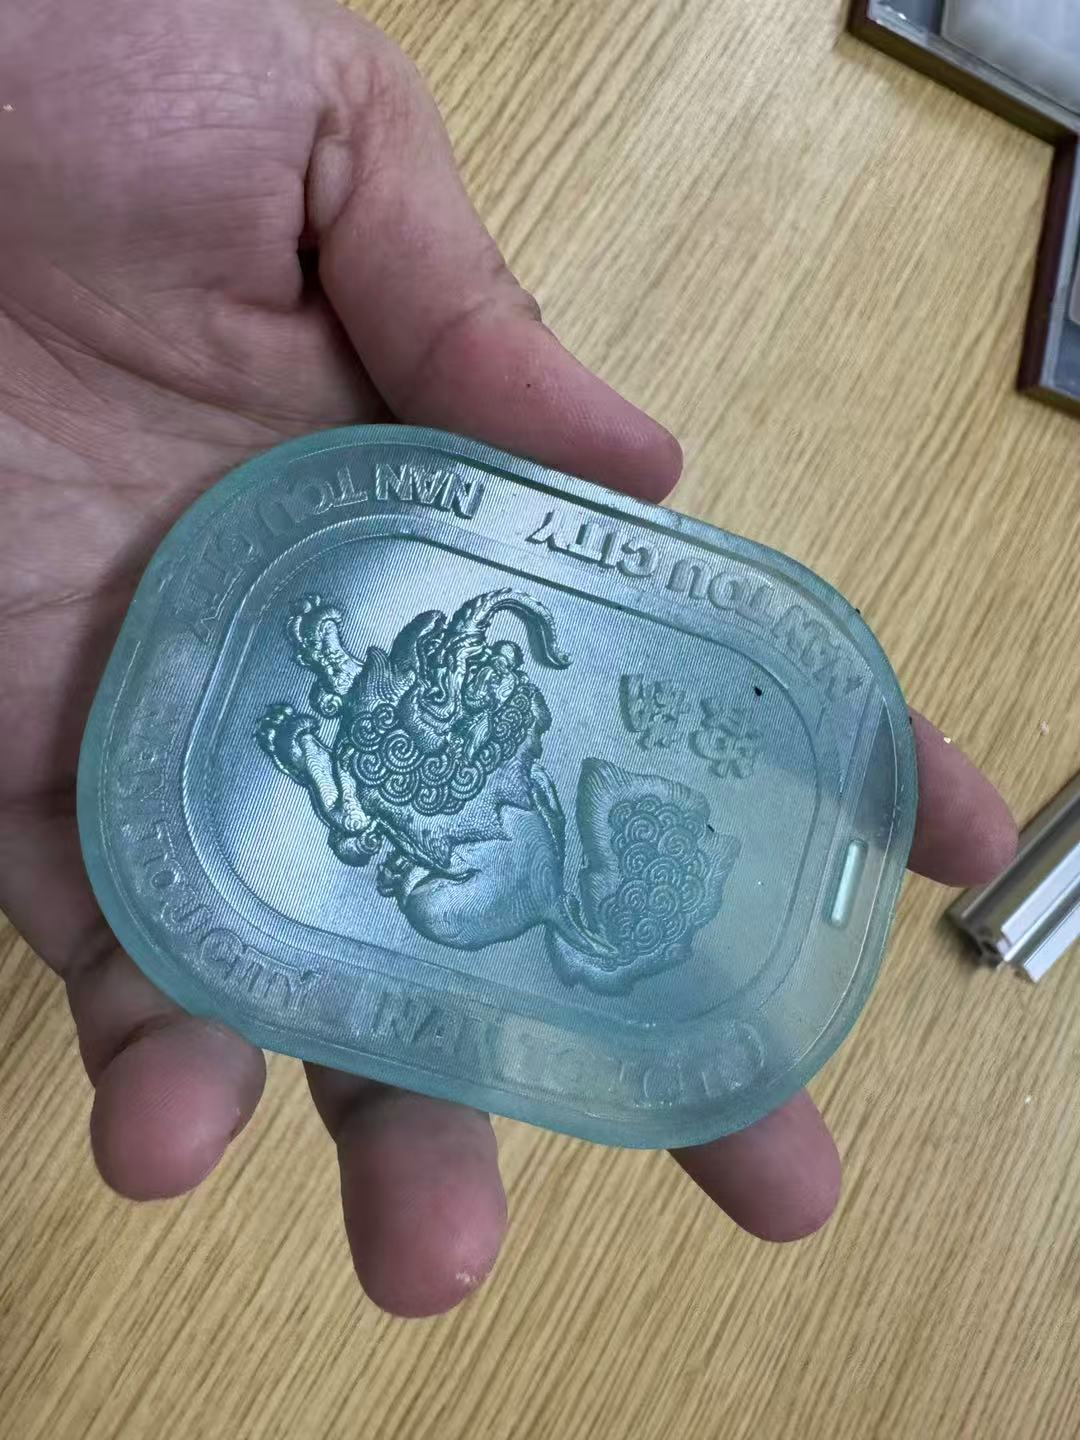
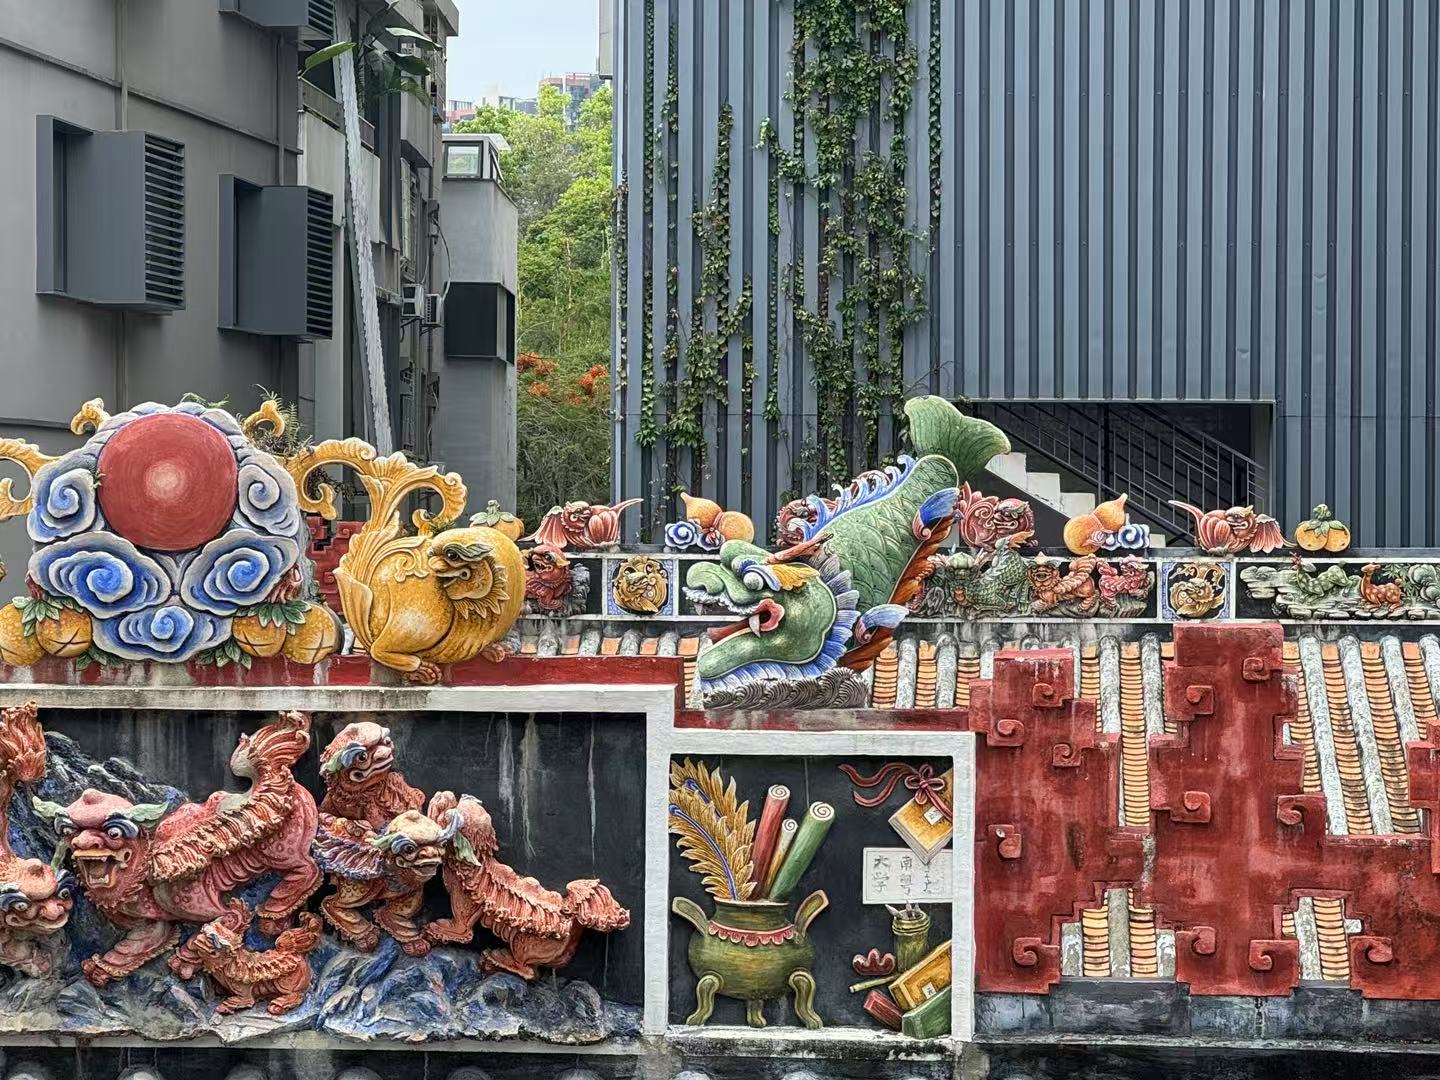
Inspiration: Chiwen (鸱吻)
Chiwen, also known as Chimera Dragon Tail in ancient Chinese architecture, is one of the mythical ridge beasts traditionally placed at the ends of rooftops in palaces, temples, and other historic buildings. According to legend, Chiwen could swallow fire to ward off evil and suppress floods, symbolizing protection and authority.
Its appearance typically features a dragon head with a fish or beast body, an open mouth, and an upturned tail—delivering a strong visual impact and cultural identity. I chose Chiwen as the inspiration for my project because I want to build a bridge between traditional aesthetics and modern fabrication, breathing new life into classical motifs through digital making.
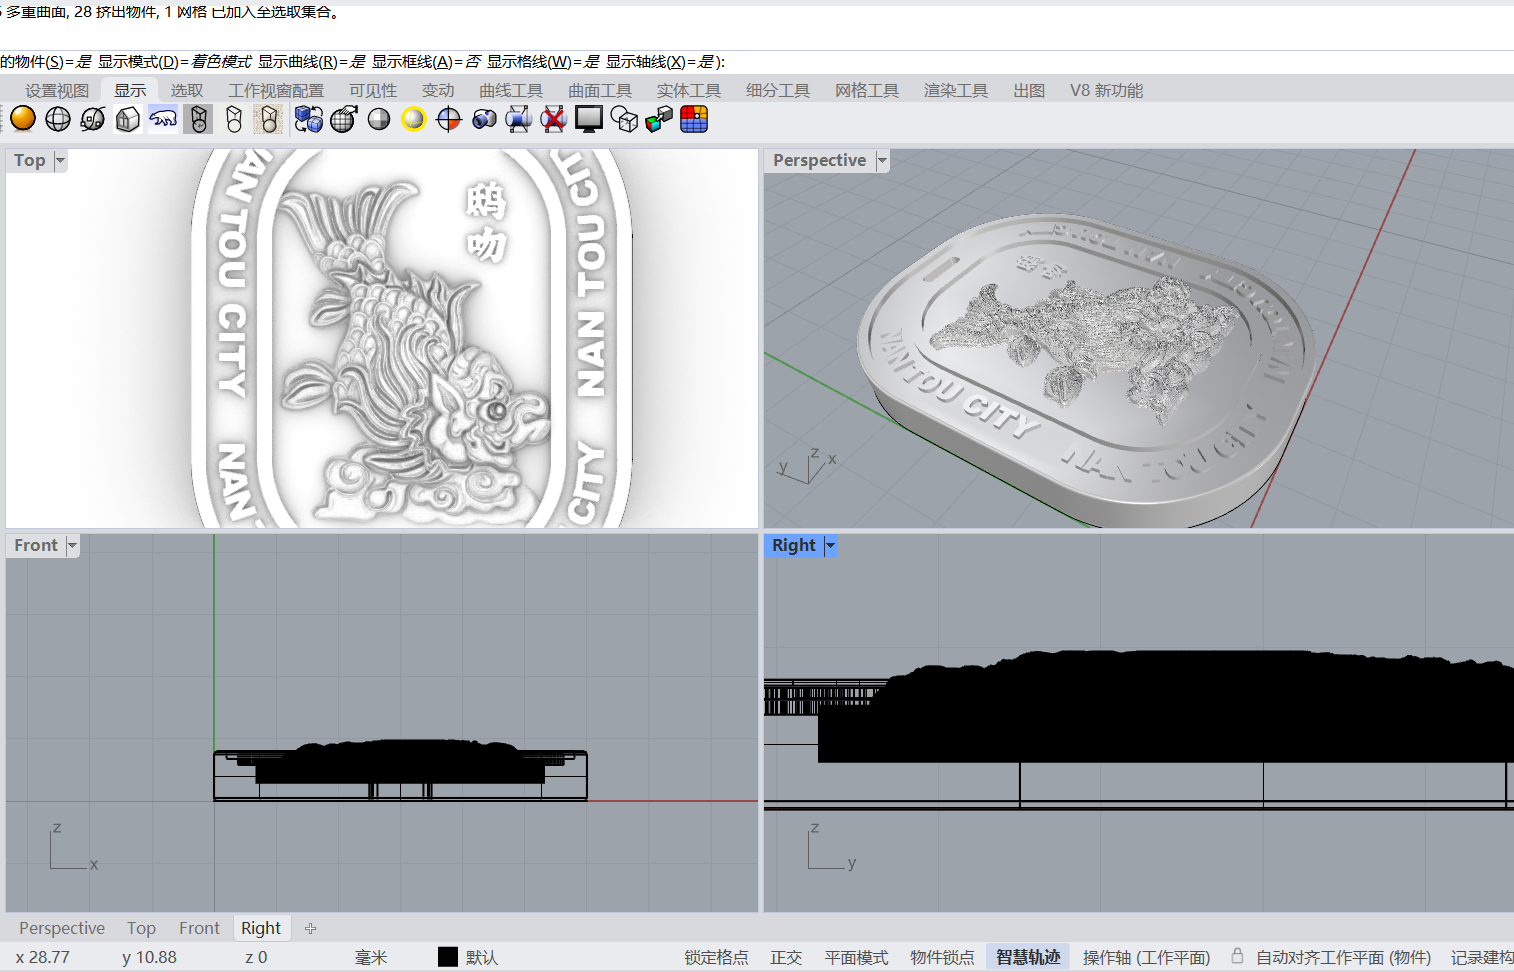
1. Digital Modeling (Rhino)
Tools Used:
Software: Rhinoceros 7
Modeling Method: NURBS surface modeling + mesh optimization
Modeling Steps:
- Reference Collection: Collected and analyzed many photos of real Chiwen sculptures and roof ornaments to study their typical features (wide-open mouth, curled horns, dorsal scales, fish tail, etc.);
- Outline Drawing: Manually sketched front and side profiles in Rhino to ensure accurate and balanced proportions;
- 3D Construction: Used Loft and Sweep2 tools to build the three-dimensional framework;
- Detail Sculpting: Sculpted scales, eyes, teeth, tail fins, etc., using layered surfaces and Boolean operations;
- Flattening the Back: Flattened the back of the model to allow stable placement and easy mold replication;
- Adding a Hanging Hole: Added a hole at the top so the piece can serve as both an ornament and a diffuser pendant.
Final Model Dimensions:
- Length: approx. 80 mm
- Width: approx. 60 mm
- Thickness: approx. 8 mm

2. 3D Printing the Positive Mold
Equipment Used: FDM 3D Printer (Ender 3V3 PLUS)
Material: White PLA filament
Layer Height: 0.1 mm (high resolution)
Infill Density: 20%
Supports: Not required
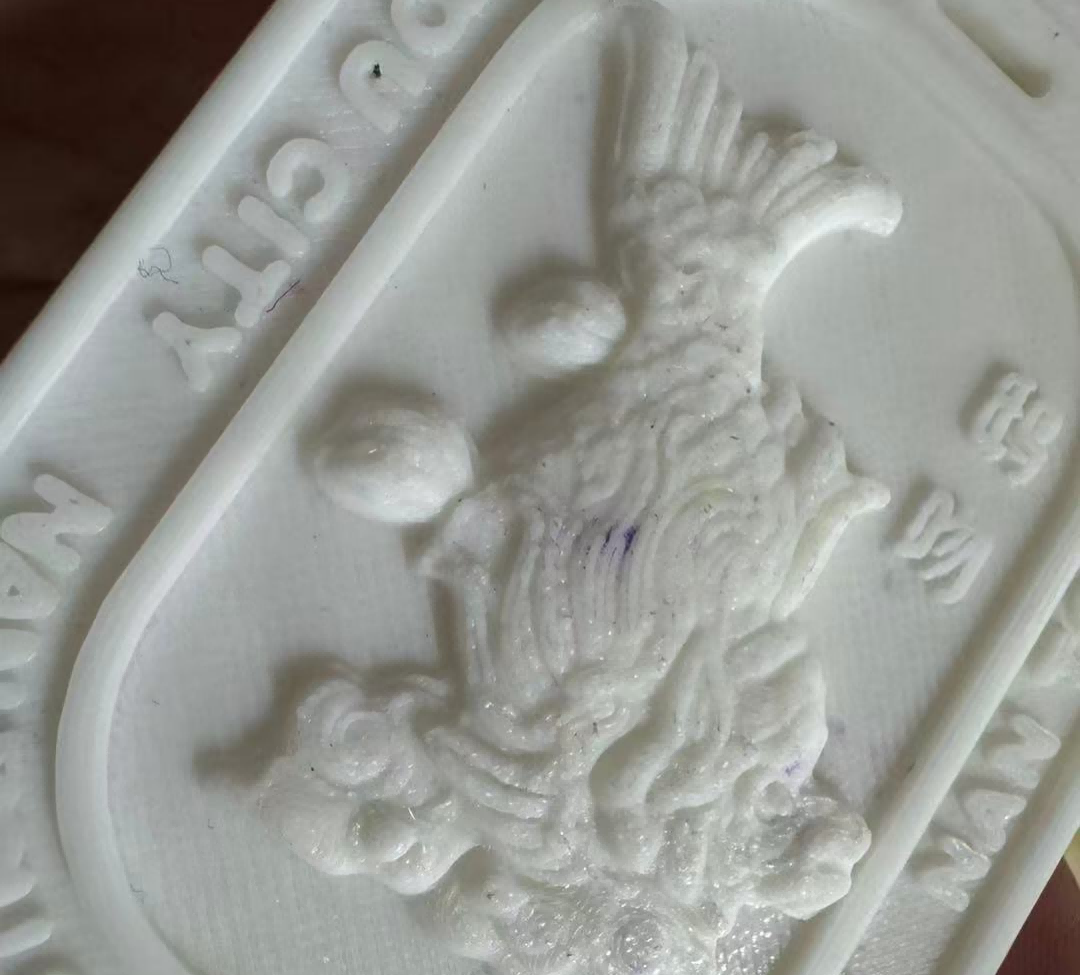
Printing Observations:
- Total print time: approx. 1 hour 46 minutes
- Surface had slight layer lines, but overall finish was improved after sanding
- Fine details were generally well preserved
- Post-processing: Light sanding was performed to remove edge fuzz and improve silicone contact during molding
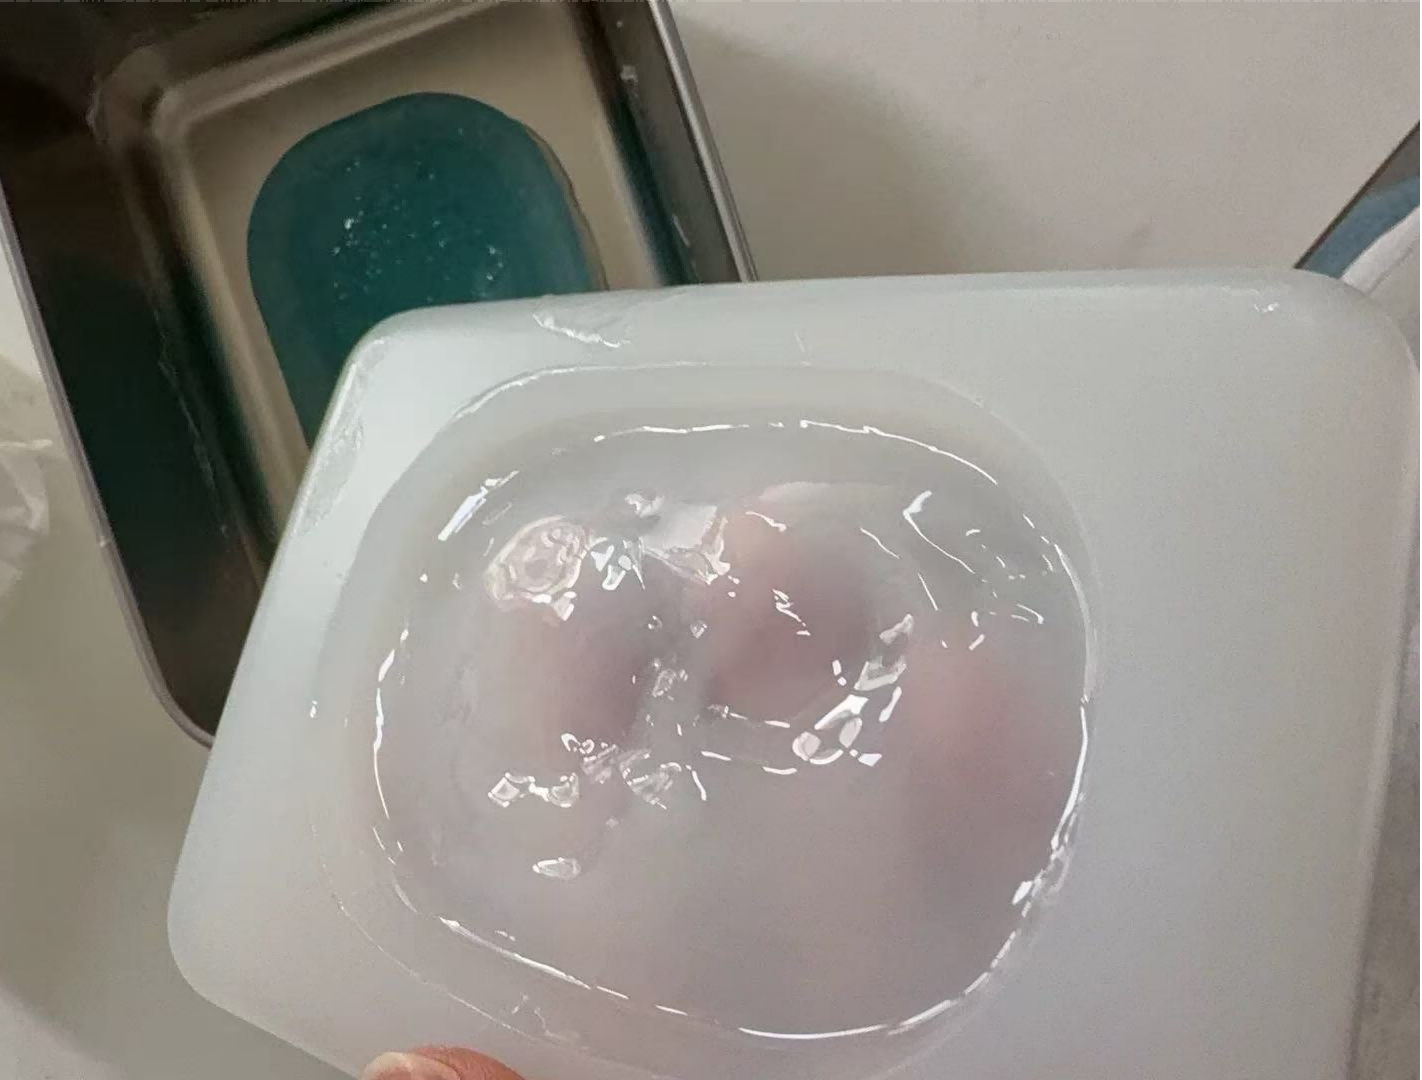
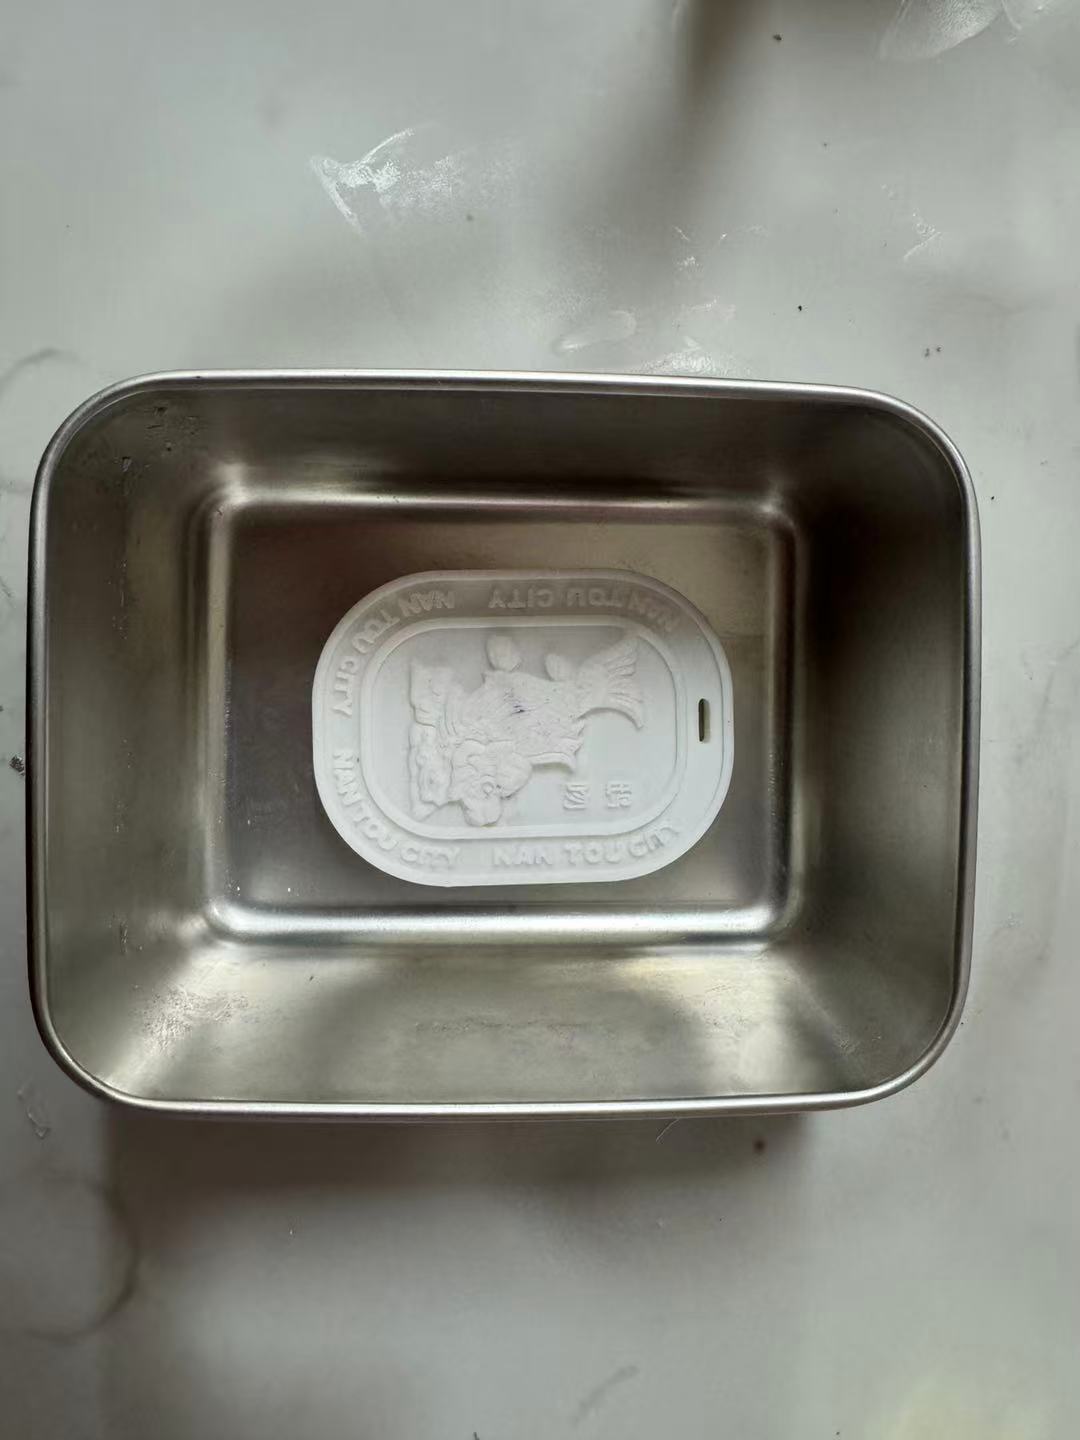
3. Making the Silicone Mold
Material Used: OOMOO 25 (1:1 ratio)
Mold Box: Small metal container
Procedure:
- Fix the 3D-printed Chiwen master to the bottom of the box using hot glue;
- Measure 50 ml each of OOMOO Part A and Part B, and mix thoroughly for 4 minutes;
- Slowly pour the silicone mixture into the box from a corner to avoid trapping bubbles in the details;
- Let cure at room temperature for 120 minutes;
- Cut open the mold box and gently remove the Chiwen mold, trimming off excess silicone from the edges.
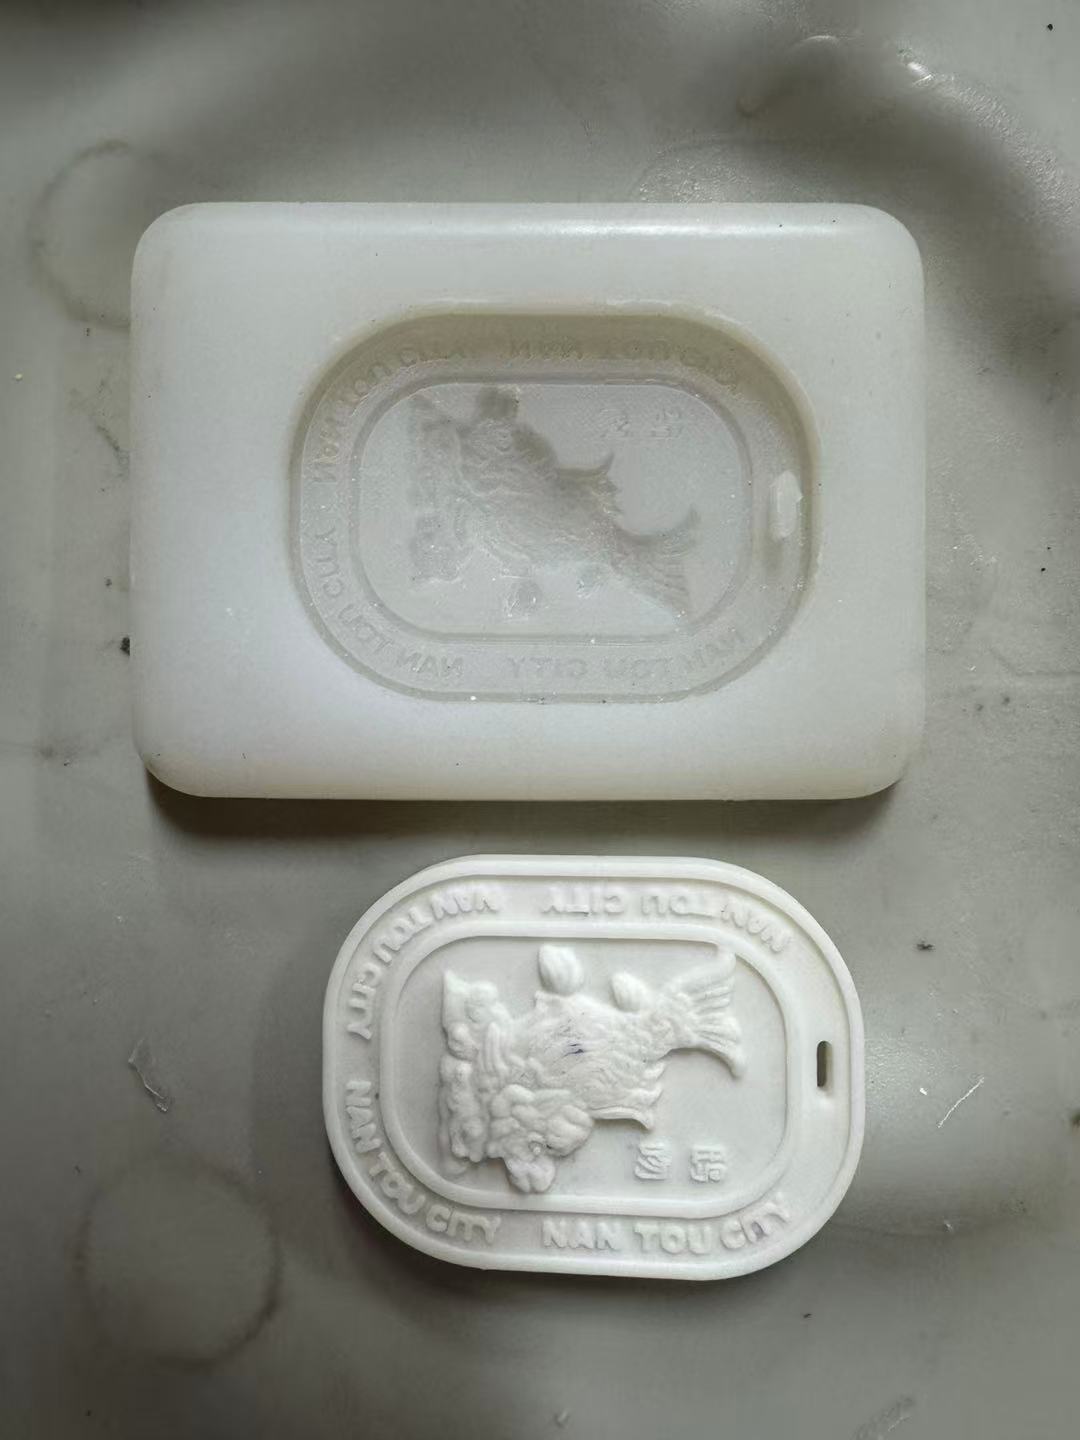
Mold Results:
- The mold cavity is complete and rich in detail;
- No bubbles on the mold surface;
- The mold is flexible and easy to demold and reuse;
- Suitable for casting with low-temperature materials like plaster.
5. Colored Plaster Casting
Material Preparation (Precise Ratios)
| Material | Amount | Description |
|---|---|---|
| Plaster of Paris | 15g | Main material |
| Clean water | 30g | Diluting medium, approx. 1:2 ratio |
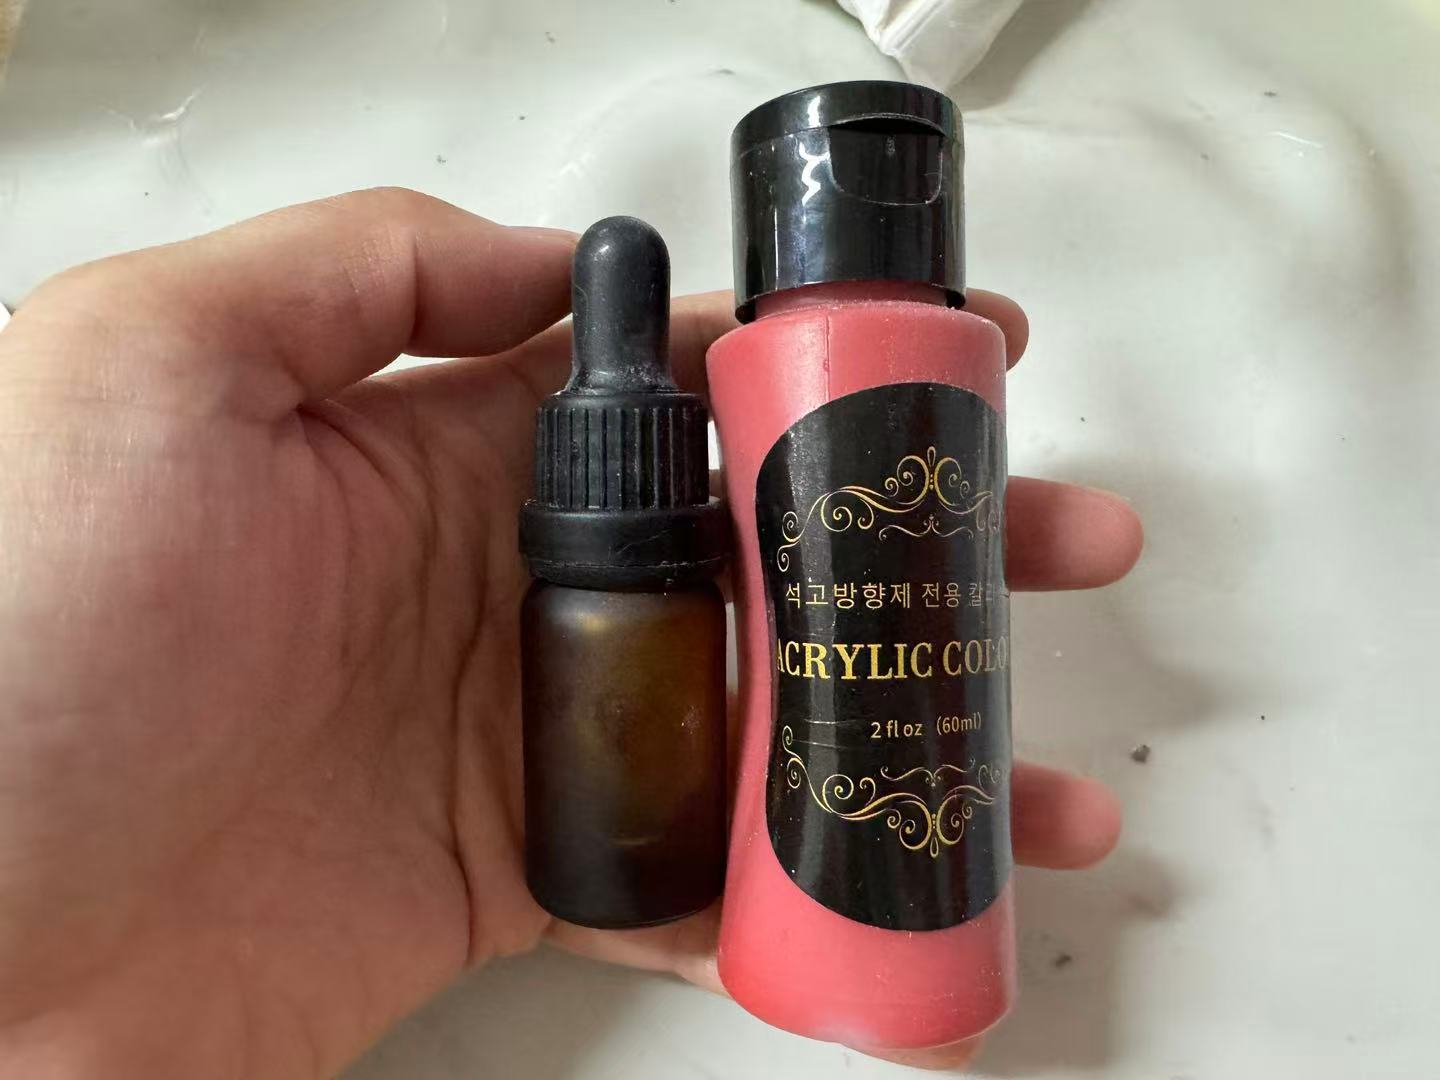
| Pink pigment paste | 1g | High-concentration paste pigment |
| Lemon essential oil | 3 drops | For aromatic diffuser functionality |
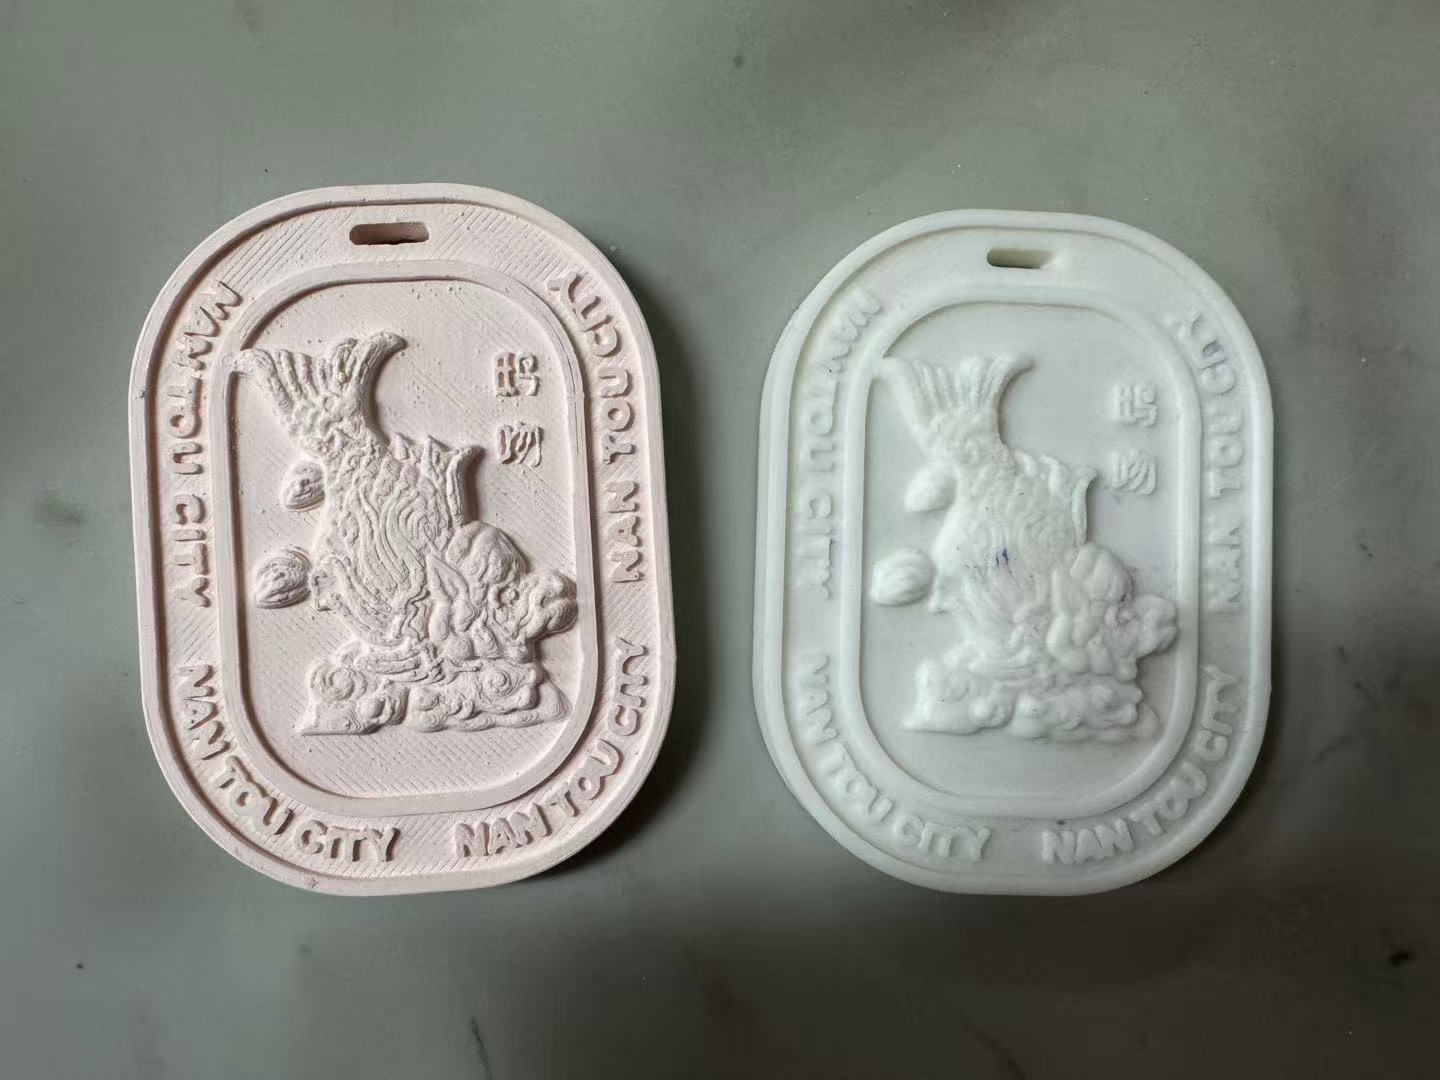
Note: The white plaster turns into a soft pastel pink when the pigment is diluted—gentle and elegant in appearance.
Mixing Procedure (with Vacuum Degassing)
- Measure 15g of plaster into a clean cup.
- Add 30g water, stir for 20 seconds until smooth.
- Add 1g pink pigment paste, mix until evenly colored.
- Add 3 drops of lemon essential oil, stir to blend.
Observation: Pigment turns milky pink; smooth mixture without clumps or separation. Excellent dispersion and color harmony.
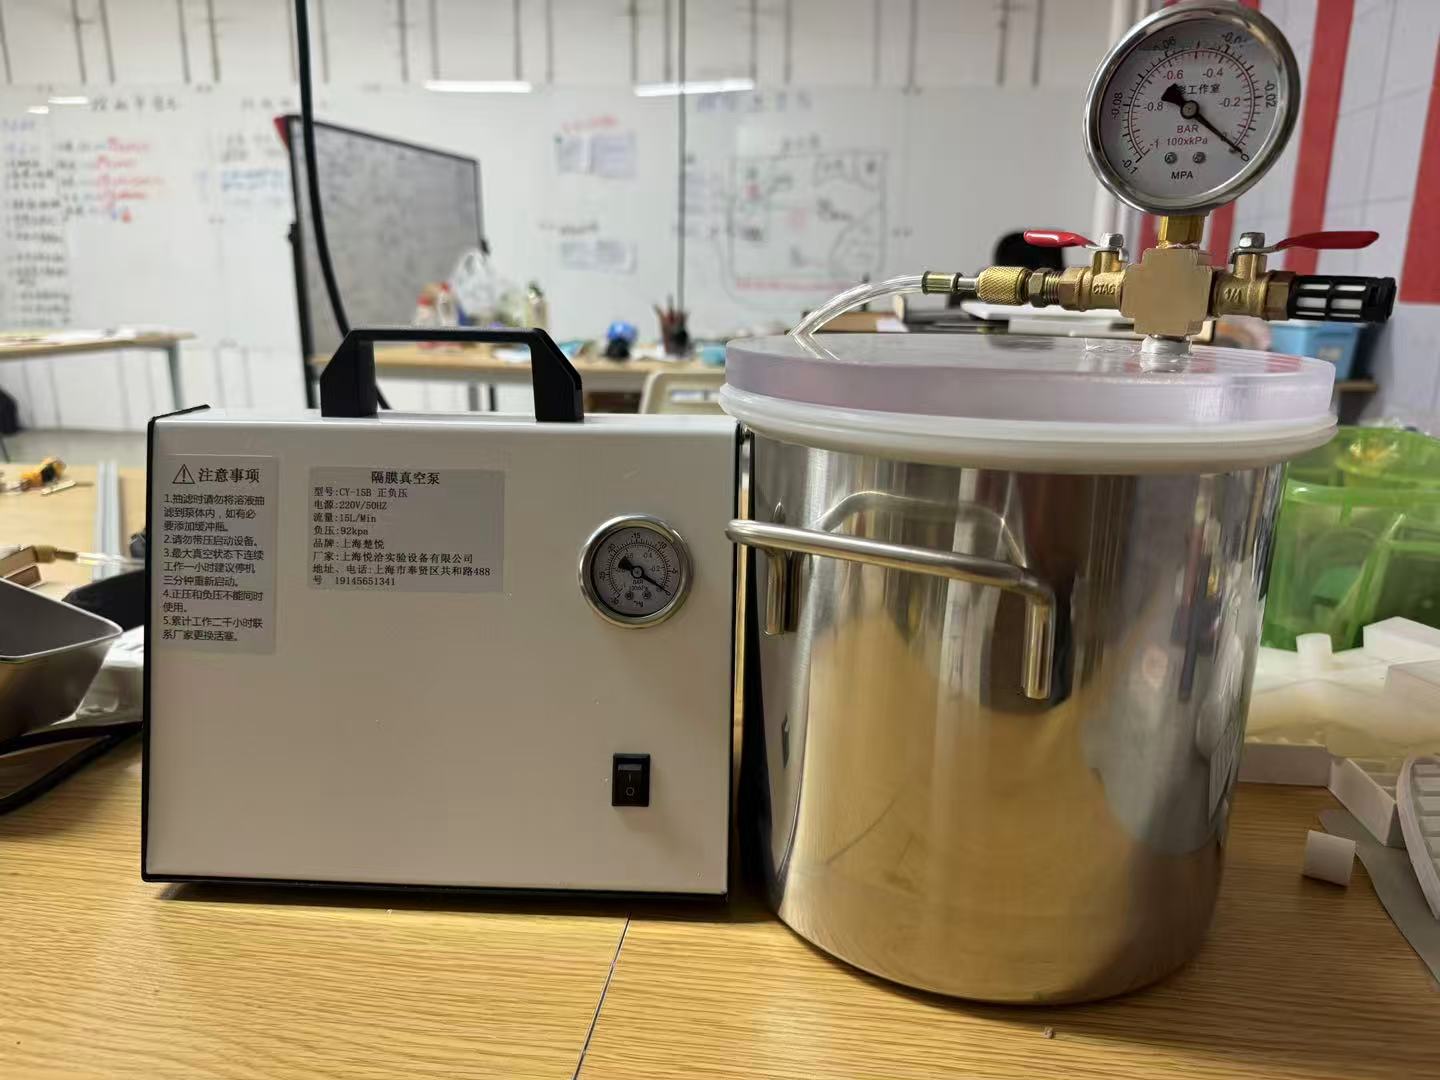
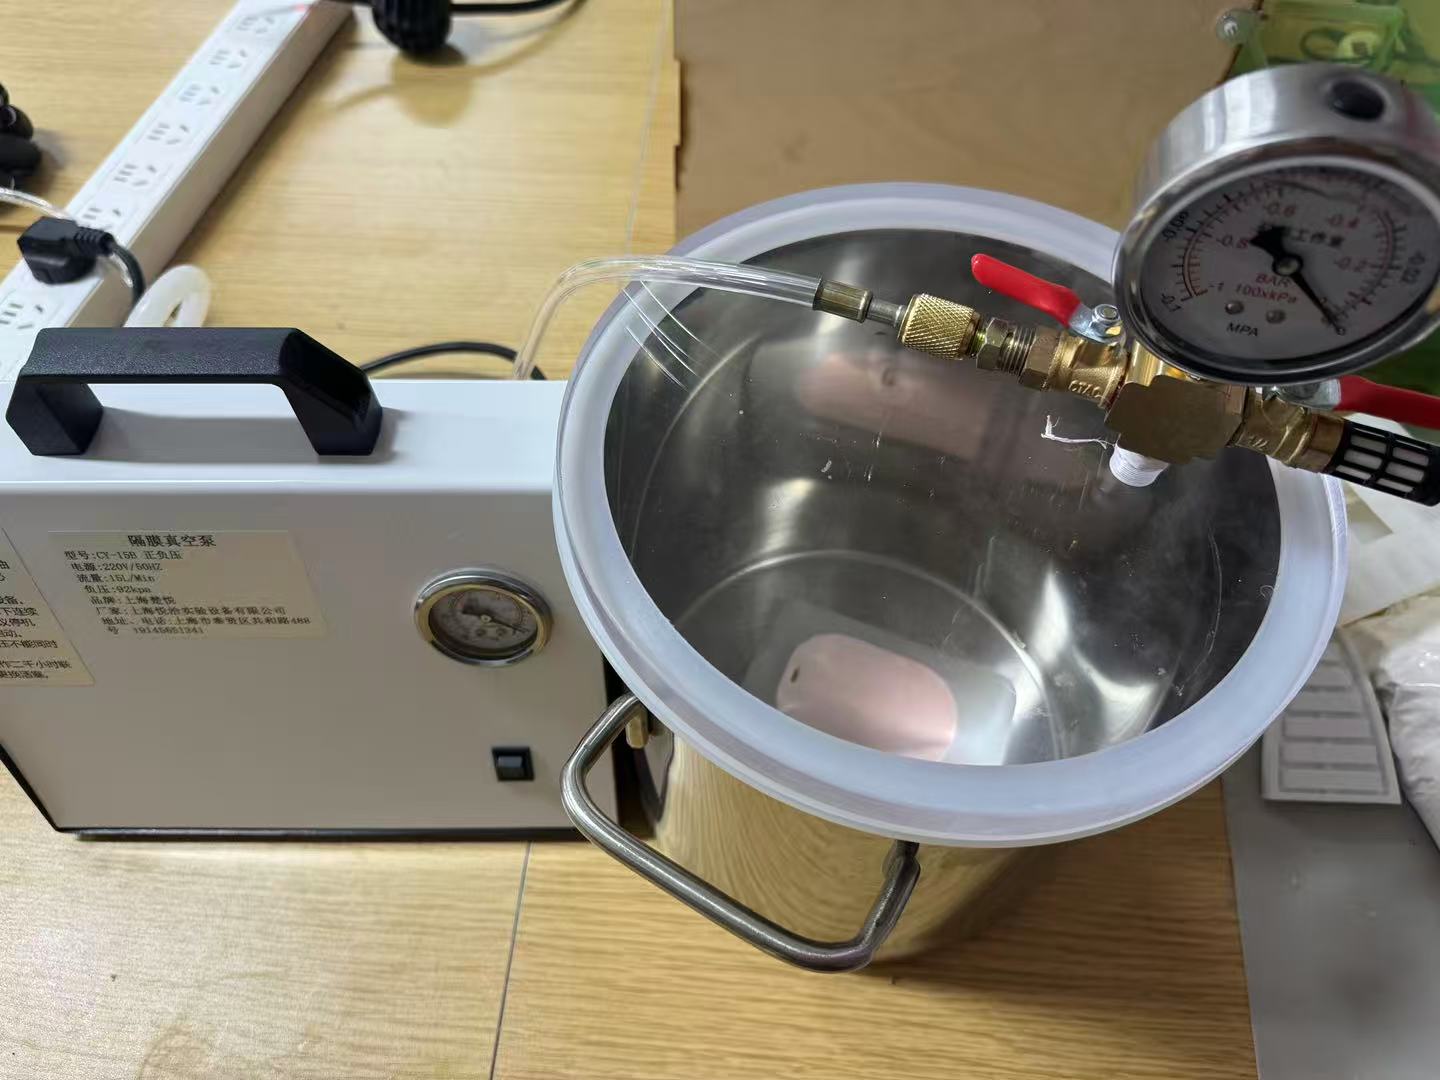
Vacuum Degassing
Equipment: 3L vacuum chamber + pump (~ -0.08 MPa)
- Place mixture in chamber immediately after mixing.
- Start pump; observe bubbling and volume expansion after 10s.
- Continue vacuuming for ~1 minute.
- Stop pump, wait 5s, then carefully remove.
Notes: Avoid overflow; pour quickly after degassing to prevent early setting. Greatly reduces bubbles in detailed mold areas.
Pouring and Curing
- Pour slurry into mold from one corner slowly and steadily.
- Tap gently to release remaining bubbles.
- Let sit for 30 minutes undisturbed.
Result: Smooth, even pouring; no visible bubbles or pigment separation.
Demolding and Drying
- Loosen mold edges gently.
- Push cast out from the back carefully.
- Dry on paper towel in a ventilated space for 24 hours.
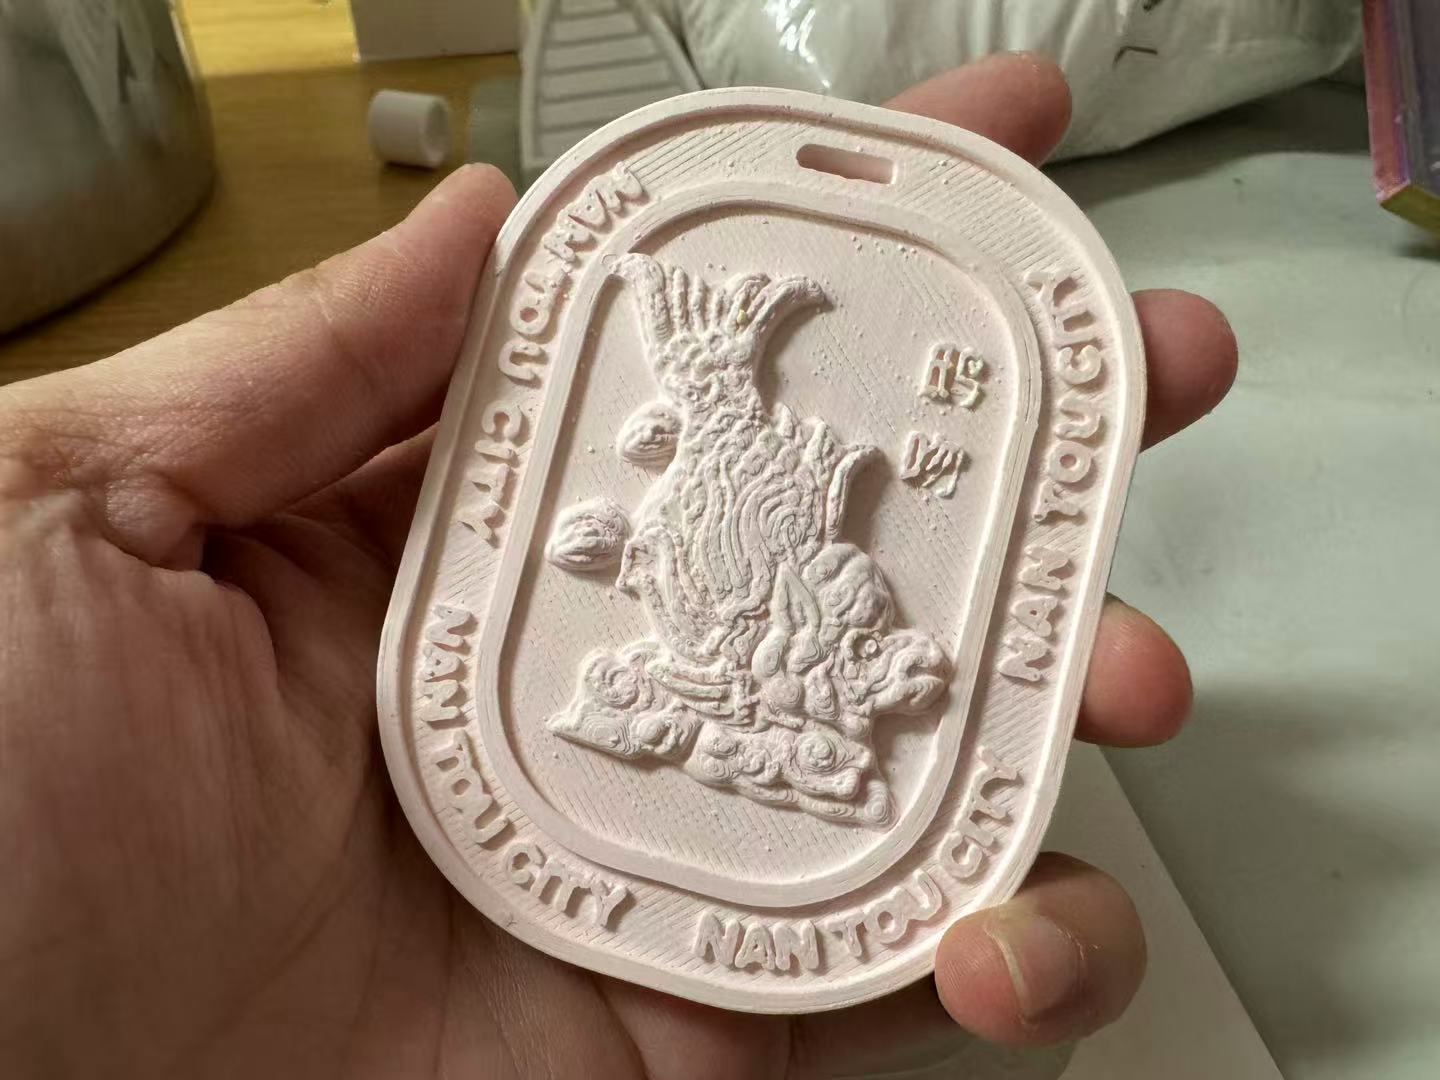
- Matte ceramic-like finish appears after drying.
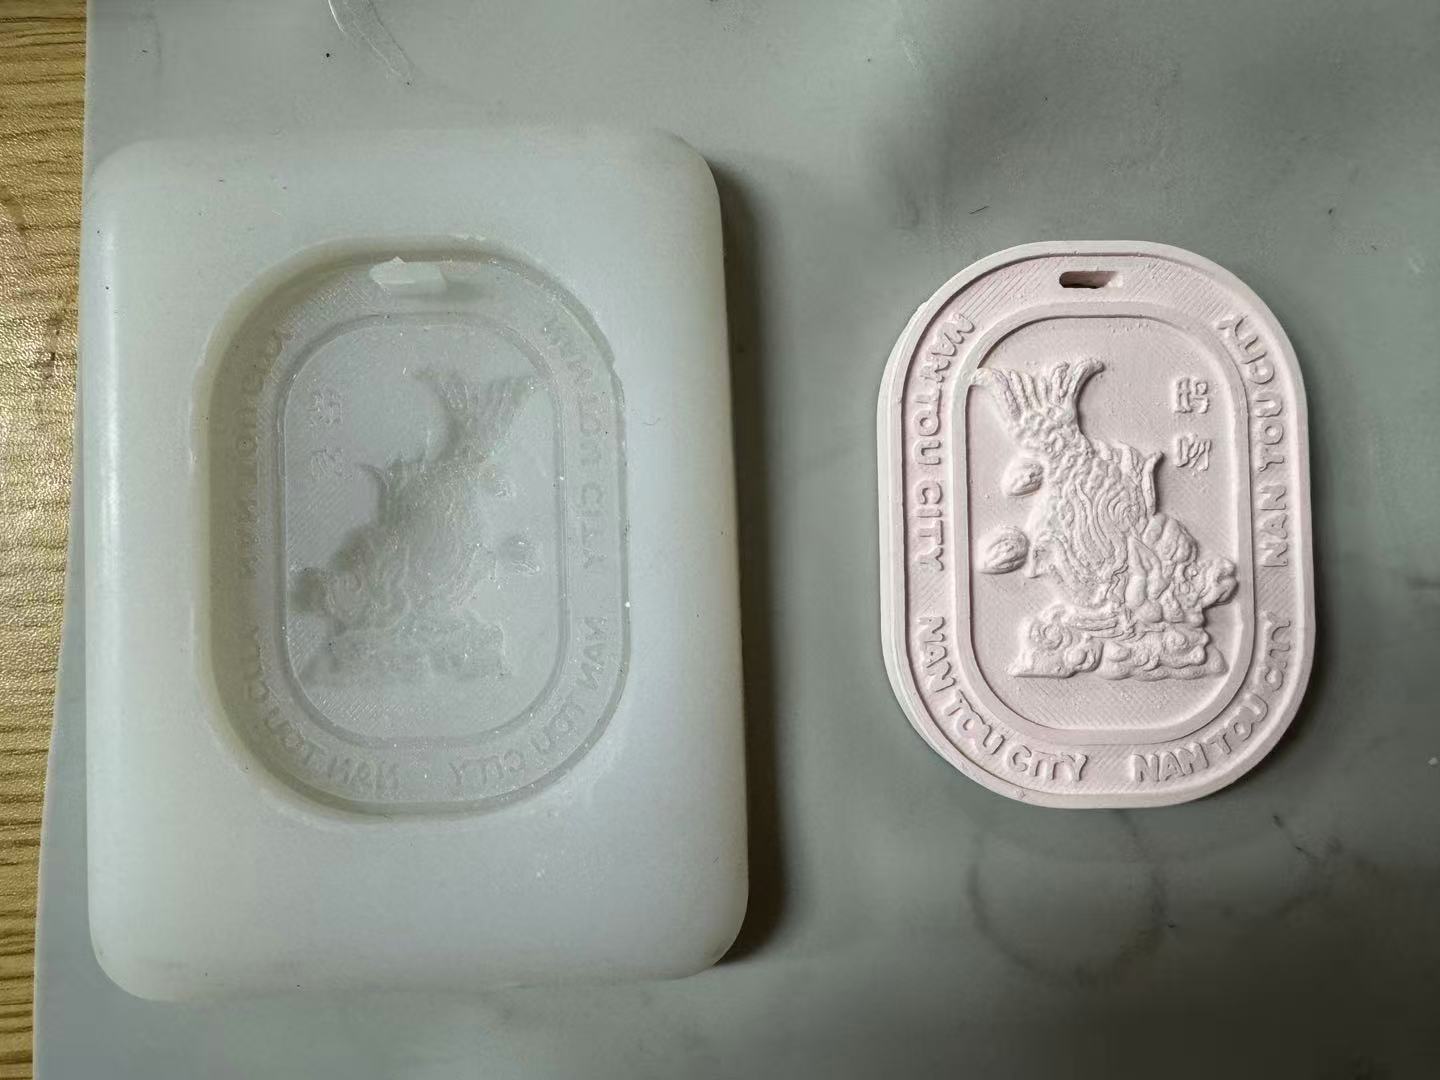
Final Product Evaluation
| Aspect | Performance |
|---|---|
| Color | Soft pink, evenly saturated, no blotches or pigment settling |
| Surface Quality | Generally smooth, minor dimples, clear detail definition |
| Aroma Diffusion | Refreshing lemon scent, detectable after 3 days |
| Structural Integrity | No warping, intact demolding, mold undamaged |
| Functionality | Usable as car diffuser, room ornament, or creative gift |
Reflection
By using pigment paste + vacuum degassing, the final product quality improved significantly:
- Bubble issues were resolved with effective degassing;
- Pigment paste performed better than powder: stable and easy to apply;
- Design achieved full sensory experience: visual (soft pink), olfactory (lemon scent), tactile (matte ceramic texture).
The traditionally fierce Chiwen was softened through pastel pink color, creating a modern contrast that enhanced its decorative appeal.
Personal Assignment Summary
Through this Molding and Casting assignment, I completed a full workflow from digital modeling, 3D printing a positive mold, silicone mold making, to colored plaster casting. I not only practiced multiple non-CNC mold-making and replication techniques but also deepened my understanding of material properties and process compatibility.
During the modeling stage, I took inspiration from the traditional Chinese roof beast Chiwen, and used Rhino’s surface modeling tools to create a three-dimensional model with strong cultural symbolism. Throughout the production process, I continuously optimized the model’s structure and surface to ensure it was both decorative and suitable for molding.
In the casting experiments, I incorporated pigment paste and essential oil, and added a vacuum degassing step to significantly improve the surface quality and sensory experience of the final product. I also extended the piece into two functional directions—a squishy toy and a fragrance ornament—exploring how traditional motifs can be applied in diverse contemporary scenarios through digital fabrication.
This assignment not only improved my hands-on skills, but also strengthened my awareness of design logic and process integration. Moving forward, I hope to continue exploring how traditional elements can be reinterpreted through modern digital fabrication, creating works that blend cultural warmth with modern aesthetics.
Ciwen.stl