Computer-Aided Design
Back to HomeGoals
- Usage of 2D and 3D Design Software:
- Modeling experimental objects/parts
- Learning and using appropriate CAD software tools
- ✳Design should, if possible, be part of your final project (rough idea).
- Guidelines for Week 2 Assignment
- Provide a clear description of your software selection and modeling process.
- Include step-by-step images (screenshots, etc.) showcasing your progress from start to finish.
- ✳Be as detailed and specific as possible.
- 3. Share Design Files
- Submit the original design files.
- IInclude source files/native CAD files.
- ✳Files can be shared via a link to an open-source platform or uploaded directly to GitLab (be mindful of file size).
Individual Assignment
- Design and 3D print an object (small, a few cm³, limited by printer time) that could not be easily made subtractively.
- 3D scan an object (and optionally print it).
Overview
In this week’s assignment, I explored both 2D and 3D design software to create experimental components. Since I have not yet finalized my final project, I focused on learning the necessary tools for CAD design by modeling a functional object as practice. This object may be useful for future projects.
Software Selection
2D Design Software
I chose Adobe Illustrator for vector-based 2D design. Illustrator provides advanced control over complex designs, making it ideal for precise shape adjustments and laser cutting preparation.
3D Design Software
For 3D modeling, I used Rhinoceros 3D due to its strong NURBS modeling capabilities, which allow for precise control over complex geometries. Rhino’s flexibility in both parametric and direct modeling makes it an excellent choice for exploring different design possibilities.
2D Software
Adobe Illustrator
Adobe Illustrator is an industry-leading vector graphics design software developed by Adobe Systems. It is widely used in graphic design, branding, illustration, UI design, product design, and even for laser cutting or CNC machining. Because it is vector-based, Illustrator allows users to create graphics that can be scaled infinitely without losing quality, making it ideal for precise drawings and professional design work.
Key Features
1.Vector Graphics
- Illustrator uses Bezier curves to draw and edit graphics, ensuring that images remain sharp and distortion-free regardless of scale. This makes it an ideal tool for logo design, typography, technical drawings, and laser cutting design.
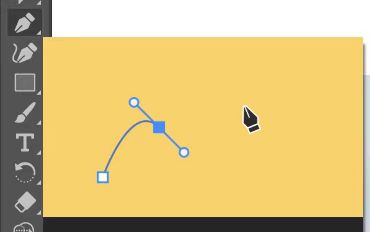
2.Precise Path Control
- The Pen Tool allows users to create precise curves and straight lines.
- Anchor points provide fine control over shape adjustments, enabling detailed and intricate designs.
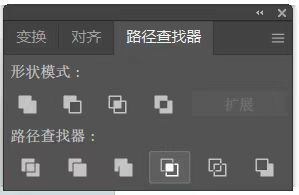
3.Powerful Shape & Alignment Tools
- Illustrator supports various export formats such as SVG, DXF, PDF, EPS, PNG, and JPG, catering to different needs. For example, DXF or SVG files are commonly used for laser cutting or CNC machining.
- Pathfinder Tool: Offers Boolean operations to merge, subtract, intersect, or exclude object areas.
- Alignment and Distribution Tools: Ensure precise positioning of design elements, improving efficiency.
4.Multiple Export Formats
- Shape Builder Tool: Helps combine or separate multiple basic shapes to create complex designs quickly.
5.Advanced Color and Gradient Controls
- Illustrator supports CMYK, RGB, and Pantone color modes for different printing and digital display requirements. Additionally, the Gradient Tool allows smooth color transitions, enhancing the visual appeal of designs.
6.High Compatibility
- Illustrator seamlessly integrates with other Adobe software such as Photoshop, After Effects, and InDesign and is compatible with CAD software. For instance, designs created in Illustrator can be exported as DXF files for further editing in Rhino, Fusion 360, or AutoCAD for 3D modeling or manufacturing.
Application in This 2D Assignment
- Creating Basic Shapes: Used the Pen Tool and Shape Tools to draft the initial design.
- Precision Adjustments: Utilized alignment tools and the Pathfinder tool to ensure accurate component dimensions for laser cutting.
- Exporting as DXF: Prepared files for laser cutting machines or CAD software to ensure compatibility.
2D Design Process
Sketching a Rough Concept
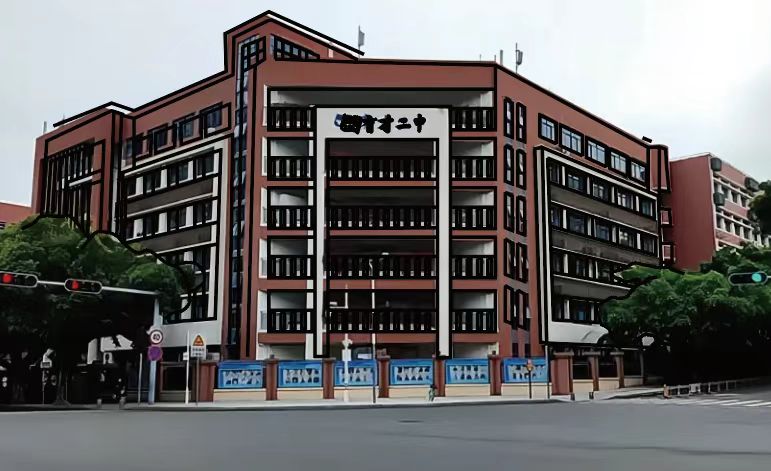
First, I conducted a brainstorming session and came up with some experimental objects. A teacher from Shenzhen Yucai No.2 Middle School approached me, hoping that I could design a cultural and creative product incorporating elements from the school campus. This product would serve as a reward for students, which they could redeem using points.
To achieve this, I collected various elements from the school, such as its teaching buildings and meaningful sculptures. Using these elements, I designed a mobile phone stand.
Create Vector Design
In Adobe Illustrator, I first insert the reference image (the main school building).Use the Pen Tool and Shape Builder Tool to trace along the contours and create the design.
After completing the design, I use the Pathfinder tool to optimize the shapes.
Since my designed phone stand is an openwork sculpture, I placed Yucai No.2 Middle School’s sculpture in front of the building to enhance the storytelling aspect of the design.
I took a screenshot of the 3D-modeled sculpture and imported it into Adobe Illustrator, using the Image Trace tool to quickly generate the design. This tool significantly reduced my workload and saved time.
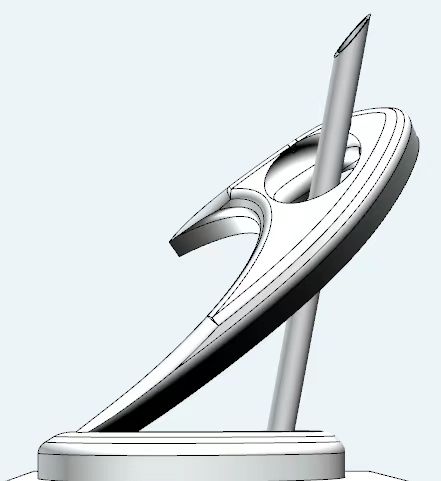
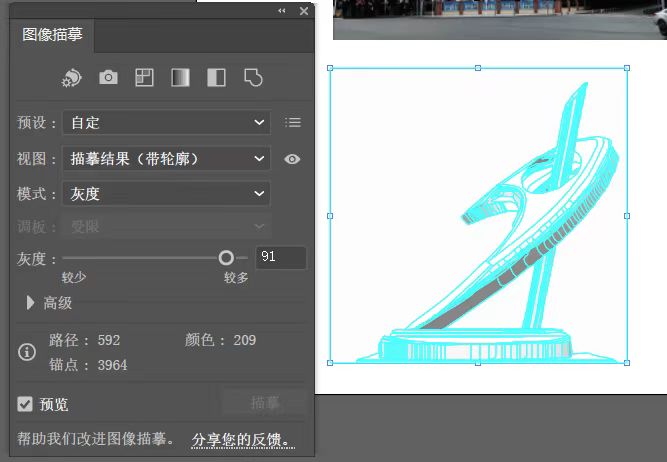
Additionally, next to the sculpture, I incorporated the school's mascot and two banyan trees that are over 100 years old.
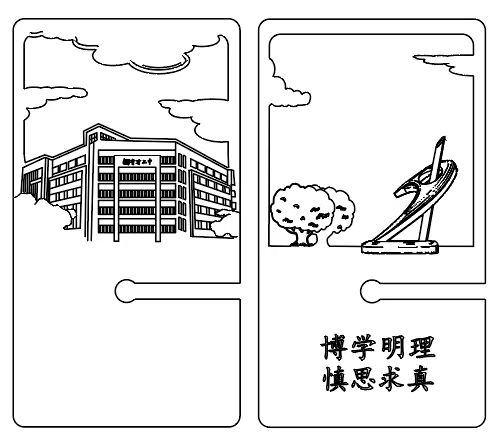
Considering that the phone stand is designed for interlocking assembly and needs a charging port, I added a semi-circular cutout at the joint of the two wooden panels to ensure the charging cable can be easily inserted.Additionally, next to the sculpture, I incorporated the school's mascot and two banyan trees that are over 100 years old.
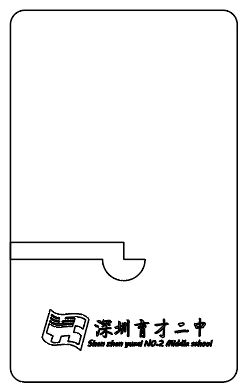
After completing the design, I exported the file in DXF format for further processing and laser cutting preparation.
Yucai_No.2_Middle_School_Commemorative_Phone_Stand.dxf
3D Software
Rhinoceros 3D
Rhinoceros 3D is a powerful 3D modeling software developed by Robert McNeel & Associates. It is widely used across various industries, including industrial design, architecture, jewelry design, product design, engineering, and animation. Known for its flexible and precise modeling capabilities, Rhino is highly regarded by designers, engineers, and 3D artists worldwide.
Key Features
1.Precision NURBS Modeling
- Rhino is renowned for its NURBS (Non-Uniform Rational B-Splines) technology, enabling the creation of highly accurate curves, surfaces, and solids. It excels at designing complex and detailed models essential for engineering and product design.
2.Extensive File Compatibility
- Rhino supports over 30 file formats, including DWG, DXF, OBJ, STL, 3DS, STEP, IGES, and more. This ensures seamless integration with other design software like AutoCAD, SolidWorks, Blender, and 3D printing devices.
3.Robust Plugin Ecosystem
Rhino’s functionality can be extended with various powerful plugins, such as:
- Grasshopper: A visual programming tool for parametric design and algorithmic modeling.
- V-Ray: A high-end rendering engine for photorealistic visualizations.
- RhinoCAM: For CNC machining and advanced manufacturing workflows.
- Other notable plugins like PanelingTools, Kangaroo, and Karamba support advanced geometry and structural analysis.
4.User-Friendly Interface
- Rhino features an intuitive and customizable interface with a comprehensive command system. This makes it accessible to beginners while offering advanced tools for professional users.
5.Scripting and Automation
- Rhino supports Python, RhinoScript, and C#, allowing for the creation of custom tools, automated workflows, and efficient batch processing to enhance productivity.
6.Large-Scale Data Handling
- Capable of handling complex models and large datasets, Rhino is well-suited for large architectural projects or intricate product designs.
Application in This 3D Assignment
- In this assignment, I utilized Rhino 3D to design and model a simple T-shirt, following a structured and systematic workflow to ensure accuracy and efficiency. The process included preparation, 2D sketching, 3D modeling, detailing, and final export.
3D Design Process
Preparation Work
To begin, I prepared the Rhino workspace for precise modeling:
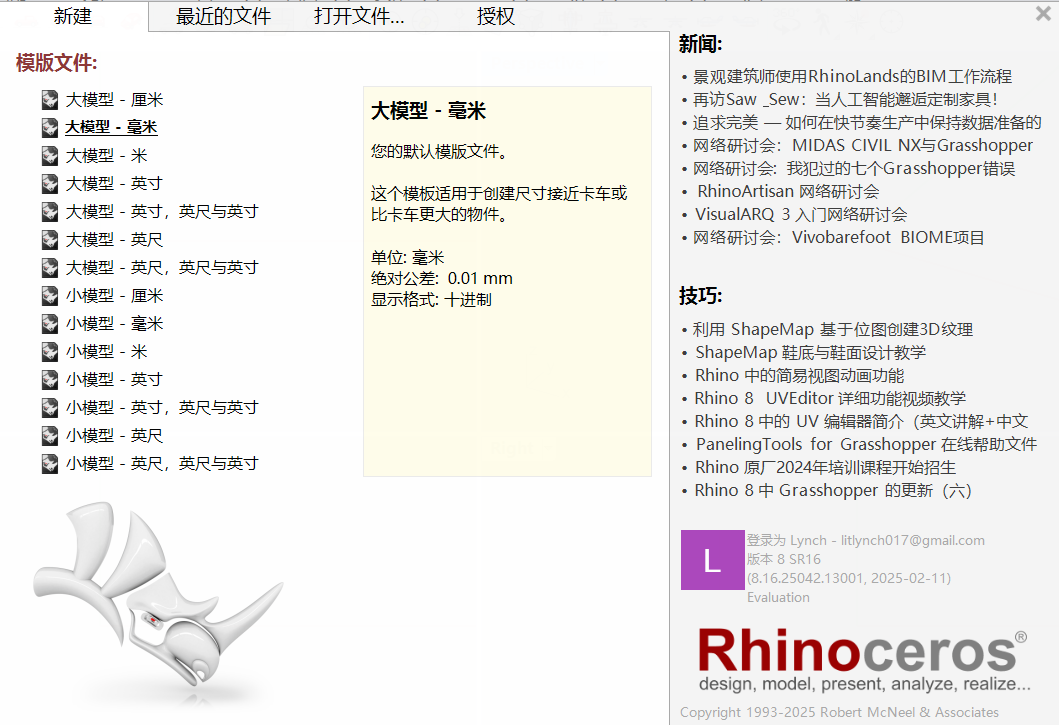
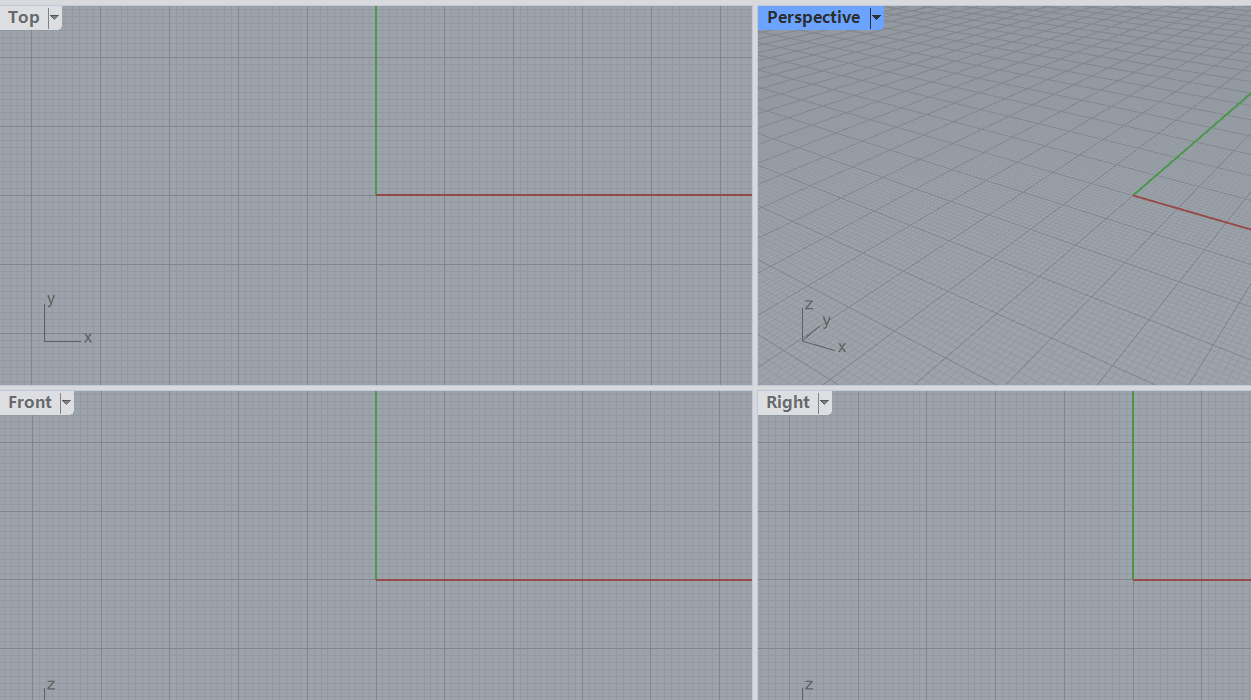
- Unit and View Setup:
I opened Rhino and started with a new file. The units were set to millimeters (mm) using the command:
Units → Selected mm for accurate dimensioning.I also ensured that multiple viewports (Front, Top, and Perspective) were open to facilitate a smooth modeling process.
- Reference Image Import:
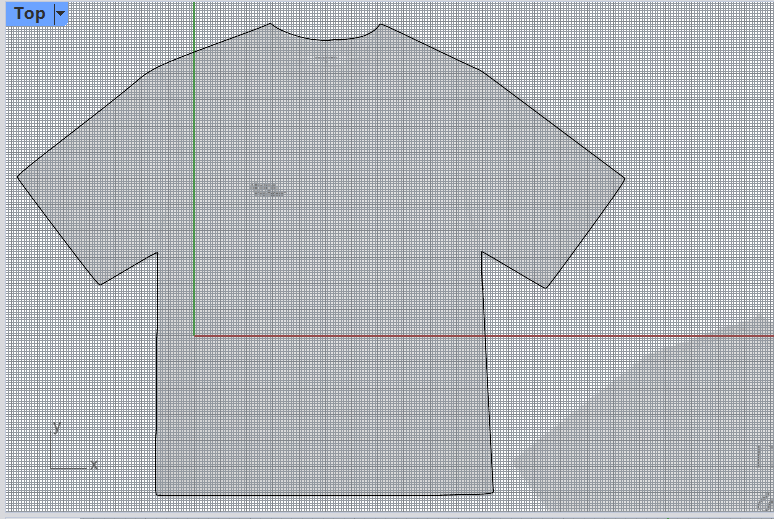
Using the Picture command in the Top View, I imported a reference image of a T-shirt to serve as a visual guide for outlining the model.
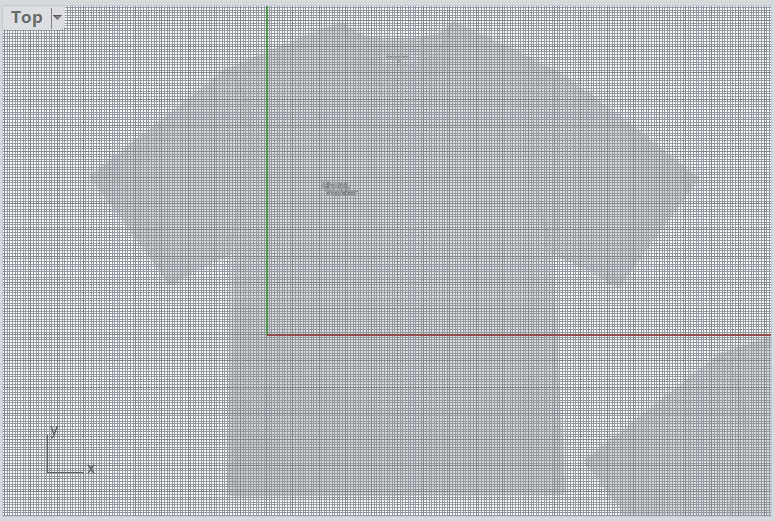
Drawing the 2D Outline
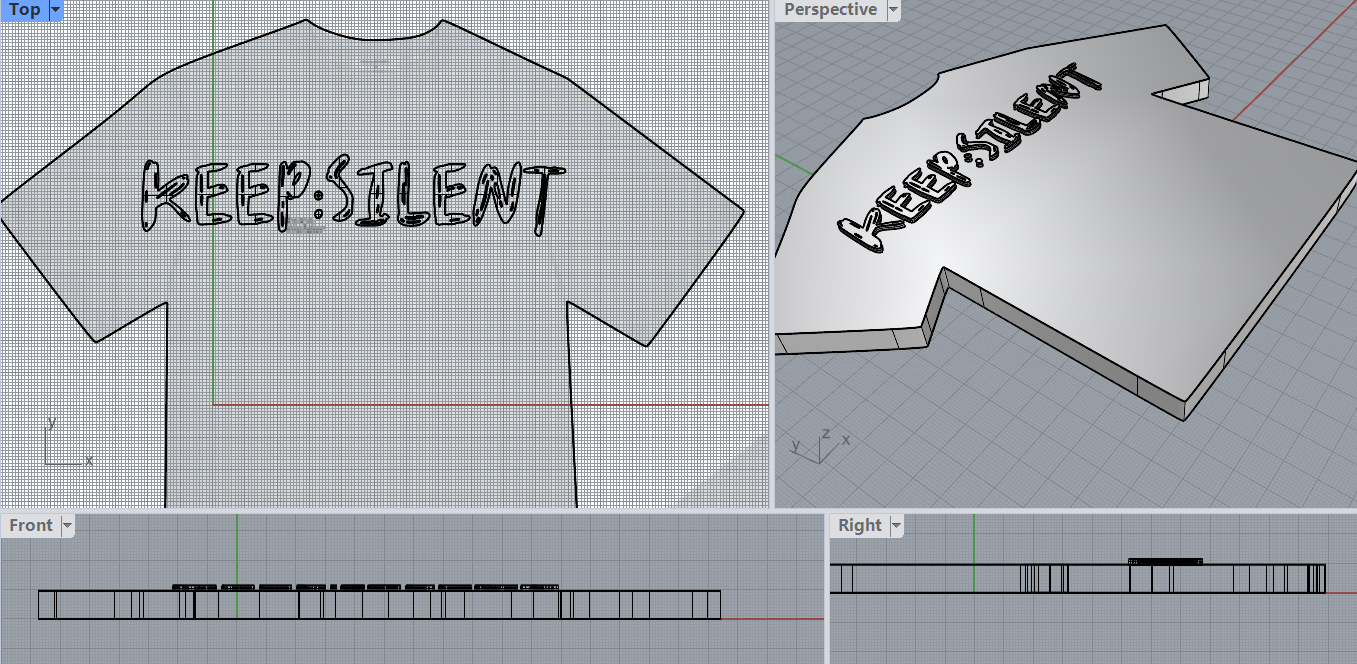
- In the Top View, I used the Polyline tool to sketch the basic half-outline of the T-shirt, focusing on key sections like the sleeves, shoulders, and hemline.
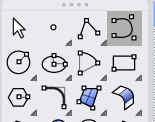
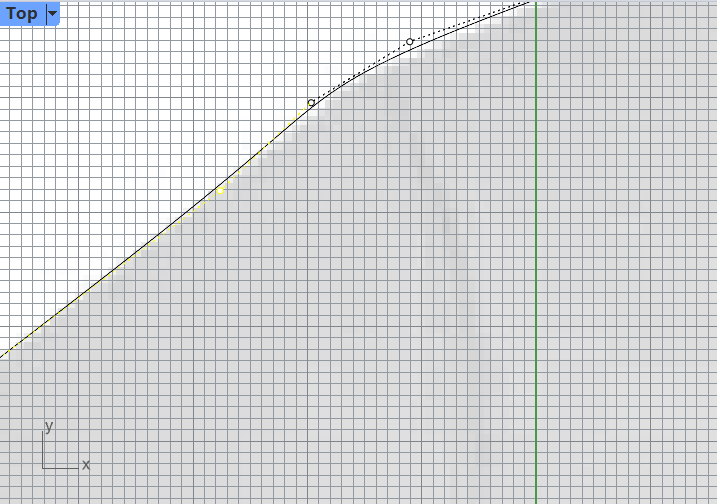
- After sketching, I activated Control Points (F10) to fine-tune the curves, ensuring the lines were smooth and proportional.
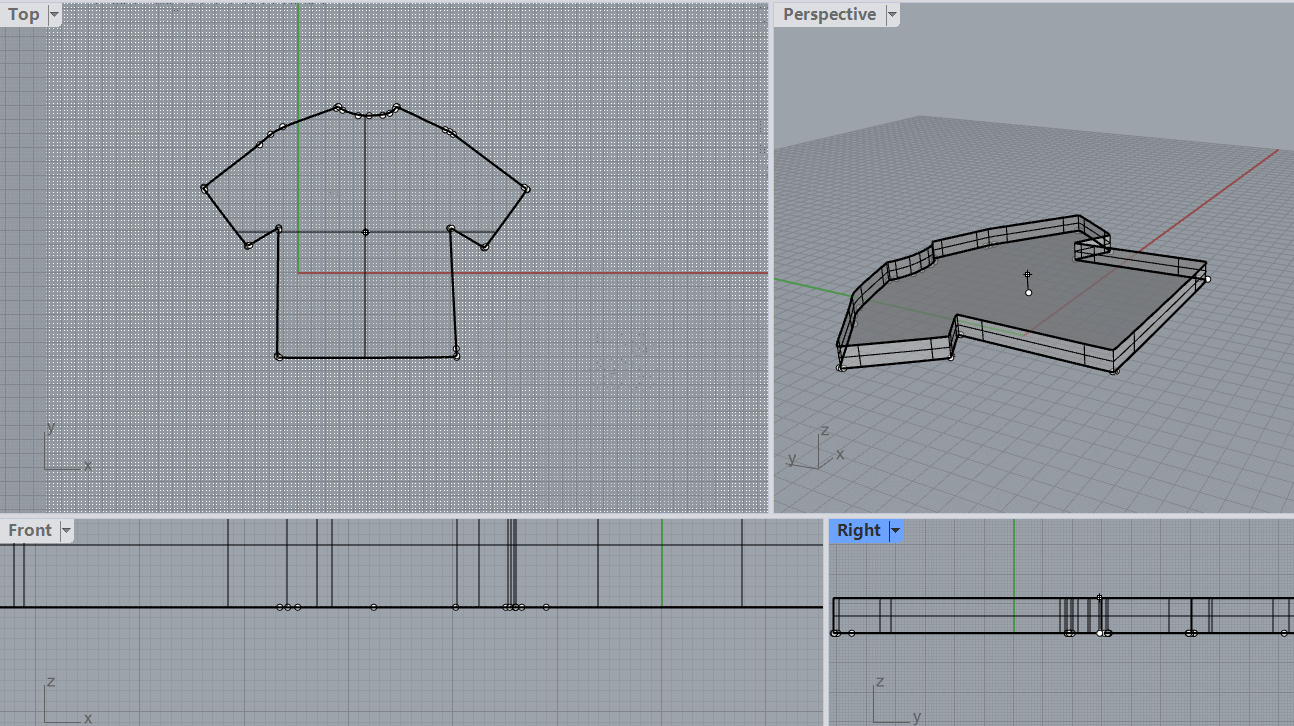
Constructing the 3D Model
- With the 2D outline selected, I applied the ExtrudeCrv command in the Top View to extrude the shape into a 3D form. The extrusion depth was determined based on the desired thickness of the model.
- After creating the base 3D form, I personalized the design by adding text. Using the TextObject command, I engraved my favorite clothing brand's name, "keep silent," onto the T-shirt surface. This step added a custom detail to enhance the model's uniqueness.
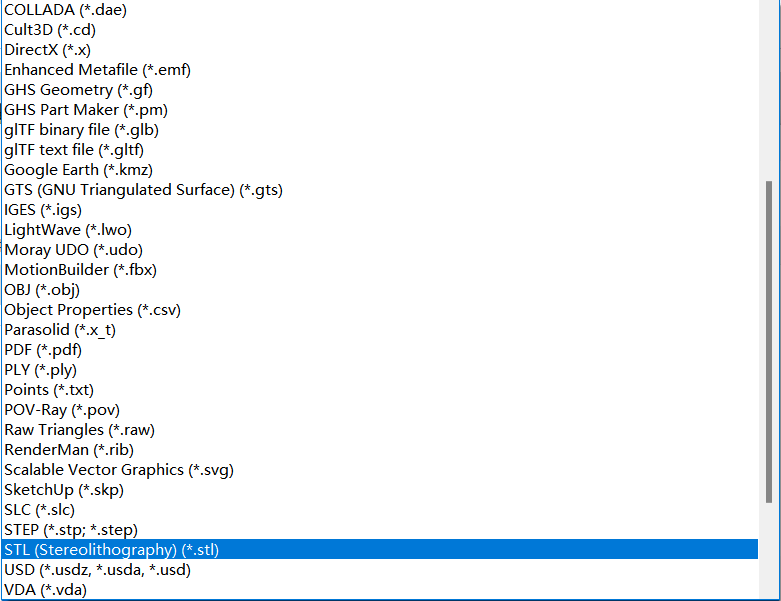
Exporting the Model
- Once the model was completed and reviewed for accuracy, I exported it using the Export command.
- The file format was set to STL, ensuring compatibility for 3D printing or further digital processing.
Conclusion
Through this assignment, I effectively applied Rhino's core modeling tools and techniques, such as Polyline drawing, Curve Extrusion, and TextObject engraving. The process demonstrated how basic design concepts could be quickly transformed into a 3D model, ready for production or visualization. This assignment not only enhanced my proficiency in Rhino but also reinforced the importance of a structured design workflow.
KS-Tshirt.stl
Image and Video Compression
In this assignment, I practiced compressing image and video files for my Fab Academy documentation.
Since Fab Academy documentation is published online, it is important to reduce the size of media files
before uploading them to the website. Smaller images and videos can make the webpage load faster and
also help keep the documentation repository lighter.
1. Image Compression
For image compression, I used Caesium Image Compressor.
Caesium Image Compressor is a free image compression software developed for simplicity and effectiveness.
According to its official website, it can compress pictures up to 90% without visible quality loss.
It also provides a simple interface, real-time preview, and supports processing multiple images at the same
time, which is very useful for documentation work.
Software download page:
https://saerasoft.com/caesium/#downloads
Compression Process
First, I downloaded and installed Caesium Image Compressor from the official website. After opening the
software, I imported the image that needed to be compressed.
Then, I checked the compression settings and previewed the result. Caesium allows users to compare the
original image and the compressed image, which helps ensure that the file size is reduced while the image
quality remains acceptable.
After adjusting the settings, I clicked the compression button and exported the compressed image.
Compression Result
After compression, the image file size was successfully reduced by 61%.
This result shows that Caesium Image Compressor is very effective for reducing image size while keeping
the image visually clear enough for online documentation.
2. Video Compression
For video compression, I used CompressO.
CompressO is a free and open-source video and image compression application available for Mac, Windows,
and Linux. It runs locally on the computer, so files do not need to be uploaded to the cloud. This makes
it more private and convenient. The software supports drag-and-drop operation and uses FFmpeg-based
compression, making it suitable for quickly reducing video file size.
Software download page:
https://compresso.codeforreal.com/#downloads
Compression Process
First, I downloaded and installed CompressO from the official website. After opening the software, I imported
the original video file into the program.
The original video file size was 3.3 MB. I used CompressO to compress the video and then
exported the compressed file.
After compression, I checked the new file size and compared it with the original file.
Compression Result
The original video size was:
3.3 MB
After compression, the video size became:
896 KB
This means the video file was reduced by about 73%. The compressed video became much smaller
and more suitable for uploading to my Fab Academy documentation webpage.
Compression
1. What is File Compression?
File compression involves encoding file data using specific algorithms to reduce its storage size. Compressed files not only save storage space but also improve transfer efficiency, especially when handling large projects and sharing files.
2. My File Compression Experience
During my Fab Academy learning journey, I personally experimented with various file compression processes and explored multiple tools.
- Choosing Tools: I first tried the built-in Windows compression function, the open-source 7-Zip tool, and WPS compression for easy project file compression.
- Practical Operation:
- Used WPS compression for quickly compressing document-type files, which provided a simple interface and convenient operation.
- Utilized 7-Zip to compress multiple project folders into 7Z format with the highest compression level.
- Applied command-line tools
tar and gzip in a Linux environment to compress code files.
- Attempted to split large files into volumes, setting each volume to 100MB for easier transfer.
- Challenges Encountered:
- Found that WPS compression had a lower compression rate for large files, so I switched to 7-Zip for better efficiency.
- Faced format compatibility issues when decompressing on Mac, which were resolved by using 7-Zip format.
- Encountered file size limitations when uploading large compressed files, which I addressed through split compression.
- Learnings and Reflections:
- Gained insights into the pros, cons, and suitable scenarios for various compression formats.
- Realized the importance of good compression habits for project management and data security.
- Compared the performance of WPS compression with other tools and selected better methods for handling large files.
3. Common Compression Formats
- ZIP: Widely used, supports multiple operating systems, and is suitable for daily file compression.
- RAR: Offers higher compression rates but requires specific software for decompression.
- 7Z: Highly efficient, supports encryption and split volumes, and is ideal for large project files.
- TAR.GZ: Commonly used in Linux systems, ideal for archiving and backing up large project files.
4. File Compression Tools
- WPS Compression: Suitable for document-type files, easy to operate, and ideal for light, everyday compression tasks.
- WinRAR: Supports multiple compression formats, ideal for Windows users.
- 7-Zip: Free and open-source, supports various formats, offers high compression rates, and is perfect for Fab Academy project files.
- PeaZip: Cross-platform, supports multiple compression standards, and is suitable for multi-OS developers.
- Linux Command-Line Tools: Such as
tar, gzip, and bzip2, ideal for automation scripts and project archiving.
5. How to Compress and Decompress Files
- Windows Systems:
- Right-click the file, select "Send to" -> "Compressed (zipped) folder."
- Use WPS or 7-Zip from the right-click menu to compress or decompress, suitable for handling large design files and project archives.
- MacOS Systems:
- Right-click the file and select "Compress."
- Use third-party tools like Keka for cross-platform file processing.
- Linux Systems:
# Compress a folder
        tar -czvf project.tar.gz /path/to/project

        # Decompress a file
        tar -xzvf project.tar.gz
6. Compression Tips
- Ensure the compression format matches the project requirements and submission specifications.
- Encrypt important data to ensure project security.
- For large files, consider split compression to facilitate transfer and storage and avoid upload restrictions.
- Regularly check the integrity of compressed files to prevent data corruption.
7. Frequently Asked Questions
- Why can't I open the compressed file?
- Check if the compression format matches the decompression tool.
- Ensure the file was not corrupted during transmission. Using MD5 or SHA for integrity checks is recommended.
- How can I improve the compression rate?
- Use the 7Z format with the highest compression level, especially for large models and design files.
- Remove redundant information or optimize file content, such as deleting unused resources.
- What if the compressed file is too large to send?
- Use split compression and set an appropriate volume size (e.g., 100MB per volume).
- Share files via cloud storage services (e.g., Google Drive, Dropbox) while ensuring link security.
Through this file compression experience, I have not only improved my file management skills but also prepared thoroughly for future Fab Academy project submissions, ensuring data integrity and smooth transfers.
Adobe Illustrator is an industry-leading vector graphics design software developed by Adobe Systems. It is widely used in graphic design, branding, illustration, UI design, product design, and even for laser cutting or CNC machining. Because it is vector-based, Illustrator allows users to create graphics that can be scaled infinitely without losing quality, making it ideal for precise drawings and professional design work.
Key Features
1.Vector Graphics
- Illustrator uses Bezier curves to draw and edit graphics, ensuring that images remain sharp and distortion-free regardless of scale. This makes it an ideal tool for logo design, typography, technical drawings, and laser cutting design.
2.Precise Path Control
- The Pen Tool allows users to create precise curves and straight lines.
- Anchor points provide fine control over shape adjustments, enabling detailed and intricate designs.
3.Powerful Shape & Alignment Tools
- Illustrator supports various export formats such as SVG, DXF, PDF, EPS, PNG, and JPG, catering to different needs. For example, DXF or SVG files are commonly used for laser cutting or CNC machining.
- Pathfinder Tool: Offers Boolean operations to merge, subtract, intersect, or exclude object areas.
- Alignment and Distribution Tools: Ensure precise positioning of design elements, improving efficiency.
4.Multiple Export Formats
- Shape Builder Tool: Helps combine or separate multiple basic shapes to create complex designs quickly.
5.Advanced Color and Gradient Controls
- Illustrator supports CMYK, RGB, and Pantone color modes for different printing and digital display requirements. Additionally, the Gradient Tool allows smooth color transitions, enhancing the visual appeal of designs.
6.High Compatibility
- Illustrator seamlessly integrates with other Adobe software such as Photoshop, After Effects, and InDesign and is compatible with CAD software. For instance, designs created in Illustrator can be exported as DXF files for further editing in Rhino, Fusion 360, or AutoCAD for 3D modeling or manufacturing.
Application in This 2D Assignment
- Creating Basic Shapes: Used the Pen Tool and Shape Tools to draft the initial design.
- Precision Adjustments: Utilized alignment tools and the Pathfinder tool to ensure accurate component dimensions for laser cutting.
- Exporting as DXF: Prepared files for laser cutting machines or CAD software to ensure compatibility.
2D Design Process
Sketching a Rough Concept
First, I conducted a brainstorming session and came up with some experimental objects. A teacher from Shenzhen Yucai No.2 Middle School approached me, hoping that I could design a cultural and creative product incorporating elements from the school campus. This product would serve as a reward for students, which they could redeem using points.
To achieve this, I collected various elements from the school, such as its teaching buildings and meaningful sculptures. Using these elements, I designed a mobile phone stand.
Create Vector Design
In Adobe Illustrator, I first insert the reference image (the main school building).Use the Pen Tool and Shape Builder Tool to trace along the contours and create the design.
After completing the design, I use the Pathfinder tool to optimize the shapes.
Since my designed phone stand is an openwork sculpture, I placed Yucai No.2 Middle School’s sculpture in front of the building to enhance the storytelling aspect of the design.
I took a screenshot of the 3D-modeled sculpture and imported it into Adobe Illustrator, using the Image Trace tool to quickly generate the design. This tool significantly reduced my workload and saved time.
Additionally, next to the sculpture, I incorporated the school's mascot and two banyan trees that are over 100 years old.
Considering that the phone stand is designed for interlocking assembly and needs a charging port, I added a semi-circular cutout at the joint of the two wooden panels to ensure the charging cable can be easily inserted.Additionally, next to the sculpture, I incorporated the school's mascot and two banyan trees that are over 100 years old.
After completing the design, I exported the file in DXF format for further processing and laser cutting preparation.
Yucai_No.2_Middle_School_Commemorative_Phone_Stand.dxf3D Software
Rhinoceros 3D
Rhinoceros 3D is a powerful 3D modeling software developed by Robert McNeel & Associates. It is widely used across various industries, including industrial design, architecture, jewelry design, product design, engineering, and animation. Known for its flexible and precise modeling capabilities, Rhino is highly regarded by designers, engineers, and 3D artists worldwide.
Key Features
1.Precision NURBS Modeling
- Rhino is renowned for its NURBS (Non-Uniform Rational B-Splines) technology, enabling the creation of highly accurate curves, surfaces, and solids. It excels at designing complex and detailed models essential for engineering and product design.
2.Extensive File Compatibility
- Rhino supports over 30 file formats, including DWG, DXF, OBJ, STL, 3DS, STEP, IGES, and more. This ensures seamless integration with other design software like AutoCAD, SolidWorks, Blender, and 3D printing devices.
3.Robust Plugin Ecosystem
Rhino’s functionality can be extended with various powerful plugins, such as:
- Grasshopper: A visual programming tool for parametric design and algorithmic modeling.
- V-Ray: A high-end rendering engine for photorealistic visualizations.
- RhinoCAM: For CNC machining and advanced manufacturing workflows.
- Other notable plugins like PanelingTools, Kangaroo, and Karamba support advanced geometry and structural analysis.
4.User-Friendly Interface
- Rhino features an intuitive and customizable interface with a comprehensive command system. This makes it accessible to beginners while offering advanced tools for professional users.
5.Scripting and Automation
- Rhino supports Python, RhinoScript, and C#, allowing for the creation of custom tools, automated workflows, and efficient batch processing to enhance productivity.
6.Large-Scale Data Handling
- Capable of handling complex models and large datasets, Rhino is well-suited for large architectural projects or intricate product designs.
Application in This 3D Assignment
- In this assignment, I utilized Rhino 3D to design and model a simple T-shirt, following a structured and systematic workflow to ensure accuracy and efficiency. The process included preparation, 2D sketching, 3D modeling, detailing, and final export.
3D Design Process
Preparation Work
To begin, I prepared the Rhino workspace for precise modeling:
- Unit and View Setup:
I opened Rhino and started with a new file. The units were set to millimeters (mm) using the command:
Units → Selected mm for accurate dimensioning.I also ensured that multiple viewports (Front, Top, and Perspective) were open to facilitate a smooth modeling process.
- Reference Image Import:
Using the Picture command in the Top View, I imported a reference image of a T-shirt to serve as a visual guide for outlining the model.
Drawing the 2D Outline
- In the Top View, I used the Polyline tool to sketch the basic half-outline of the T-shirt, focusing on key sections like the sleeves, shoulders, and hemline.
- After sketching, I activated Control Points (F10) to fine-tune the curves, ensuring the lines were smooth and proportional.
Constructing the 3D Model
- With the 2D outline selected, I applied the ExtrudeCrv command in the Top View to extrude the shape into a 3D form. The extrusion depth was determined based on the desired thickness of the model.
- After creating the base 3D form, I personalized the design by adding text. Using the TextObject command, I engraved my favorite clothing brand's name, "keep silent," onto the T-shirt surface. This step added a custom detail to enhance the model's uniqueness.
Exporting the Model
- Once the model was completed and reviewed for accuracy, I exported it using the Export command.
- The file format was set to STL, ensuring compatibility for 3D printing or further digital processing.
Conclusion
Through this assignment, I effectively applied Rhino's core modeling tools and techniques, such as Polyline drawing, Curve Extrusion, and TextObject engraving. The process demonstrated how basic design concepts could be quickly transformed into a 3D model, ready for production or visualization. This assignment not only enhanced my proficiency in Rhino but also reinforced the importance of a structured design workflow.
KS-Tshirt.stl
Image and Video Compression
In this assignment, I practiced compressing image and video files for my Fab Academy documentation.
Since Fab Academy documentation is published online, it is important to reduce the size of media files
before uploading them to the website. Smaller images and videos can make the webpage load faster and
also help keep the documentation repository lighter.
1. Image Compression
For image compression, I used Caesium Image Compressor.
Caesium Image Compressor is a free image compression software developed for simplicity and effectiveness.
According to its official website, it can compress pictures up to 90% without visible quality loss.
It also provides a simple interface, real-time preview, and supports processing multiple images at the same
time, which is very useful for documentation work.
Software download page:
https://saerasoft.com/caesium/#downloads
Compression Process
First, I downloaded and installed Caesium Image Compressor from the official website. After opening the
software, I imported the image that needed to be compressed.
Then, I checked the compression settings and previewed the result. Caesium allows users to compare the
original image and the compressed image, which helps ensure that the file size is reduced while the image
quality remains acceptable.
After adjusting the settings, I clicked the compression button and exported the compressed image.
Compression Result
After compression, the image file size was successfully reduced by 61%.
This result shows that Caesium Image Compressor is very effective for reducing image size while keeping
the image visually clear enough for online documentation.
2. Video Compression
For video compression, I used CompressO.
CompressO is a free and open-source video and image compression application available for Mac, Windows,
and Linux. It runs locally on the computer, so files do not need to be uploaded to the cloud. This makes
it more private and convenient. The software supports drag-and-drop operation and uses FFmpeg-based
compression, making it suitable for quickly reducing video file size.
Software download page:
https://compresso.codeforreal.com/#downloads
Compression Process
First, I downloaded and installed CompressO from the official website. After opening the software, I imported
the original video file into the program.
The original video file size was 3.3 MB. I used CompressO to compress the video and then
exported the compressed file.
After compression, I checked the new file size and compared it with the original file.
Compression Result
The original video size was:
3.3 MB
After compression, the video size became:
896 KB
This means the video file was reduced by about 73%. The compressed video became much smaller
and more suitable for uploading to my Fab Academy documentation webpage.
Compression
1. What is File Compression?
File compression involves encoding file data using specific algorithms to reduce its storage size. Compressed files not only save storage space but also improve transfer efficiency, especially when handling large projects and sharing files.
2. My File Compression Experience
During my Fab Academy learning journey, I personally experimented with various file compression processes and explored multiple tools.
- Choosing Tools: I first tried the built-in Windows compression function, the open-source 7-Zip tool, and WPS compression for easy project file compression.
- Practical Operation:
- Used WPS compression for quickly compressing document-type files, which provided a simple interface and convenient operation.
- Utilized 7-Zip to compress multiple project folders into 7Z format with the highest compression level.
- Applied command-line tools
tar and gzip in a Linux environment to compress code files.
- Attempted to split large files into volumes, setting each volume to 100MB for easier transfer.
- Challenges Encountered:
- Found that WPS compression had a lower compression rate for large files, so I switched to 7-Zip for better efficiency.
- Faced format compatibility issues when decompressing on Mac, which were resolved by using 7-Zip format.
- Encountered file size limitations when uploading large compressed files, which I addressed through split compression.
- Learnings and Reflections:
- Gained insights into the pros, cons, and suitable scenarios for various compression formats.
- Realized the importance of good compression habits for project management and data security.
- Compared the performance of WPS compression with other tools and selected better methods for handling large files.
3. Common Compression Formats
- ZIP: Widely used, supports multiple operating systems, and is suitable for daily file compression.
- RAR: Offers higher compression rates but requires specific software for decompression.
- 7Z: Highly efficient, supports encryption and split volumes, and is ideal for large project files.
- TAR.GZ: Commonly used in Linux systems, ideal for archiving and backing up large project files.
4. File Compression Tools
- WPS Compression: Suitable for document-type files, easy to operate, and ideal for light, everyday compression tasks.
- WinRAR: Supports multiple compression formats, ideal for Windows users.
- 7-Zip: Free and open-source, supports various formats, offers high compression rates, and is perfect for Fab Academy project files.
- PeaZip: Cross-platform, supports multiple compression standards, and is suitable for multi-OS developers.
- Linux Command-Line Tools: Such as
tar, gzip, and bzip2, ideal for automation scripts and project archiving.
5. How to Compress and Decompress Files
- Windows Systems:
- Right-click the file, select "Send to" -> "Compressed (zipped) folder."
- Use WPS or 7-Zip from the right-click menu to compress or decompress, suitable for handling large design files and project archives.
- MacOS Systems:
- Right-click the file and select "Compress."
- Use third-party tools like Keka for cross-platform file processing.
- Linux Systems:
# Compress a folder
tar -czvf project.tar.gz /path/to/project
# Decompress a file
tar -xzvf project.tar.gz
6. Compression Tips
- Ensure the compression format matches the project requirements and submission specifications.
- Encrypt important data to ensure project security.
- For large files, consider split compression to facilitate transfer and storage and avoid upload restrictions.
- Regularly check the integrity of compressed files to prevent data corruption.
7. Frequently Asked Questions
- Why can't I open the compressed file?
- Check if the compression format matches the decompression tool.
- Ensure the file was not corrupted during transmission. Using MD5 or SHA for integrity checks is recommended.
- How can I improve the compression rate?
- Use the 7Z format with the highest compression level, especially for large models and design files.
- Remove redundant information or optimize file content, such as deleting unused resources.
- What if the compressed file is too large to send?
- Use split compression and set an appropriate volume size (e.g., 100MB per volume).
- Share files via cloud storage services (e.g., Google Drive, Dropbox) while ensuring link security.
Through this file compression experience, I have not only improved my file management skills but also prepared thoroughly for future Fab Academy project submissions, ensuring data integrity and smooth transfers.
Rhinoceros 3D is a powerful 3D modeling software developed by Robert McNeel & Associates. It is widely used across various industries, including industrial design, architecture, jewelry design, product design, engineering, and animation. Known for its flexible and precise modeling capabilities, Rhino is highly regarded by designers, engineers, and 3D artists worldwide.
Key Features
1.Precision NURBS Modeling
- Rhino is renowned for its NURBS (Non-Uniform Rational B-Splines) technology, enabling the creation of highly accurate curves, surfaces, and solids. It excels at designing complex and detailed models essential for engineering and product design.
2.Extensive File Compatibility
- Rhino supports over 30 file formats, including DWG, DXF, OBJ, STL, 3DS, STEP, IGES, and more. This ensures seamless integration with other design software like AutoCAD, SolidWorks, Blender, and 3D printing devices.
3.Robust Plugin Ecosystem
Rhino’s functionality can be extended with various powerful plugins, such as:
- Grasshopper: A visual programming tool for parametric design and algorithmic modeling.
- V-Ray: A high-end rendering engine for photorealistic visualizations.
- RhinoCAM: For CNC machining and advanced manufacturing workflows.
- Other notable plugins like PanelingTools, Kangaroo, and Karamba support advanced geometry and structural analysis.
4.User-Friendly Interface
- Rhino features an intuitive and customizable interface with a comprehensive command system. This makes it accessible to beginners while offering advanced tools for professional users.
5.Scripting and Automation
- Rhino supports Python, RhinoScript, and C#, allowing for the creation of custom tools, automated workflows, and efficient batch processing to enhance productivity.
6.Large-Scale Data Handling
- Capable of handling complex models and large datasets, Rhino is well-suited for large architectural projects or intricate product designs.
Application in This 3D Assignment
- In this assignment, I utilized Rhino 3D to design and model a simple T-shirt, following a structured and systematic workflow to ensure accuracy and efficiency. The process included preparation, 2D sketching, 3D modeling, detailing, and final export.
3D Design Process
Preparation Work
To begin, I prepared the Rhino workspace for precise modeling:
- Unit and View Setup:
I opened Rhino and started with a new file. The units were set to millimeters (mm) using the command:
Units → Selected mm for accurate dimensioning.I also ensured that multiple viewports (Front, Top, and Perspective) were open to facilitate a smooth modeling process.
- Reference Image Import:
Using the Picture command in the Top View, I imported a reference image of a T-shirt to serve as a visual guide for outlining the model.
Drawing the 2D Outline
- In the Top View, I used the Polyline tool to sketch the basic half-outline of the T-shirt, focusing on key sections like the sleeves, shoulders, and hemline.
- After sketching, I activated Control Points (F10) to fine-tune the curves, ensuring the lines were smooth and proportional.
- With the 2D outline selected, I applied the ExtrudeCrv command in the Top View to extrude the shape into a 3D form. The extrusion depth was determined based on the desired thickness of the model.
- After creating the base 3D form, I personalized the design by adding text. Using the TextObject command, I engraved my favorite clothing brand's name, "keep silent," onto the T-shirt surface. This step added a custom detail to enhance the model's uniqueness.
- Once the model was completed and reviewed for accuracy, I exported it using the Export command.
- The file format was set to STL, ensuring compatibility for 3D printing or further digital processing.
- Choosing Tools: I first tried the built-in Windows compression function, the open-source 7-Zip tool, and WPS compression for easy project file compression.
- Practical Operation:
- Used WPS compression for quickly compressing document-type files, which provided a simple interface and convenient operation.
- Utilized 7-Zip to compress multiple project folders into 7Z format with the highest compression level.
- Applied command-line tools
tarandgzipin a Linux environment to compress code files. - Attempted to split large files into volumes, setting each volume to 100MB for easier transfer.
- Challenges Encountered:
- Found that WPS compression had a lower compression rate for large files, so I switched to 7-Zip for better efficiency.
- Faced format compatibility issues when decompressing on Mac, which were resolved by using 7-Zip format.
- Encountered file size limitations when uploading large compressed files, which I addressed through split compression.
- Learnings and Reflections:
- Gained insights into the pros, cons, and suitable scenarios for various compression formats.
- Realized the importance of good compression habits for project management and data security.
- Compared the performance of WPS compression with other tools and selected better methods for handling large files.
- ZIP: Widely used, supports multiple operating systems, and is suitable for daily file compression.
- RAR: Offers higher compression rates but requires specific software for decompression.
- 7Z: Highly efficient, supports encryption and split volumes, and is ideal for large project files.
- TAR.GZ: Commonly used in Linux systems, ideal for archiving and backing up large project files.
- WPS Compression: Suitable for document-type files, easy to operate, and ideal for light, everyday compression tasks.
- WinRAR: Supports multiple compression formats, ideal for Windows users.
- 7-Zip: Free and open-source, supports various formats, offers high compression rates, and is perfect for Fab Academy project files.
- PeaZip: Cross-platform, supports multiple compression standards, and is suitable for multi-OS developers.
- Linux Command-Line Tools: Such as
tar,gzip, andbzip2, ideal for automation scripts and project archiving. - Windows Systems:
- Right-click the file, select "Send to" -> "Compressed (zipped) folder."
- Use WPS or 7-Zip from the right-click menu to compress or decompress, suitable for handling large design files and project archives.
- MacOS Systems:
- Right-click the file and select "Compress."
- Use third-party tools like Keka for cross-platform file processing.
- Linux Systems:
# Compress a folder tar -czvf project.tar.gz /path/to/project # Decompress a file tar -xzvf project.tar.gz - Ensure the compression format matches the project requirements and submission specifications.
- Encrypt important data to ensure project security.
- For large files, consider split compression to facilitate transfer and storage and avoid upload restrictions.
- Regularly check the integrity of compressed files to prevent data corruption.
- Why can't I open the compressed file?
- Check if the compression format matches the decompression tool.
- Ensure the file was not corrupted during transmission. Using MD5 or SHA for integrity checks is recommended.
- How can I improve the compression rate?
- Use the 7Z format with the highest compression level, especially for large models and design files.
- Remove redundant information or optimize file content, such as deleting unused resources.
- What if the compressed file is too large to send?
- Use split compression and set an appropriate volume size (e.g., 100MB per volume).
- Share files via cloud storage services (e.g., Google Drive, Dropbox) while ensuring link security.
Constructing the 3D Model
Exporting the Model
Conclusion
Through this assignment, I effectively applied Rhino's core modeling tools and techniques, such as Polyline drawing, Curve Extrusion, and TextObject engraving. The process demonstrated how basic design concepts could be quickly transformed into a 3D model, ready for production or visualization. This assignment not only enhanced my proficiency in Rhino but also reinforced the importance of a structured design workflow.
KS-Tshirt.stlImage and Video Compression
In this assignment, I practiced compressing image and video files for my Fab Academy documentation. Since Fab Academy documentation is published online, it is important to reduce the size of media files before uploading them to the website. Smaller images and videos can make the webpage load faster and also help keep the documentation repository lighter.
1. Image Compression
For image compression, I used Caesium Image Compressor.
Caesium Image Compressor is a free image compression software developed for simplicity and effectiveness. According to its official website, it can compress pictures up to 90% without visible quality loss. It also provides a simple interface, real-time preview, and supports processing multiple images at the same time, which is very useful for documentation work.
Software download page:
https://saerasoft.com/caesium/#downloads
Compression Process
First, I downloaded and installed Caesium Image Compressor from the official website. After opening the software, I imported the image that needed to be compressed.
Then, I checked the compression settings and previewed the result. Caesium allows users to compare the original image and the compressed image, which helps ensure that the file size is reduced while the image quality remains acceptable.
After adjusting the settings, I clicked the compression button and exported the compressed image.
Compression Result
After compression, the image file size was successfully reduced by 61%.
This result shows that Caesium Image Compressor is very effective for reducing image size while keeping the image visually clear enough for online documentation.
2. Video Compression
For video compression, I used CompressO.
CompressO is a free and open-source video and image compression application available for Mac, Windows, and Linux. It runs locally on the computer, so files do not need to be uploaded to the cloud. This makes it more private and convenient. The software supports drag-and-drop operation and uses FFmpeg-based compression, making it suitable for quickly reducing video file size.
Software download page:
https://compresso.codeforreal.com/#downloads
Compression Process
First, I downloaded and installed CompressO from the official website. After opening the software, I imported the original video file into the program.
The original video file size was 3.3 MB. I used CompressO to compress the video and then exported the compressed file.
After compression, I checked the new file size and compared it with the original file.
Compression Result
The original video size was:
3.3 MB
After compression, the video size became:
896 KB
This means the video file was reduced by about 73%. The compressed video became much smaller and more suitable for uploading to my Fab Academy documentation webpage.
Compression
1. What is File Compression?
File compression involves encoding file data using specific algorithms to reduce its storage size. Compressed files not only save storage space but also improve transfer efficiency, especially when handling large projects and sharing files.
2. My File Compression Experience
During my Fab Academy learning journey, I personally experimented with various file compression processes and explored multiple tools.
3. Common Compression Formats
4. File Compression Tools
5. How to Compress and Decompress Files
6. Compression Tips
7. Frequently Asked Questions
Through this file compression experience, I have not only improved my file management skills but also prepared thoroughly for future Fab Academy project submissions, ensuring data integrity and smooth transfers.