
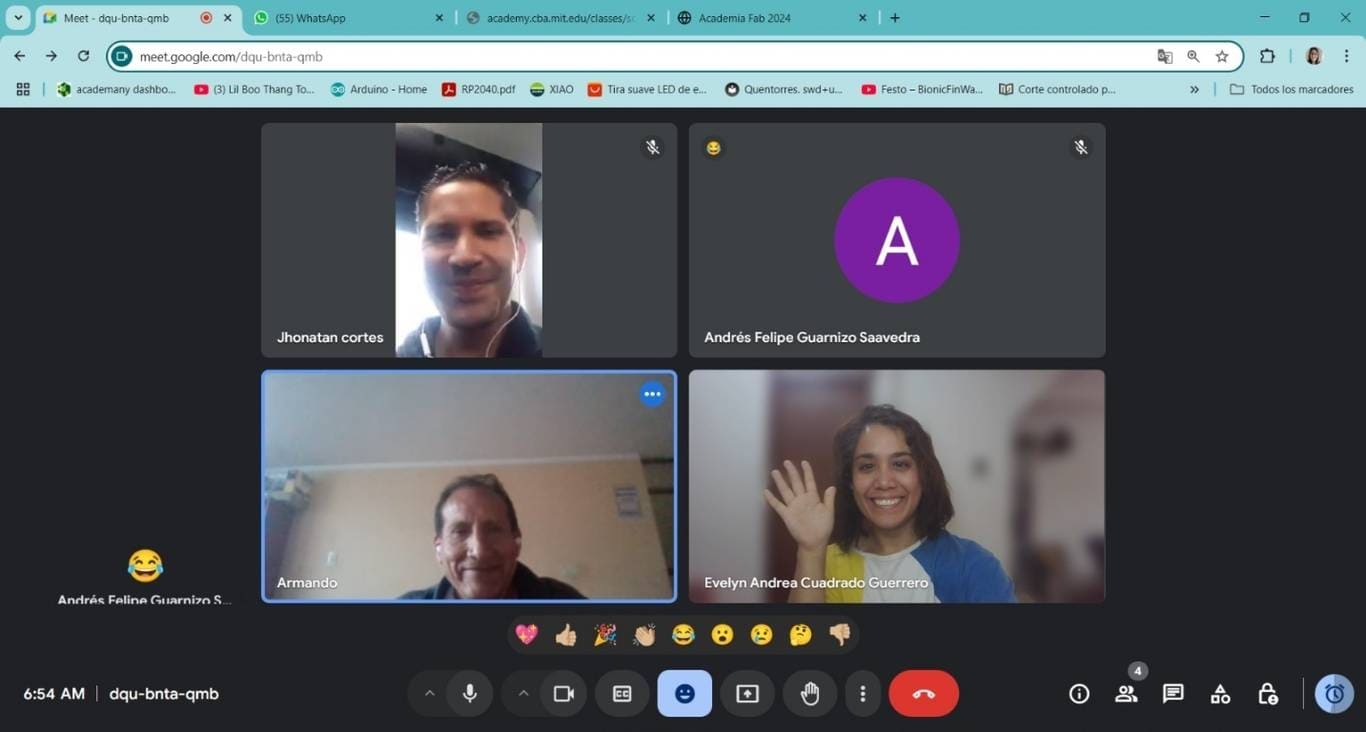
The group project posed quite a challenge, as we were located in different cities and countries. To facilitate communication, we created a WhatsApp group that allowed us to coordinate more efficiently. We had our first virtual meeting, during which we already understood some basic concepts of 3D printing. Jhonatan went into more detail about the different types of printing, such as resin and clay printing, which was very helpful for everyone.
Since I was further along in the development of the project, I began working individually at first. Nevertheless, we held additional virtual meetings that helped deepen our understanding of 3D printing technologies.
However, when it came to documenting the project, I had to handle that part on my own due to the circumstances. Still, the collaborative efforts during our virtual meetings made a big difference in the overall development of the project.
Due to the distance in this group task, we decided that each of us would create some print samples and analyze the characteristics of the printers we were going to use.
The 3D printer I am using for this project is an Artillery Genius Pro from the Fab Lab iFurniture.
Artillery Genius Pro Printer Specifications:
Knowing these features, I will now proceed to conduct the tests for 3D printing.
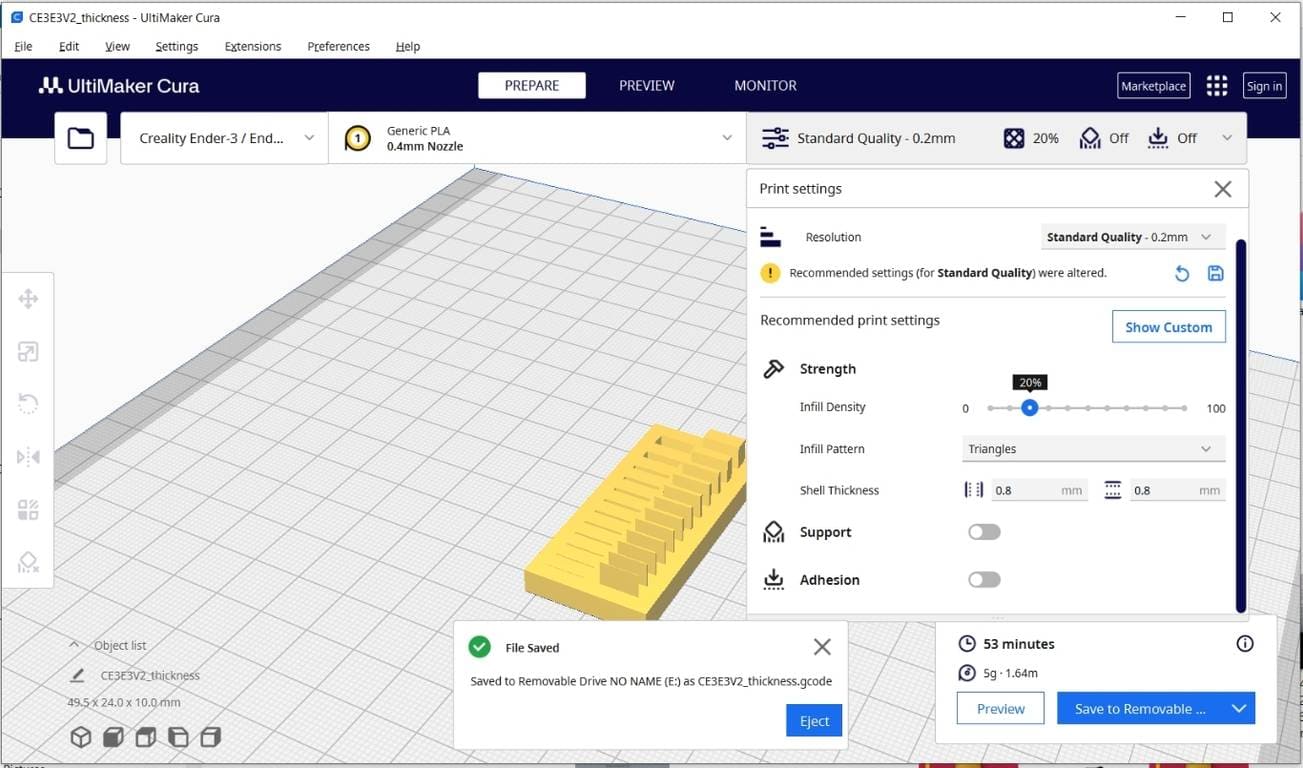
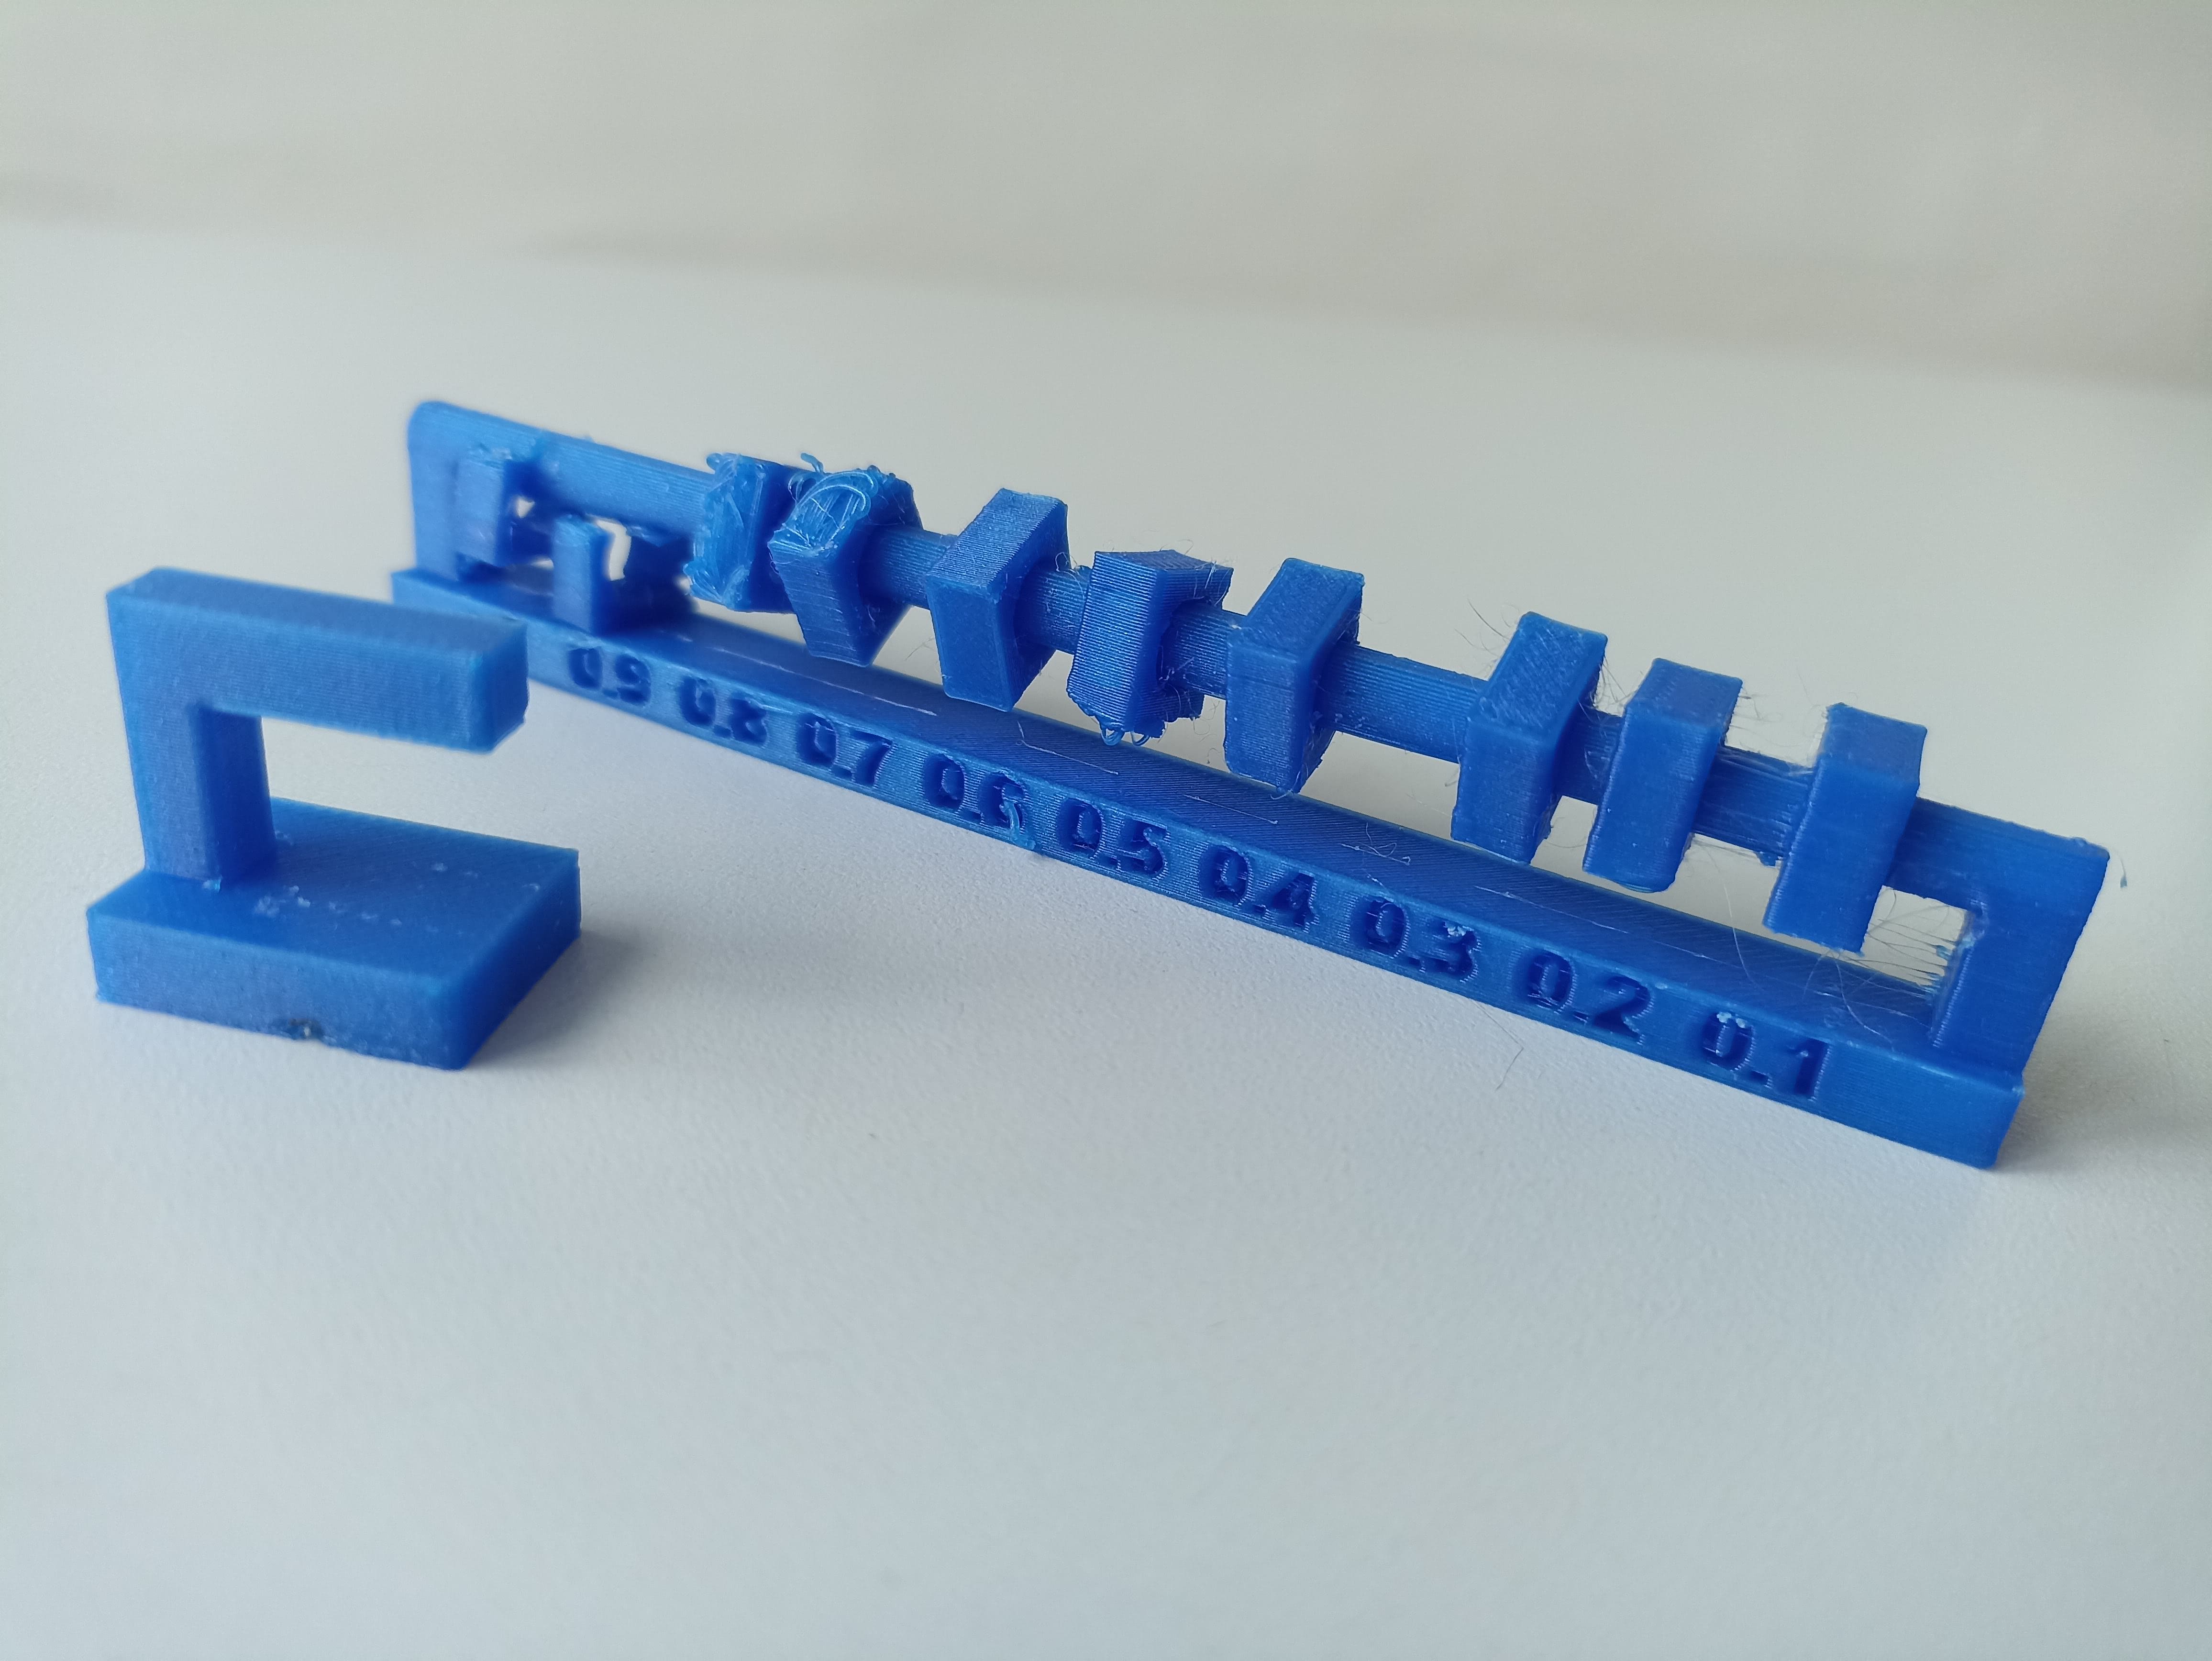
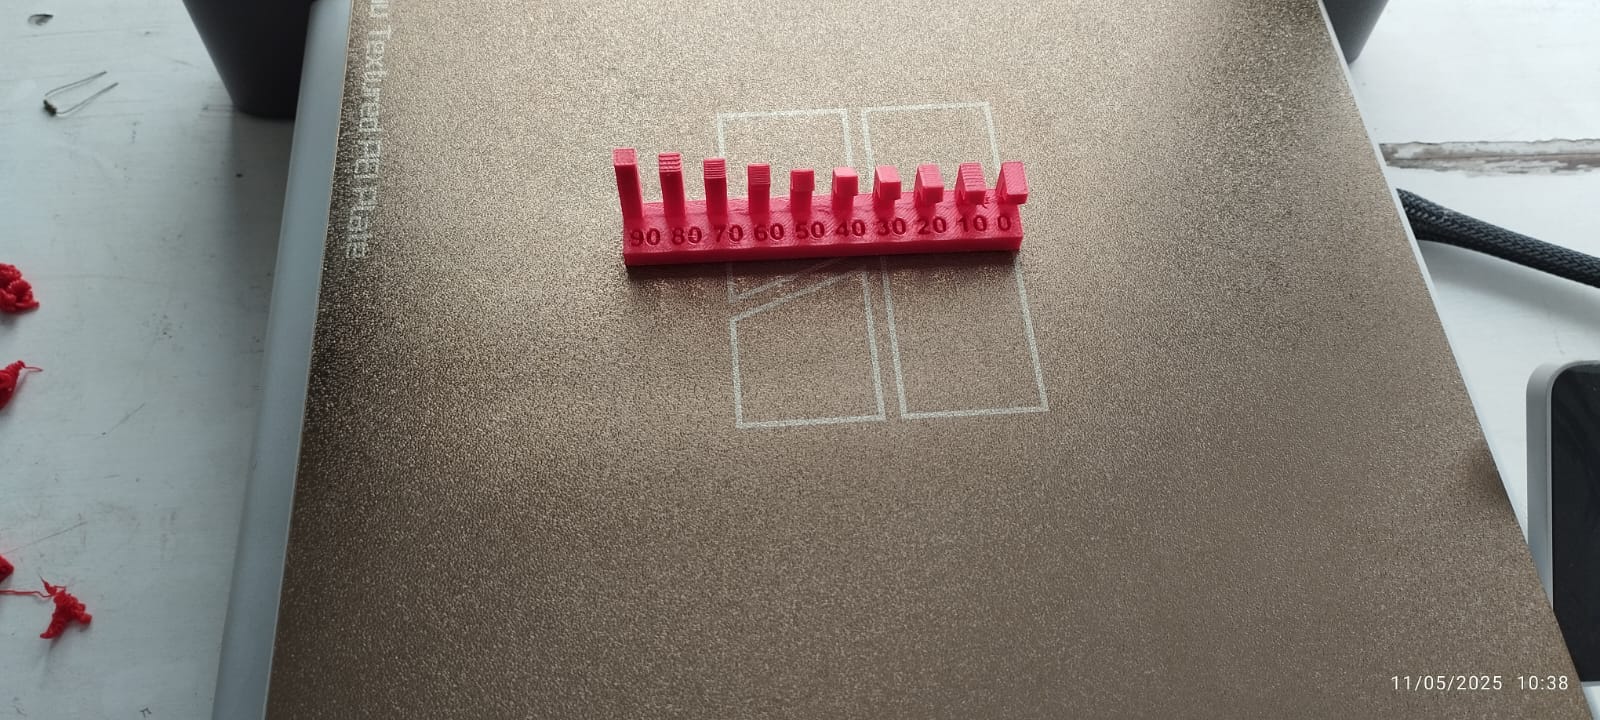
For this activity, I used the Thickness test model. I opened the Ultimaker Cura program and set the infill density to 20%, with a triangular infill pattern, and then saved the file in G-code format.
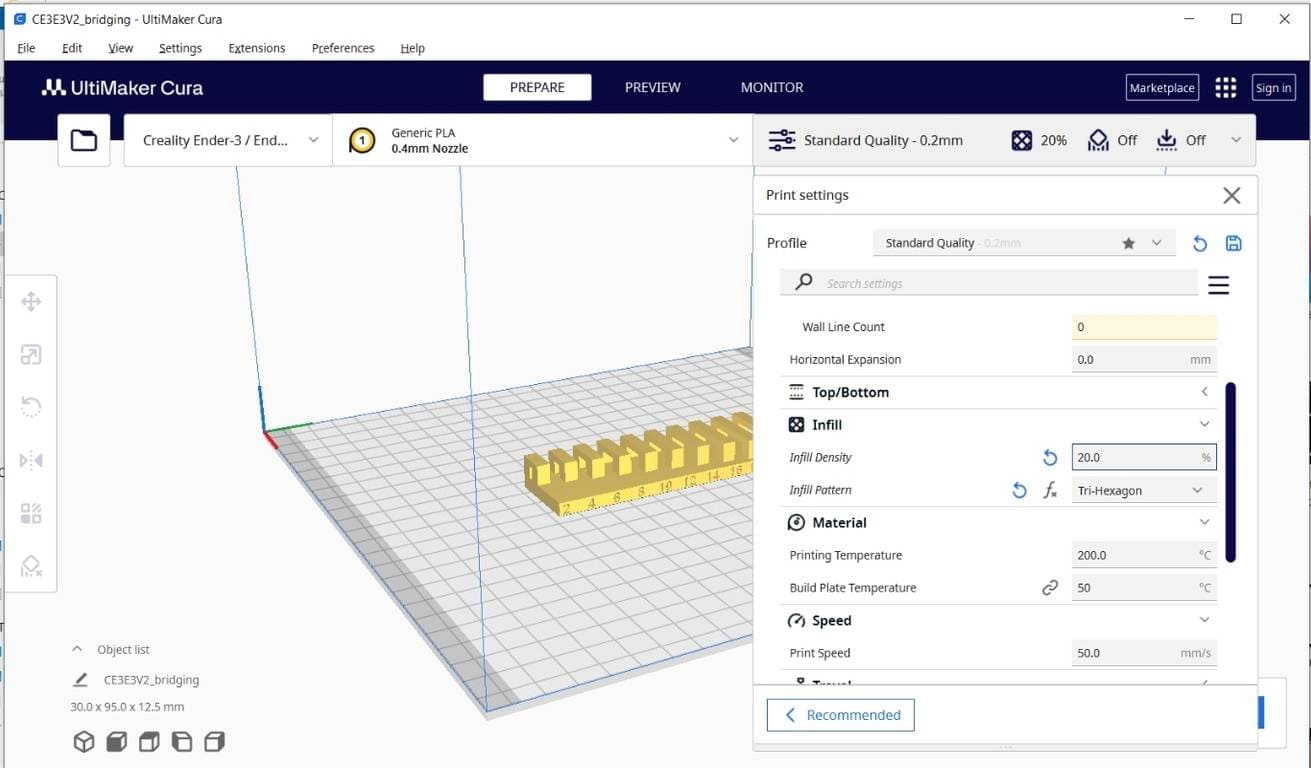
I also used the Bridging model, setting the infill density to 20%, with a tri-hexagon infill pattern, and saved the file in G-code format. In both cases, I did not use any support.
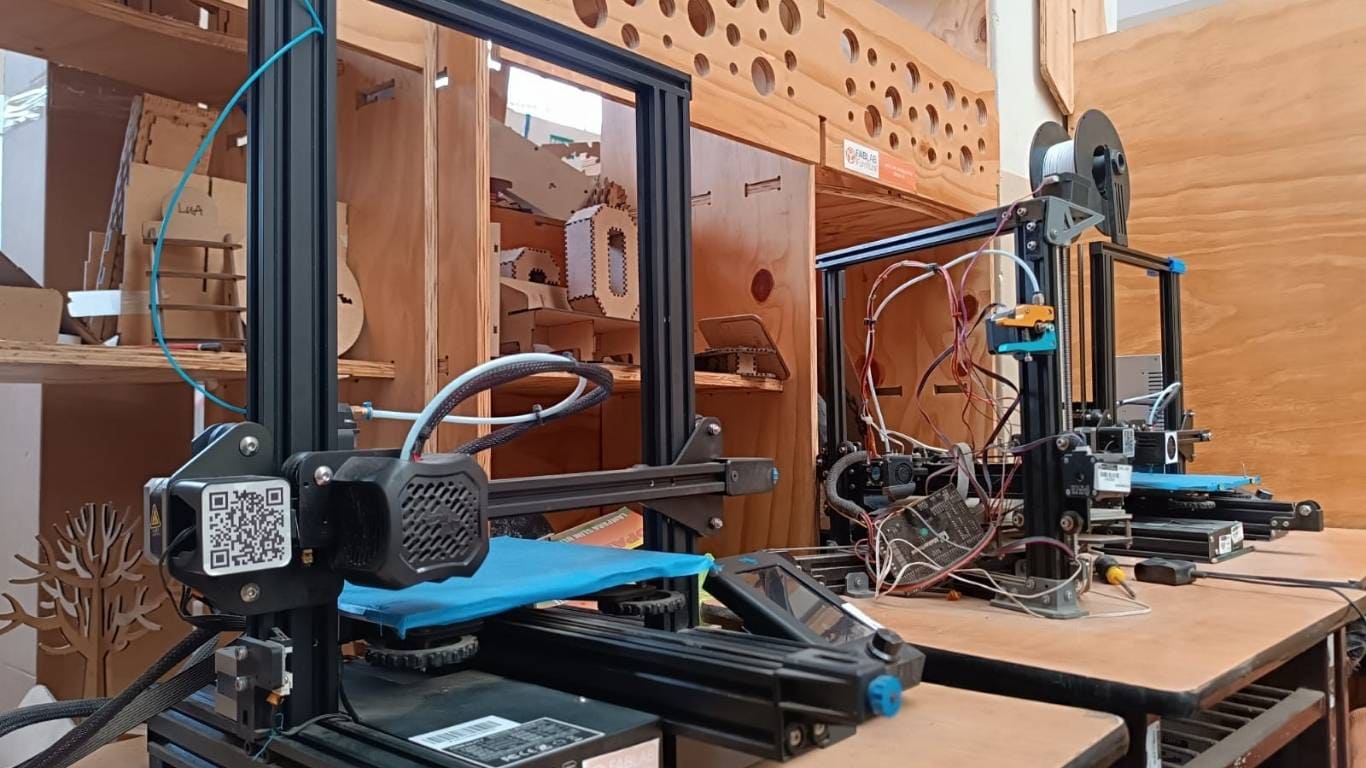
The printer I will be using is a Creality Ender-3 V2, which is located at the Fab Lab iFurniture.
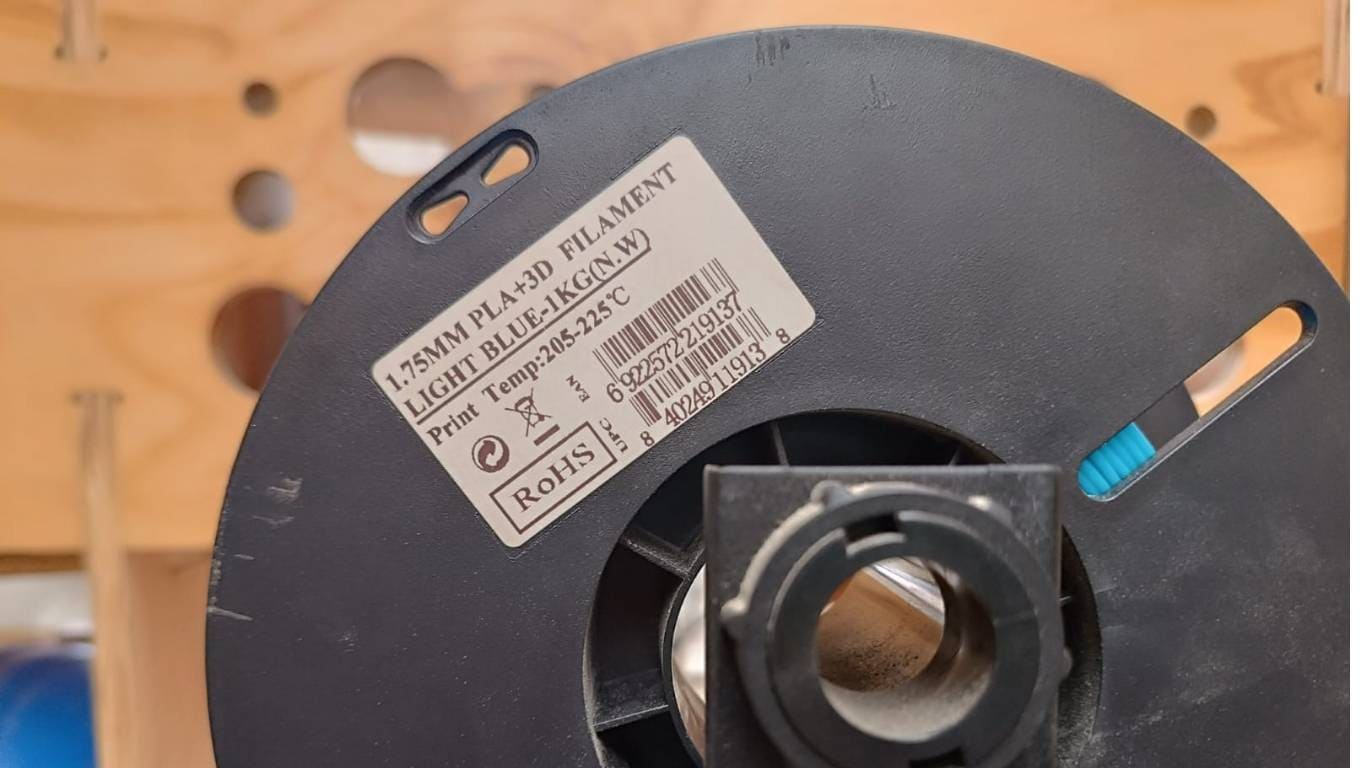
Another important aspect is knowing the type of filament to be used and its technical specifications. The filament I will be using is light blue, weighing 1 kg (n.w.) with a diameter of 1.75 mm, PLA+ 3D. It is also essential to know the printing temperature, which ranges from 205°C to 225°C.
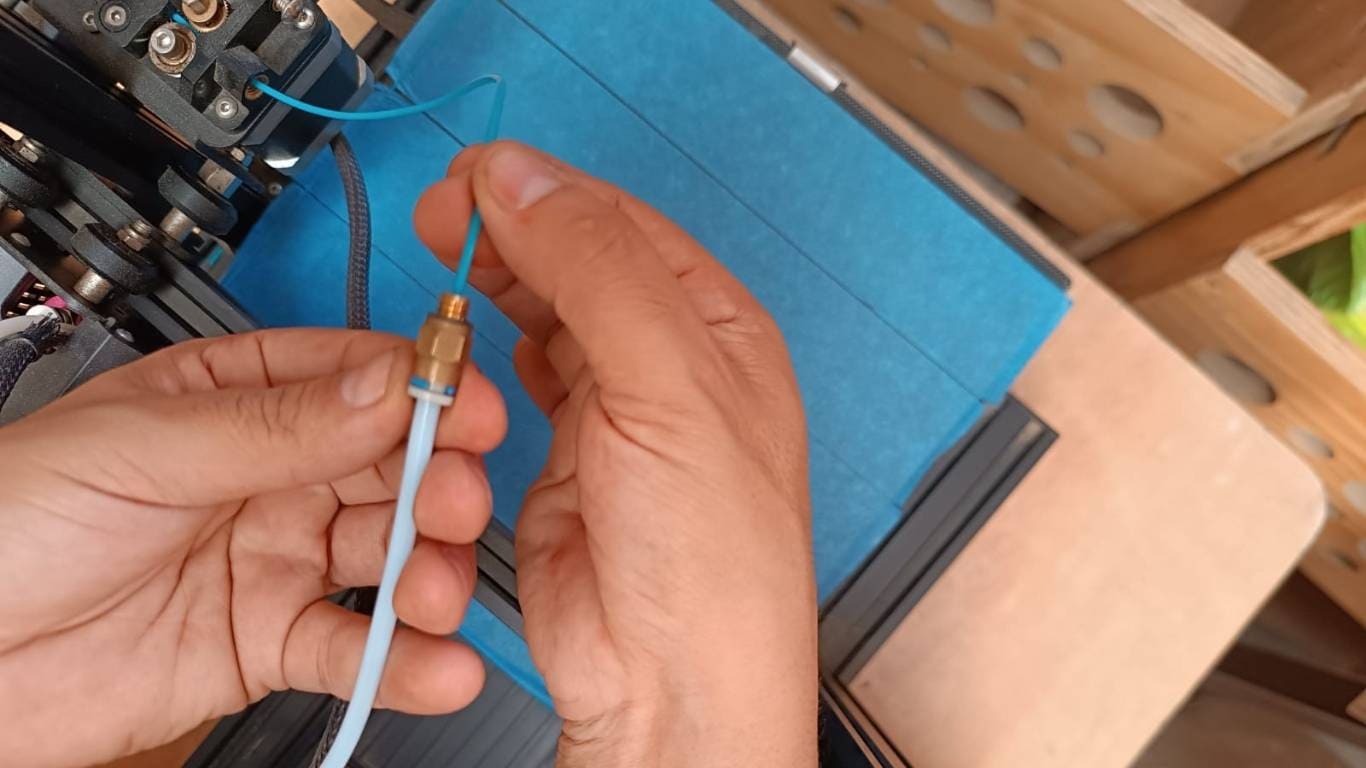
I loaded the filament into the extrusion tube until it reached the tip of the hotend, where the printing will take place.
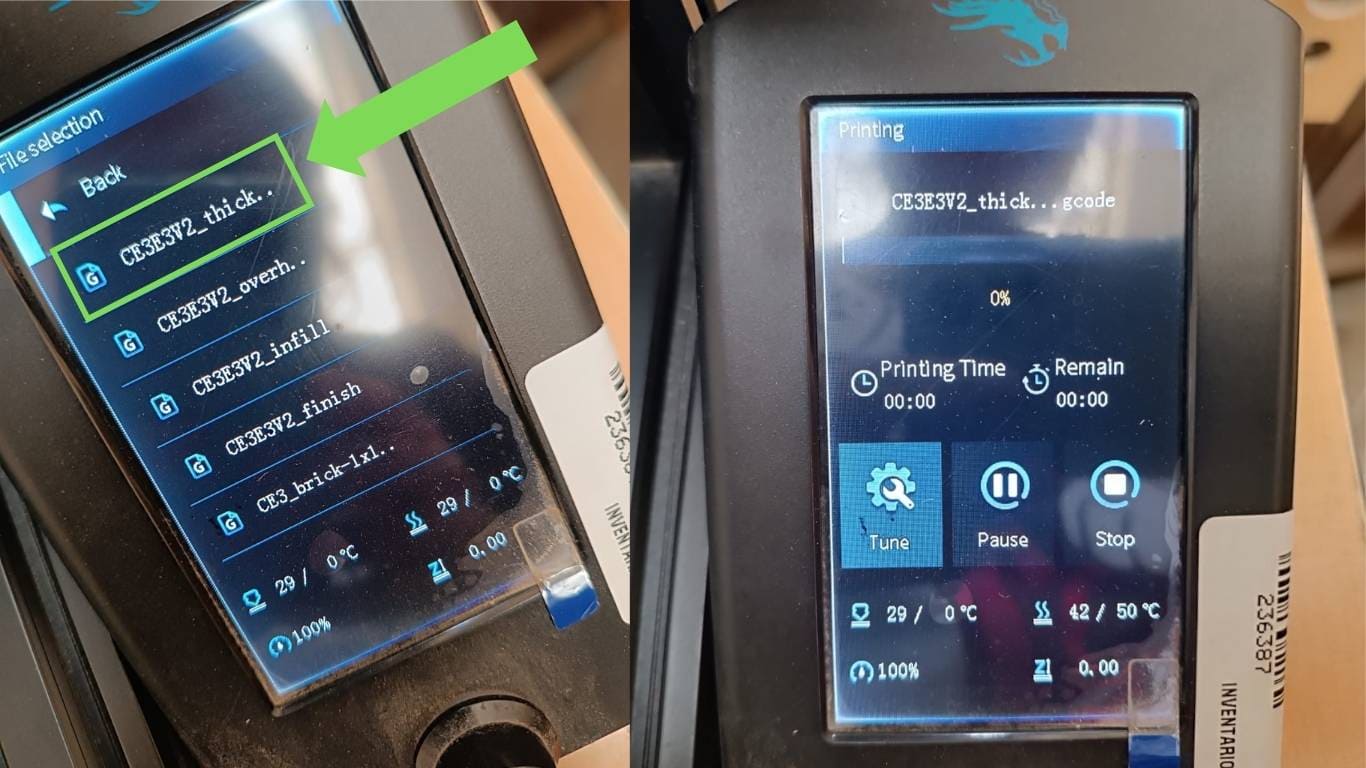
First, I select the file, then click to start the printing process.
Let the magic begin.
All that's left is to wait patiently and check the filament to make sure it's not tangled.
Waiting for the printing process.
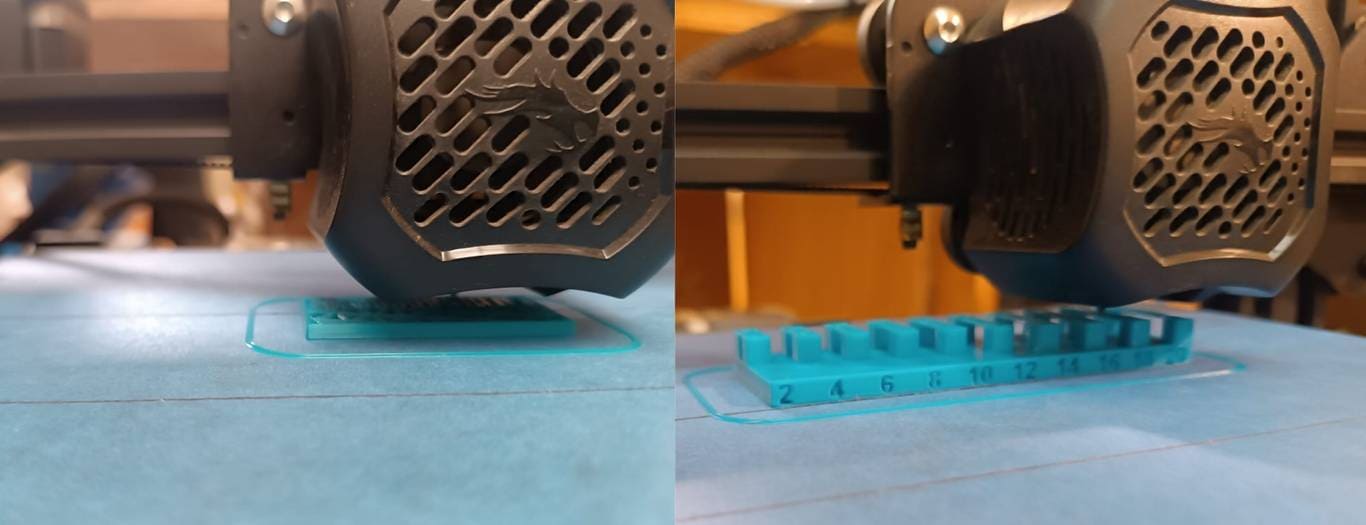
Final result of the Bridging model print.
Final result of the Thickness model print.
High-speed (500 mm/s), multicolor, auto calibration, build volume 256x256x256 mm, standard 0.4 mm nozzle.

High speed (500 mm/s), great cooling, build volume 225x225x265 mm, 0.4 mm nozzle, supports PLA, PETG, ABS, TPU.
Large format (420x420x480 mm), 0.8 mm nozzle ideal for large models, mainly PLA, PETG.

Entry-level, 180 mm/s, manual calibration, 220x220x250 mm volume, 0.4 mm nozzle, PLA only.
Working remotely with Evelyn, we coordinated through virtual meetings to compare different 3D printers. This allowed us to share experiences and test various settings, even being in different locations. The machines we analyzed were those in the carousel above.

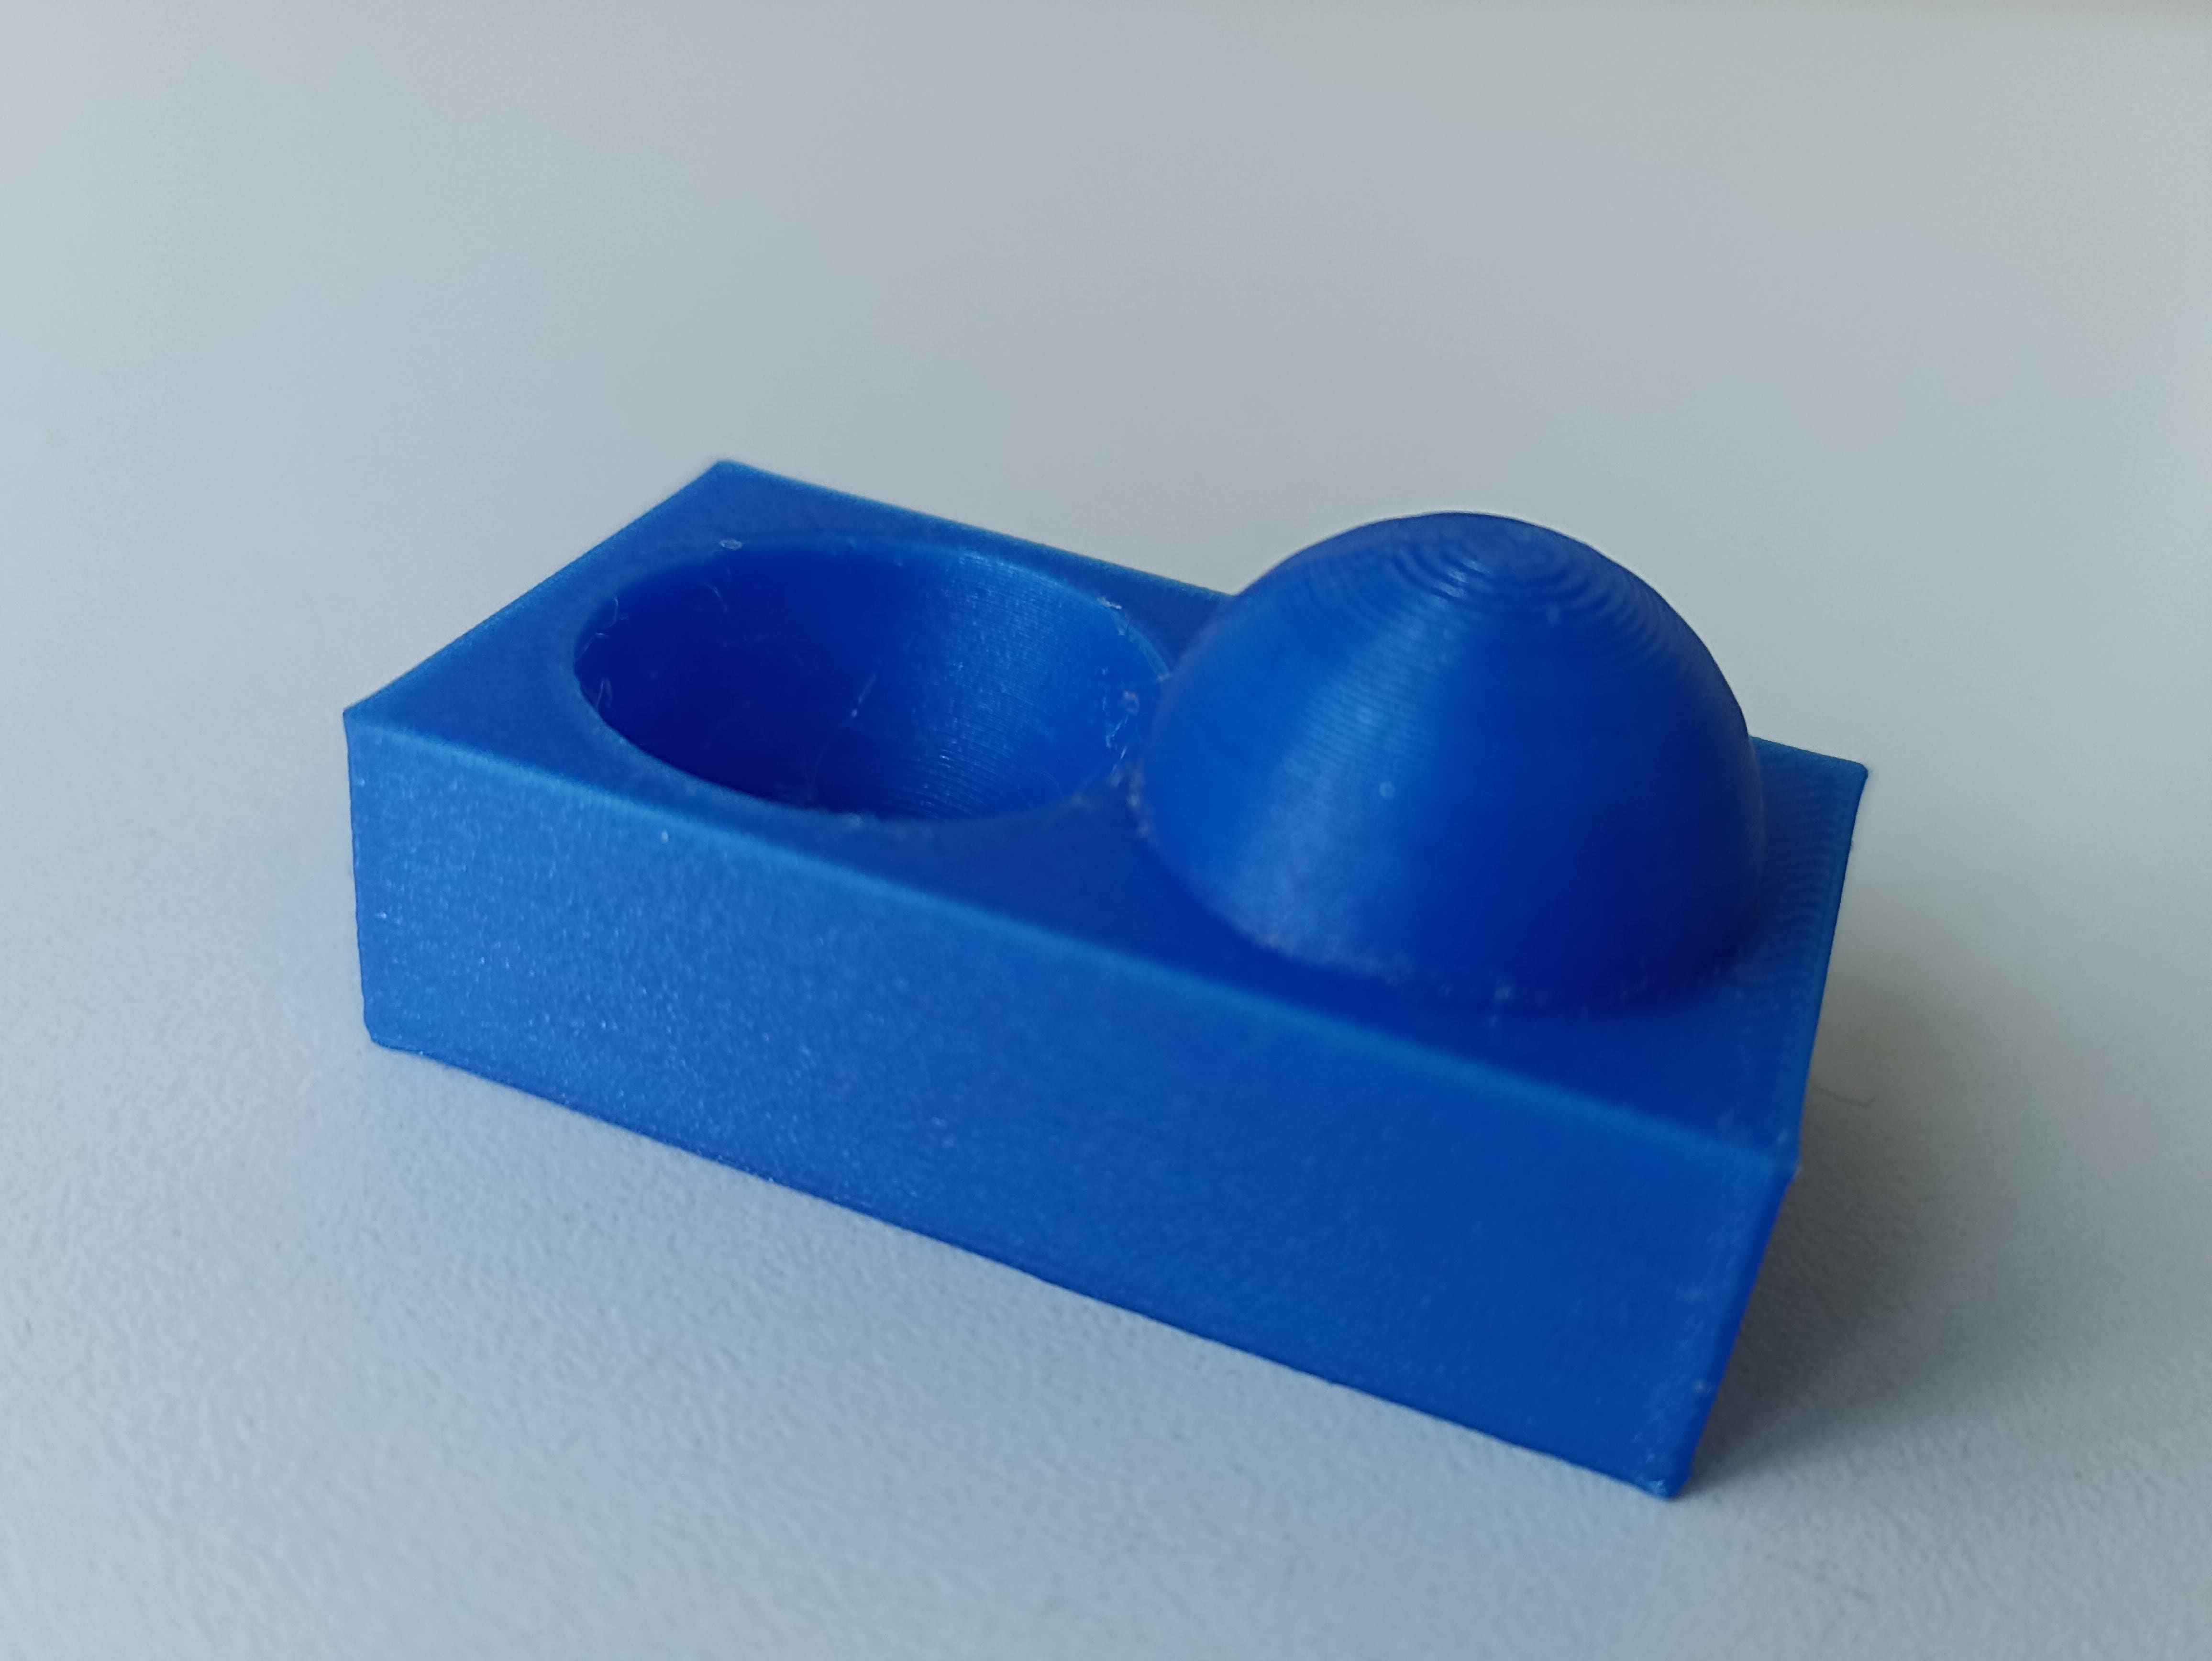
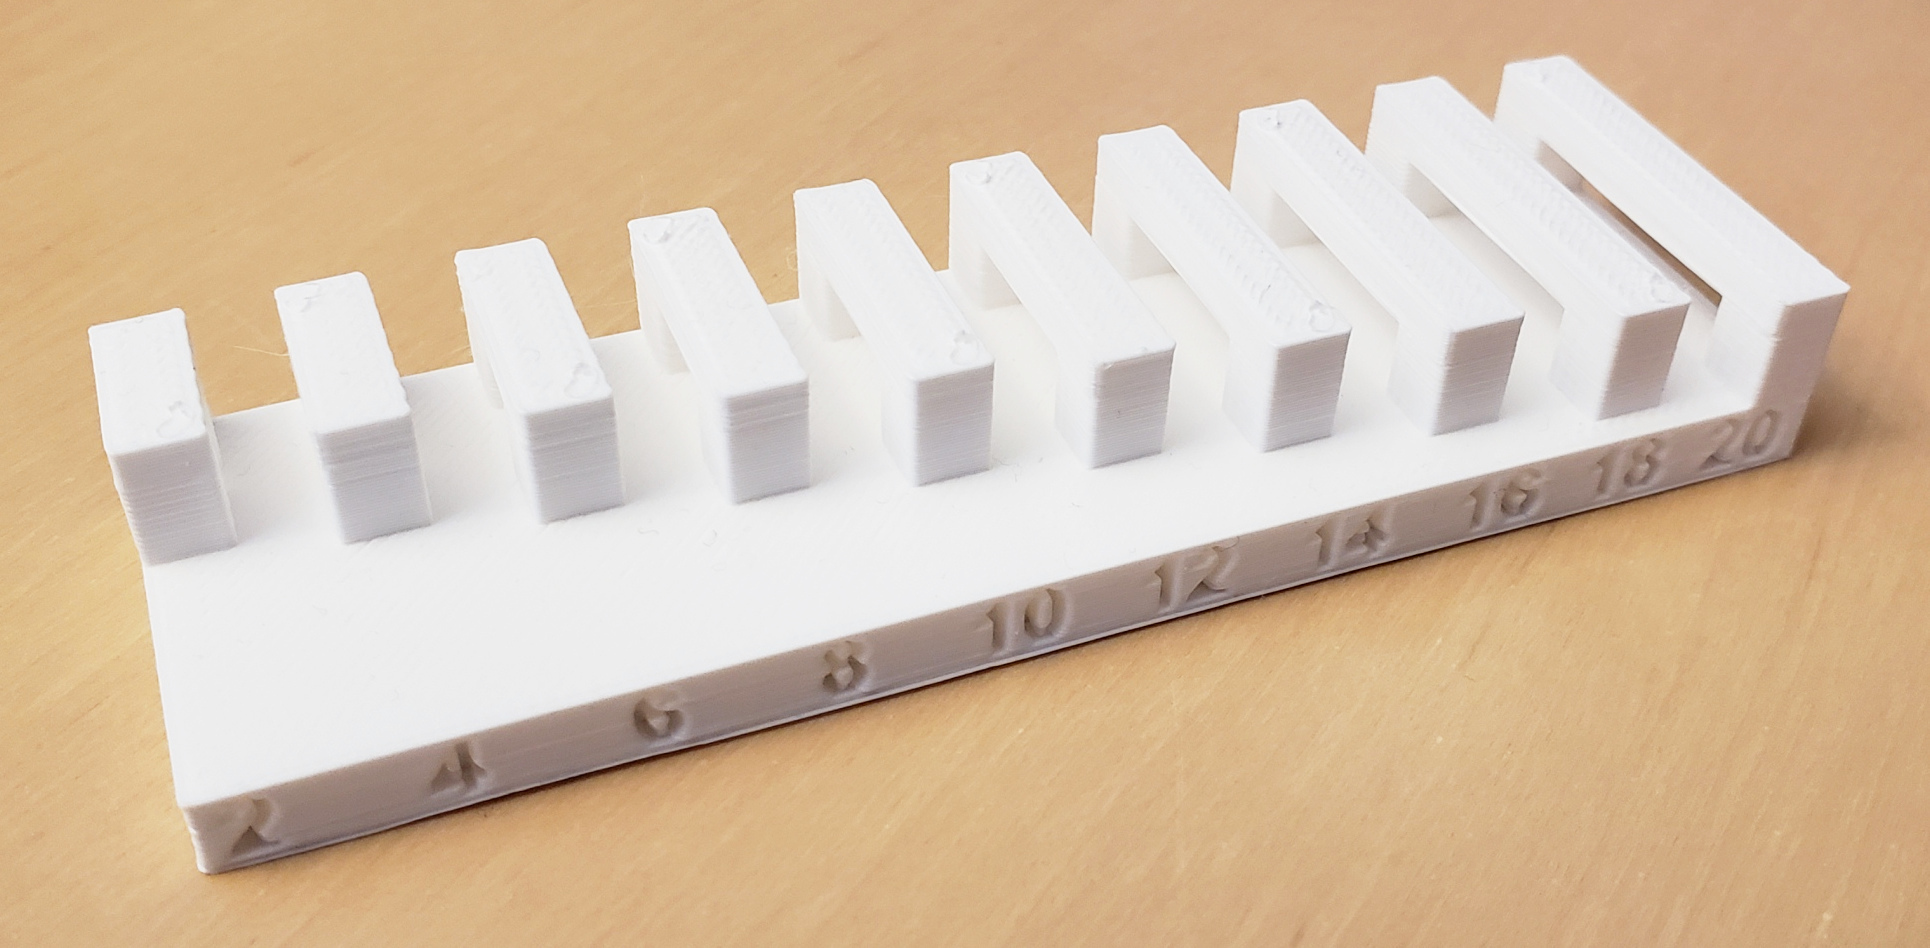
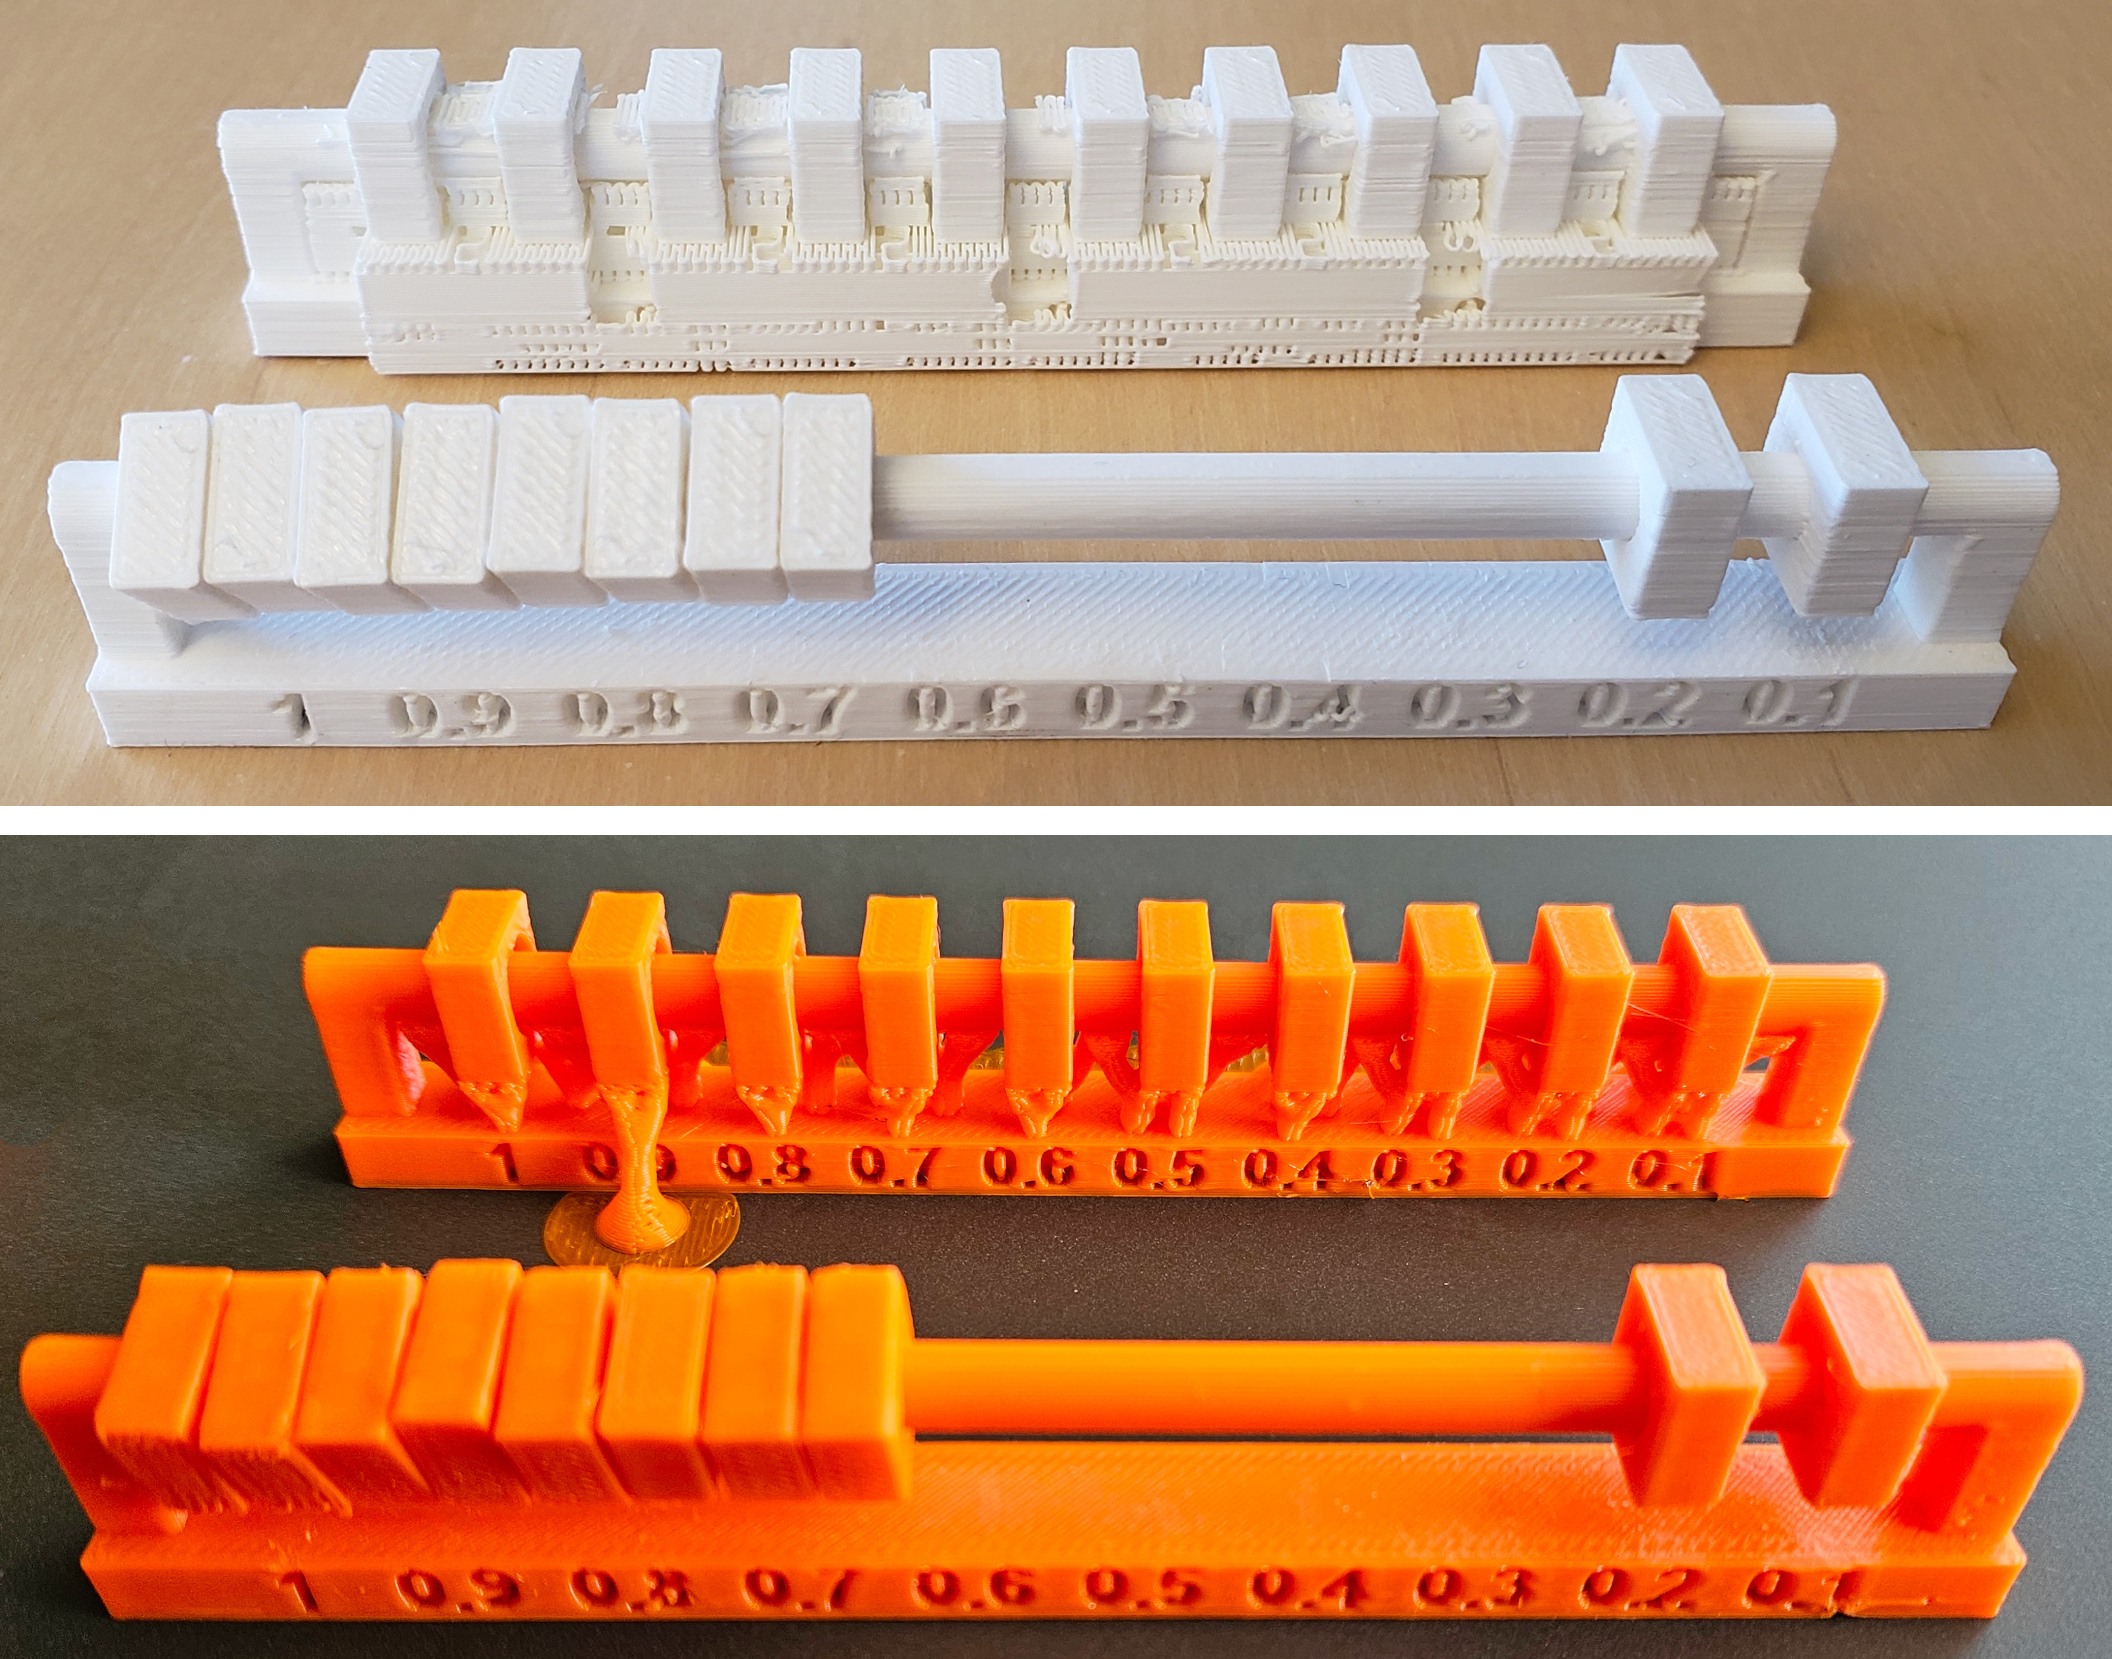
We conducted several tests, including overhangs, bridges, supports, wall thickness, and complex models. This helped us understand how nozzle size and layer height directly affect print quality and speed.
I achieved bridges of over 20 mm on the Bambulab A1 using advanced settings, while Evelyn’s standard settings on the Ender-3 showed failures beyond 16 mm.
To improve print results, I configured thin walls and adjusted advanced settings in Orca Slicer and Bambu Studio. These slicers provided much better control and integration with the machines, especially compared to older software like Cura.
Below you will find all the files, models, and software resources used during our group tests and configurations:
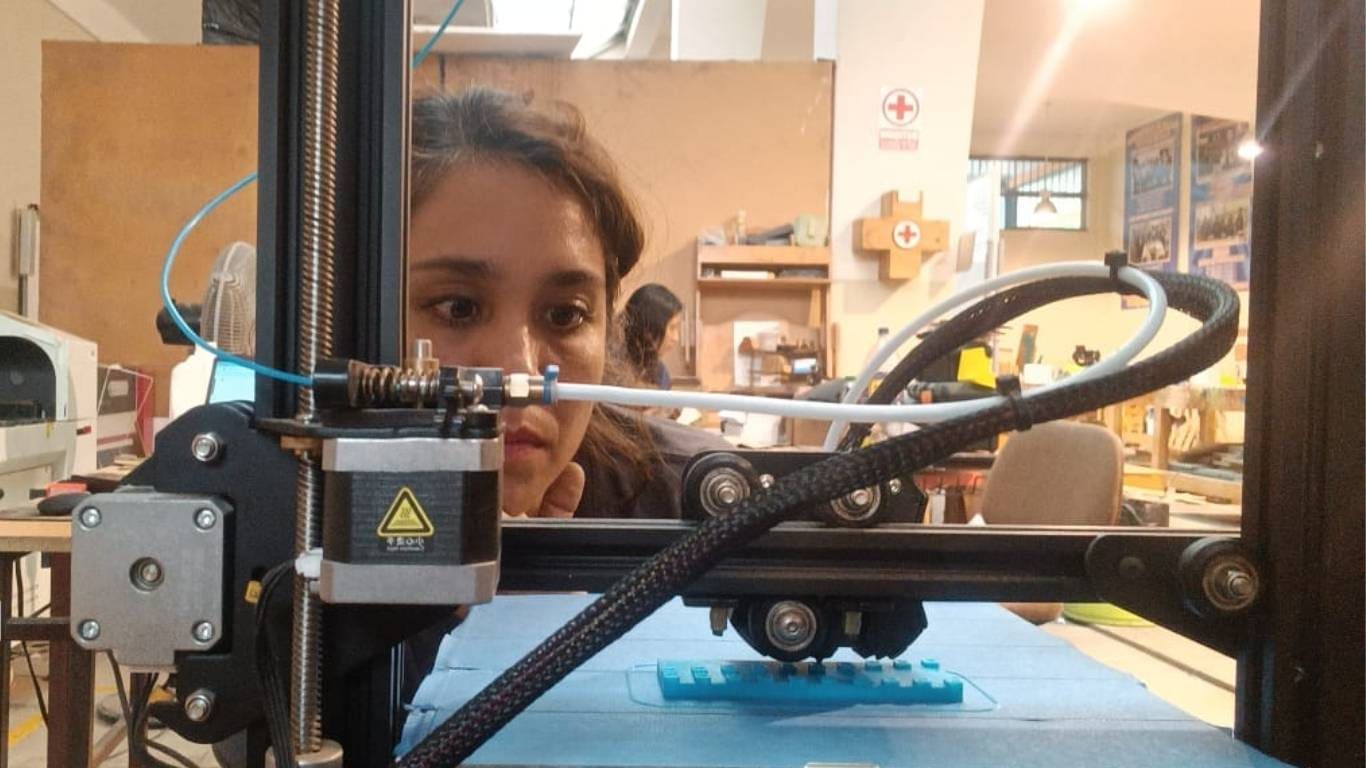
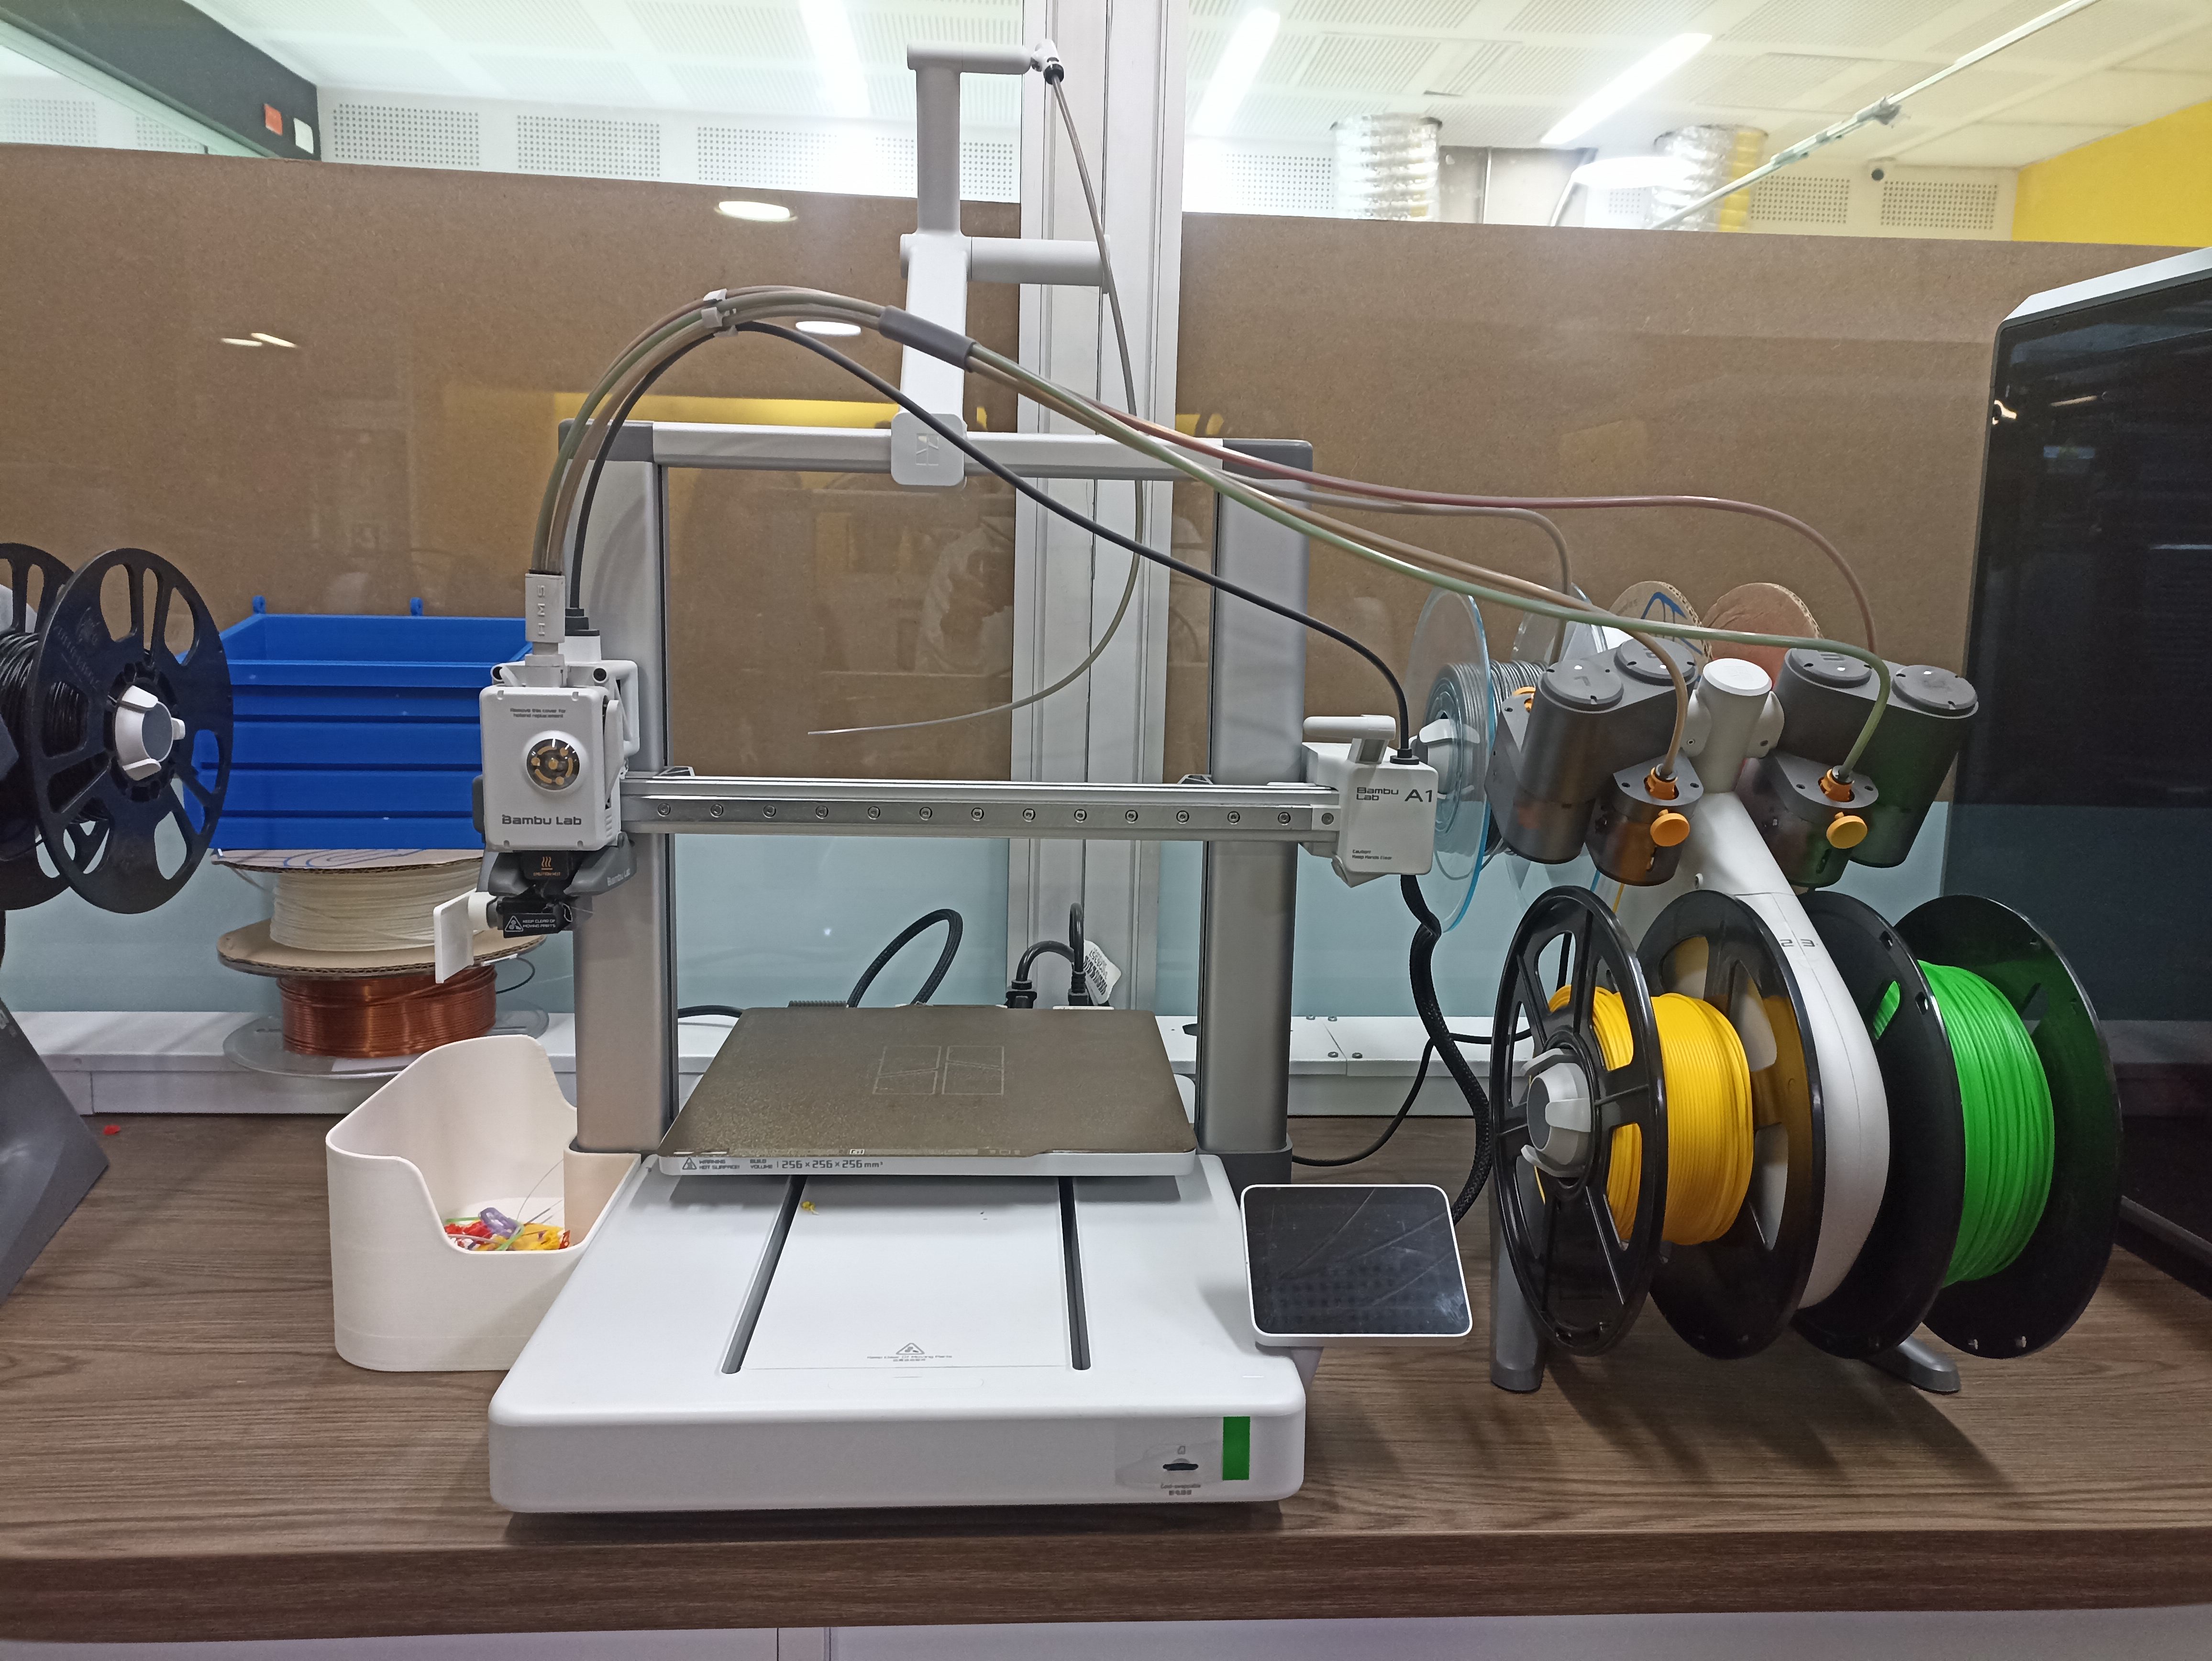
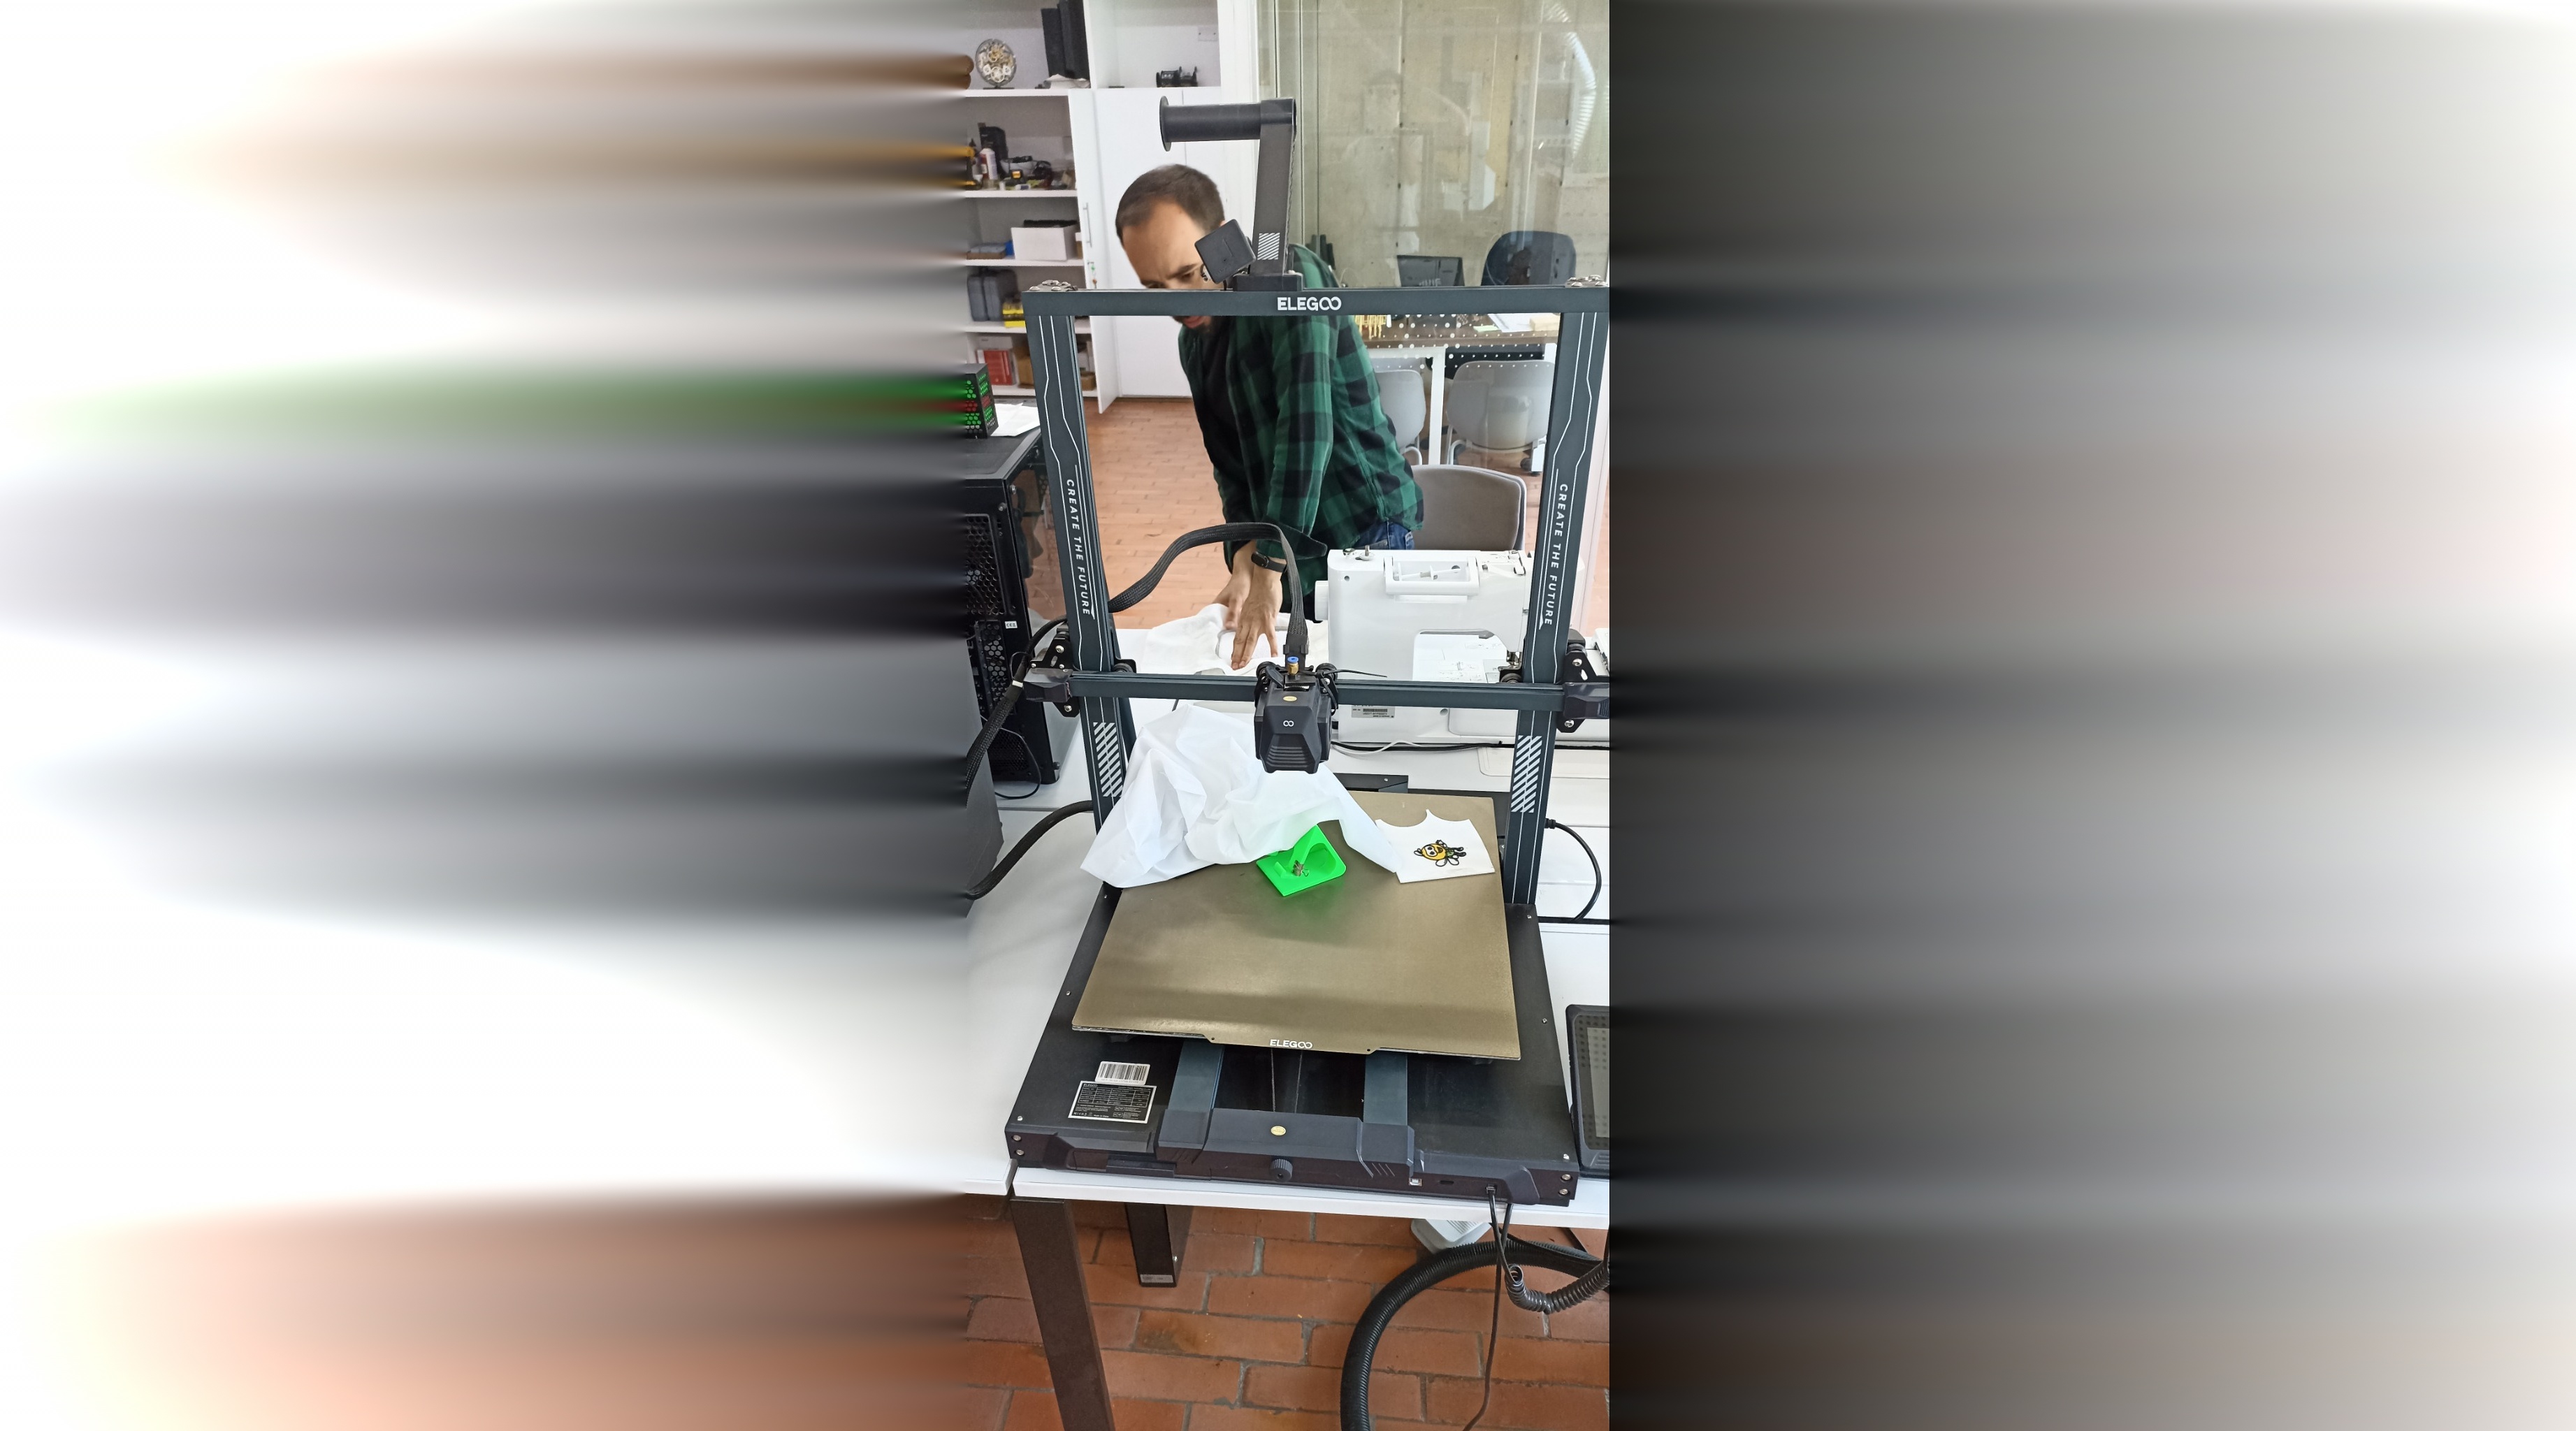
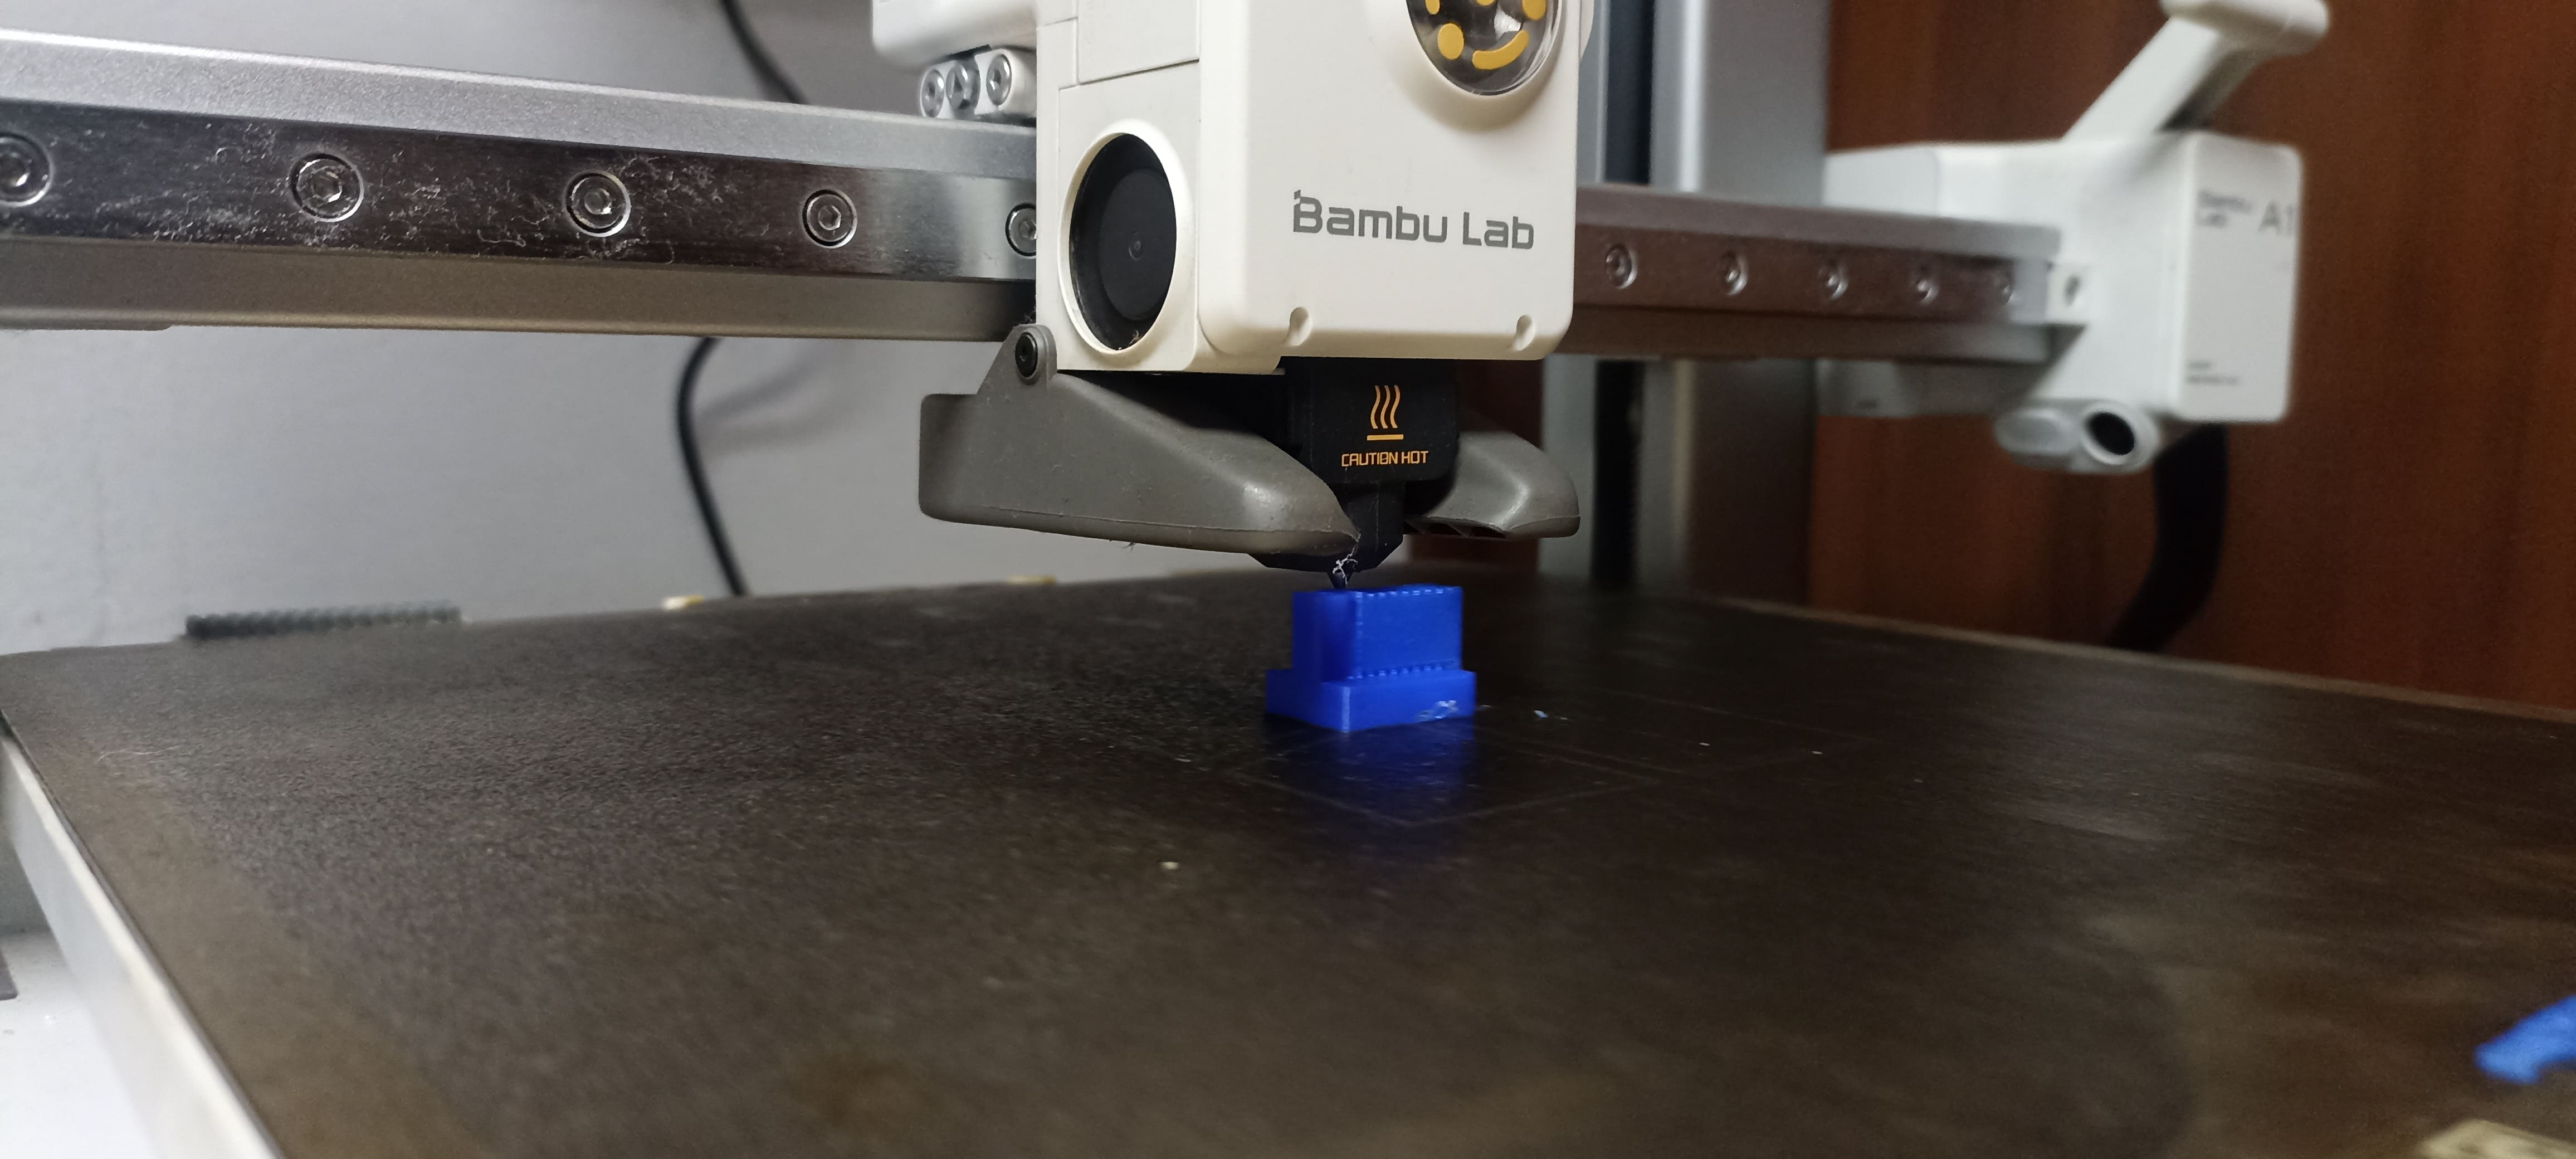
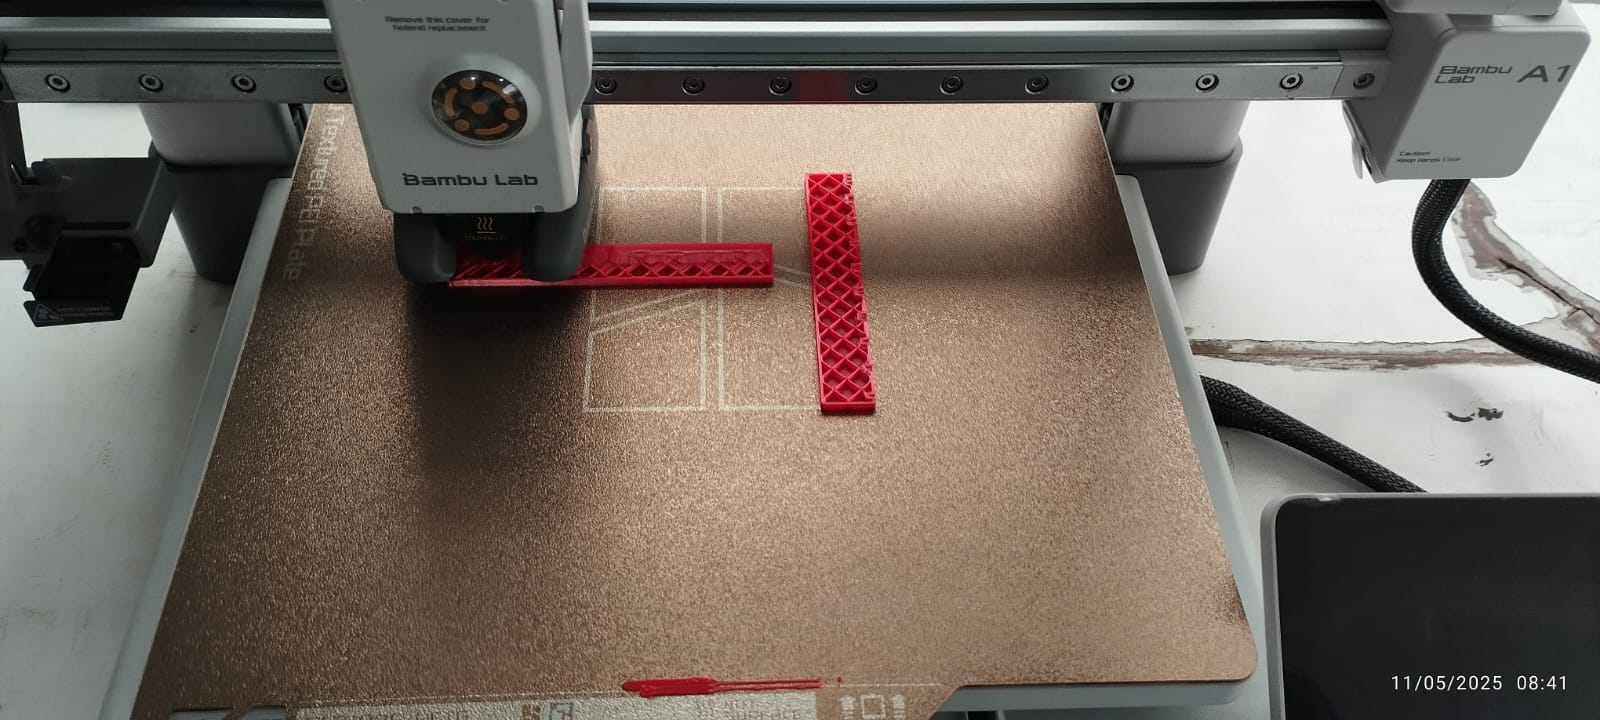
To carry out the group task, we met with our classmates virtually. Each of us used the printer available in our laboratory. In my case, I used the Bambu Lab A1 printer.
Bambu Lab A1 Printer Specifications:
To get started, download and install Bambu Studio from the official Bambu Lab website. Once installed, open the software and select the correct printer profile, either Bambu Lab A1 or A1 Combo, depending on the model.
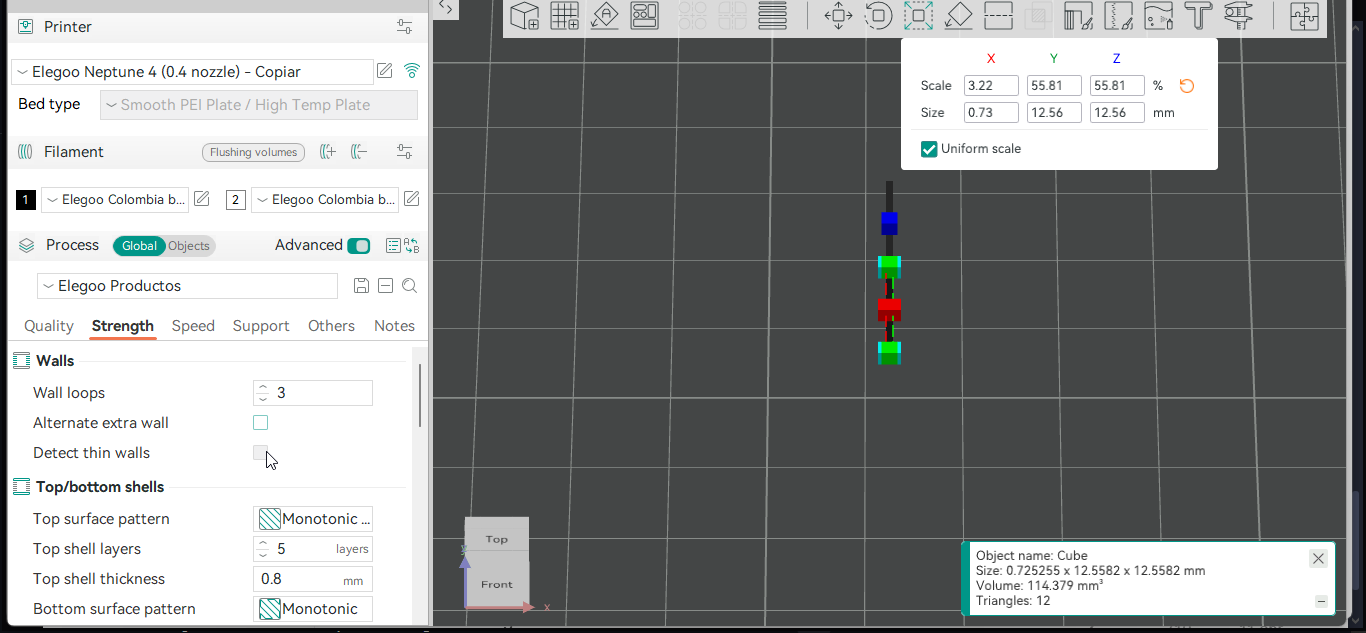
For this activity, I used the test model. I opened Bambu Studio and set the fill density to 25%, with a layer height of 0.2mm
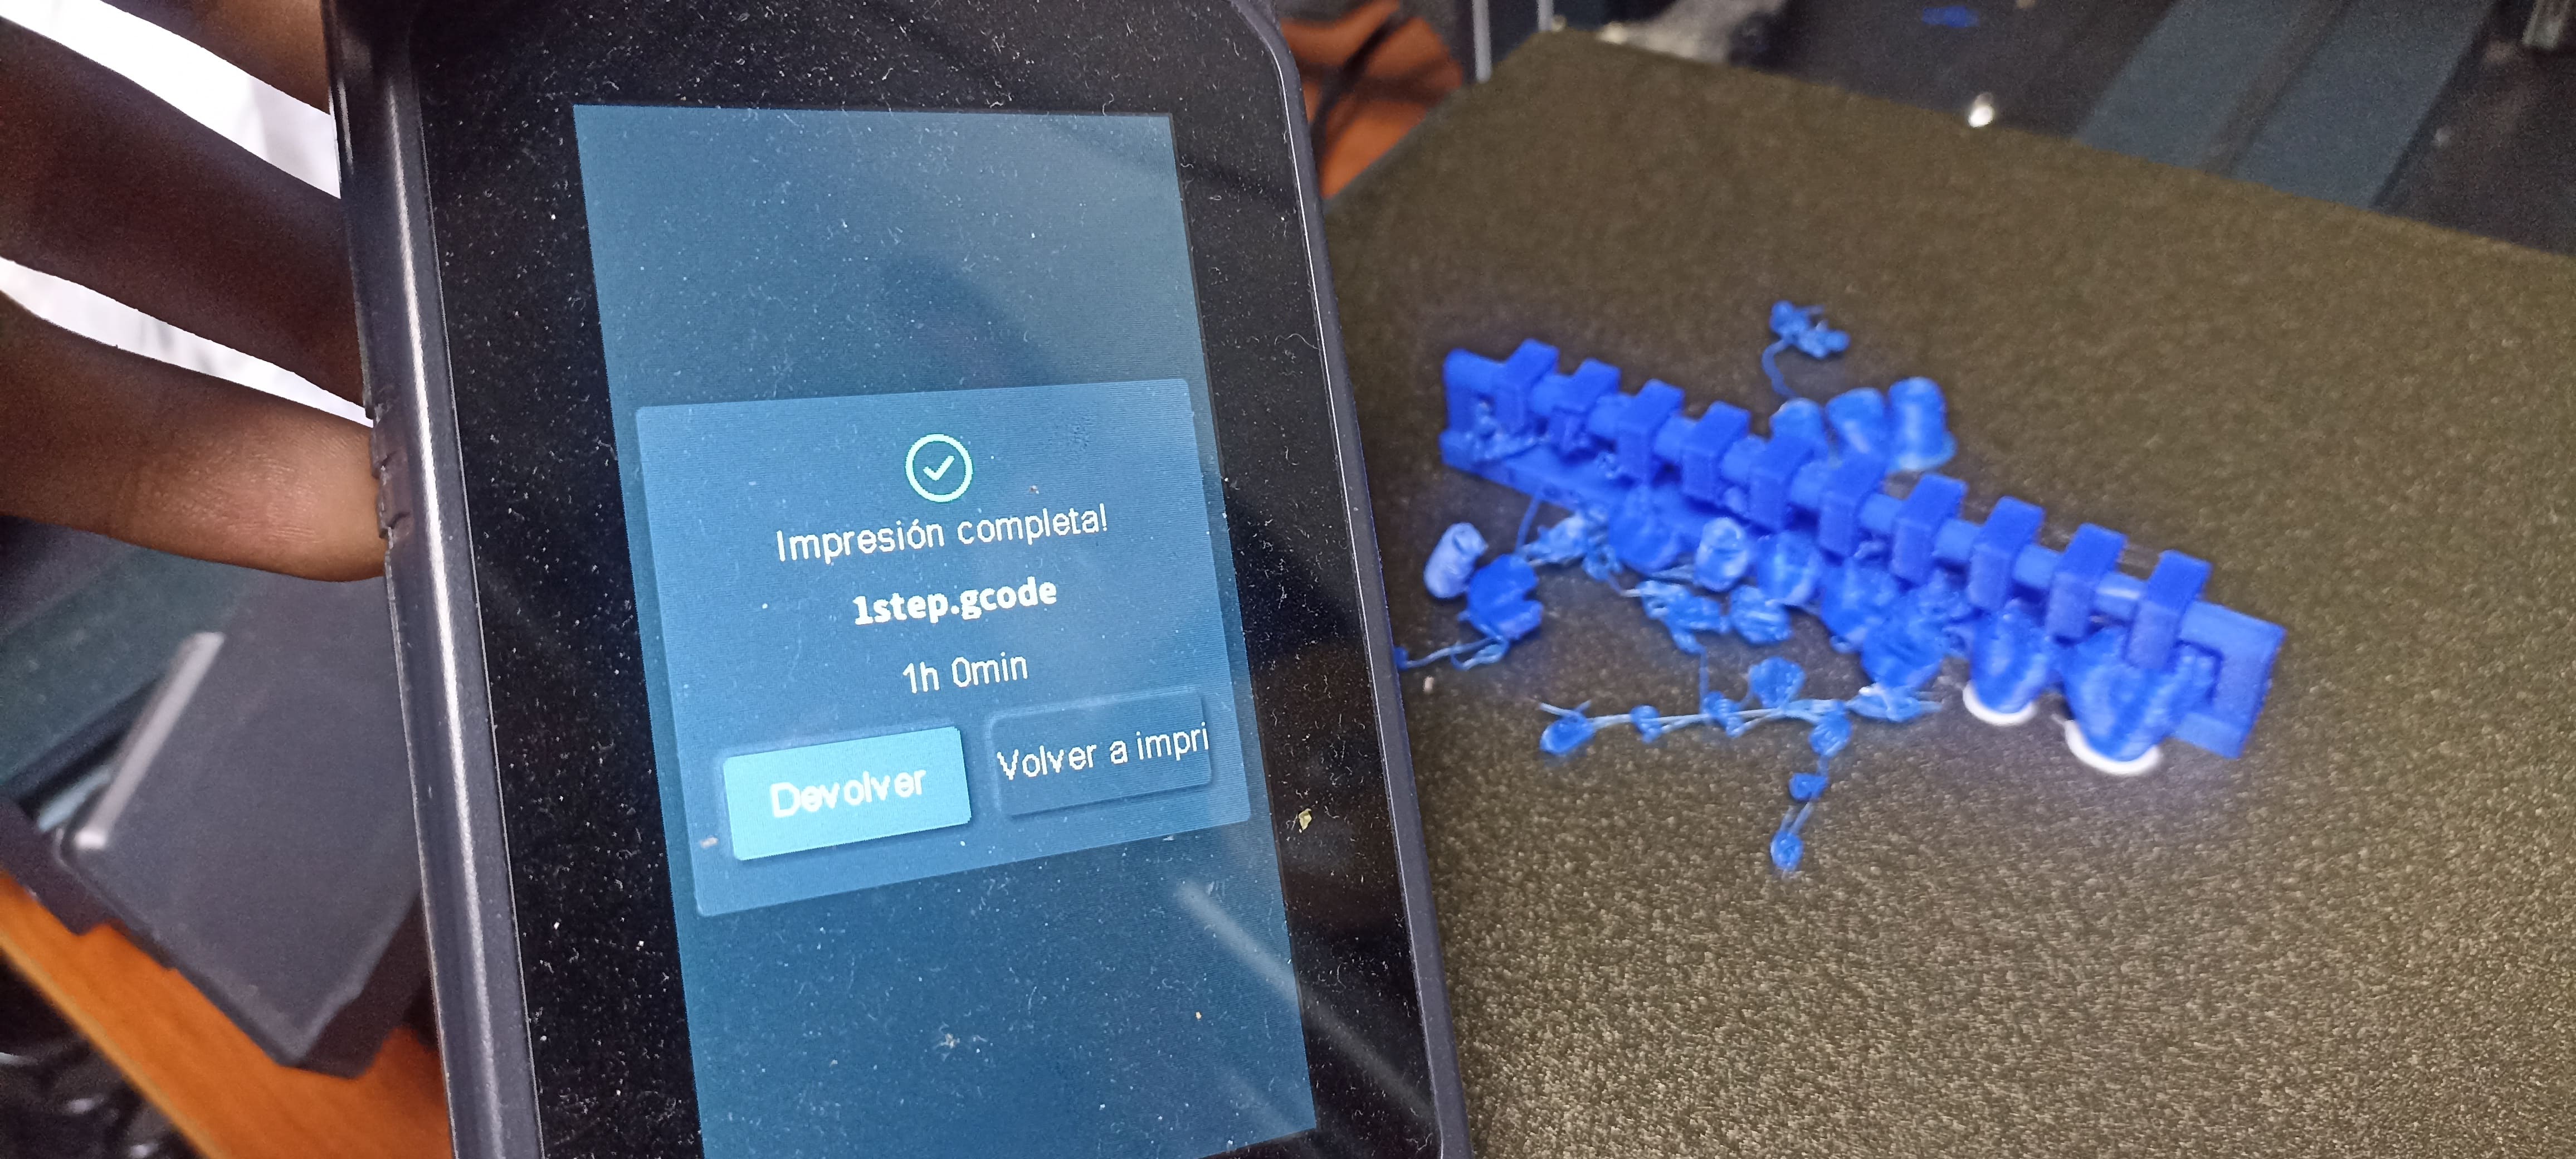
We also chose the filament type; in our case, we'll use PLA. For the print quality, we chose a standard type. Regarding the print time, with the settings made, it took us 1 hour and 3 minutes.
Once the settings are complete, the printer begins printing the selected test. We will perform several tests to see the print quality.
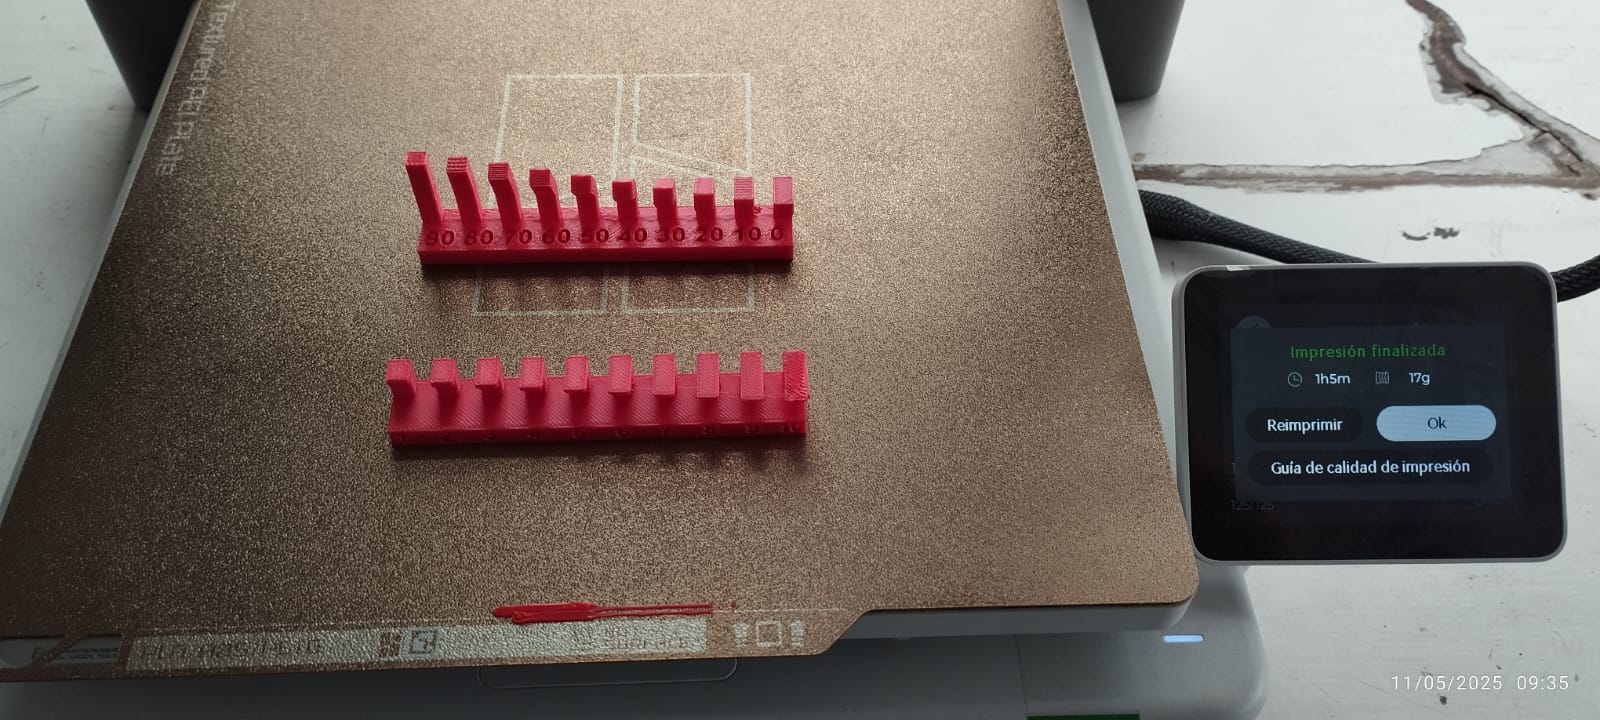
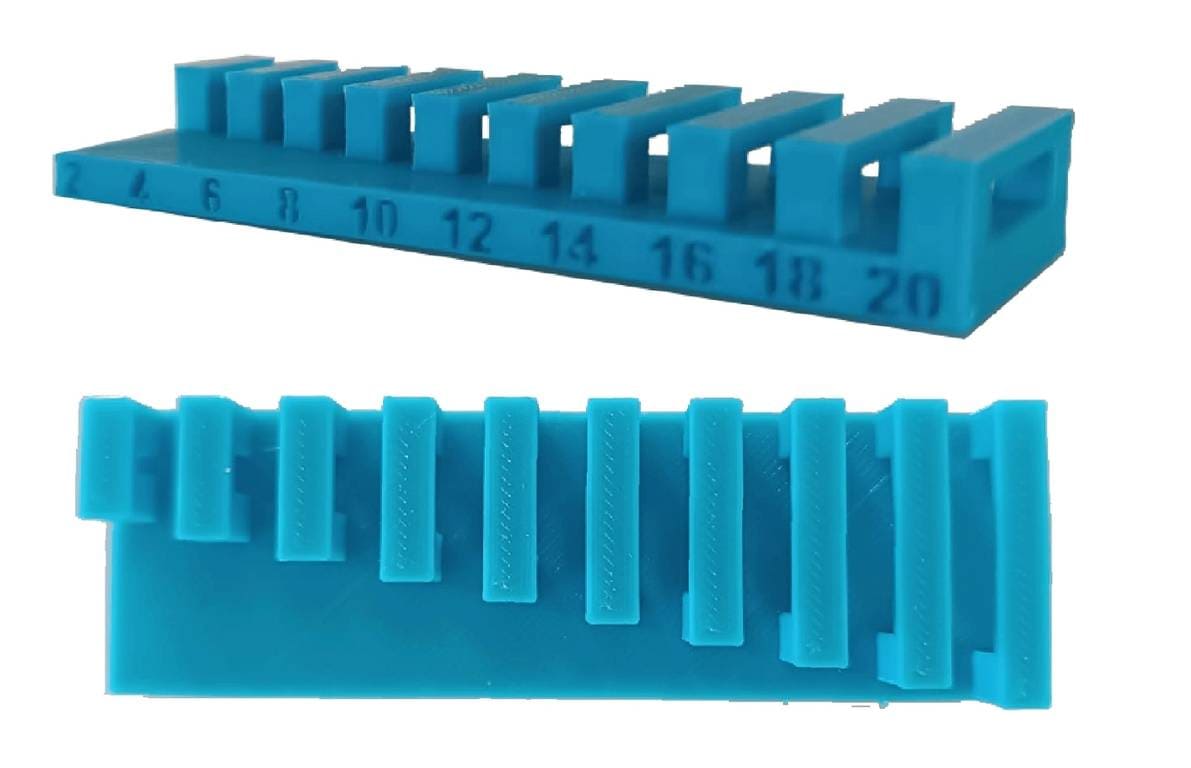
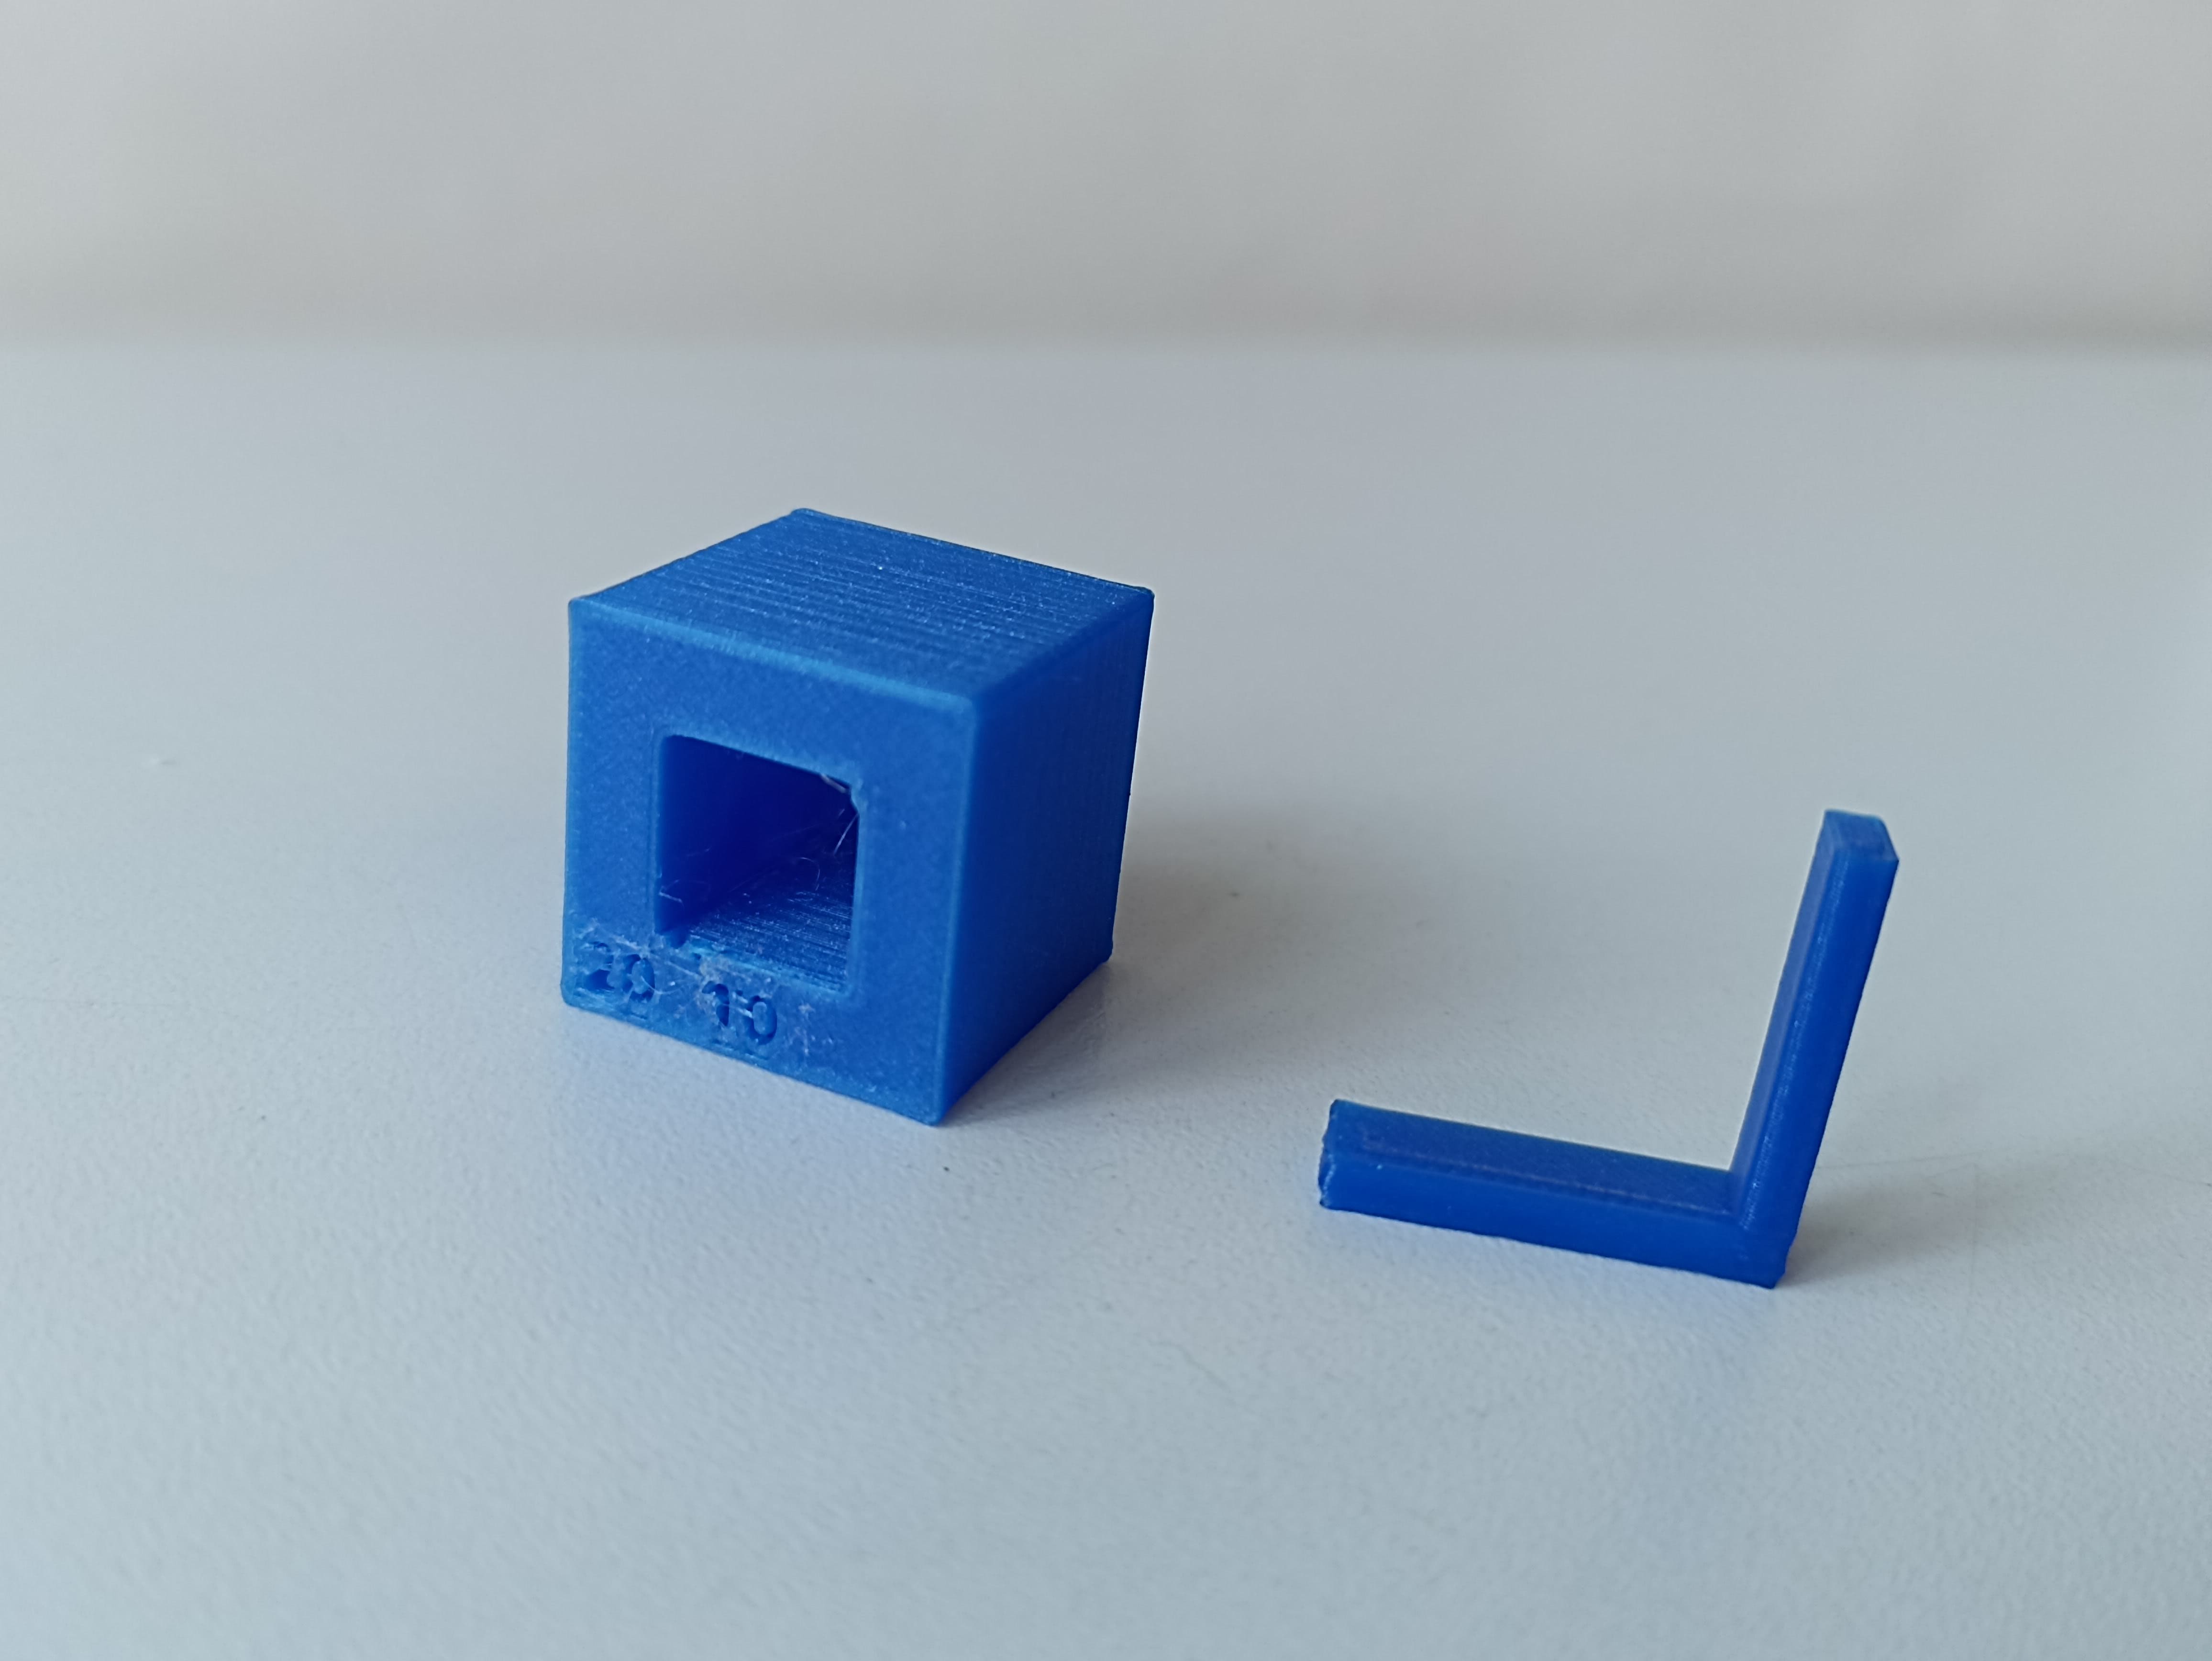
We got good results in the first impression of the tests.
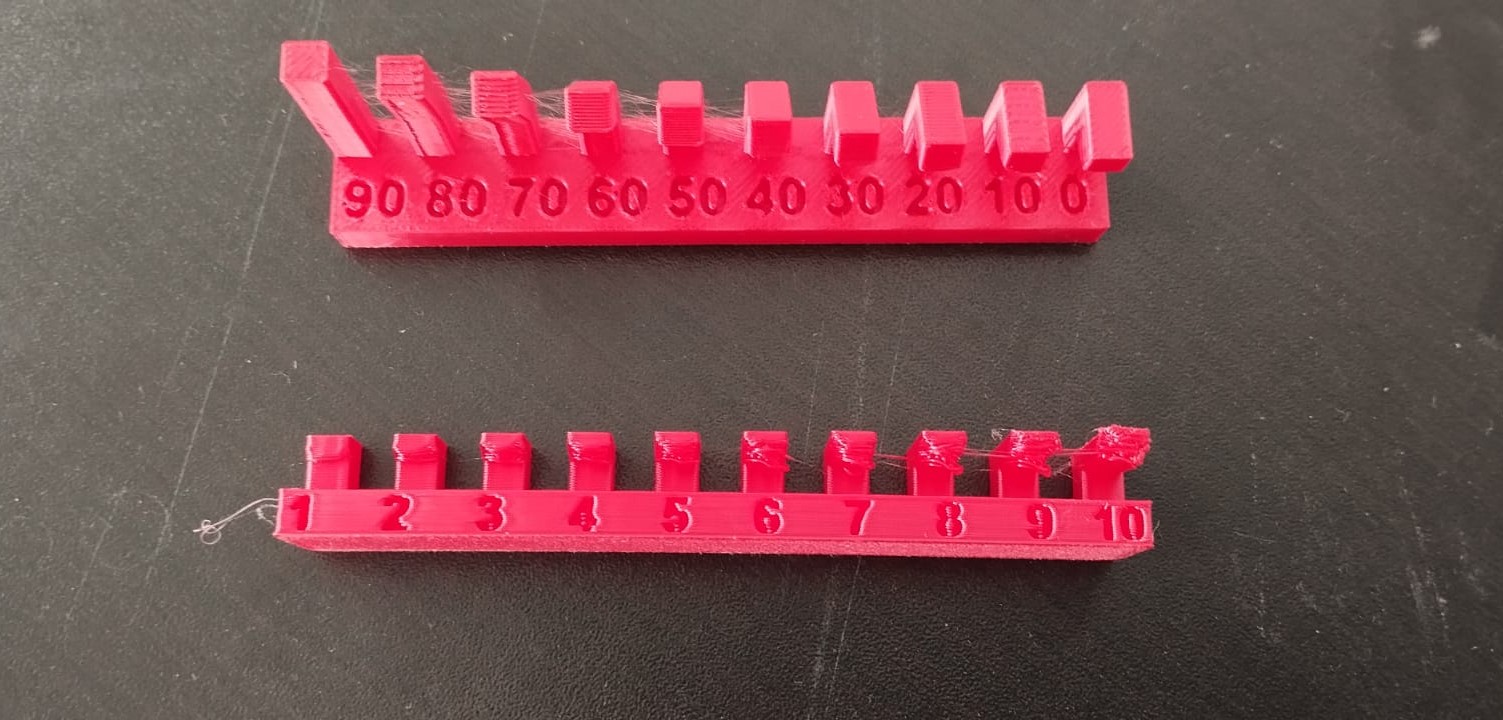
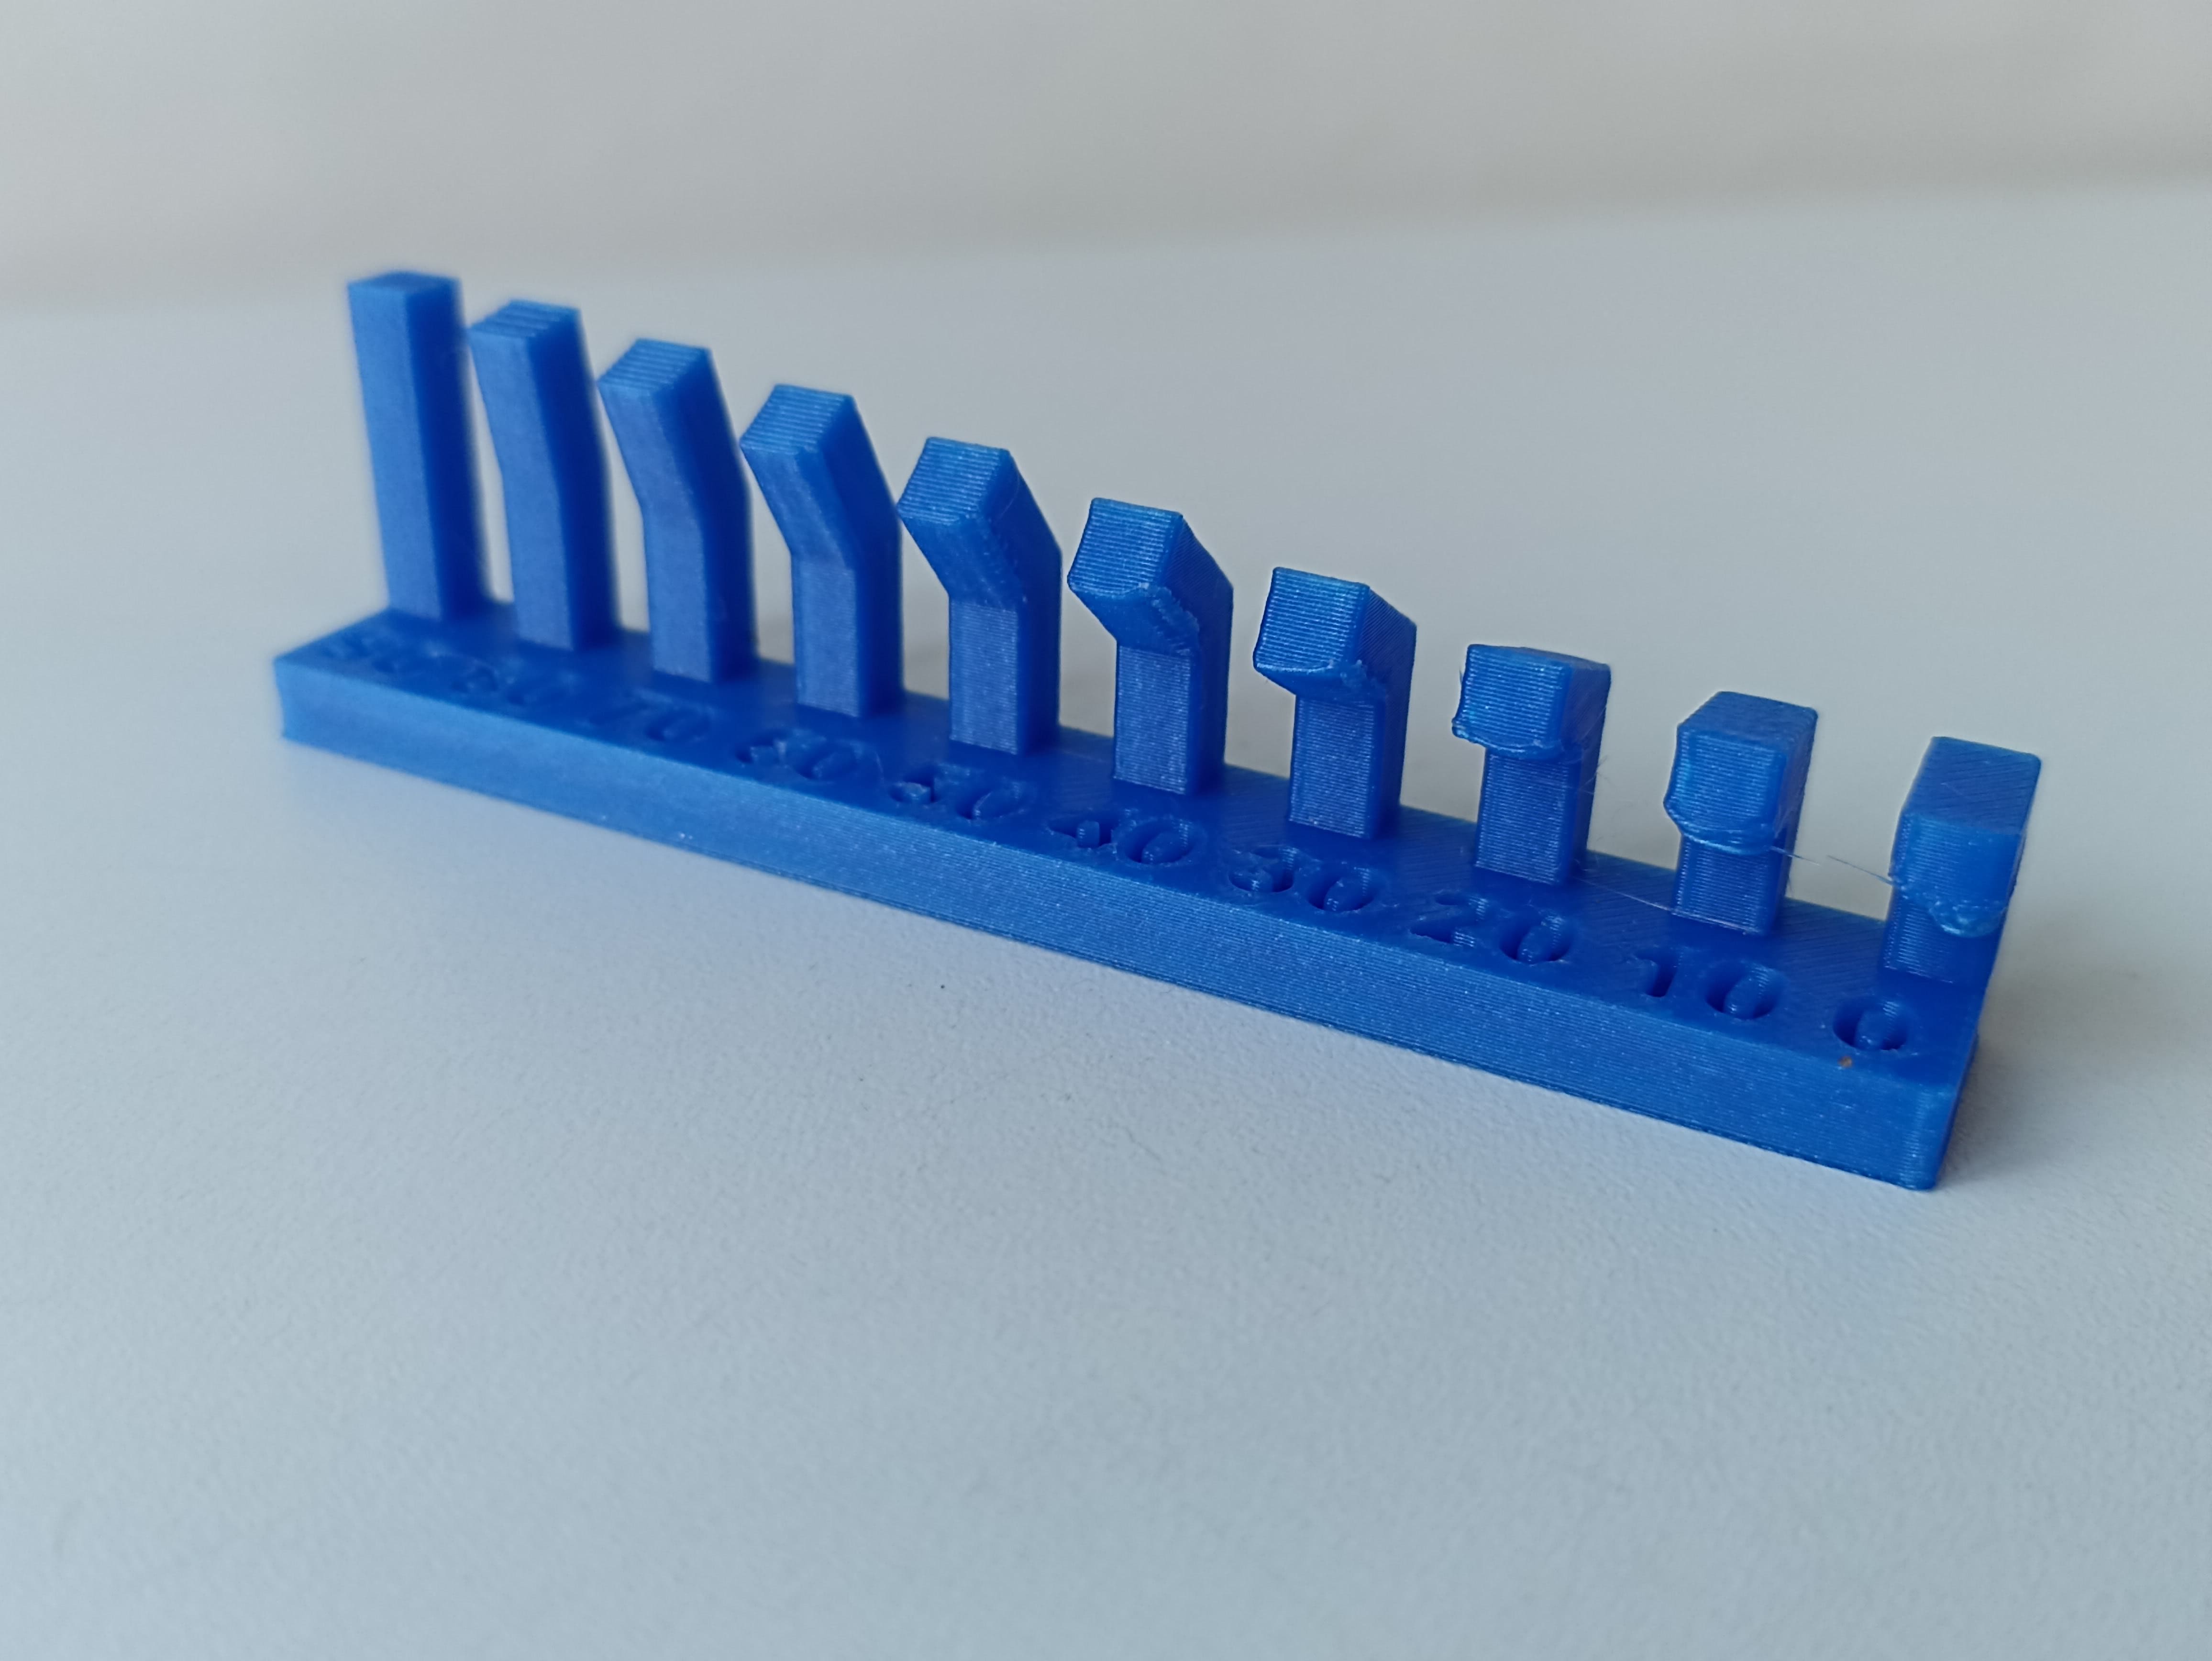
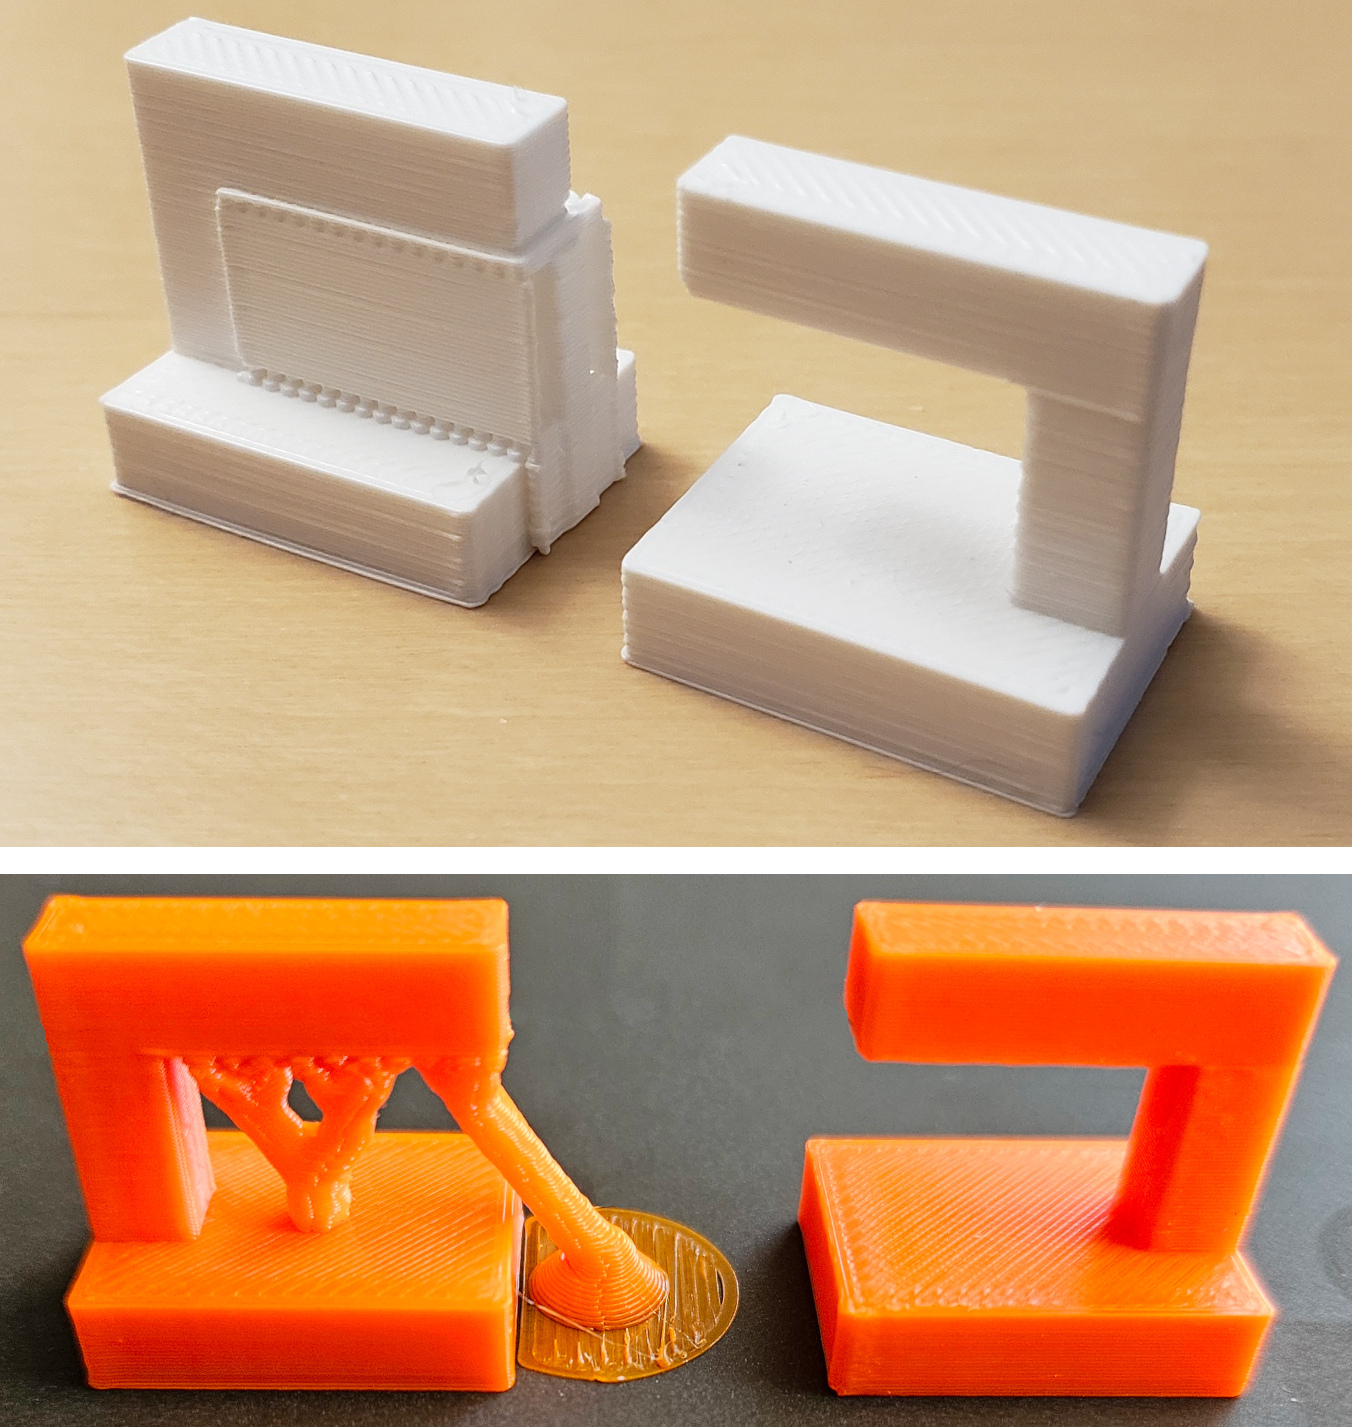
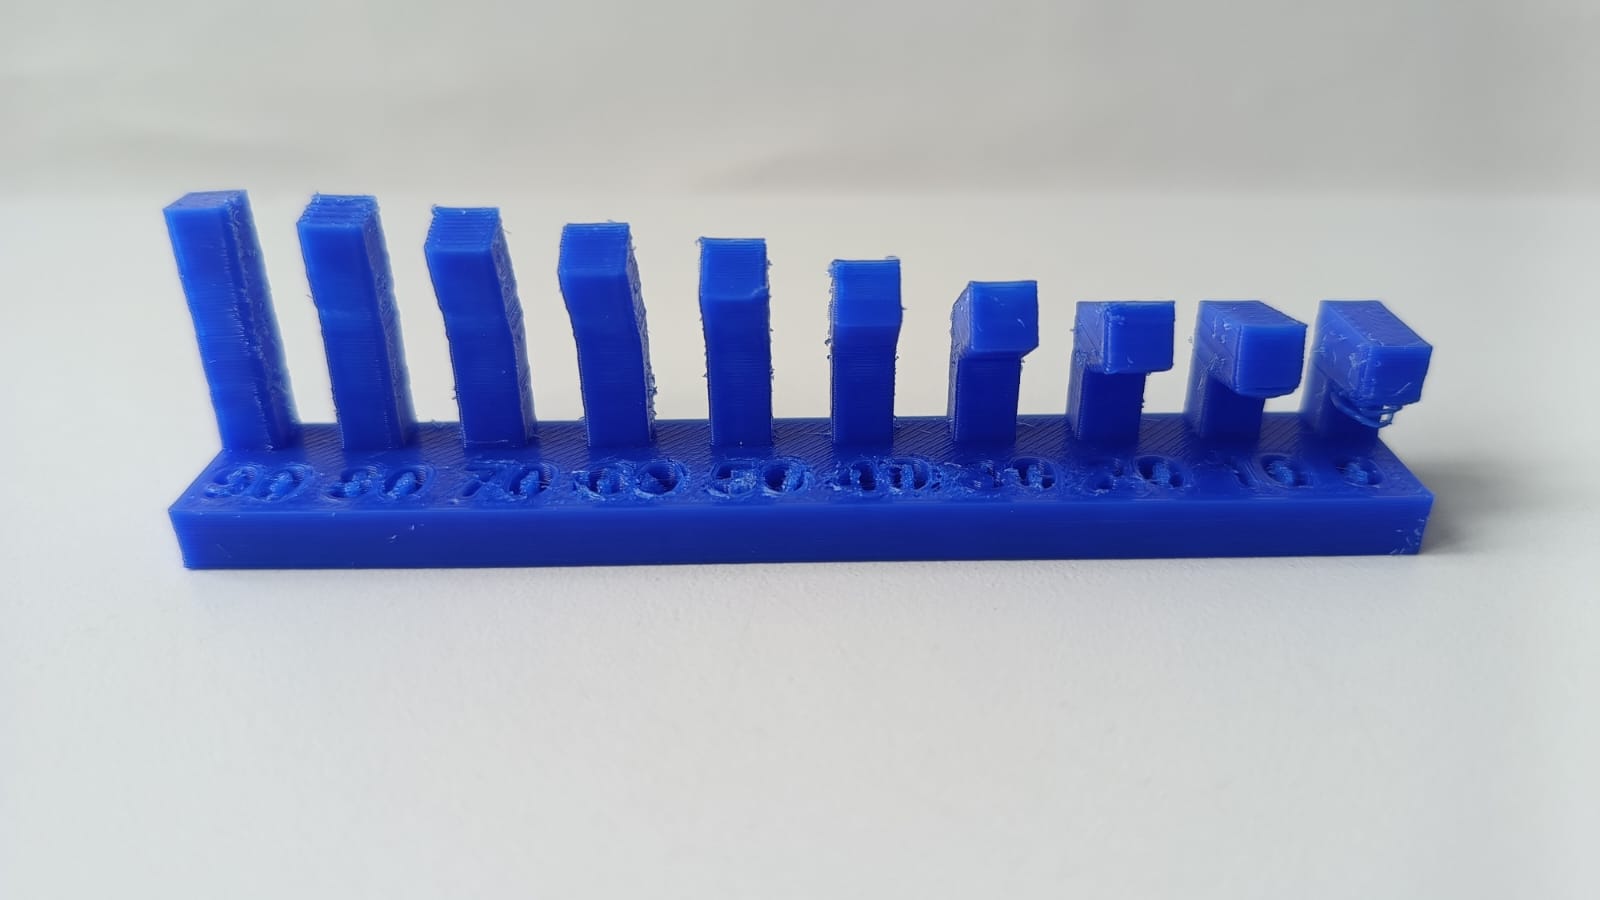
result of the two tests carried out, the first test angle without support and the second second test is very similar to the previous one, but the modeling presents a right angle where the flight distance of each prism increases.
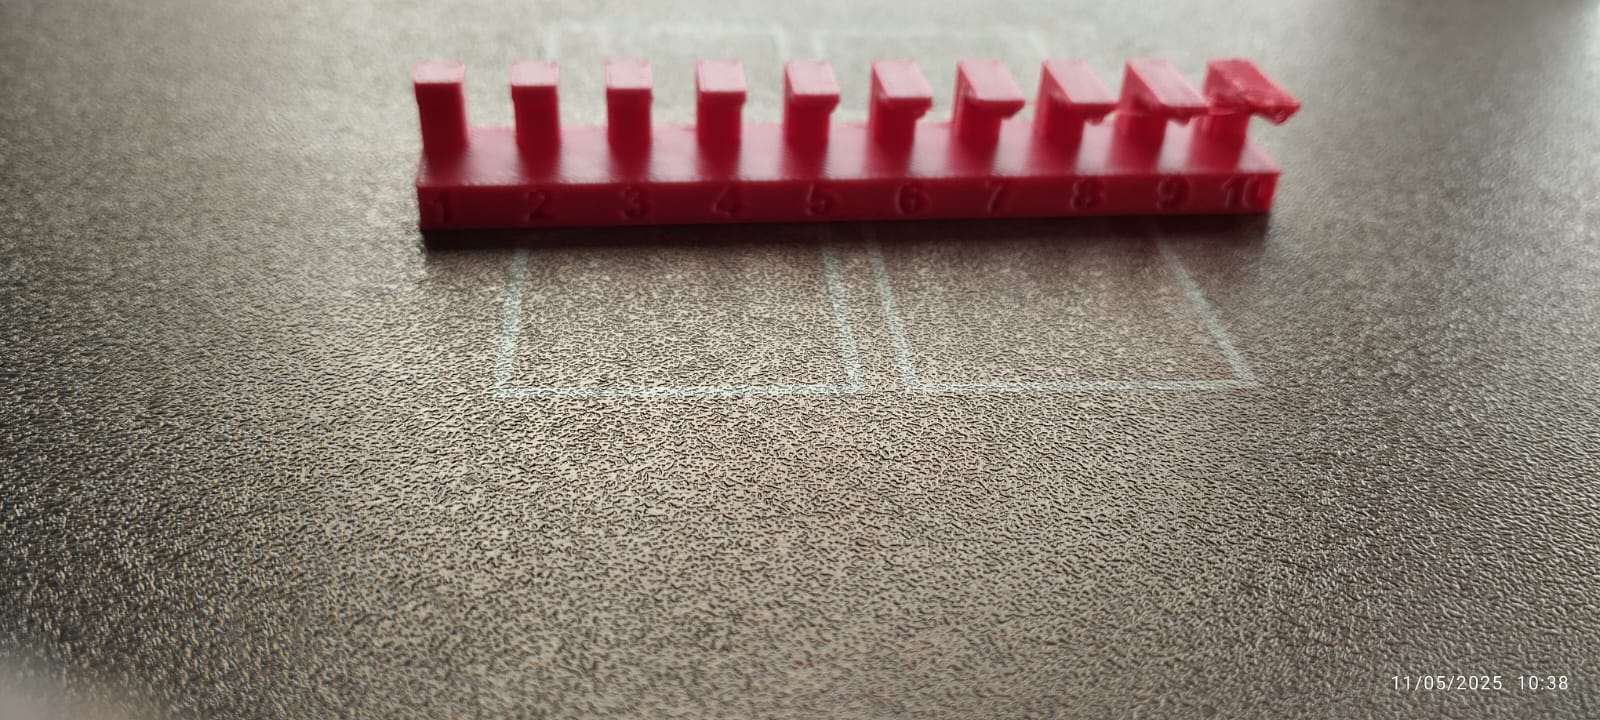
For support-free tests, the idea is to check if the machine can perform the modeling without them. The first support-free test focuses on angles, where the modeling presents volumes that change angles.
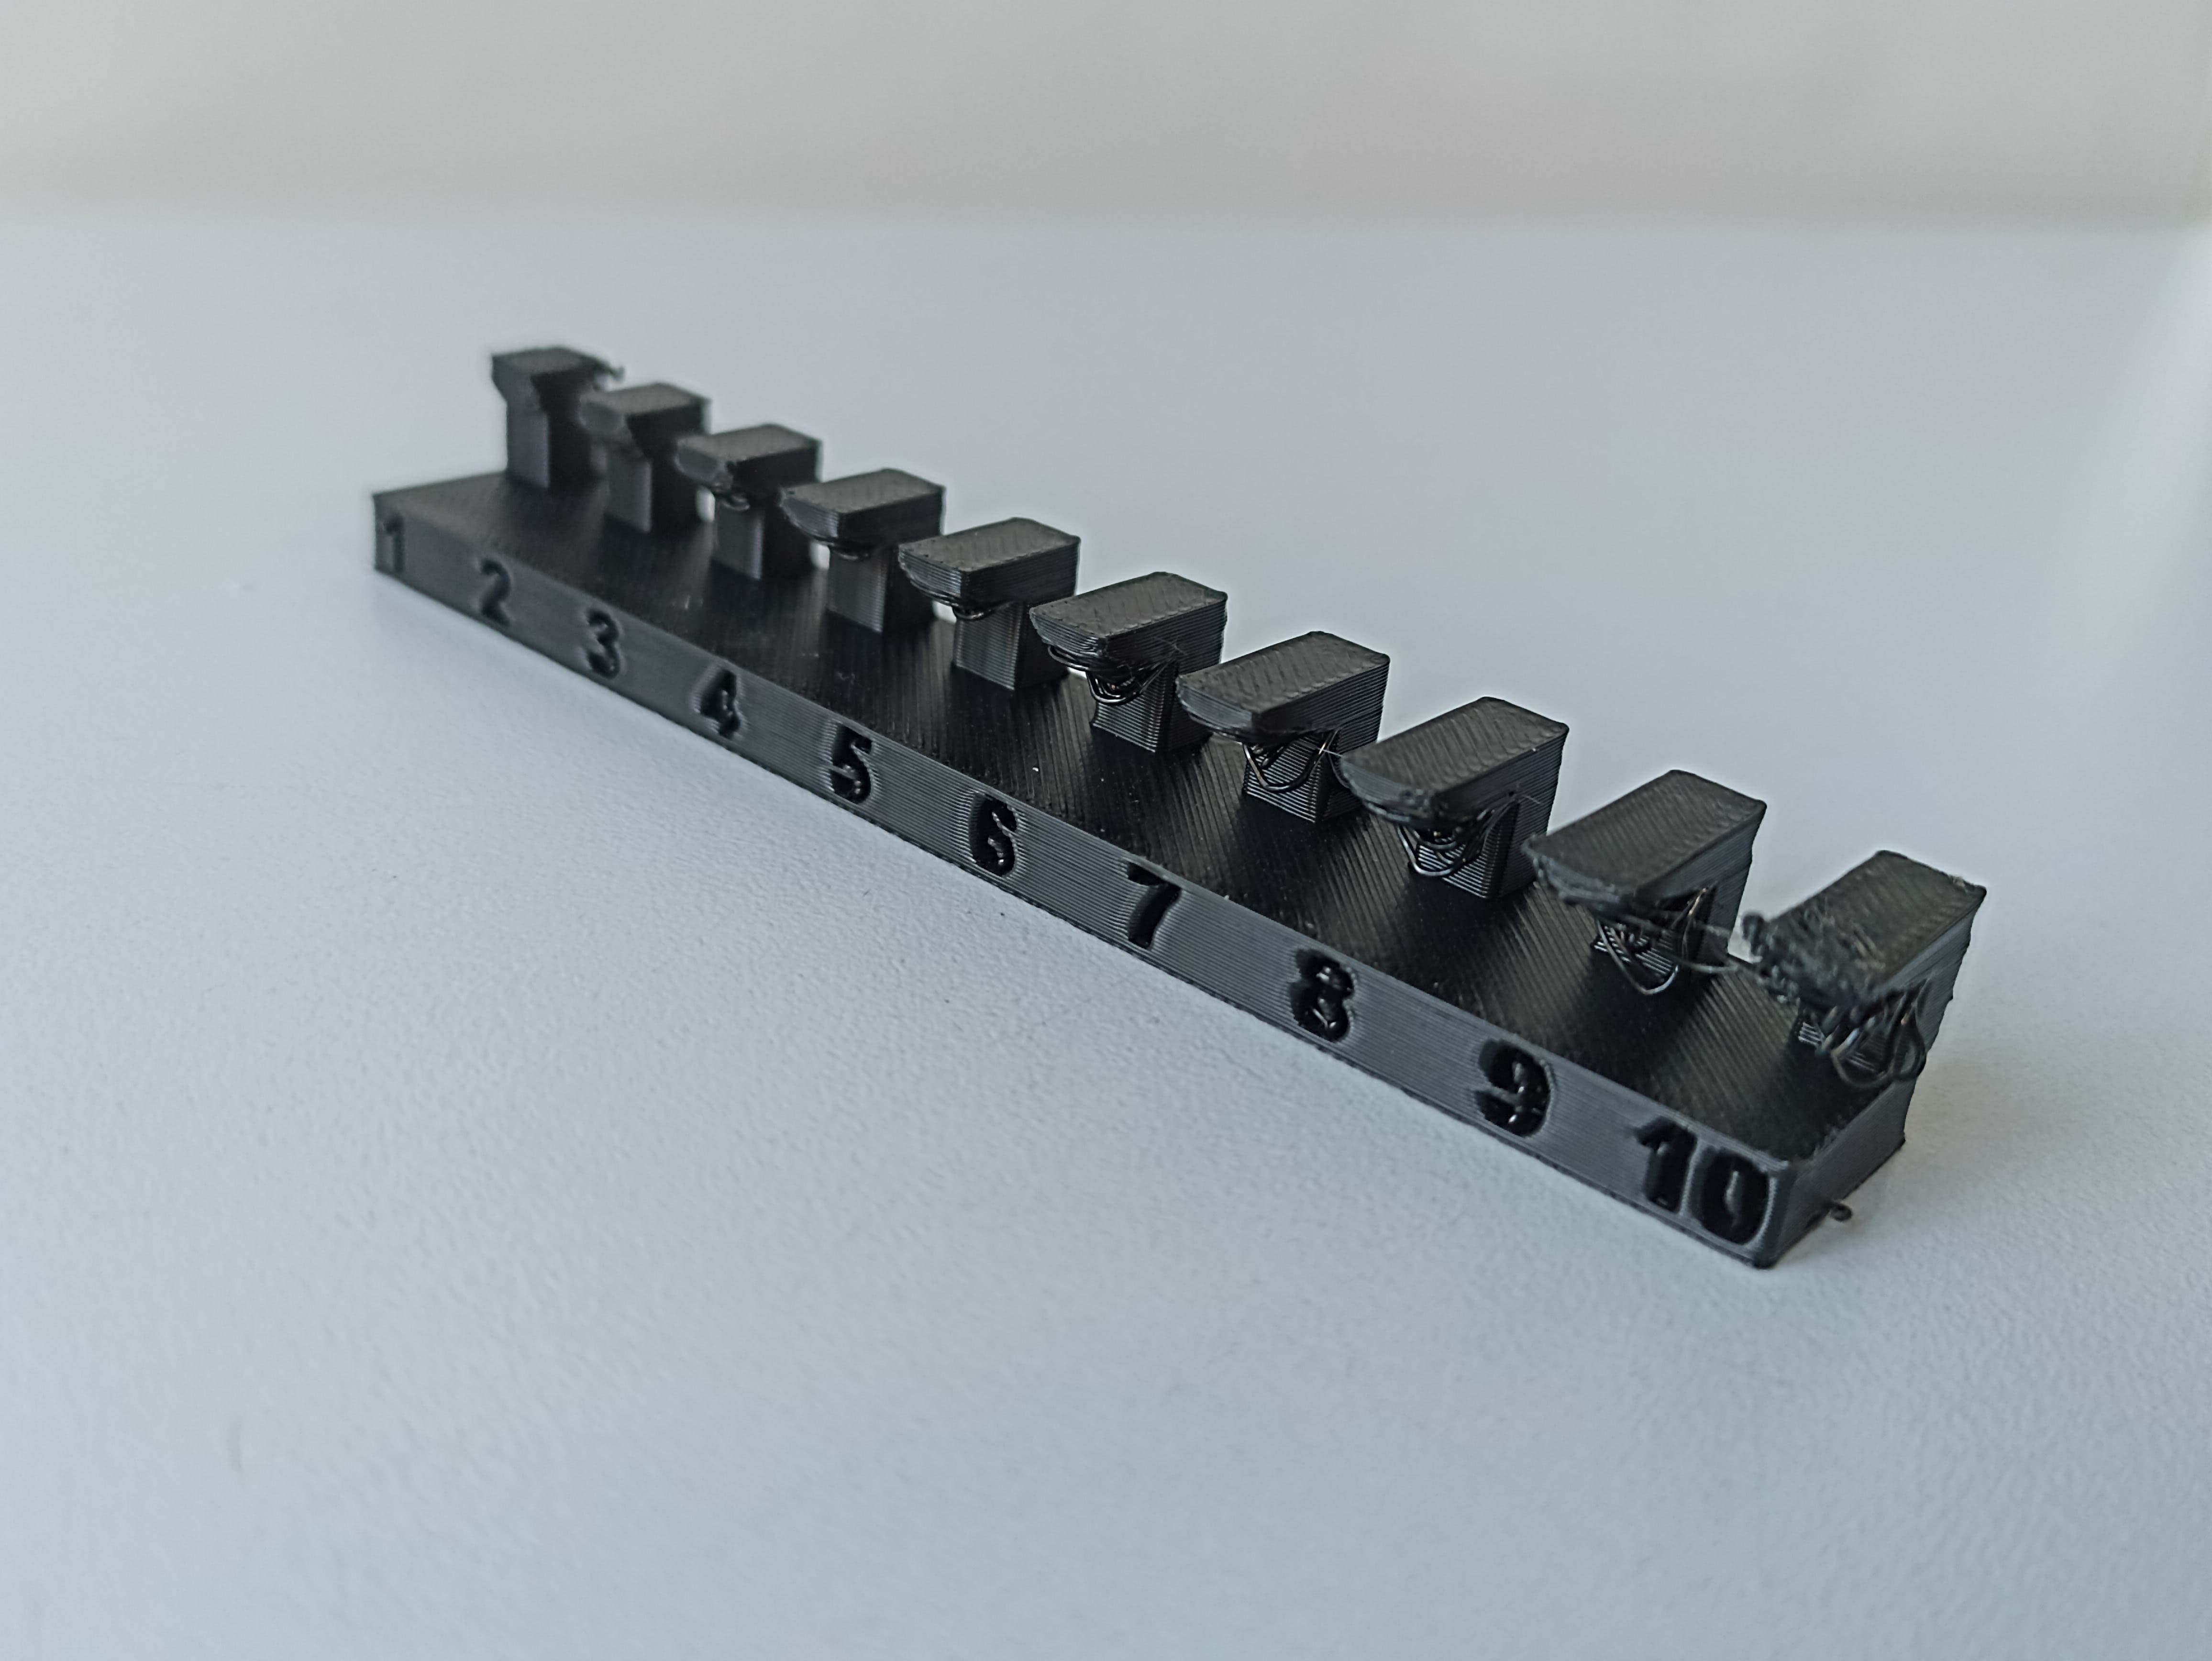
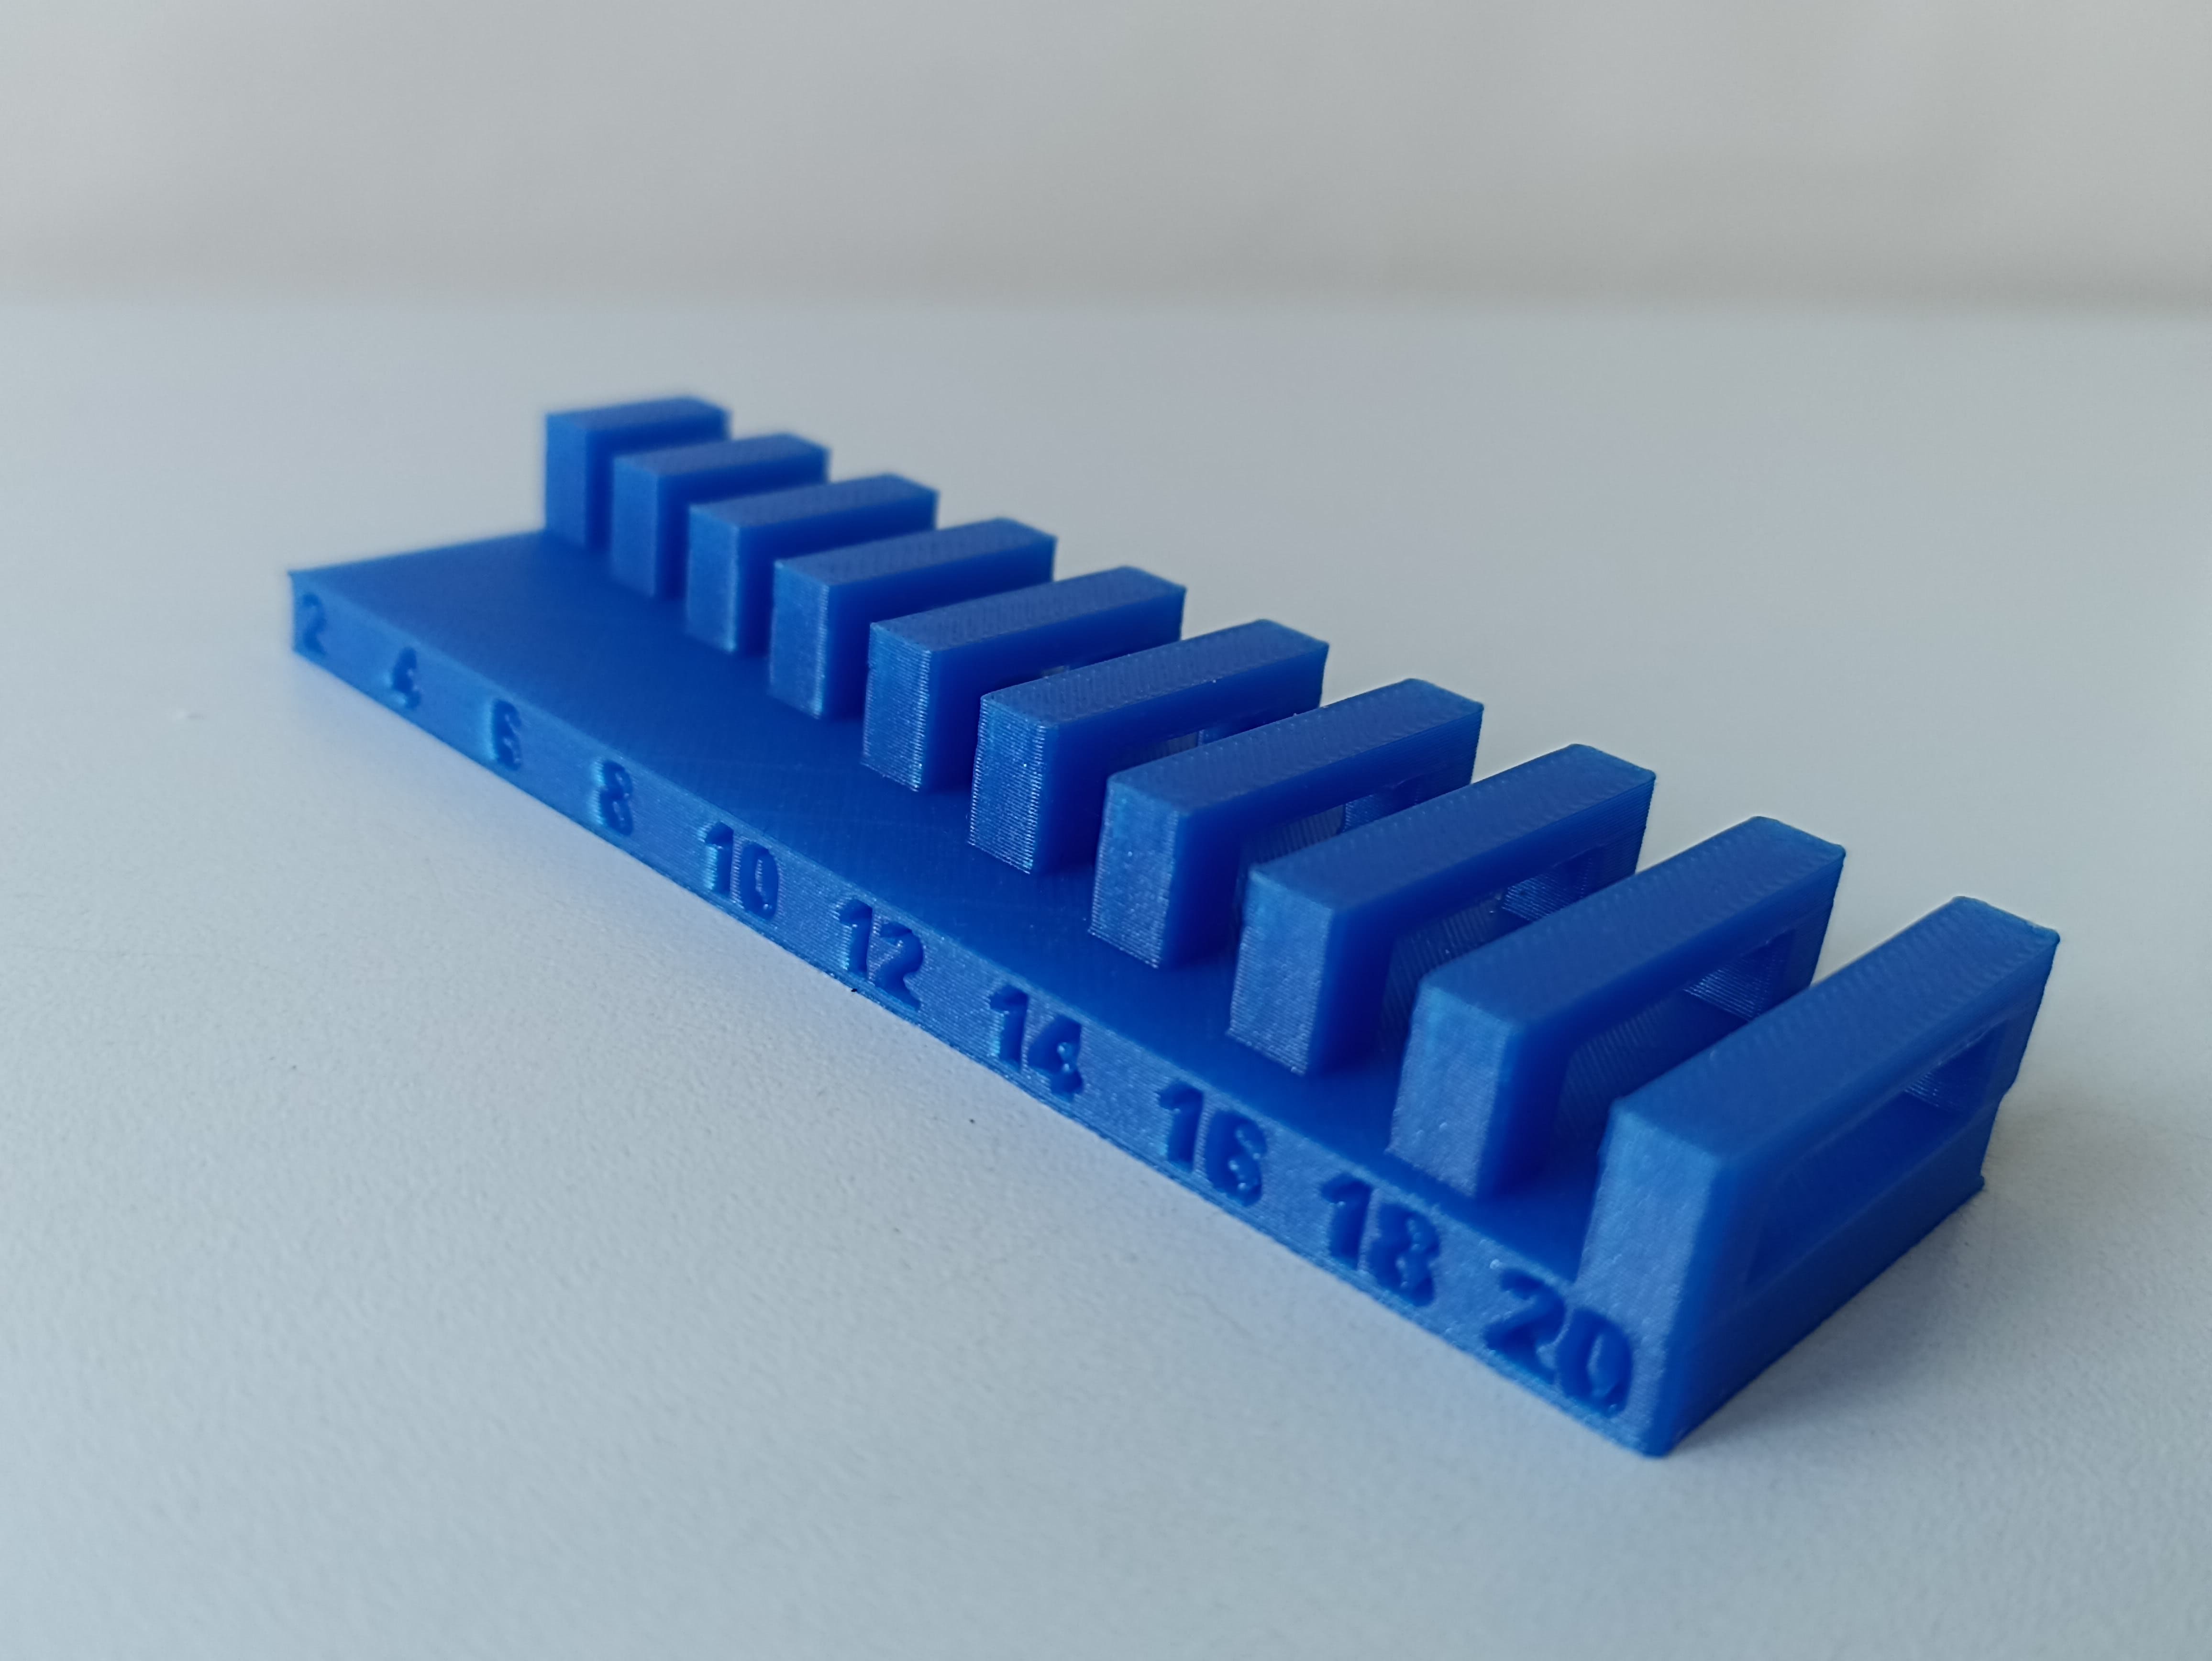
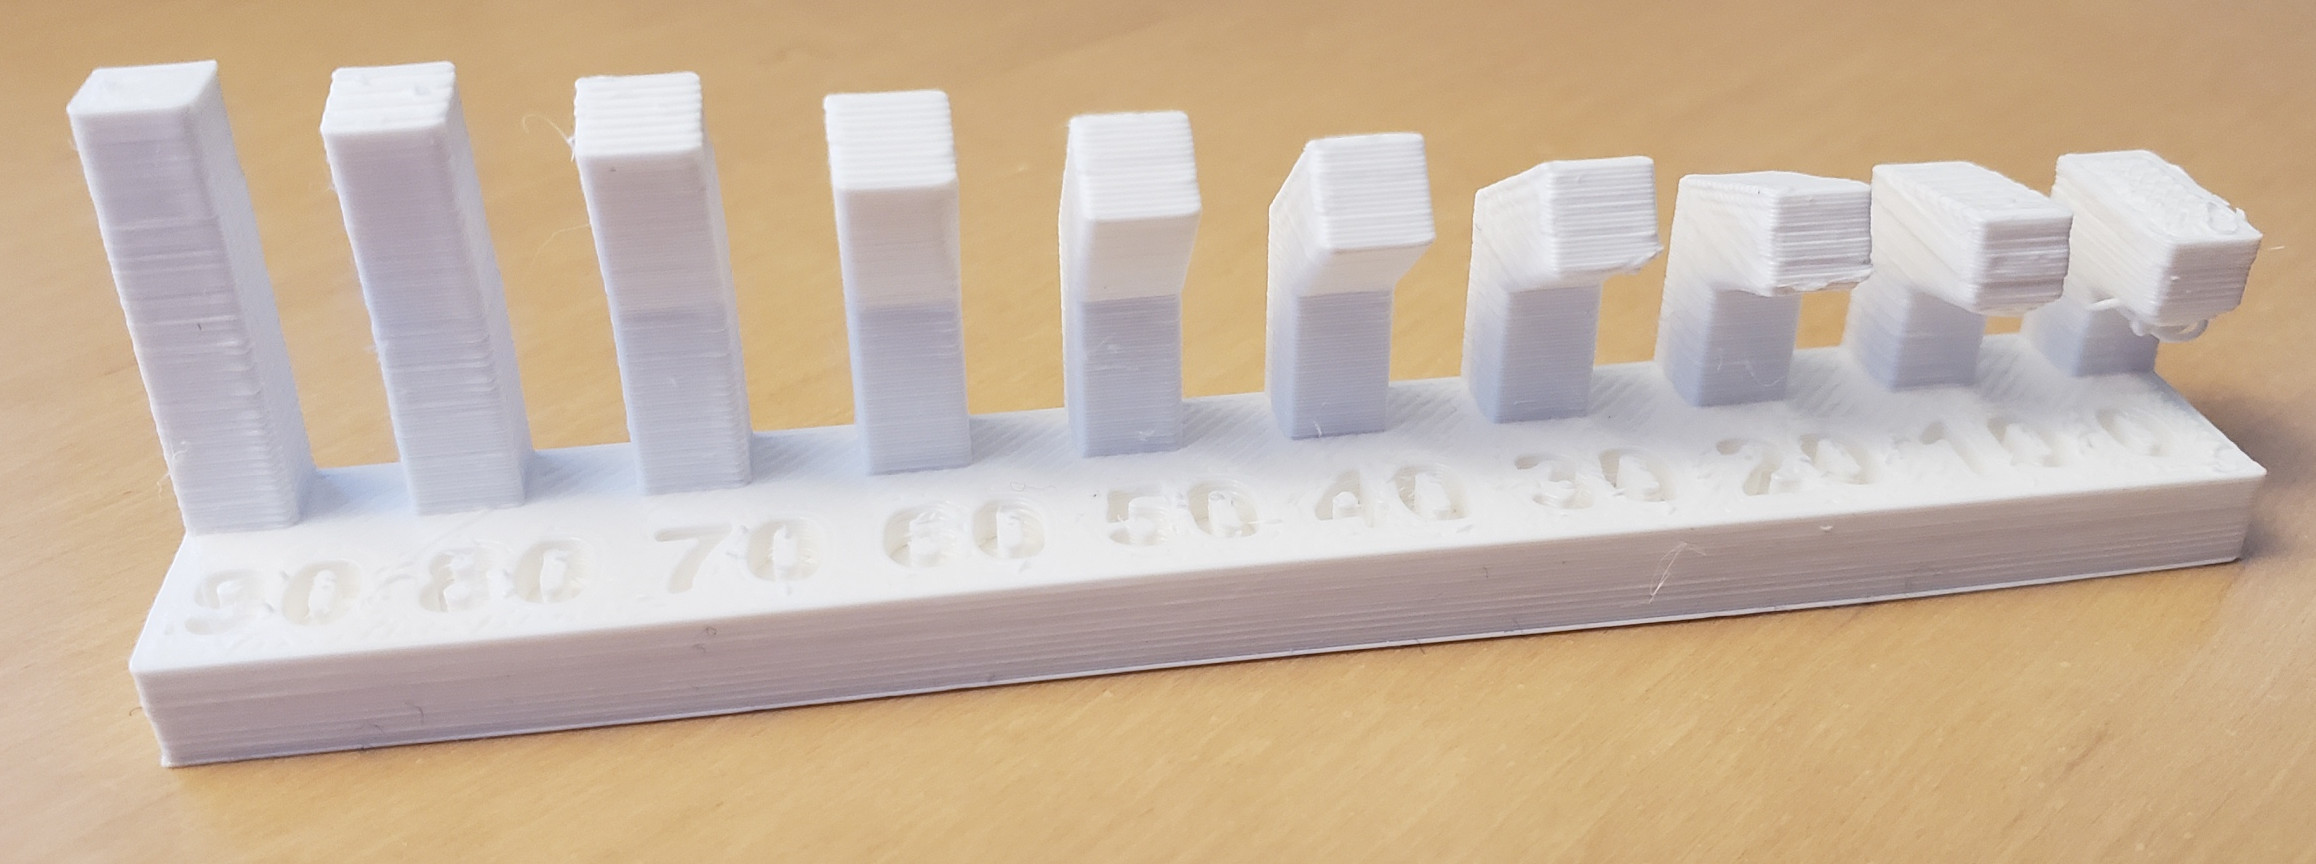
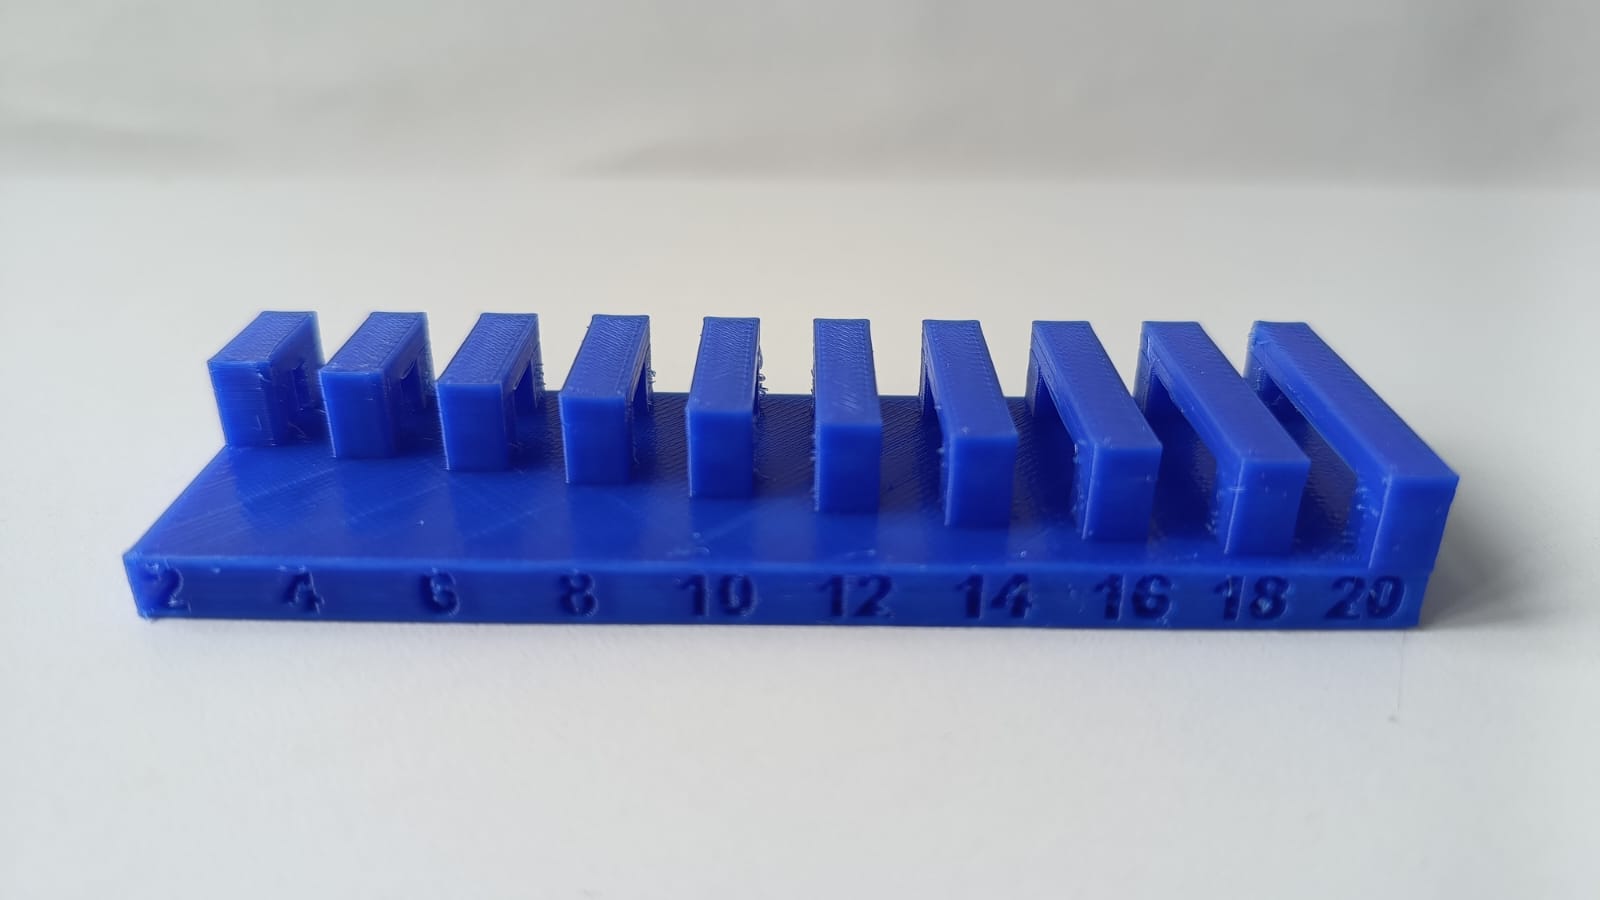
As part of the group assignment, we conducted calibration tests using various STL files to characterize the print quality of our Ender 3 V3 SE printer with PLA material. These files include tests for overhang, bridging, clearance, and angle tolerance. For example, here are the reference images of the different STL files.
The first step was to meet as a group to establish the work strategy and exchange experiences regarding the use of 3D printers.
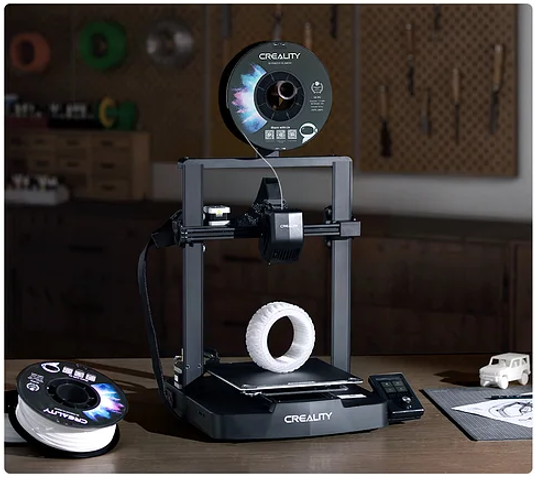
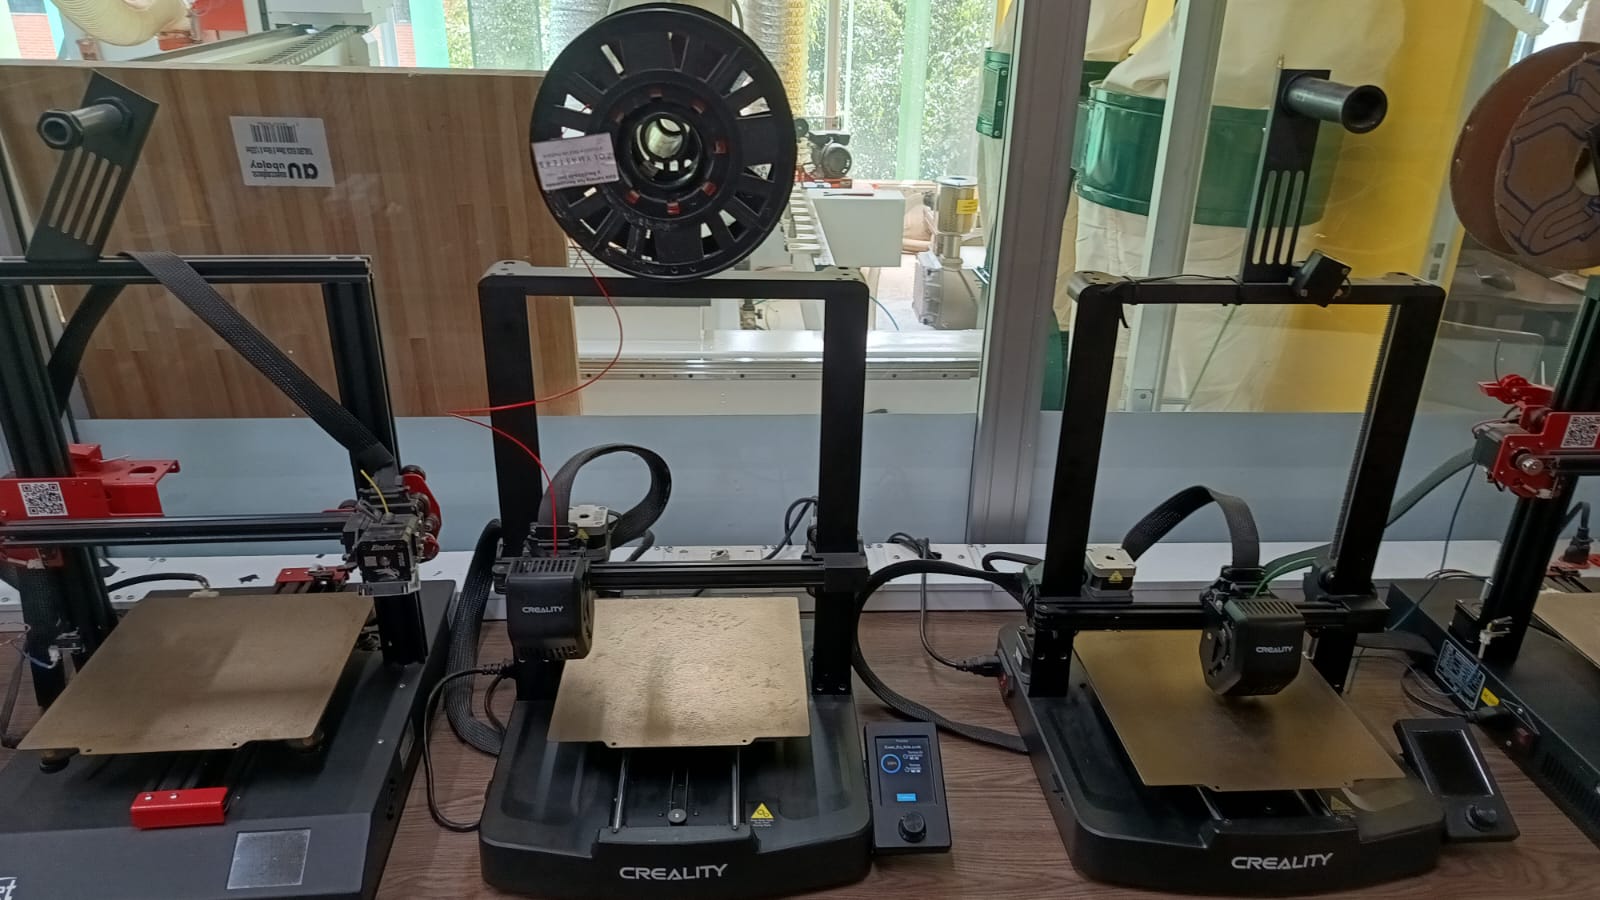
The printer I used for this assigment was the ENDER 3 VE SE which is available at the fablab of Ean University in Bogota, Colombia.
| Ender 3 V3 SE - Key Specifications | |
|---|---|
| Printing Technology | FDM |
| Build Volume | 220×220×250 mm |
| Nozzle Temperature | ≤260 °C |
| Bed Temperature | ≤100 °C |
| Typical Printing Speed | 180 mm/s |
| Max Printing Speed | 250 mm/s |
| Acceleration | 2500 mm/s² |
| Layer Height | 0.1–0.35 mm |
| Supported Filaments | PLA, PETG, TPU(95A) |
| Extruder Type | Sprite Direct Extruder |
| Leveling Mode | Auto Leveling |
| File Formats | STL, OBJ, 3MF, AMF |
| Slicing Software | Creality Print, Cura 5.0+, Simplify3D |
| Display | 3.2" Color Knob Screen |
| File Transfer | SD Card |
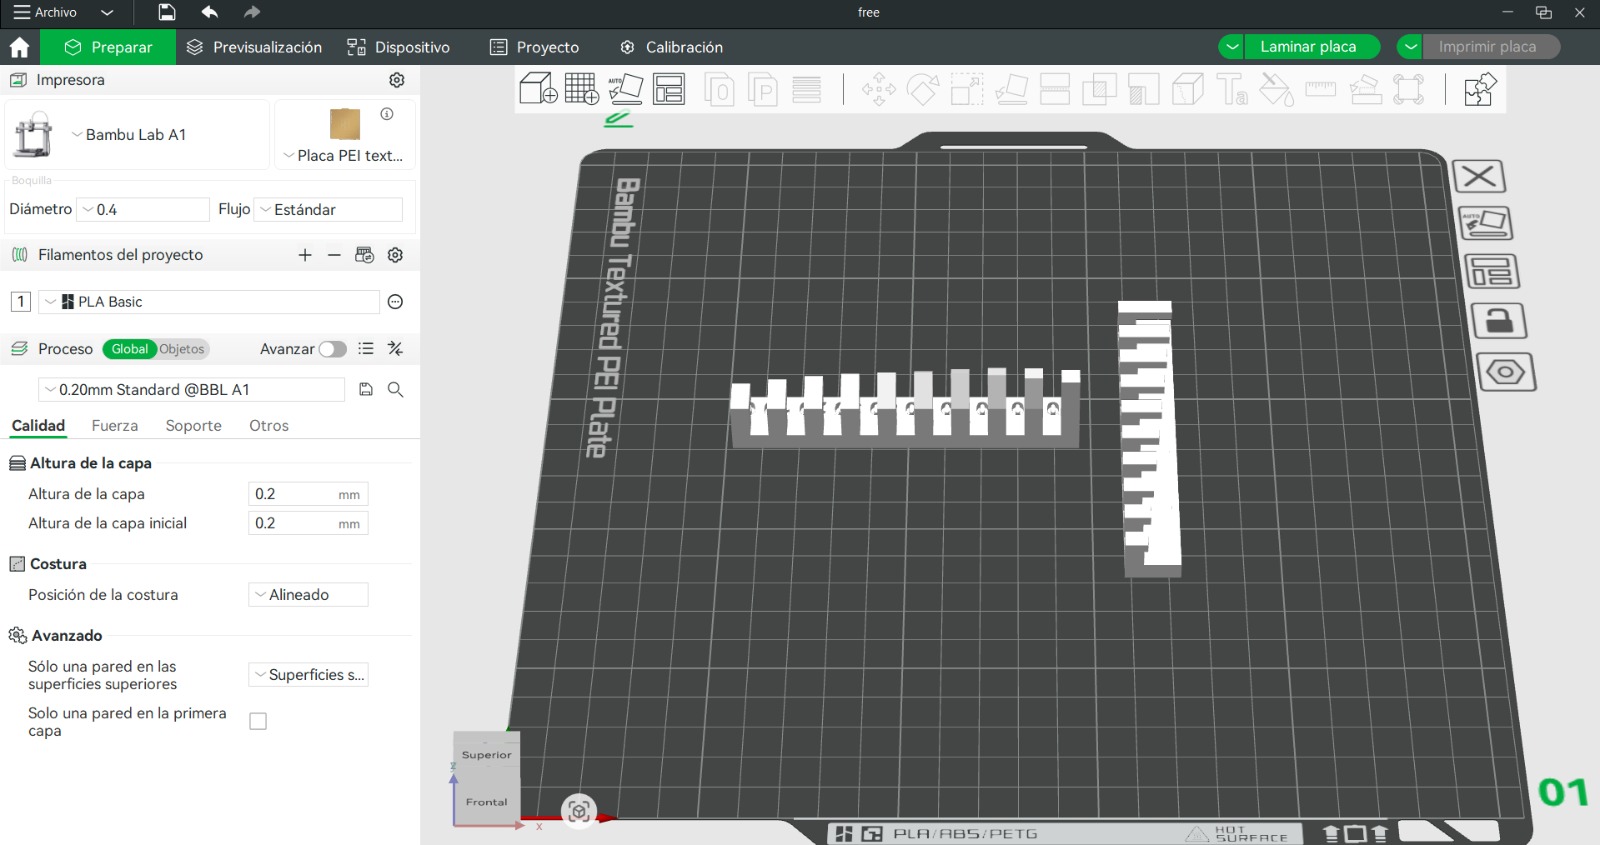
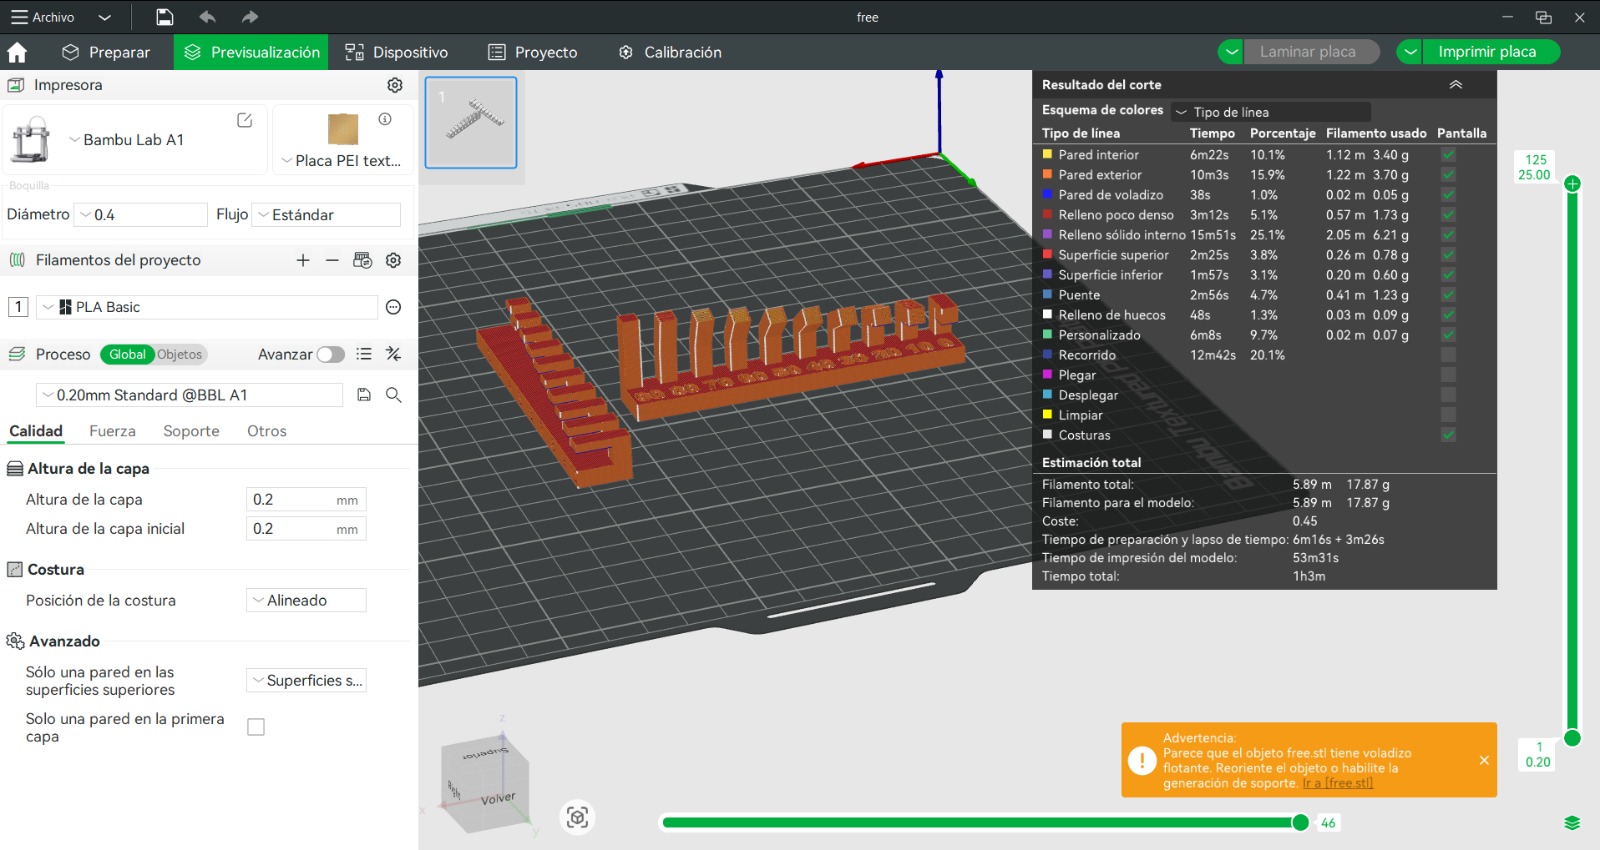
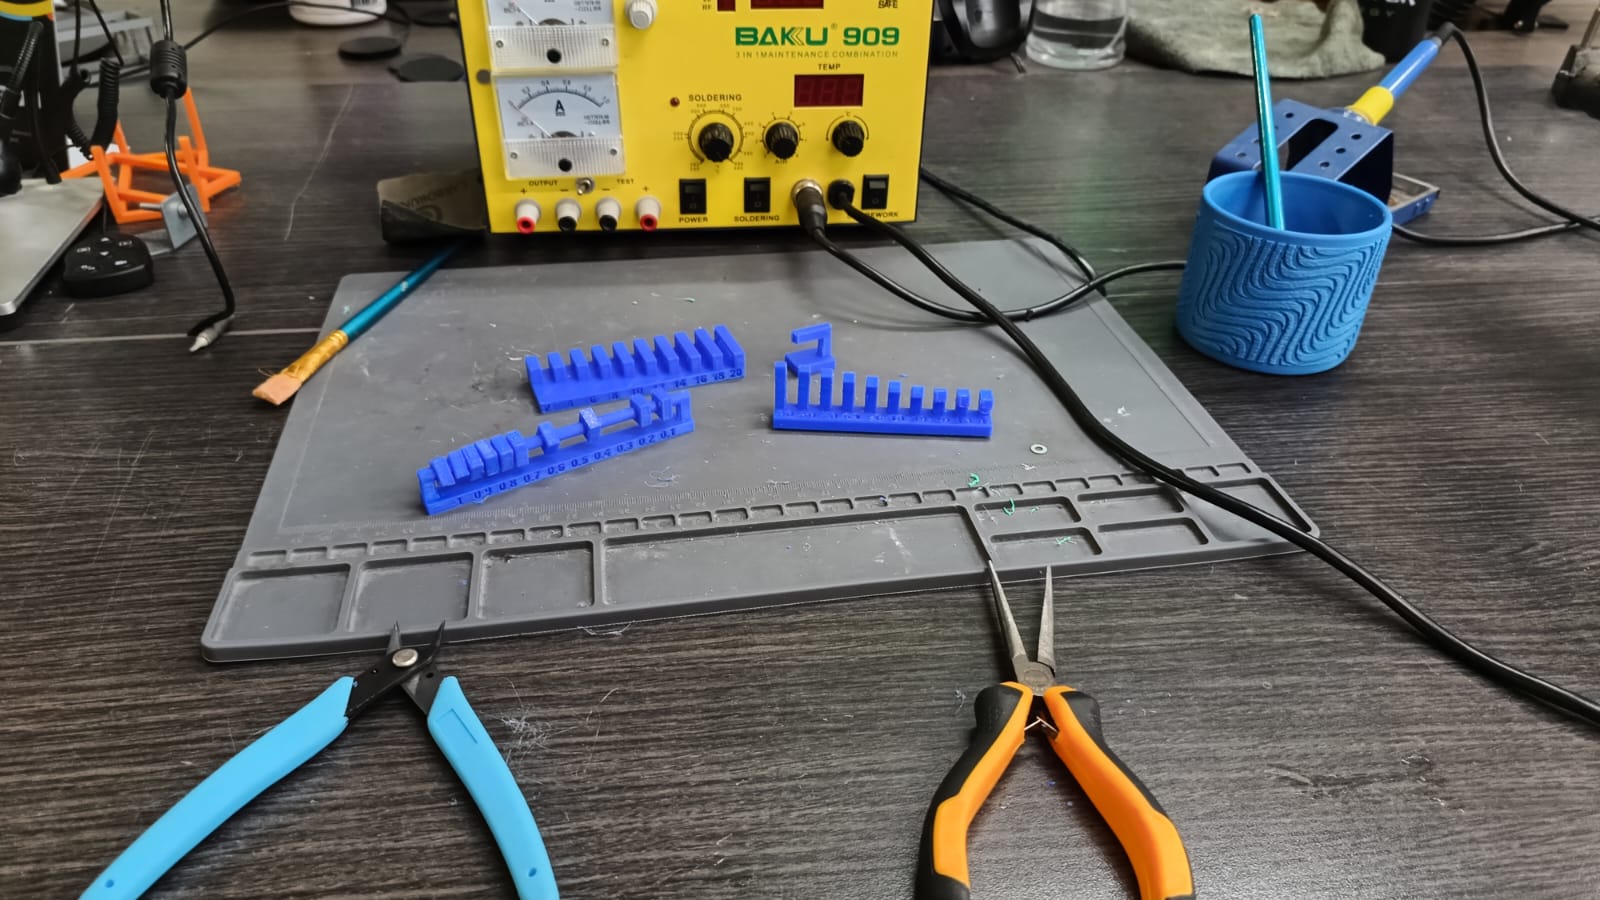
To manufacture the models, I used a Creality Ender 3 V3 SE with PLA filament. The slicing was done using Orca Slicer, applying standard parameters suitable for a calibration and functional test model. The printing setup ensured adequate quality and adhesion for the selected material and geometry.
| Parameter | Value |
|---|---|
| Printer | Creality Ender 3 V3 SE |
| Material | PLA |
| Slicing Software | Orca Slicer |
| Models Used | Clearance Test, Overhang Test, Bridging Test, Angle Test |
| Layer Resolution | 0.2 mm |
| Infill | 15% |
| Extruder Temperature | 200°C |
| Bed Temperature | 60°C |
During this phase, several test prints were performed to evaluate the capabilities and calibration of the Ender 3 V3 SE printer using PLA and ORCA Slicer. The tests included clearance, overhangs, bridges, and angles. The models revealed key insights about print precision, support needs, and nozzle behavior under different configurations.
To evaluate the performance of the Ender 3 V3 SE using PLA, I printed several standard calibration models designed to test clearance, overhangs, bridging, and unsupported angles. These tests helped me better understand the printer’s capabilities and fine-tune the slicing settings in ORCA Slicer accordingly.
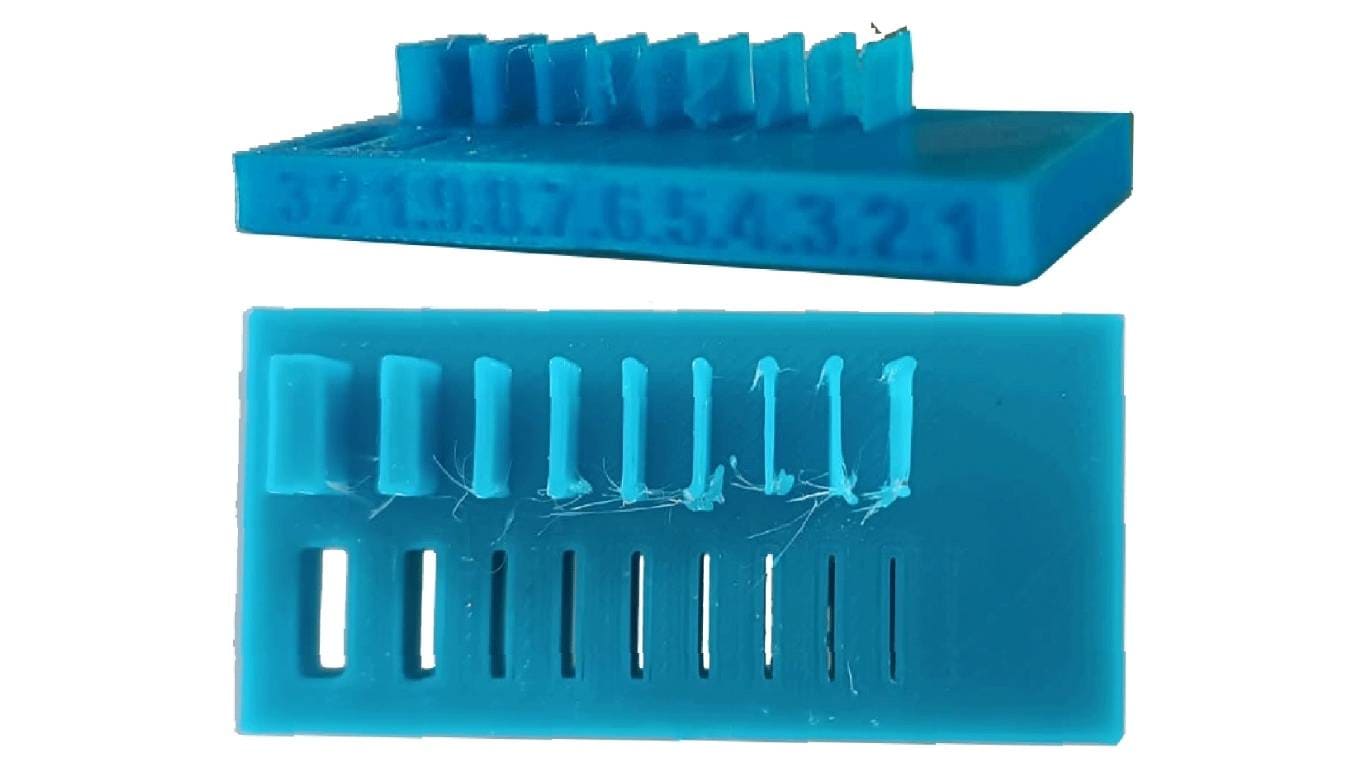
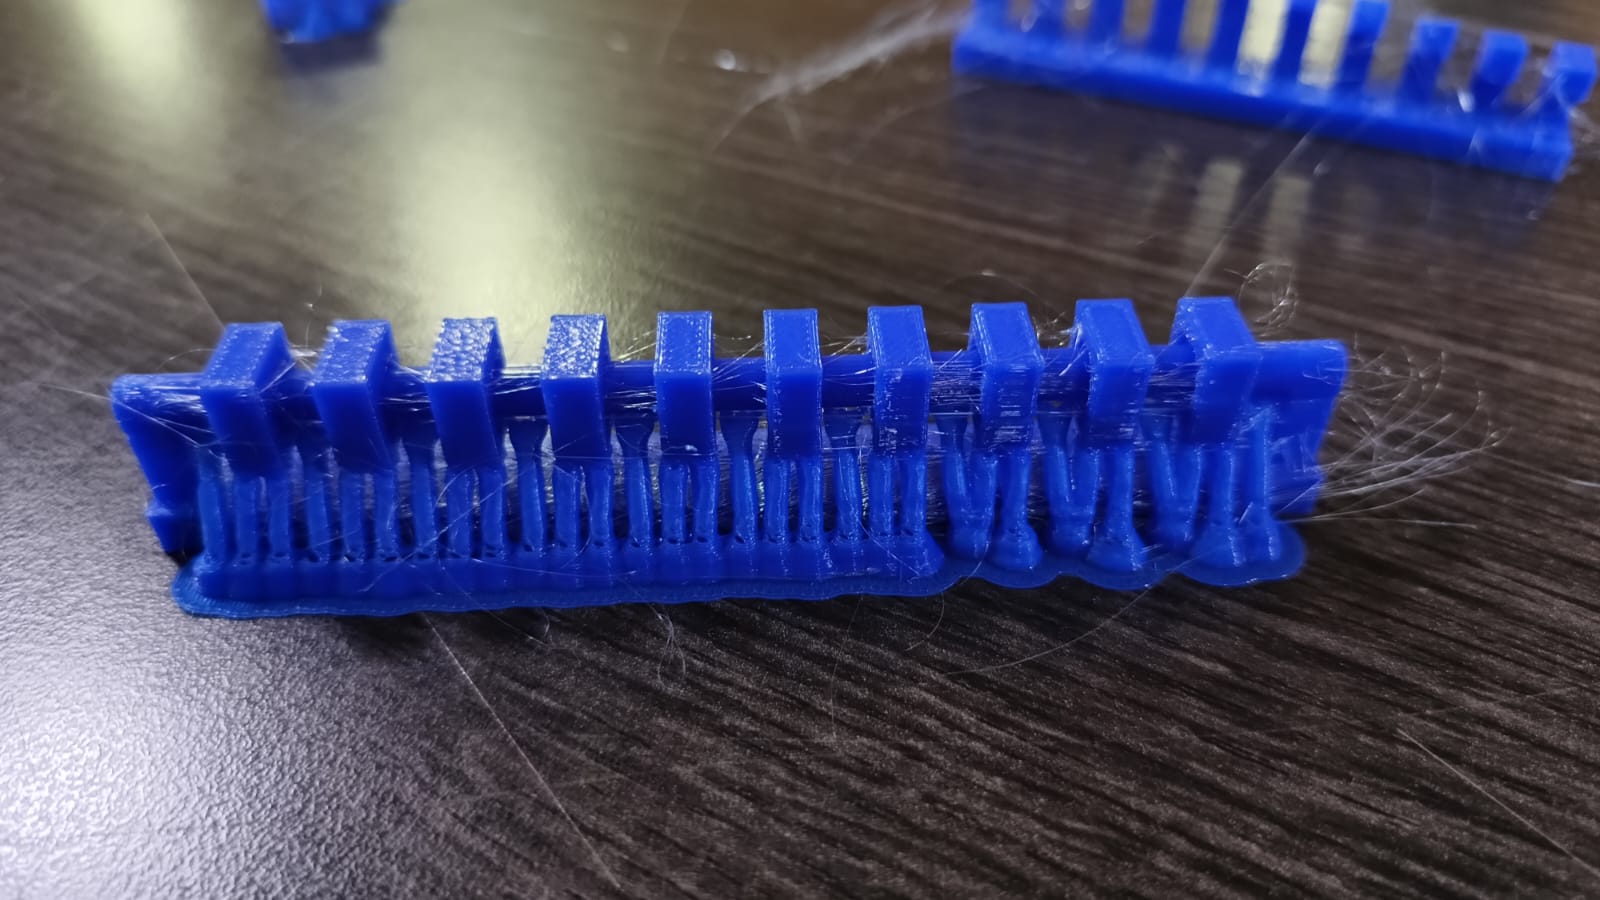
The clearance test showed that gaps under 0.4 mm tend to fuse together, indicating slight over-extrusion or the need for better retraction settings. From 0.4 mm and above, the parts behaved as expected and could be separated easily.
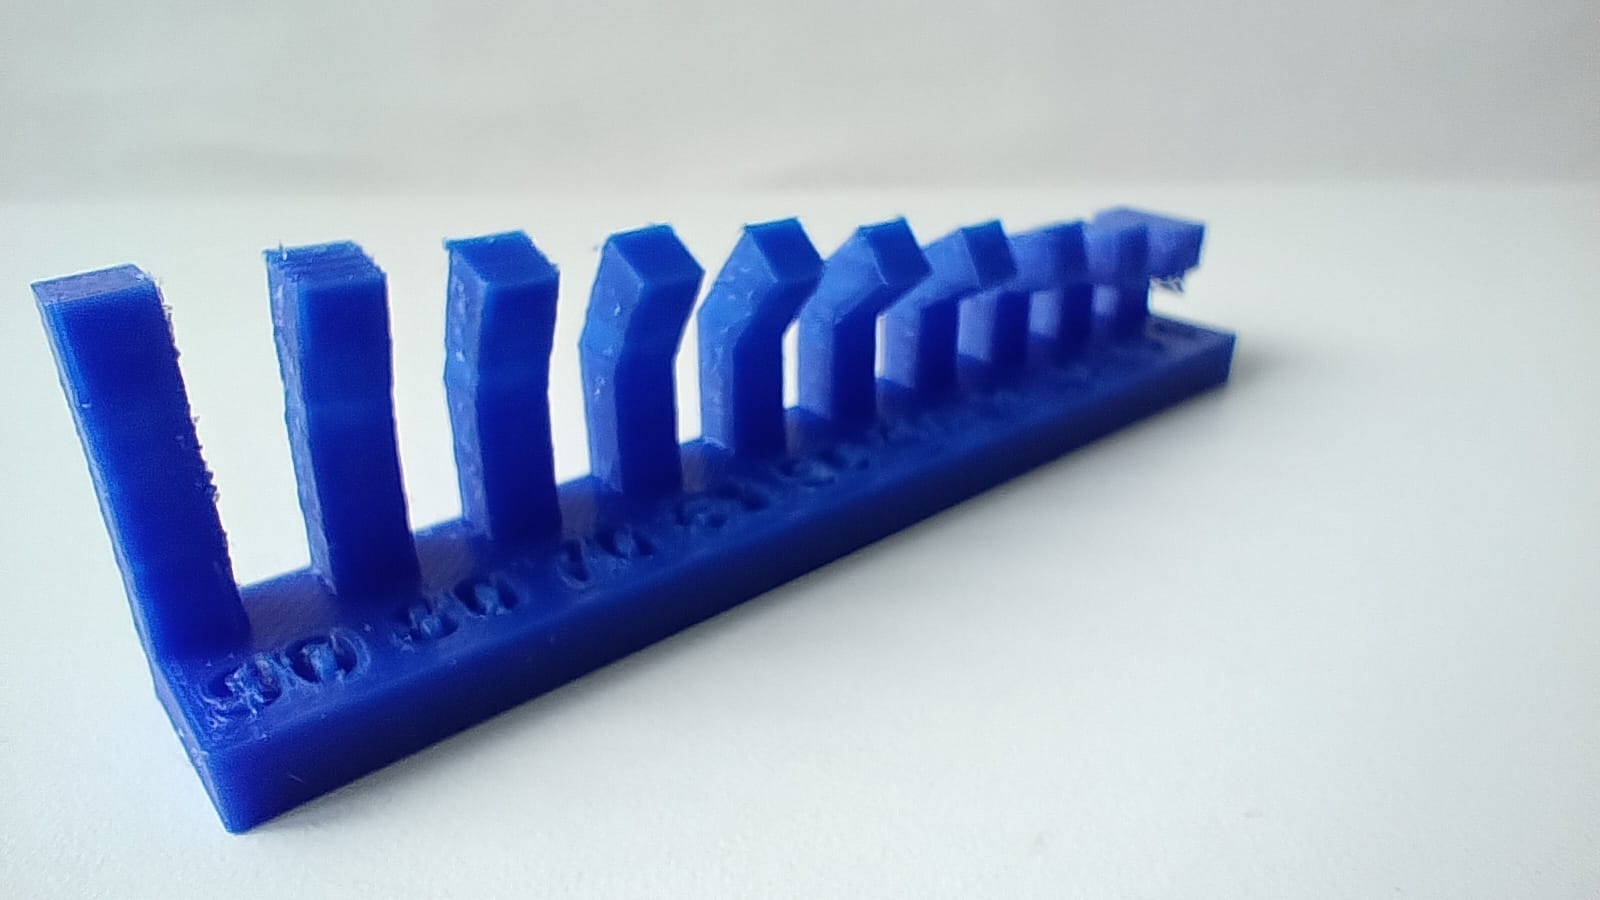
Overhangs up to 40° were printed cleanly, but beyond that point, there was a noticeable drop in print quality. Layer drooping was evident at steeper angles, suggesting that enabling supports or lowering the print speed would improve the results.
Short bridges were handled well, but longer spans resulted in sagging and stringing between the ends. Increasing cooling and adjusting retraction and temperature settings should help reduce this issue in future prints.
The angle test revealed some visible stair-stepping on steep inclines. While this didn’t affect functionality, print quality could be improved by lowering the layer height or printing at a slower speed.
Stringing was observed between smaller features, which suggests the need to fine-tune retraction distance and speed. A cleaner surface finish can be achieved by optimizing these parameters.
The testing was carried out in a prepared workspace with essential tools: flush cutters, tweezers, a scraper, and a heat-resistant mat. This setup made the printing and post-processing more efficient and safer.

Specific models were created to systematically assess the critical design rules in additive manufacturing:


Click the button below to access and download all available project materials:
Download Resources