
During this week, we explored and compared different tools to create interfaces for communicating with users or devices. The goal was to evaluate how intuitive, flexible, and efficient each environment is for prototyping or deploying an interface. While we did not connect to a board, we focused on understanding workflows, use cases, and outputs of each tool.
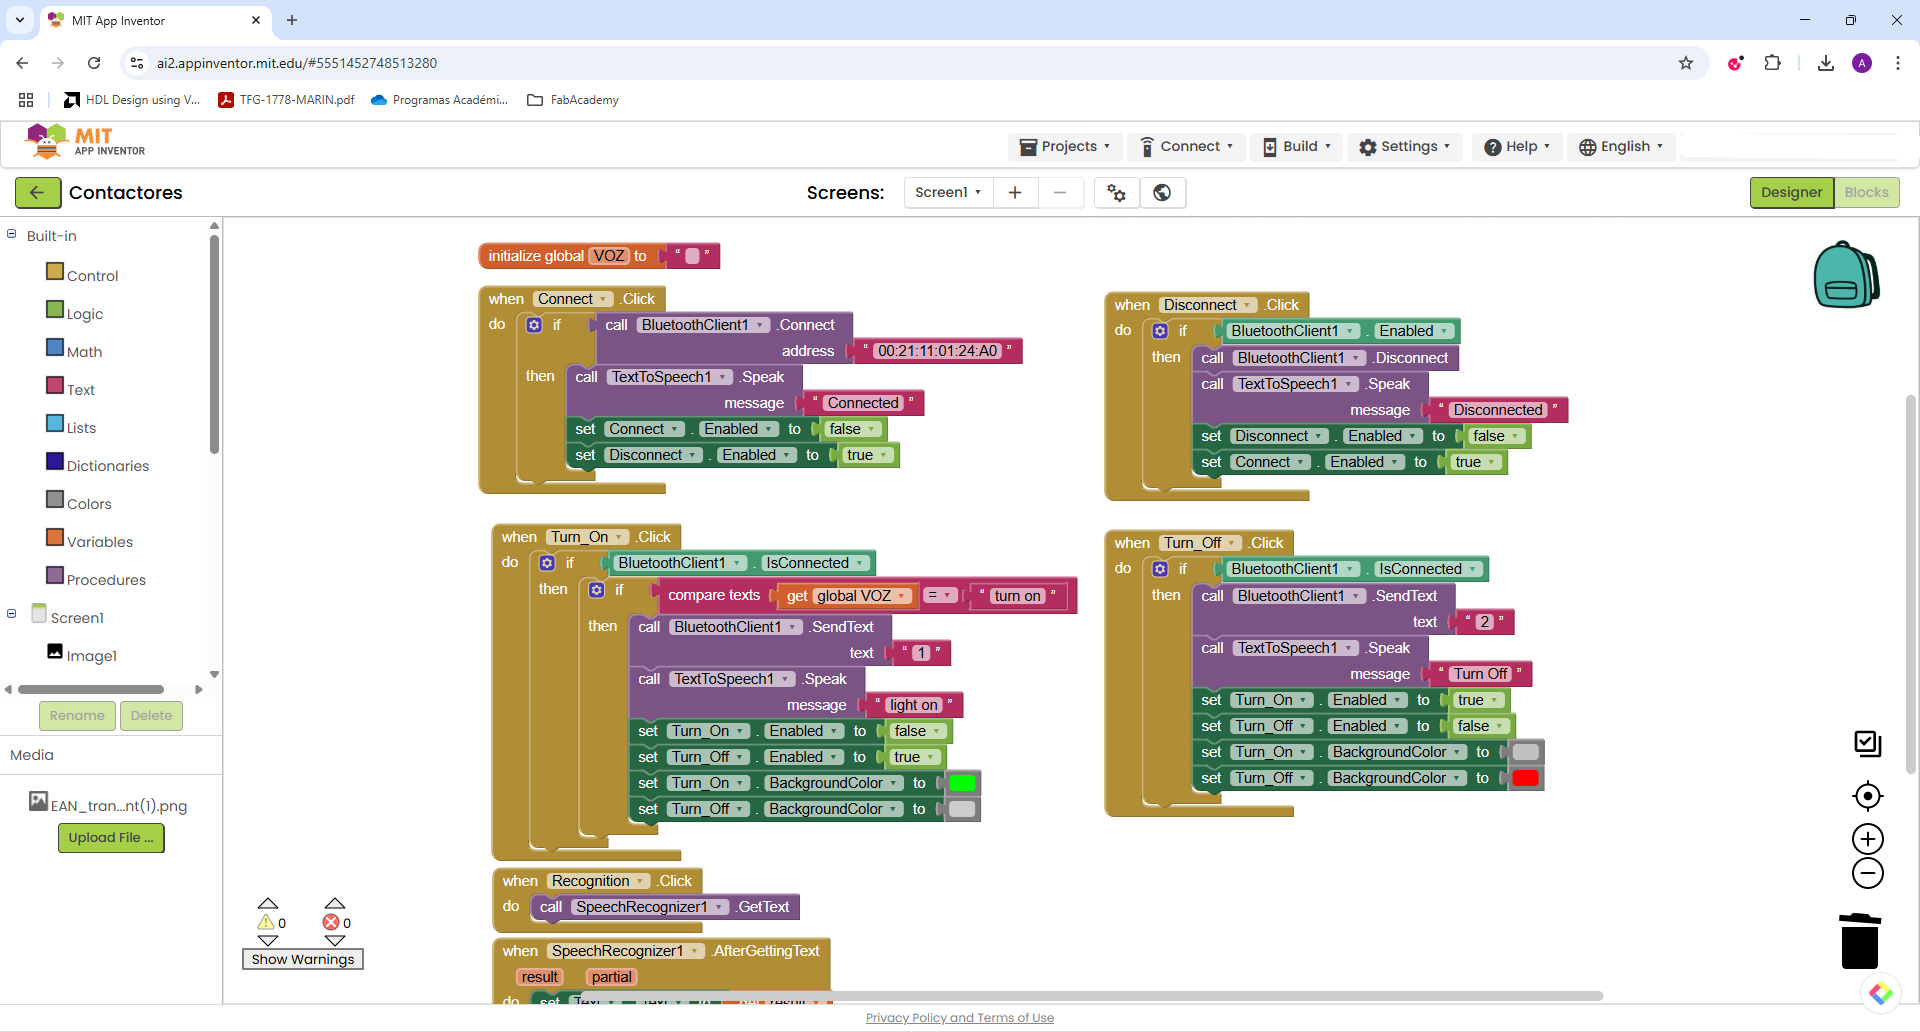
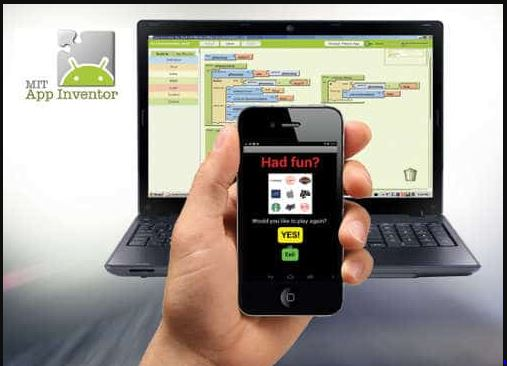
Used to build a mobile app for Android. Offers drag-and-drop logic blocks and visual UI design. This tool allows you to build different applications using the additional logic can work directly on the interface taking into account the features of mobile devices such as voice recognition, camera, gyroscope, accelerometer and others..
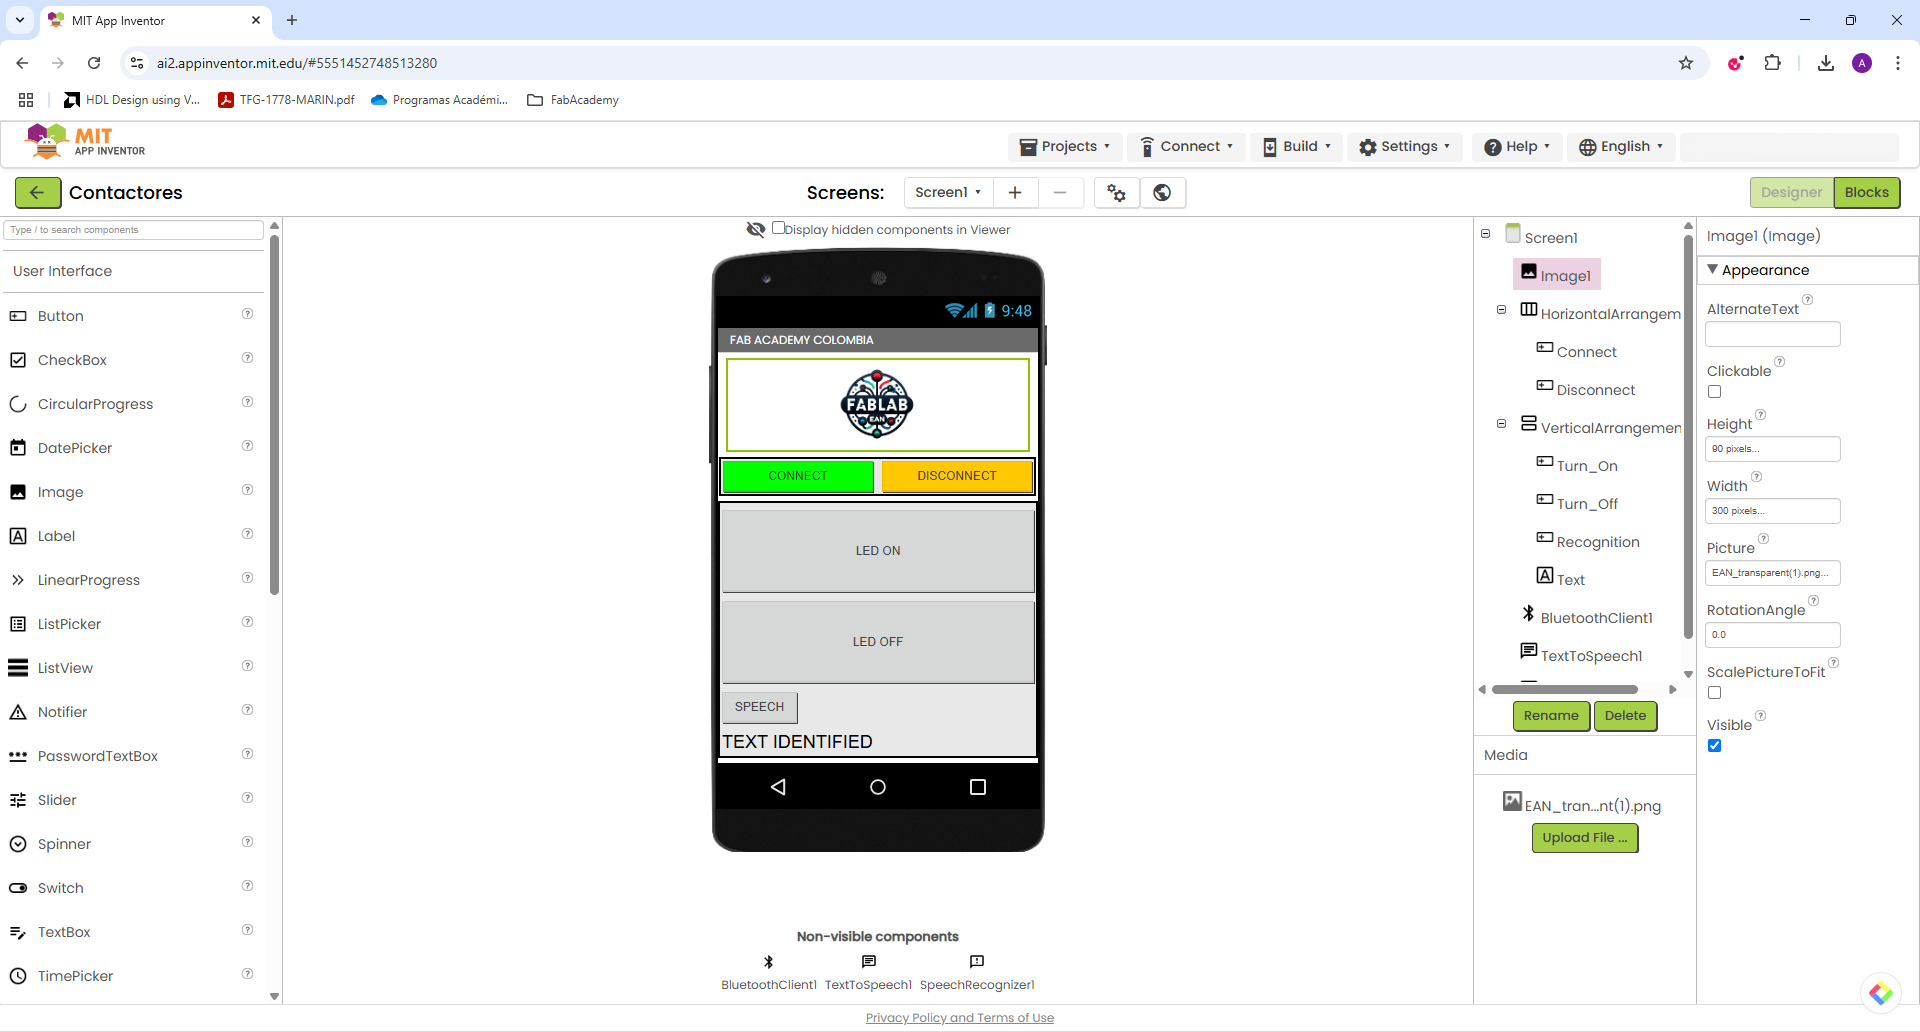
The tool has block programming that facilitates code development and allows you to think about the actions to be performed by the application instead of thinking about the specific development of the code. We must emphasize that the code that is visualized in the image has not yet been tested but is used as a reference, in the individual page you can see the correct operation and the final version of it.
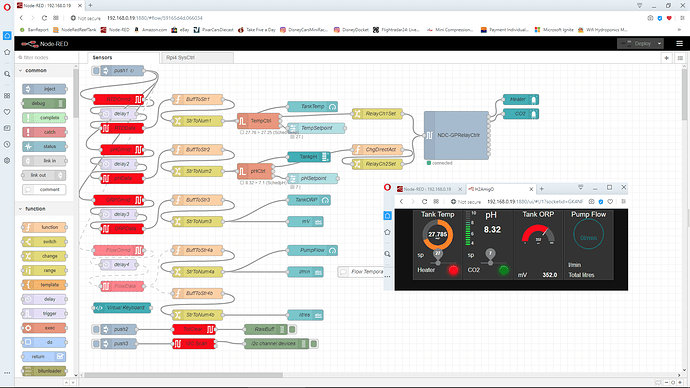
Node-RED is a visual programming tool that makes it easier to build and understand how data flows through a system. It runs in a browser and allows you to connect functional blocks called nodes using a drag and drop interface. What makes Node-RED powerful is how it simplifies tasks that would normally require complex code, especially when integrating sensors, APIs, and external services. It is possible that we consider using it in future assignments, particularly for designing dashboards or managing real-time data, since it offers a clear and efficient way to monitor system behavior without writing extensive code.
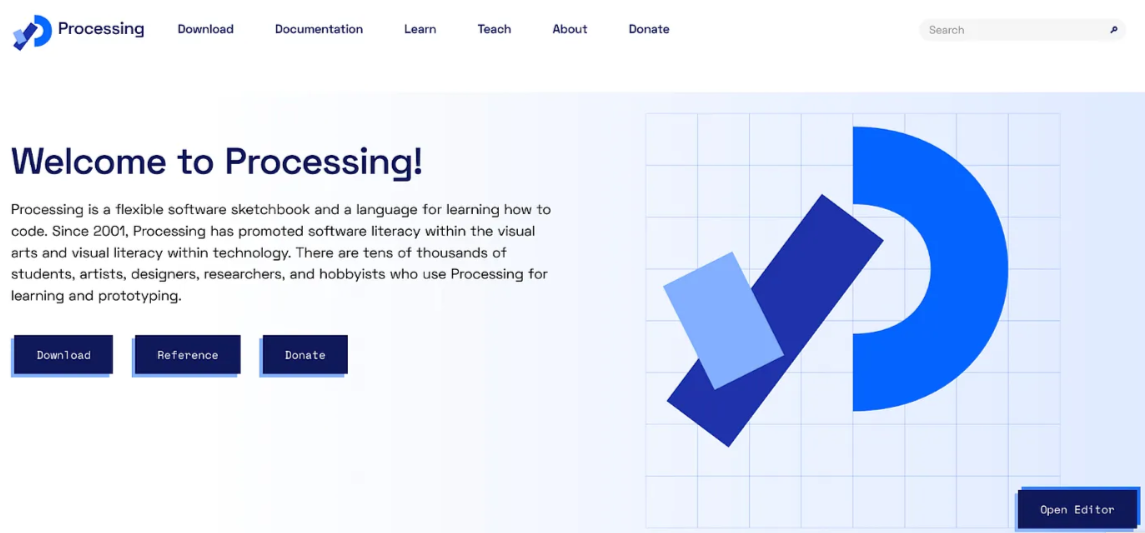
Processing is an open-source software sketchbook and language designed to make visual and interactive programming more accessible. It’s built on Java and has a simple syntax that allows users to create graphics, animations, and real-time interactions very quickly. Processing is especially strong when it comes to visual exploration whether you're plotting data, responding to user input, or generating dynamic visualizations. While it requires writing code, it’s intuitive and there are many examples. It’s possible that we consider using Processing when the goal is to build interfaces that respond visually in real time, or when we want to prototype user interactions in a graphical environment (for example, this week :D).
Python + Tkinter is a simple way to build basic desktop interfaces using Python. One of its main advantages is that it’s already included in the standard Python installation, so it’s easy to access and quick to test. Even though the interfaces it produces are not visually complex, they’re functional and good enough when the goal is to display buttons, labels, or input fields. It’s the kind of tool we might consider using when we need to create something local, lightweight, and fast without depending on a browser or external frameworks.
We decided to compare tools that offer different ways to create user interfaces, not only in terms of how they look but also in how they’re built and used. Our goal was to include options that range from visual programming to code based environments, and from mobile platforms to desktop or browser-based tools. These tools were chosen because they’re accessible, widely used, and allow us to experiment with different types of interaction—from simple buttons and labels to more dynamic dashboards or animated visuals. By exploring different approaches, we have a better idea of which tool is best suited to the project we defined in the first week of the fab academy.
| Tool | Interface Type | Ease of Use | Requires Coding? | Platform | Operating System | Underlying Language | Best For |
|---|---|---|---|---|---|---|---|
| MIT App Inventor | Drag-and-drop (Mobile) | Very Easy | No | Android (App Output) | Web-based (any OS) | Java / Blockly | Rapid mobile app prototyping |
| Node-RED | Flow-based (Web) | Easy | No (but logic is visual) | Browser | Linux, Windows, macOS | JavaScript (Node.js) | IoT dashboards and data interaction |
| Processing | Code-based (Graphical) | Medium | Yes | Desktop | Windows, macOS, Linux | Java | Visual interaction and animations |
| Python + Tkinter | Code-based (Desktop GUI) | Medium | Yes | Desktop | Windows, macOS, Linux | Python | Simple local control interfaces |

PyQt5 is a set of Python bindings for Qt, used to create desktop applications with a modern GUI. It requires some knowledge of Python programming and is suitable for more complex PC-based interfaces.
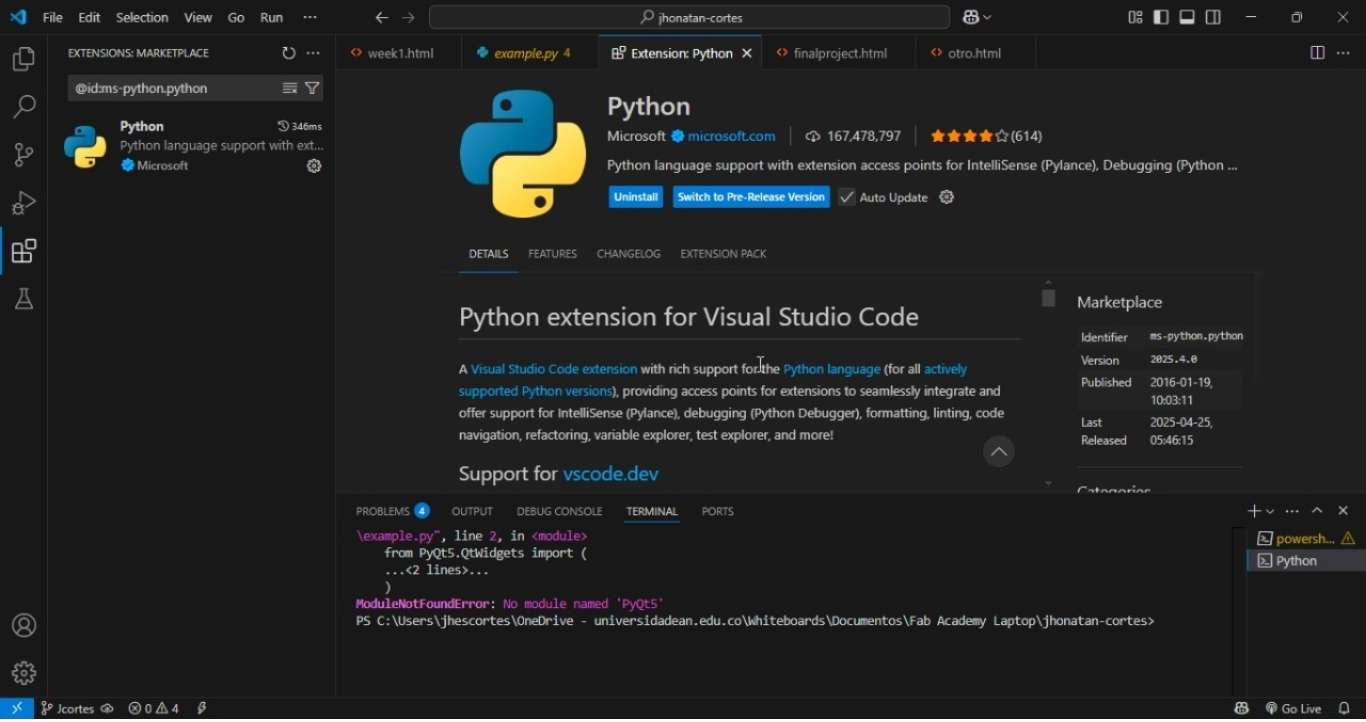
To work with PyQt5, I used Visual Studio Code as the development environment. It’s essential to have Python and the PyQt5 package installed beforehand, and to ensure the environment is properly configured to run and debug graphical applications directly from the editor.
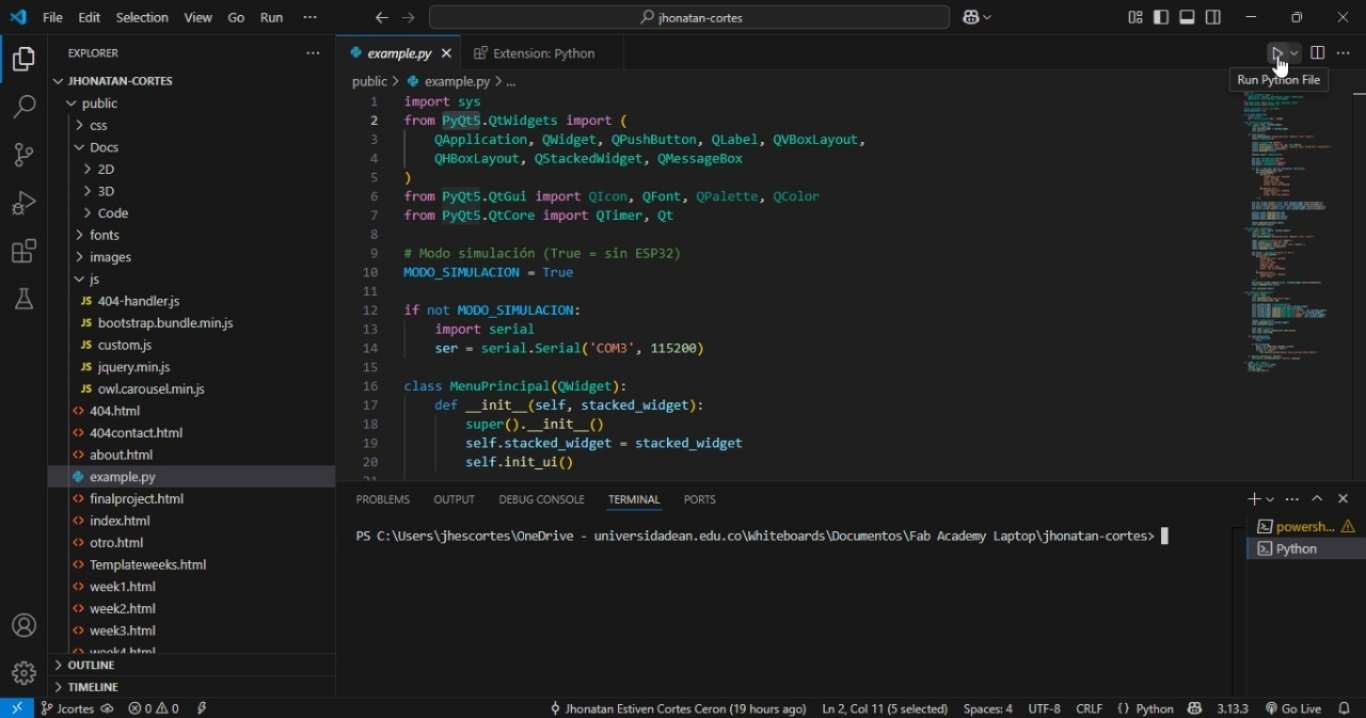
Using Python and with the help of both the official documentation and ChatGPT, I was able to debug a basic script by fixing the errors that were preventing it from running. After installing the Python extension in Visual Studio Code, the script can be executed directly using the "Play" button located in the top-right corner of the editor.
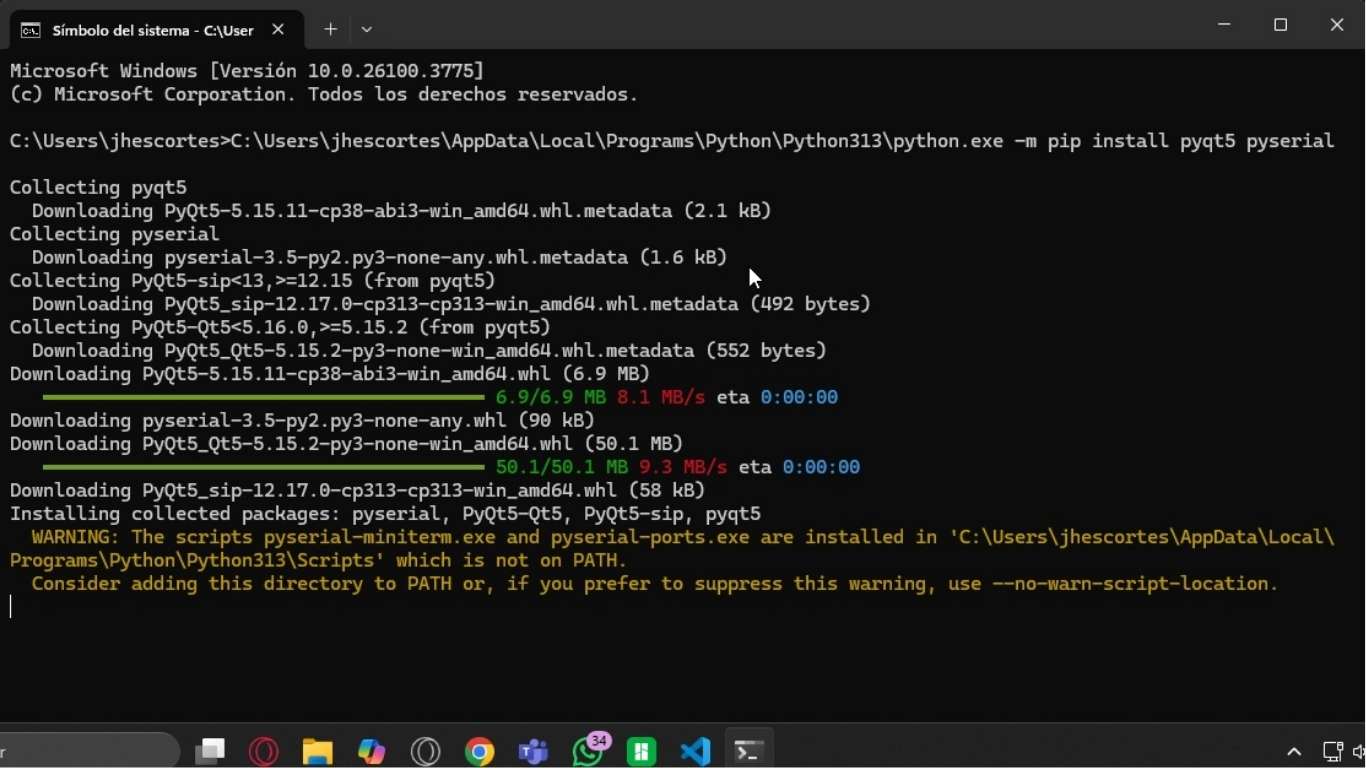
It is important to check the correct installation of both Python and PyQt5 if the code fails to run and an error appears. On this laptop, I didn't have a compatible version of Python installed for PyQt5, so I had to reinstall it to resolve the issue.
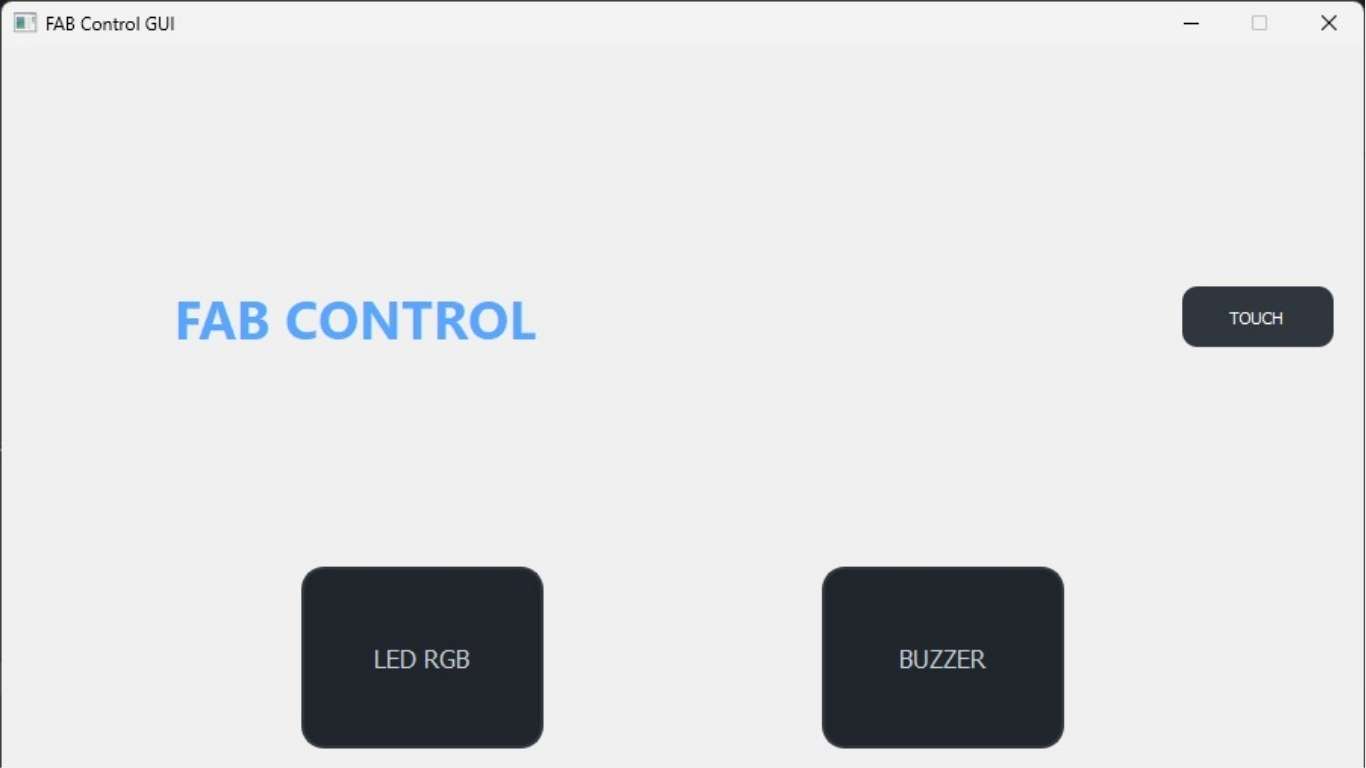
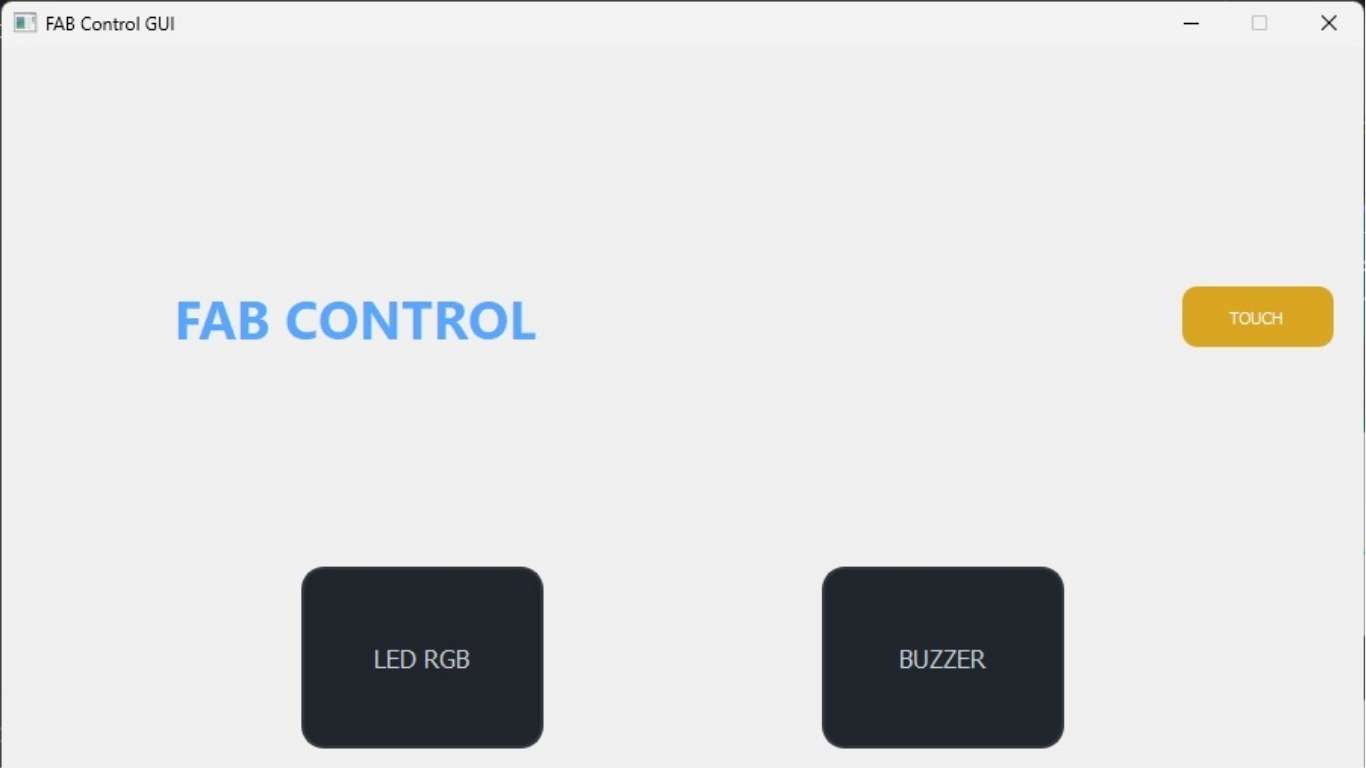
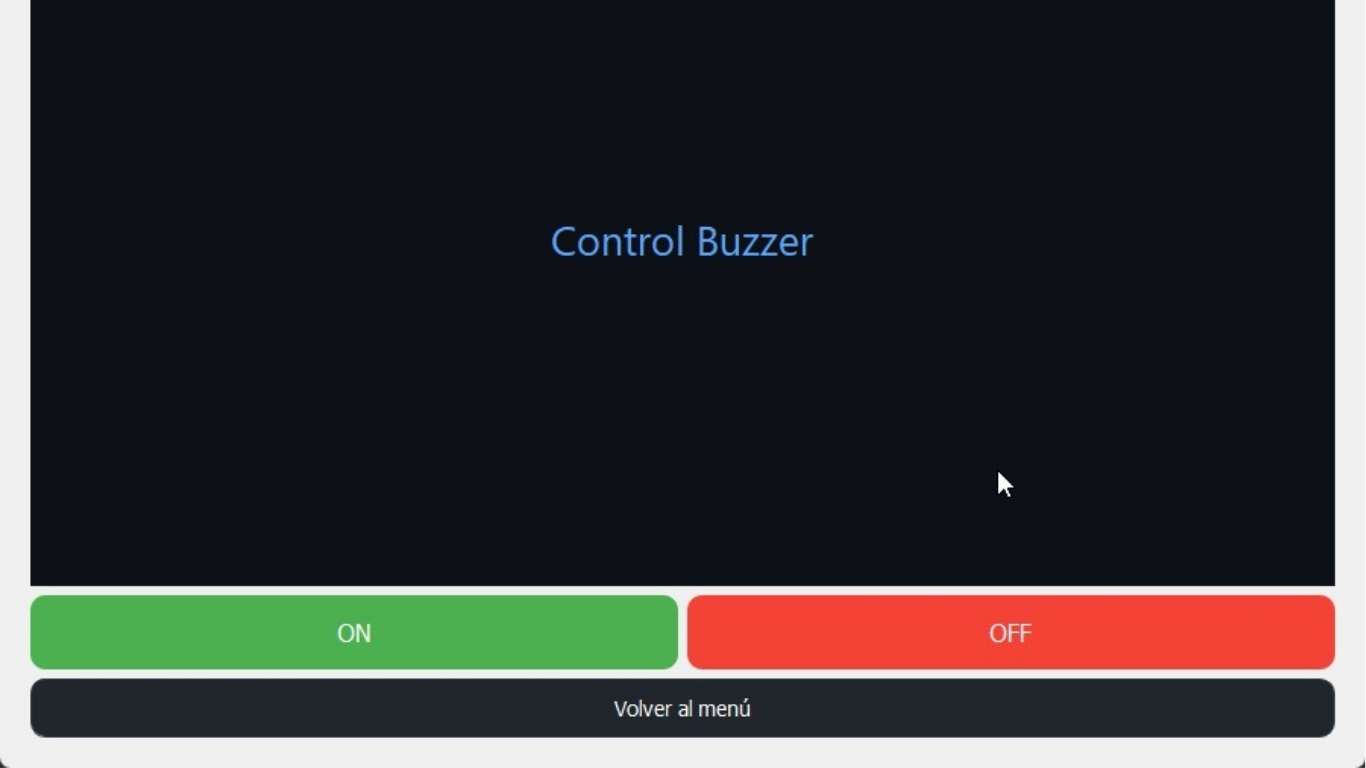
This is the initial menu, where we can access either of the two available actuators. Additionally, at the top of the screen, there is a touch button that turns gold when pressed, providing clear visual feedback of the interaction.
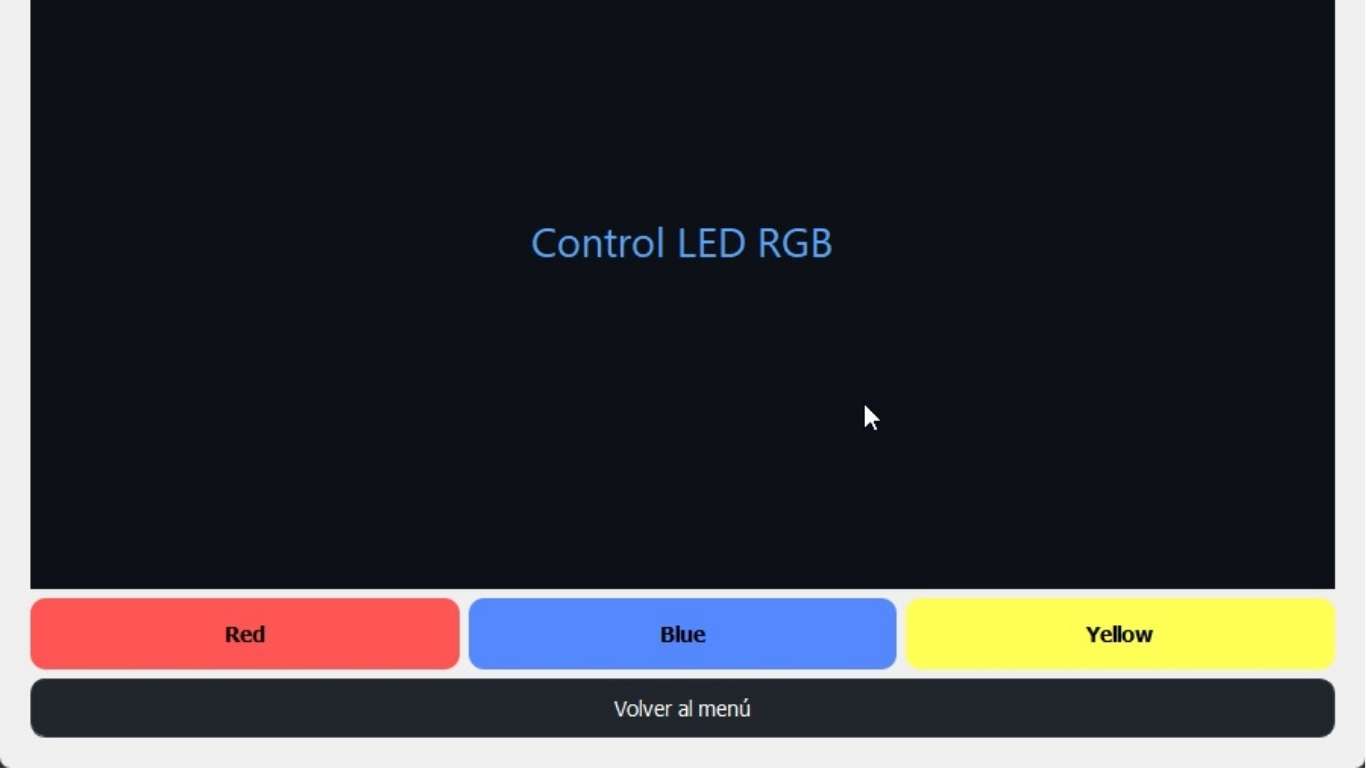
As shown here, I also have the option to access one of the specific sections, where I can control the actuators, each with its own dedicated menu.
MIT App Inventor is a block-based programming tool for building Android apps. It uses drag-and-drop components, making it ideal for beginners.

Initial loading screen designed to provide a brief delay while essential resources—such as images, fonts, and system configurations—are being loaded.
This is an introductory video designed to create a visually appealing first impression of the app and enhance its overall aesthetics. It also serves as a smooth transition while resources are initialized in the background.
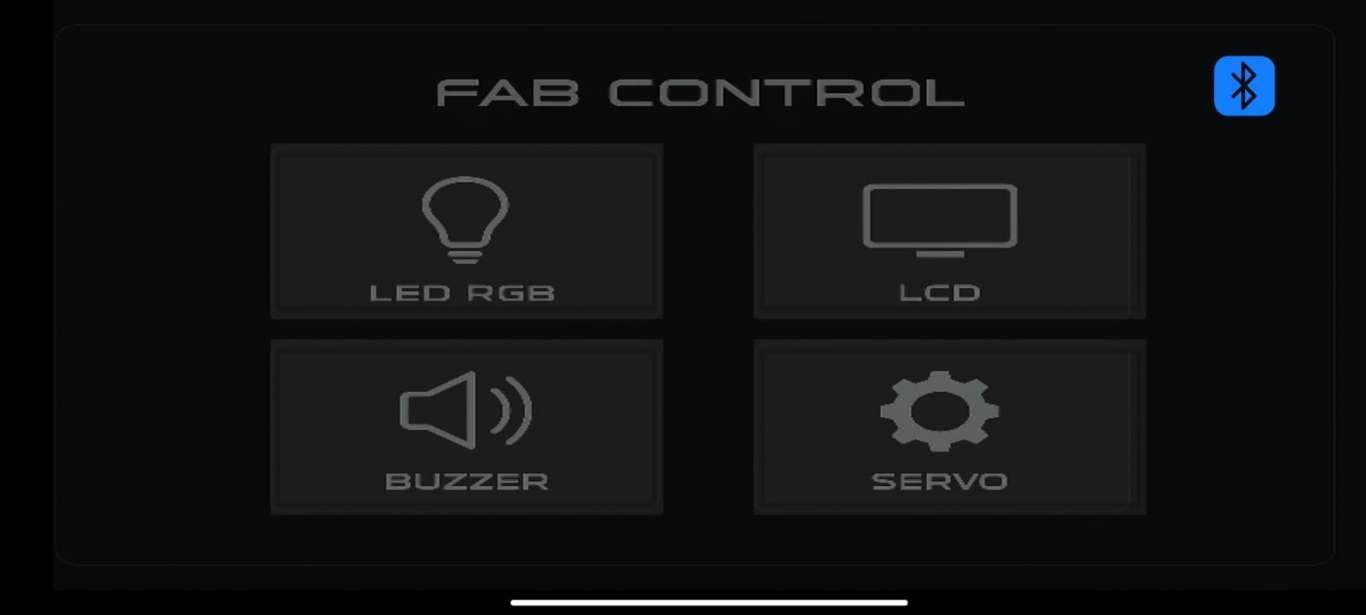
Initial menu where the user can establish a Bluetooth connection with the ESP32 device. This screen serves as the starting point for pairing the app with the microcontroller, allowing the user to select the available device and initiate communication.
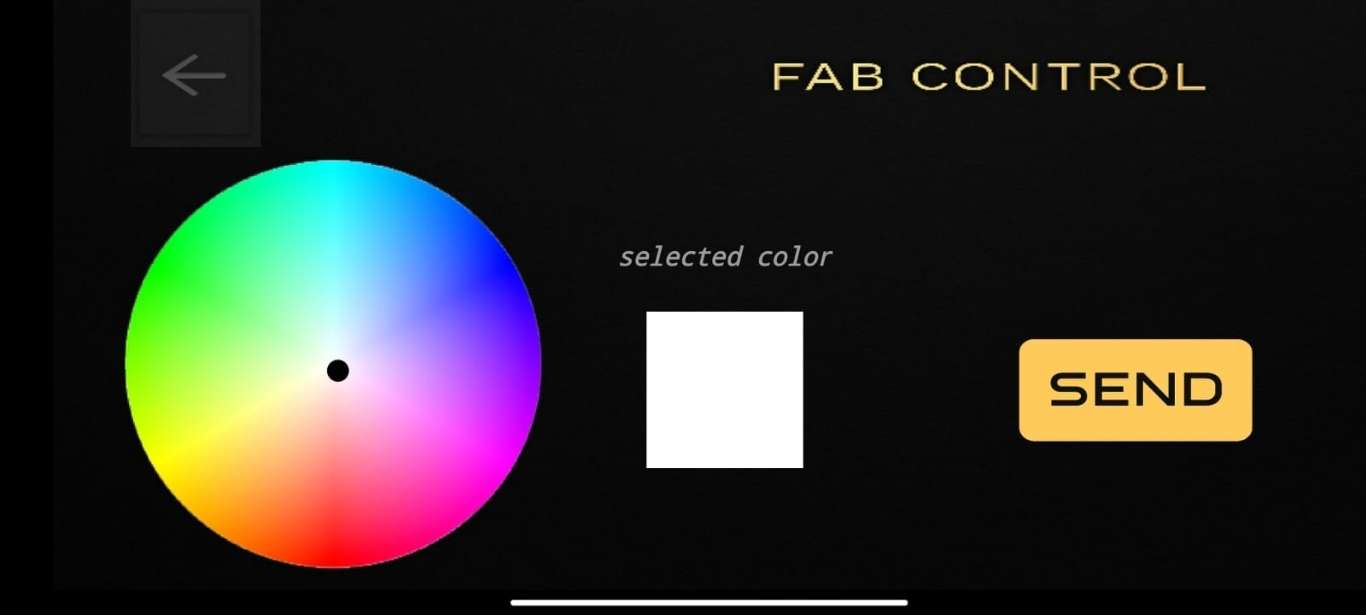
This is one of the app's screens, featuring a color picker that allows the user to choose a specific hue. The selected value is sent to the ESP32, which controls an RGB LED to display the chosen color in real time.
Kodular is an advanced version of App Inventor with more customization and visual components. It's great for building polished Android apps without writing code.
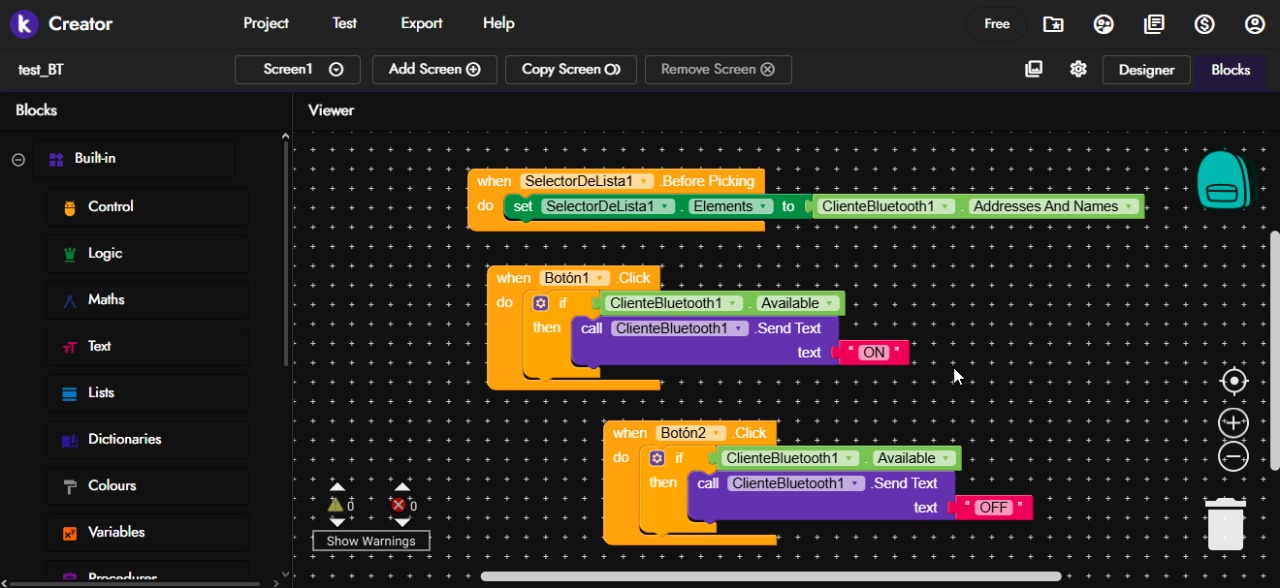
An overview of the Kodular environment and its block-based programming system (Blockly-style). As mentioned earlier, clicking on one of the interface buttons sends a message to the ESP32, provided that a Bluetooth connection is active.
As highlighted in the comparison, Kodular includes a broader range of extensions, visual components, and customization options than other App Inventor-based platforms. It even supports the integration of new features via external add-ons, significantly expanding its development capabilities.
It even supports direct serial communication from a mobile device using the Arduino extension available in Kodular. This allows for sending and receiving data over the serial port, expanding the range of interaction with microcontrollers without requiring an intermediate interface.
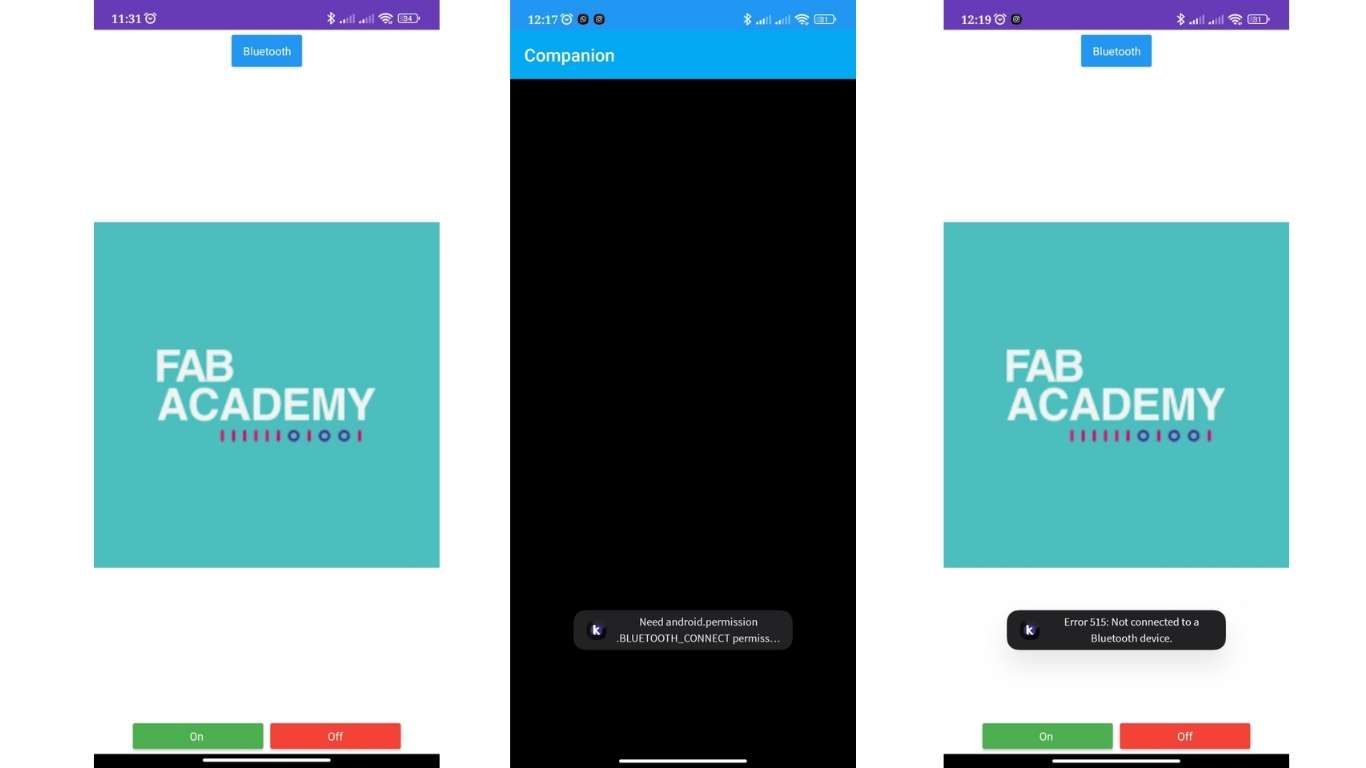
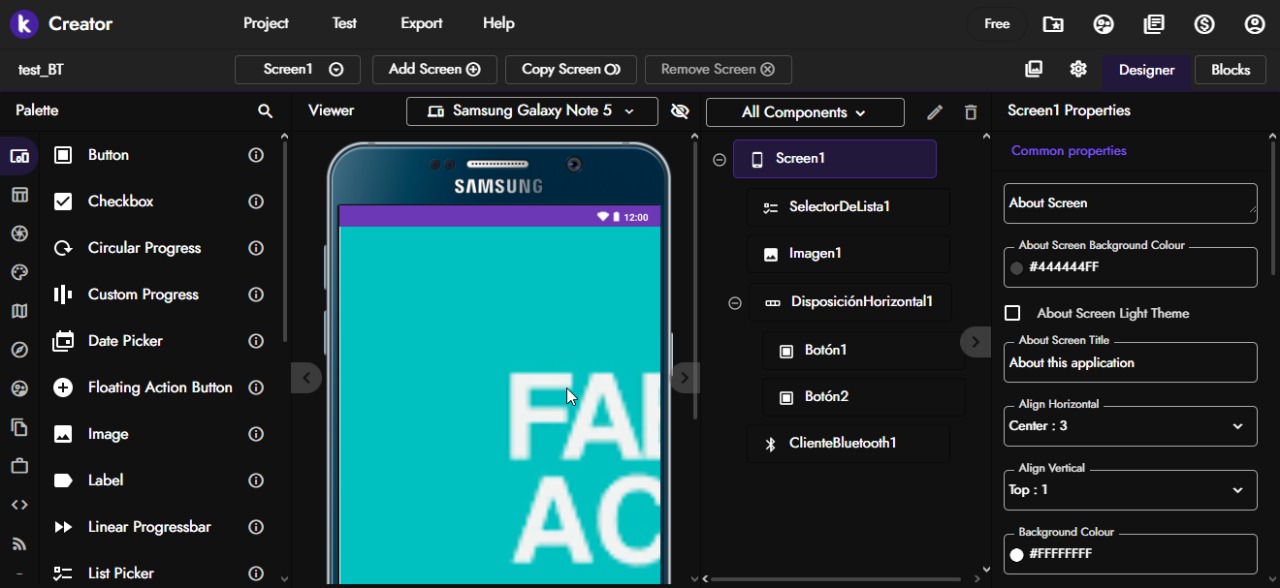
This is how the interface appears on the mobile device. So far, only a single screen has been created. At the top, there is a button to open the list of available devices and pair via Bluetooth. At the bottom, there are buttons to turn the LED on or off. When everything is working correctly, no error messages should appear.

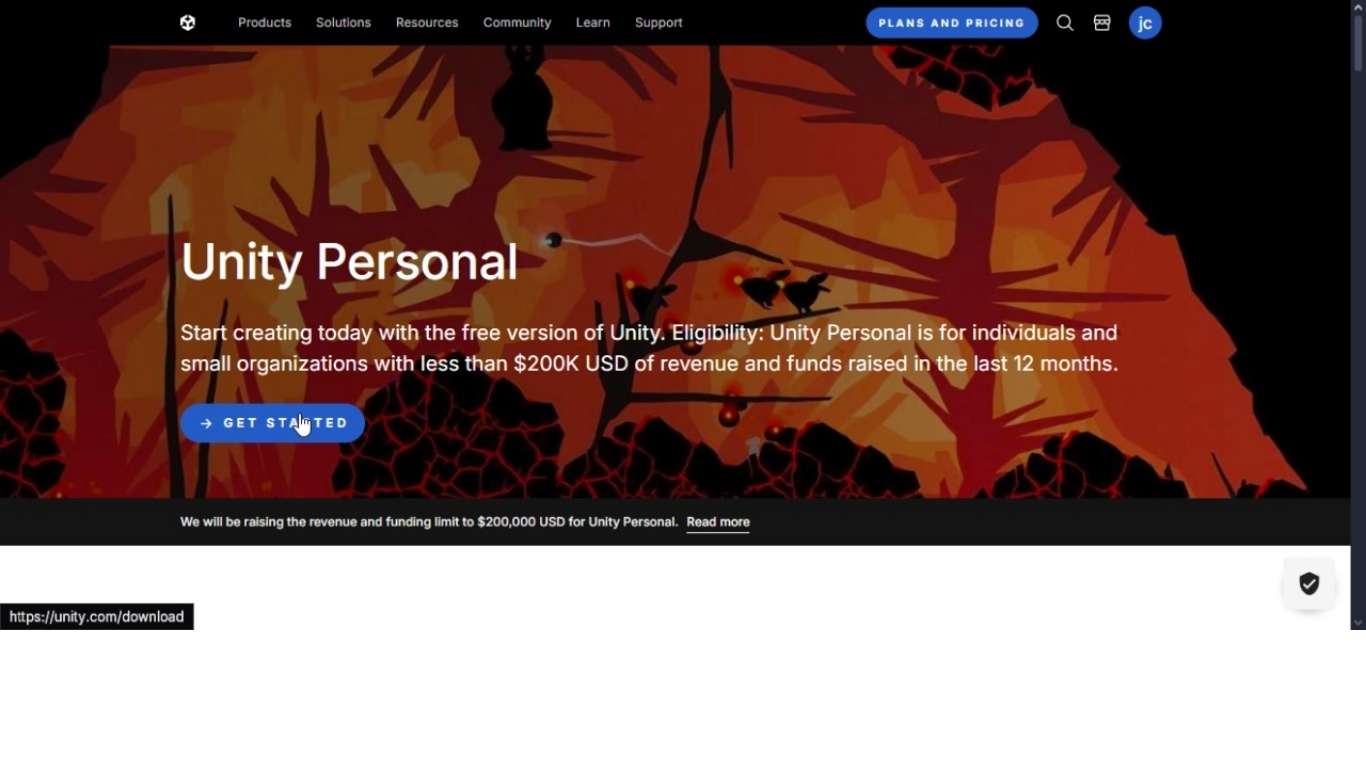
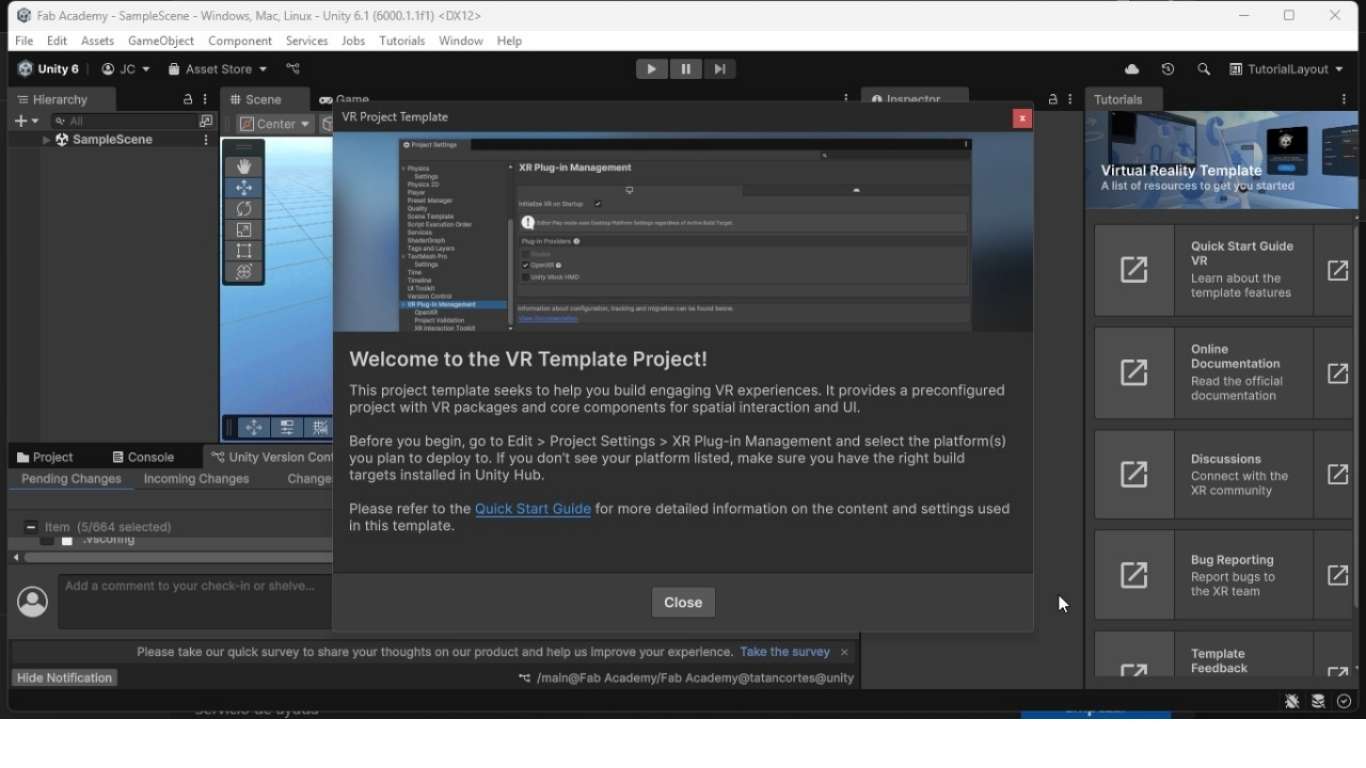
Unity is a powerful game engine used to build immersive 3D and VR applications. With Meta devices, you can create virtual environments that interact with hardware like the ESP32. Requires experience in C# and networking.
The process in Unity is more time-consuming and complex, requiring both programming experience and design knowledge. Additionally, the installation and initial setup of the environment can take a considerable amount of time, and a high-performance computer is necessary to ensure a smooth development experience.
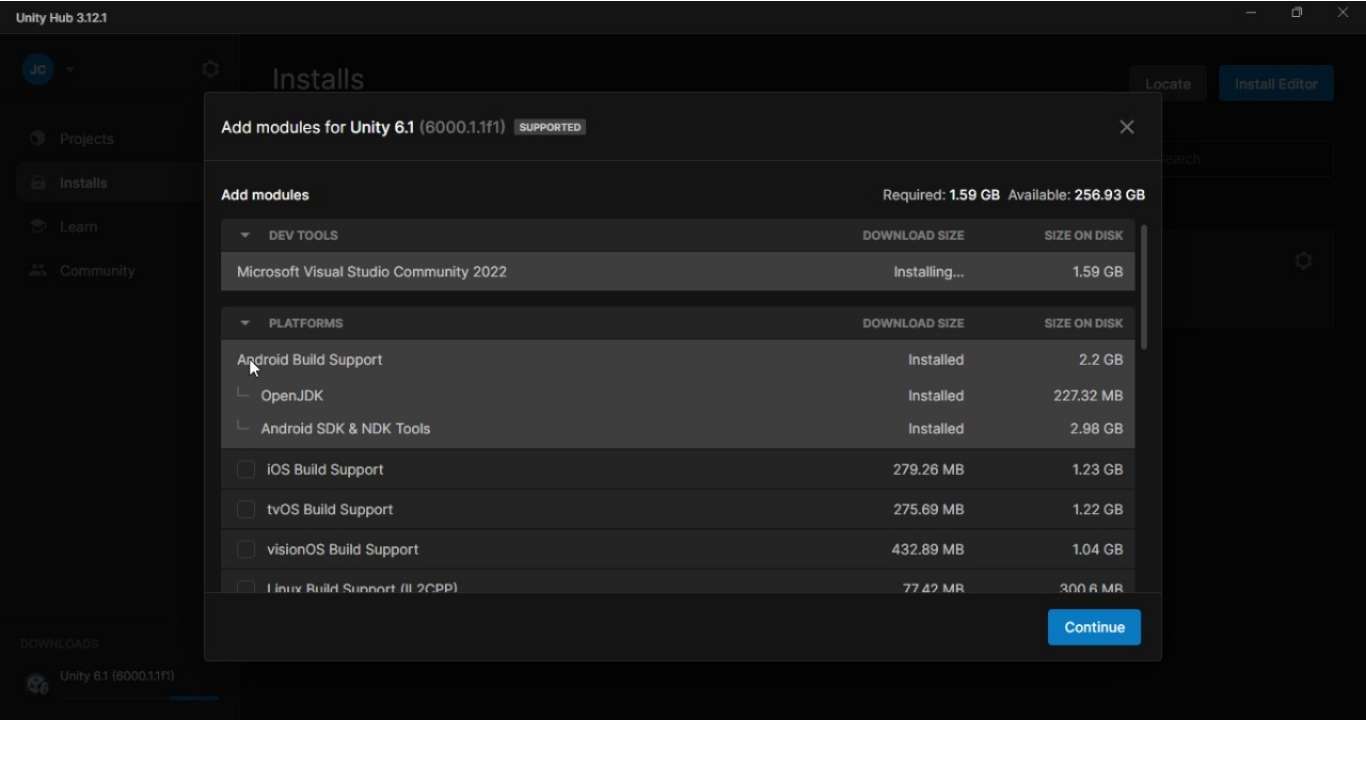
The Oculus run on Android, so it is necessary to install the required plugins for this platform.
Once installed, we need to add all the necessary assets and plugins to run the project on the headset. Packages
Para usar las gafas, es requisito tener los drivers instalados junto con el programa correspondiente, por lo que también los estamos instalando mientras el resto se configura.
Now we enable the VR modules in Unity and configure the experience to run on the headset.
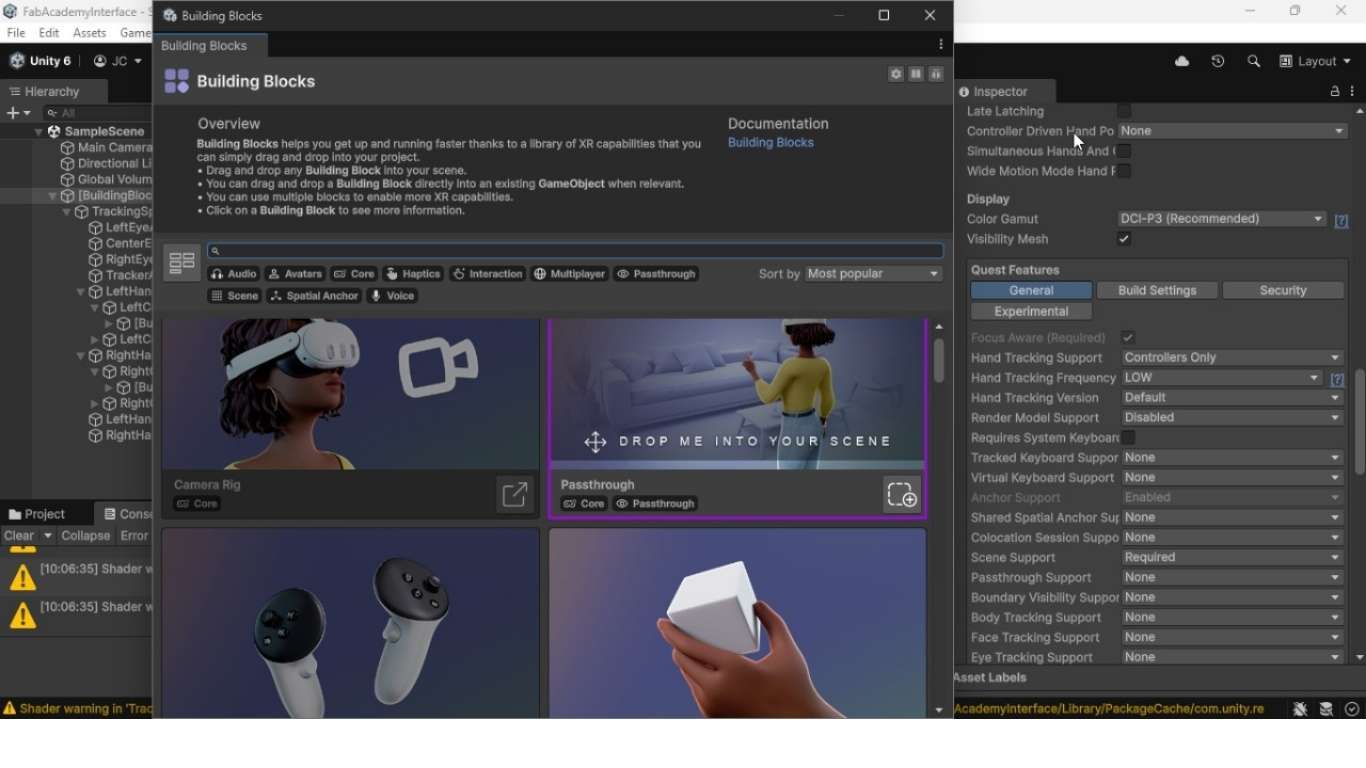
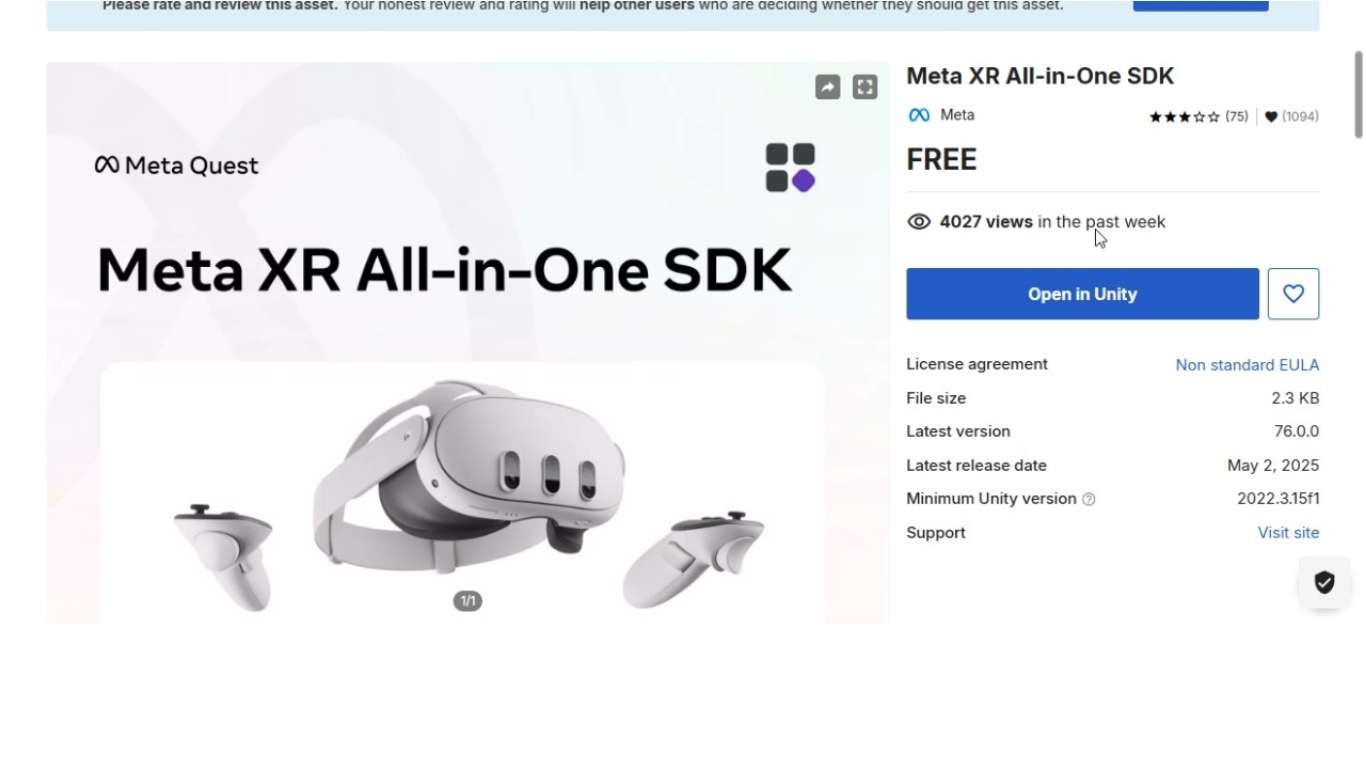
Unity, being a collaborative platform with Meta, already includes pre-programmed blocks for interactions, making the work faster and easier when creating VR experiences. I’ve used blocks for the controls, the camera, and object touch interactions for buttons.
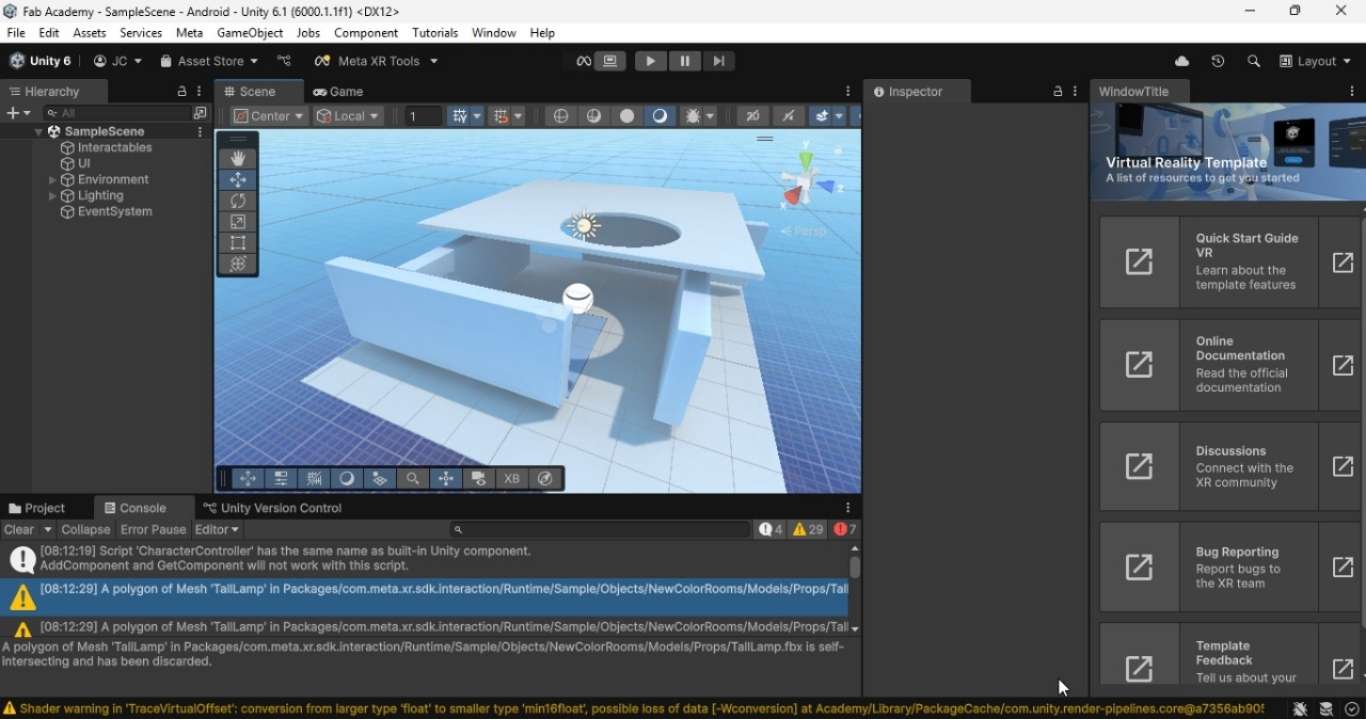
Later, you can either use a scene package or create your own. I will use a default one, where I’ll place a table with some buttons for interaction.
Unity allows working with Python to program the actions performed at each instance. Using the MQTT protocol, as covered in week 11, the data is sent via WiFi to the ESP32, and depending on the selected button, the RGB LED is turned on.
Processing is a visual programming language based on Java, commonly used in the creative arts and prototyping. It's beginner-friendly and works well for serial or network-based projects.
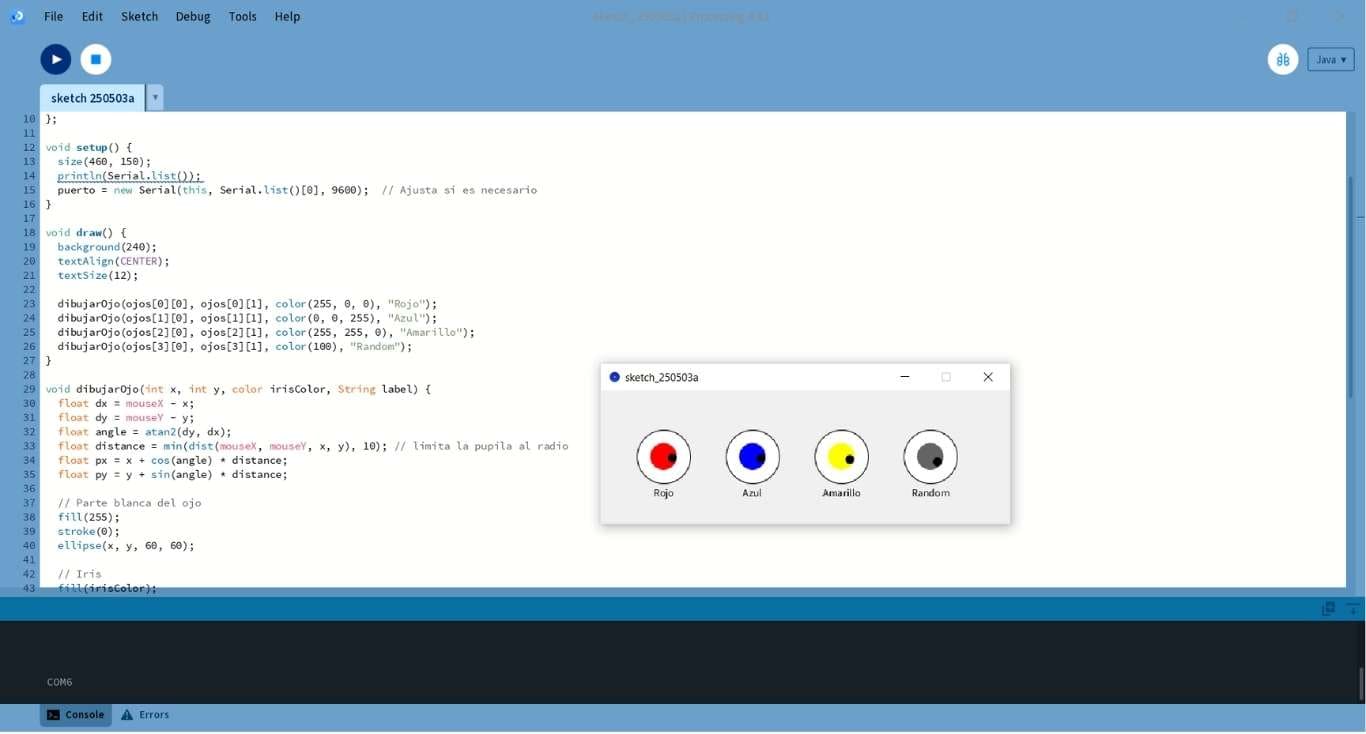
For the Processing exercise, we used an ESP32-C3 connected to a Neopixel LED strip. The graphical interface featured a set of eye-shaped colored circles, each corresponding to a specific LED color that could be activated. When a user clicked on the red "eye", for instance, a serial command was sent from Processing to the ESP32-C3, which then lit the LED in red. The same mechanism was used for blue, yellow, and a random mode where the ESP32-C3 would select and display a color at random. This project illustrates key concepts such as serial communication between a PC and microcontroller, RGB LED control, and real-time interactive GUI design for embedded systems.
This is an example of how the system operates. One of the most visually appealing features of the project was that the "eyes" in the graphical interface were not static. Instead, they dynamically tracked the mouse cursortracked the mouse cursor in real time. Each eye rotated to follow the cursor’s position, simulating natural eye movement and giving the GUI a lifelike, interactive quality.
This behavior was implemented by calculating the angle between the center of each eye and the current cursor location, then updating the position of the pupil accordingly. The result was a smooth animation that made the eyes appear to "look" at the user as they moved the mouse. This added not only an aesthetic touch but also enhanced the user experience, making the interface feel more engaging while still serving as a control layer for sending commands to the ESP32-C3 over serial communication.
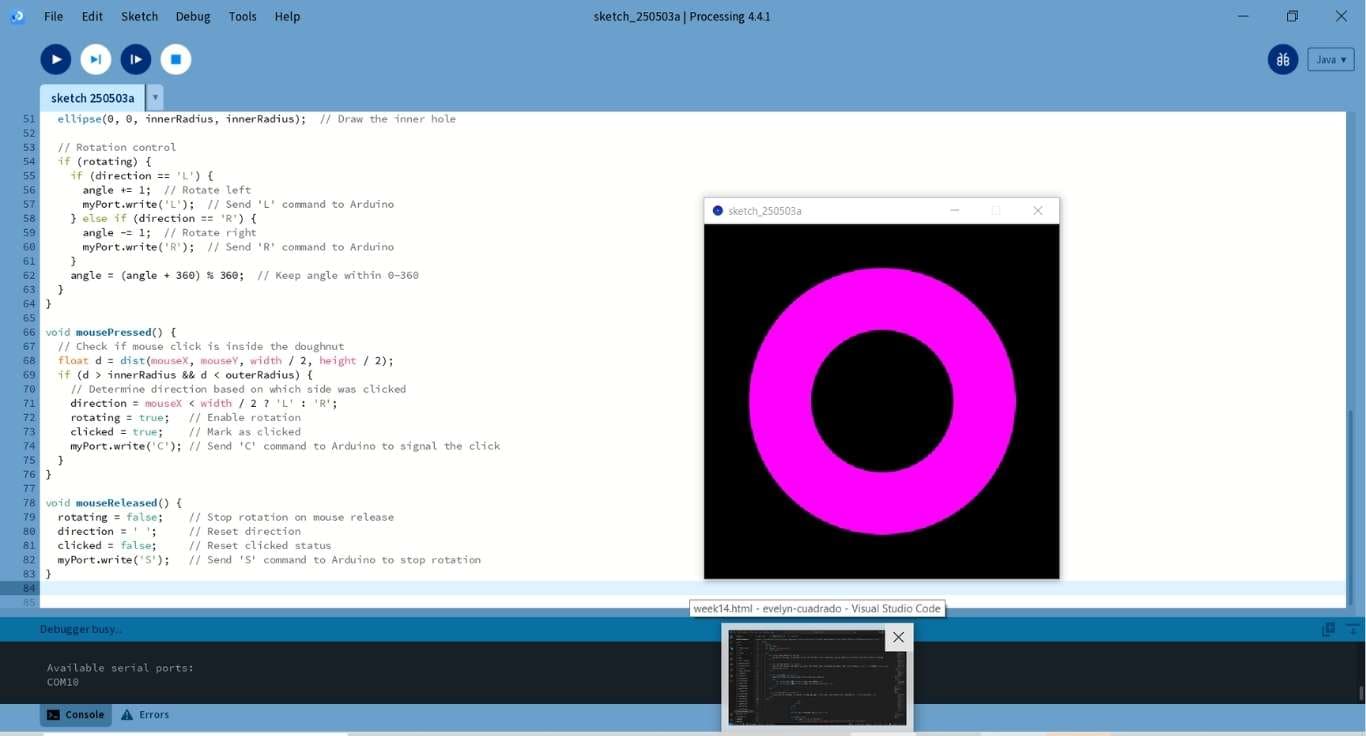
For the servo motor control example, we initially attempted to use the ESP32-C3, but encountered issues related to PWM signal timing and inconsistent servo behavior. While the ESP32-C3 is capable of generating PWM signals, we noticed erratic movement and latency—likely due to internal clock handling or task scheduling conflicts that interfered with precise timing.
As a solution, we switched to the RP2040, which features dedicated hardware PWM and programmable I/O (PIO) blocks that allow for much more accurate signal generation. With the RP2040, the servos responded quickly and consistently, resulting in smoother operation and a more reliable control setup.
| Tool | Interface Type | Difficulty Level | Target Platform | Requires Programming | Communication Method | ESP32 | ESP32-C3 | RP2040 | Example Use |
|---|---|---|---|---|---|---|---|---|---|
| PyQt5 | Desktop (PC) | Medium | Windows, Linux, macOS | Yes (Python) | Serial | ✅ | ✅ | ✅ | GUI with buttons to turn LED on/off via serial |
| MIT App Inventor | Mobile (Android) | Very Low | Android | No (Blocks) | Bluetooth (Classic or BLE) | ✅ | ⚠️ (BLE only) | ❌ | App with a button to send "ON"/"OFF" to ESP32 via Bluetooth |
| Kodular | Mobile (Android) | Low | Android | No (Blocks) | WiFi | ✅ | ✅ | ❌ | App with sliders/switches to control servos and LEDs over WiFi |
| Unity + Meta (VR) | Virtual Reality (VR) | High | Meta (Oculus), PC | Yes (C# and Networking) | WiFi/Network | ✅ | ✅ | ❌ | VR scene where a virtual switch triggers a buzzer on ESP32 |
| Processing | Desktop (PC) | Low to Medium | Windows, Linux, macOS | Yes (Java-based) | Serial | ✅ | ✅ | ✅ | Live graph displaying ESP32 sensor data over serial |
| Tool | Typical Use Cases | Workflow |
|---|---|---|
| PyQt5 | Desktop applications with graphical user interfaces (GUIs) in Python | Design GUI with Qt Designer → Generate Python code → Add logic in Python → Test and debug |
| MIT App Inventor | Basic Android apps for education, prototyping, and learning | Drag-and-drop UI components → Use blocks to program logic → Test on emulator/device → Package and export APK |
| Kodular | Android apps with more advanced features than App Inventor | Drag-and-drop UI → Add logic via visual blocks → Preview or test live → Export APK/AAB |
| Unity + Meta (VR) | Immersive virtual reality applications and games | Create 3D environment in Unity → Integrate Meta SDKs → Add interaction logic with C# → Build and deploy to Meta Quest devices |
| Processing | Creative coding, visual arts, and interactive media | Write sketches in Java-based language → Run and visualize → Iterate design with quick edits → Export if needed |
To complete this assignment, I met with my instructor Ronal Vilca, with whom I shared my research. I also compared different types of tools for creating interfaces that enable communication with a user (a person) or an electronic or computing device (such as a microcontroller, sensor, actuator, etc.), thus facilitating mutual interaction and control. The objective of this was to compare different tool options and assess their applicability based on the type of interface and the type of communication.
Platforms for developing Android mobile applications using visual block-based programming. They allow users to create interfaces with buttons, sliders, and sensors, and communicate with devices via Bluetooth or WiFi.
MIT App Inventor is a free, block-based programming platform that lets anyone create simple Android apps using a visual interface — no traditional coding needed. It was developed by the Massachusetts Institute of Technology (MIT).
Kodular is a no-code app development platform that allows you to create Android applications without writing traditional code. It uses a drag-and-drop block-based interface, similar to MIT App Inventor, but with more advanced features and a modern design.
Professional tools for user interface (UI) design. These tools do not provide functional interaction directly but are used to prototype the visual layout of interfaces before actual development.
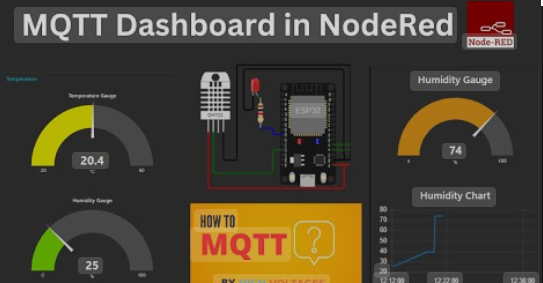
Node-RED Dashboard is a visual interface add-on for Node-RED, which allows you to create web-based user interfaces (UI) to interact with hardware, sensors, and APIs — like those on an ESP32-C3. It’s especially useful for IoT projects where you want to display data (like temperature or sensor readings) or control devices (like turning on a light or motor) from a browser.
| Tool | Interface Type | Ease of Use | Requires Coding? | Platform | Operating System | Underlying Language | Best For |
|---|---|---|---|---|---|---|---|
| MIT App Inventor | Drag-and-drop (Mobile) | Very Easy | No | Android (App Output) | Web-based (any OS) | Java / Blockly | Mobile apps for controlling devices |
| Kodular | Drag-and-drop (Mobile) | Very Easy | No | Android (App Output) | Web-based (any OS) | Java / Blockly | Feature-rich mobile app creation |
| Figma / Adobe XD | Visual Design (Prototyping) | Very Easy | No | Web / Desktop (Design only) | Windows, macOS, Linux | — | UI/UX interface mockups and planning |
| Node-RED Dashboard | Flow-based (Web Dashboard) | Easy | No (visual logic only) | Browser (IoT/Web) | Linux, Windows, macOS | JavaScript (Node.js) | IoT control panels and real-time monitoring |
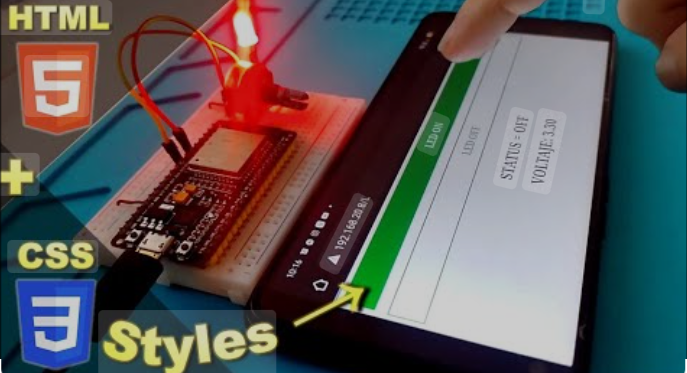
HTML, CSS, and JavaScript work together to build complete, functional web pages. HTML defines the structure, CSS handles the layout and appearance, and JavaScript adds interactivity and dynamism. These three languages work together to create a complete web experience, where structure is defined by HTML, design by CSS, and interactivity by JavaScript.
To create a web interface to control or interact with an ESP32-C3 XIAO microcontroller, you can use HTML + CSS + JavaScript for the client side (UI), and the ESP32-C3 can host that interface or communicate with it over WiFi.
It is an open-source, easy-to-use Java-based programming language and integrated development environment for teaching and producing multimedia and interactive digital design projects. It was pioneered by Ben Fry and Casey Reas, both members of the Aesthetics and Computation Group at the MIT Media Lab, led by John Maeda.
Processing is a flexible software sketchbook and a programming language built on Java, designed for artists, designers, educators, and beginners to create visual art, interactive graphics, and animations easily.
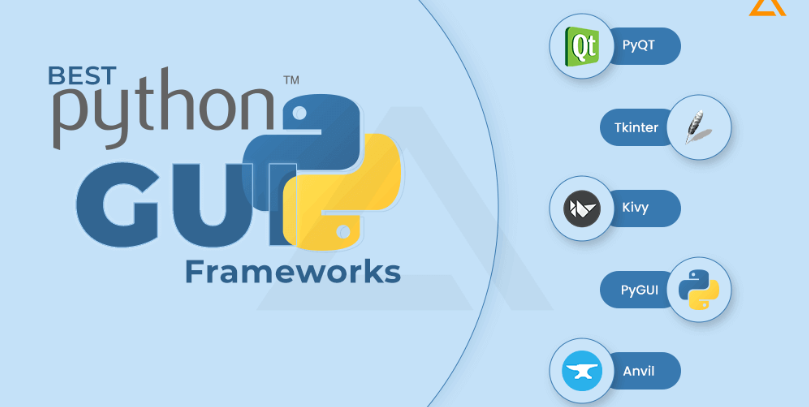
Tkinter, PyQt, and Kivy are graphical user interface (GUI) frameworks for Python. Tkinter is a standard, easy-to-use library ideal for simple projects. PyQt is a more robust framework that offers a wide range of widgets and features, ideal for more complex projects and desktop applications. Kivy focuses on touch and cross-platform interfaces, making it a good choice for mobile and tablet applications.
| Tool | Interface Type | Ease of Use | Requires Coding? | Platform | Operating System | Underlying Language | Best For |
|---|---|---|---|---|---|---|---|
| HTML + CSS + JavaScript | Code-based (Web Interface) | Medium | Yes | Browser | Any (Windows, macOS, Linux) | HTML / CSS / JavaScript | Responsive and dynamic web interfaces |
| Processing / p5.js | Code-based (Creative Coding) | Easy to Medium | Yes | Browser / Local App | Any (Windows, macOS, Linux) | Java (Processing) / JavaScript (p5.js) | Interactive visuals and generative art |
| Tkinter / PyQt / Kivy | Code-based (Desktop GUI) | Medium to Hard | Yes | Desktop App | Windows, macOS, Linux | Python | Standalone desktop apps with full GUI |
This week's group assignment focused on comparing three different tools used to create user interfaces for interacting with embedded systems. The aim was to evaluate each tool’s strengths, weaknesses, and applicability in educational or prototyping contexts.
| Tool | Type | Strengths | Limitations | Device Used |
|---|---|---|---|---|
| MIT App Inventor | Visual (Mobile) | Easy to learn, ideal for beginners, fast prototyping | Limited design flexibility and professional polish | ESP32 |
| Blynk | IoT Dashboard | Widget-based, fast connection, supports sensors & GPIO | Requires internet (for cloud), limitations in free tier | ESP32 |
| Flutter | Cross-platform App | Beautiful, customizable UI, full control | Higher complexity, requires Dart and setup | ESP32 |
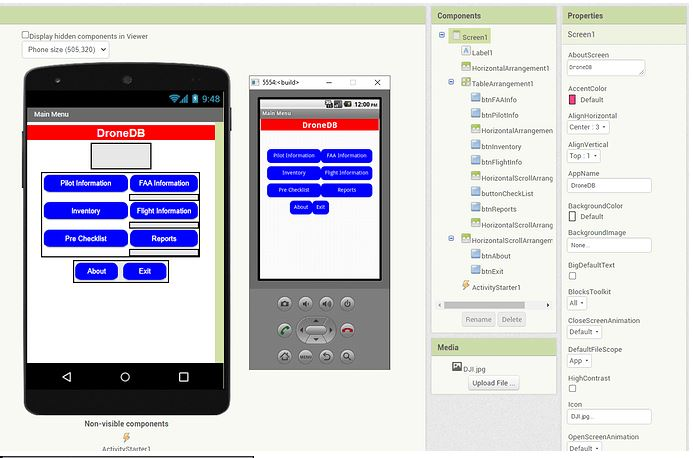
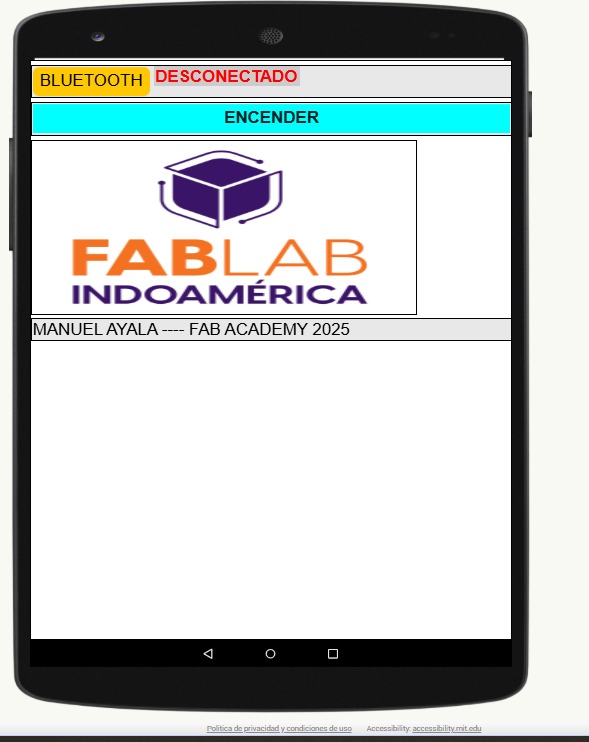
For this assignment, we created a prototype mobile application using MIT App Inventor, a free online tool widely used for educational and prototyping purposes. It offers a block-based programming environment that allows users to build functional apps without deep knowledge of syntax-based coding.
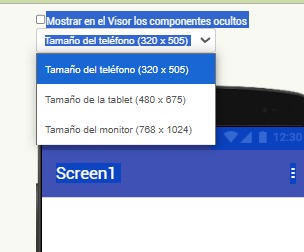
The application was designed to work with Bluetooth connectivity to interface with an embedded device (ESP32). We selected the Android 5+ profile and adjusted the screen size to simulate different devices for responsive layout testing.

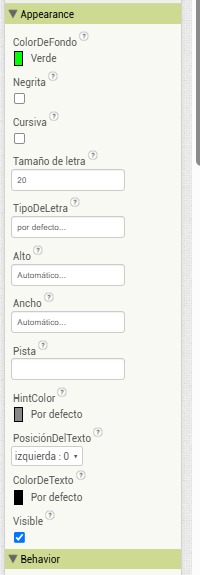
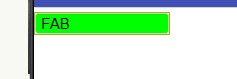
We added a user interface button labeled FAB and configured its appearance parameters such as background color (green), font size, and alignment. This allowed for visual feedback and interaction on mobile devices.
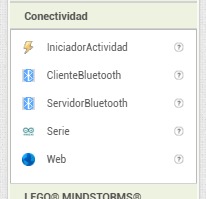
To enable communication with the ESP32 board, we used the built-in connectivity components of App Inventor. These include the BluetoothClient and BluetoothServer components, which allow the app to send and receive data via Bluetooth.
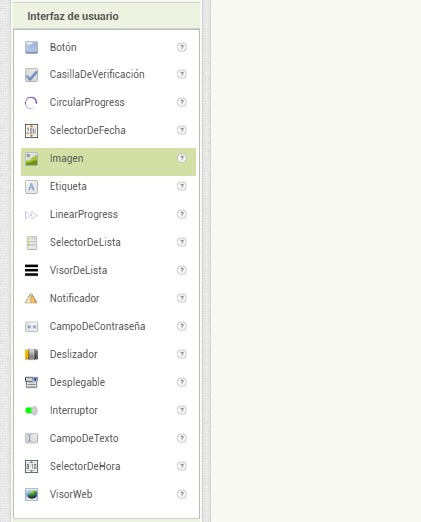
MIT App Inventor also offers a wide range of interface components such as sliders, list pickers, image viewers, and web viewers. These components can be combined to create rich, interactive applications tailored to different user needs.
Each tool serves a specific purpose. App Inventor is best for rapid, low-complexity projects. Blynk is optimal for connected IoT dashboards. Flutter is powerful for developers who require fully customized, scalable apps. As a group, we understood that choosing the right interface tool depends on the user’s experience level, the project’s scope, and the desired user experience.
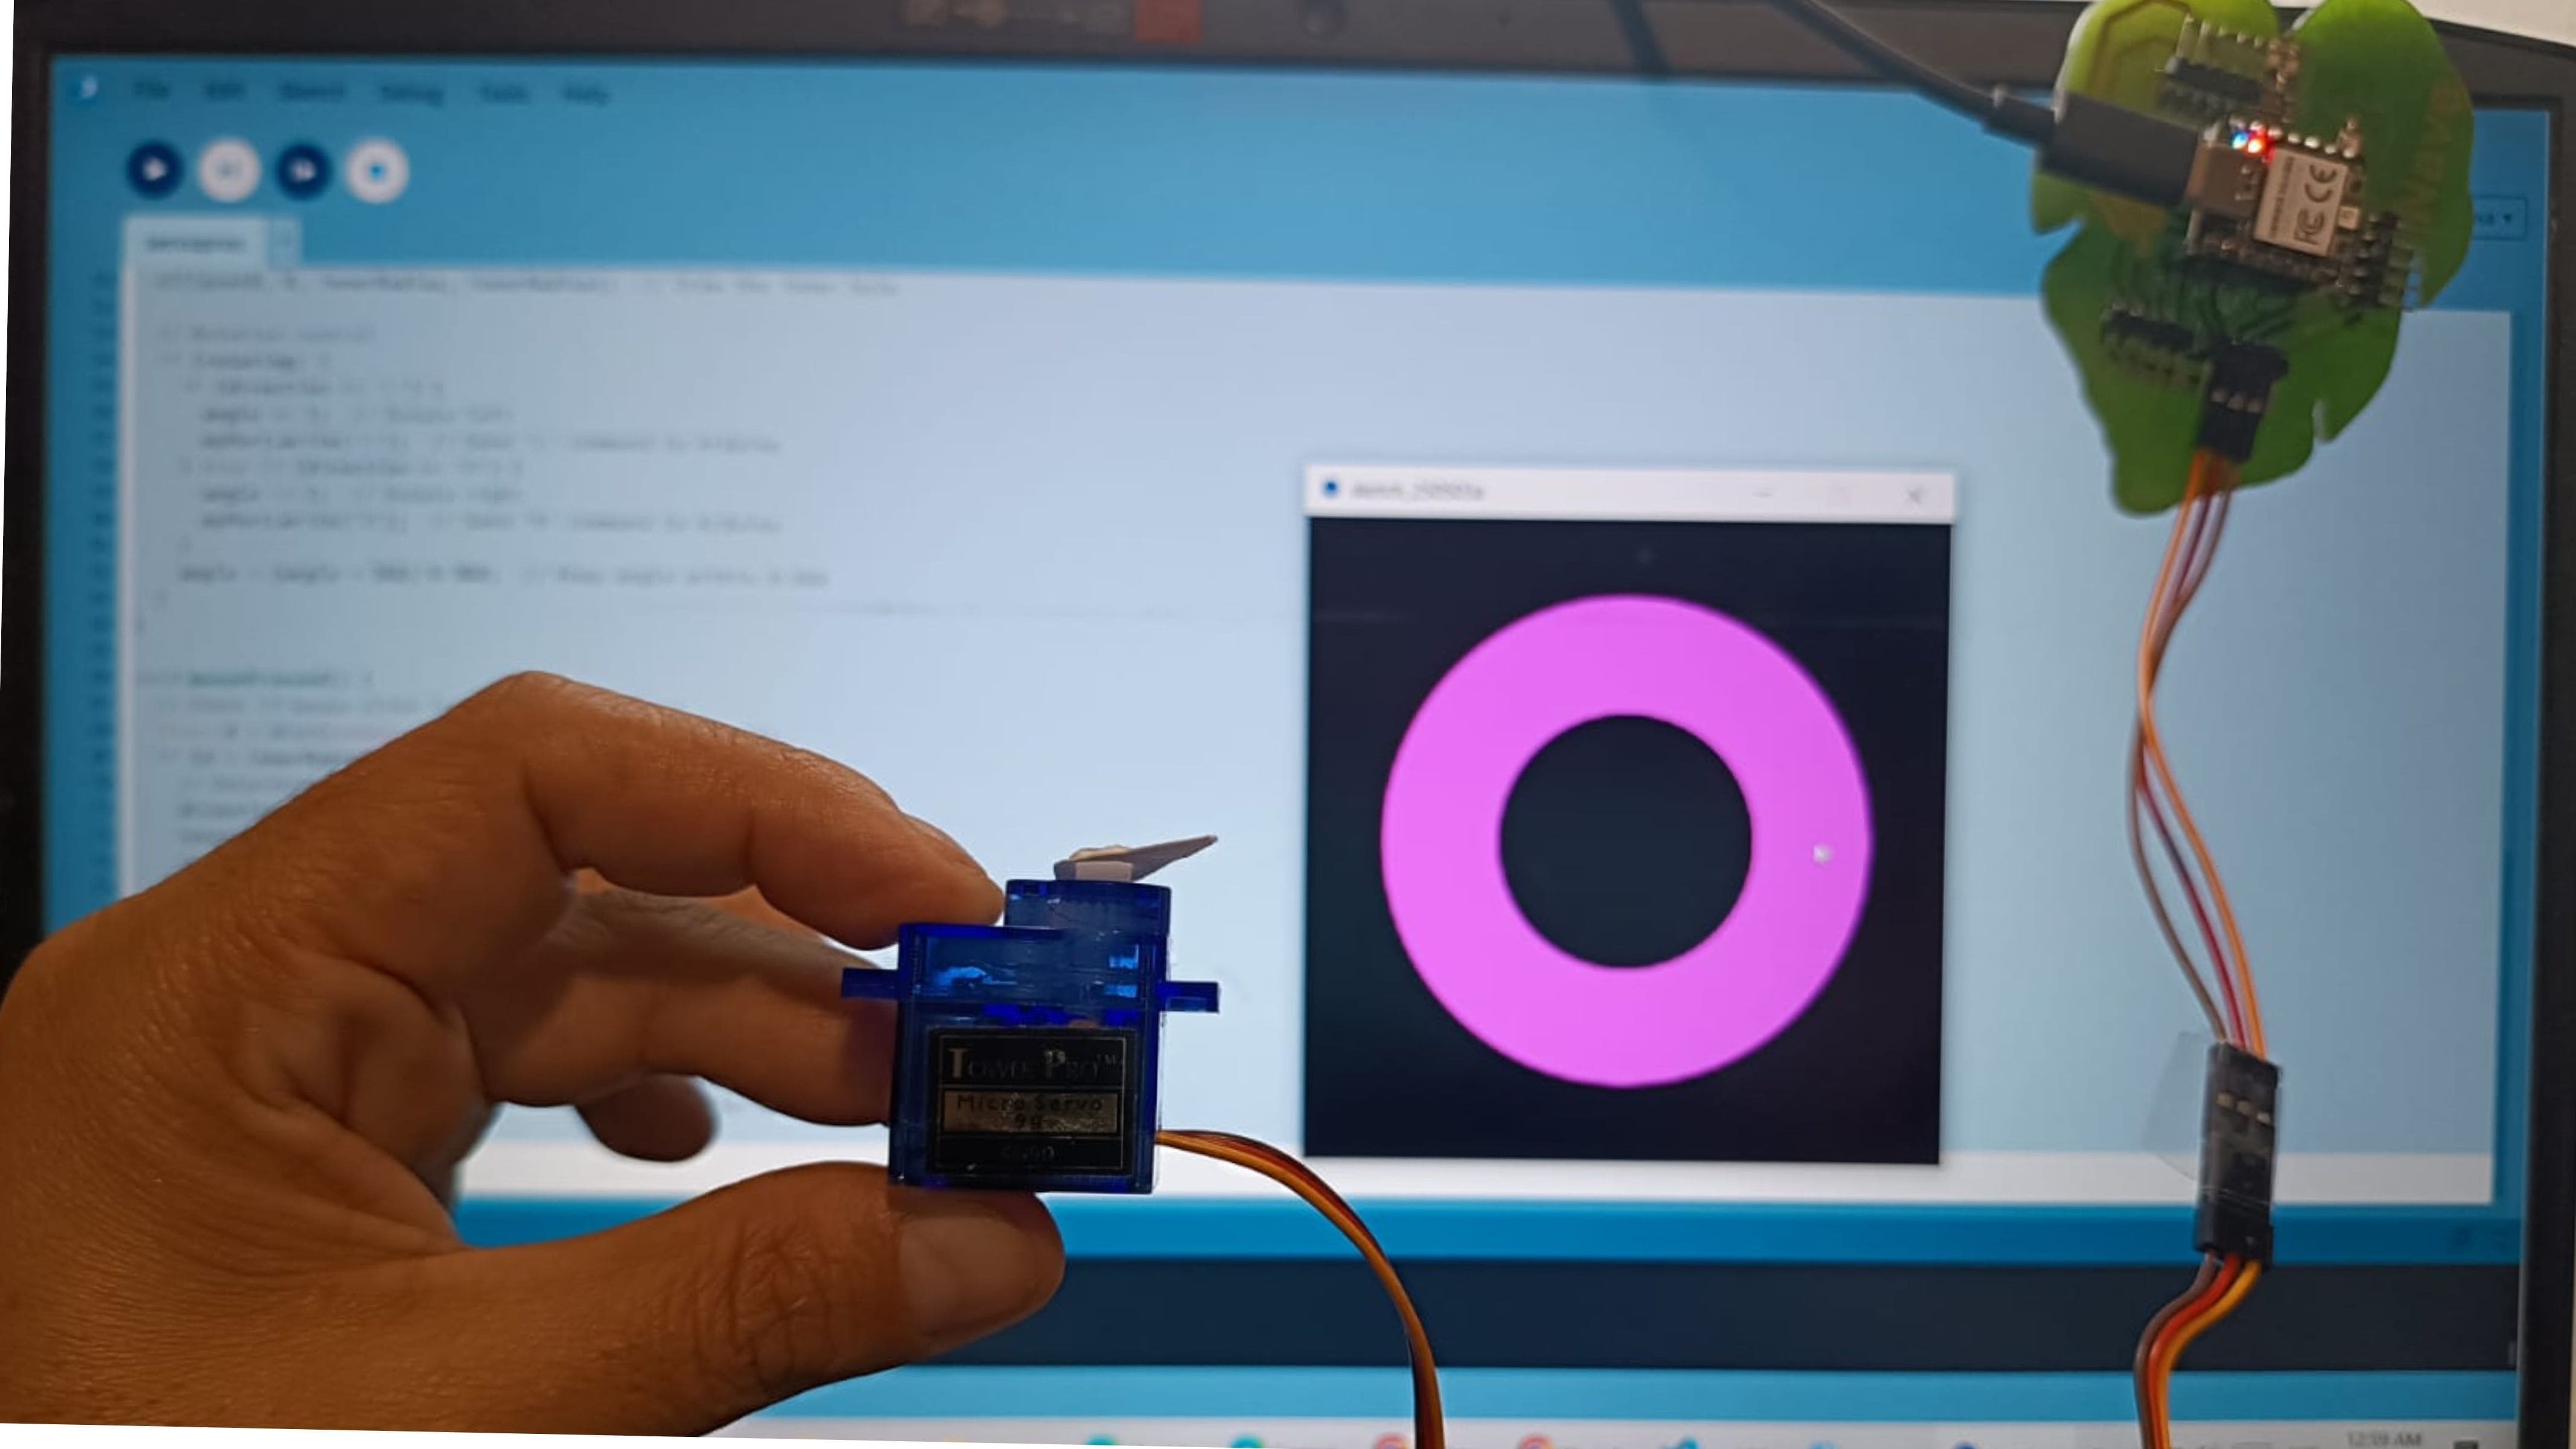
The mobile interface was created using MIT App Inventor. It includes:
The app logic was implemented using visual blocks that:
'1' when the user presses the button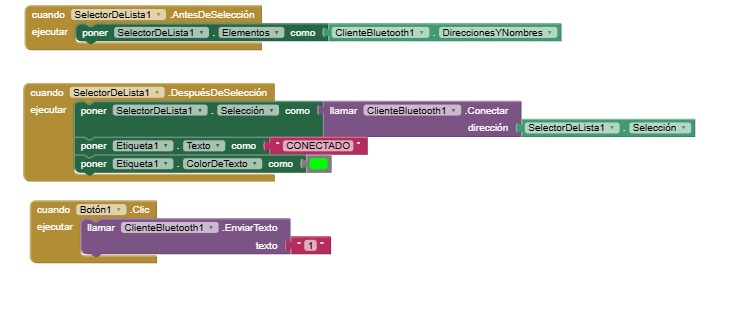
The ESP32 board runs Arduino code that:

BluetoothSerial and ESP32Servo
libraries to control the motor.'1' to the ESP32This assignment demonstrated how to connect user interfaces with embedded systems through Bluetooth. By using App Inventor, the mobile UI was easy to build and test, while the ESP32's behavior showed how simple commands can activate precise physical movements. This project builds a foundation for more interactive systems in the future.