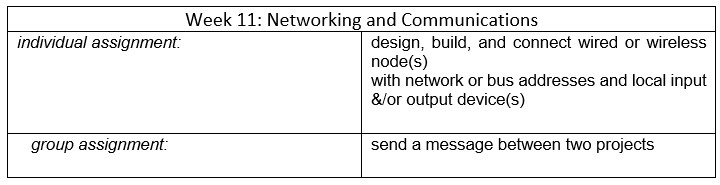
Week 11: Networking and Communications
Networking and communications includes the analysis, design, implementation, and use of local, wide area, and mobile networks that connect computers together. This week focuses on using ESP32-CAM development boards to implement IoT communication and stream live video over a WiFi connection.
Group Assignment
Group Assignment: Design, build, and connect wired or wireless nodes with network or bus addresses, integrating local input and/or output devices to simulate a basic Internet of Things (IoT) interaction between two embedded systems.
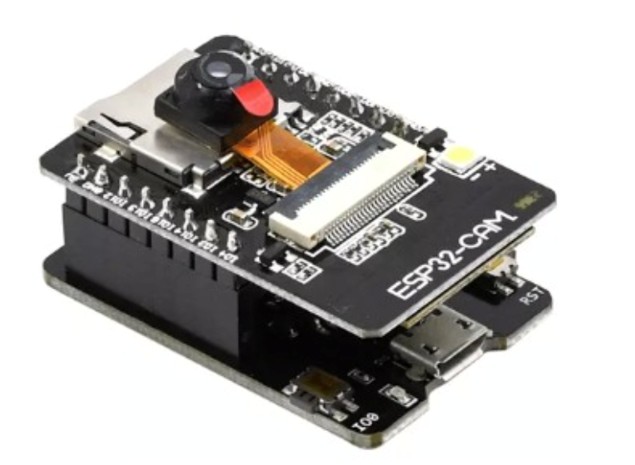
For this assignment, we implemented a communication system using two ESP32-CAM modules, each independently powered and equipped with WiFi capabilities, allowing interaction through a local wireless network. The onboard LED connected to GPIO4 was used to visually confirm successful command transmission and reception.
1. Objective
The goal was to create a system where two ESP32-CAM modules communicate wirelessly, with one acting as a server and the other as a client, using HTTP requests to toggle an LED based on a button press.
2. Introduction
We used two ESP32-CAM modules to establish a client-server communication model over WiFi. The client sends HTTP requests triggered by a push button, and the server toggles its LED in response, demonstrating basic IoT interaction.
3. Materials Used
- 2 ESP32-CAM development boards
- Independent 5V power supplies for each board
- WiFi network (created using a router or mobile hotspot)
- Arduino IDE installed with WiFi.h and HTTPClient.h libraries
- USB-to-Serial adapters for flashing the ESP32-CAM boards
- Push button (for the client device)
- Resistors (for button pull-down configuration)
- Jumper wires and prototyping breadboard
4. Development Process
4.1 Hardware Overview and Initial Setup
Each ESP32-CAM was mounted on a breadboard with its own power source. A push button circuit was prepared for the client device to trigger HTTP requests.

4.2 Network Creation
A local WiFi network was set up using a mobile hotspot or router. The server ESP32-CAM listened for HTTP requests, while the client sent requests when the button was pressed.
4.3 Establishing WiFi Connection
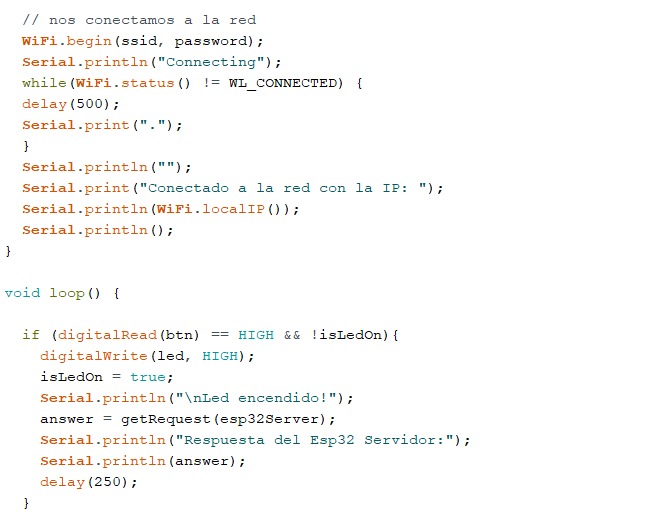
Both boards were programmed with the WiFi credentials. The server printed its IP address, which was used by the client for targeting HTTP requests.
4.4 Device Communication and Interaction
The client monitored the push button and sent an HTTP GET request to the server upon a press. The server toggled its LED and responded with an acknowledgment. Debounce delays and serial monitor outputs ensured reliable operation.
5. Code Overview
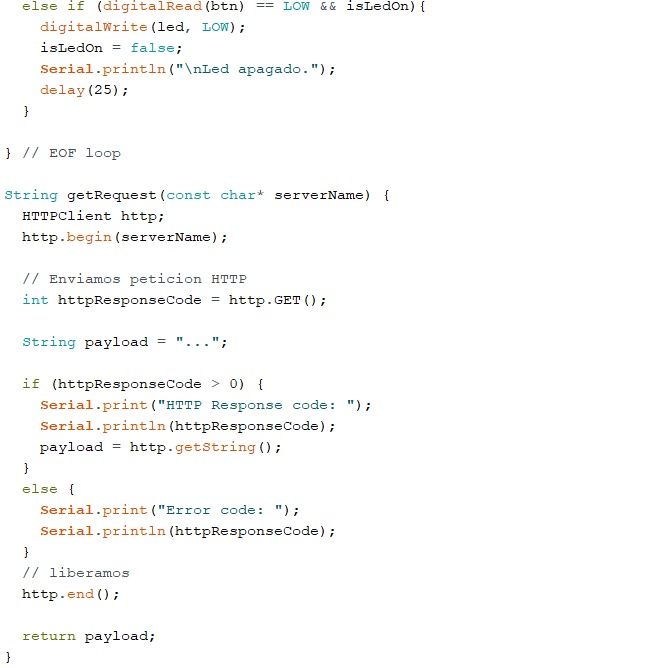
Server-side: Listened for incoming HTTP GET requests and toggled the LED accordingly. The server also responded with an acknowledgment message back to the client.
Client-side: Continuously monitored the push button. Upon detecting a press, it sent a GET request to the server and processed the server's response, printing it to the serial monitor for confirmation.
6. Challenges and Solutions
- WiFi Connection Stability: Ensured the network signal strength was adequate and added reconnection logic if disconnected.
- Button Debouncing: Implemented software delay techniques to avoid false triggering.
- HTTP Request Handling: Verified correct URL formats and HTTP status code checks for robust communication.
Final Reflections
This group project offered an invaluable opportunity to delve into basic IoT communication between two embedded devices using WiFi. By building both the server and client logic, we gained a practical understanding of wireless networking protocols, HTTP communication, and microcontroller programming. The real-time LED response upon request provided immediate feedback that not only confirmed the success of our setup but also reinforced the importance of careful configuration and debugging in networked systems. This foundational exercise prepares us for more complex interconnected systems in future smart device applications.
Individual Assignment
Individual Assignment: Use an ESP32-CAM development board to stream live video over a WiFi connection, viewable on devices such as a computer or mobile phone.
Networking and communications involve the analysis, design, implementation, and use of networks to connect devices. For this assignment, we used an ESP32-CAM development board, which includes an integrated camera, WiFi, and Bluetooth capabilities, eliminating the need for additional modules.
The goal was to stream live video from the ESP32-CAM and access it on any device, such as a computer or mobile phone, using a WiFi connection.
1. Hardware Setup
The ESP32-CAM board includes a connection and power module to upload programs from the Arduino IDE.
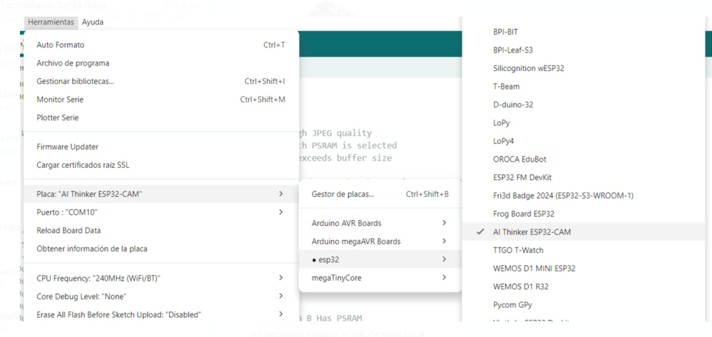
2. Software Configuration
In the Arduino IDE, select the correct board type for the ESP32-CAM to ensure proper communication.
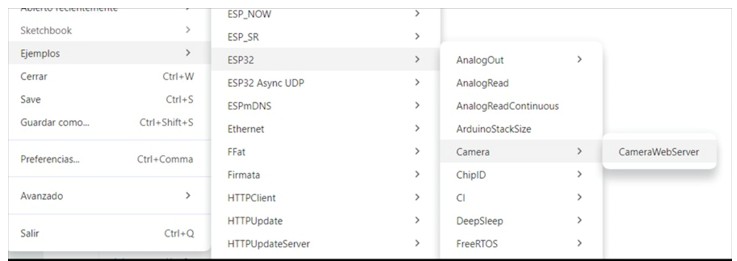
3. Importing Libraries
Import the necessary libraries for WiFi and camera functionality to enable the ESP32-CAM's camera.
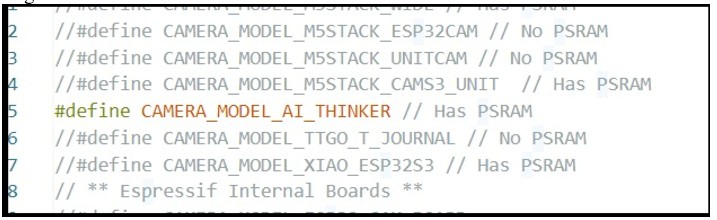
4. Camera Model
The camera model used is integrated into the ESP32-CAM board, supporting WiFi and Bluetooth connectivity.
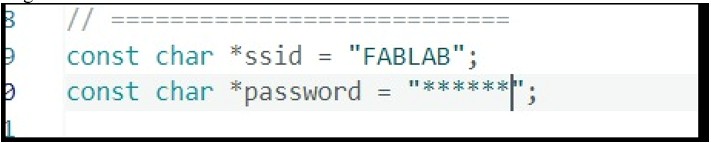
5. Network Configuration
Enter the WiFi network name (SSID) and password in the code to allow the ESP32-CAM to connect to the network.
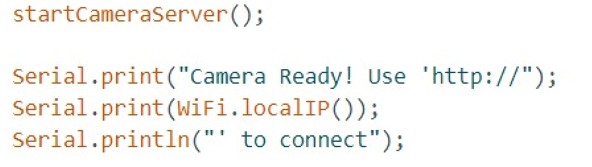
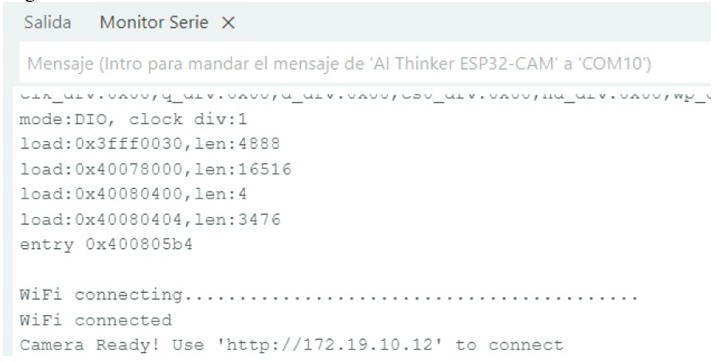
6. Obtaining the IP Address
After uploading the program, the serial monitor provides an IP address to access the camera's video stream.
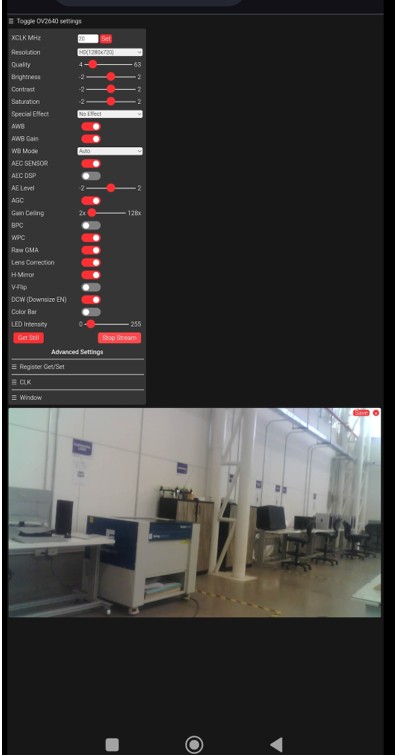
7. Accessing the Video Stream
Enter the IP address in a web browser to view the live video feed from the ESP32-CAM.
8. Mobile Access
Access the same IP address from a mobile phone over the WiFi network to watch the live video stream.
9. Demonstration Video
The following video demonstrates the live video streaming functionality of the ESP32-CAM.
Final Reflections
In this week's practice, I learned to apply protocols for inter-device communication. By configuring a broker and using an ESP32 as a board, I was able to manage the transmission of messages efficiently. This protocol facilitated communication between devices through topics, where the publisher sends a message, and the subscribers receive it, optimizing data distribution in distributed networks.
The experience provided insight into how devices can interact efficiently in an Internet of Things (IoT) environment, particularly through WiFi-based video streaming.