Design and produce something with a digital process
(incorporating computer-aided design and manufacturing) not covered
in another assignment, documenting the requirements that your
assignment meets, and including everything necessary to reproduce
it.
Manuel Ayala-Chauvin Institution: Fablab - Universidad Tecnológica Indoamérica Year: 2025
Design and produce something with a digital process
This assignment focused on digital textile fabrication, using tools not covered in other Fab Academy
assignments:
specifically, the Brother sewing machine and the Brother SE1900 embroidery
machine.
While other weeks focused on rigid materials, electronics, or subtractive methods, this project
centered on flexible materials, decorative stitching, and embroidery as fabrication
processes.
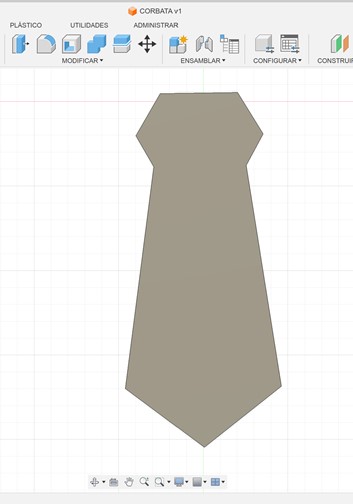
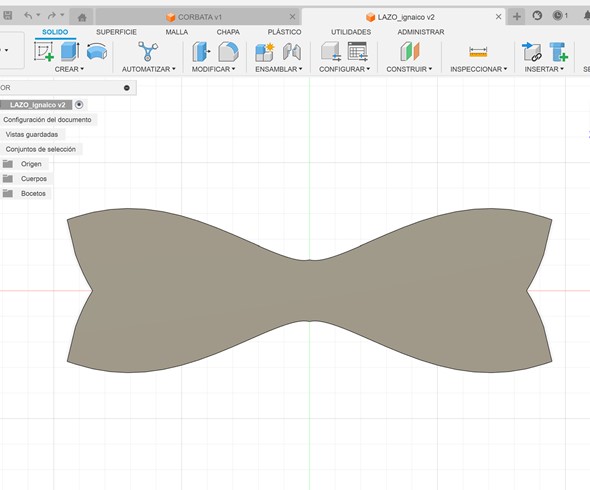
Step 1: Design in Fusion 360
I created two decorative elements for the puppet—a tie and a bowtie—using 2D sketches in Fusion 360.
These were exported as DXF files for laser cutting.
The goal was to match the puppet’s dimensions while allowing clean stitching lines.
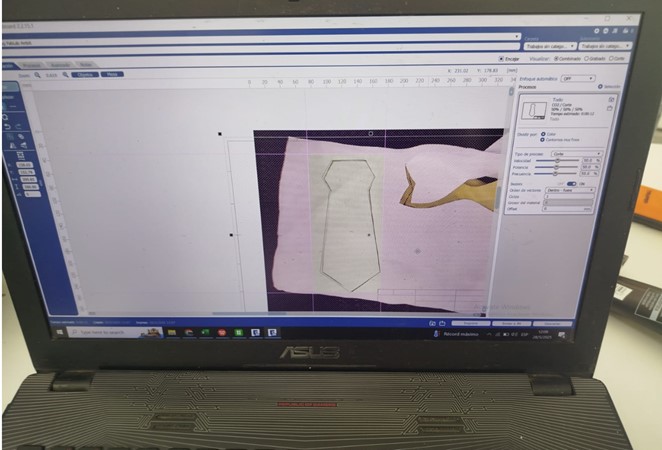
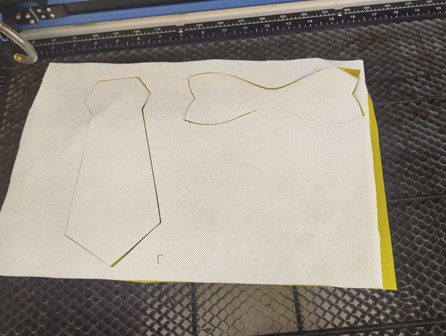
Step 2: Laser Cutting on Epilog Fusion Maker 24
I used yellow polyester and white cambrel fabric for the pieces. The DXF files were imported into
the Epilog software and cut with the following settings:
Speed: 50
Power: 50
Frequency: 50
This section documents the laser cutting process used to create textile shapes using adhesive-backed
fabric. Two main designs were cut: a tie and a bow. The process was executed using a laser cutter
and controlled via design software.
1. Design and Software Setup
The cutting file was prepared in the laser control software. The material was aligned using a
background image to match the position of the fabric. Cutting parameters were adjusted according to
the material thickness and adhesive layer.
2. Beginning the Laser Cutting
The laser begins cutting the shapes: a tie on the left and a curved bow on the right. The fabric is
placed on the honeycomb metal base of the cutter, ensuring ventilation and support.
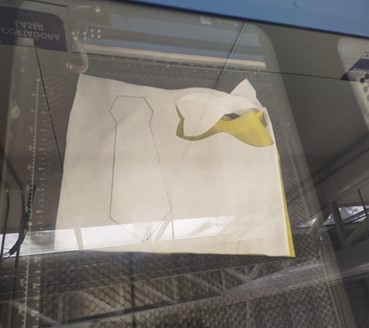
3. Completed Laser Cuts
Both the tie and bow shapes are fully cut and visible. The cut pieces are still attached to the
fabric for stability and easy removal.
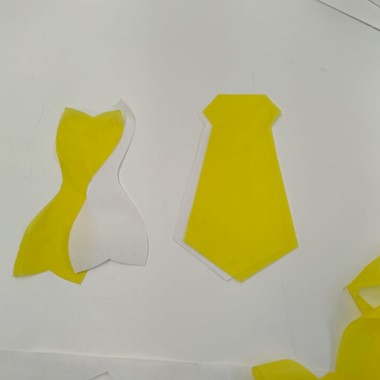
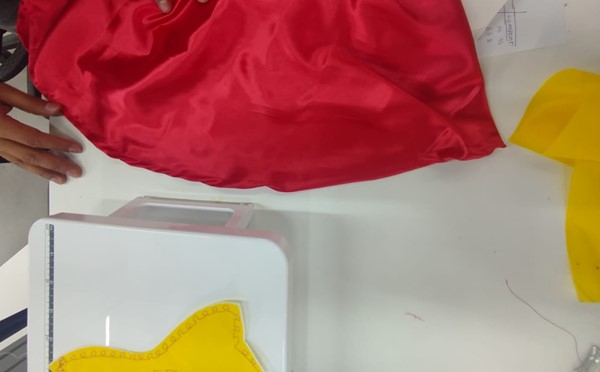
4. Final Fabric Pieces
The final cut shapes are removed from the backing. On the left is the yellow bow with white backing,
and on the right the yellow tie. These will be used in a puppet design or fabric decoration project.
Shapes Description
Tie: Classic straight tie shape with a rectangular knot top and pointed bottom,
suitable for character decoration.
Bow: Symmetrical curvy bow shape, intended for aesthetic or accessory placement
on soft objects.
Failures and Adjustments
During the initial laser cutting phase, the speed was too high, which led to incomplete
cuts.
The speed was reduced from 50% to 35%, resulting in significantly cleaner cuts.
In the first sewing attempt, the border was misaligned, causing irregular waves. This was
due to poor pinning.
The stitching was removed and redone using clips and precise alignment with a ruler,
achieving a symmetric finish.
For the logo embroidery, the first attempt had issues with upper thread tension. The process
was restarted and a higher quality thread was used.
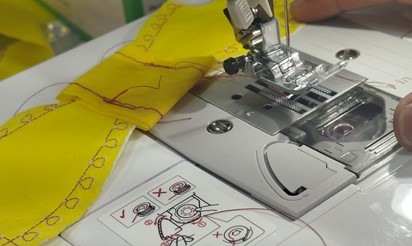
Step 3: Sewing Workflow with Brother Machine
The pieces were sewn with a Brother machine. The workflow included: threading with
red and white thread (top and bobbin), testing tension and stitch length, selecting stitch pattern
56 for the tie and 63 for the bowtie, and adjusting machine speed to maximum without compromising
precision.
Problem encountered: At first, the threading was incorrect, causing skipped
stitches. This was solved by consulting official Brother tutorial videos and following each
threading guide step-by-step. Once corrected, stitching proceeded smoothly.
Technical Setup and Machine Adjustments
Technical details on design and machine settings
Bow dimensions: 180 mm x 60 mm
Tie dimensions: 220 mm long, 70 mm wide (base), 30 mm (top)
Brother SE1900: 138 designs, USB input, 5"x7" hoop, embroidery speed up to 850 spm
Failed attempts and adjustments
See below for visual documentation and description of each failed test and correction:
1. Brother CS7000X Sewing Machine
This machine was used for decorative stitching. Settings were adjusted for stitch type (#63, #56),
thread tension, and presser foot pressure.
2. Brother SE1900 Embroidery Machine
This embroidery machine was used for logo stitching. Settings included 850 spm speed, embroidery #900
type, and PES file input. Multiple thread and hoop tension tests were performed.
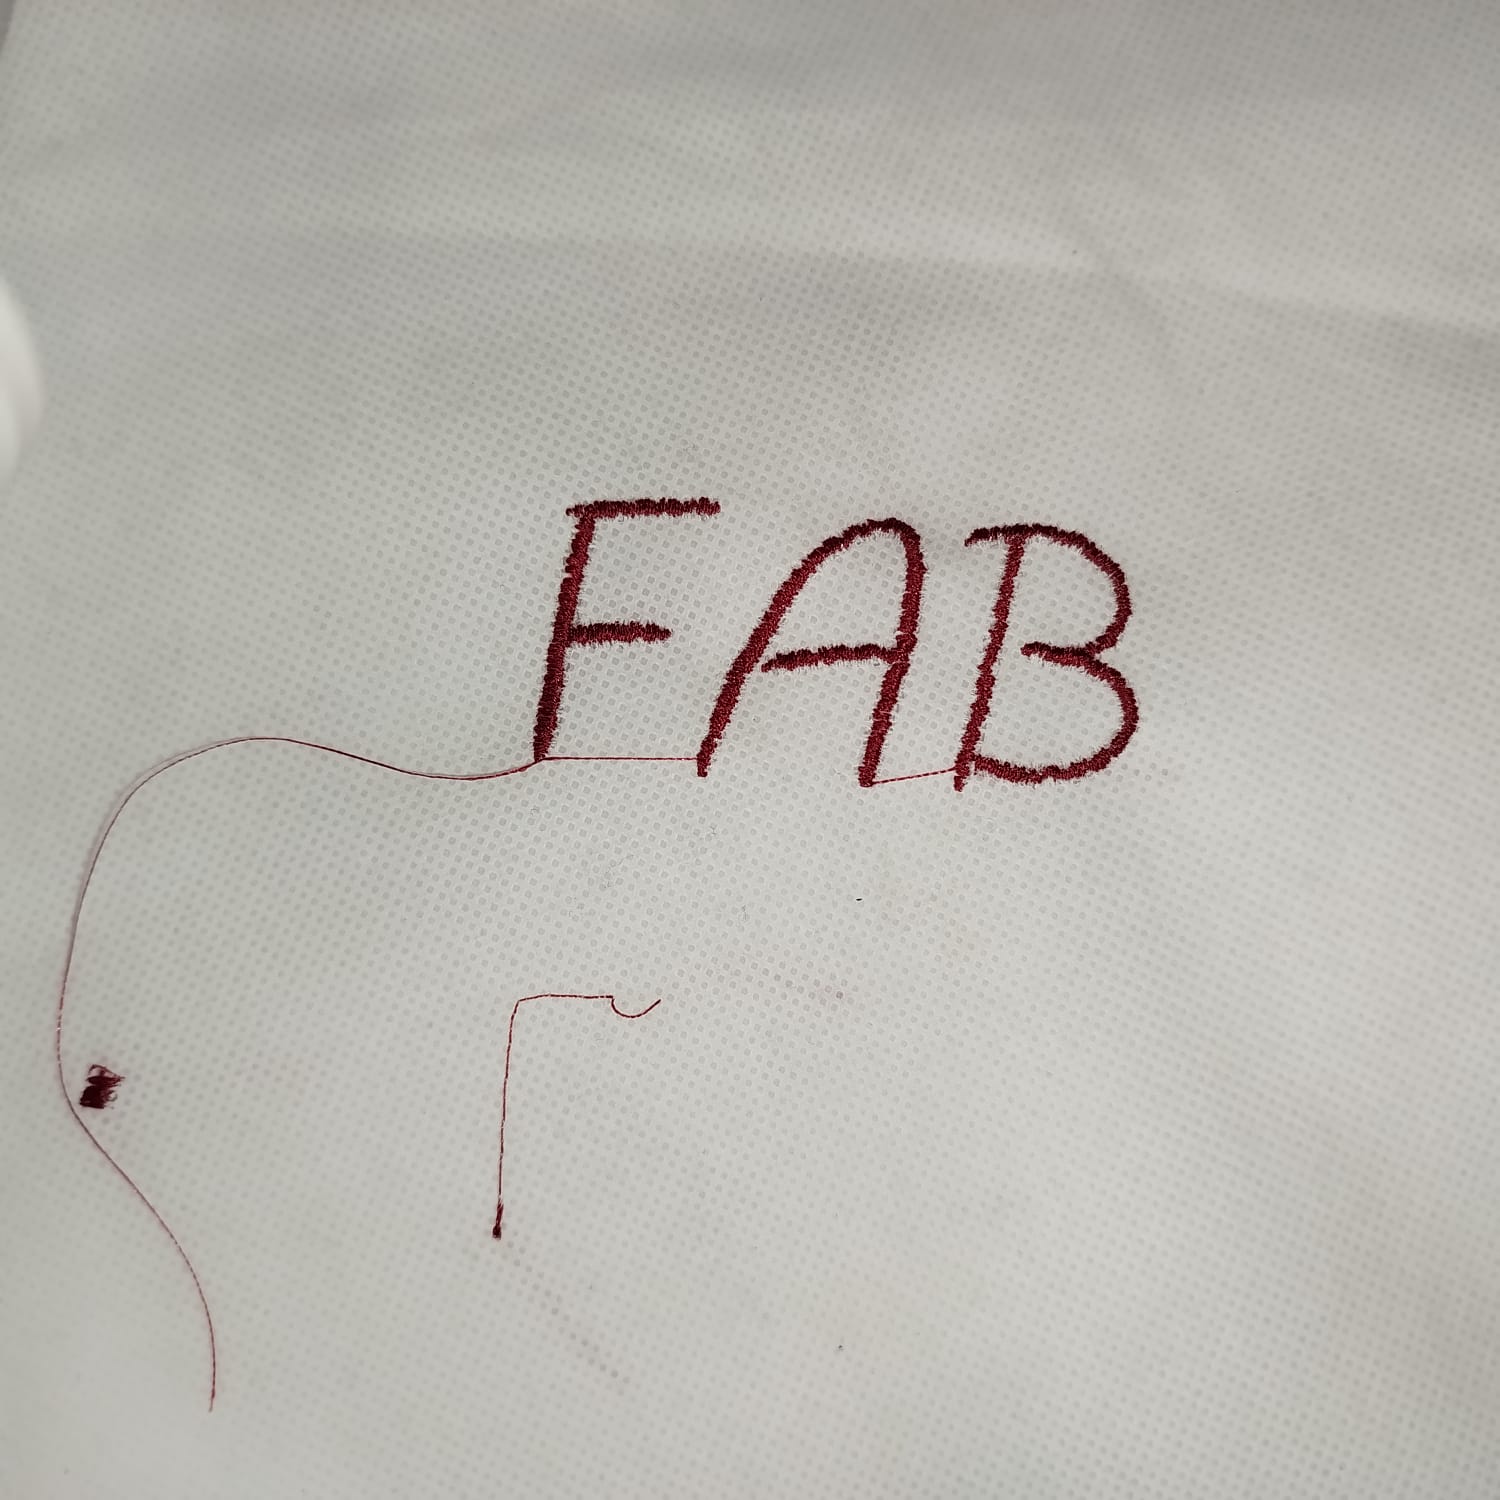
3. First embroidery test: loose threads and misalignment
The text 'FAB' shows poor upper thread tension. This was resolved by rethreading, stabilizing fabric,
and adjusting upper tension setting to 4.5.
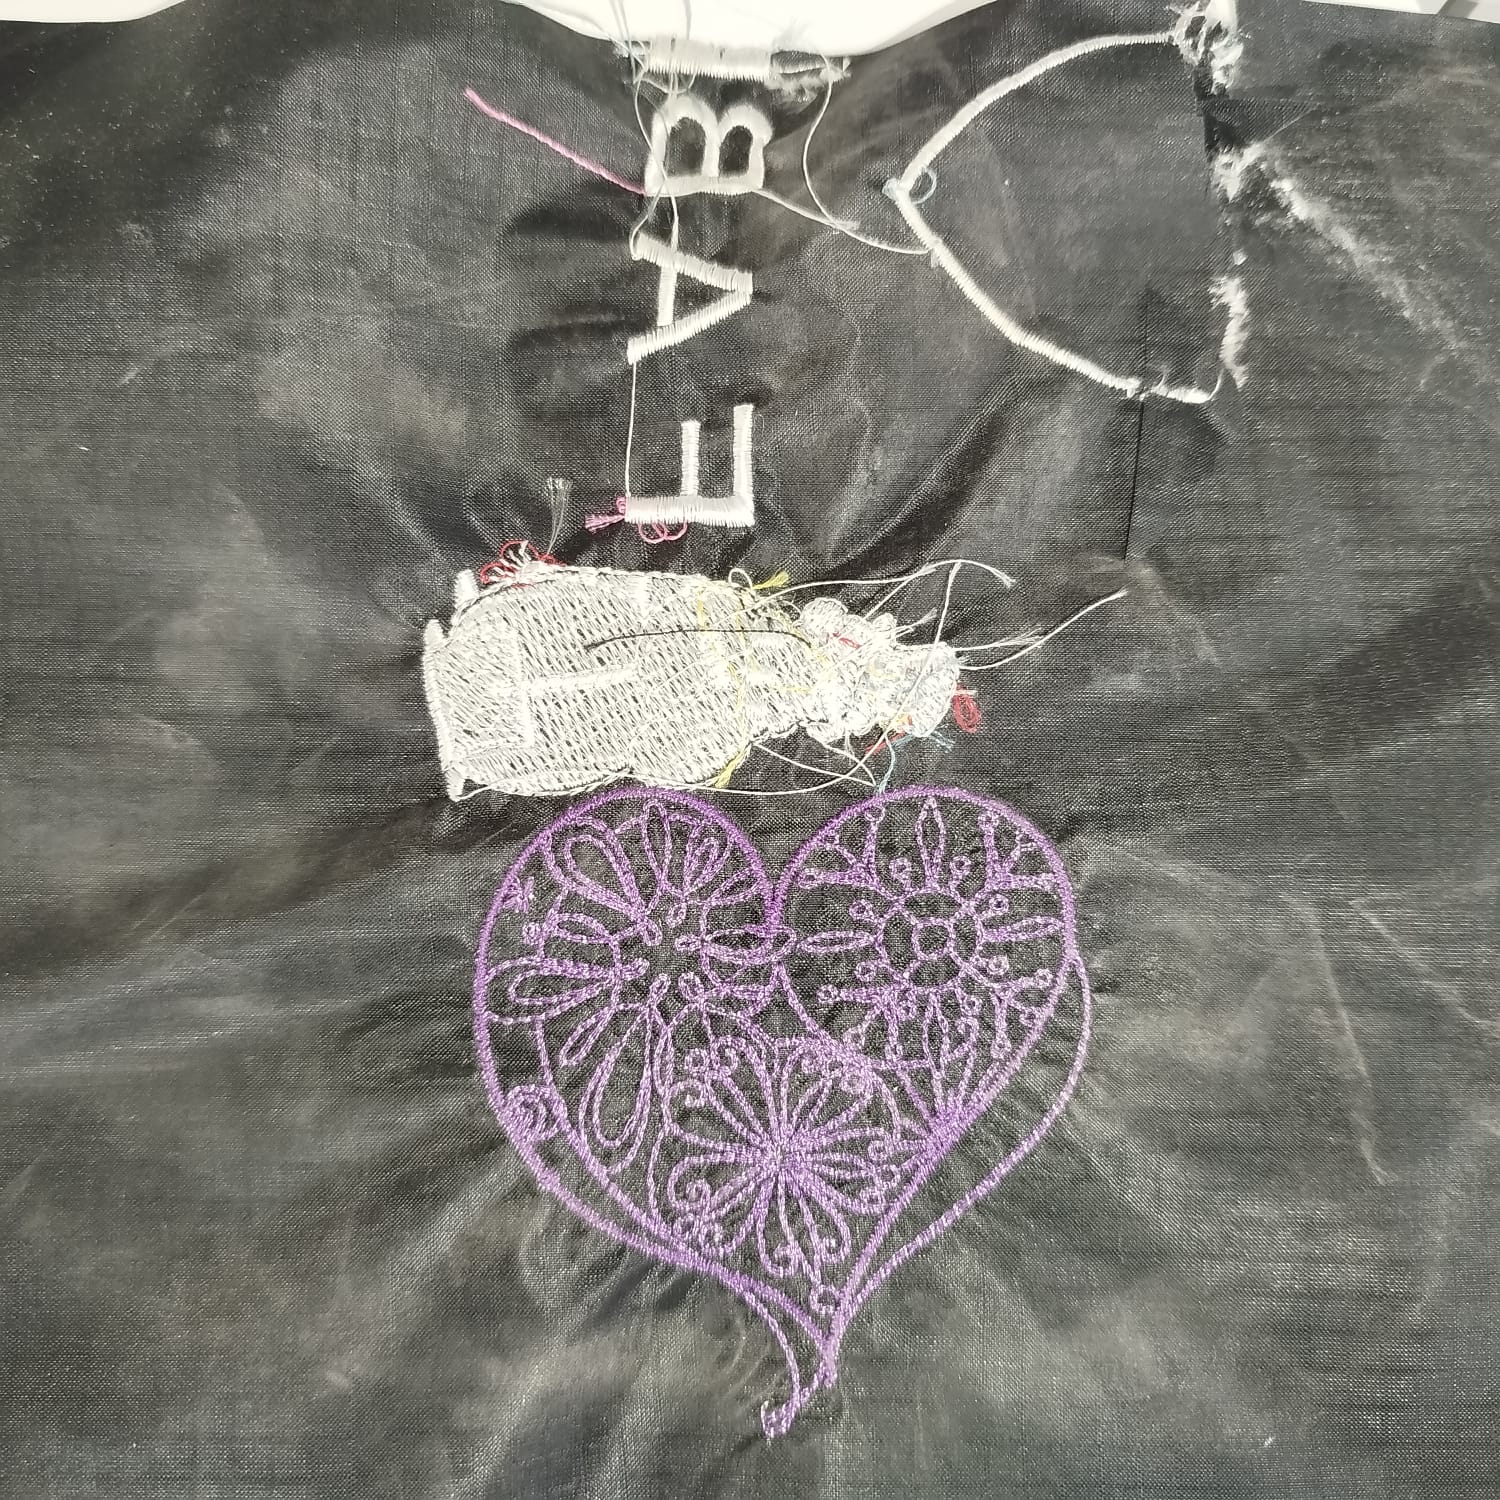
4. Multi-thread embroidery test on dark fabric
Tests included overlapping heart and white-text designs. Issues found: bobbin imbalance, poor hoop
centering. Corrections included changing stabilizer and centering frame manually.
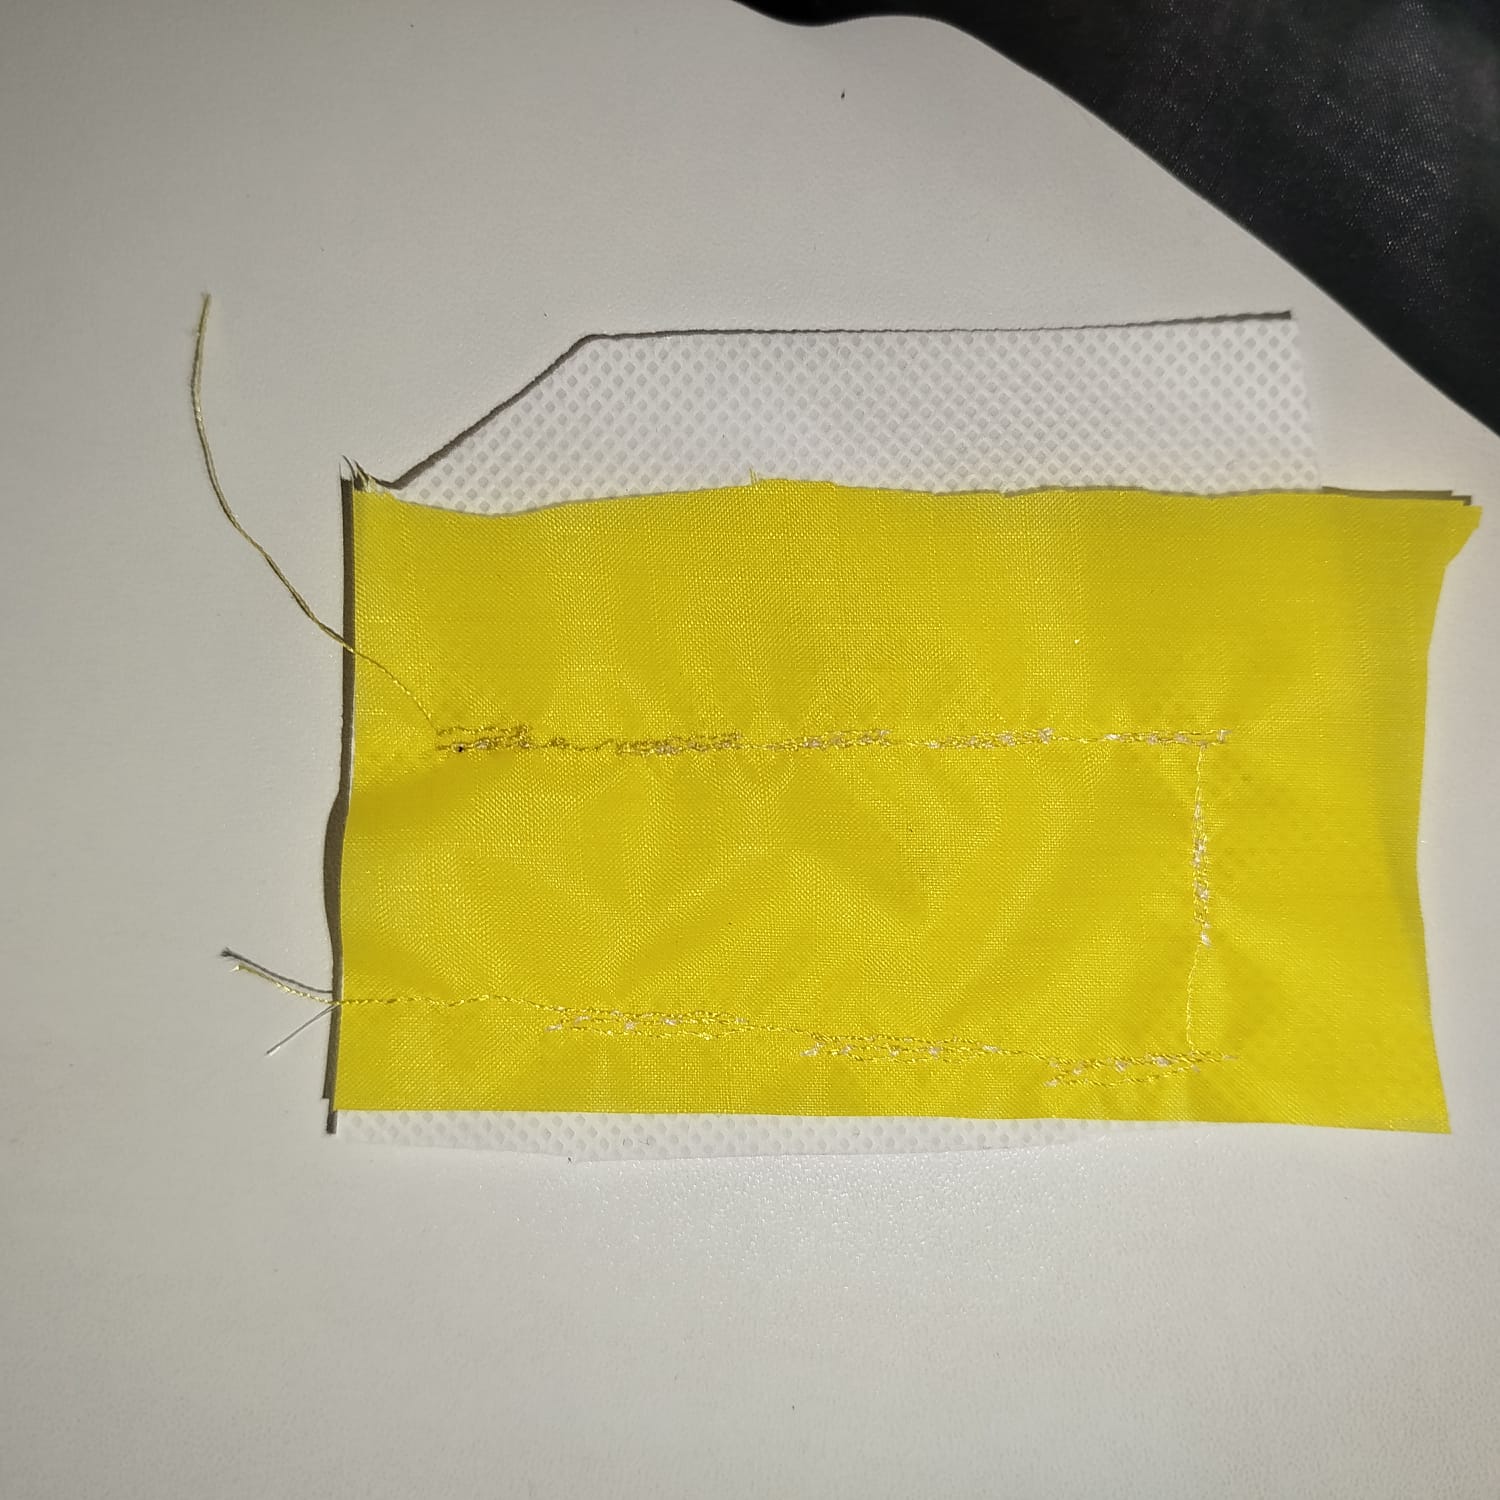
5. Early stitch test on yellow polyester
This attempt had inconsistent stitch density. Presser foot pressure was increased and thread changed
from metallic to polyester.
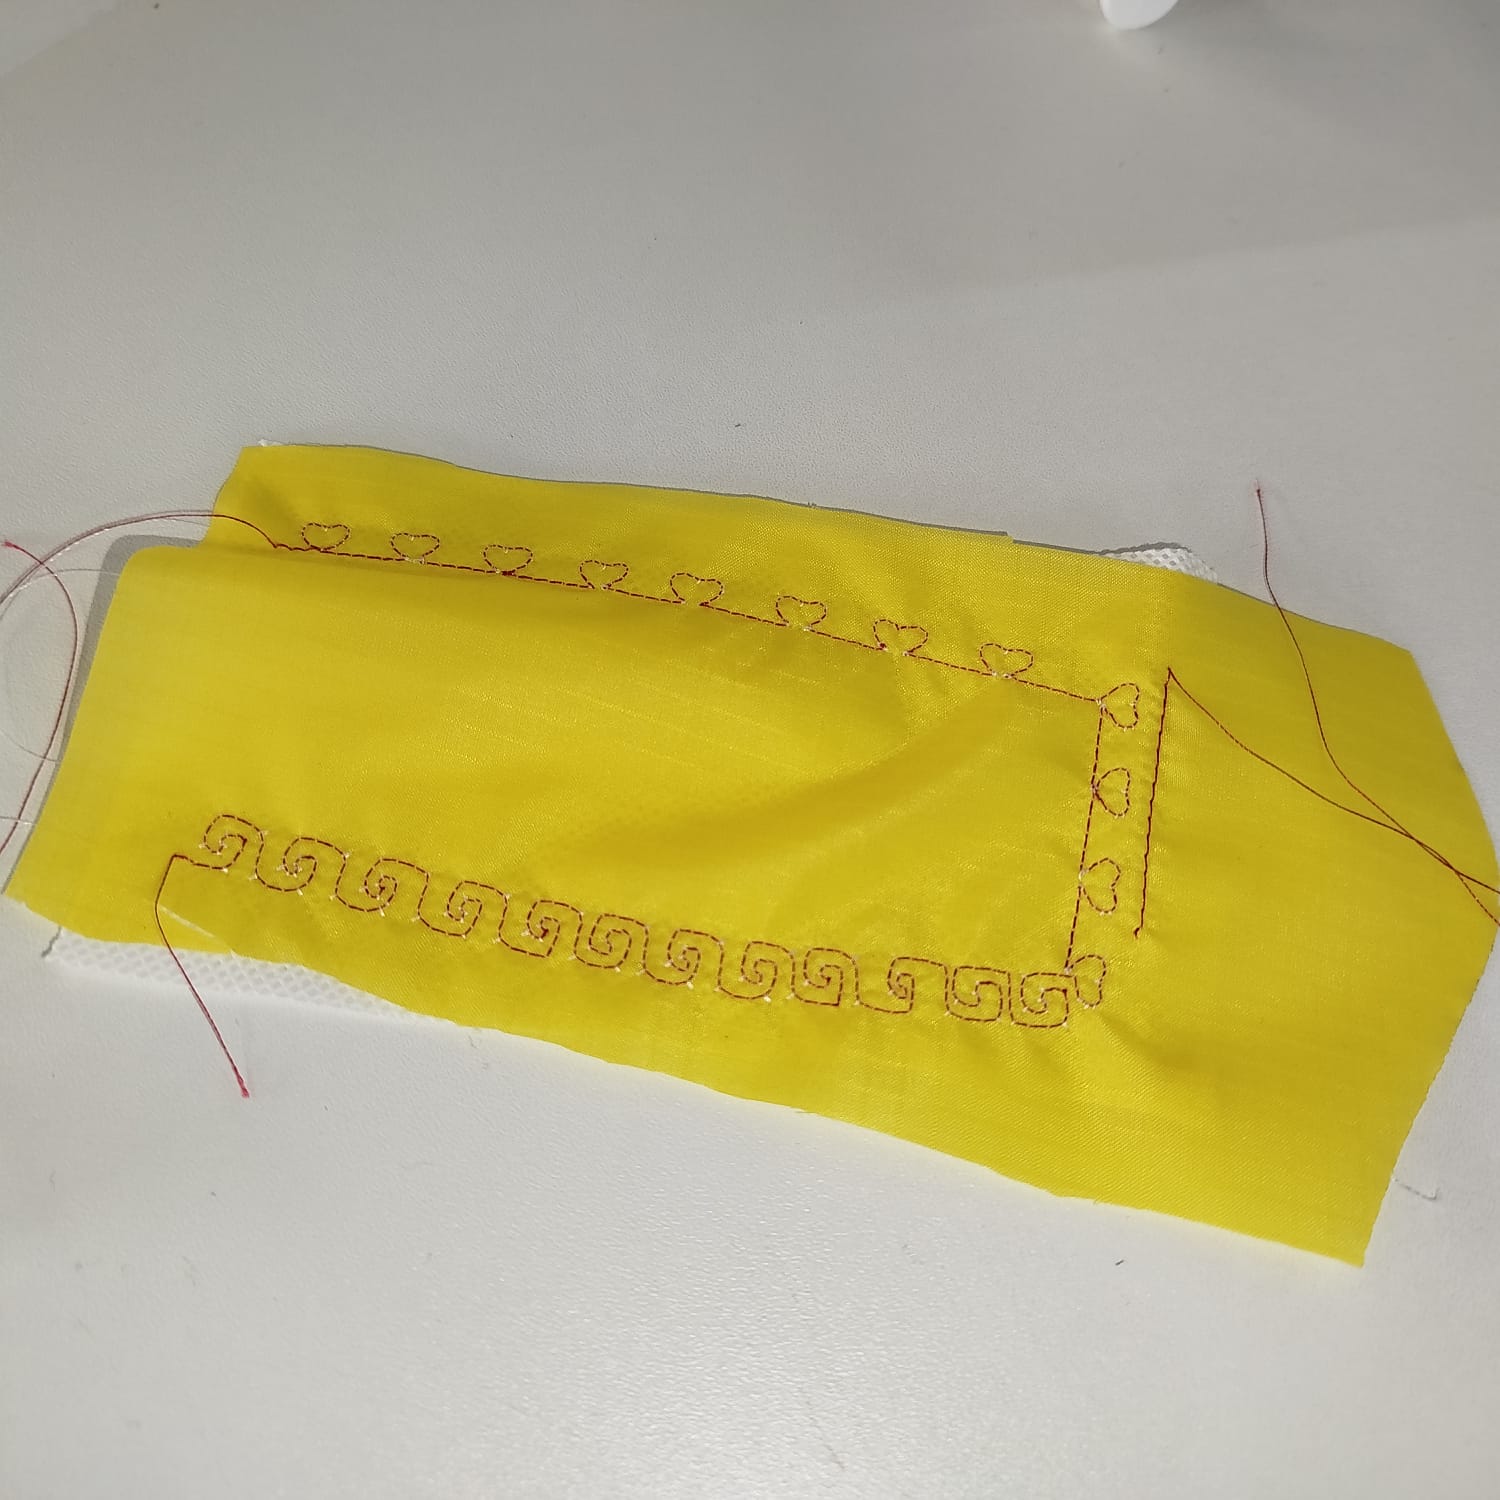
6. Decorative stitch test with adjusted parameters
After adjustments, clean decorative borders were obtained using stitch patterns #56 and #63. Machine
speed was reduced slightly to improve precision.
A central decorative loop was sewn manually to complement the bowtie. All components were aligned
using pins before final machine sewing.
Textile assembly and decoration process using a Brother sewing machine
This section describes the textile assembly and decoration process using a Brother sewing machine.
The elements were previously cut with a laser cutter and decorated with ornamental stitches.
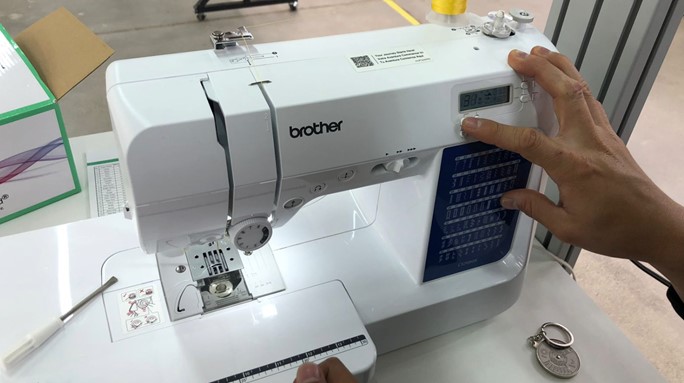
1. Machine Setup
The sewing machine is configured with the appropriate settings. Decorative stitch types and lengths
are selected on the digital panel, and thread and bobbin are correctly placed.
Machine: Brother Sewing Machine
Stitch patterns: #56 for tie, #63 for bow
Top thread: Red; Bobbin: White
Speed: Max (manual guidance used to avoid shifting)
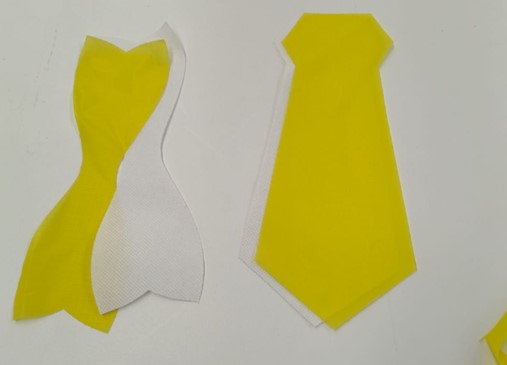
2. Fabric Pieces Ready to Sew
Two shapes are prepared: a bow tie on the left and a classic necktie on the right, both made from
yellow fabric with adhesive white backing.
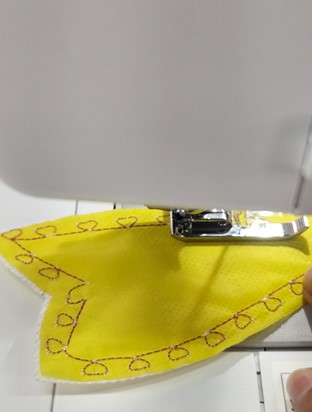
3. Decorative Stitching on the Bow
The bow is sewn with a heart-shaped stitch pattern using red thread, which contrasts with the yellow
fabric for a playful effect.
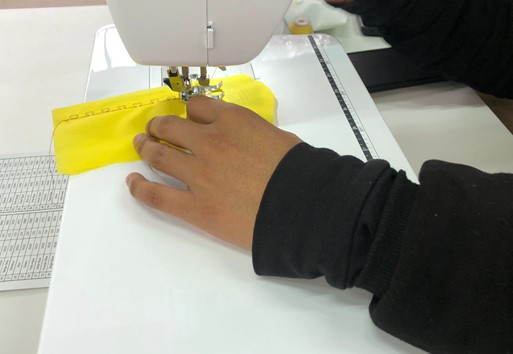
4. Starting the Tie Stitching
The sewing of the tie begins. Careful manual control ensures clean, consistent stitching along the
edge.
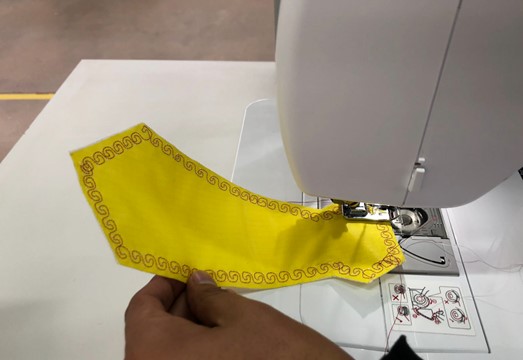
5. Finished Tie Decoration
The tie is completed with a decorative spiral border. The stitch follows the contour and enhances the
shape visually.
6. Manual Guidance
Manual guidance of the fabric ensures accuracy, especially with complex or decorative stitch
patterns.
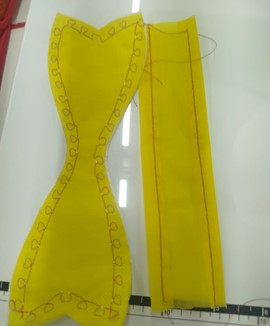
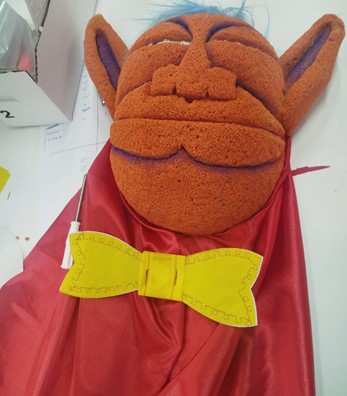
7. Final Pieces before Assembly
The bow (left) and center band (right) are completed and ready to be joined for final assembly.
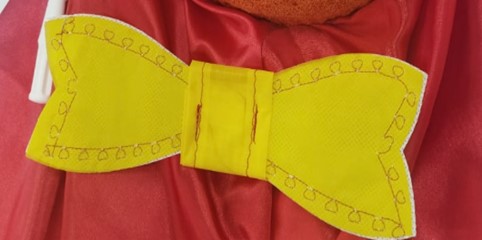
8. Attaching the Bow Center
The rectangular center band is sewn around the bow to give it structure and finish. This reinforces
the bow shape.
9. Final Result
The finished bow is mounted on a red fabric background, possibly as part of a puppet costume. The
result is clean, colorful, and playful.
Used Shapes Summary
Bow: Symmetrical double-layer shape with decorative heart stitching.
Tie: Straight classic tie with spiral border stitch.
Center band: Rectangular strip to secure and shape the bow.
The following short clips document parts of the stitching process:
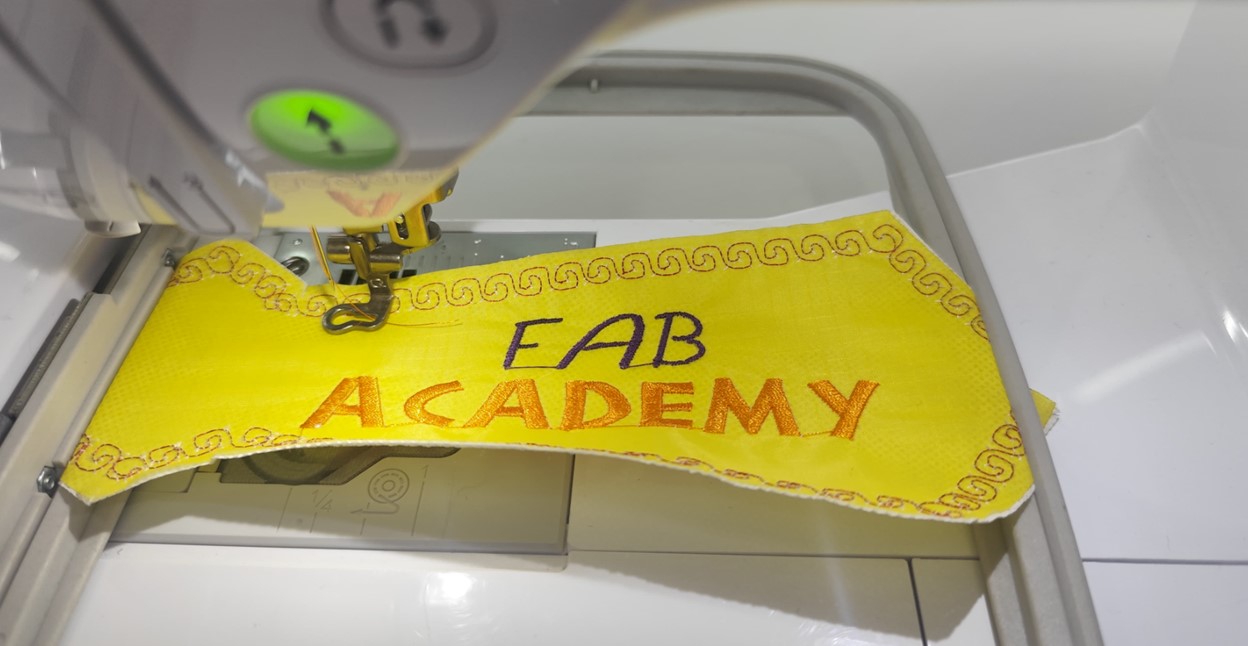
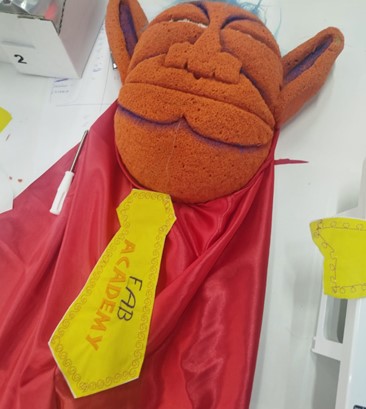
Step 4: Embroidery Workflow with Brother SE1900
I embroidered the FabAcademy logo onto the tie using the SE1900. The process involved: framing the
fabric tightly, selecting a font and size from the machine interface, setting thread colors
(black/orange top, white bobbin), and aligning the hoop correctly.
Problem encountered: The fabric moved slightly during the first attempt, causing
misalignment. This was resolved by re-tightening the hoop and double-checking the hoop-lock before
restarting the job.
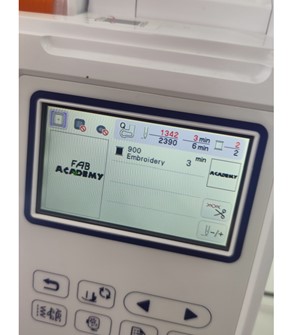
The digitized design was loaded in PES format. The logo was embroidered on white fabric using the
following settings:
Stitch type: Embroidery #900
Estimated time: 3 minutes
Total stitches: 1342
Speed: 2390 stitches per minute (spm)
Design Dimensions
The decorative border was designed in Inkscape with the following dimensions:
Total border length: 180 mm
Wave height: 8 mm
Spacing between waves: 12 mm
Additional seam allowance: 5 mm on each side
Step 5: Cape Hemming and Finishing
A cape was created for the puppet and hemmed with stitch 00. This prevents fraying and enhances the
professional look of the final product.
Hem Sewing Process for the Puppet's Dress
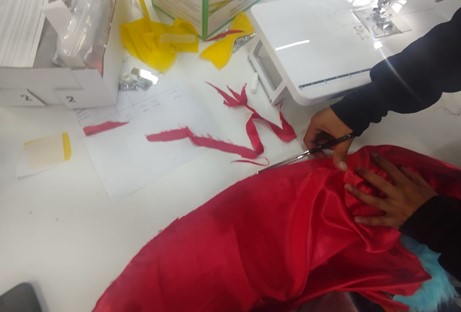
1. Trimming the Fabric Edge
In this initial phase, the excess fabric of the dress is trimmed using scissors. The goal is
to shape the lower edge of the garment to achieve a cleaner form before sewing.
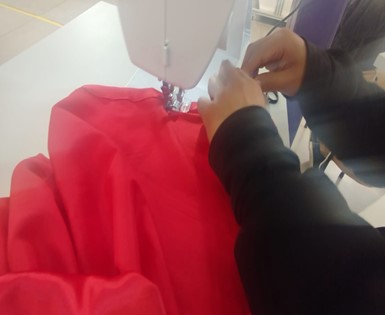
2. Positioning the Fabric on the Sewing Machine
After trimming, the fabric is positioned on the sewing machine. The edge is aligned to begin
sewing with precision.
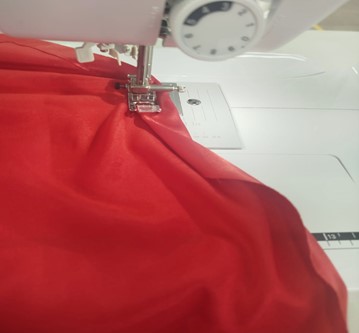
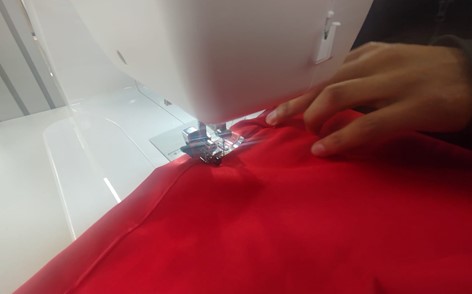
3. Sewing the Hem
The edge is sewn using a straight stitch on the sewing machine. A simple hem is likely
applied by folding the fabric inward to prevent fraying and to provide a neat finish.
4. Finishing Inspection
Once the sewing is complete, the hem is inspected to ensure the stitch is firm and
aesthetically clean. The result shows a curved fabric shape, typical of the puppet's dress
design.
Conclusion
This process ensures a clean and durable edge, suitable for the puppet's movement and with a
professional visual finish.
Step 6: Final Assembly
All pieces—tie, bowtie, cape, and embroidery—were assembled onto the puppet using machine and hand
stitching. Special care was taken to align pieces symmetrically and avoid bulk at connection points.
Week 16: Conclusion
This assignment provided the opportunity to explore digital fabrication techniques in the textile
domain, which are often overlooked in technical training.
Through the integration of CAD modeling, laser cutting, machine sewing, and embroidery, I was able
to produce functional and aesthetic accessories for a puppet that not only enhanced its appearance
but also demonstrated the versatility of digital tools beyond rigid materials.
One of the key learnings was the importance of combining traditional craftsmanship with digital
precision.
The challenges faced—such as threading errors and alignment in embroidery—allowed me to understand
the limits and capabilities of the machines, and how to resolve issues using documentation and
tutorials.
Most importantly, this week showed that digital fabrication can be extended into creative
storytelling tools, and that textile-based design can be as structured, repeatable, and shareable as
other forms of digital making.
Resource Download
Click the button below to access and download all available materials.