Week 13
Mold Making and Casting
brief.
- design a mold that will produce a smooth surface finish that does not show witness of process used to make mold
- cast parts from mold
a bit of context + plan for the week.
This week i would like to design and make a mold digitally. My concept is to take a 3d scan or digital model and make a two part mold in CAD. I will then 3d print each mold half and cast silicone rubber into the 3d printed mold halves. I've had experience using silicon to make mold halvein which i cast a two part urethane to make hard plastic parts. But ive always wanted to experiment with making soft flexible parts. Let's begin...
Digital Creation of molds
I first began by downlading an asset of a 3d scanned hand from artec's website. We utilize the artec leo in the lab and have had great success with it. I didnt have an axtra pair of hands (no pun intended) to help scan my own hand so this asset will be a place holder for proof of concept.
I imported the model into fusion 360 and followed this helpful tutorial in making molds and modifying mesh models in fusion.
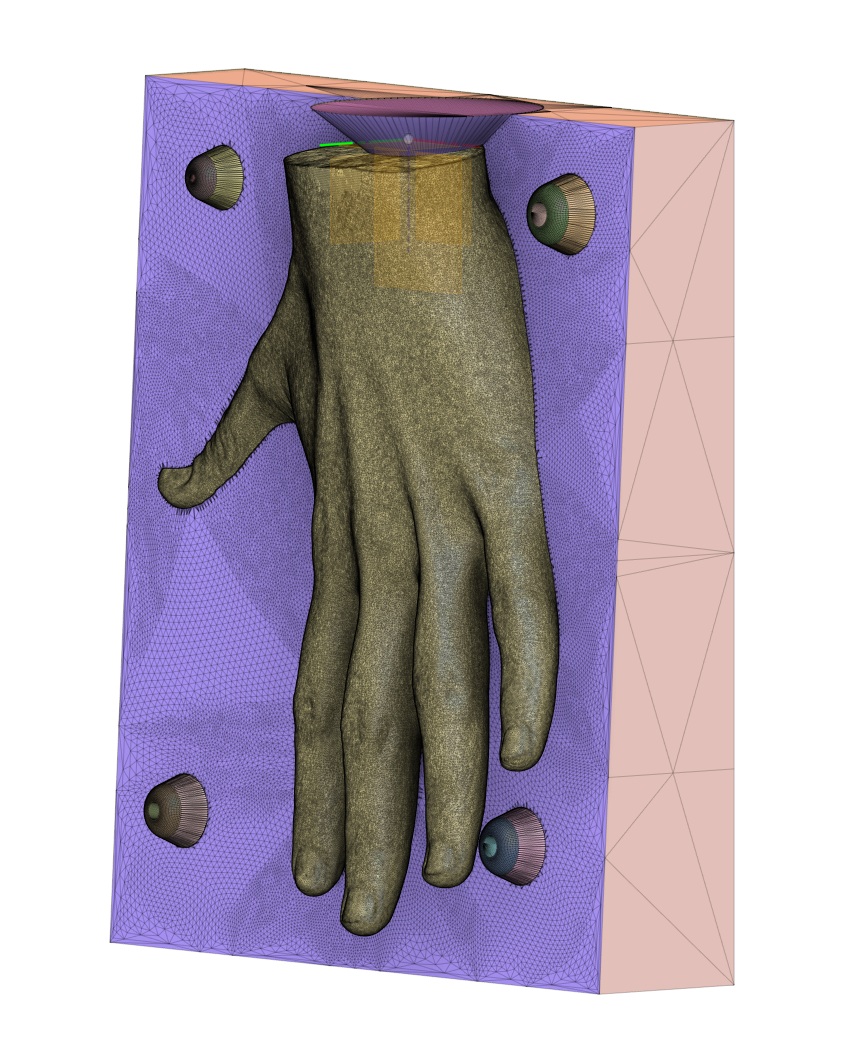
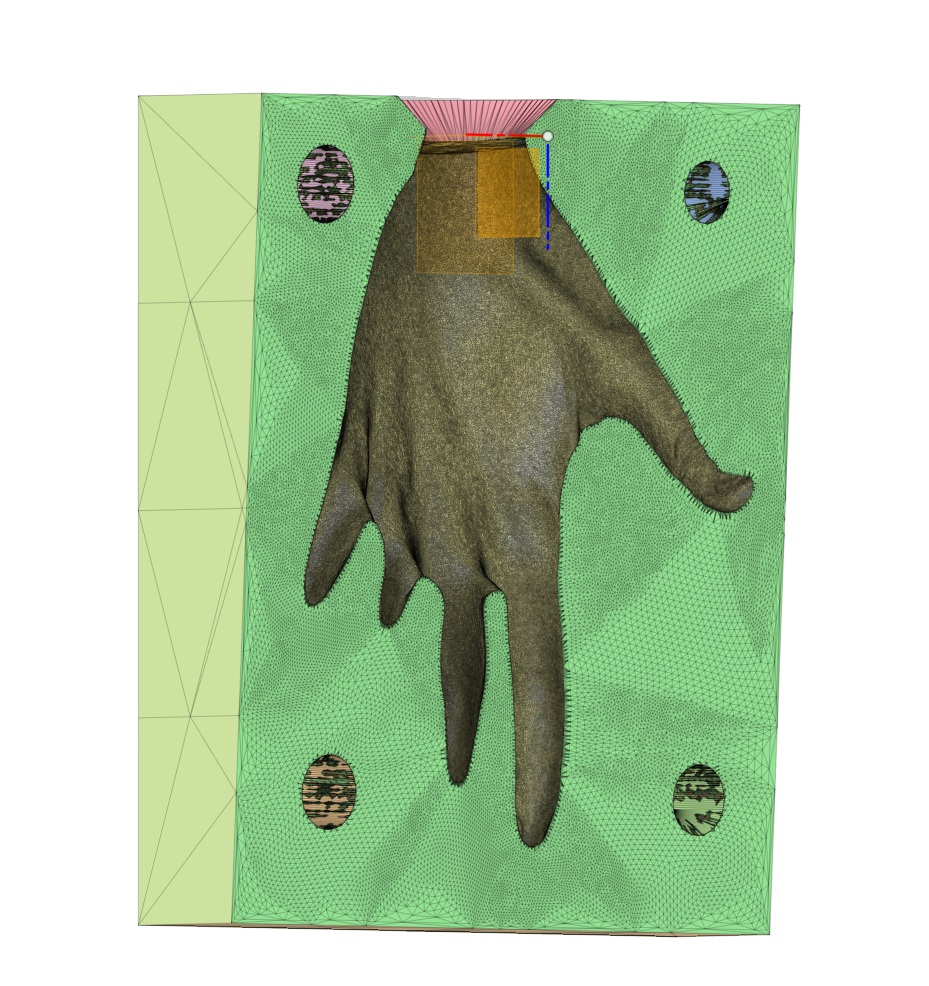
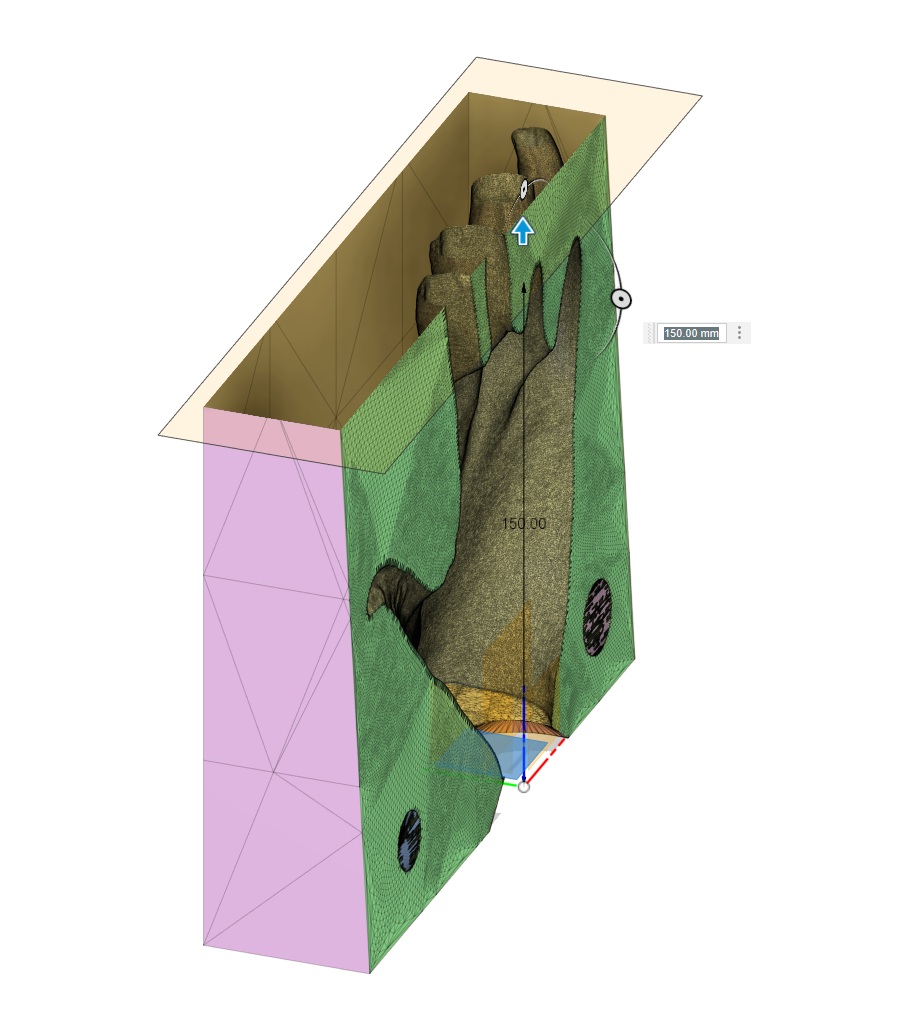
process
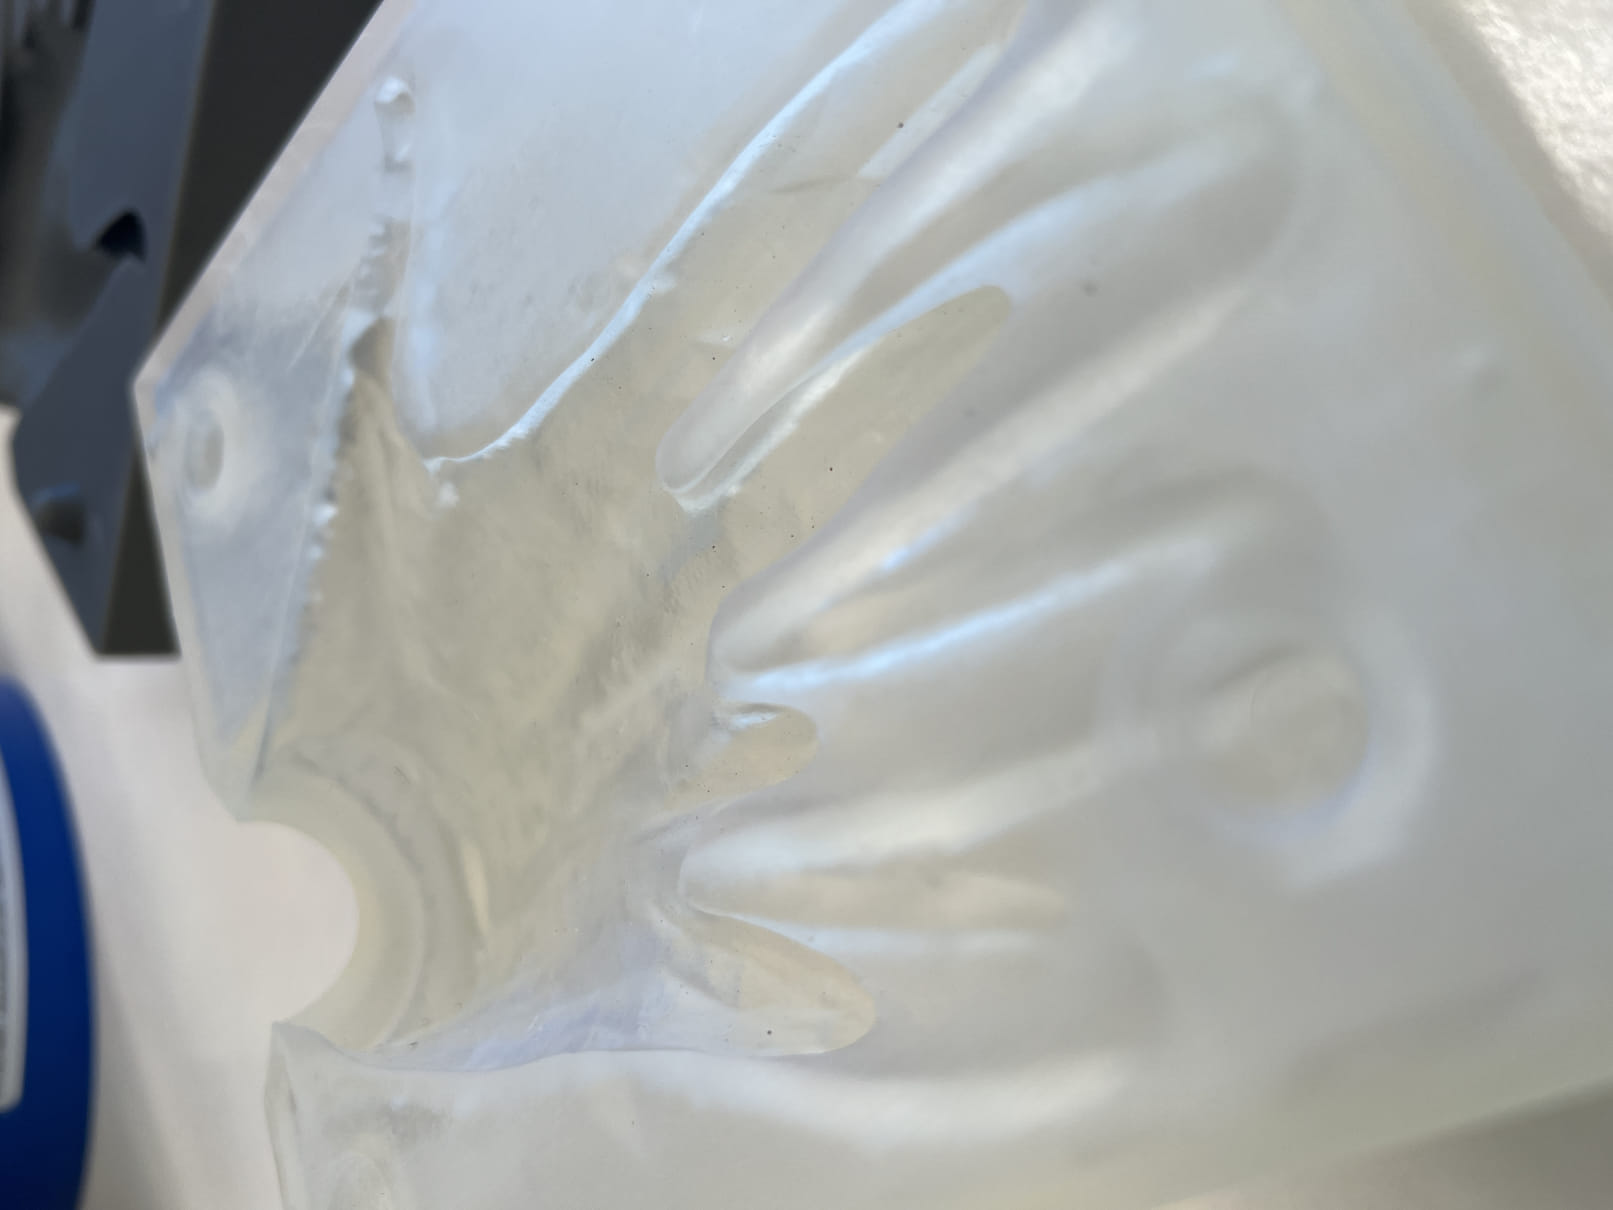
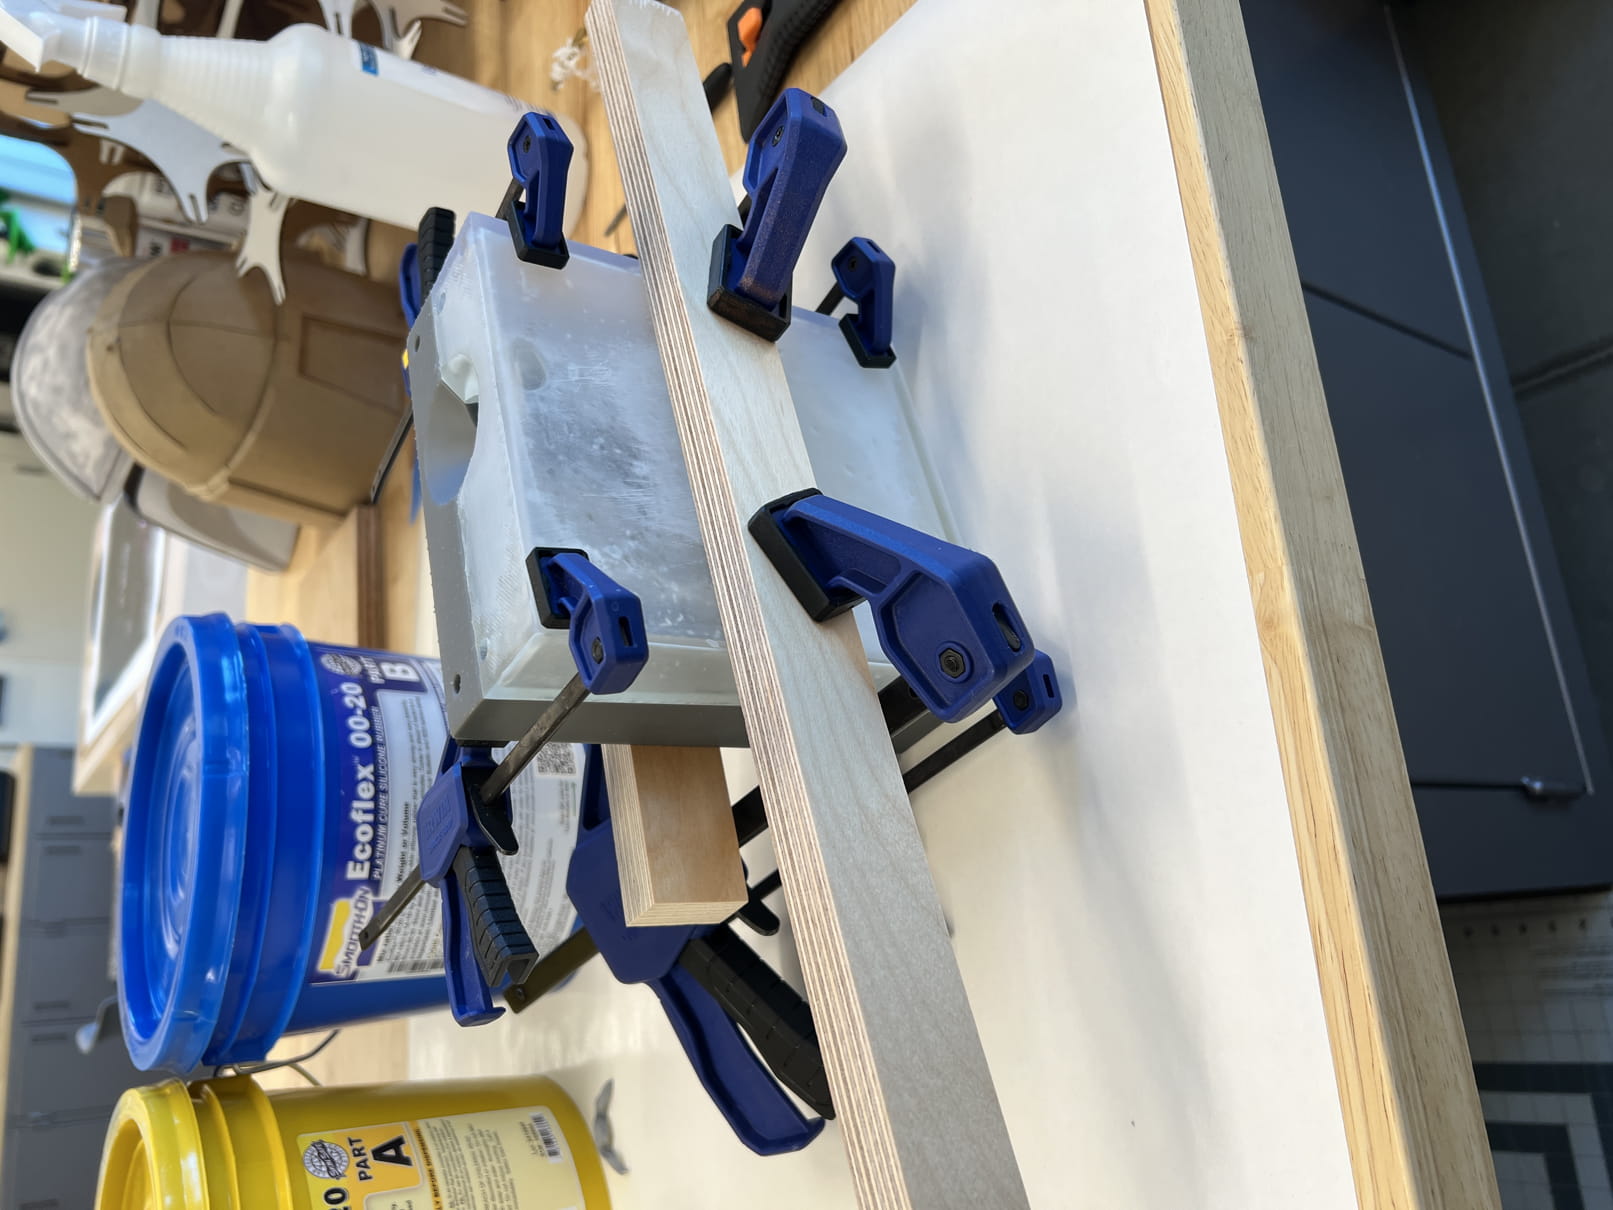
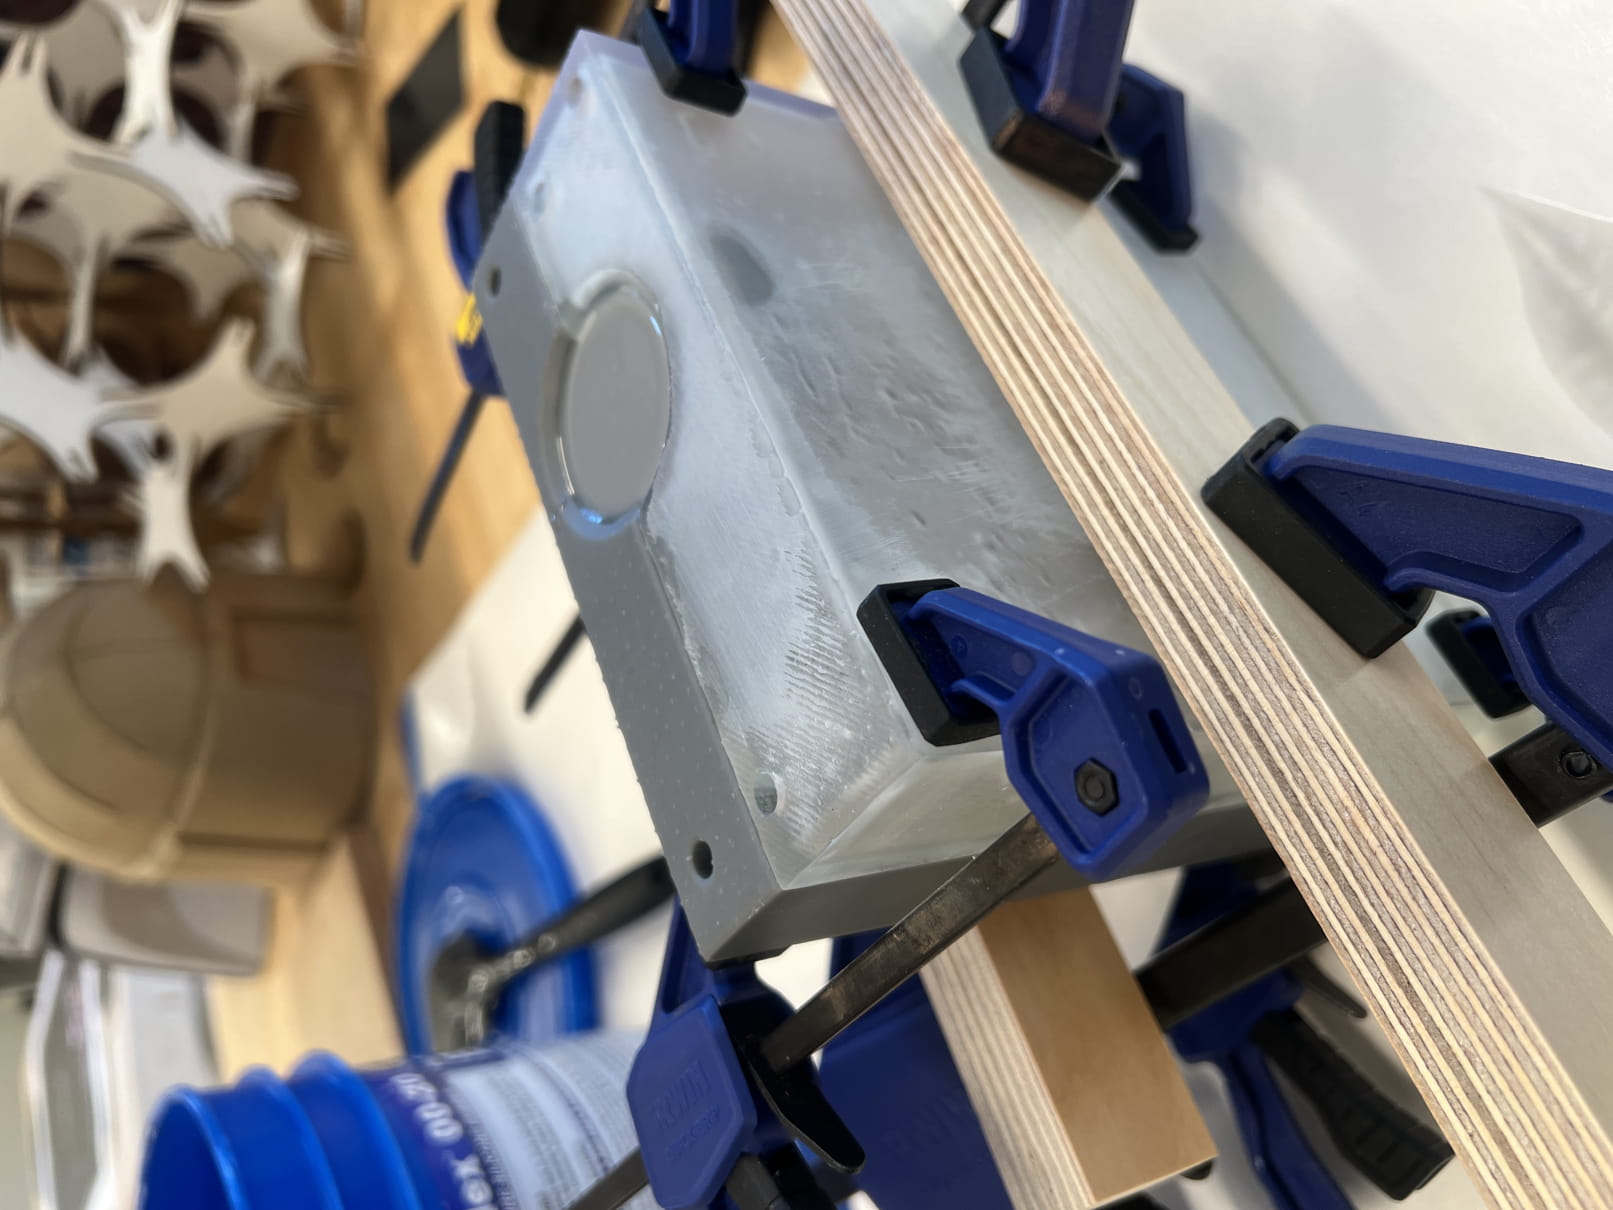
After creating the mold halves in fusion i sent them off to our formalabs printer to get i nice high resolution 3d print which hill hopefull capture the skin texture of the scan. And produce a smooth layer free part. I decided to hollw my molds to save material.
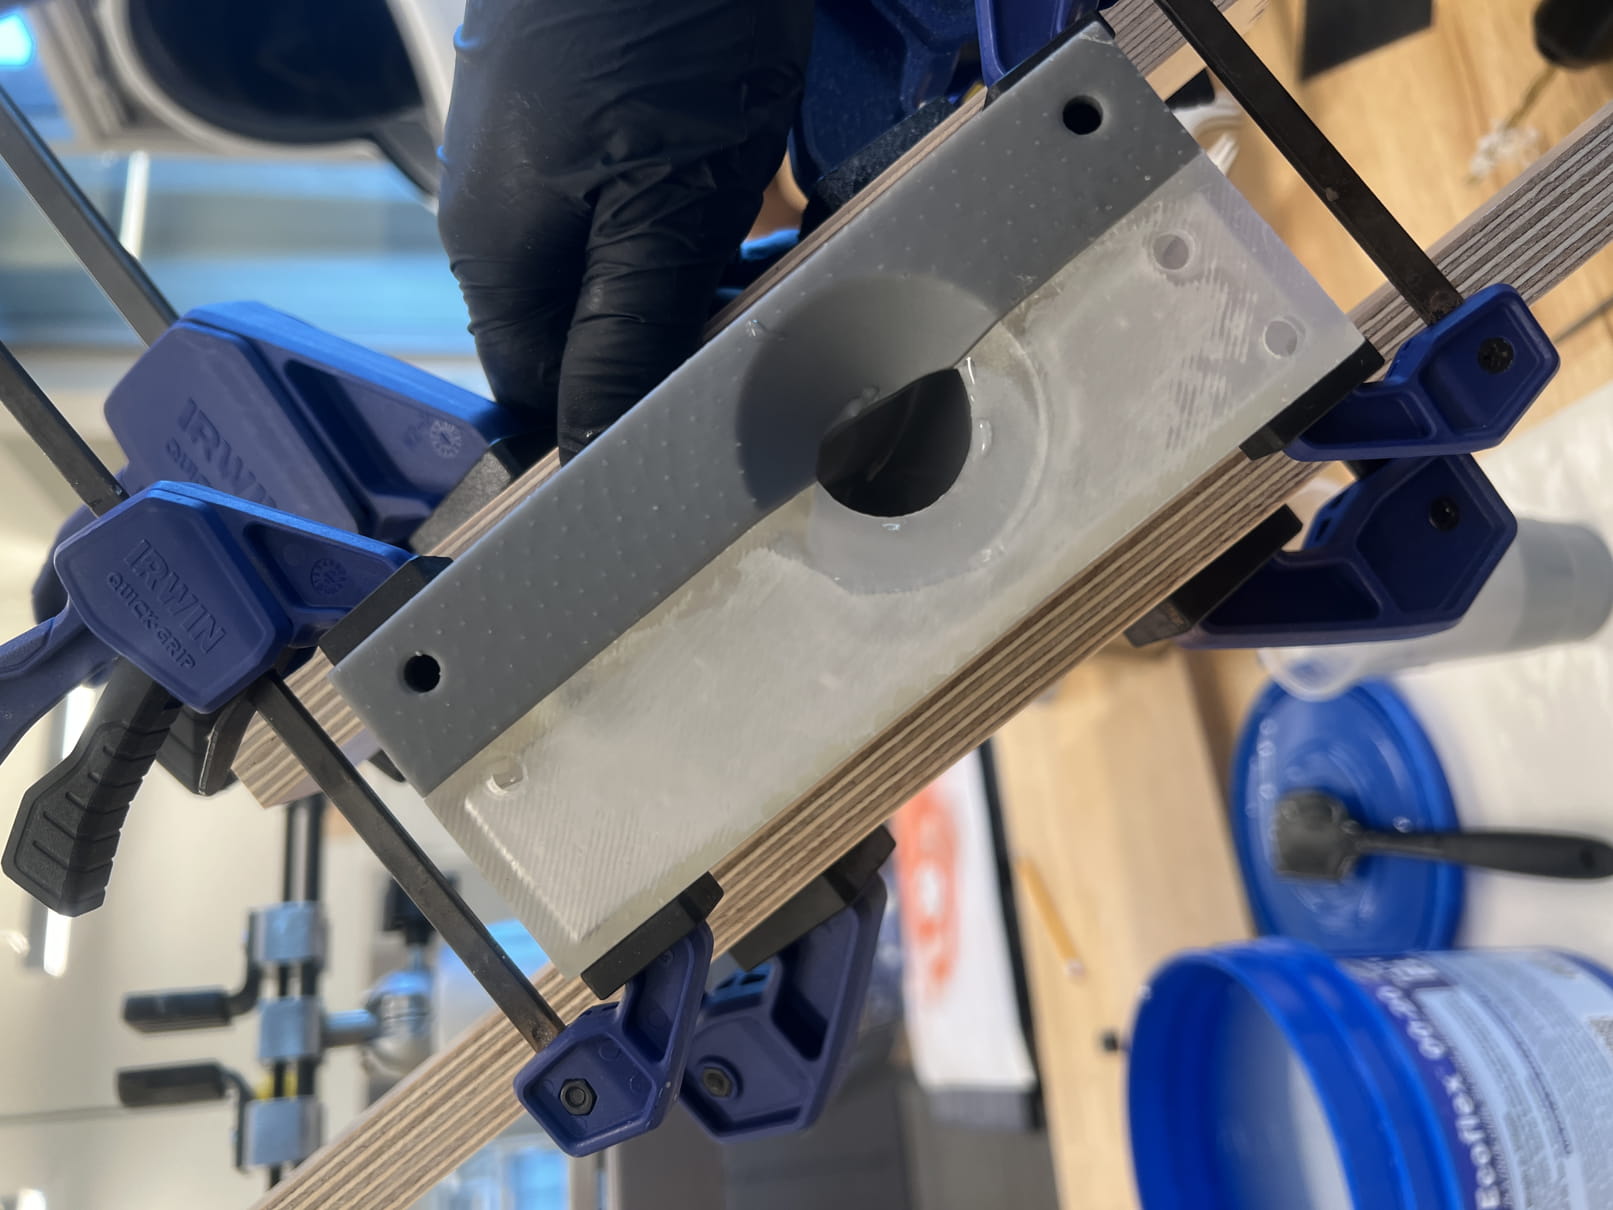
The parts printed over night and presto i had two halves ready to be post processed and preped for casting. I did notice the parts to have some wraping so i decided to try and flatten the faces of the mold with the negative key registration. i did this by wet sanding the face on a flat counter with some 220 grit sand paper.
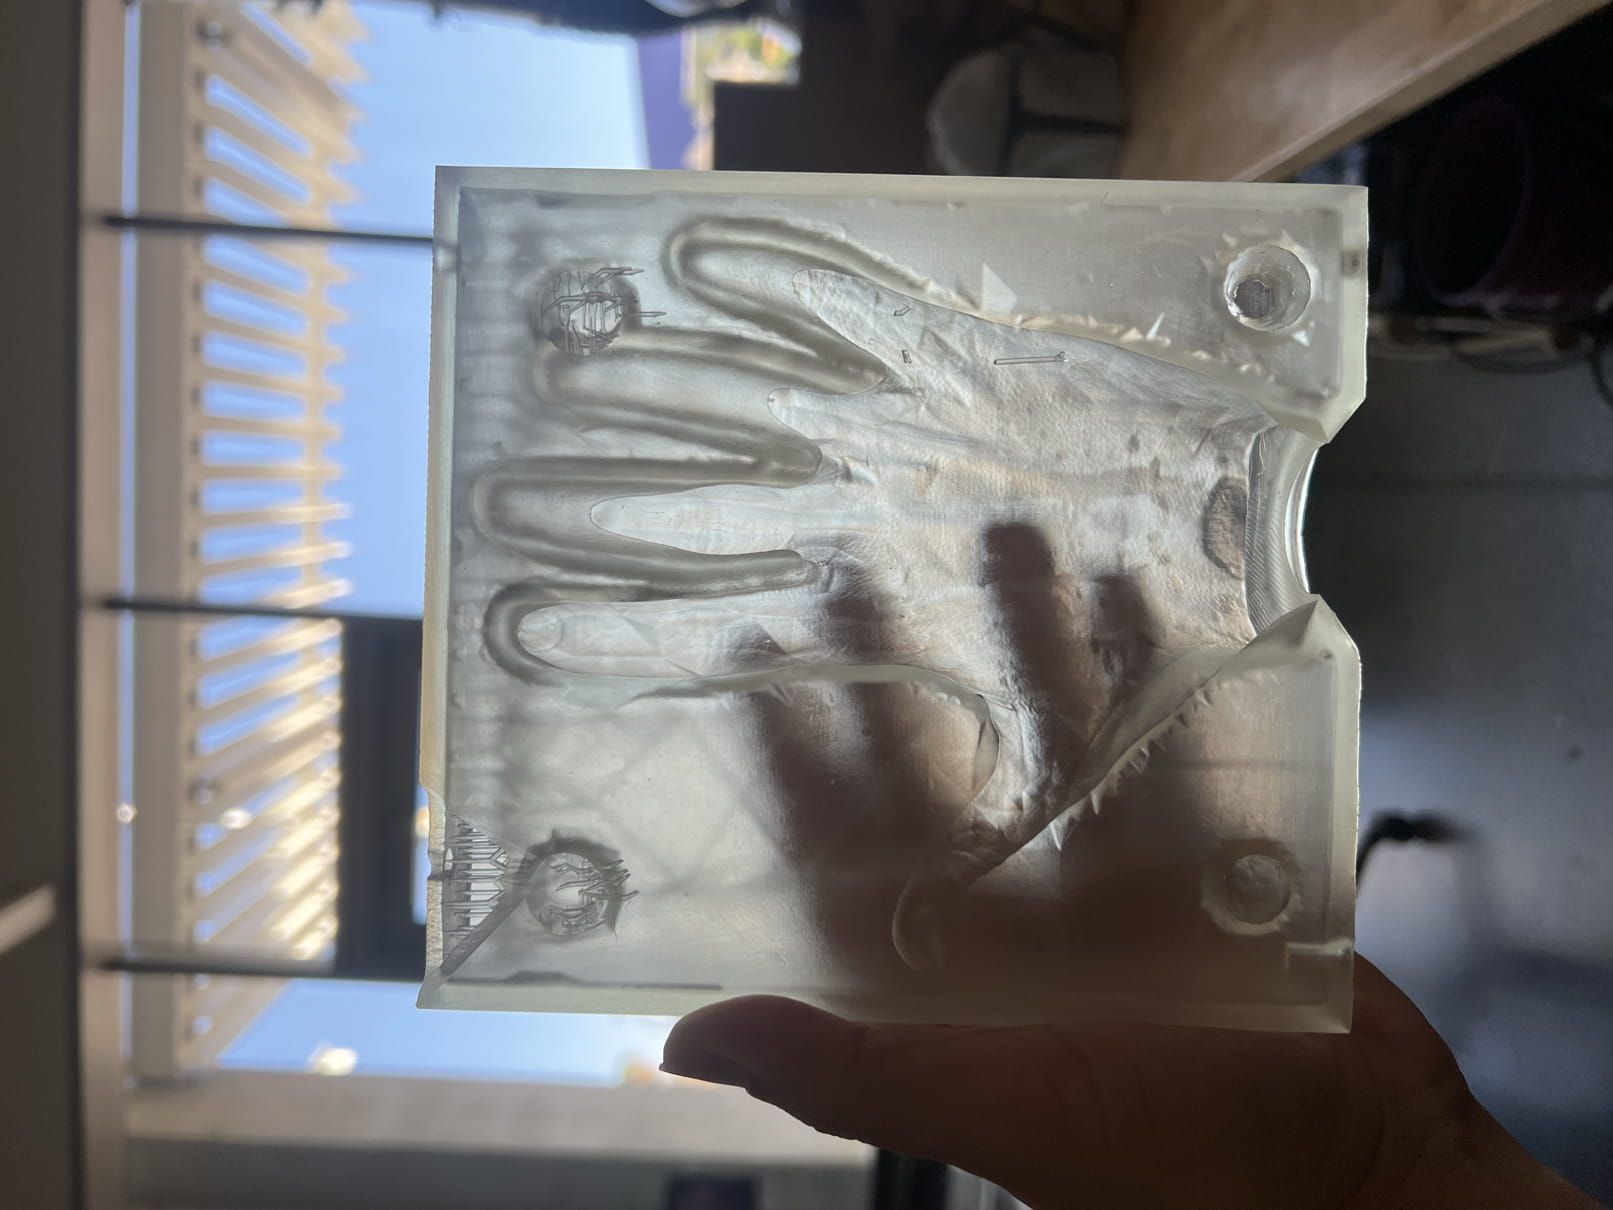


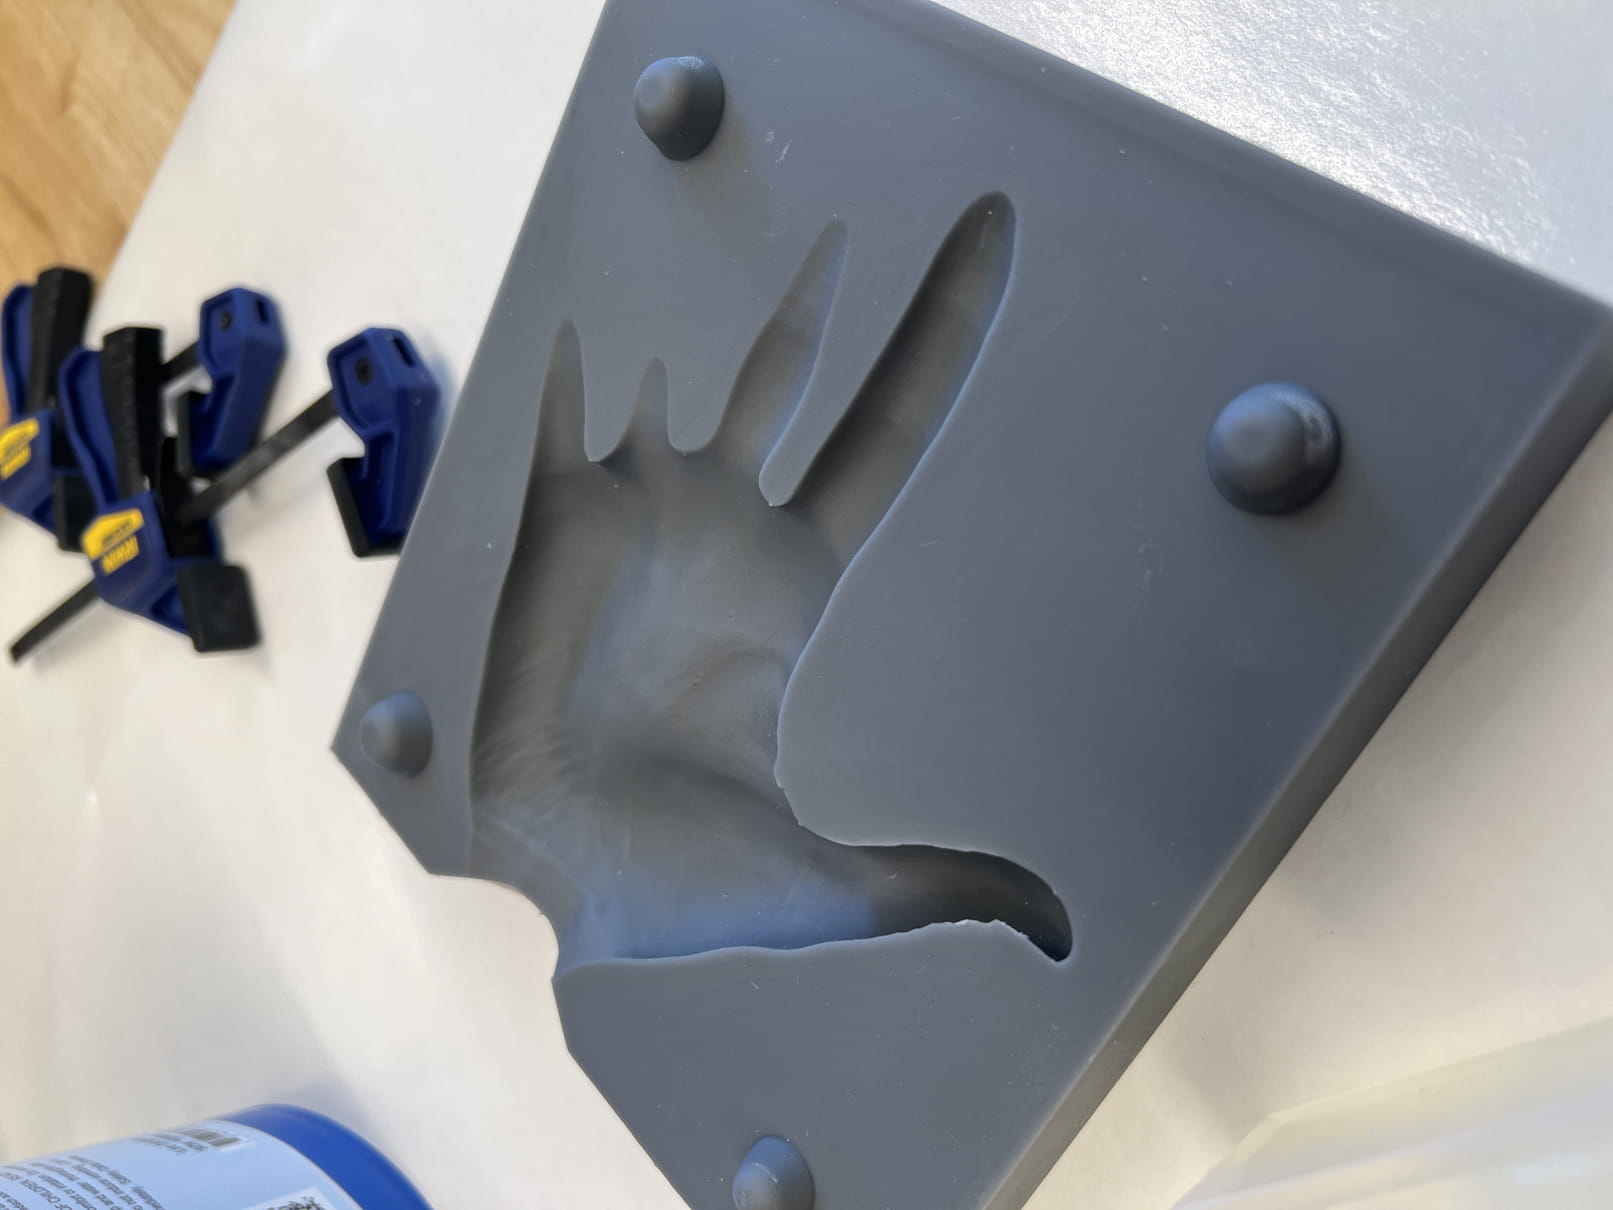
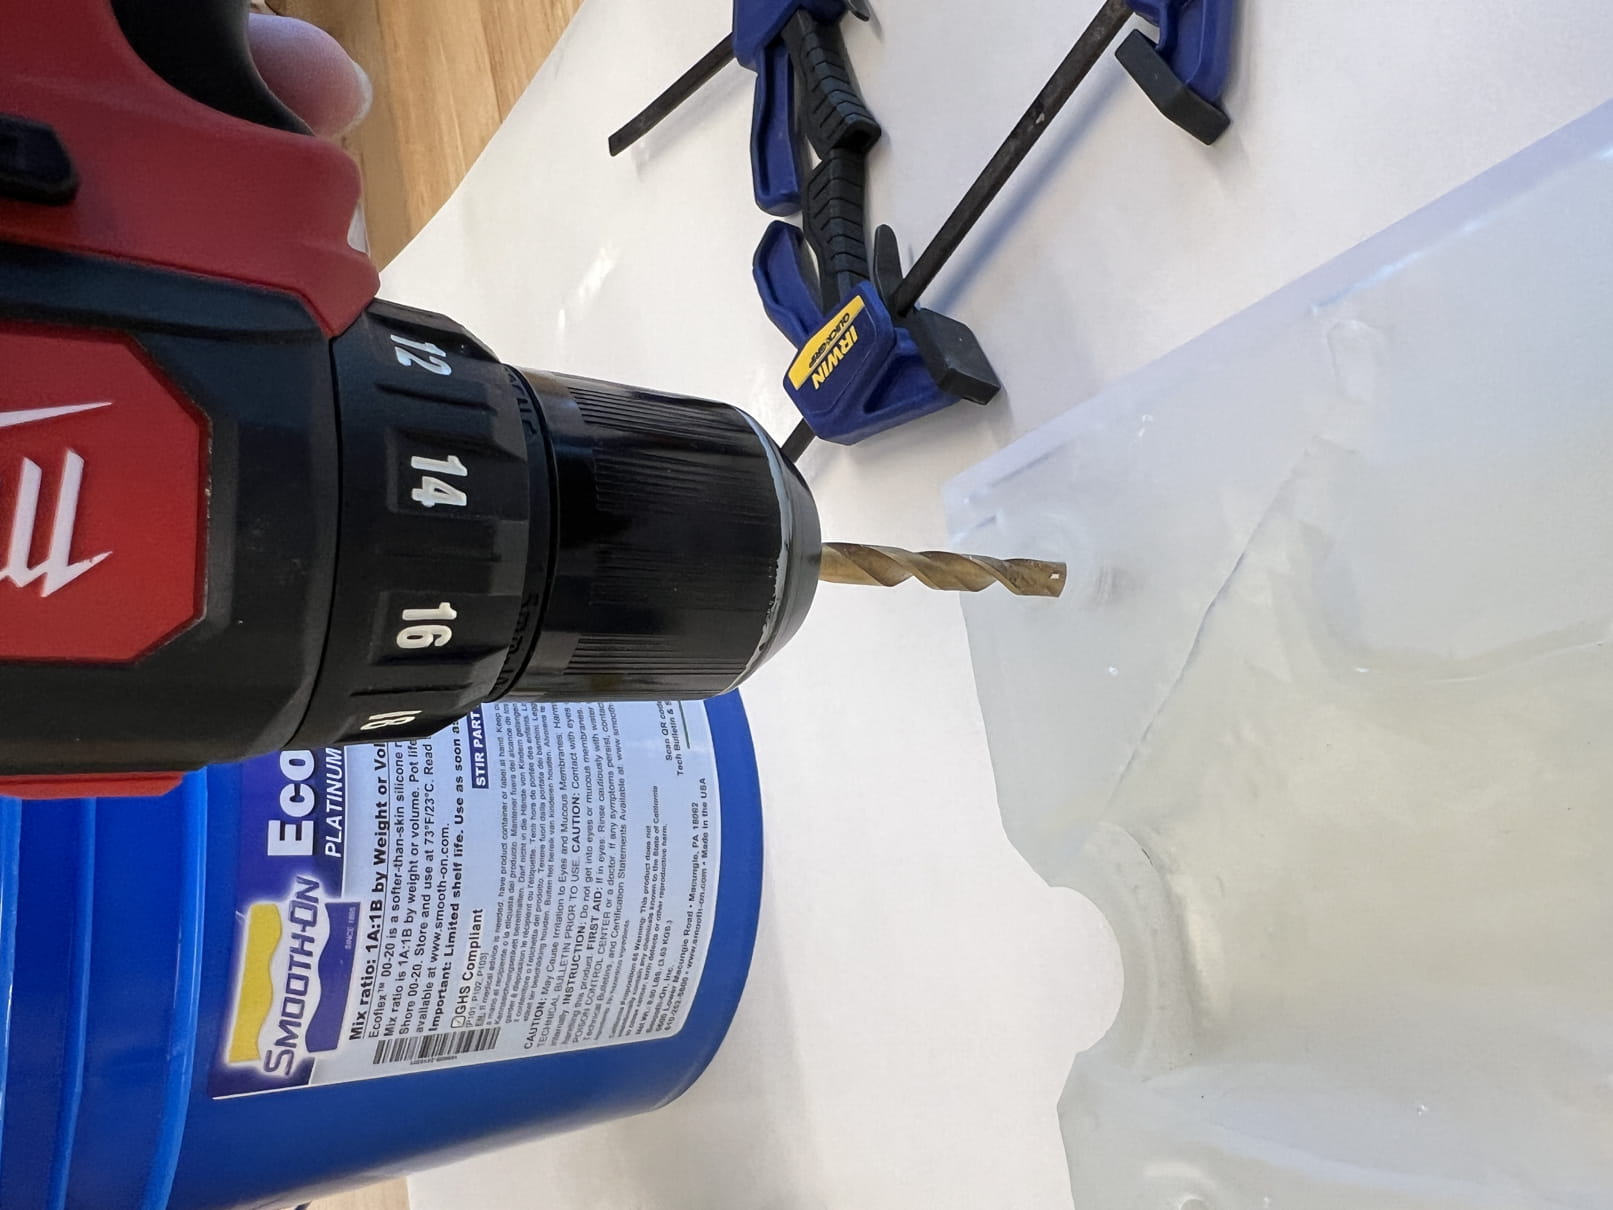
With the mold halves clamped together I noticed the the faces of the two molds wher not seating flush with one another. I think this was largly due to the registration keys not having enough tolerence between them selves. I used a boolean operation in cad and should have made the cut out or negative of the key a bit larger. To help remedy I drilled out the negative side of the key to remove the floor along for the molds to sit closer to one another.
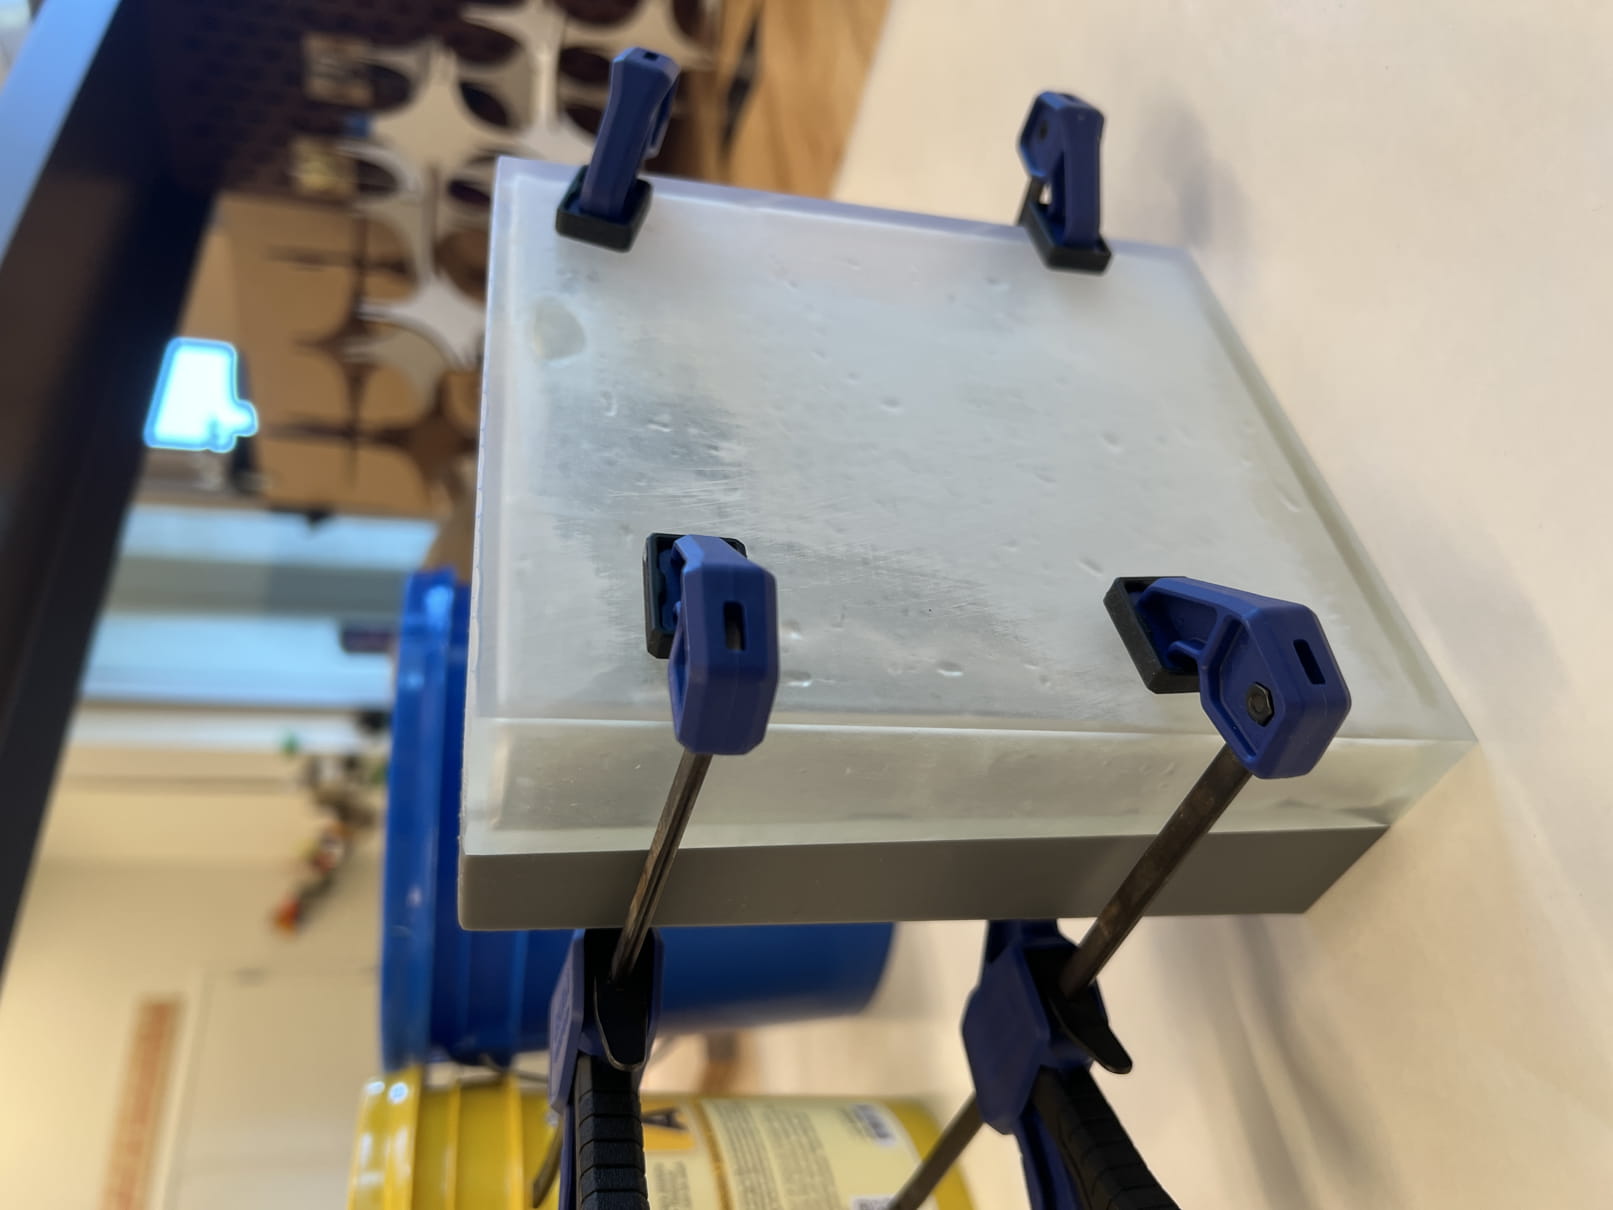
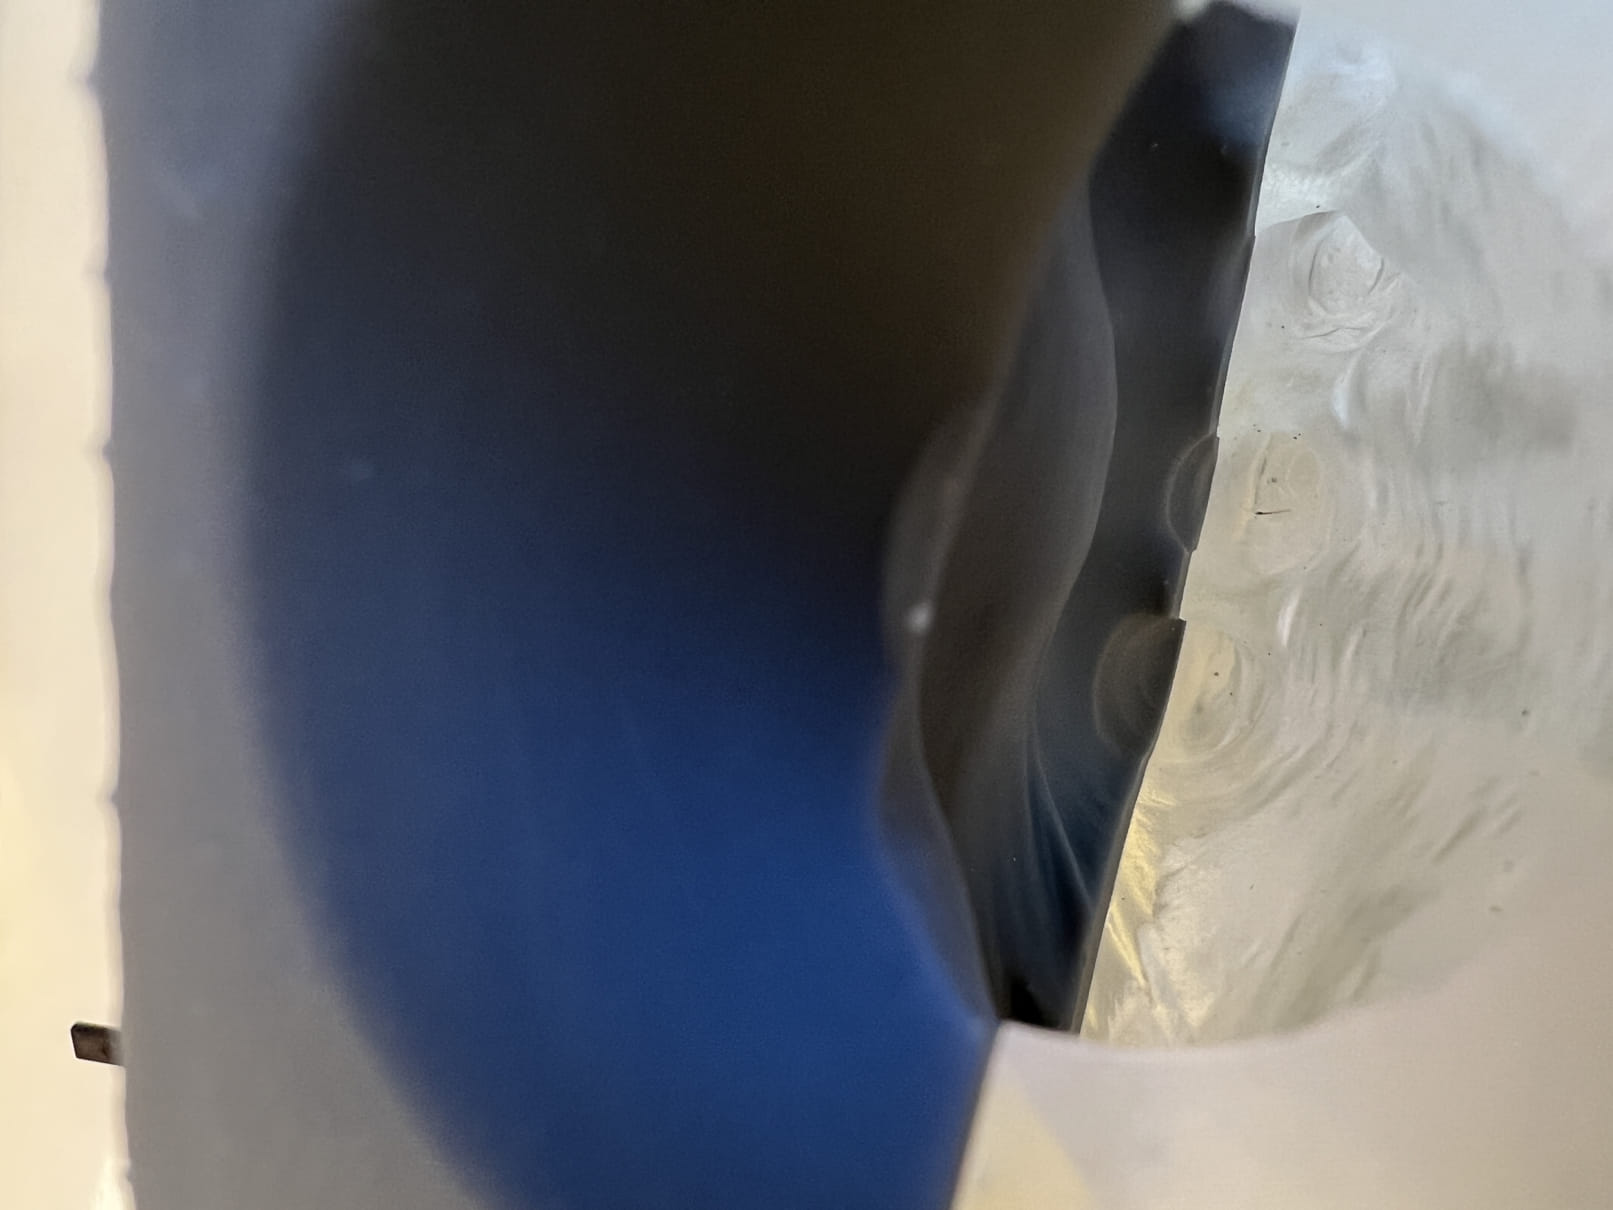
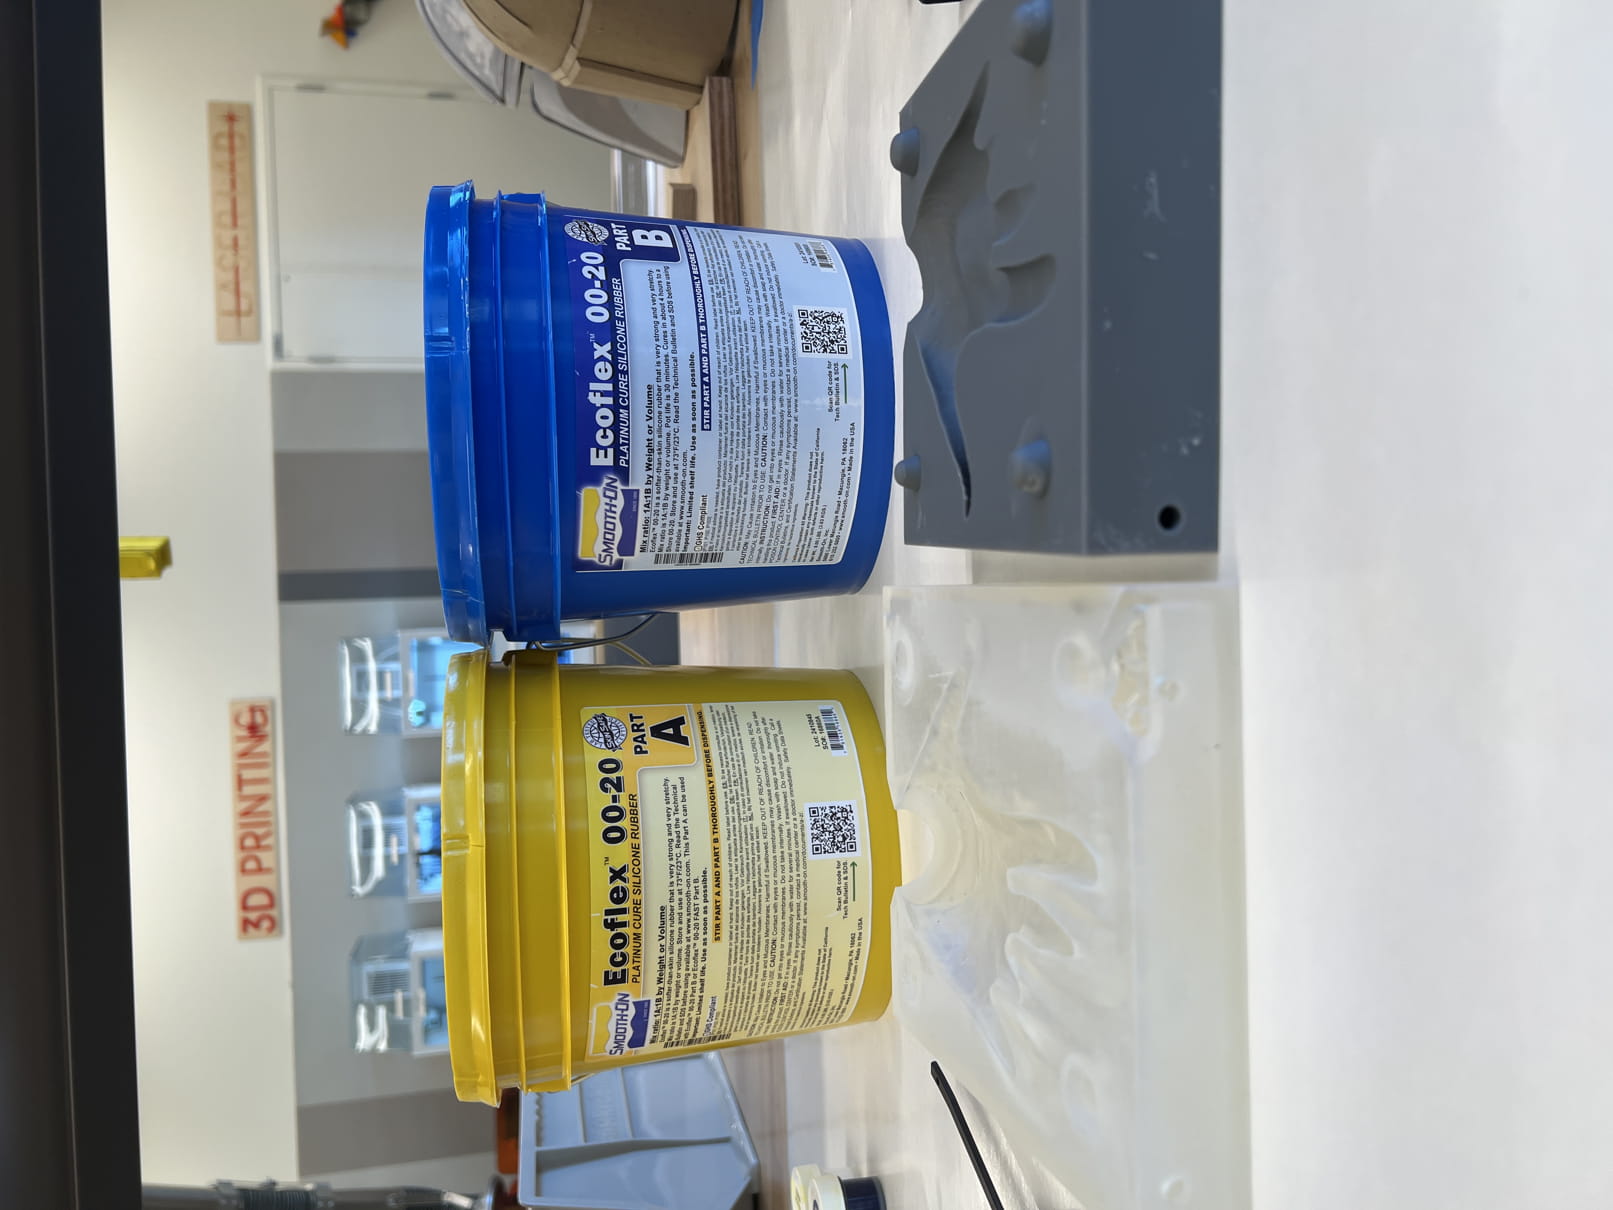
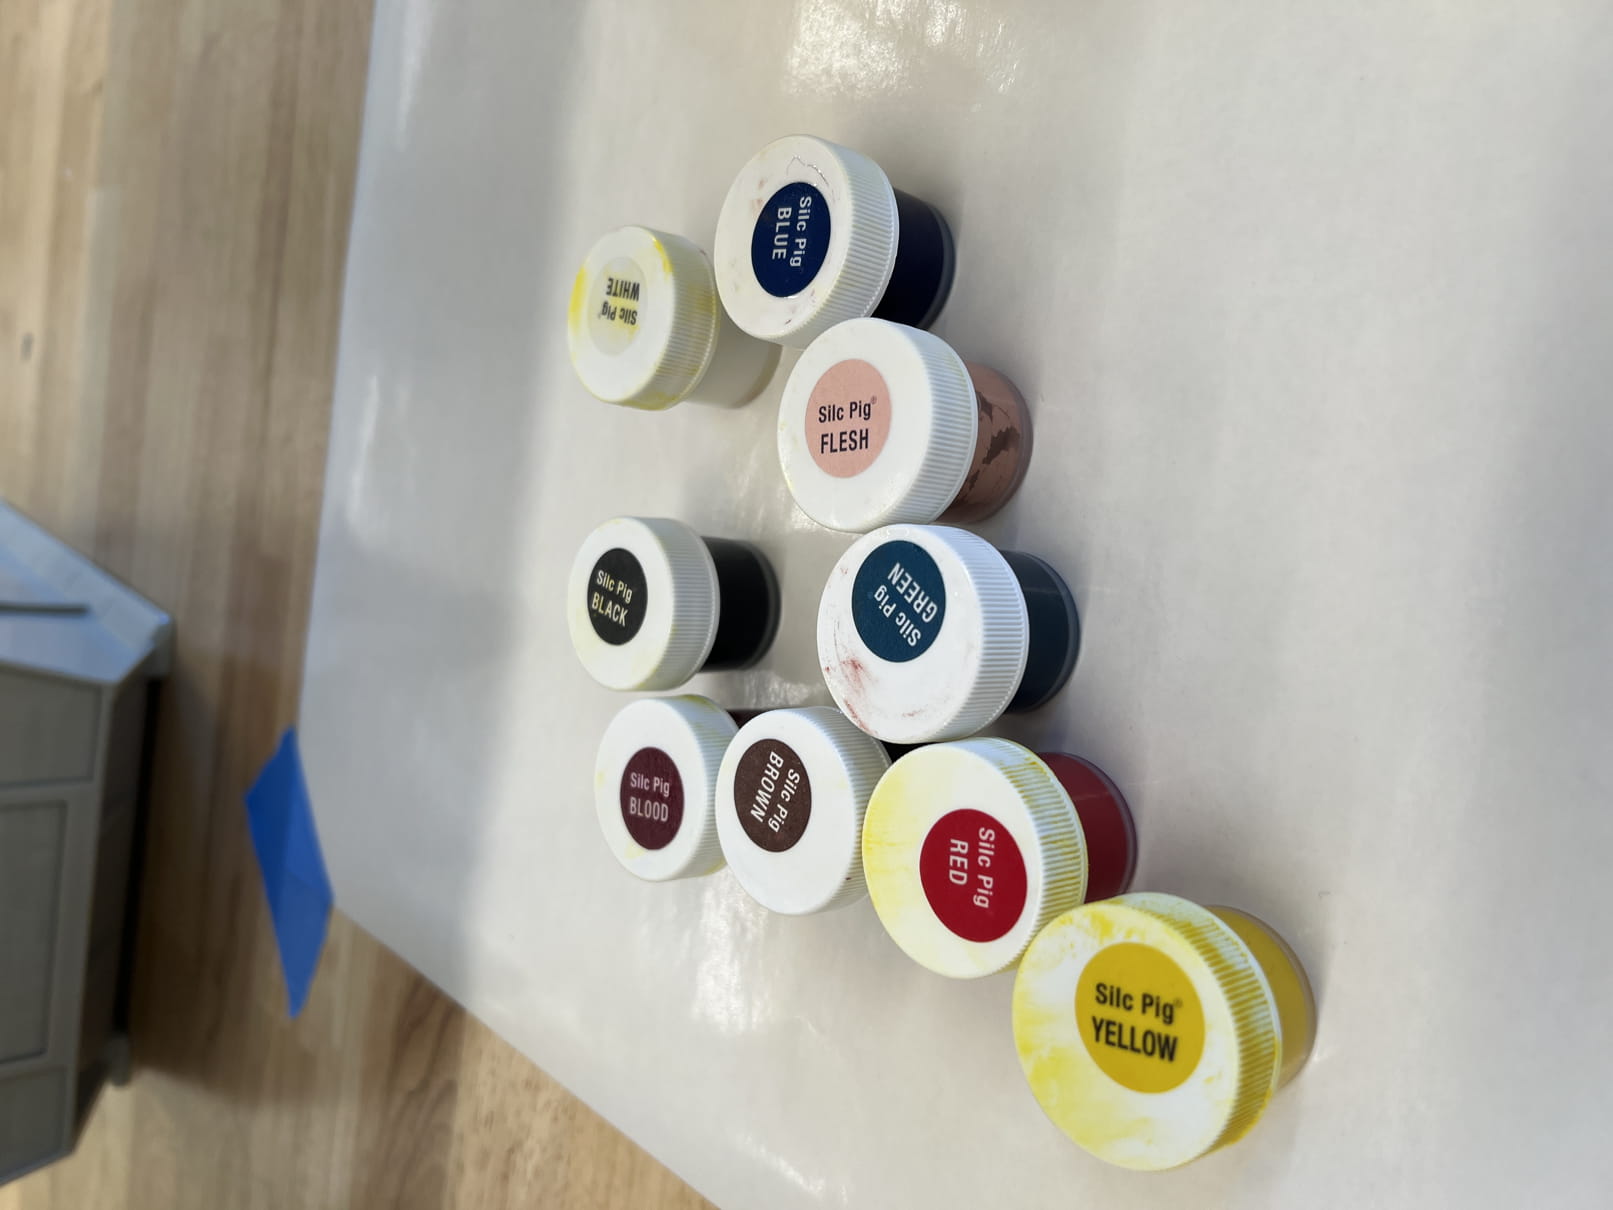
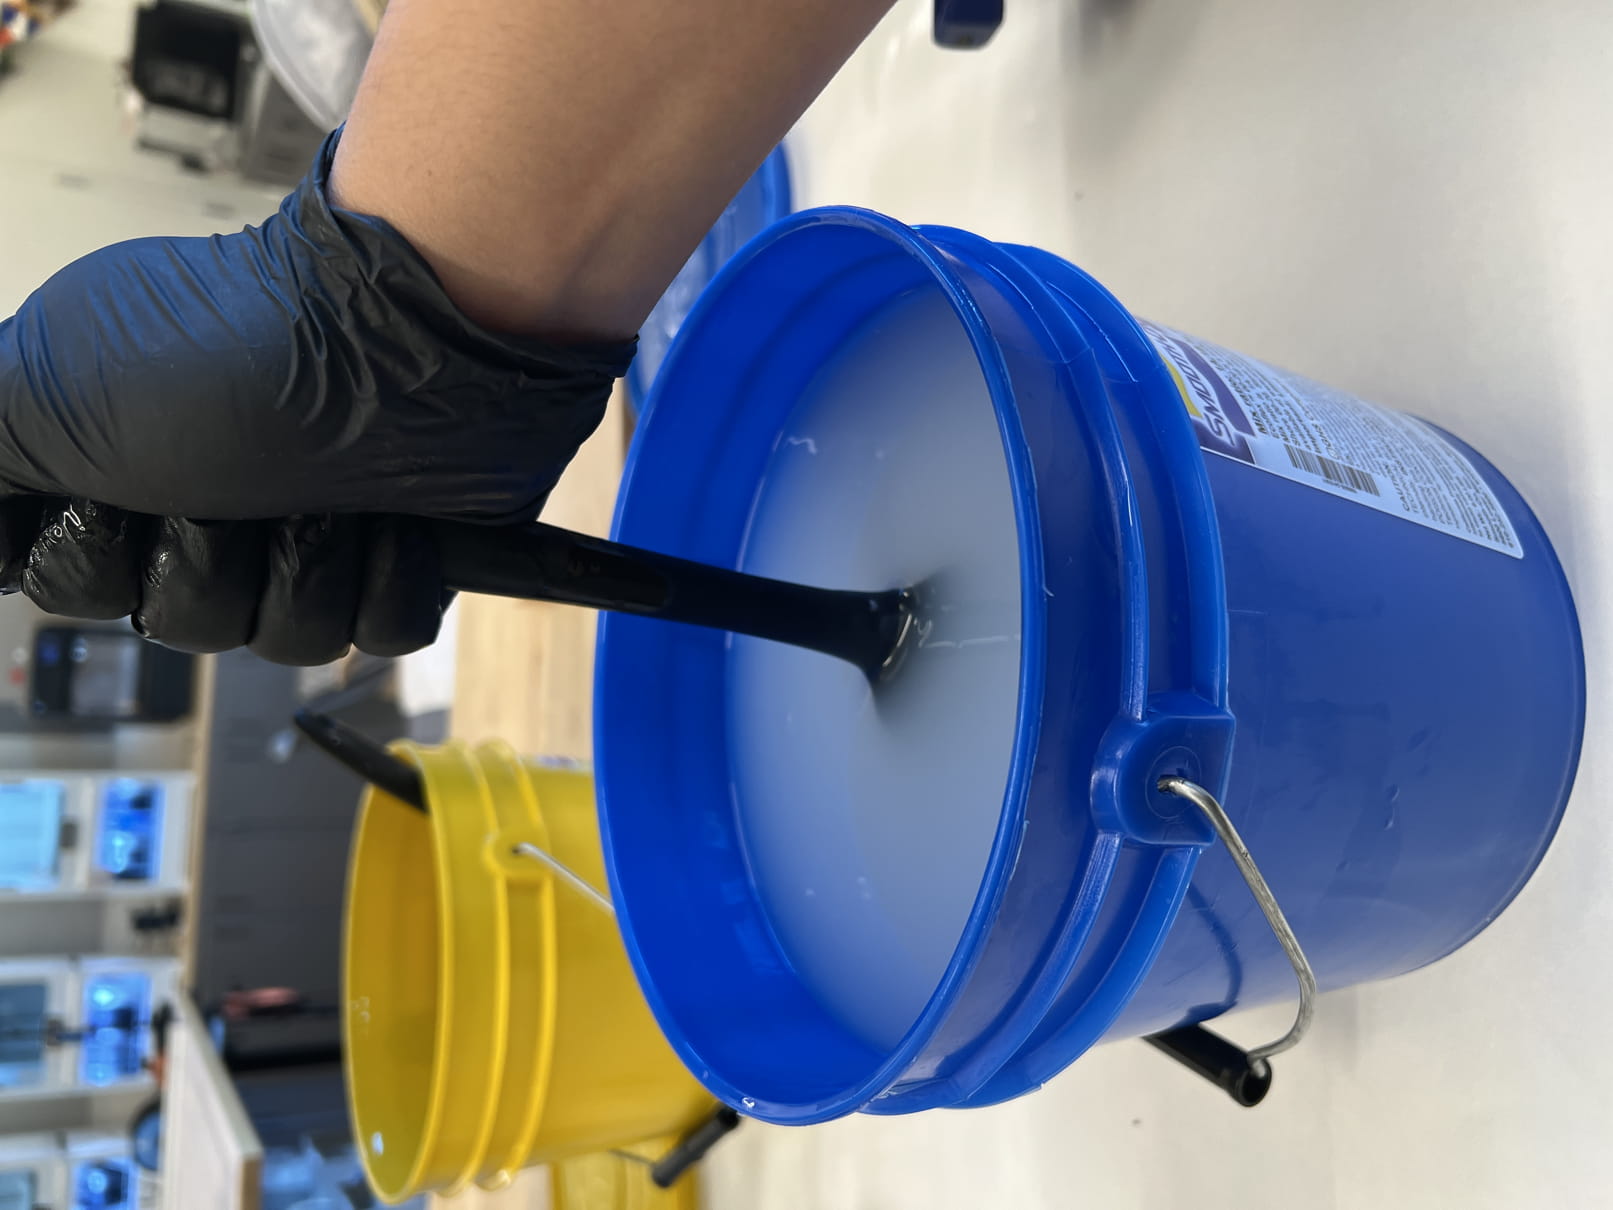
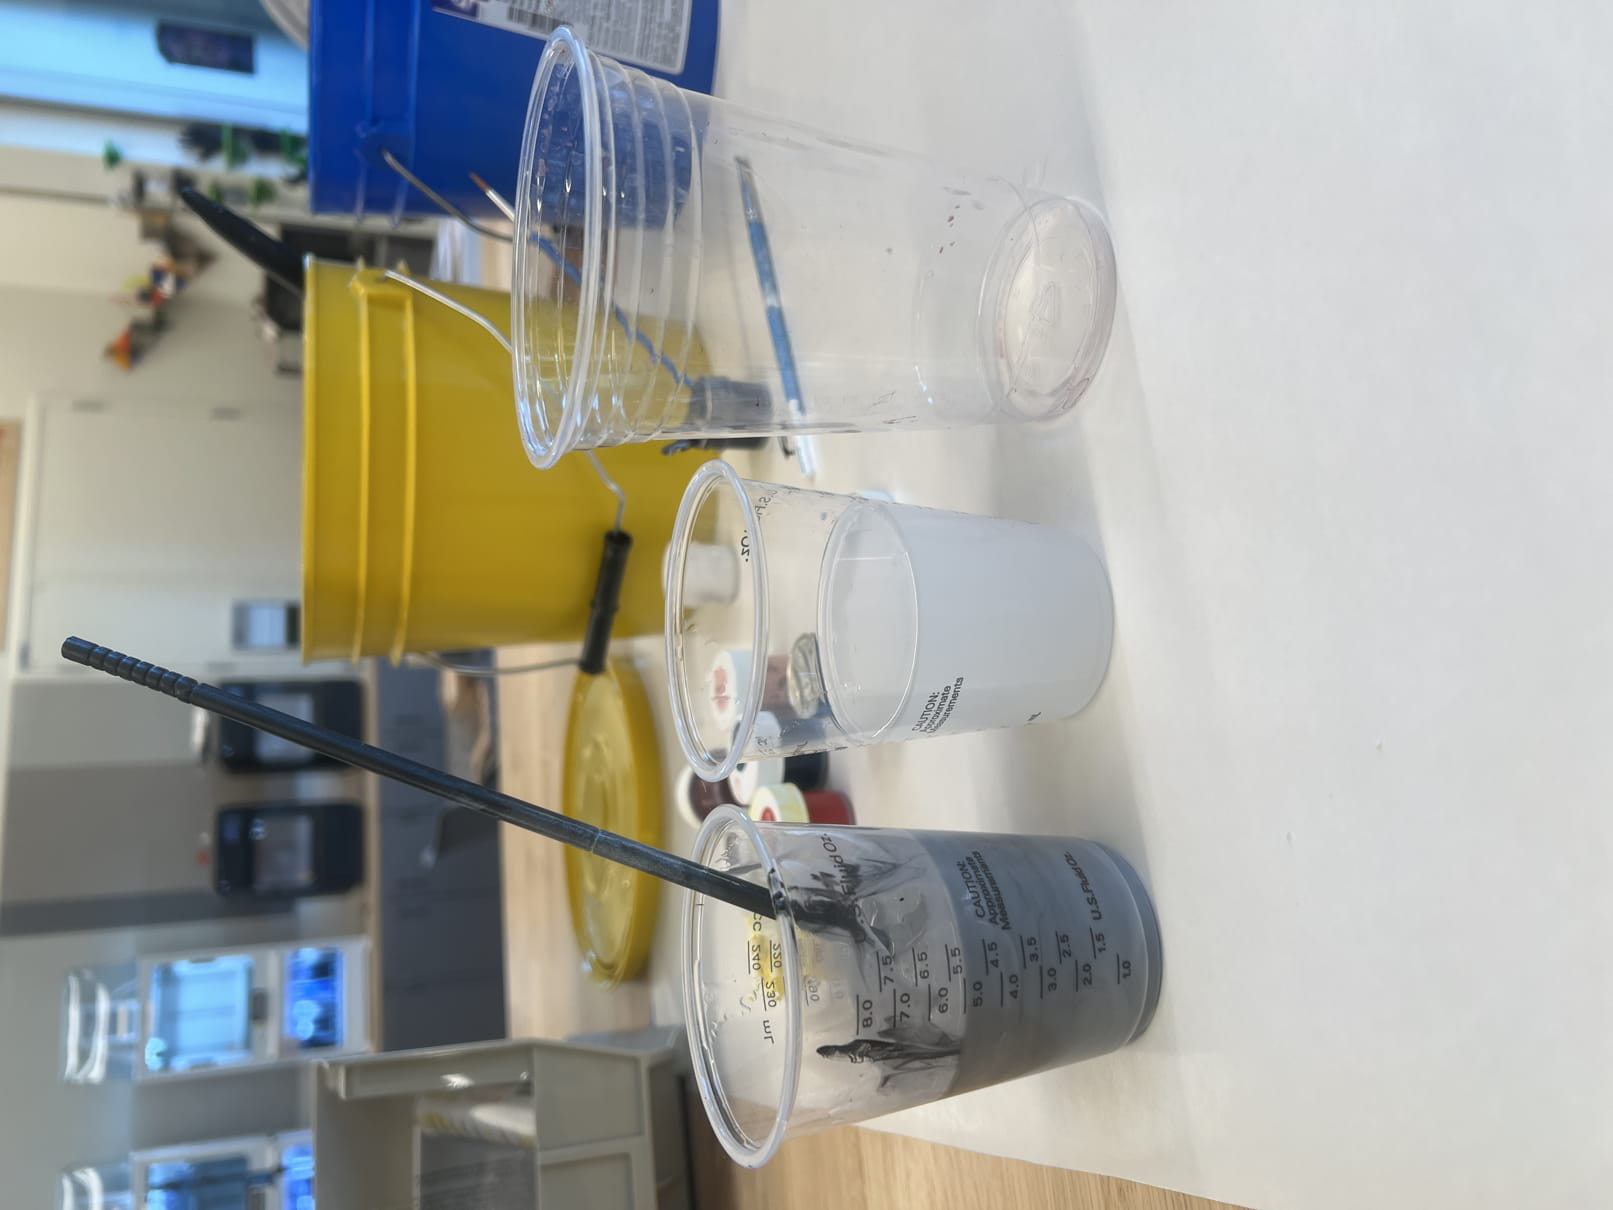
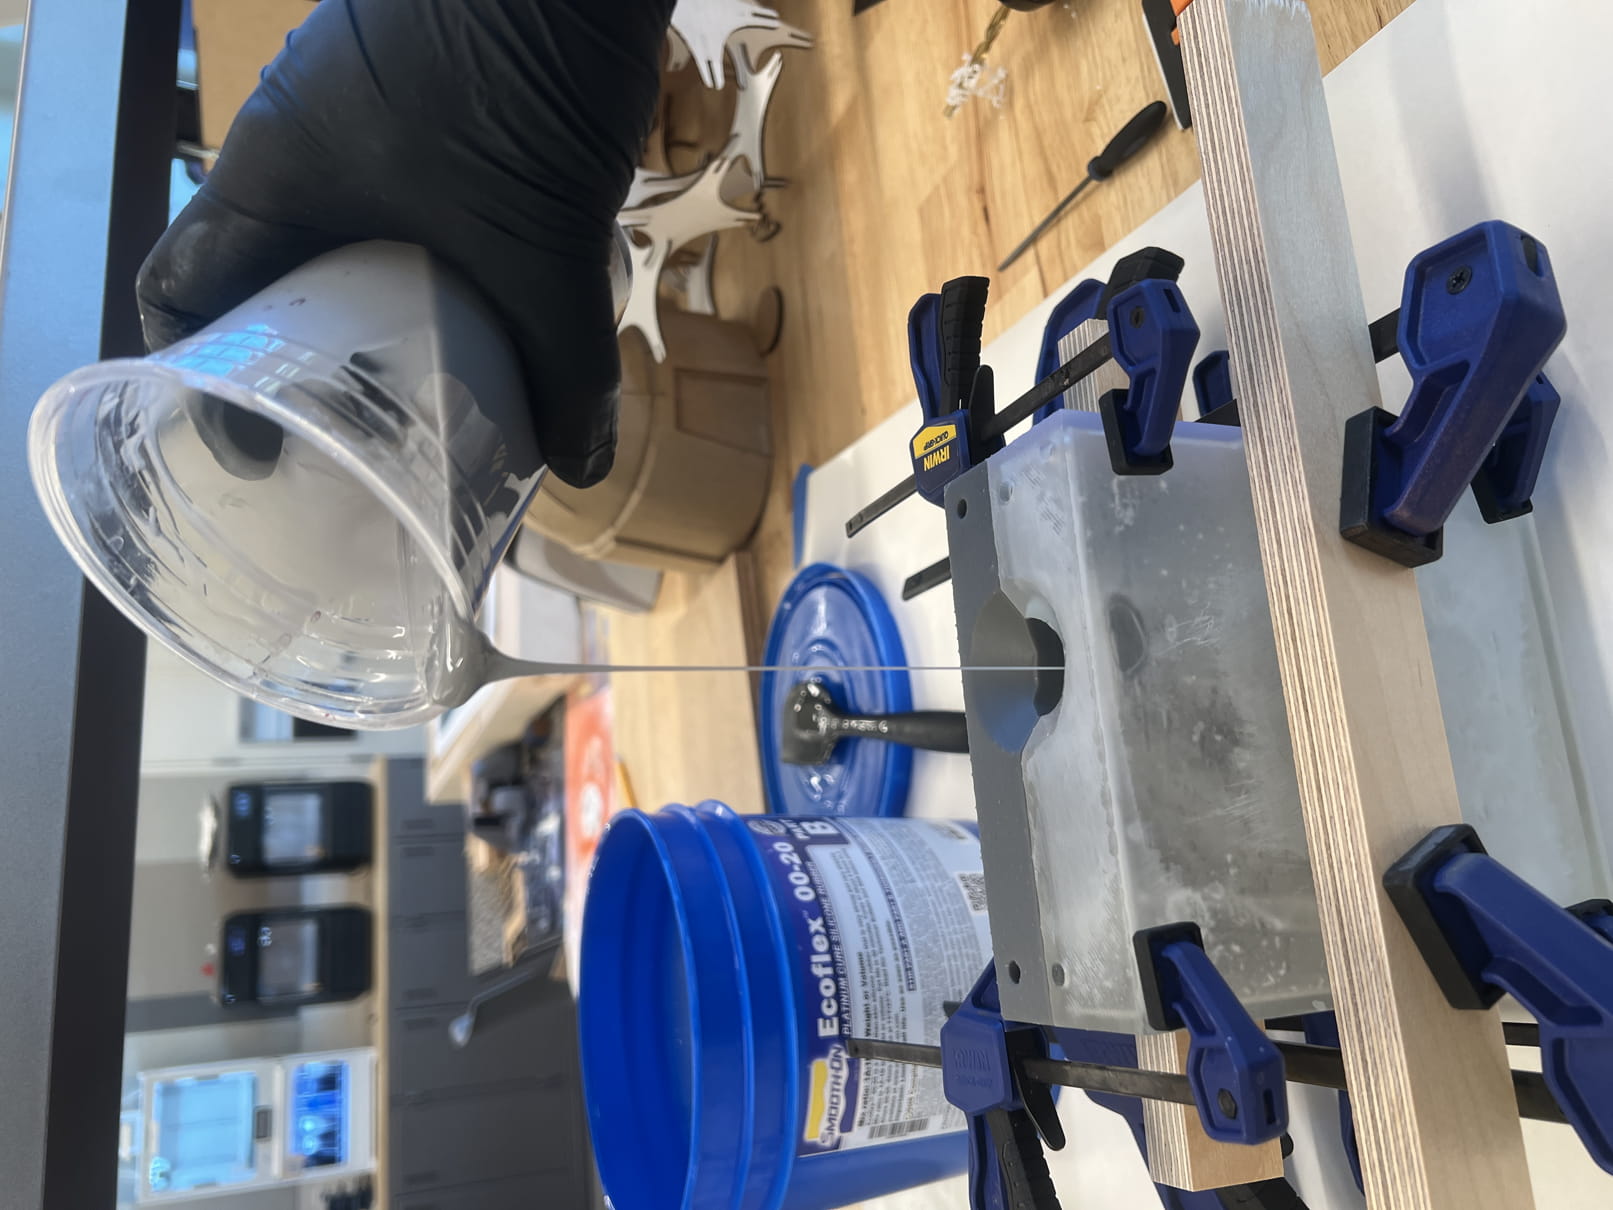
I will be using smooth on ecoflex 00-20 as my casting material. It is a flexible silicone that should cure to a durometer of 20a. I will also be using silc pig a dye specialy fomulated to be used as a colorant for silicone. Whaen mixing it is important to mix with a slicing motion rather then a roation to help reduce the amount of air being introduced to your mixture. Also measure out part a and b in sperate cups then combine into a larger third cup to mix and pur from. I set a timer for 30 mins to track pot life and then procedded to pour into the mold. Pour a thin stream from a high distance to help pop any bubbles that can remain in your mixture. I also filled my mold in thirds. Making sure to pick up and "tumble" the mold to get a nice even coating on all surfaces of the molds helping to ensure a nice surface finish on the final part.
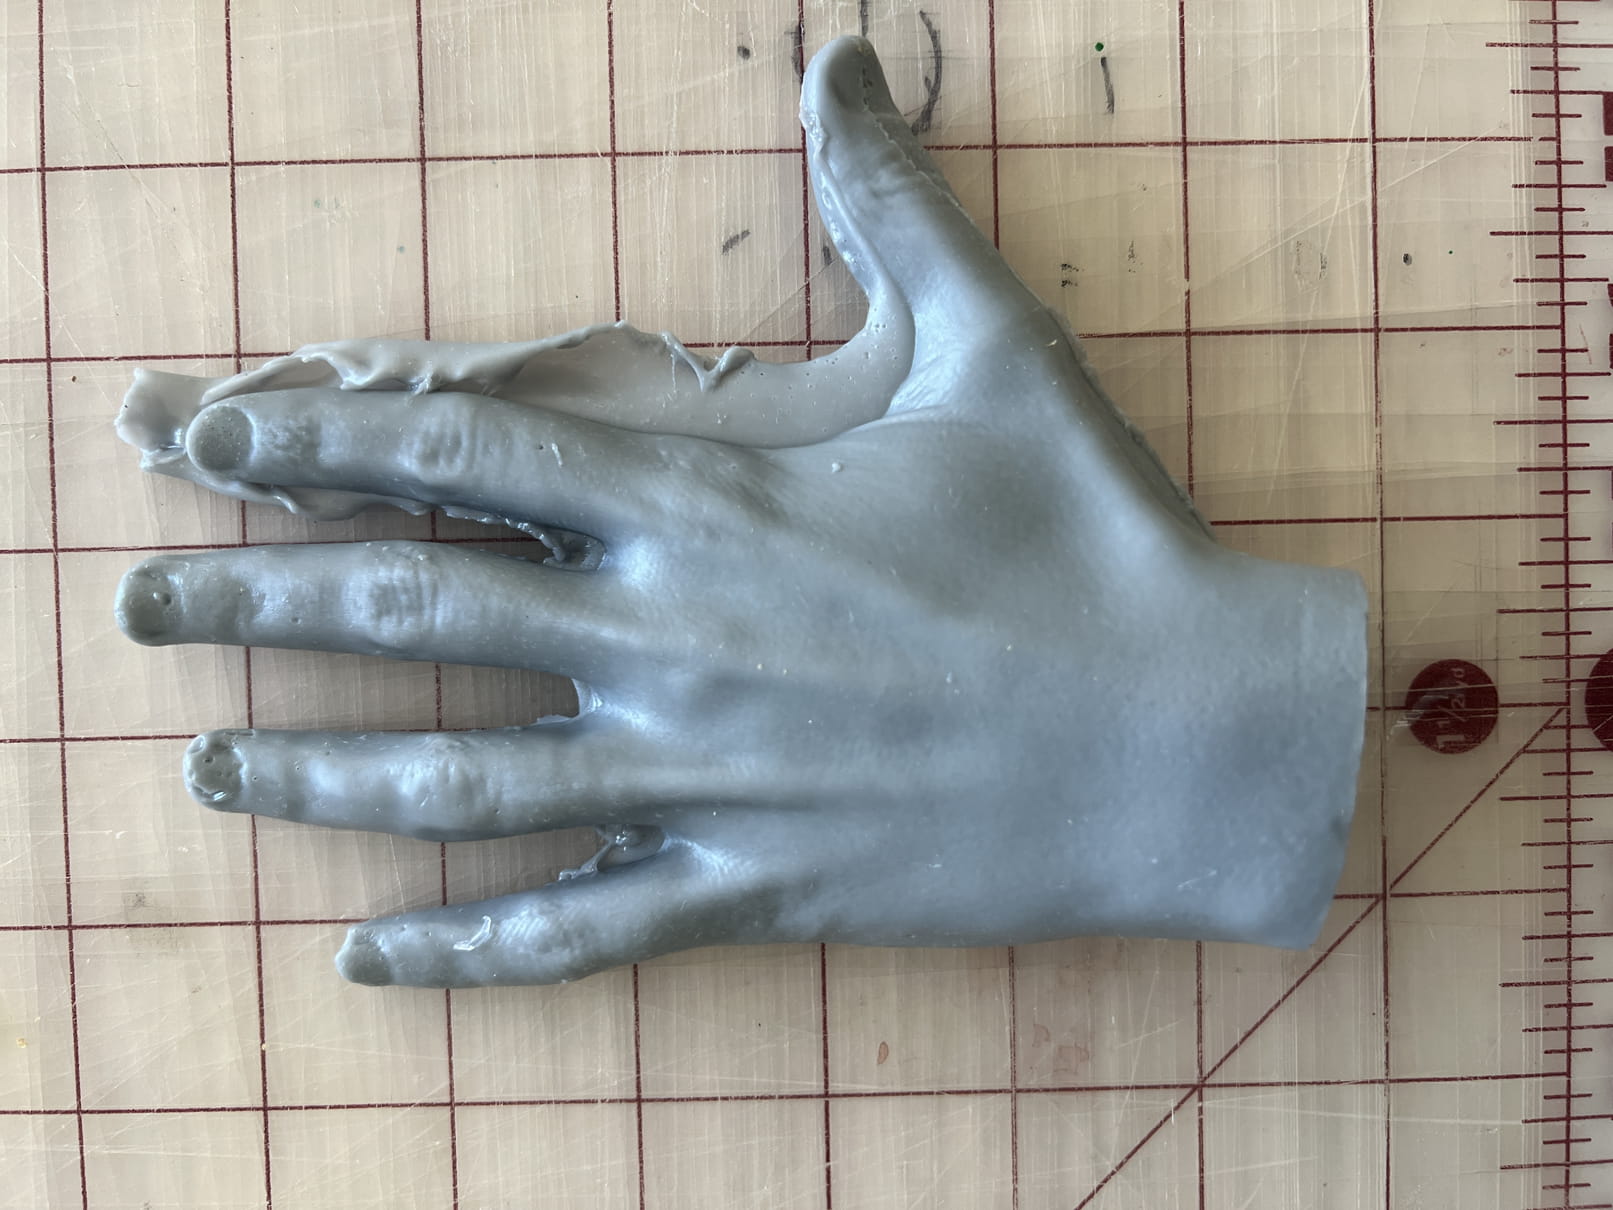
After letting the mold cure over night (about 16 hours) i demolded the silicion hand. I used a plastic pry tool to seperate the part as it was faily secure fit. I didnt apply mold release but the part seemed to pull out fine with some coaxing. I had to make sure to demold gently as not to tear the fingers which had the deepest inset in the mold. I had some slight issues with curing as the outside of the part was a little tacky and wet. I used some alchol to clean the hand and mold, and it seemed to come off alright. I thihnk this might have had to do with either the pigment i used or the shelf life of the silicon nearin its end. Either way it still turned out alright.
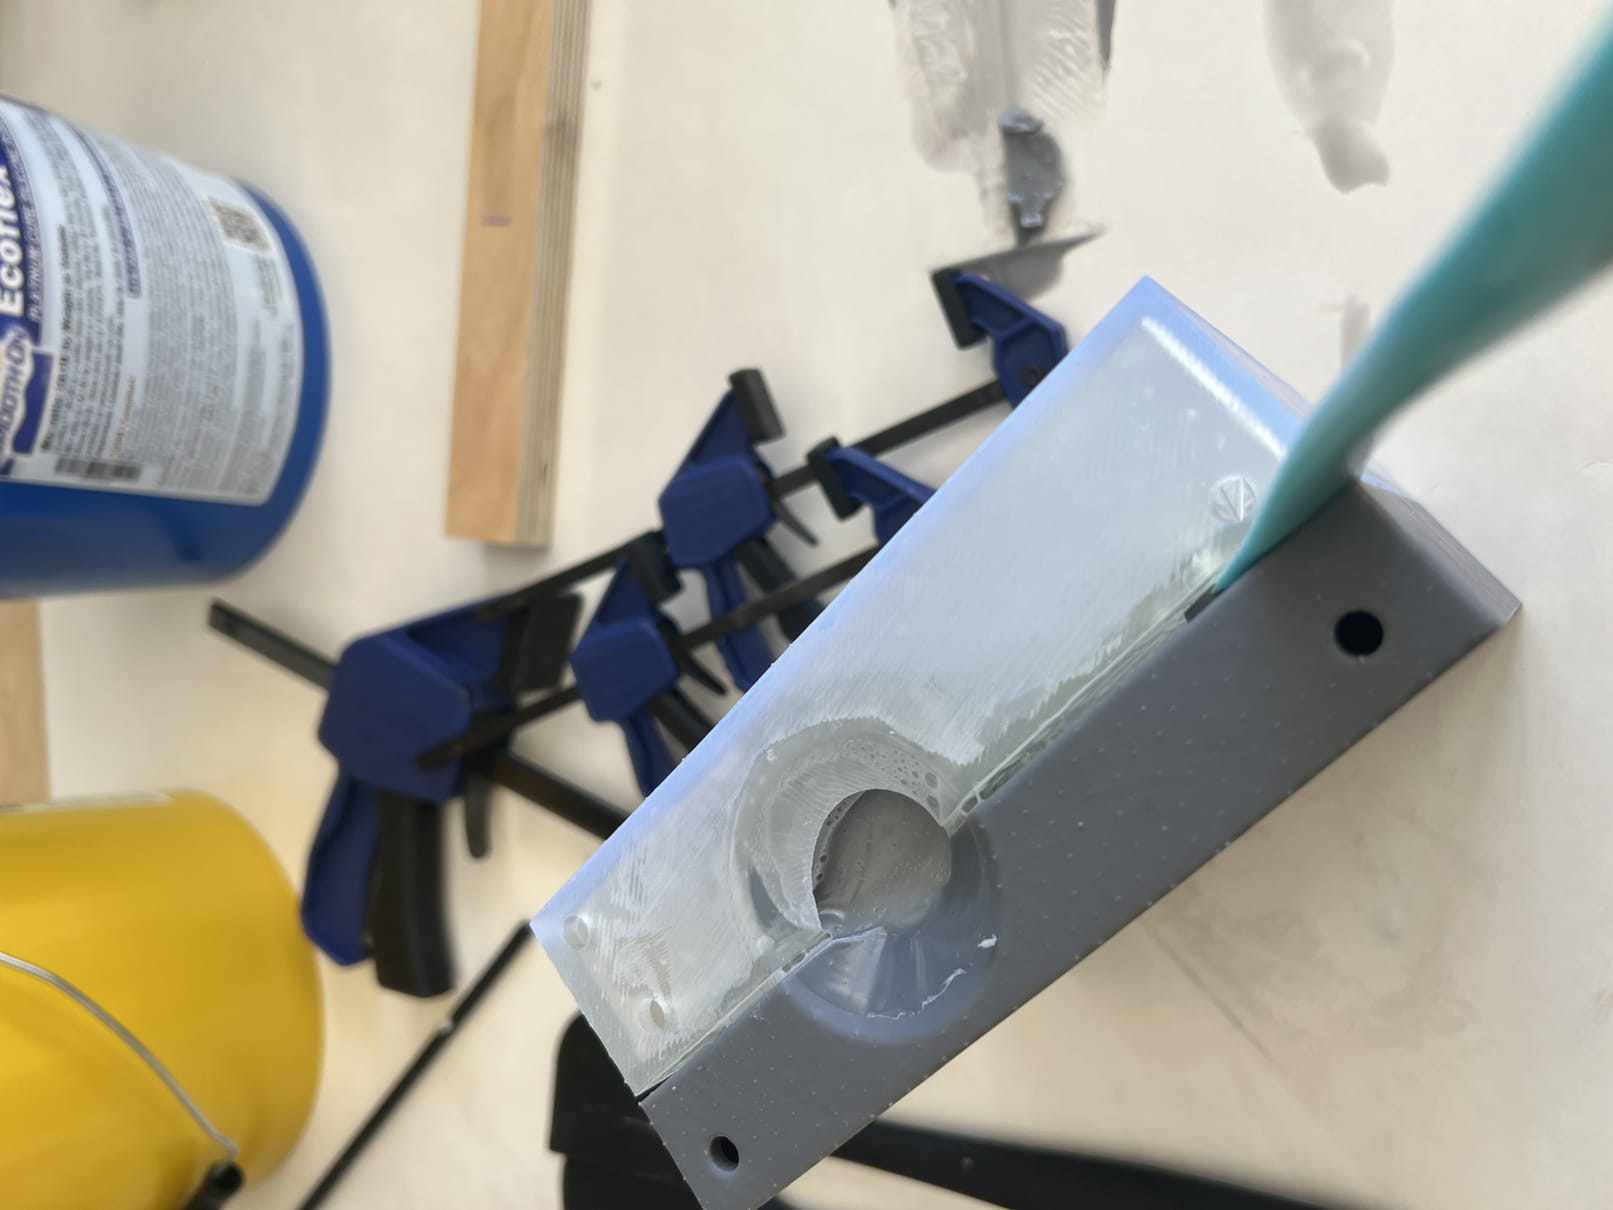
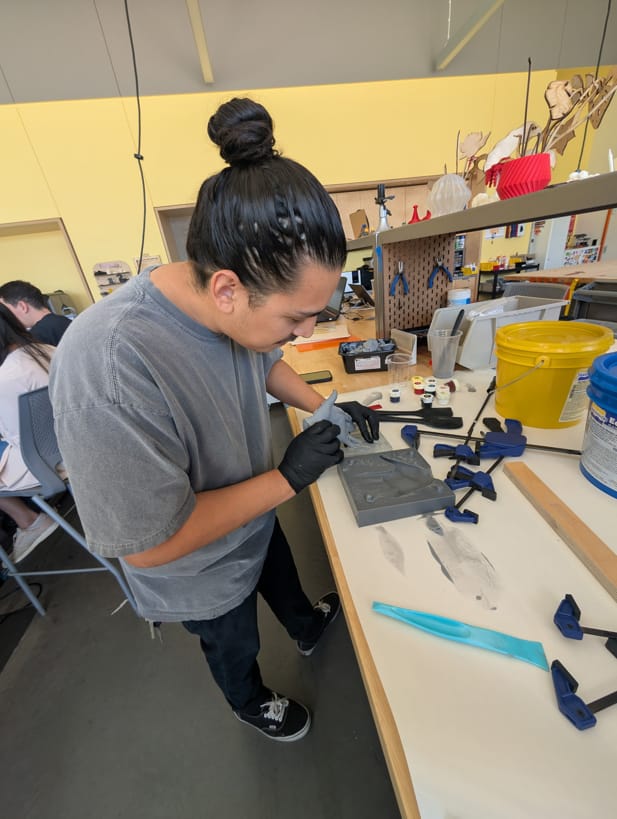
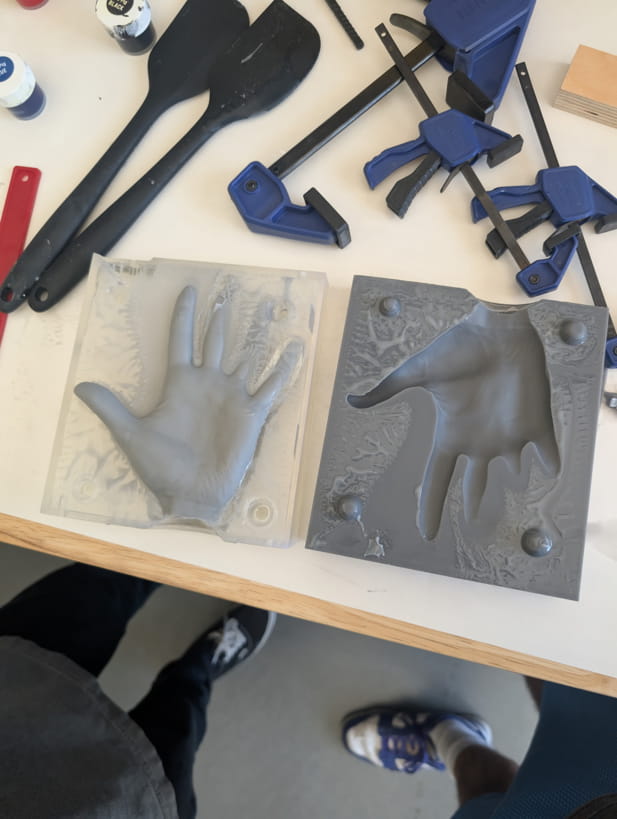
Since the mold didn seat fully flush their was a good amount of flashing that needed to be trimed. A xacto type blade worked well for this. The finished part was much softer and stretchier then I anticipated. the 3d printed part captured a surprising amount of surface detail.

conclusion
Overall i like and enjoyed the concept of working digitally to make and cast soft parts. The process allowed for a quicker workflow then would normally be required if working in a more traditional manner, especially when considering making soft silicone parts. I do need to perfect how the prionted mold halves should be designed. SLA did allow capture of some pretty fine details and skin texture. My next steps to further my research would be to.
- rethink mold registration, perpahs keys that dont interfear with the mating surface. Or keys that live on the outer edge of the mold
- consider ways to reduce mold wraping when printing. Consider printing mold halves that have less mass and can be bolted back together. almost like a shell mold in traditional methods.
- testing to see why material didn't cure all the way.
files
Click the link below to try for yourself!:
Download Sample File