Printing
Fusion 360
Infinity Cube
I designed an infinity cube with help from this video

Important steps I did when making this cube were:
- Created Sketch of two 20mmx20mm squares .4mm apart & used Colinear Constraint for the top line of the cubes
- Used Extrude to turn the cubes 3d and applied Chamfer
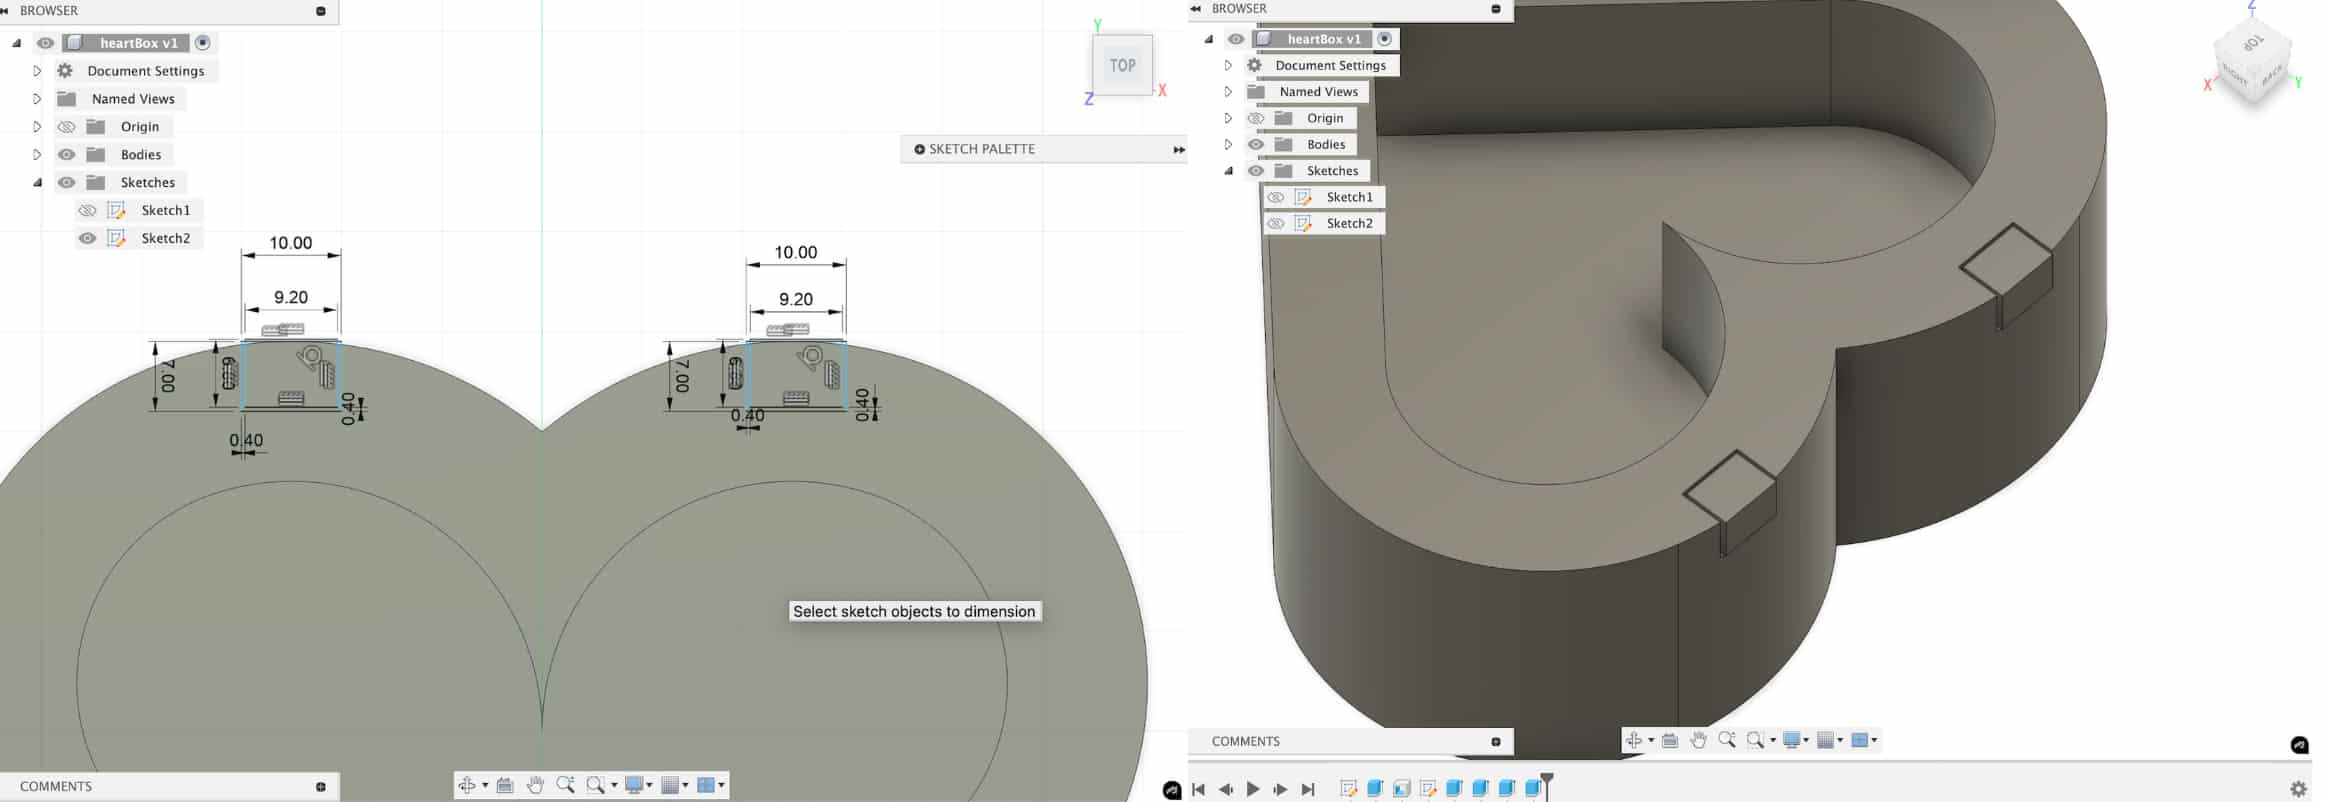
- Created Sketch 4 times (outer rectangle 7mmx10mm & inner rectangle 9.2mmx6.8mm with .4mm distance) for where the hinges would go
- Used Extrude to cut and create the hinges (outer (cut) = -7mm inner & .2 small rectangle (new body) = -6.6mm)
- Used Fillet to round the edges of the hinges by 3.3mm
- Adding pin and socket: Created Sketch of circles (inner=2.6mm outer=3mm) with one going on the cube and the other on the edge of the hinge
- Create > Project/Include > Project > Select center point of circle to interact with the point
- Hid the hinge to interact with the circle sketches
- Select both outer and inner circle, Extrude 3mm taper angle = -25deg, Toggle body back on and Cut
- Select inner circle, Extrude 3mm taper angle = -30deg, Join
- Mirror the bodies, operation: New Body
Tolerance
The 8 smaller cubes should be able to rotate around each other. For this to happen without issues, the hinges connecting the cubes should rotate freely without being too loose or too tight.
I learned that I had to add a tolerance between the moving parts to allow this to happen. I added a clearance tolerance of 0.4 mm between moving parts (as written in the steps above). This gap ensured that the parts didn’t fuse together during 3D printing but also allowed smooth movement.
3D Printing
3D printing was the ideal method for this design because it allowed me to print a working and moving mechanism in one piece without post-assembly.
After I was done I exported the file in 3mf format. Here is the cube after I printed it out using Bambu Lab A1:
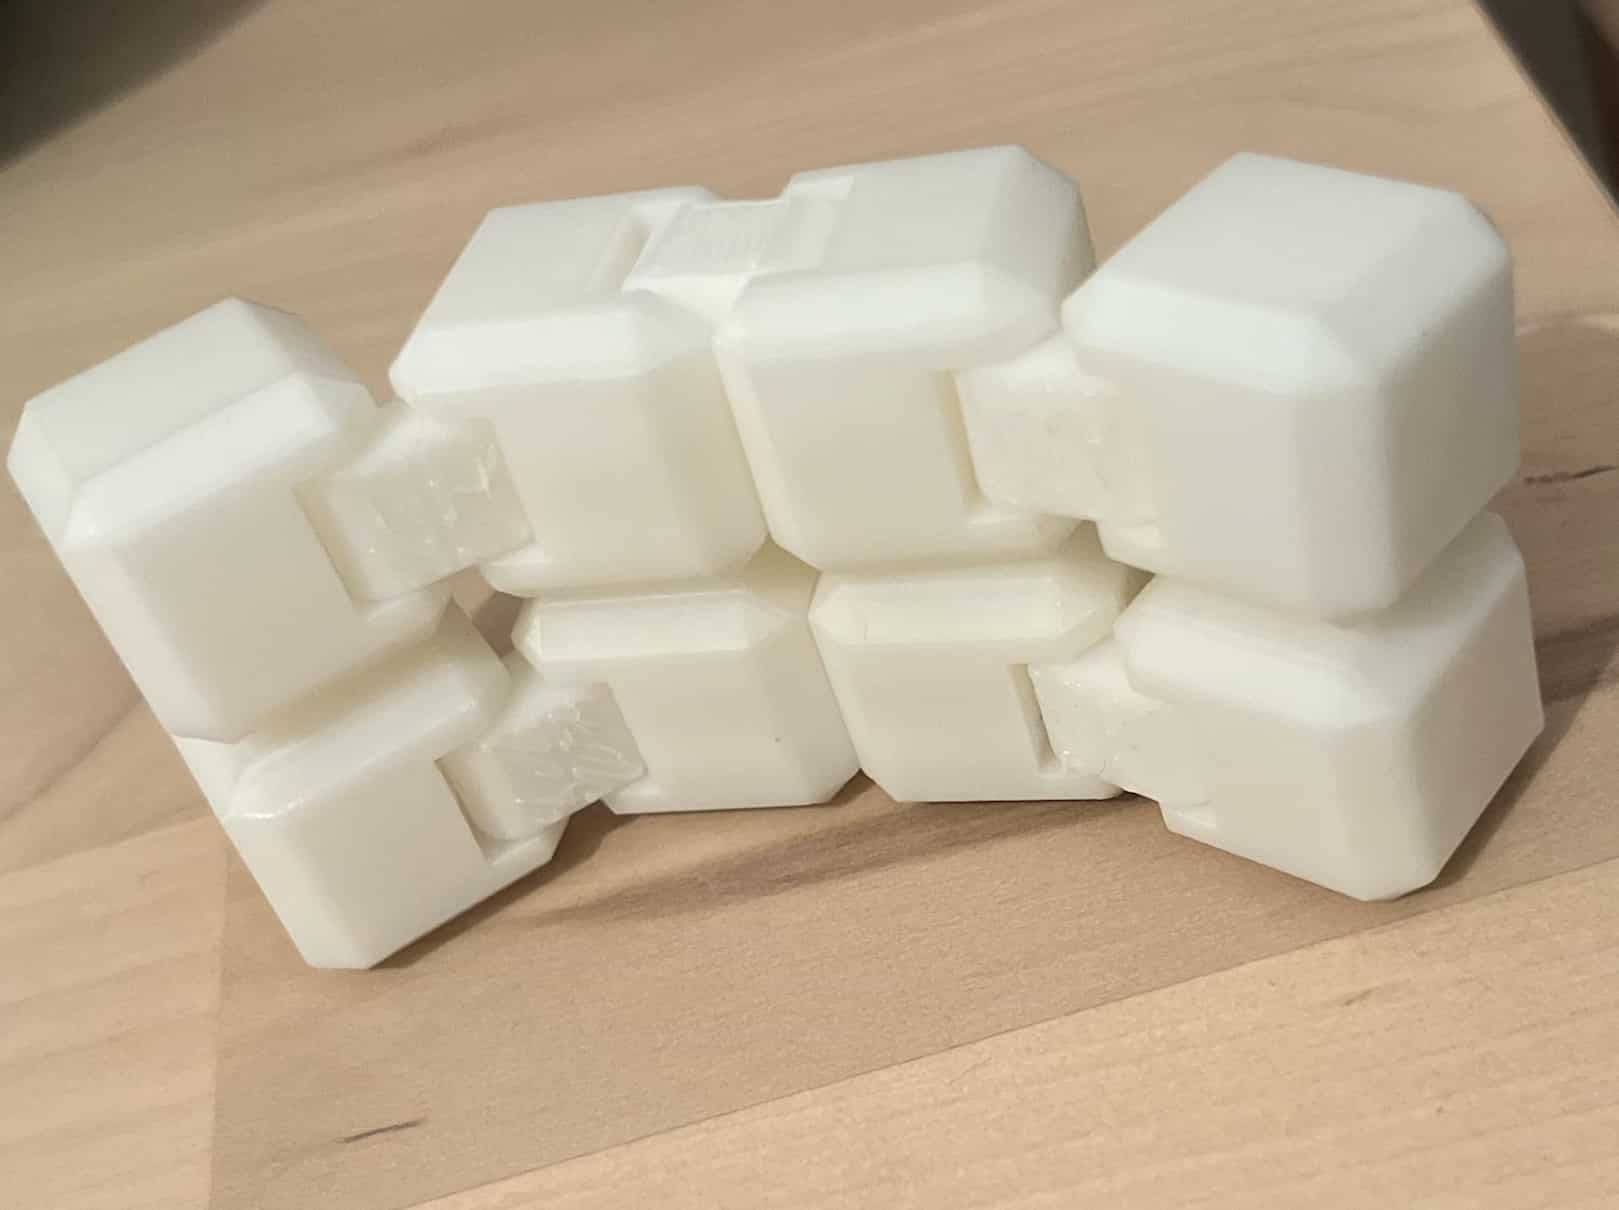
The cube in action:
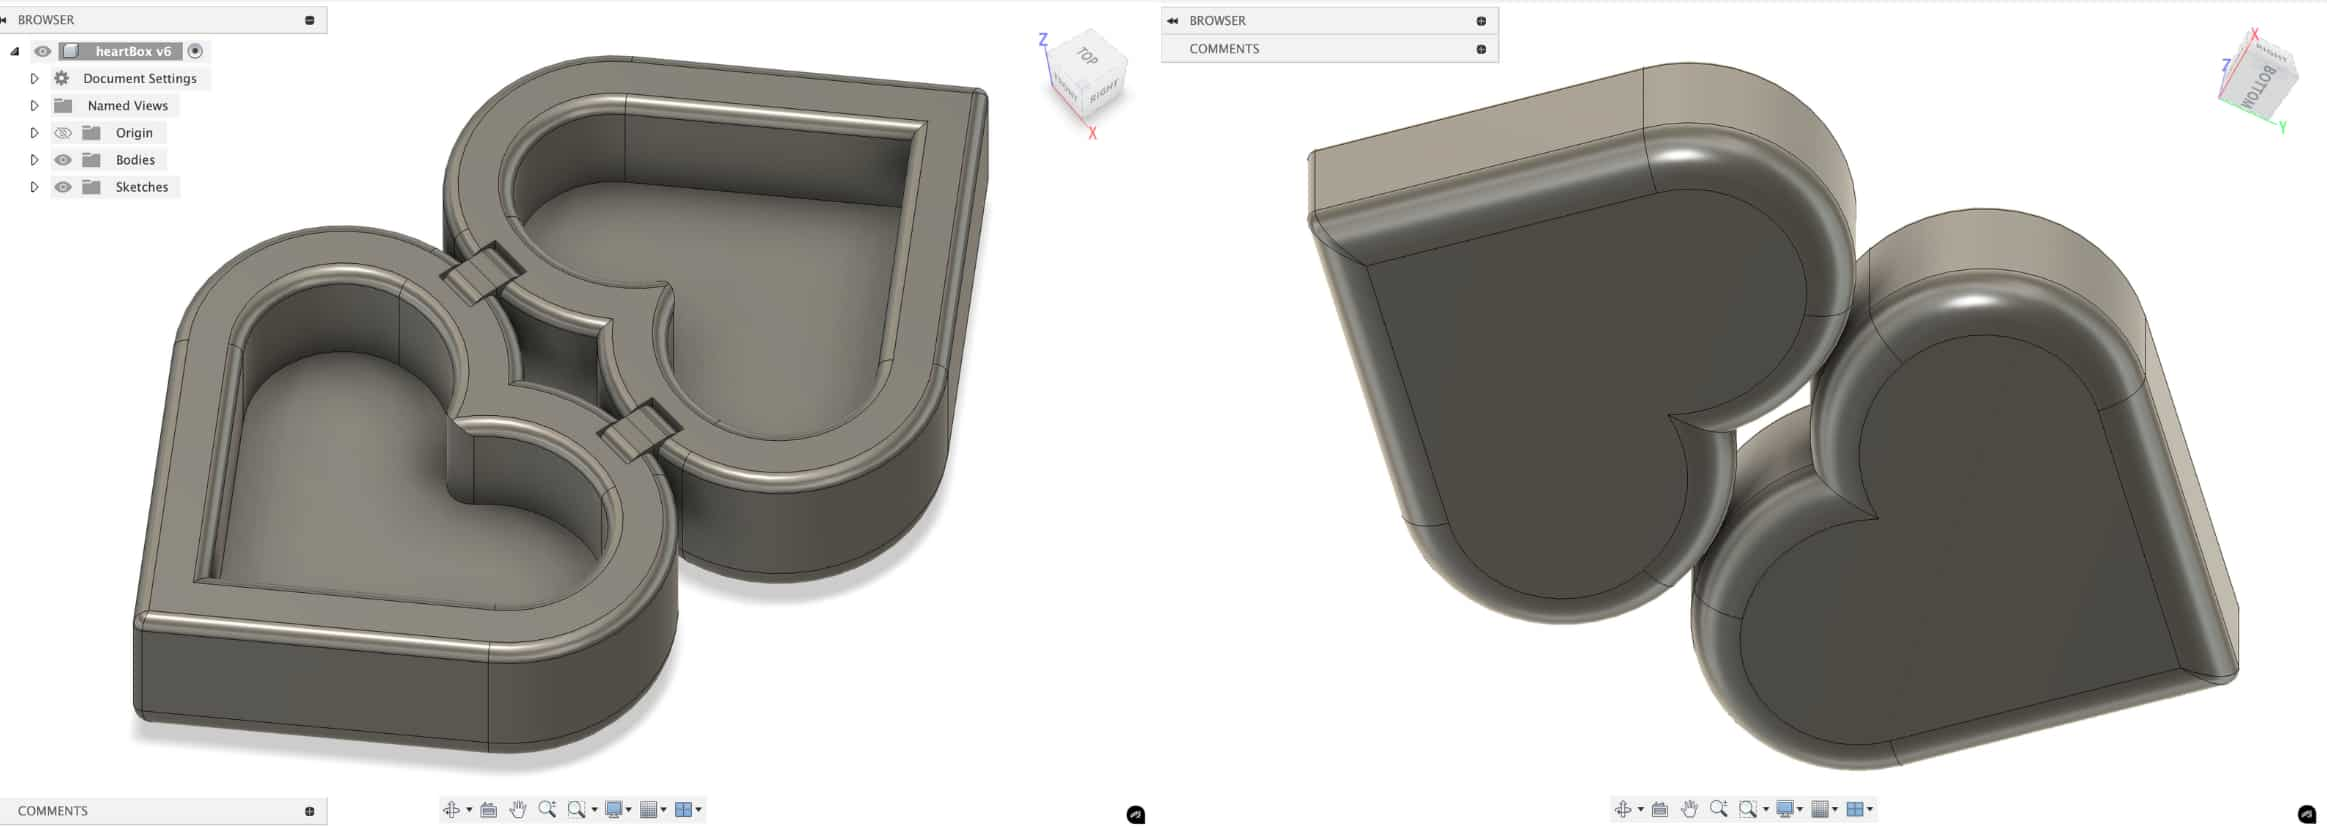
Heart Box with Hinges
The way the cube moves reminded me of a box so I used the knowledge I learned from making the infinity cube to make a heart shaped box.
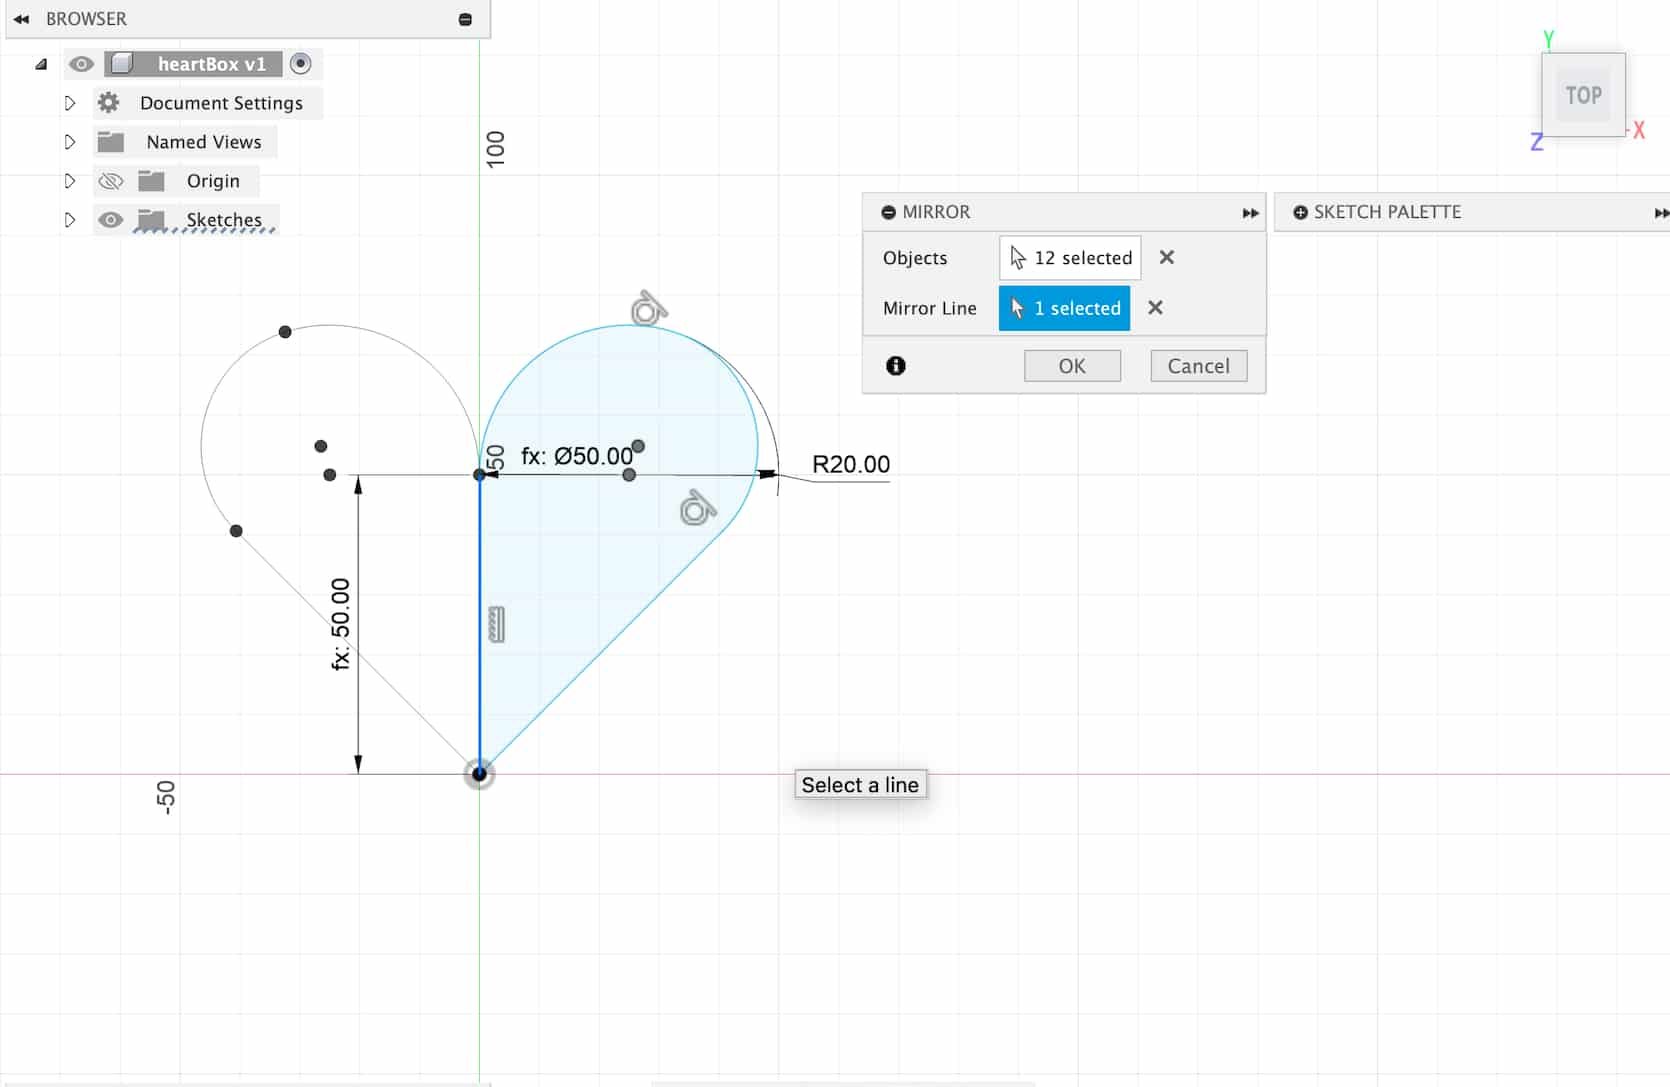
I started out by making a heart sketch
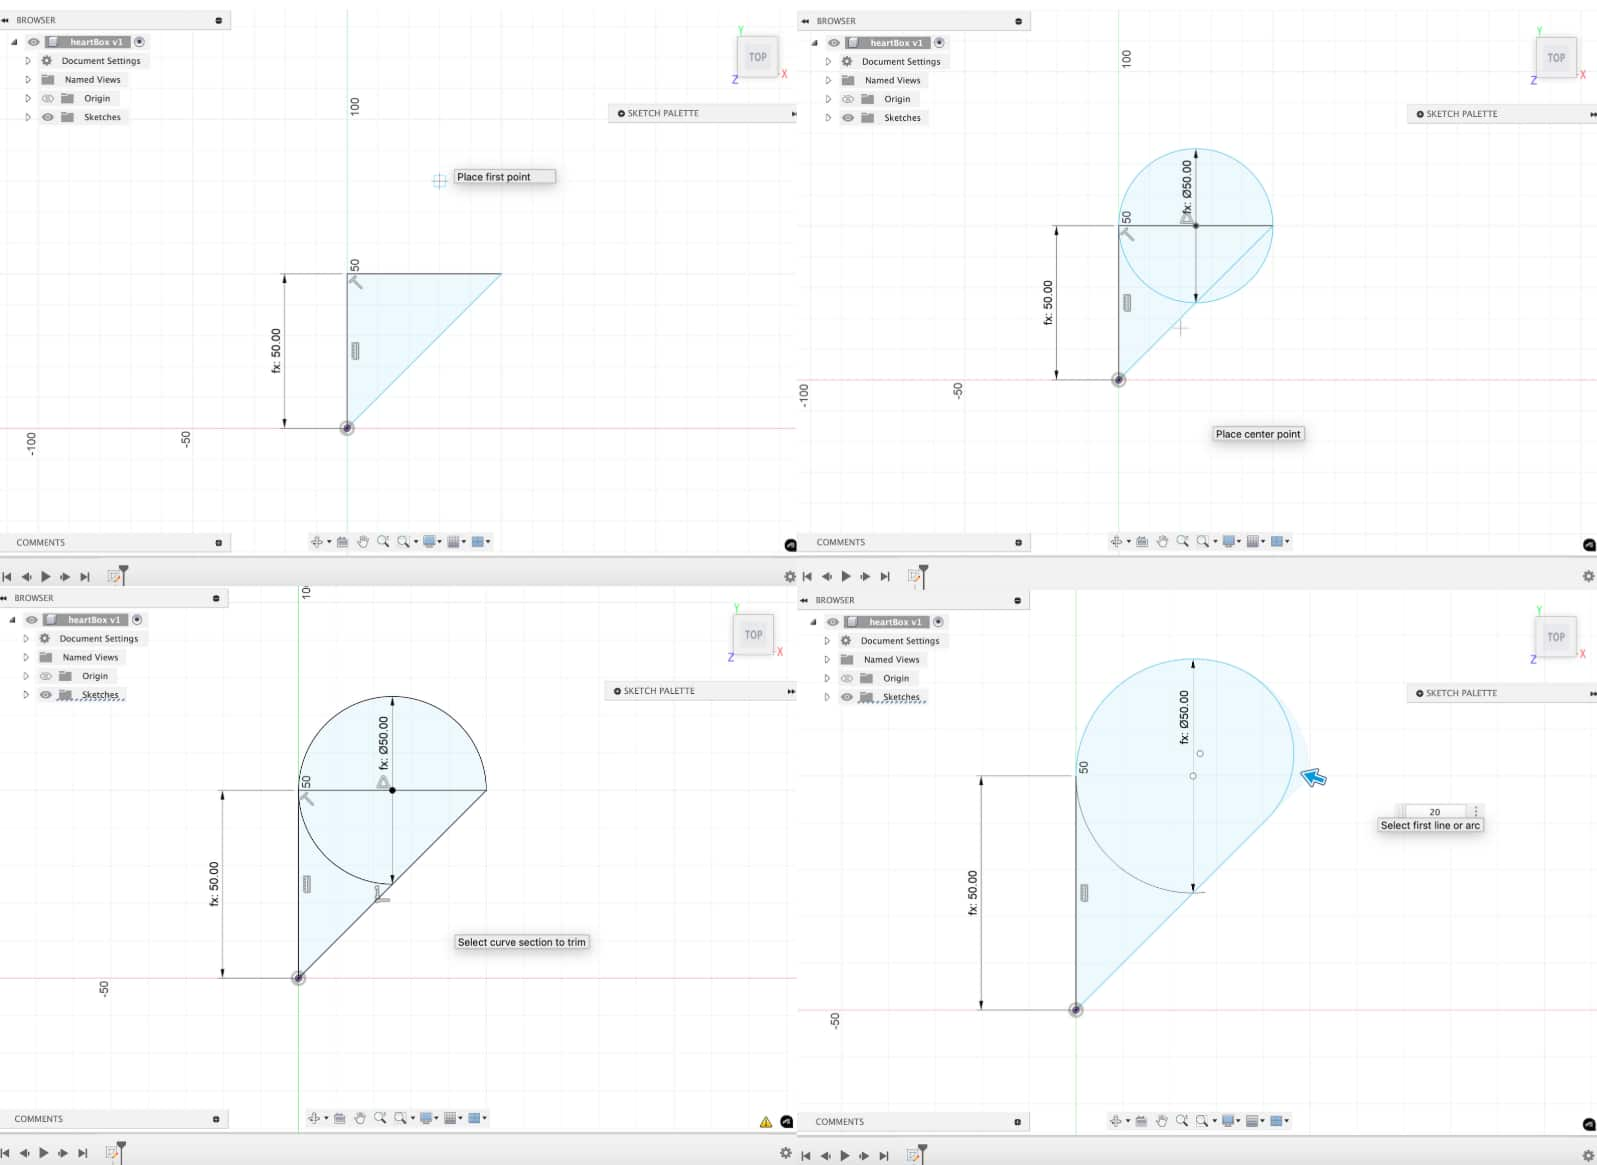
After I was done with the sketch I used fillet to soften the edge, trim to get rid of unnecessary lines and finally mirrored the shape
I used extrude to make the sketch 3D and shell to have an empty middle so it looks like a box. I then did the same process as infinity cube for adding the hinges
Finally I used fillet on the edges to make them round
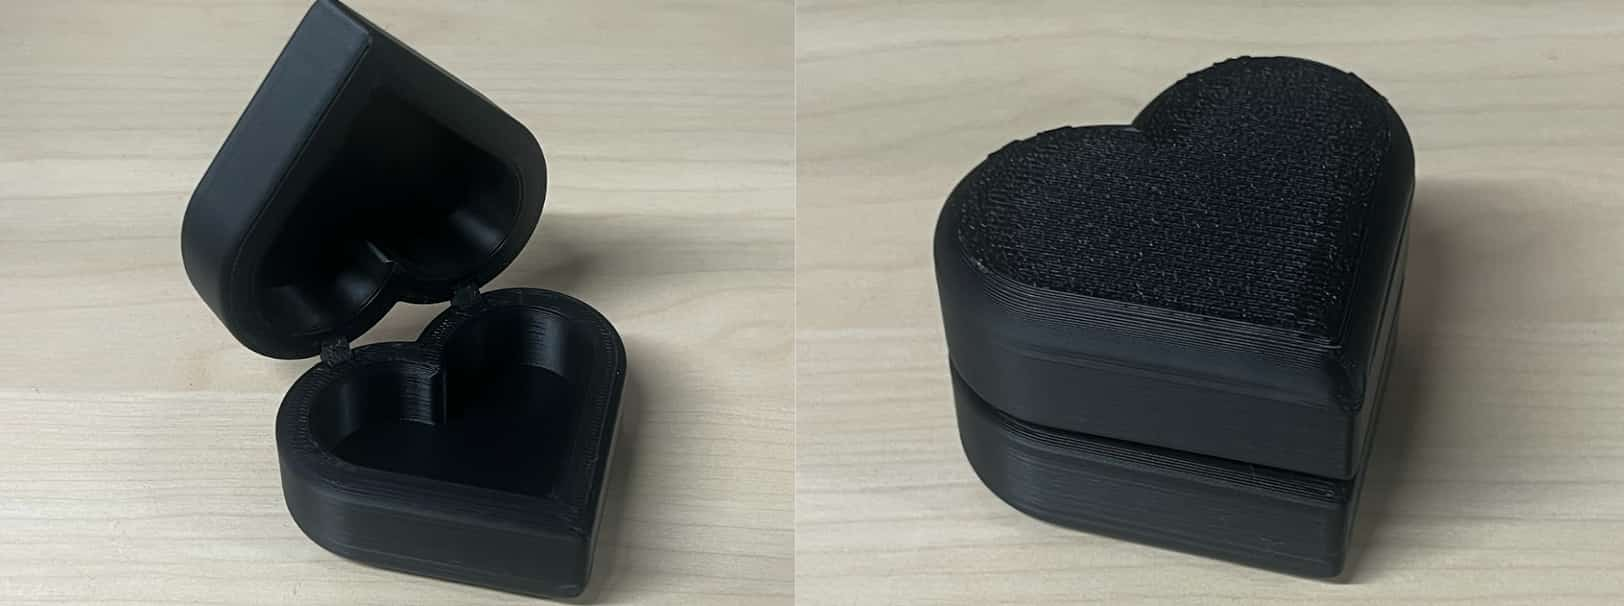
Here is the final product printed:
3D Scanning
3D scanning is very powerful since it allows us to digitally capture real-world objects with high detail. These scanned models can then be 3D printed.
The scanner I used was Shining 3D Einstar 3D scanner and the scanner software is EXStar.
The first thing we had to do was perform Calibration. We did this by using the white board that comes with the scanner, we scanned this board from different angles as the software instructed.
To create a new project, New Project > Scan Mode: Portrait > Object Size: Medium & Large Objects > Select Mode of Alignment: Texture Alignment > Select Resolution: 0.2 > Texture Scan: on
I then sat on a chair and spun around while a friend kept the scanner steady. Problems that can occur at this stage is:
- if you move around and fail to remain still it can cause the scanner to not be able to detect what it is scanning properly and you might have to start all over again.
- if the person scanning moves the scanner too quickly it again causes problems with detecting the object being scanned.
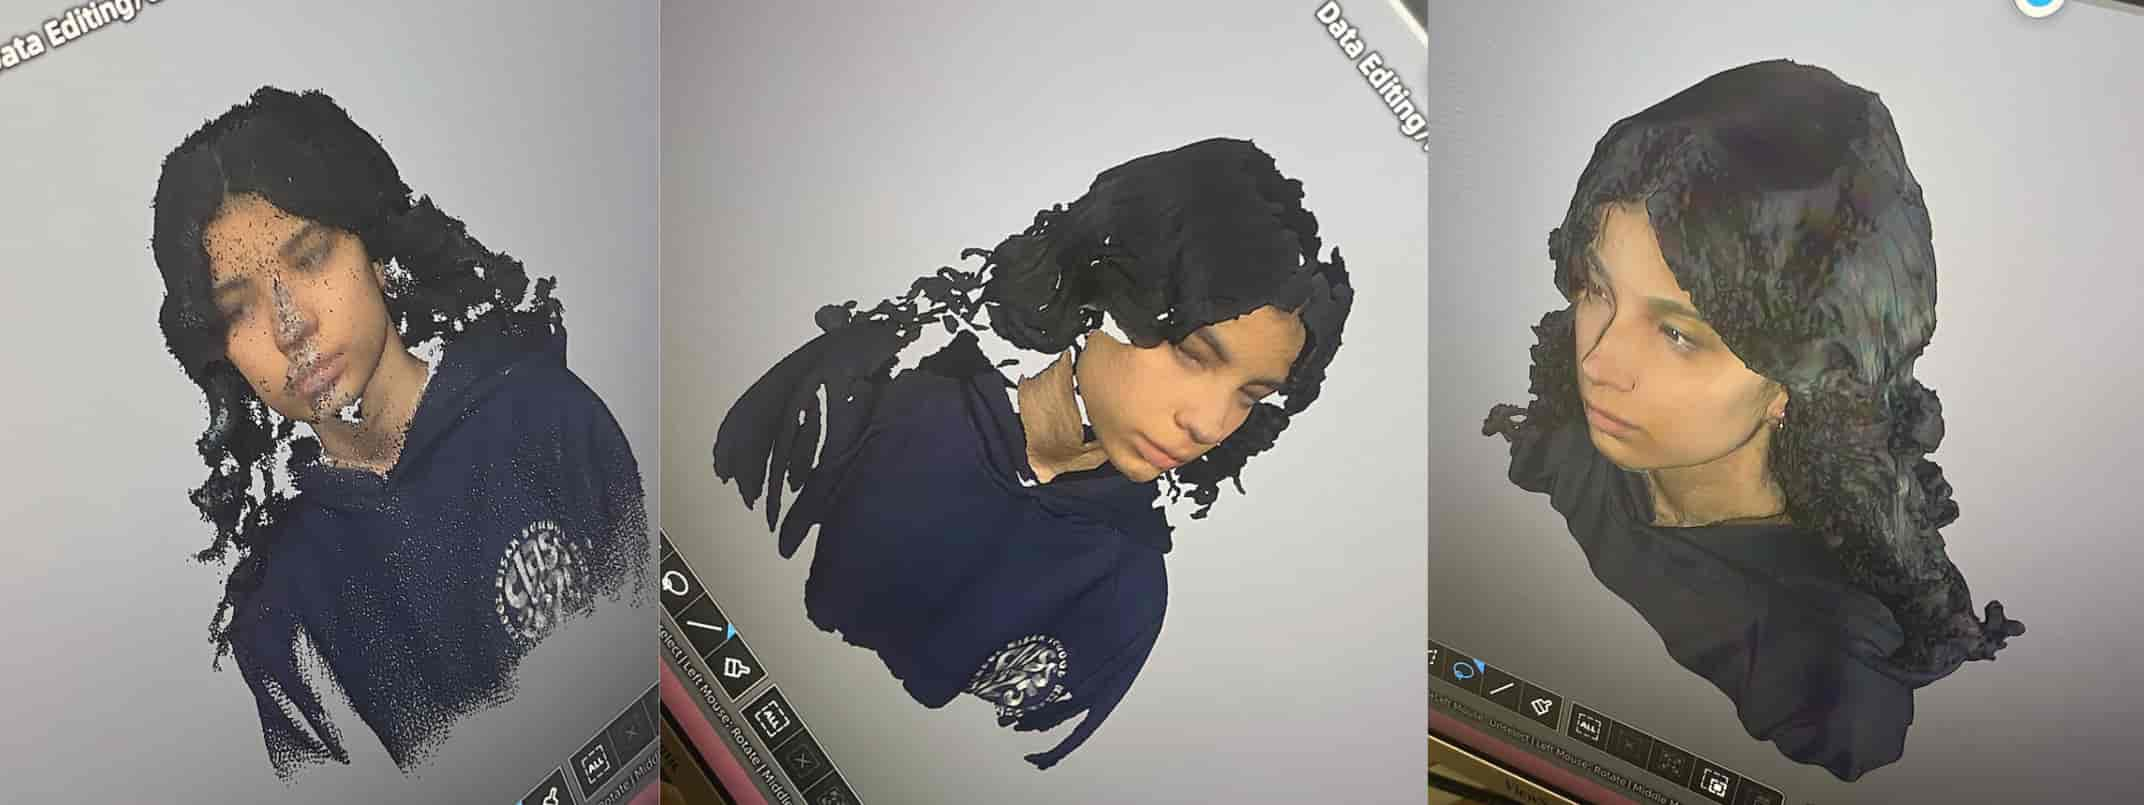
I clicked Mesh Model to create a more solid object. There were parts that were sticking out and I used Cutting PLane Tool to get rid of them in the post-processing process. Here are pictures from different steps of the process:
Group Assignment
Here is our group assigment