Pico w
Wokwi
I started out by trying a simulation in wokwi using pico w, a red LED and a resistor for the LED
I started out by checking the pico w datasheet to understand the pinout functions and what goes where
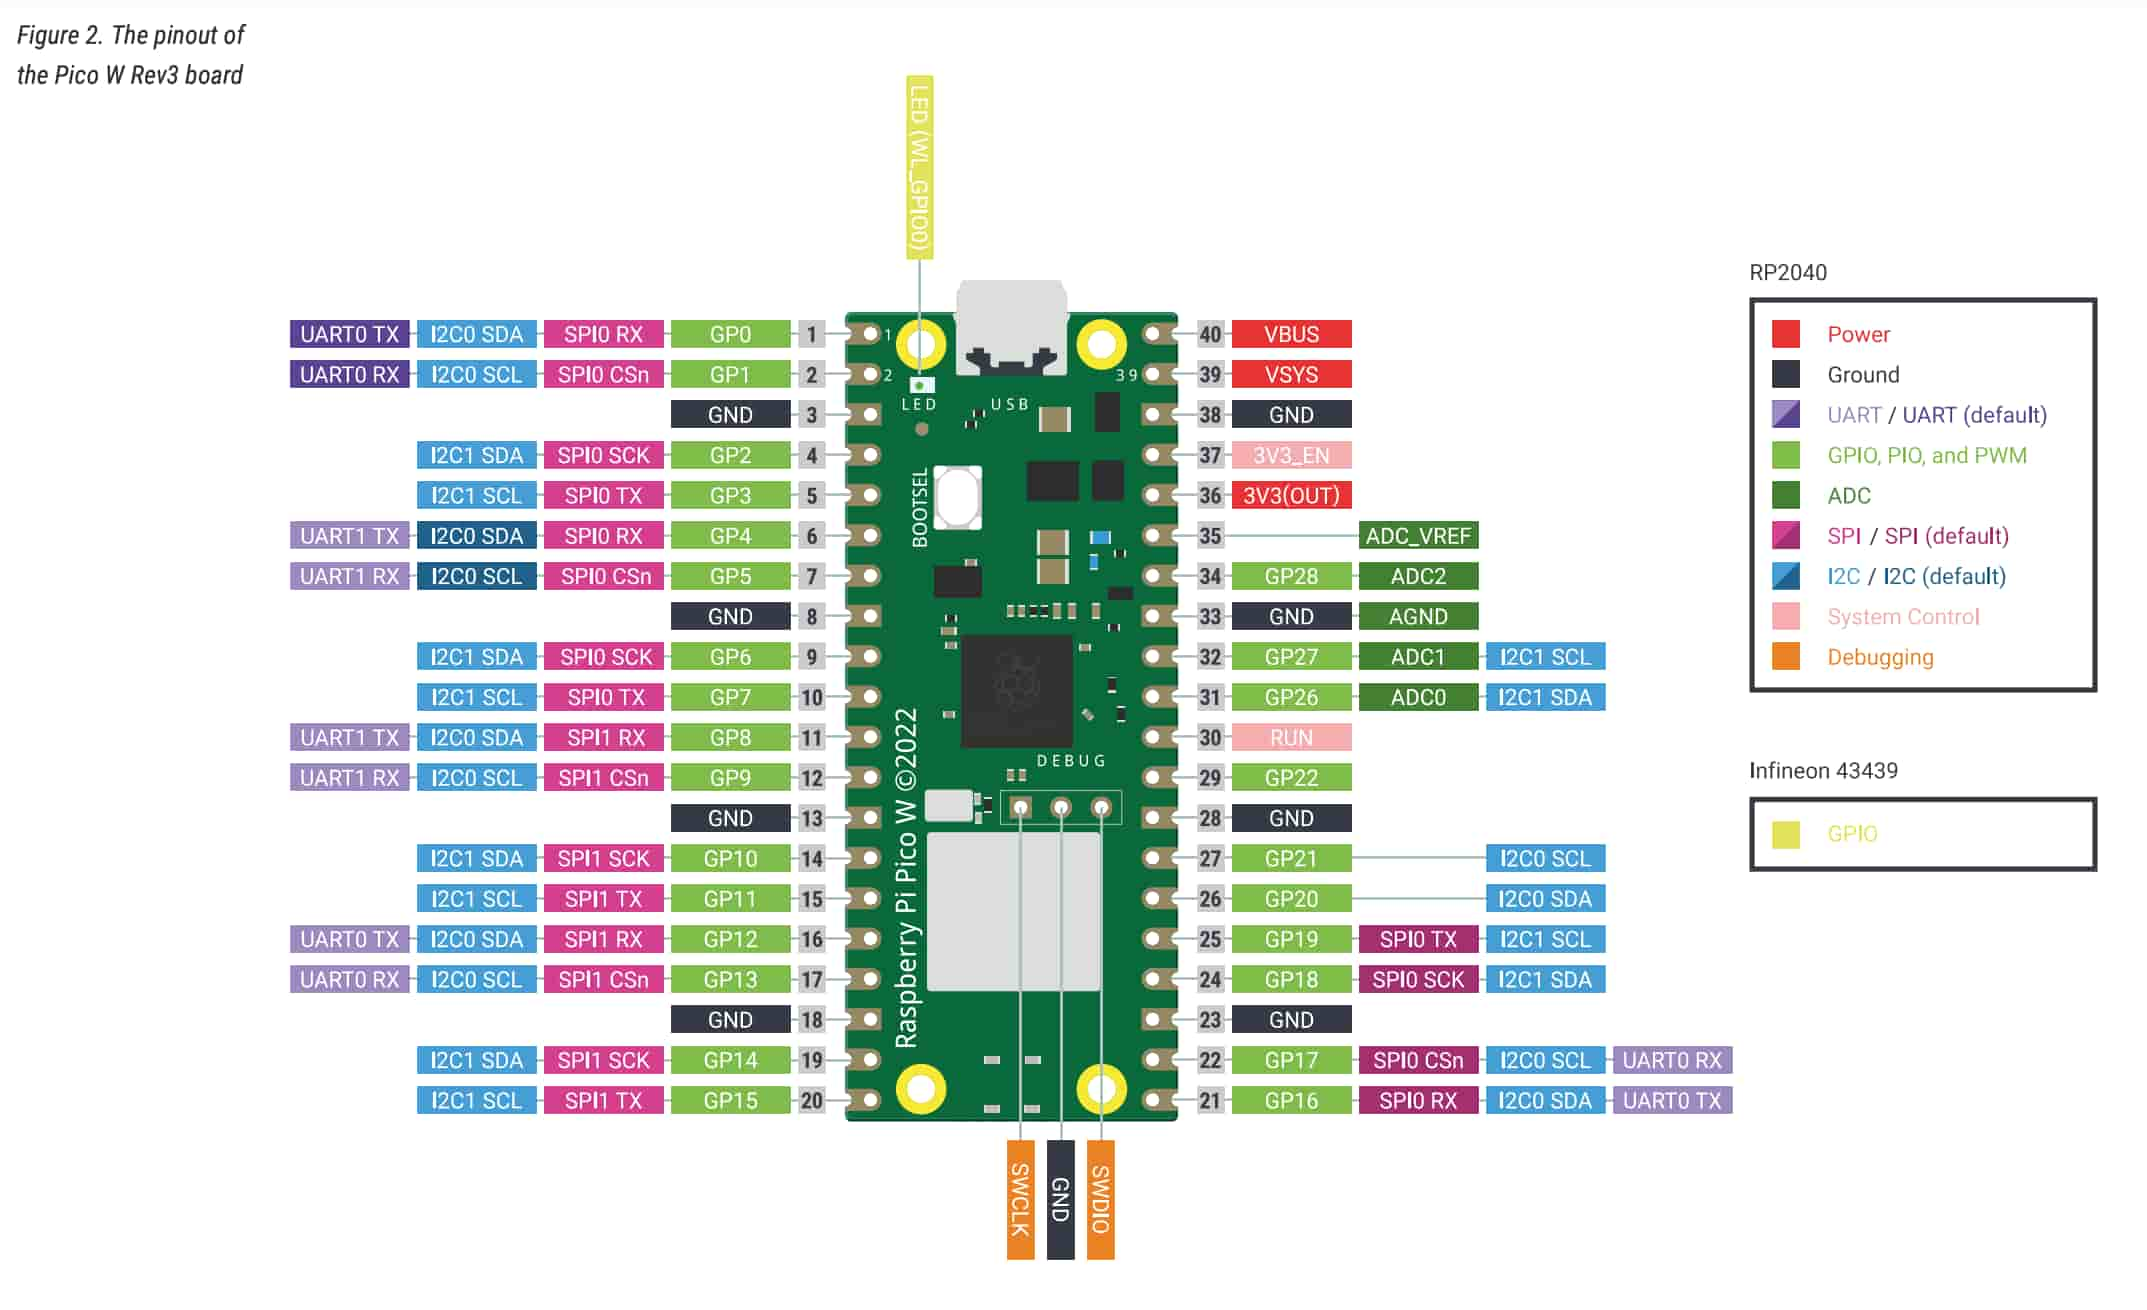
The Raspberry Pi Pico W has 40 pins:
- 26 GPIO (General Purpose Input/Output) pins (3.3V). These can be used for buttons, LEDs, motors, sensors.
- GND: Any component that requires power must also connect to GND (an LED in my case)
- ADC: GP26, GP27, GP28. These can be used for reading sensor values like temperature, light, potentiometers.
For the LED anode (A, positive pin) goes to GPIO pin 2 and cathode (C, negative pin) goes to GND. I connected a 100 ohm resistor between the led (A) and GPIO pin 2 so that if this model was created in real life the LED would be safe.
Here is the code:
|
|
Thonny
I downloaded Thonny. I plugged the pico w to my laptop while holding the BOOTSEL button.
Tools > options > MicroPyhton (Rasberry Pi Pico) > Install or update Micropyhton
Here are the options I chose after:
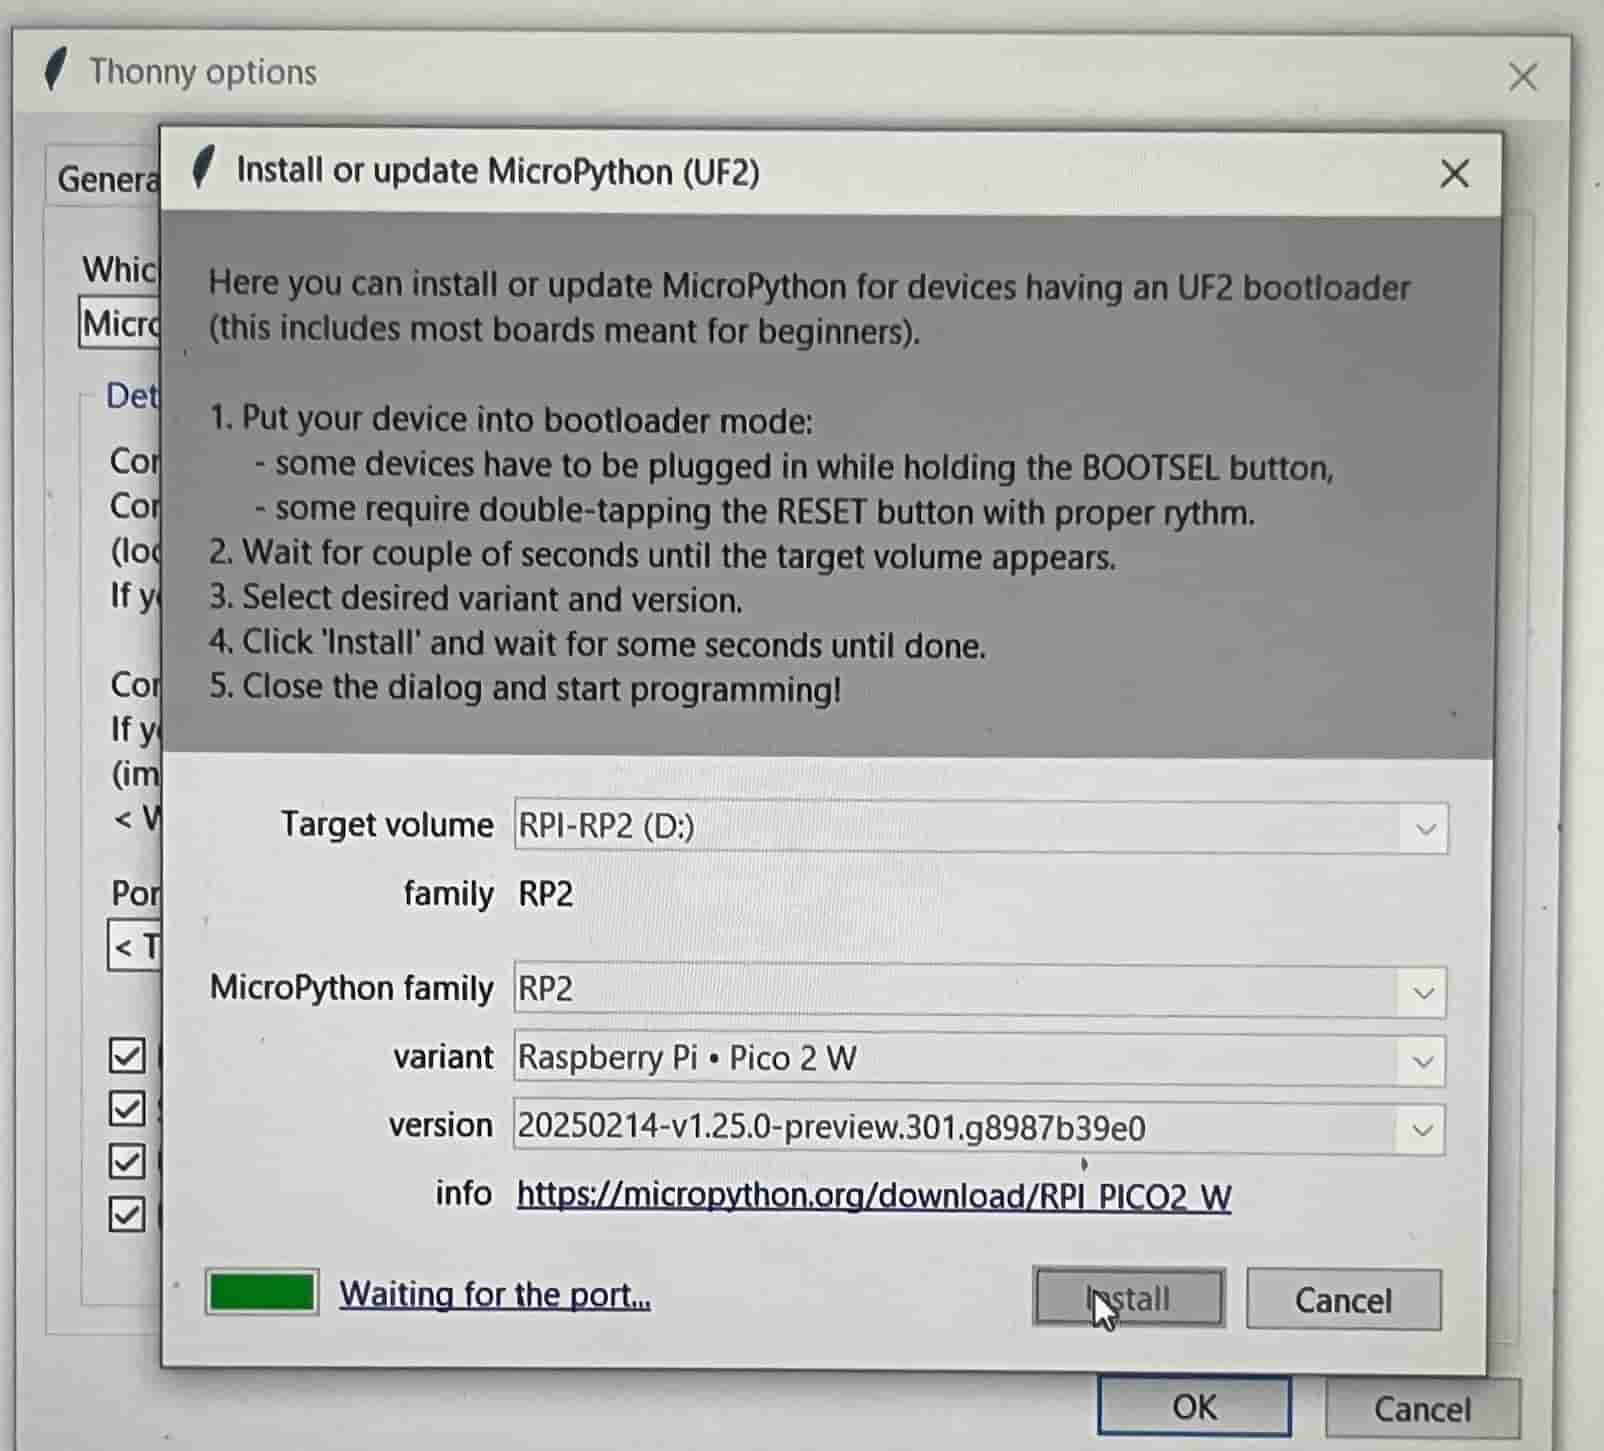
But after I installed it this way it said “no backend” in bottom left corner and I realized I chose the wrong variant. The correct variant for this microcontroller was pico w / pico wh.
After connecting and managing to send a simple print("Hello Wold) without any issues, I wrote the following code to make the LED blink
|
|
Here is the blink:
Group Assignment
Here is our group assigment