It was a challenging week for me and I gained some embedded programming experience. Includes simple programming language, microcontroller features, etc. When the control program is running, it's really interesting.
Learning Objectives
Group assignment:
Demonstrate and compare the toolchains and development workflows for available embedded architectures
Individual assignment:
Browse through the datasheet for your microcontroller
Write a program for a microcontroller, and simulate its operation, to interact (with local input &/or output devices) and communicate (with remote wired or wireless connection)
I used AI assistance to help me learn while summarizing this week’s assignment webpage content and understanding the board.
Group assignment:
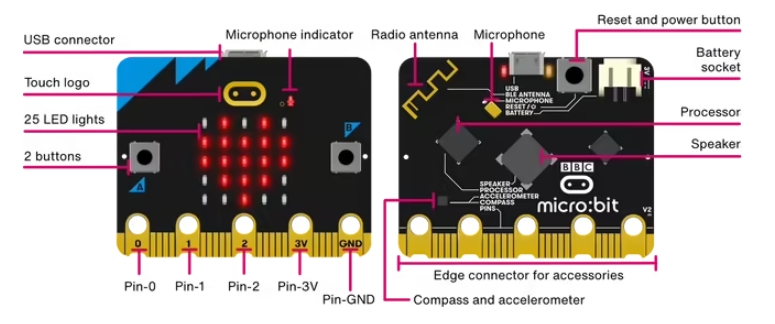
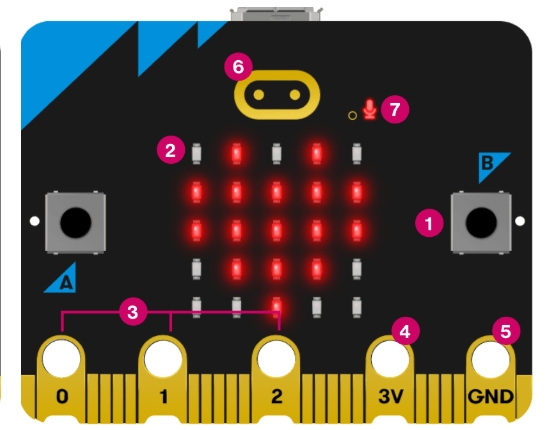
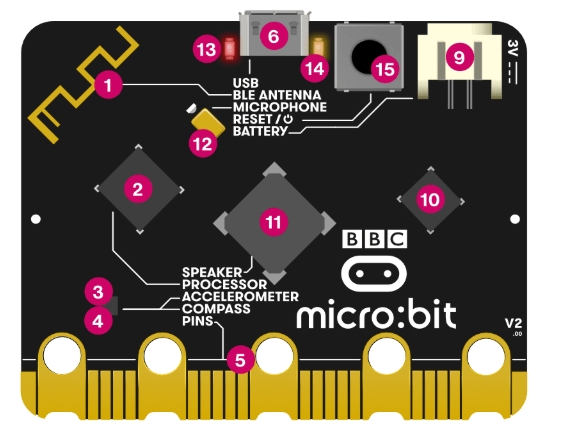
I have practiced embedded programming using Arduino Uno, micro:bit v2, and XIAO ESP32C3.
1. Tech specs
1.1 Comparison Between Arduino Uno, micro:bit v2, and XIAO ESP32C3
Feature
Arduino Uno
micro:bit v2
XIAO ESP32C3
Microcontroller
ATmega328P
nRF52833
ESP32-C3 (32-bit RISC-V)
Memory
Flash: 32 KB, SRAM: 2 KB, EEPROM: 1 KB
Flash: 512 KB, RAM: 128 KB
Flash: 4 MB, SRAM: 400 KB
GPIO Pins
14 digital pins (6 support PWM), 6 analog input pins
25 programmable GPIO pins (including 3 analog inputs)
11 GPIO (6 PWM, 4 ADC, 1 DAC)
Communication Interfaces
UART, SPI, I2C
BLE, NFC, USB, SPI, I2C
Wi-Fi, BLE, UART, SPI, I2C
Power Supply
USB or External Power (7-12V)
USB or Battery Pack (2xAAA Batteries)
USB-C (5V), Li-Po Battery (3.7V)
Dimensions
Approx. 68.6 mm x 53.4 mm
Approx. 52 mm x 43 mm
21 mm x 17.5 mm
Programming Environment
Arduino IDE (Primarily C/C++)
MakeCode, MicroPython
Arduino IDE, PlatformIO (C/C++)
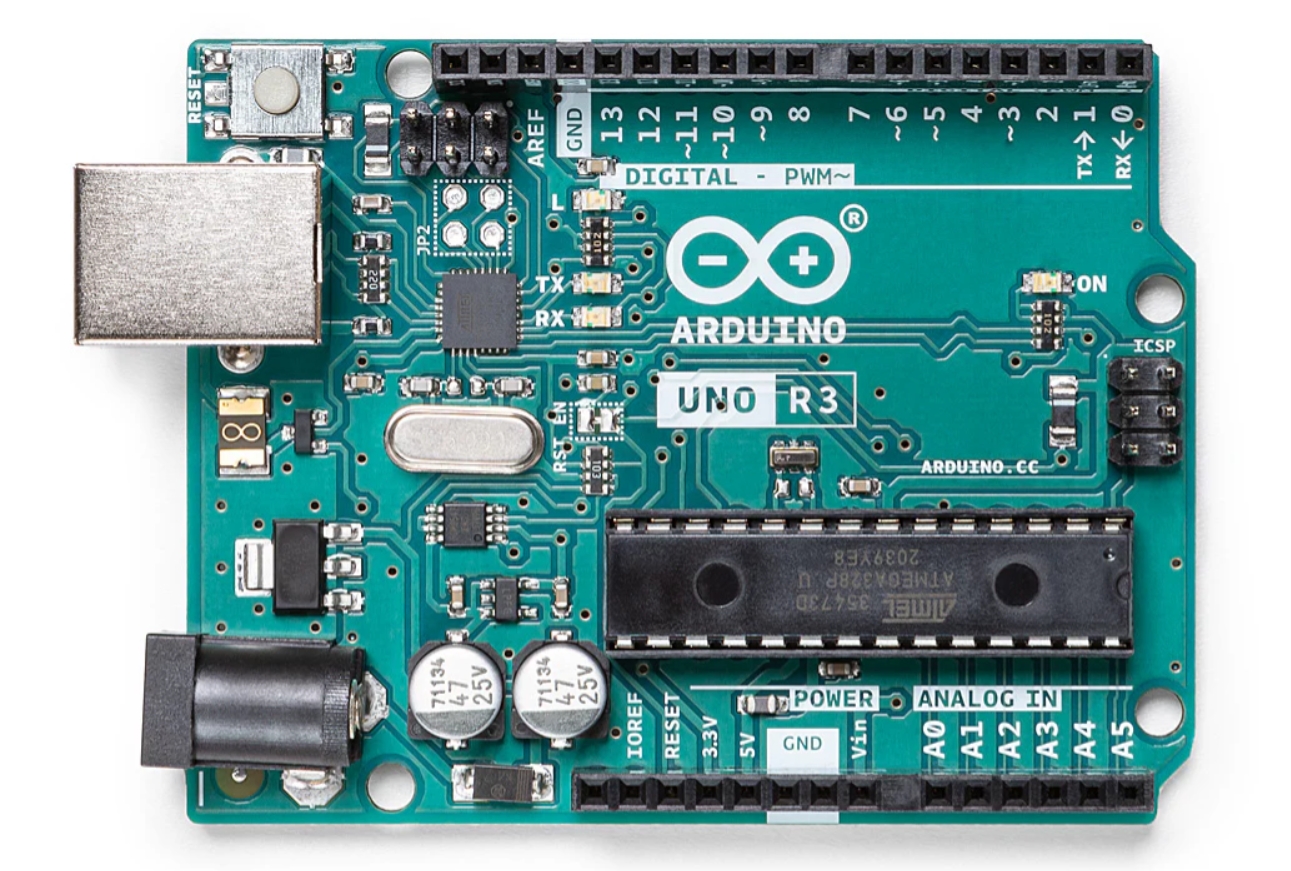
1.2 Arduino Uno
The Arduino UNO is the best board to get started with electronics and coding. Datasheet
from microbit import *
while True:
display.scroll("Hello!")
sleep(1000)
Click "Download" to get the .hex file
Connect your micro:bit and drag the file into the drive
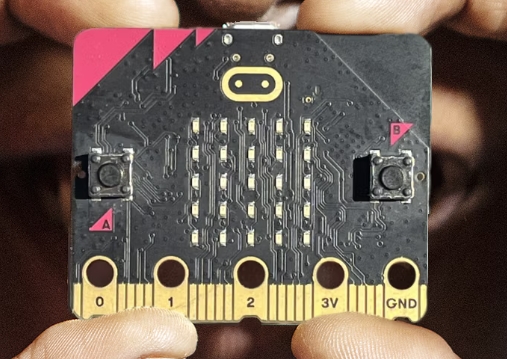
Tips:
micro:bit v2 has extra features like sound, microphone, and touch sensor
Programs will auto-run when the board is powered on
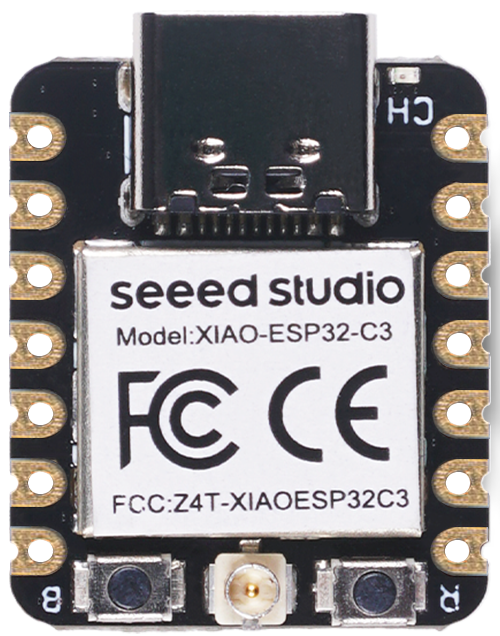
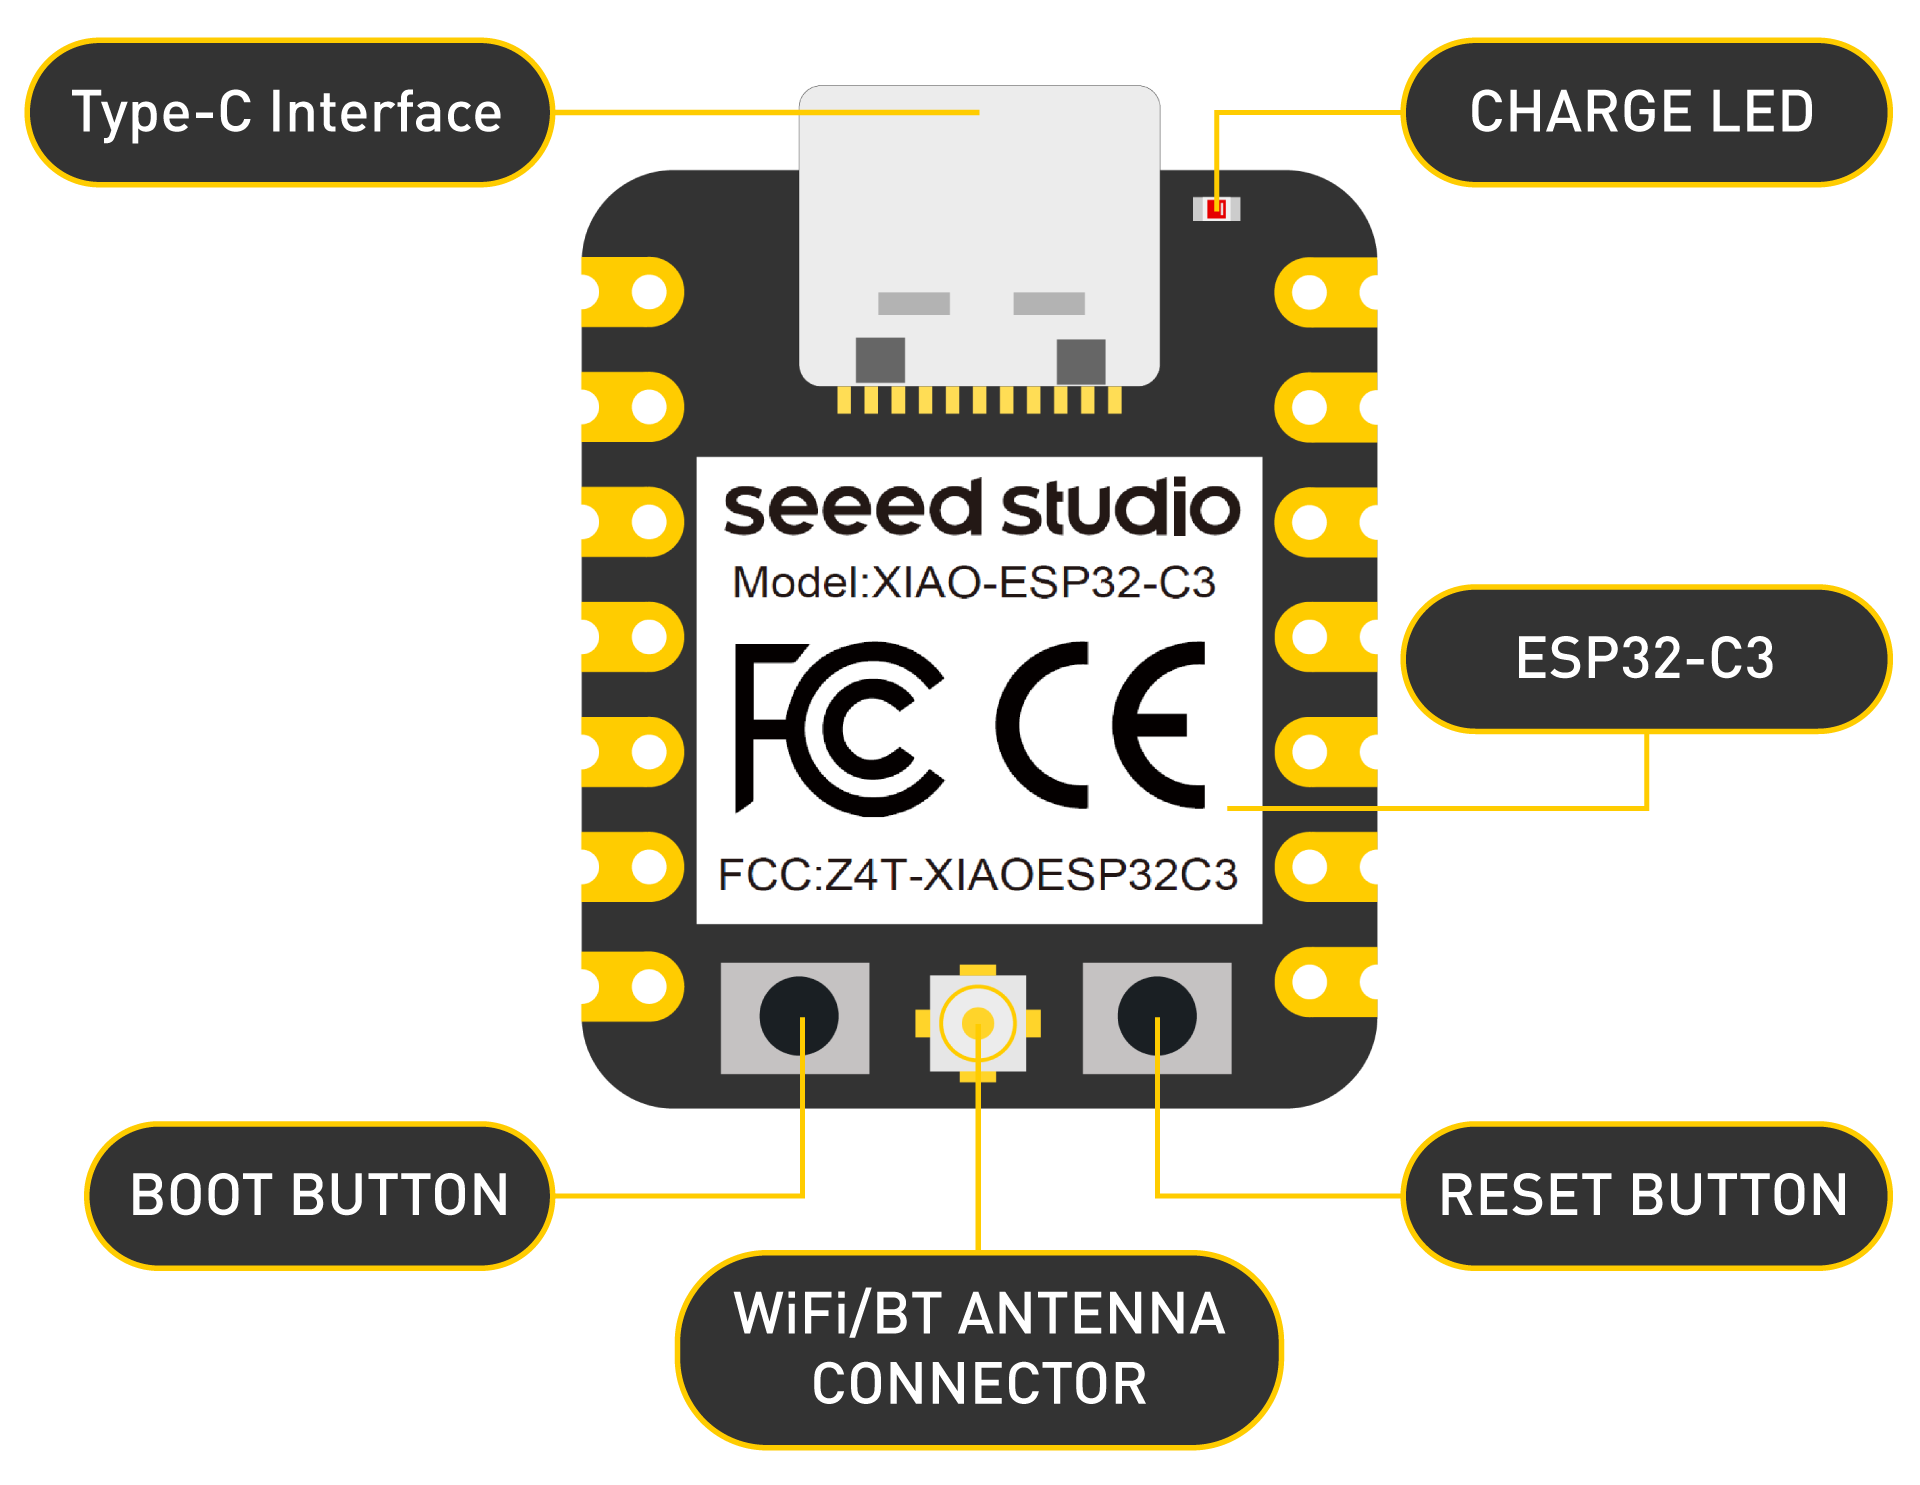
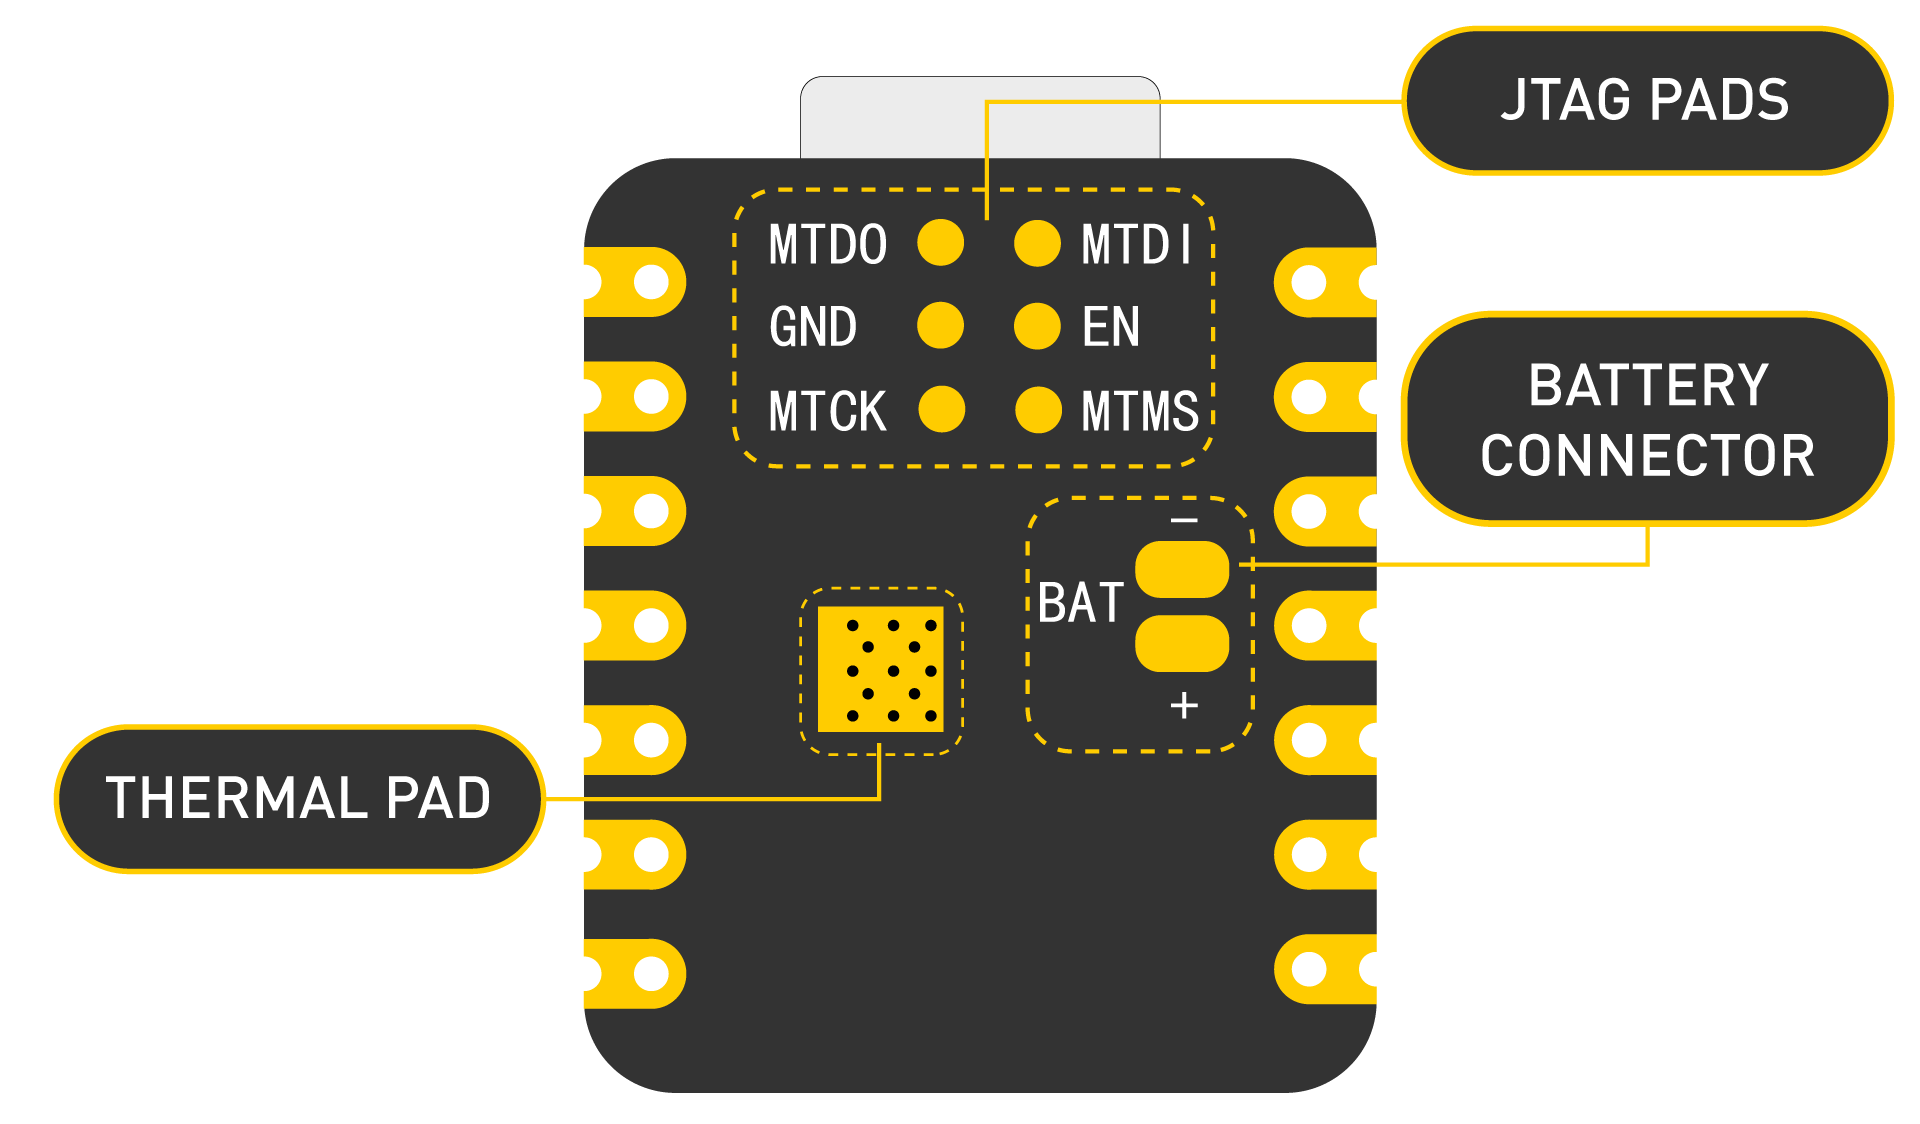
1.4 XIAO ESP32C3
The Seeed Studio XIAO ESP32C3 is a tiny and powerful development board with Wi-Fi and BLE capabilities, based on the ESP32-C3 RISC-V processor.
Datasheet
1.4.1 Schematic Diagram
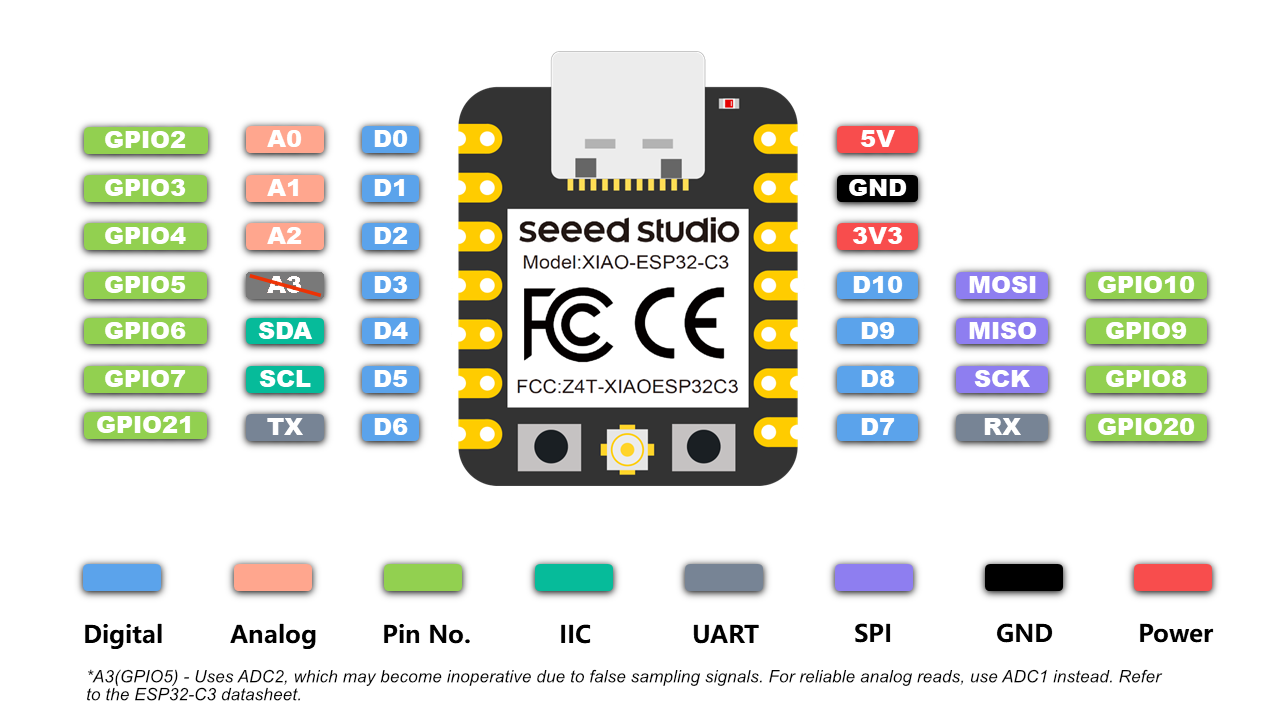
1.4.2 Connector Pinouts
1.4.3 Install Arduino IDE and Setup for XIAO ESP32C3
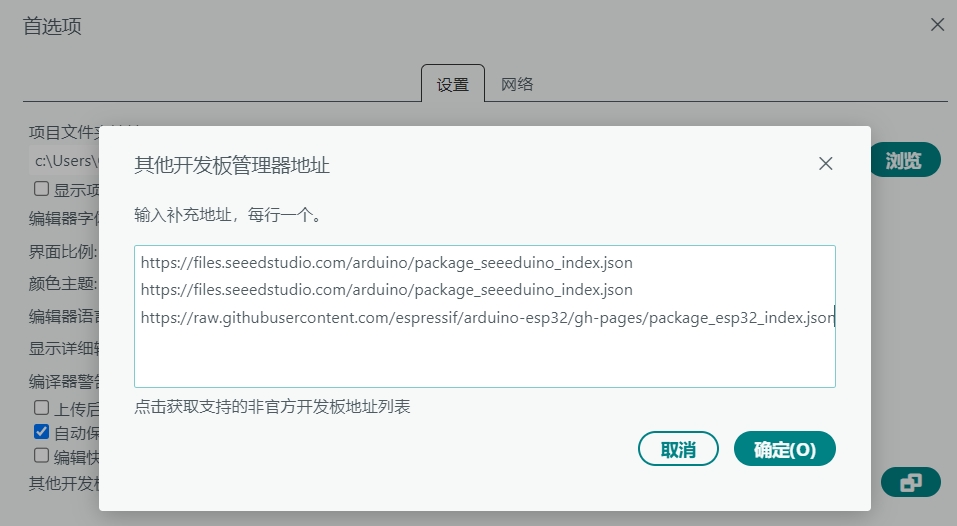
Install Board Manager URL: Open Preferences and add this URL:https://espressif.github.io/arduino-esp32/package_esp32_index.json
Board Manager: Go to Tools → Board → Boards Manager, search for ESP32 and install it.
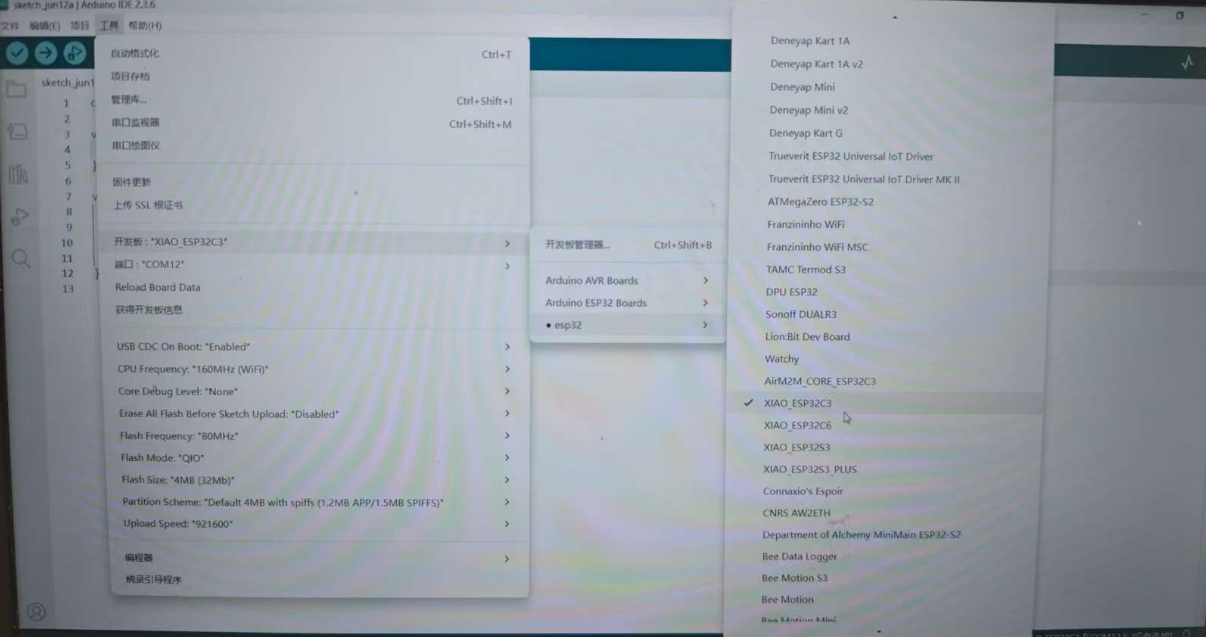
Select Board: Go to Tools → Board and select Seeed XIAO ESP32C3.
1.4.4 Upload and Run Program
Step-by-Step Guide:
Connect XIAO ESP32C3: Use a USB-C cable to connect it to your computer.
Open Arduino IDE
Board & Port:
Tools → Board → Seeed XIAO ESP32C3
Tools → Port → COMxx
Write or Open Code
Compile & Upload:
Click the icon to verify
Click the ⬆ icon to upload
Open Serial Monitor:
Tools → Serial Monitor (Shift + Alt + M)
Set baud rate to 115200
Tips:
Press the BOOT button while uploading if upload fails
Compact size: only 21mm x 17.5mm, ideal for wearable or IoT projects
Supports both Wi-Fi and BLE, suitable for wireless control projects
Summary
Arduino Uno
Arduino Uno is ideal for more advanced users who want flexibility and hardware control. Great for robotics, sensors, and real-world device building.
micro:bit
micro:bit is perfect for beginners and education. It has built-in features that make learning fast and fun, especially in classrooms.
XIAO ESP32C3
XIAO ESP32C3 is compact yet powerful, making it excellent for IoT projects, wearable tech, and wireless applications. With built-in Wi-Fi, BLE, and support for modern development tools, it bridges the gap between beginner boards and professional solutions.
Individual assignment:
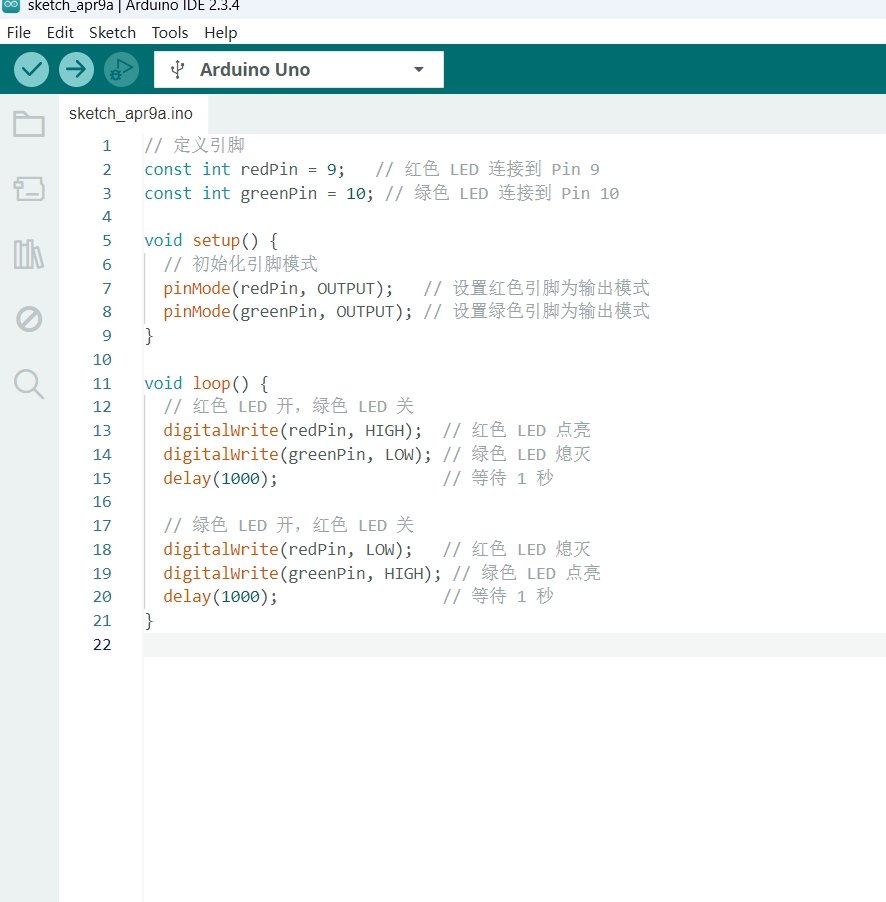
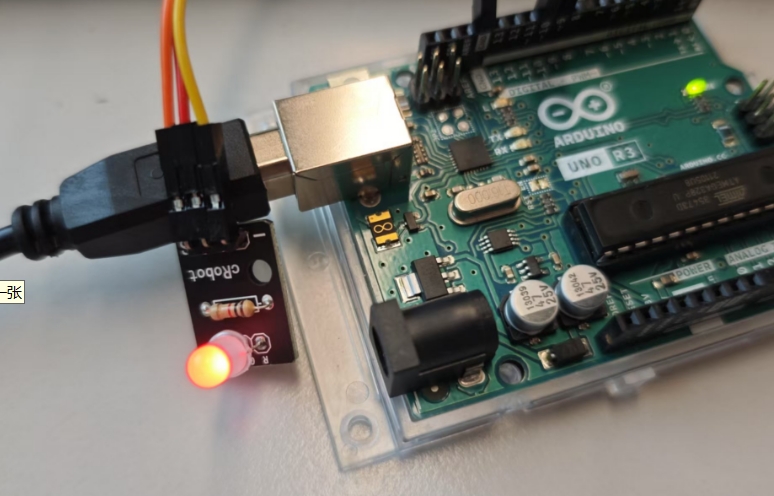
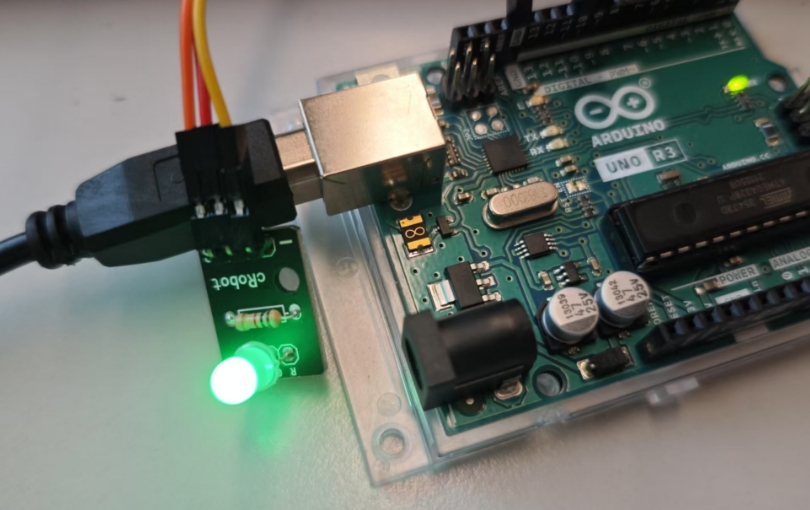
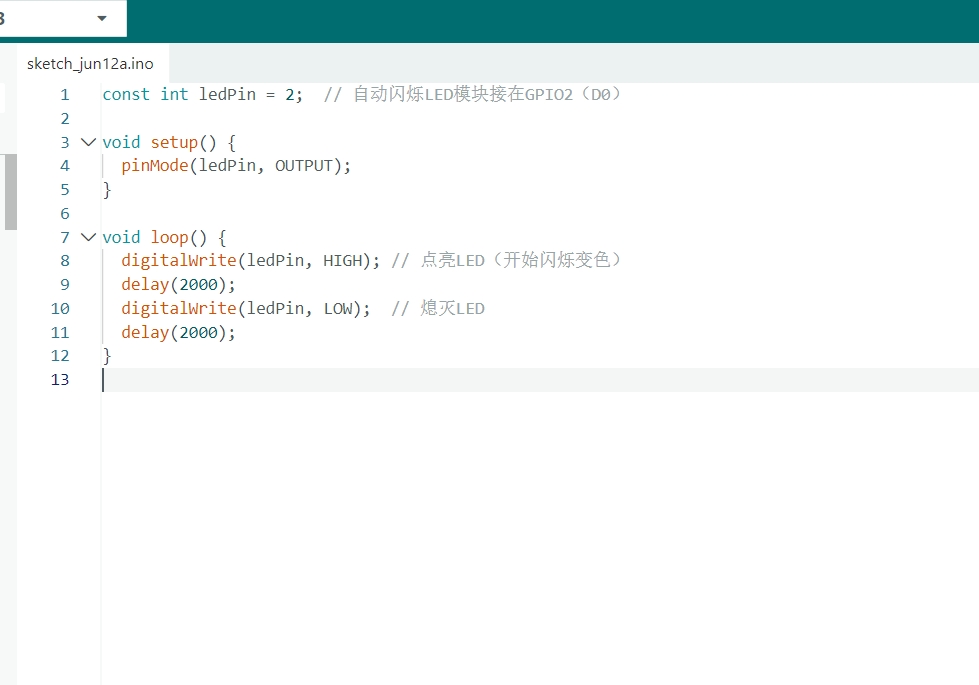
2.0 Dual-color light
Using an Arduino UNO board to design a red-green dual-color LED system
2.0.1 Code
2.0.2 Running & Testing
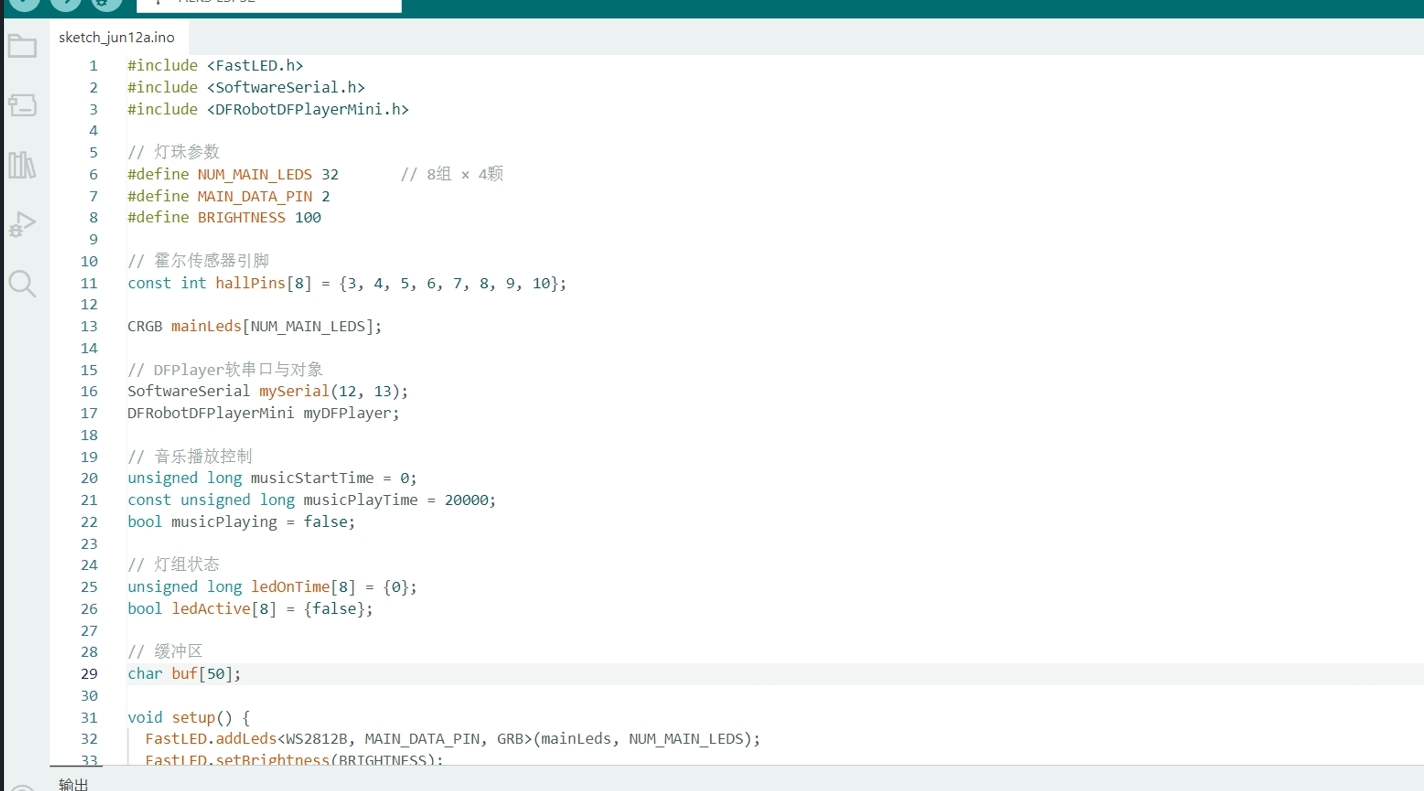
2.1 Final Project:Digital Hall Sensor
When a student puts their apple near the Hall sensor, the LED lights up.
2.1.1 Code
2.1.2 Running & Testing
2.1.3 my work
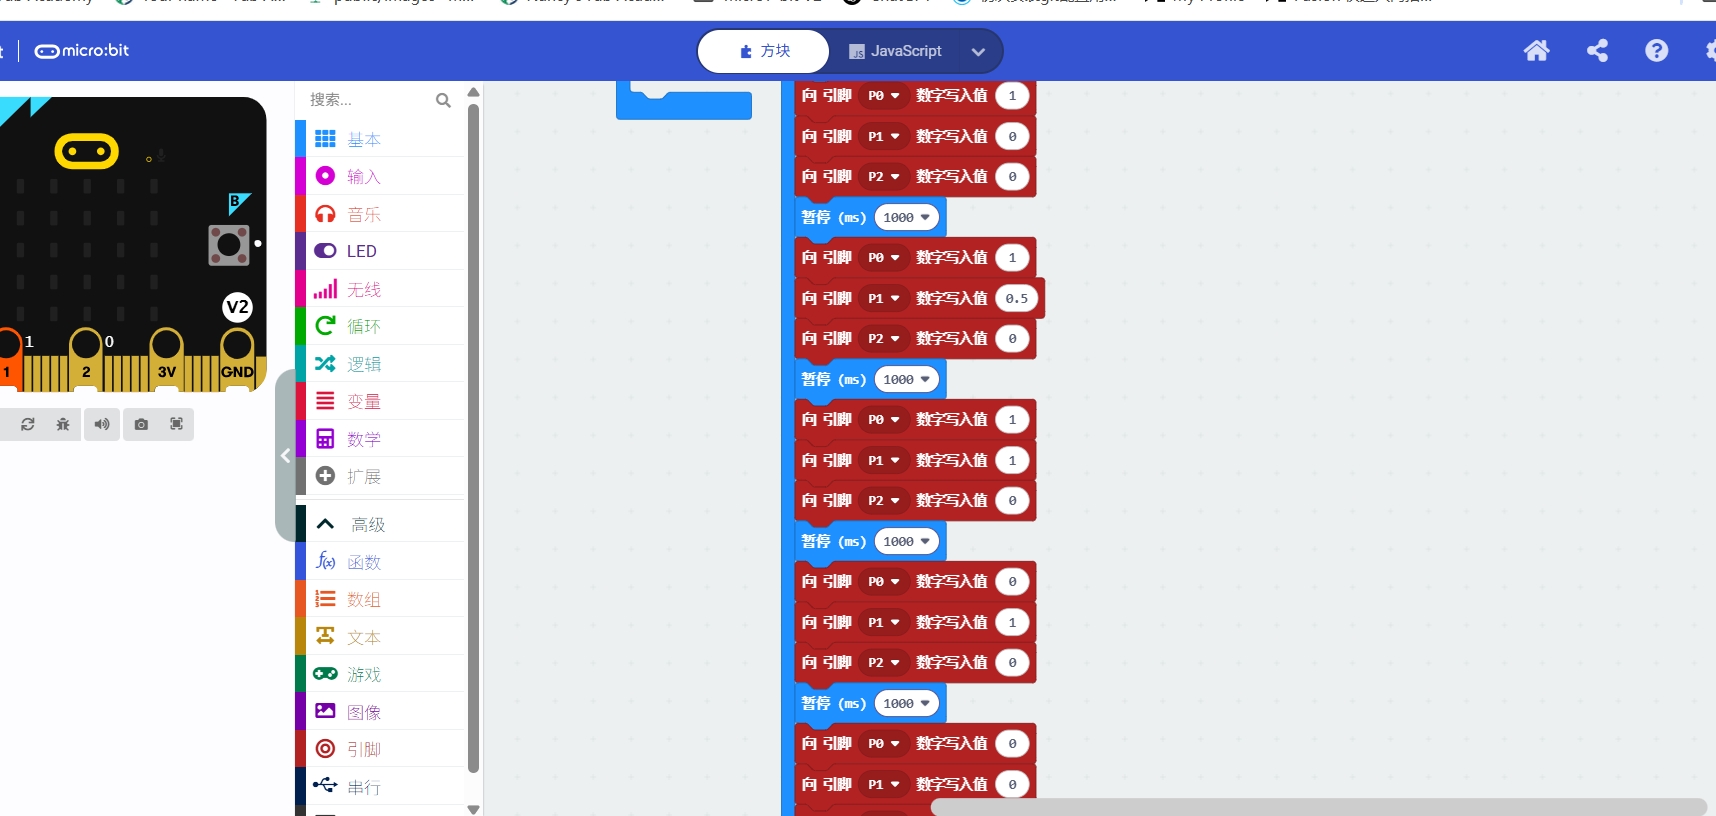
2.2 RGB light with seven colors
Using a micro:bit to create a seven-color LED system
2.2.1 Code
2.2.2 Running & Testing
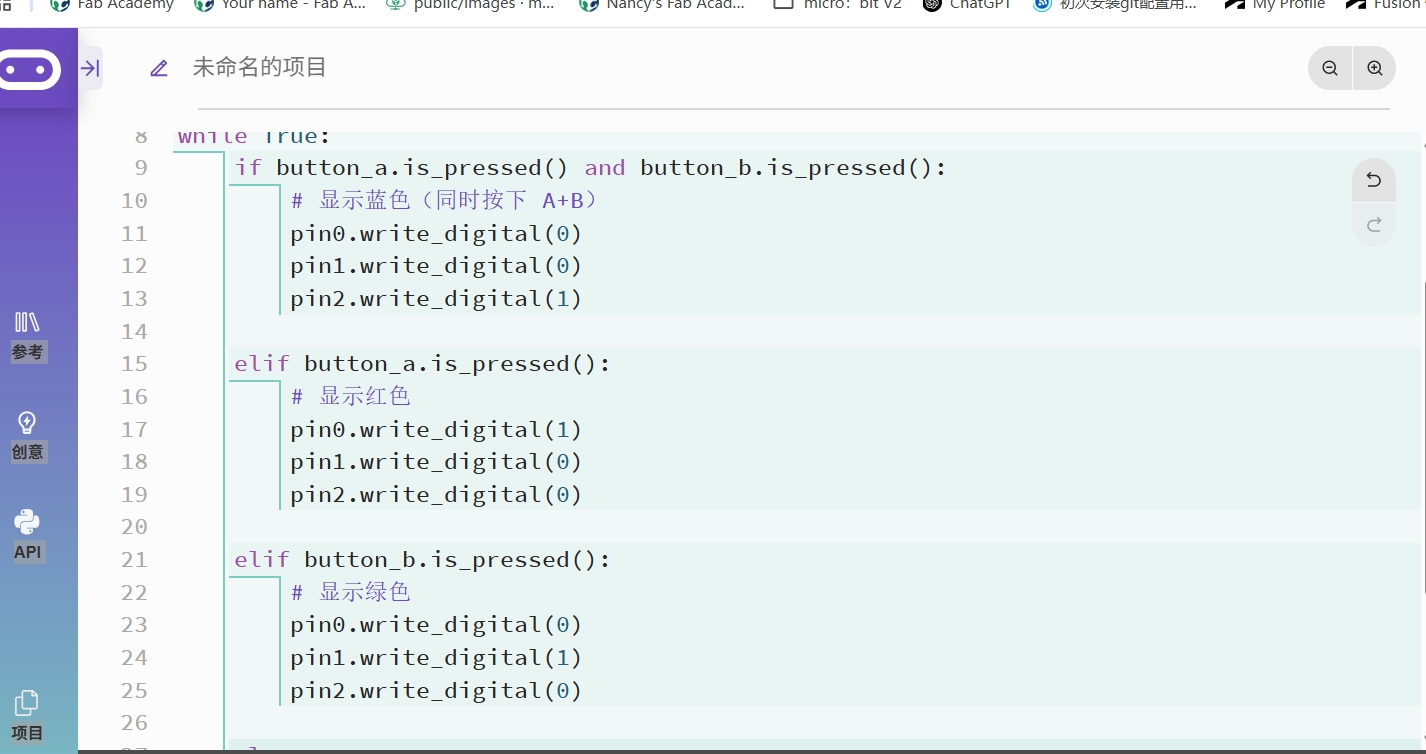
2.3 Smiley face and heart button lights
Using a micro:bit to create smiley face and heart button lights>
2.3.1 Code
2.3.2 Running & Testing
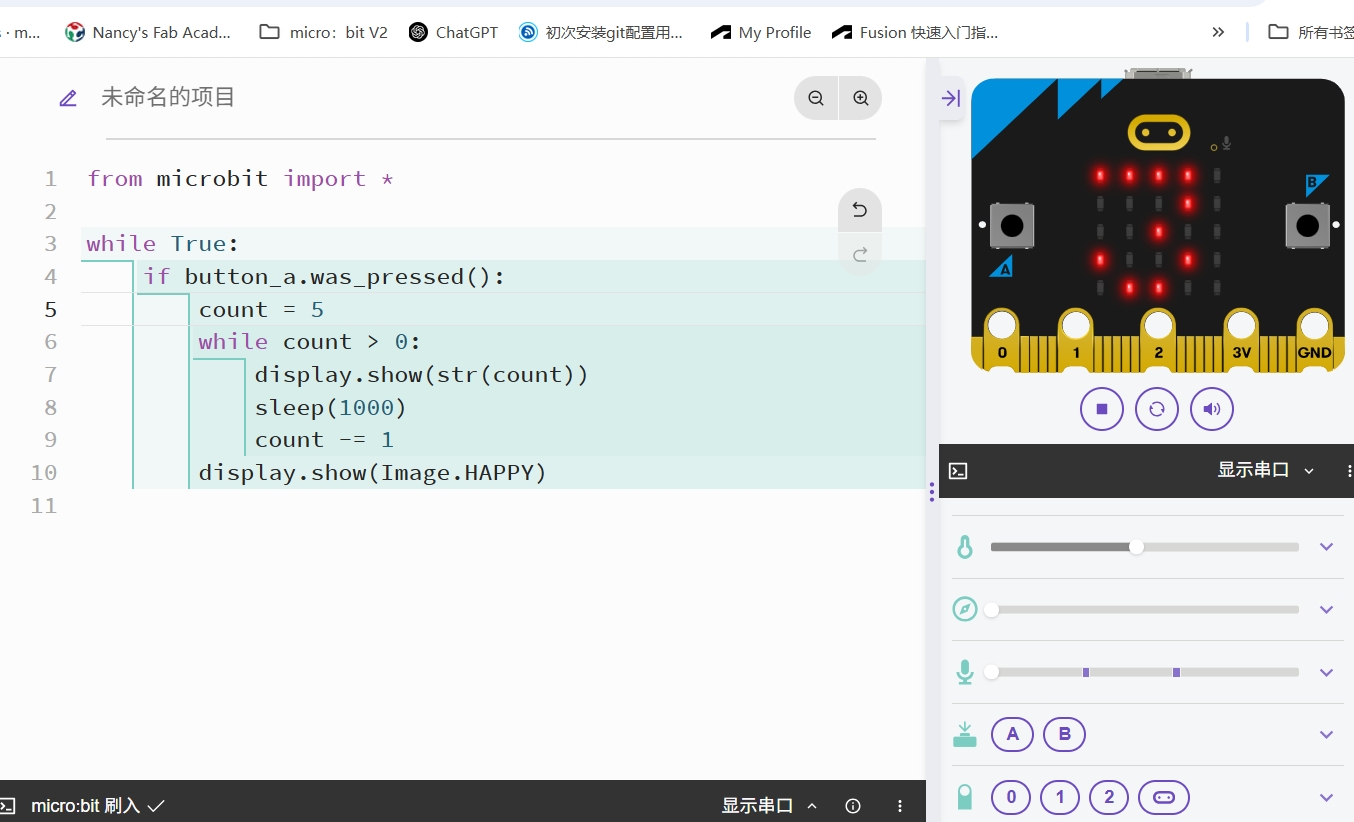
2.4 Timer
Using a micro:bit to build a timer
2.4.1 Code
2.4.2 Running & Testing
2.5 Rainbow LED blinking
Using the Seeed Studio XIAO ESP32-C3 to control a multi-color LED
2.5.1 Code
2.5.2 Running & Testing
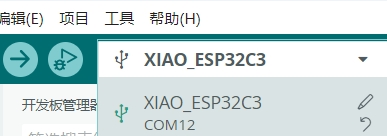
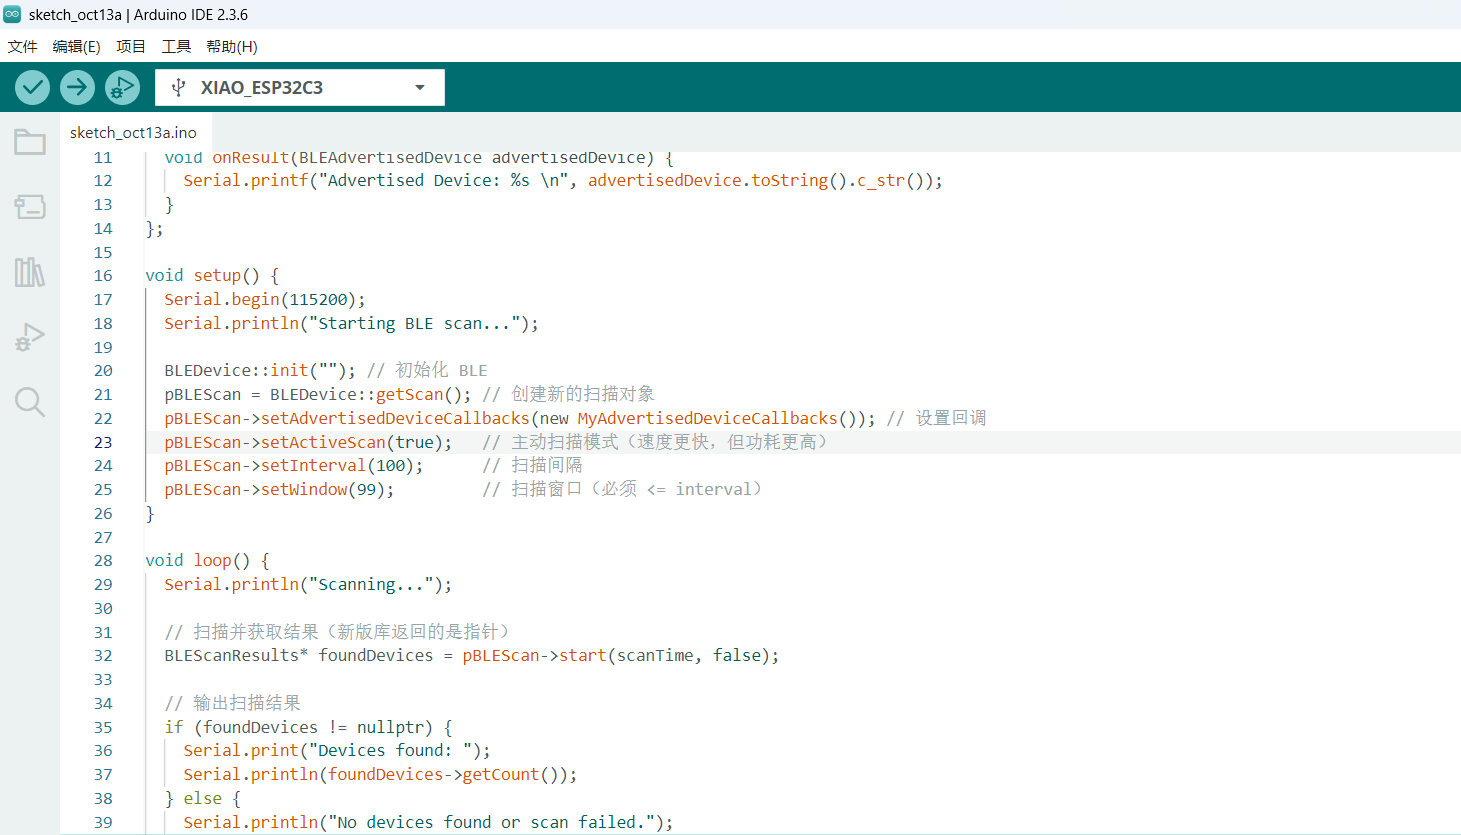
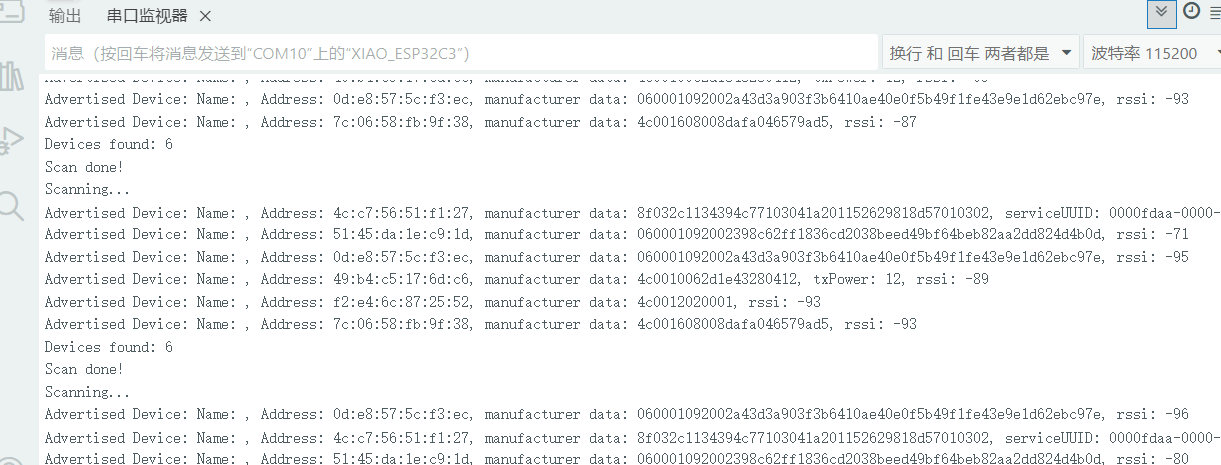
2.6 XIAO ESP32C3 Scanning Bluetooth Devices
Connect the XIAO ESP32C3 to your computer using a USB Type-C data cable to scan for available Bluetooth devices nearby.
2.6.1 Code
2.6.2 Running & Testing
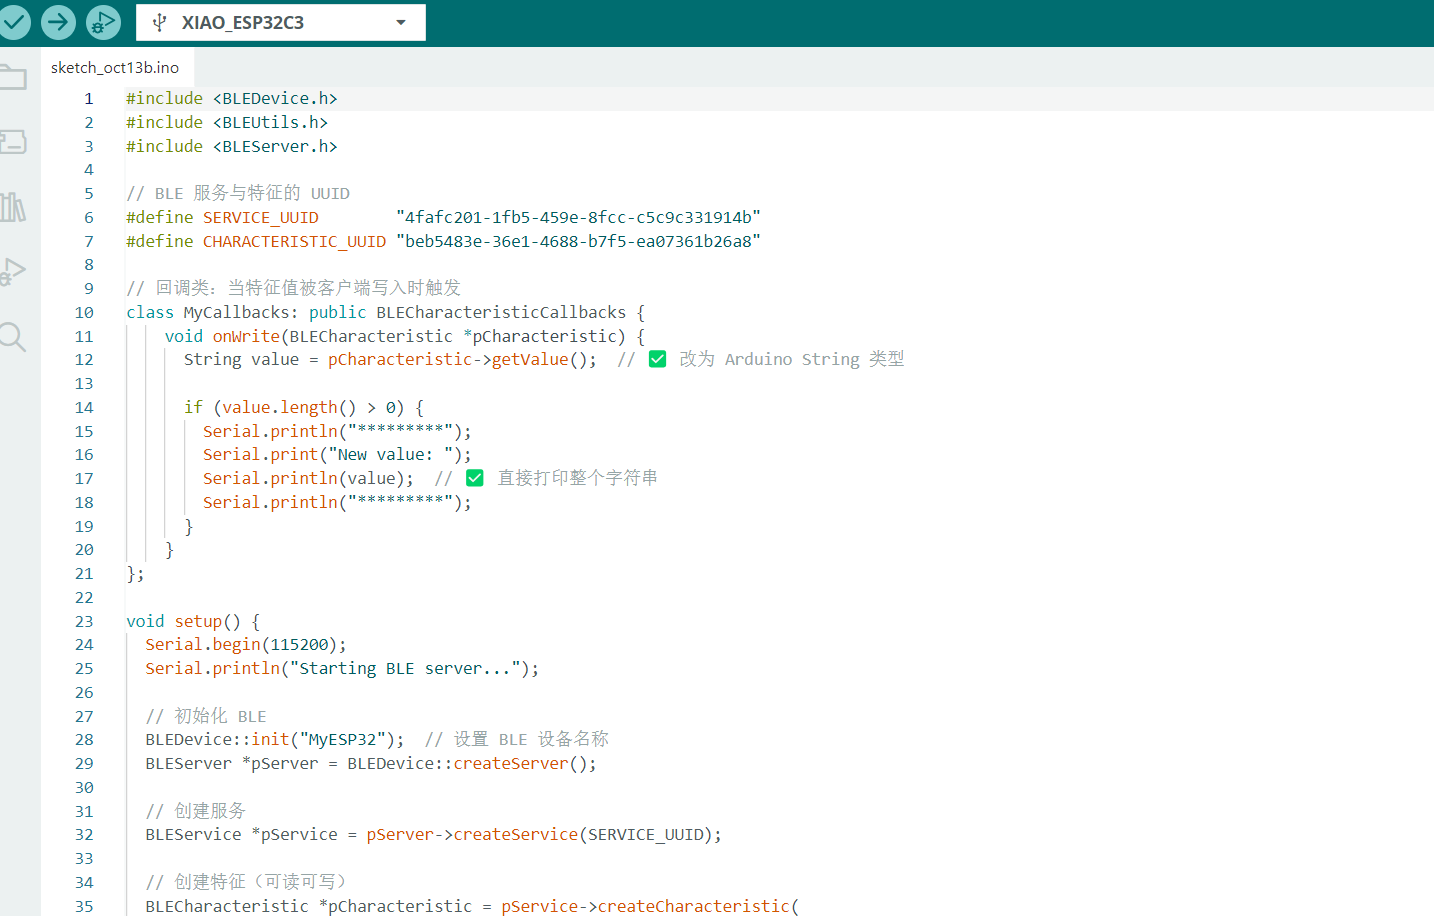
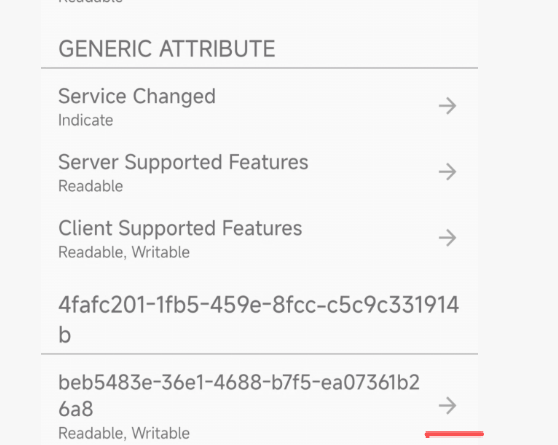
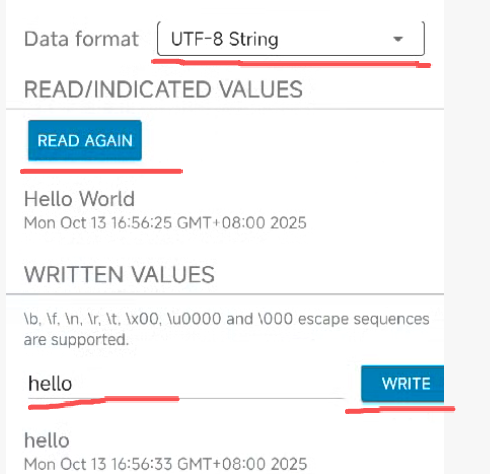
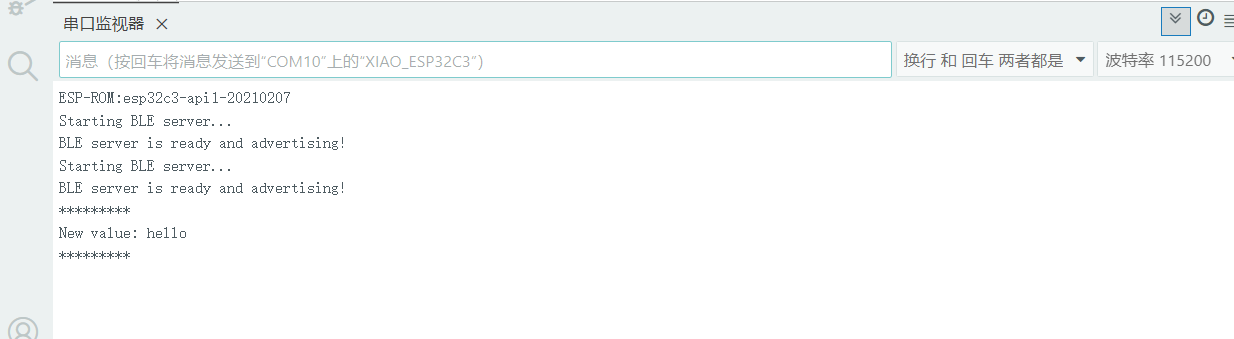
2.7 XIAO ESP32C3 as a Bluetooth Server
Connect the XIAO ESP32C3 to your computer using a USB Type-C data cable. Use your smartphone to search for the XIAO ESP32C3 development board and send the string “hello” to display it in the Serial Monitor.
2.7.1 Code
2.7.2 Download and Install the LightBlue App on Your Smartphone