05 : 3D Printing and Scanning
Group Assignment
We spent the first couple of days playing with the different 3D printers and exploring the 3D scanning option from the Microsoft Kinect to apps on our smartphones. The group project can be found here https://academany.fabcloud.io/fabacademy/2025/labs/barcelona/students/group-assignments/week5.html.
There are plenty of different workflows for 3D printing starting with the CAD build or scan, Meshing, Slicing and printing. Of course there are plenty of problems to overcome, but the resin and Bambu X1- Carbon provide outstanding results.
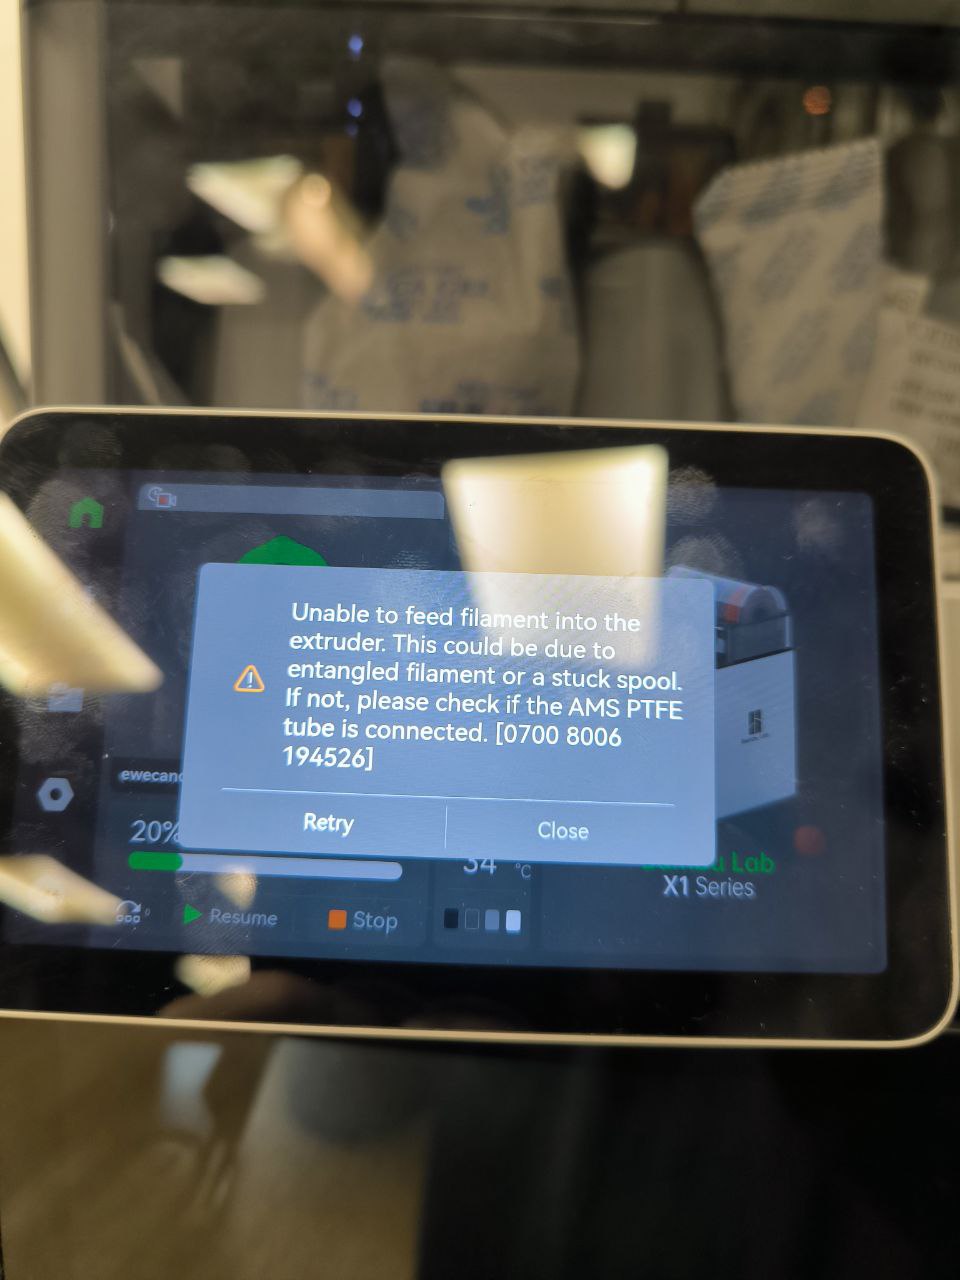
Bambu X1 - filament feeding issues occurred often towards the end of the roll
Elegoo Resin Printer - Messy to clean but detail is outstanding
Individual Assignment
This week assignment asks :
- Design and 3D print an object (small, few cm3, limited by printer time) that could not be easily made subtractively
- 3D scan an object (and optionally print it)
3D printing
BAMBU X1-Carbon
The workflow involves :
- building 3D model with Rhino and exporting a closed surface mesh
- slicing with bambu studio
- printing on Bambu X1
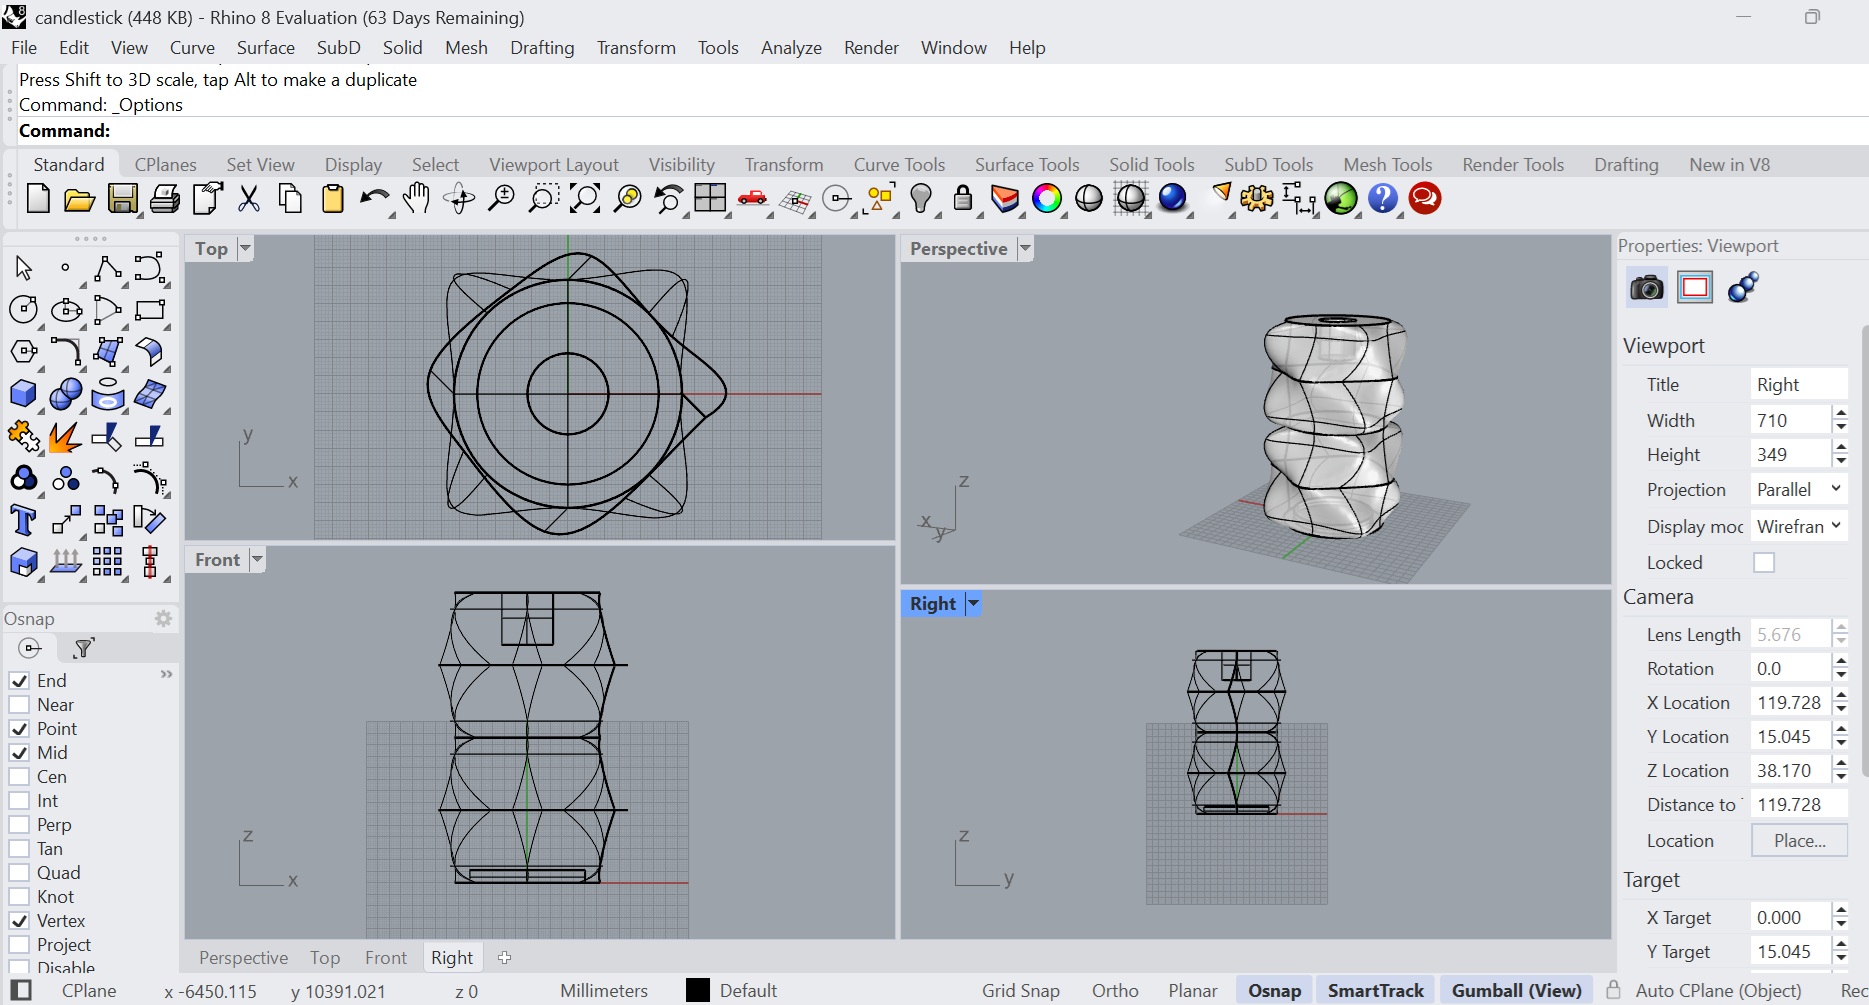
Building the 3d model in Rhino
I opted to make a simple candlestick to play with geometric shapes. I placed a circle, rectangle and circle at different Z elevations, I then used the “loft” feature to connect walls between these shapes which gave a nice geometric skewed design.
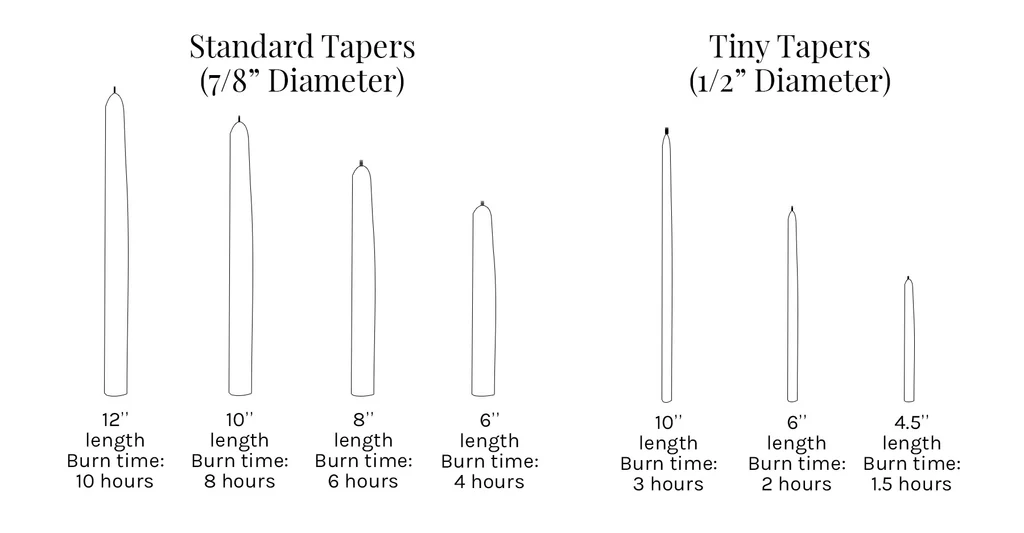
To make the candlestick stable and capable of actually holding a candle, I mirrored the design vertically to add height. Typical candle dimensions are given in Figure 3D1 below.
To determine the width of the candle stick I looked for a weight in the workshop and measured it’s width, with the intention of this weight being able to be pressed into the bottom of the candle stick to add stability. I used this diameter and height boolean difference a place for it in the bottom of the candle stick. A 0.1mm margin was given around the diameter so that it will have a nice snug fit.
A 7/8 inch hole with a depth of 1 inch on the top of the candlestick was also boolean differenced to allow the candle to be wedged in.
Slicing with Bambu studio
The .stl design file was uploaded to the Bambu studio software to be sliced. The standard settings were used with a lattice infill and the design was exported onto an SD card to be loaded directly onto the Bambu X1-Carbon printer.
3D printing on Bambu X1
The SD card was placed into the 3D display, the design selected and launched. The printer worked flawlessly until it came towards the end of the filament where it snagged a couple of times and had to be re-rolled onto the wheel. You can see the Bambu labs X1 carbon printer in action in Figure BC3.
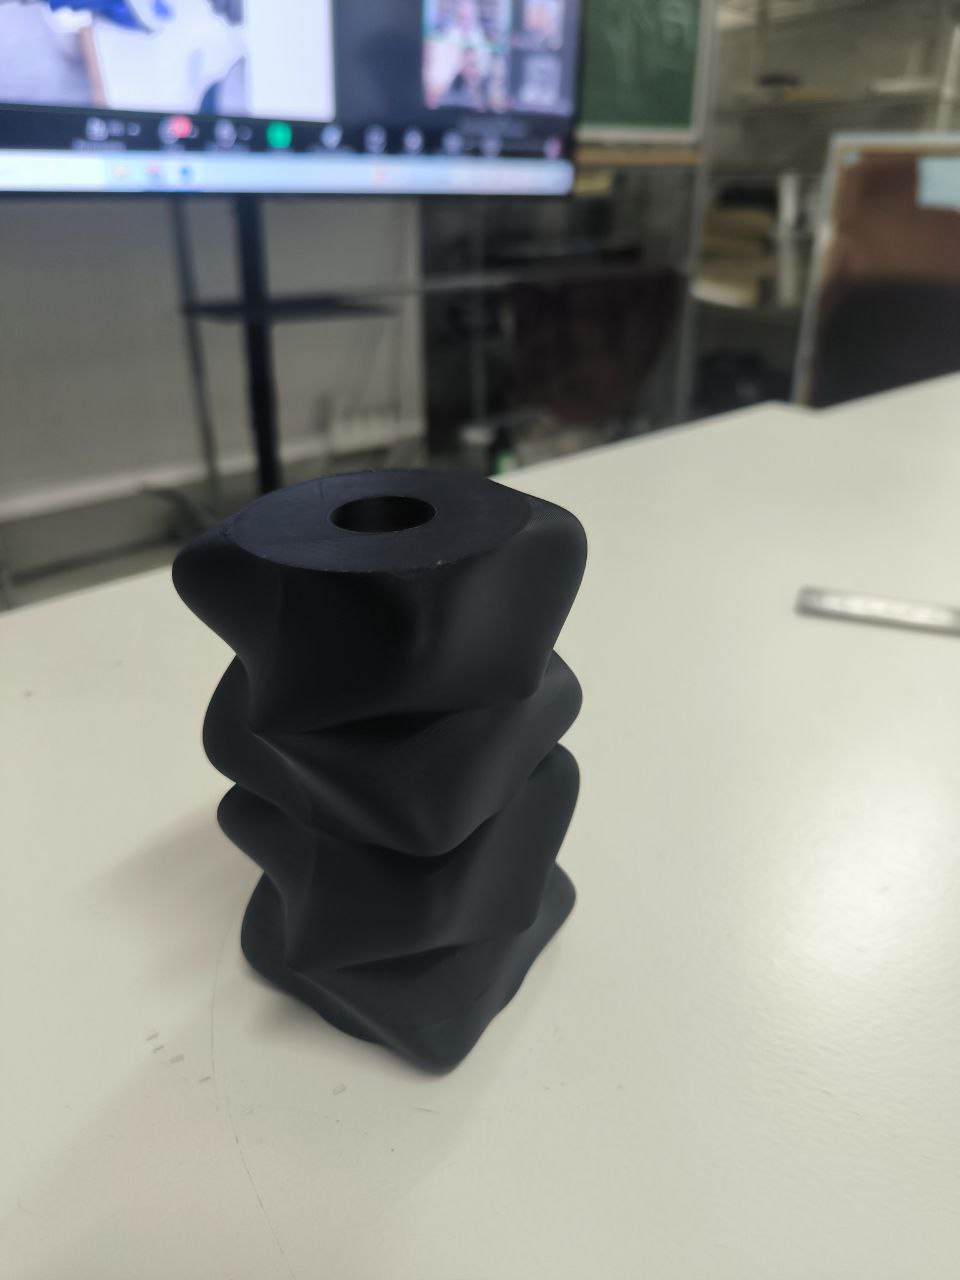
The final result was satisfying but it shows why several iterations are necessary for a good product:
- The points are too sharp,
- the different level rotations could be improved and better cohesion between the levels could improve the aesthetics of the object.
- the seem could be hidden better.
- the diameter of the space given at the bottom of the candlestick was slightly too large to hold the weight, the 0.1mm was too generous a tolerance.
I now have confidence in the 3D printer to provide exceptional results.
3D scanning and Paste Printing
I decided to scan my hand using the Kiri Engine app from the android playstore and then attempt to use a paste printer to print out a mini statue in ceramic.
The scan was surprisingly accurate although it was difficult to get the entire hand scanned in detail because of the different angles. Figure CP1 below shows the 3D image render of my hand using the Kiri engine app, this could be improved by having better lighting and a more steady camera hand.
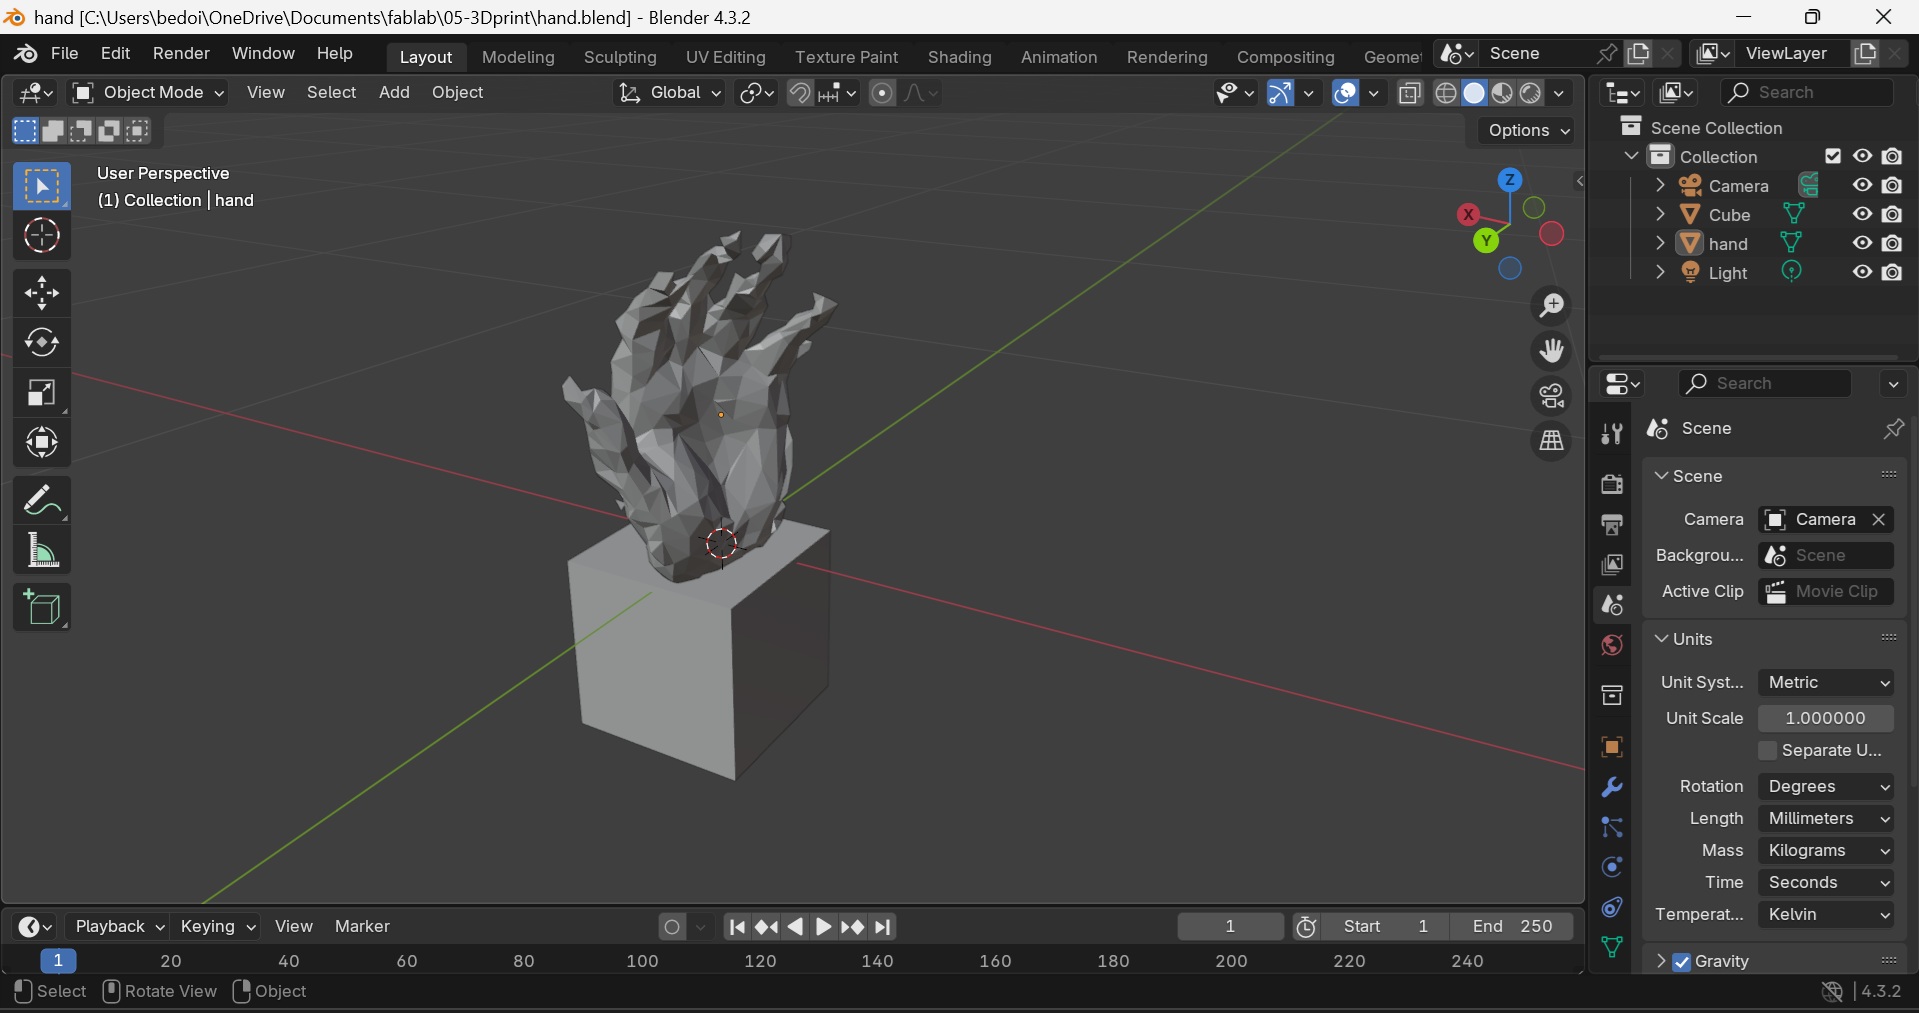
This image was then imported into blender to be cleaned up ready to be exported into a .stl file ready to be sliced and printed. The orientation of the hand is important as the paste printer builds one layer on top of the other but the clay is pushed out at room temperature so the different layers are still wet and have a tendence to slide off one another or crack.
I therefore decide to print the hand vertically, cutting the wrist across the cross section which is flat. To do this I created a Cube and placed it on the wrist of the hand. It was my initial intention to boolean difference the two but I liked how it looked on a pedastal so I instead boolean unioned the two objects, which would later proof to be my downfall for the design. The final design to be sent to the Cura slicing software can be seen in Figure CP2 and the corresponding .stl is given hereafter:

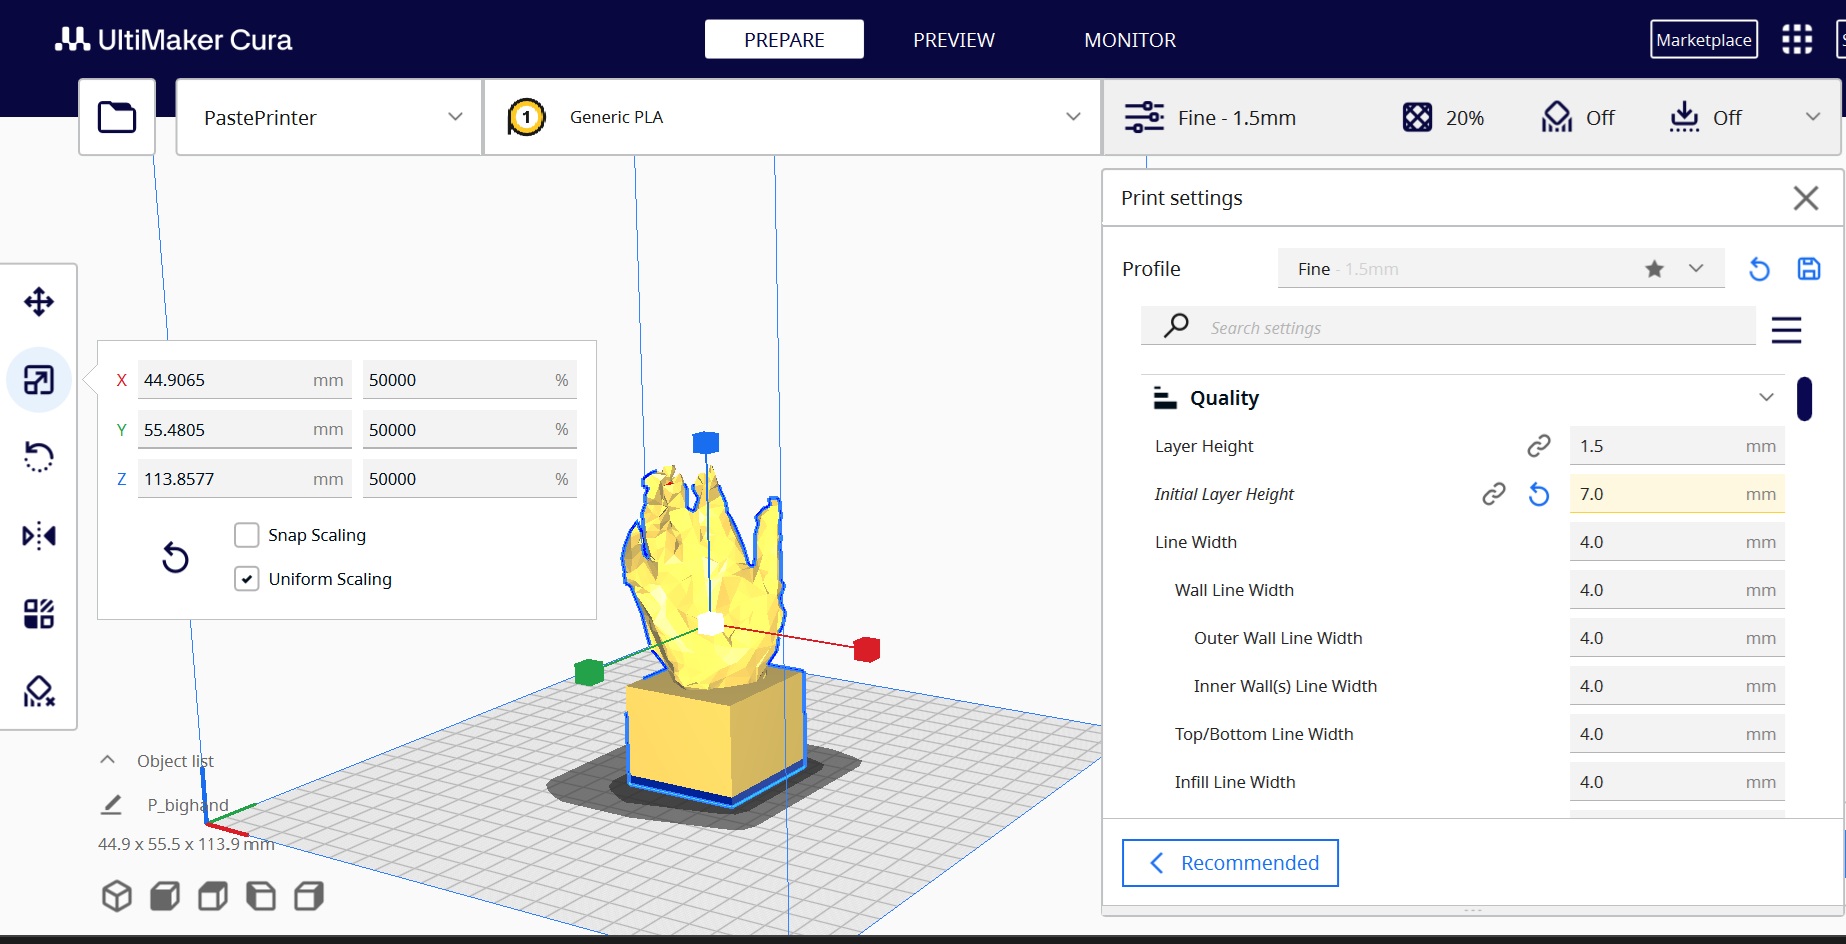
The .stl file was then imported into Cura ready to be sliced. The previous user of the paste printer gave me here settings, noting that the initial later height should be 7mm, and a layer height of 1.5 mm has given her the best results. Using the advanced options in the slicing software a spiralised path was selected and then the G-code was exported ready to be sent to the Repetier-Host software which is connected directly to the paste printer.
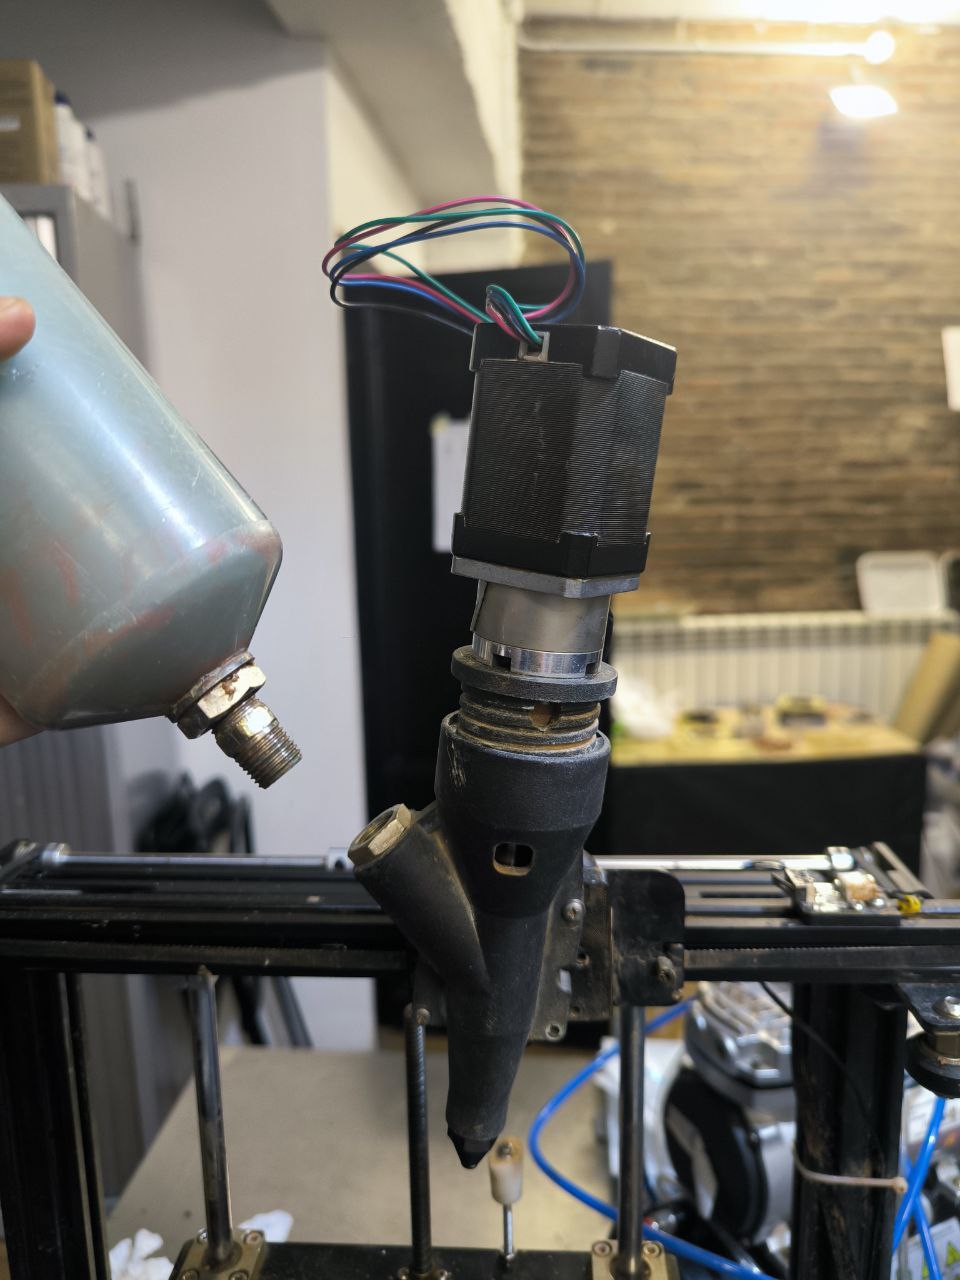
Now that the design is ready to be launched, the clay can be mixed at 6-7% hydration. In our Lab a pressurised cylinder has been built. The cylinder is filled with the clay mixture and sealed with a pneumatic piston inside that will push the clay into the printer nozzle when pressurised. A compressor is used to pressurise the system to 3-4 bar.
The nozzle itself has a 3D printed metal screw inside that turns with an electric motor that turns to give a specific clay feed rate at the nozzle. The nozzle size we used for my prints was 4mm. Figure CP5 shows where the cyclinder is twisted into the nozzle at the side. The electric motor is twisted into nozzle at the top and is connected directly to the screw inside. As the screw turns, the compressor pushes some more clay material into the new space available at the screw as it rotates and extrudes clay at the nozzle exit.
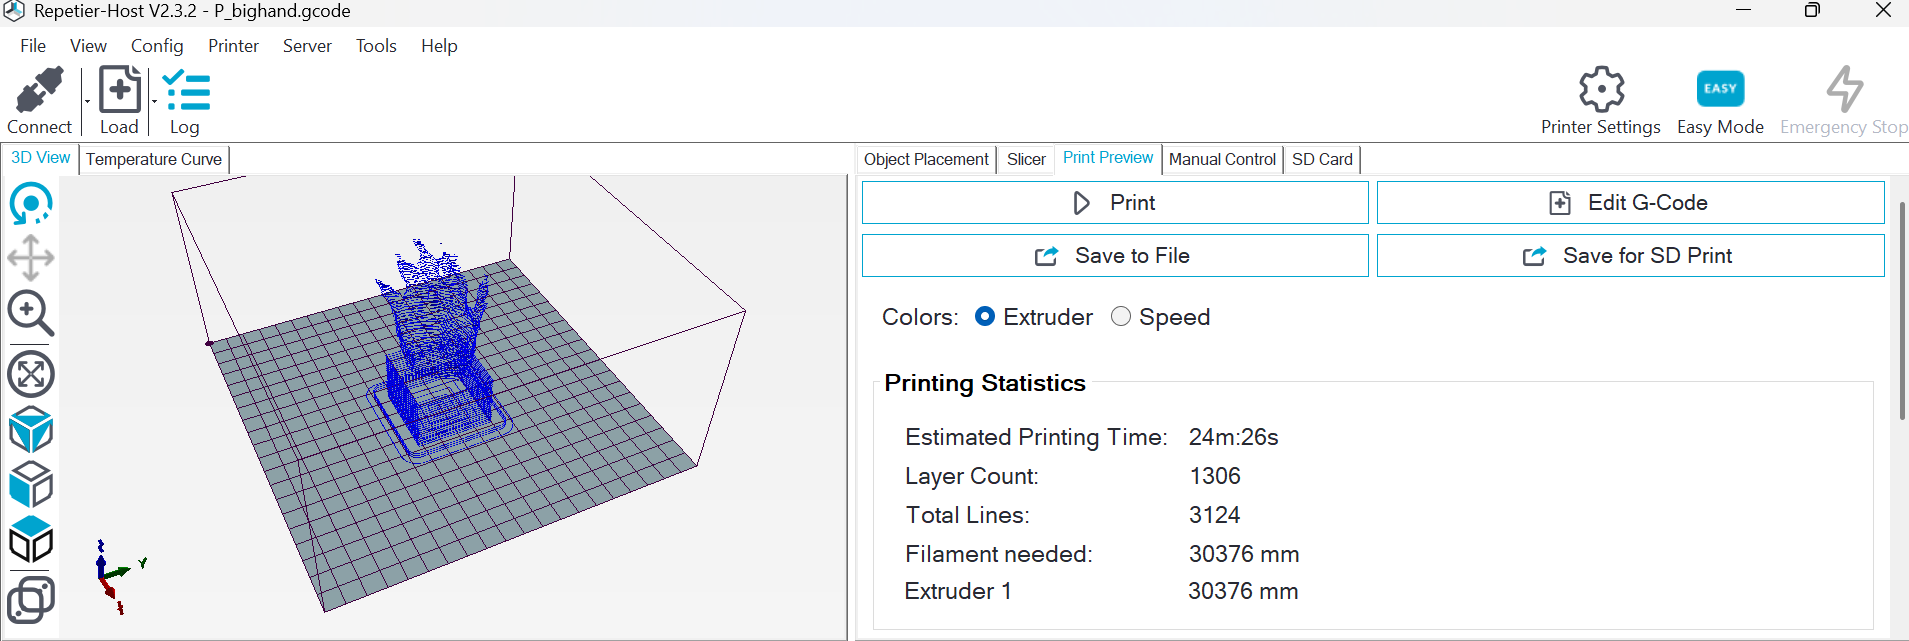
The 3D printer at the Barcelona Lab is a modified Ender printer. We connected our computer directly to the printer using a USB to mini USB connection and then launched he Repetier-Host app and launched the print.
As you can see in Figure CP6, the pedestal was a very bad idea as with the spiral g-code ther was no infill and the 3D printer hand collapsed upon itself. Next time I will try with a smaller infilled pedestal.
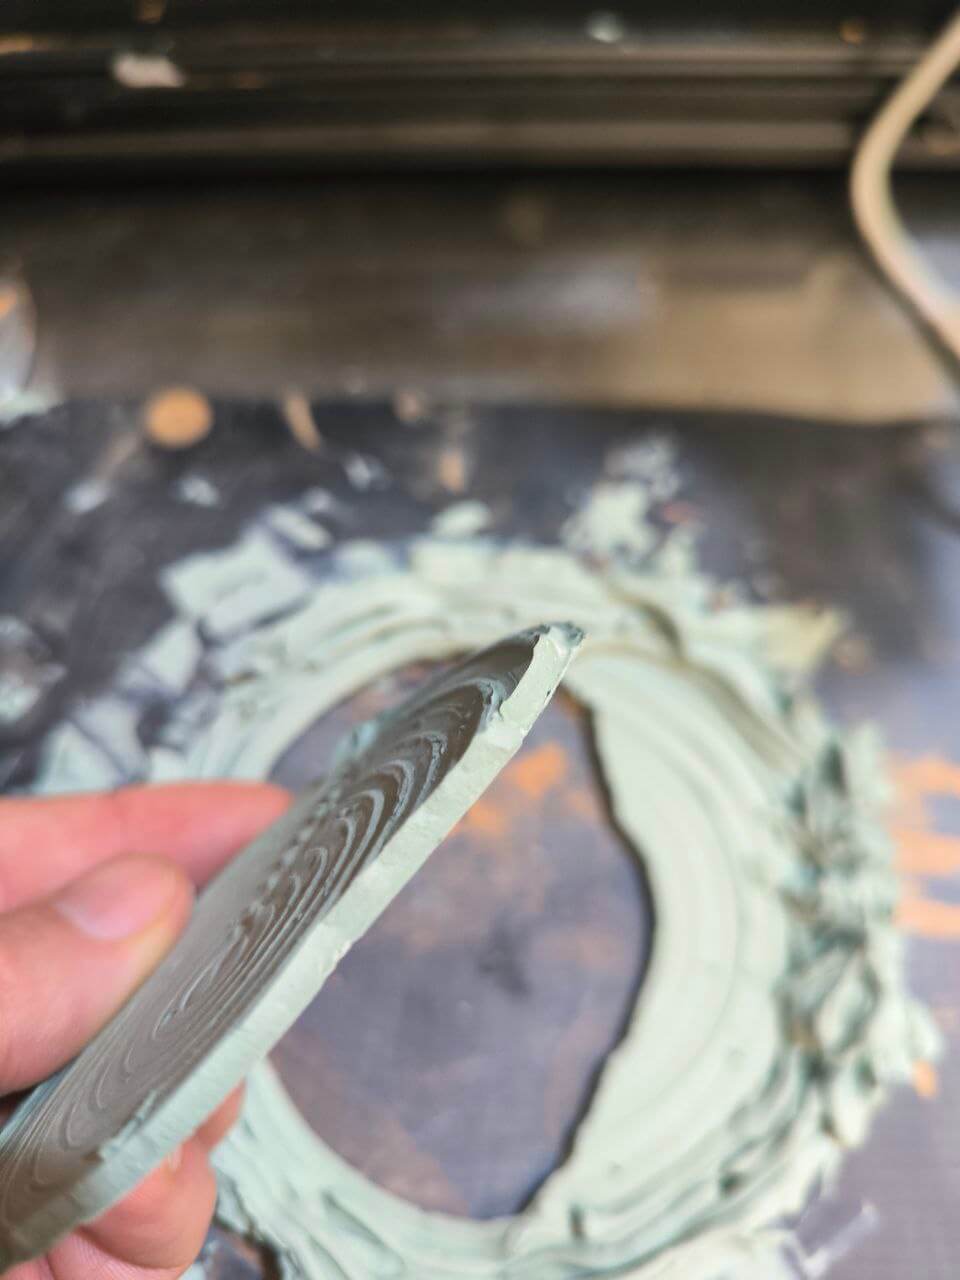
The images below show an attempt to make a simple plate with a tapered edge. Unfortunately the design did not simply print a spiral from the centre outwards, which was my hope as perhaps there would have been enough tension between layers to maintain a slightly tapered shape. I’m sure with a little more research I will be able to improve the printing flow. The thickness of the print however was ideal for kitchen plates, but traditional methods of making ceramics are perhaps better suited for this.