02 : Computer-aided Design
4.2.2025 - 11.2.2025
Rhino8
Jumped straight into a free course on coursera.org to use rhino python script and introduce different commands:

Design Computing: 3D Modeling in Rhinoceros with Python/Rhinoscript
Here are some useful documents:
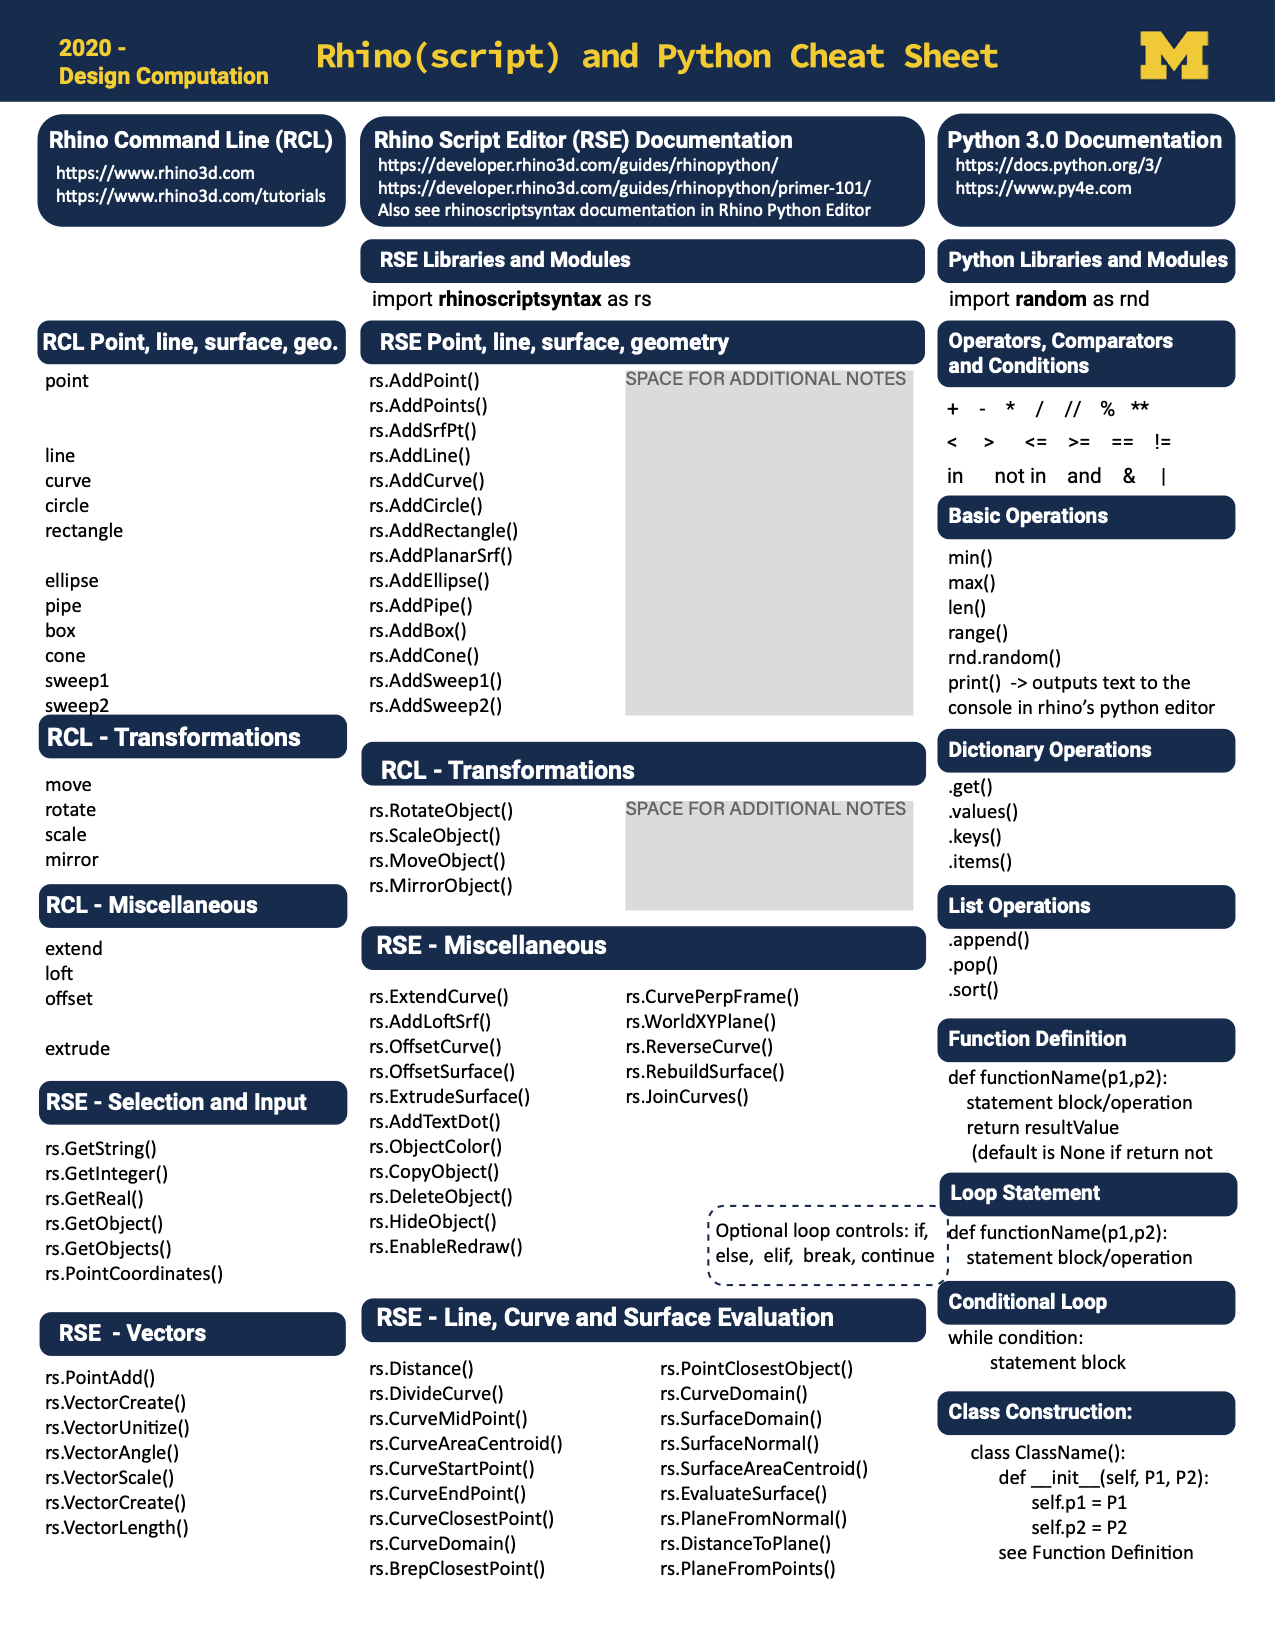
University of Michigan Cheat Sheet
Python Essentials in Rhino
Python for Everybody
Exploring Data Using Python 3
Dr. Charles R. Severance
https://do1.dr-chuck.com/pythonlearn/EN_us/pythonlearn.pdf
Introduction to data points and variables = code
#! python3
#DATA TYPES
import rhinoscriptsyntax as rs

#Integer
x = rs.GetInteger('input integer', 5)

#Float
num = rs.GetReal('input a number',5.245)

#String
strVal = 'forty five cats'

#Boolean
bin01 = True
bin02 = False

#GUID
obj = rs.GetObject('select a box', rs.filter.polysurface)
curve =rs.GetObject('select a curve', rs.filter.curve)
srf = rs.GetObject('seclect a surface', rs.filter.surface)

#3D Point
point = rs.GetPlugInObject('select a point')

#OUTPUT
print(x)
print(num)
print(strVal)
print(bin01)
print(obj)
print(curve)
print(srf)
print(point)
I finished the first module of the course, but want to continue toward the end of module 5 in the coming weeks as it appears very powerful. Although, geometry nodes and parametric tools in fusion and grasshopper remove the necessity to have a much deeper level of understanding, it remains useful.
Final project 3D design
In order to work towards the weekly assignment, I only used rhino python to create the arc:
#! python3
import rhinoscriptsyntax as  rs
plane = rs.WorldZXPlane()
plane = rs.RotatePlane(plane,  0.0, [0,0,1])
rs.AddArc( plane, 20.0, 90.0  )
rs.AddArc( plane, 20.0, -90.0  )
I then moved the bottom left corner of the arc to (0,0,35) which is the coordinate system in (x,y,z).
The two arcs were then “join”ed and then duplicated dragging the mouse and click alt. I then used the move function to move 1 corner to the edge of the previous curve. This was done three times to have three roofs of the chambers.
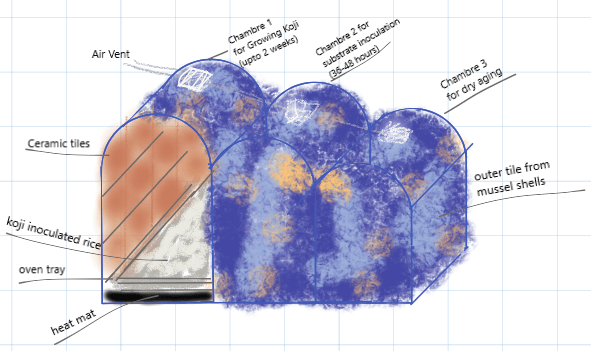
I then created lines to make the rest of one side of frame. I then duplicated the whole face and copied it 40 units away. I then used “control point curve” to connect the corners and midpoints from one face to the other to make a wire structure, which I want to use to attach ceramic tiles on the interior and smashed seashells and resin tiles on the outer shell of the koji-muro structure for aesthetics (shown in figure 1 below, sketched on Concepts v2024.12.7).
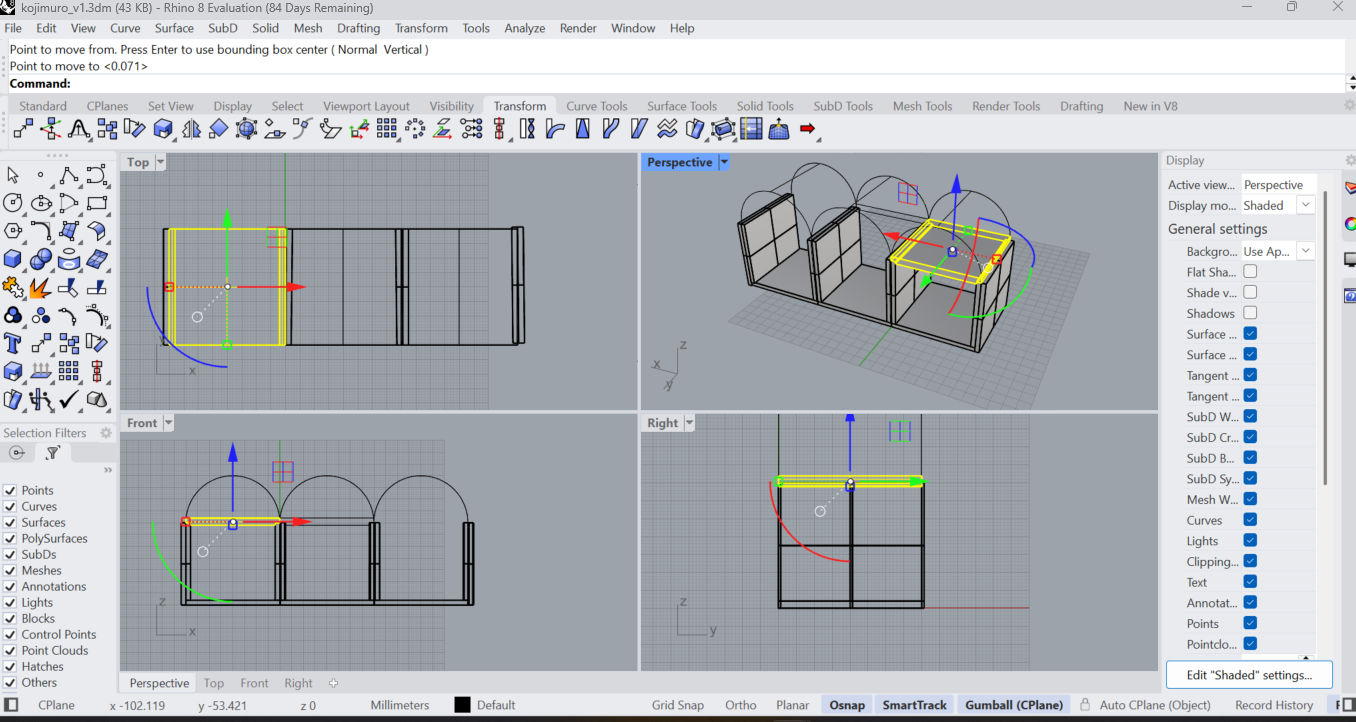
The floor and wall tiles we created using the box function, selecting the starting point and then their dimensions. The polycurve function was used inputing the (x,y,z) coordinates, then extruding the depth, and capping the object as shown in the command history below, before being snapped in place to the room 1 of the chambre:
Command: _Polyline
Start of polyline ( PersistentClose=No ): 0,0,37
Next point of polyline ( PersistentClose=No  Mode=Line  Helpers=No  Undo ): 40,0,37
Next point of polyline. Press Enter when done ( PersistentClose=No  Mode=Line  Helpers=No  Length  Undo ): 40,0,35
Next point of polyline. Press Enter when done ( PersistentClose=No  Close  Mode=Line  Helpers=No  Length  Undo ): 38,0,35
Next point of polyline. Press Enter when done ( PersistentClose=No  Close  Mode=Line  Helpers=No  Length  Undo ): 38,0,34
Next point of polyline. Press Enter when done ( PersistentClose=No  Close  Mode=Line  Helpers=No  Length  Undo ): 0,0,34
Next point of polyline. Press Enter when done ( PersistentClose=No  Close  Mode=Line  Helpers=No  Length  Undo ): Undo
Next point of polyline. Press Enter when done ( PersistentClose=No  Close  Mode=Line  Helpers=No  Length  Undo ): 2,0,34
Next point of polyline. Press Enter when done ( PersistentClose=No  Close  Mode=Line  Helpers=No  Length  Undo ): 2,0,35
Next point of polyline. Press Enter when done ( PersistentClose=No  Close  Mode=Line  Helpers=No  Length  Undo ): 0,0,35
Next point of polyline. Press Enter when done ( PersistentClose=No  Close  Mode=Line  Helpers=No  Length  Undo ): 0,0,37
1 closed curve added to selection.
Command: ExtrudeCrv
Extrusion distance <31> ( Output=Surface  Direction  BothSides=No  Solid=No  DeleteInput=No  ToBoundary  SetBasePoint ): 40
Creating meshes... Press Esc to cancel
1 open extrusion added to selection.
Command: Cap
Created 2 caps, resulting in one closed object.
Creating meshes... Press Esc to cancel
1 closed extrusion added to selection.
Command: Cap
Select objects to cap ( DeleteInput=Yes )
Select objects to cap. Press Enter when done ( DeleteInput=Yes )
Select objects to cap. Press Enter when done ( DeleteInput=Yes )
Unable to cap 2 objects that were closed prior to starting.
1 closed polysurface added to selection.
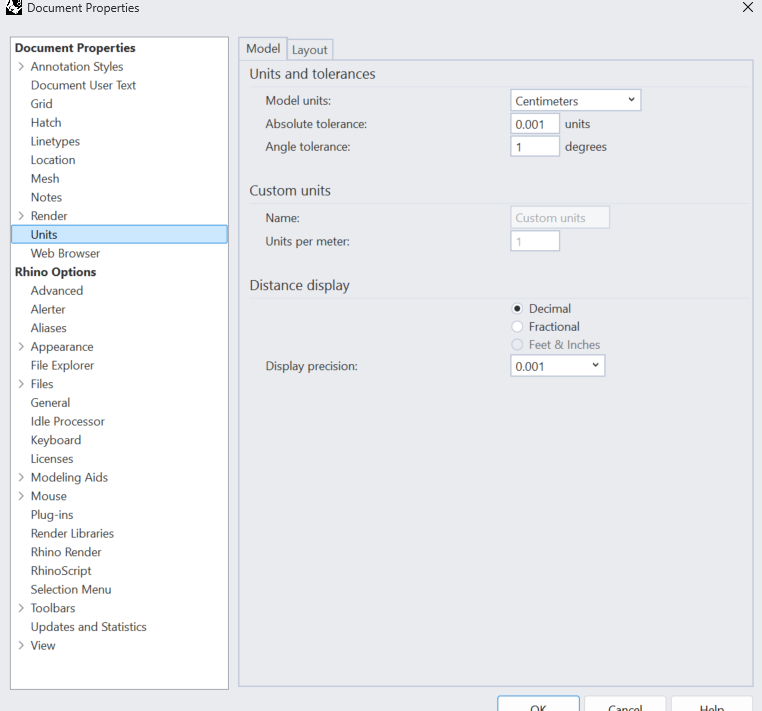
I modified the unit system to centimetres otherwise the image is a factor of ten too small !
Here is the Rhino file for the design:
2D CAD tools.
Concepts App
This allows an more abstractive approach as if having a note pad. There is a steep learning curve to use all of the tools. There is a large variety of pens and pencils that can be used, you can select the grid behind but I have struggled to draw as accurately as in rhino as I like selecting the coordinates.
Figure 4 below, is an attempt at designing a wooden version of Meccano for a laser cutter, perhaps to be used in week 3. I can see it’s usefulness for sketching ideas but not for geometric design. Figure 1 previously was also made within Concepts.
I hope to have the time to explore the app further, using the tutorials to improve my illustration skills.
Video and Image Compression
Tinypng.com and Handbrake software was used for image and video compression.
Tinypng files are simply dragged into the webpage and they will be compressed into a tinified.zip file that can then be extracted locally.
Handbrake is downloaded locally, then the files are dragged into the app window. The user can then change the quality of the video and then reencode a new video. Fast 480p 30 is a low acceptable quality.
All the files uploaded for this week’s, and previous week’s assignment have been uploaded using this procedure.
PANDA Video Compressor
I have taken all of my images and videos using my phone. It has become tiresome having to transfer them onto my computer for compression so I prefer to do this directly on my android phone now.
I subscribed to Panda Video Compressor in Google Play for the year and it has been fantastic. The compression quality is outstanding!


2D Raster Software - Krita
I decided to try Krita for selecting an object with precision and removing the background. I took an image of some sheep in a field from a recent trip back home in North Manchester and decided to try and remove the background.
- Duplicate Layer
- Freehand Selection tool to roughly select the sheep
- Add a Transparency Mask
- Refine selection
You can see in the video above this process. It is tedious and less intuitive than Paint. The plus is supposed to be the ADD and SUBTRACT from the selection path tools, but I was unimpressed.