16- Wildcard
The aim of this week was to delve int some other digital manufacturing processes not addressed during the course. Some wildcard week examples. The weekly group projects are located here.
Individual Project
One of the workshops we did in the Lab was soft robotics. Our first attempt during the group assignment was a little bit of a disaster as we put the press at over 100 degrees Celsius at 90 second intervals, instead of 35 degrees at 3 minute intervals. The bio-material melted and we had to put the sealed design in the freezer to cool it down. This provided us with a poor finish so I decided to have a go using the correct procedure.
Soft Robotics
The workflow for the soft robotics is to :
- Make Bio Material
- Make Baking Paper layout and Laser Cut it
- Hot press the layout between two peices of bio-material
- Test the material by blowing air into it
- Control motors to pump air in and out like breathing
We used a mixture of glycerine, gelatine and water to make a biofabric, spreading it across a window pane and letting it dry until it was solid and flexible.
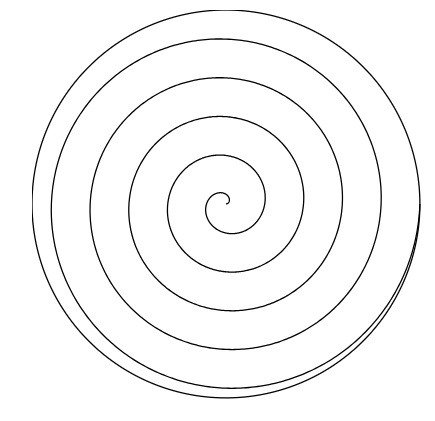
I drew a spiral with a python code in Blender, the spiral and code are here below.
import numpy as np
import matplotlib.pyplot as plt

# Parameters
R = 1.0        # radius of the circle
turns = 5      # number of turns
theta_max = 2 * np.pi * turns
k = R / theta_max  # spiral contraction rate

# Generate spiral
theta = np.linspace(0, theta_max, 1000)
r = R - k * theta
x = r * np.cos(theta)
y = r * np.sin(theta)

# Plot
fig, ax = plt.subplots()
circle = plt.Circle((0, 0), R, color='lightgray', fill=False)
ax.add_artist(circle)
ax.plot(x, y, color='blue')
ax.set_aspect('equal')
ax.set_xlim(-R-0.1, R+0.1)
ax.set_ylim(-R-0.1, R+0.1)
plt.title("Spiral from Edge to Center")
plt.show()
import bpy
import math
from math import pi, cos, sin
# Parameters
R = 15.0 # cm
turns = 5
theta_max = 2 * pi * turns
points_count = 2000
k = R / theta_max
# Generate spiral points
theta_vals = [i * theta_max / points_count for i in range(points_count)]
points = [(R - k * t) * cos(t) for t in theta_vals], [(R - k * t) * sin(t) for t in theta_vals]
# Convert to list of (x, y, z) for Blender (z = 0)
spiral_points = [(x, y, 0) for x, y in zip(*points)]
# Create new curve data
curve_data = bpy.data.curves.new(name='SpiralCurve', type='CURVE')
curve_data.dimensions = '3D'
curve_data.resolution_u = 2
# Create a new spline in the curve
polyline = curve_data.splines.new('POLY')
polyline.points.add(len(spiral_points)-1)
for i, coord in enumerate(spiral_points):
x, y, z = coord
polyline.points[i].co = (x, y, z, 1) # w=1 is required
# Create object with this curve data
curve_obj = bpy.data.objects.new('Spiral', curve_data)
bpy.context.collection.objects.link(curve_obj)
From here I laser printed the spiral on baking paper. This was then placed between two pieces of the Bio-Material and put under the heat press at 40 degrees for 3 to 5 minute intervals. Although the material did not melt. You can see the result below, it was once again less that ideal. The bio-material was too fragile.
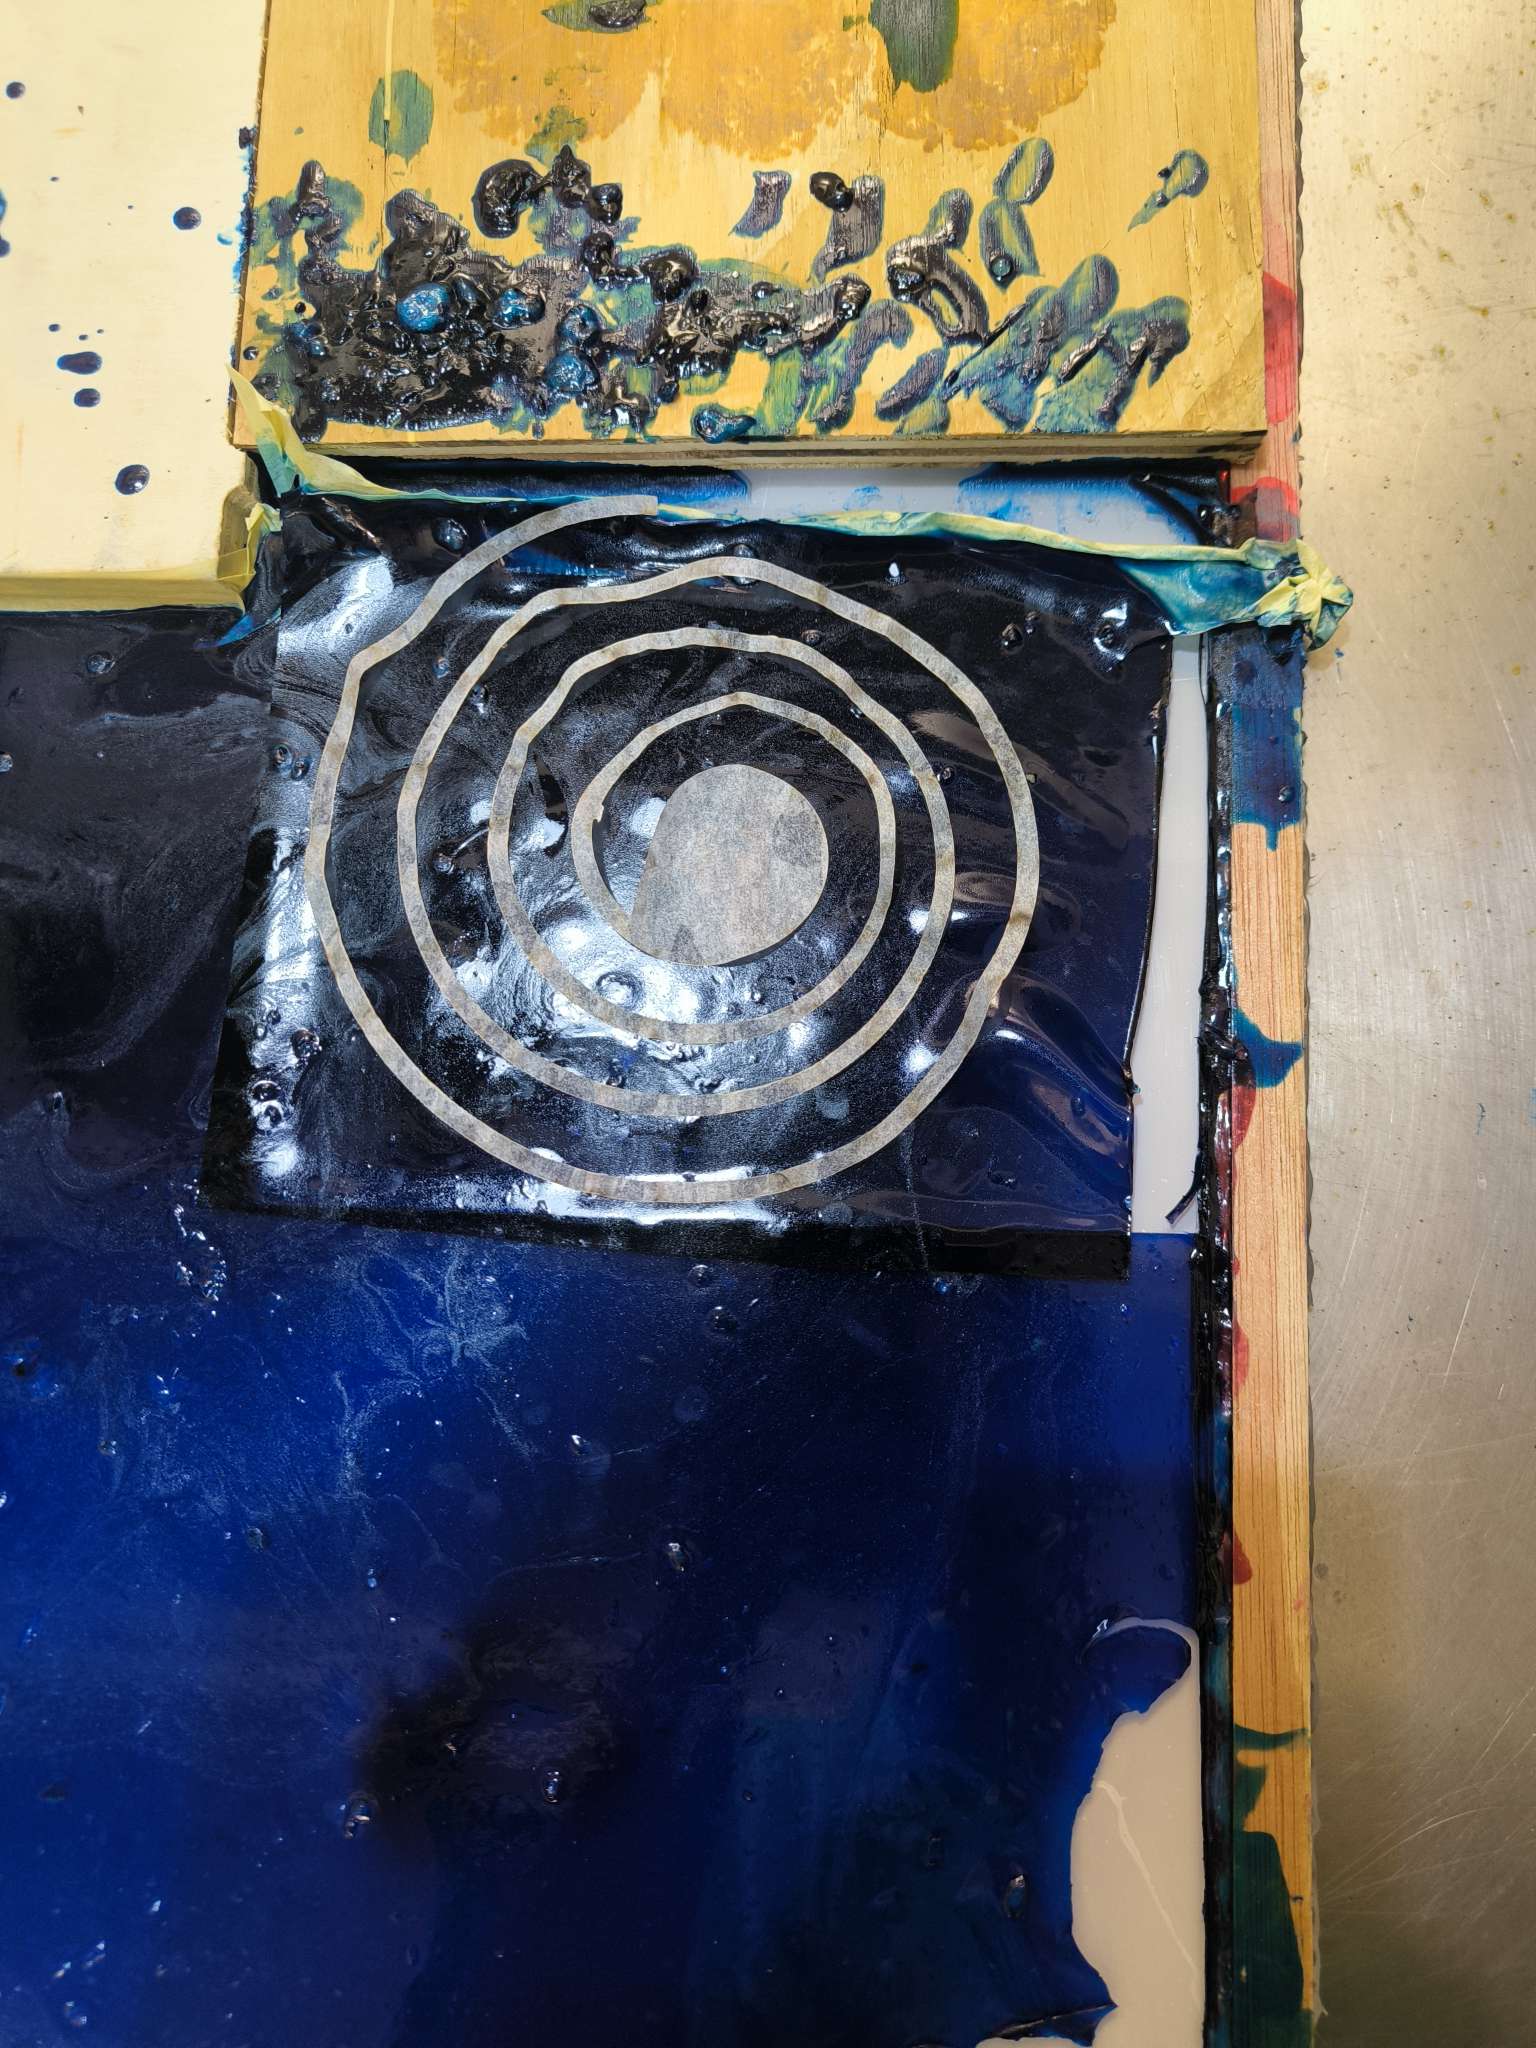
As you can see from the video the material was too fragile so I did not go further with the motor.
Embroidery
I used Julia Gaese’s documentation as a template for my little embroidery project. https://juliagaese.fabcloud.io/internship-dokumentation-fab-lab-bcn/project/embroidery/
An overview of the workflow is:
- Generate Image
- Turn into SVG on Inkscape
- Use InkStitch to choose Detail of stitching to generate a .pes file
- Run embroidery machine
I generated an image using chatgpt from a photograph of my friend (excluded here for privacy reasons) with the prompt :
“draw me a ricky and mortyesque image of the person in this photo with his tongue out and red eyes, in the style of a sports club badge with the words raw guy records.”


Once I had the image, I noticed that I had to choose the thread colours. To make the badge stand out I decided I wanted to only use a RED thread. Therefore I imported it into Inkscape, and edited the paths so that the image was only red and white. To do this I clicked on F2 to see the nodes and then whilst hovering over the node rolled the middle scroll button on my mouse to select the outline of the images I wanted. In the video below you can see how I selected the lettering.
Once I had the image as I wanted it to be stitched, I selected PARAMs in the Inkstitch extension. As you can see in the video below, it shows a simulation of the stitch. It appeared very clean so I clicked apply.
There are tons of customisations available for the stitching, all of which are documented well in Julia’s Fablab BCN internship’s documentation.
I saved the file as rawguy.pes, a format that can be read by our Brother embroidery machine.
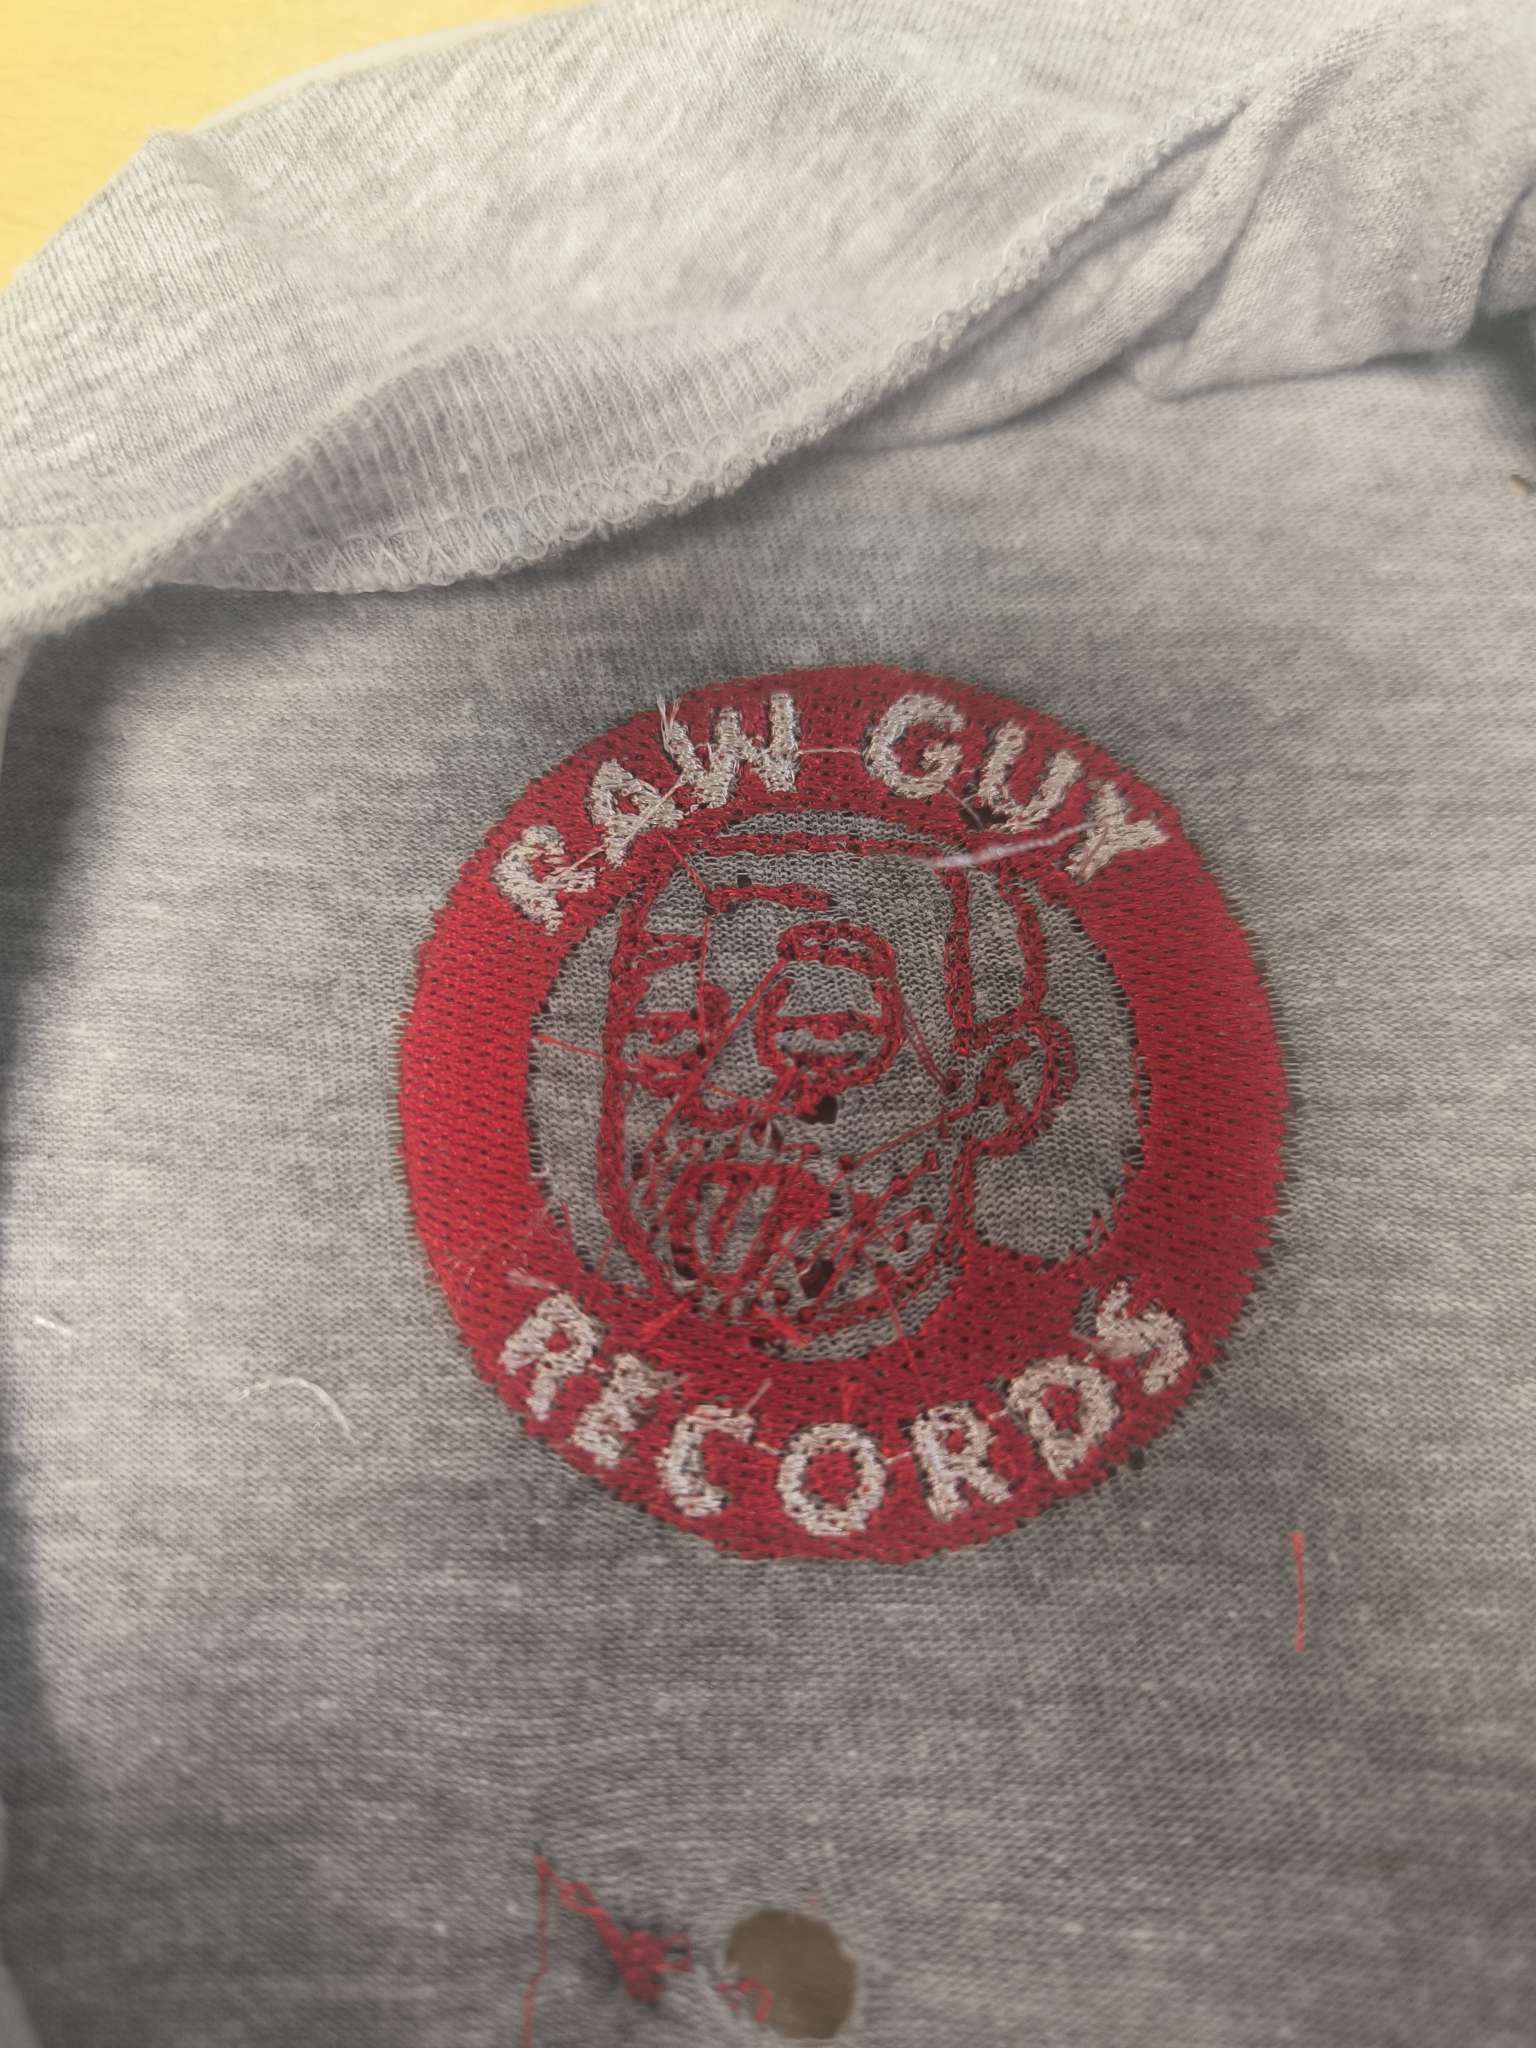
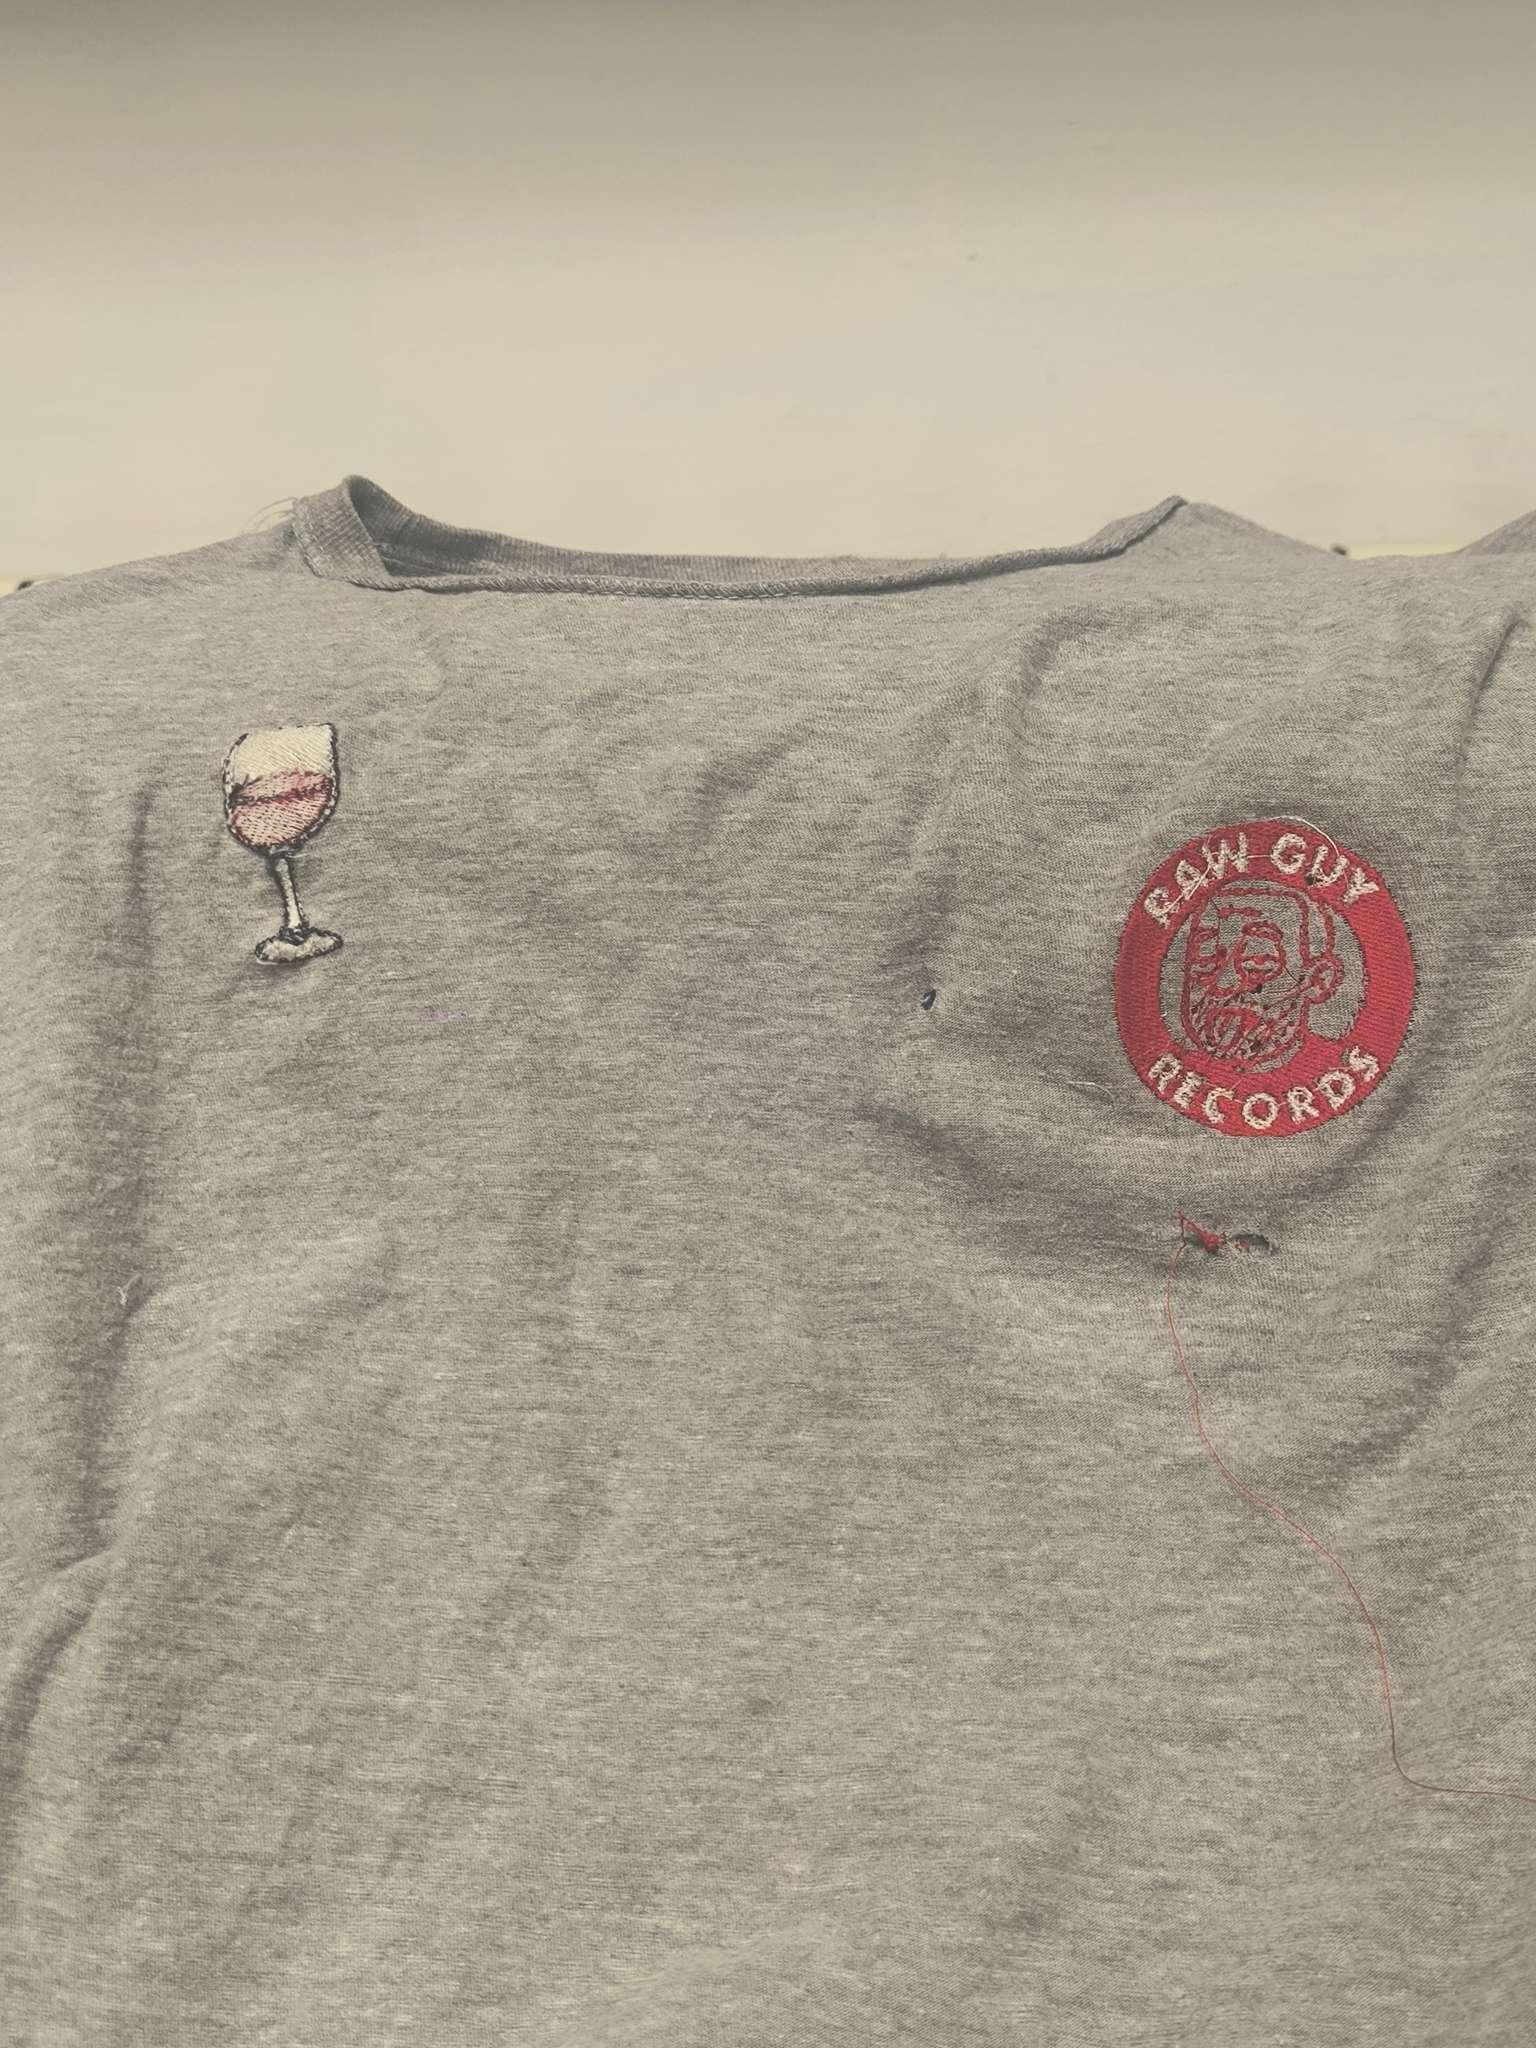
The resulting embroidery was pretty impressive for a first try but some refinements are needed for better quality. It would also help to not print it inside out next time !
I have spoken with someone who uses Brother embroidery regularly, and should I want to have a good quality finish “digitilizer”s can be found on fiverr for as little as $5.