
14 - Interface and Application Programming
Group assignment:
- Compare as many tool options as possible.
- Document your work on the group work page and reflect on your individual page what you learned.
The group assignment can is located at the following address: https://academany.fabcloud.io/fabacademy/2025/labs/barcelona/students/group-assignments/week15.html
We investigated some Interface Design Platforms:
Arduino Cloud, Touch Designer, Streamlit, Processing / p5.js
Reflections
Arduino Cloud is suitable for a beginner like me to for some simple tasks and remote monitoring and Sreamlit is more flexible for a better looking interface design.
Individual assignment
- Write an application for the embedded board that you made. that interfaces a user with an input and/or output device(s)
First things first, I chose the Arduino Cloud platform for it’s connectability and familiarisation with the Arduino IDE application. I created an account and a new “Thing”.
I recently created a circuit that uses a thermistor to take a temperature reading and provides the temperature reading on an RGB screen, imaging an oven temperature reading.
For this weeks project I want to use the Arduino Cloud Interface that notifies an app when the temperature has attained 90 degrees Celsius.
Workflow thanks to Google Gemini:
- Set up your "Thing" in Arduino Cloud:
- Define Cloud Variables:
- temperatureCelsius (float, read-only for the dashboard, updated by ESP32S3)
- alertMessage (String, read-only for the dashboard, updated by ESP32S3 when 90°C is reached)
- cookingThreshold (float, read-write, so you can adjust the 90°C target from the dashboard if needed, default to 90.0)
- alertSent (bool, read-only, internal flag to prevent spamming alerts)
- Associate your Xiao ESP32S3 with this Thing.
- Configure your network credentials (WiFi SSID and Password).
- Define Cloud Variables:
- Modify your Arduino Sketch:
- Include Arduino Cloud libraries.
- Initialize Cloud connection in setup().
- Call ArduinoCloud.update() in loop().
- Update the temperatureCelsius cloud variable with the reading.
- Check if the temperature exceeds cookingThreshold.
- If it does, and an alert hasn't been sent yet (!alertSent), update the alertMessage cloud variable and set alertSent to true.
- If the temperature drops below the threshold, reset alertSent to false.
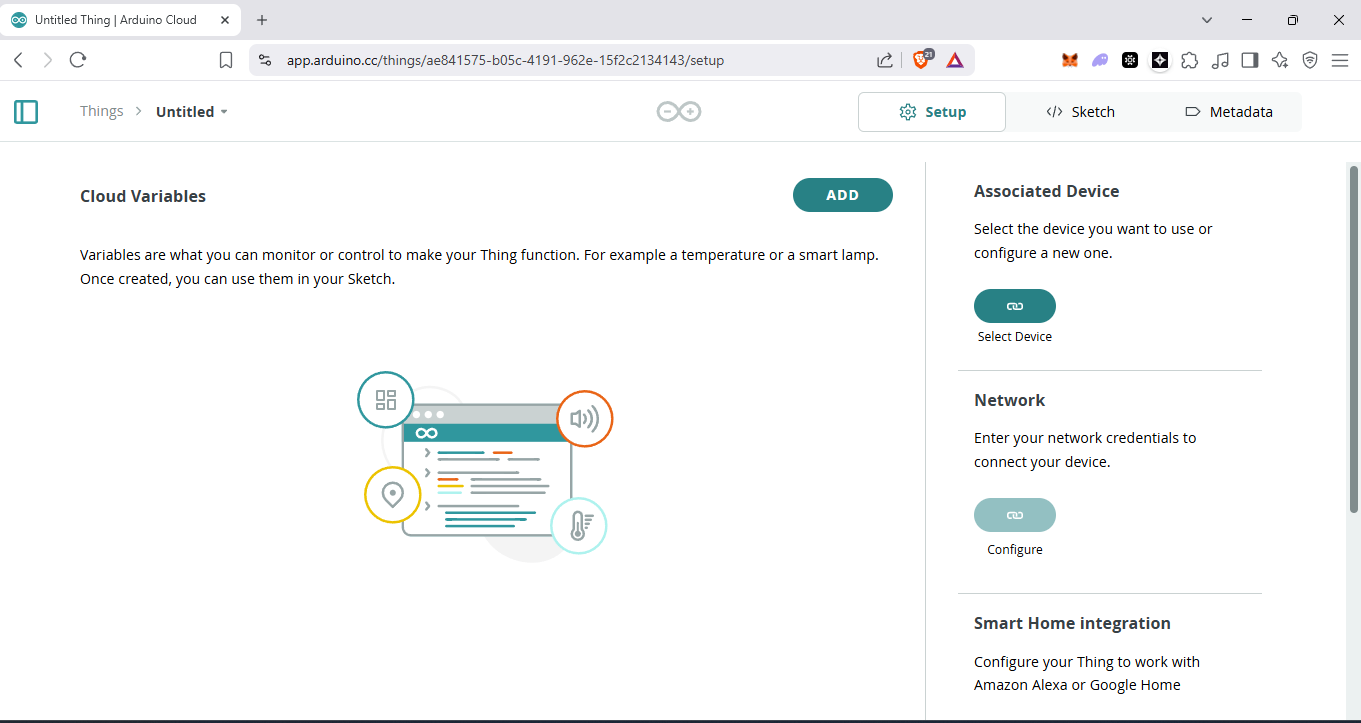
Setting up the Thing in Arduino Cloud
Step 1: Arduino Cloud Setup (You'll do this on the Arduino Cloud website)
- Go to Arduino Cloud.
- Go to the "Things" section and click "Create Thing".
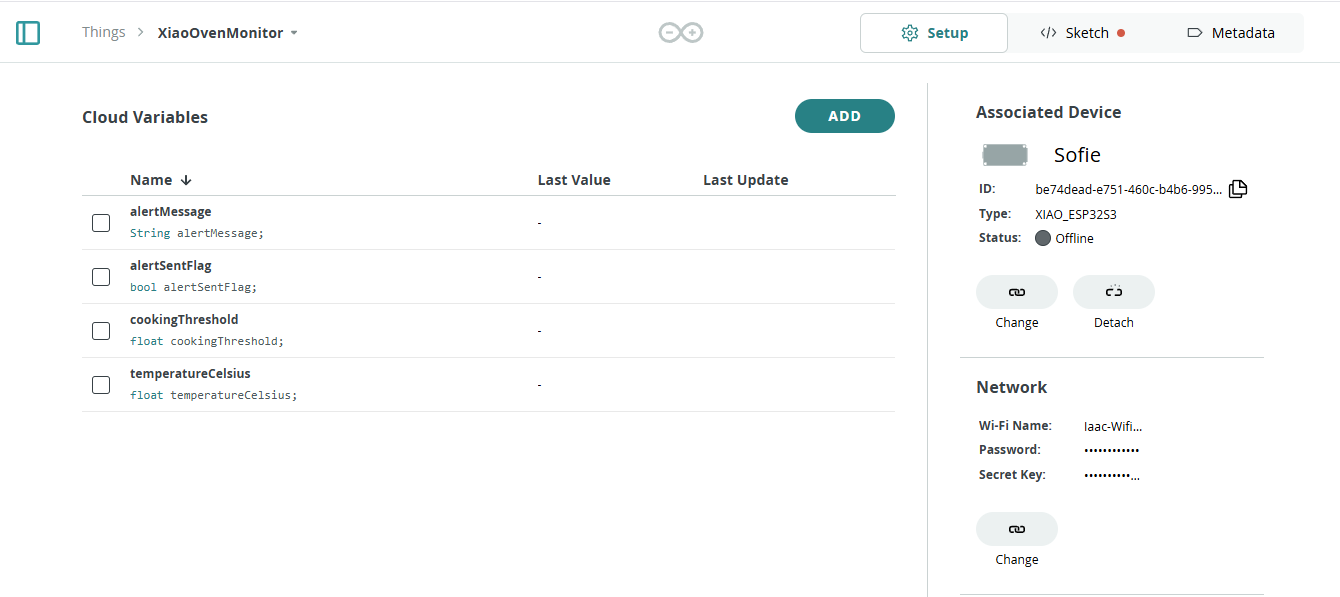
- Name your Thing (e.g., "XiaoOvenMonitor").
- Associate Device:
- Click "Select Device".
- If your Xiao ESP32S3 isn't listed, click "Set up a new device" and follow the instructions for ESP32. You'll need to install the Arduino Create Agent.
- Add Variables: Click "Add Variable" for each:
- Name: temperatureCelsius
- Type: Floating Point Number
- Declaration: float temperatureCelsiusCloud; (the Cloud suffix is just a suggestion to differentiate from local if needed, but Arduino Cloud will often just use the name you give it)
- Variable Permission: Read Only
- Update Policy: On Change
- Name: alertMessage
- Type: String (or Character String)
- Declaration: CloudString alertMessage;
- Variable Permission: Read Only
- Update Policy: On Change
- Name: cookingThreshold
- Type: Floating Point Number
- Declaration: float cookingThreshold;
- Variable Permission: Read & Write
- Update Policy: On Change
- (After creating, you can set its initial value to 90.0 in the dashboard)
- Name: alertSentFlag
- Type: Boolean
- Declaration: bool alertSentFlag;
- Variable Permission: Read Only (Device will write, cloud will read its status)
- Update Policy: On Change
- (Initialize to false)
- Name: temperatureCelsius
- Network Configuration:
- Enter your WiFi SSID and Password in the "Network" tab for your Thing.
Setting up the Sketch
I provided my Arduino code for the temperature reading in Gemini to get an updated sketch for the Thing.
You have the entire conversation history for this project here.
The Arduino Cloud Sketch platform is very useful for coding but I still prefer IDE. Switching between the two is a little painful as the cloud won’t see the Xiao if it is already connected in the IDE

The resulting files, given below provide a temperature in the Arduino Dashboard and send a message when the temperature goes above a user-specified threshold. This threshold can be toggled in the Arduino dashboard.

The intention the user is notified when the final project solar cooker has reached a temperature useful for cooking. In the code it is 25 degrees Celsius to test the code at room temperature but it will be modified to 120 degrees Celsius if I decide to add this feature to my final project at a later date.
Problems
I spent a few hours wondering why the WiFi was not connecting only to realise I had not added the Antenna to the Xiao ESP32S3.
I used AI to help trouble shoot some problems but a big thank you to Dani for helping me troubleshoot most of them.