Project management
Week 1: Project Management
Asignment Spec: Draft working website utilizing learning project management lecture, Plan and sketch a potential final project document learnings.
01 — git and terminal
List item summary: I quickly recognized the need review important learnings from our lecture on git below is what I felt like are the essentials with refference for git and termina that I created to keep everythign straight.
Core Git Flow (as I understand it)
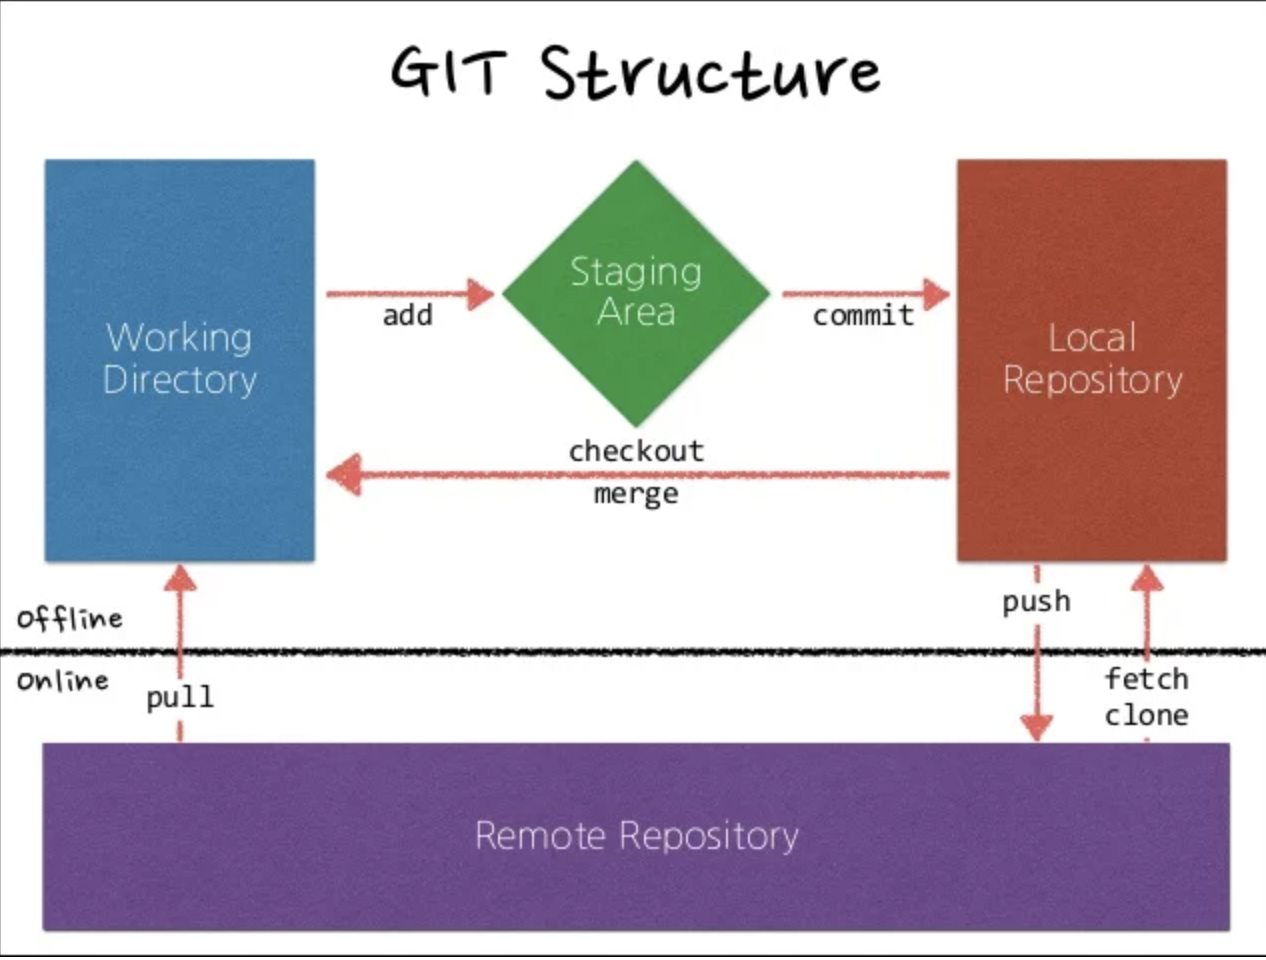
- You work from your connected folder
- You push that into a staging area where you essentially prep it for import in a holding zone.
- You then upload it the local repository which is like another holding zone for your commited changes
- Then upload from the local repo by 'pushing' it to the remote
Terminal vs Shell
- Terminal is the program I am using to run a shell that runs the commands.
- The shell can be of many types with bash being standard, zsh which is newer (2019). The zsh shell is more feature rich version and is what is used on my newer mac configuration.
Directory vs Repository
- Directory is just your folder or folder system
- Repository/repo is a directory with version control in this case git. when you clone a repository from a site like github or gitlab you are cloning the repository not just the directory
Key Repo Concepts
- SSH vs HTTPS Cloning — SSH is more convenient and stores key on your machine so that you don't have to login in everytime you want to push or pull things from the remote repo. Just use SSH unless you have a reason not to. To use SSH you generate a key pair (id_rsa and id_rsa.pub) the public key is uploaded to the repo and the private stays on your machine. It automatically authenticates once configured.
- CI / CD Pipeline — basically an automatic workflow that could be configured for more granularity for more complex project. Basically it automatically runs through a series of predifine automations after the repo is updated. These can include checks and other integration steps to deploy the modified code base. I think GitLab is already doing some basic stuff under the hood here for me.
SSH keys and Linking the Fab Academy SSH Repo
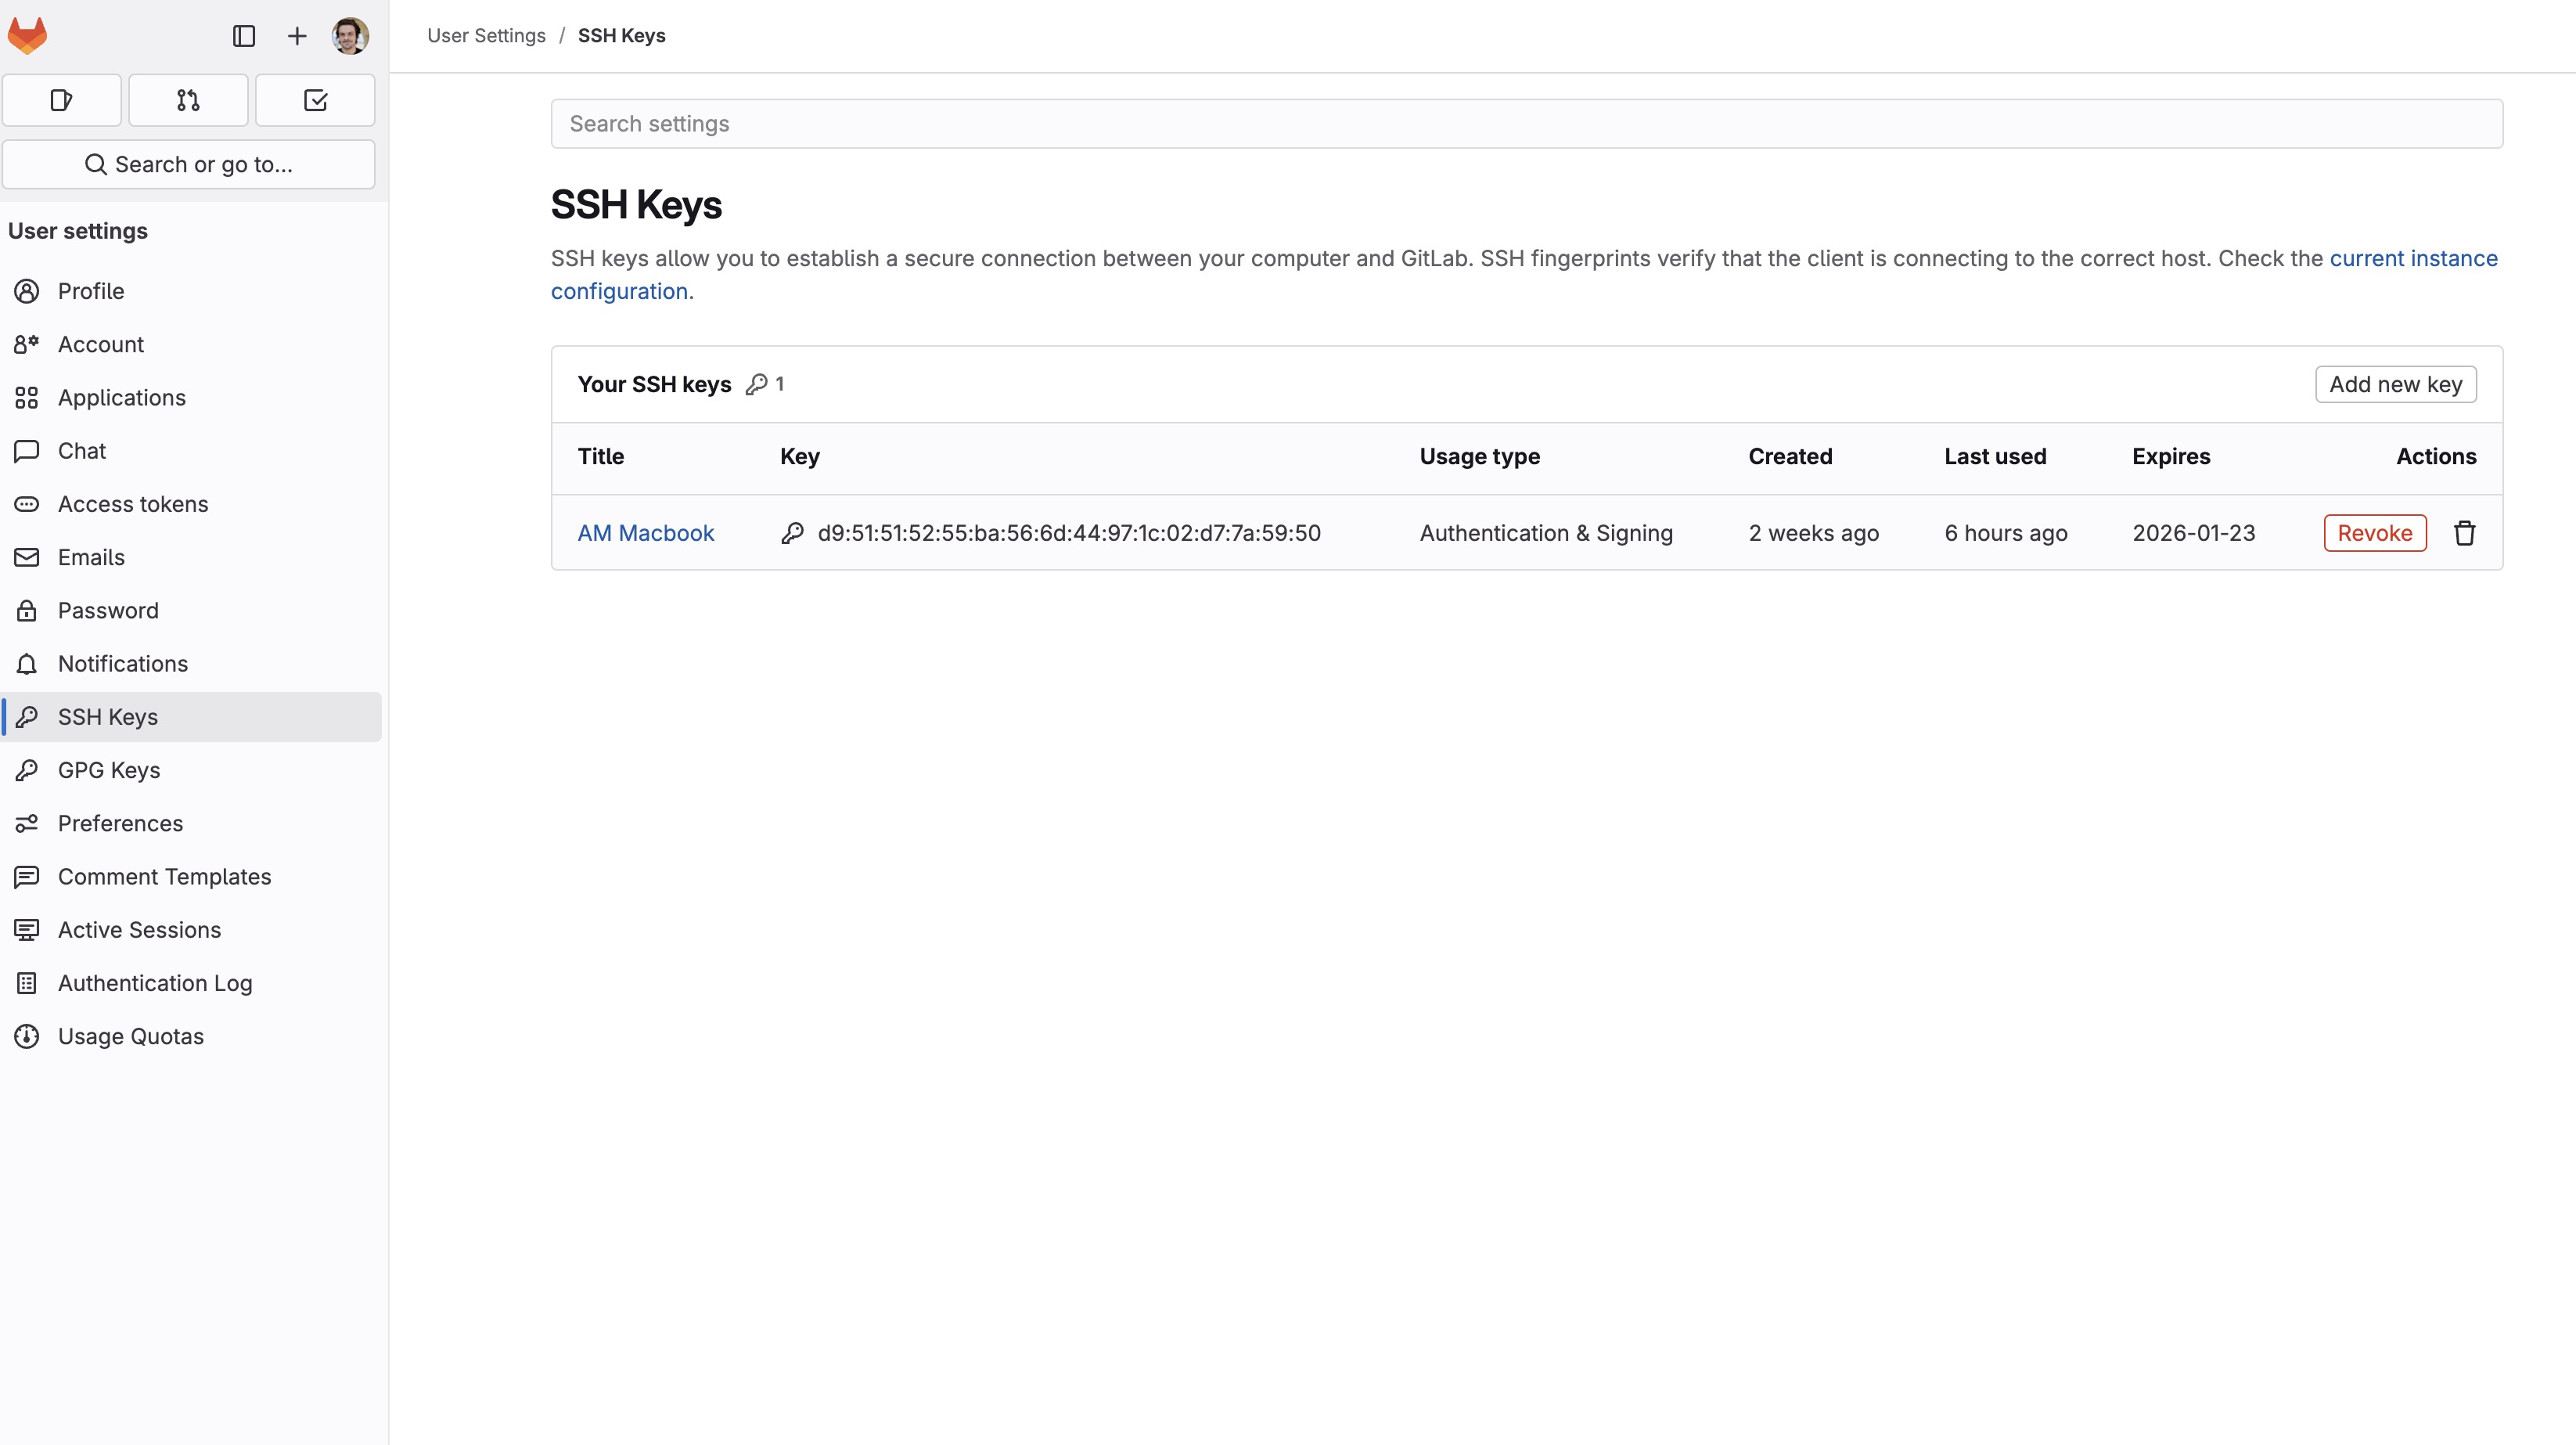
- Walk through the provided Fab Academy login account setup so you have your own personal gitlab account you can log into.
- I created a folder on my desktop manually "FAB25_REPO"
- cd "FAB25_REPO" to make sure you are working in the directory you want
- Configure repo setttings

git config --global user.name andrew-mark

git config --global user.email andrew.mark@gmail.com
- Generate SSH key locally
ssh-keygen -t ed25519 -C ""andrew.mark@gmail.com""
- Copy SSH key to clipboard
cat ~/.ssh/id_ed25519.pub
- Clone git files from domain to your new linked repo this is found by clicking the 'code' button dropdown and then copying the "clone with SSH" link.
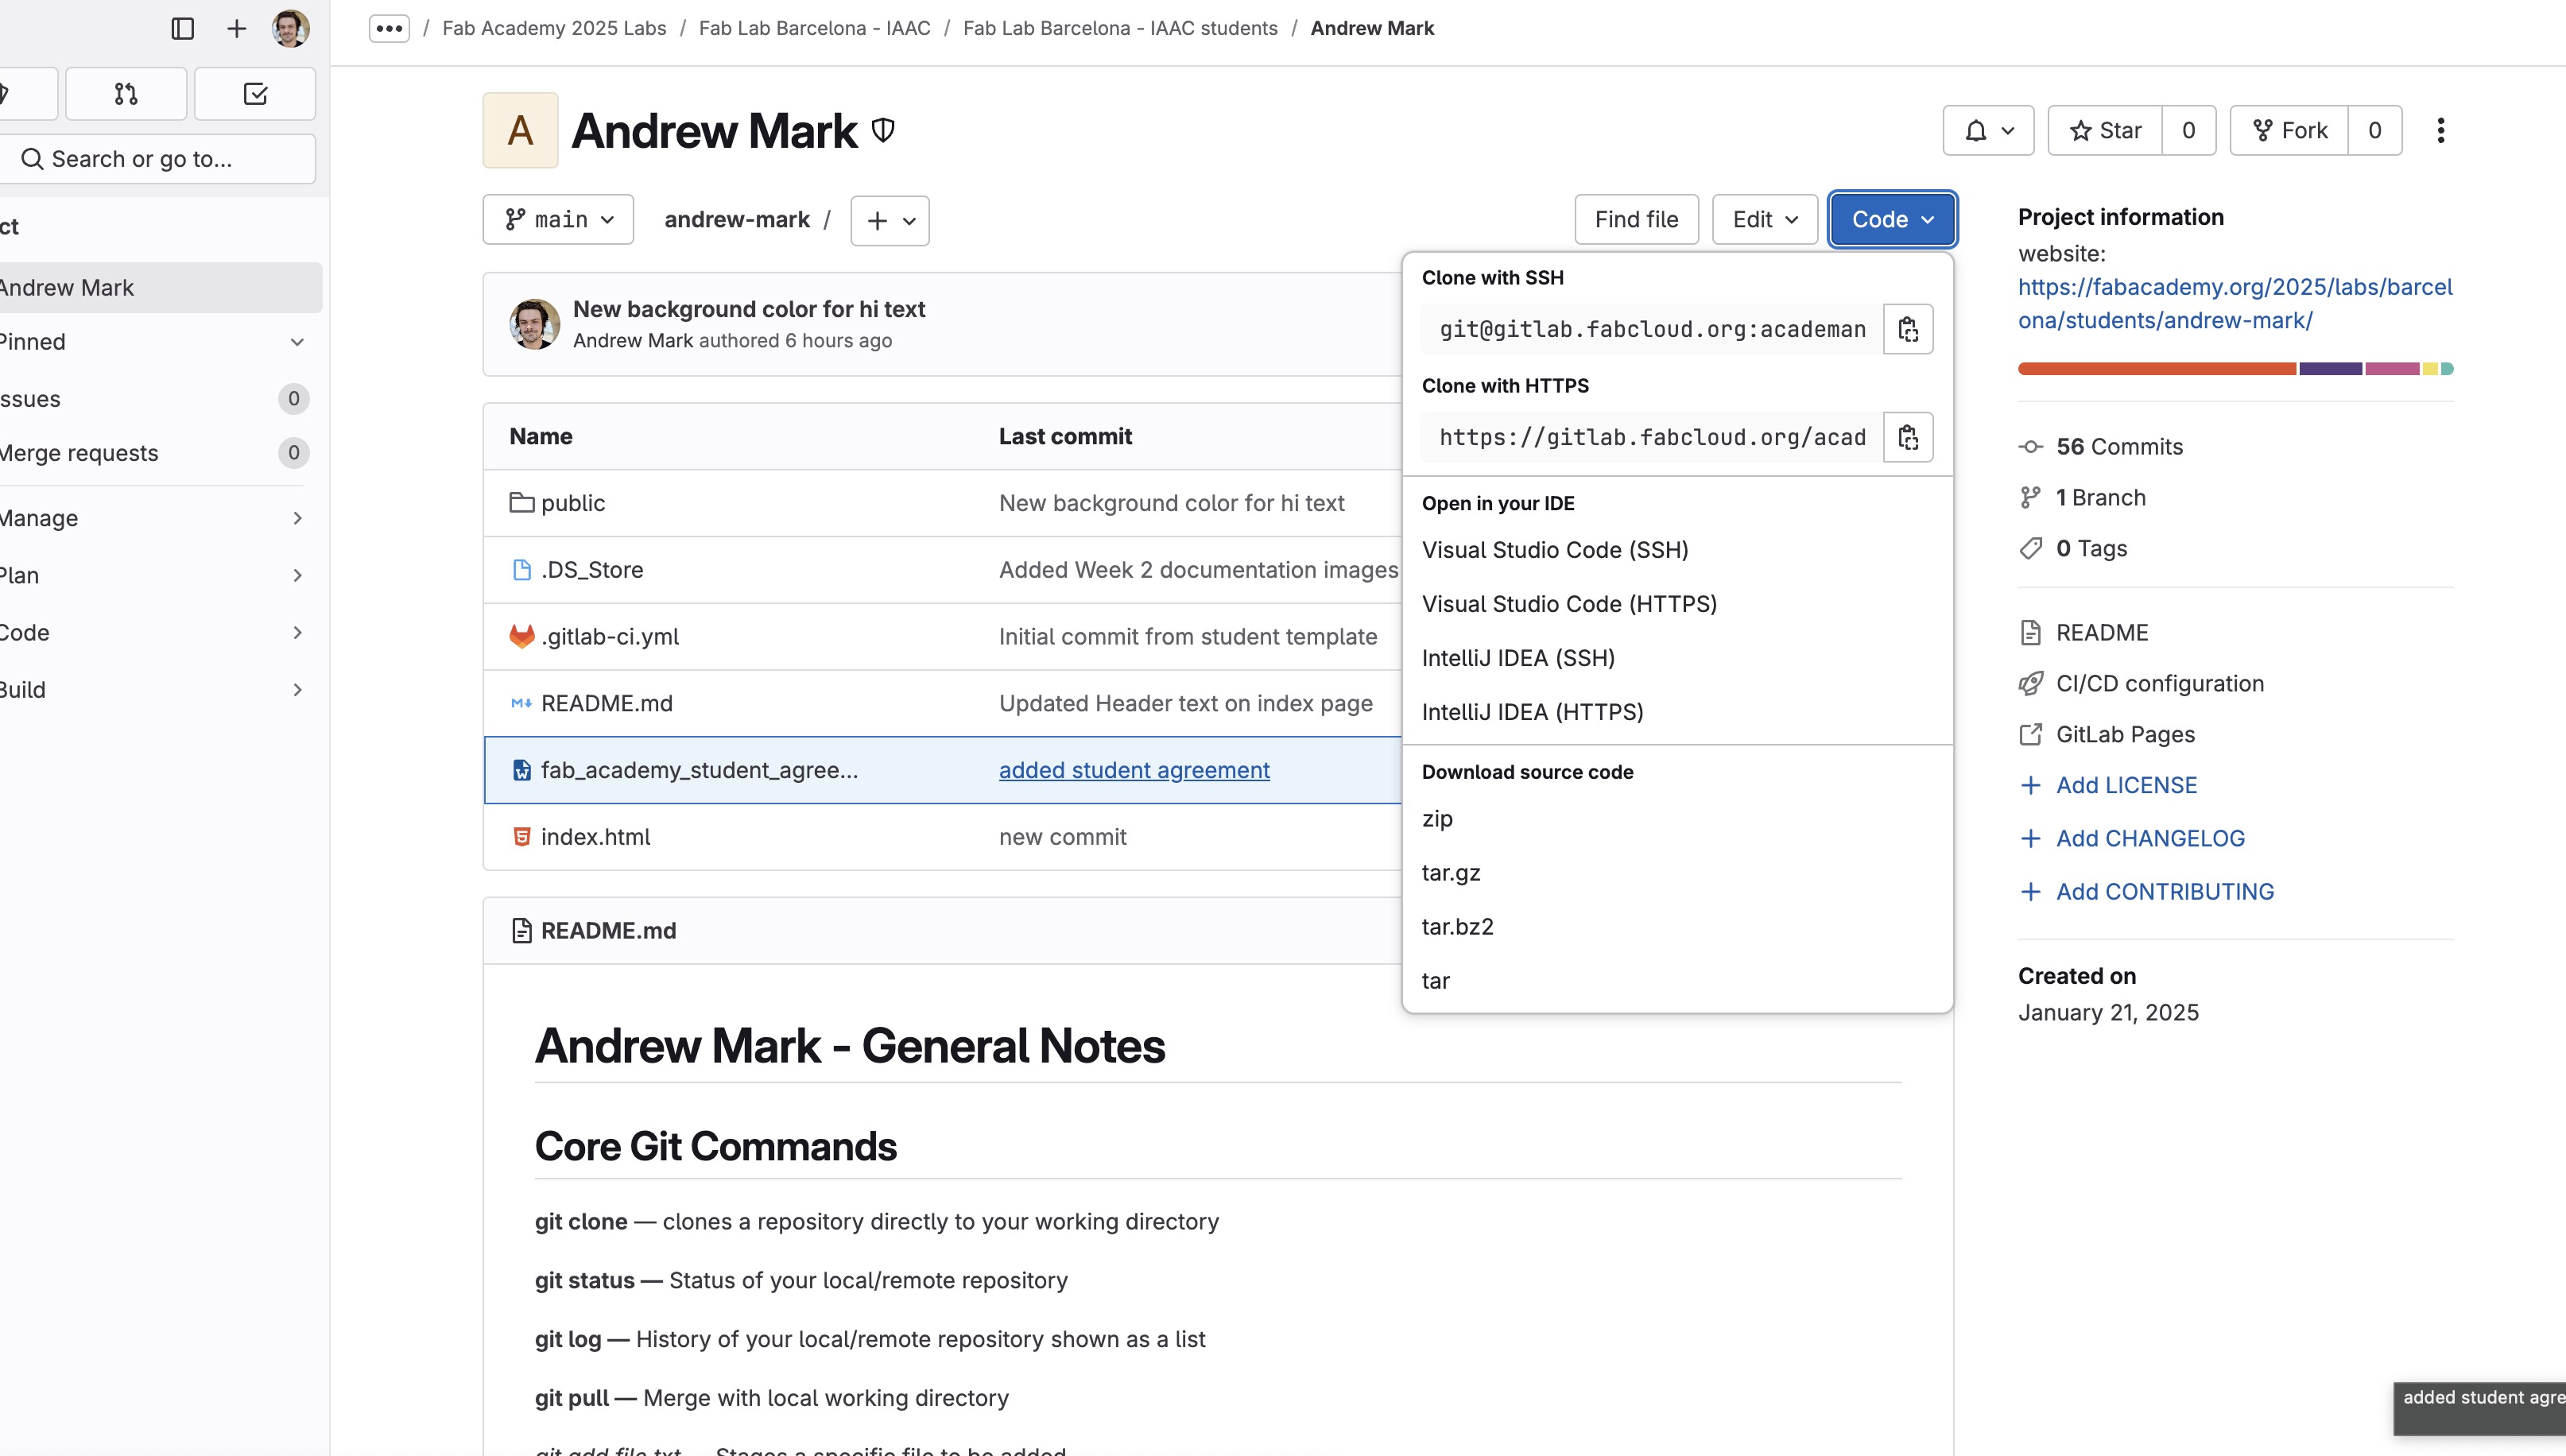
git clone git@gitlab.fabcloud.org:academany/fabacademy/2025/labs/barcelona/students/andrew-mark.git
Git Concepts
- Git Clone — Clones a remote repository into the working directory in your computer and enables you to make changes of many kinds locally to your local repository that then can be pushed to the master online repository.
- Git Commit — records the changes as a 'snapshot' with an asociated comment in the repositories history.
- Git Push — Pushes only your commited changes to the remote repository
- Git Pull — Pulls down your changes from the remote to your working. So if changes are recorded on the remote repo they will get brought down to your local repo.
- Git Branch — A bit beyond what I plan to use… but worth exploring it creates a seperate branch of your working repo that can later be reintegrated into your working codebase.
- Git Merge — Combines changes from different branches
Fundamental Shell Commands
- cd — then copy file path by right clicking desired folder and just clicking 'copy'
- cd .. — move up one directory from current directory
- ls — will show you all files / folders within the current working directory
- ls -l — will show you the size and last modified date and time of items
- ls -l -a — will give you hidden fils as well last modified date and time of items
- pwd — print working directory
- mkdir folder_name — make directory in working directory
- mkdir folder_name_01 folder_name_02 — creates multiple directories within working directory
- mkdir -p foldername/subfoldername — makes a nested directory
- mv ~/directory1/directory 2 ~directory3/directory 4 — moves a directory form one place to another
Core Git Commands
- git clone — clones a repository directly to your working directory
- git status — Status of your local/remote repository
- git log — History of your local/remote repository shown as a list
- git pull — Merge with local working directory
- git add file.txt — Stages a specific file to be added
- git add . — Stages all changes to be added from the working directory
- git commit -m "COMMIT MESSAGE" — adds a comment relateed to the changes to be commited while file is in staging area
- git push — uploads file into the repository
My Essential Added Shell Commands
- code . — will open the full folder heirarchy from a prespecified directory into vs code using
- brew upgrade git — Incase you ever need to check for git upgrades for your homebrew git package
wget -r -np -k -p http://www.site.com/dir/page.html — download a single file into your working directory
- wget --mirror --convert-links --adjust-extension --page-requisites --no-parent https://example.com — download an entire website into working directory
02— Markdown, CSS, and HTML
List item summary: Will not go too deep as I did not review the syntex, but clarifying the function of these 3 was useful for me.
- Markdown — Simplified descriptive notation for formating text used across the internet. Notion actually has a nice implementation of markdown commands that I realized I was already using.
- HTML — Standardized web page code for core formating features
- CSS — A style sheet that can be refferenced across all asociated HTML pages, mostly so you don't have recode details for every HTML page. CSS also has additional functionalities.
03 — Downloading Tools
List item summary: Tools that helped me during the process.
Homebrew
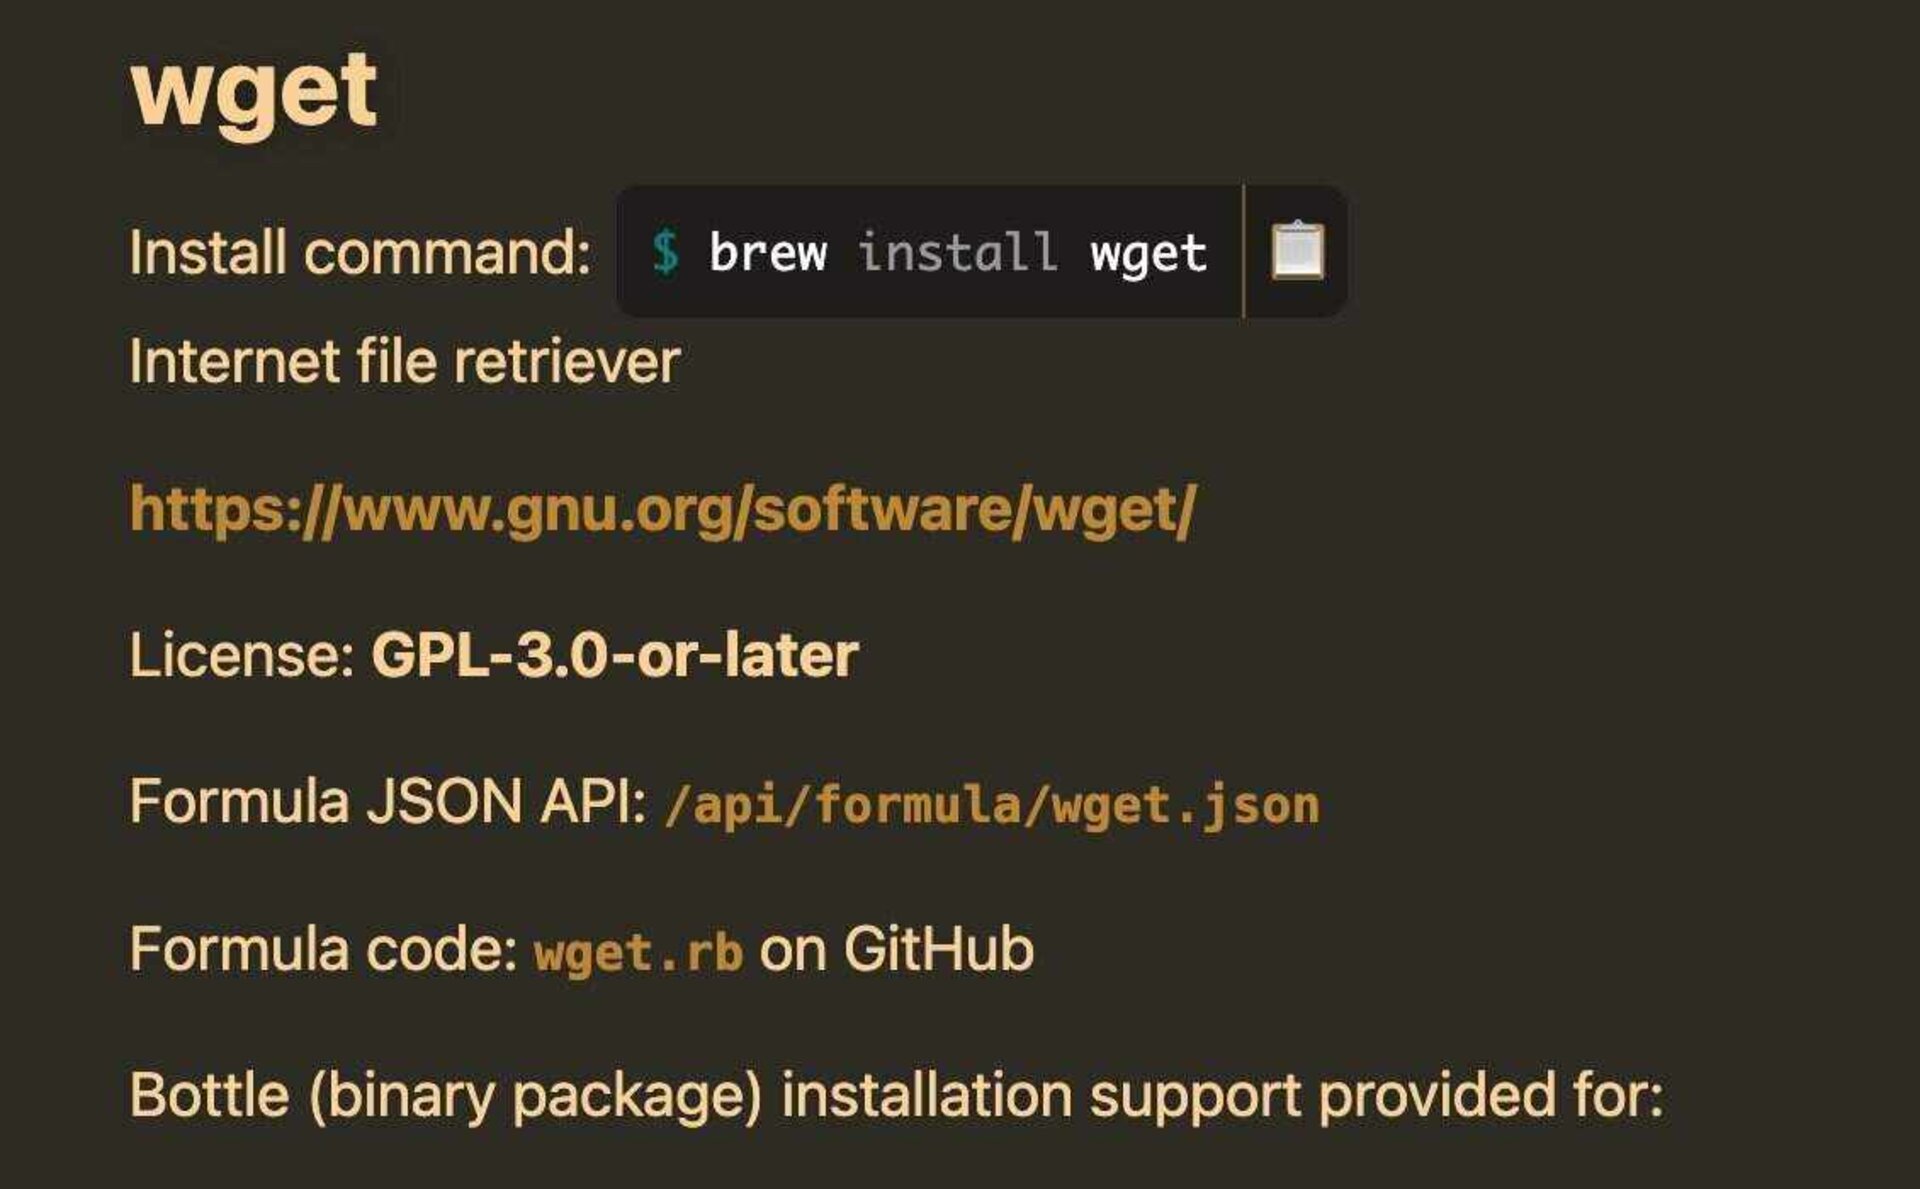
- Installed Homebrew using its installation guide.
- This enabled me to install wget for scraping website and brew git for leveraging a more feature rich git package that is more up to date.
VS Code
- Installed Visual Studio Code
- Added copilot in VS Code
- Added 'code .' shell command
04— General Research
List item summary: Tried several things before I settled on a site design.
- Searched through 2024 websites for web refference designs settled on one by Andrea Rubio - FAB24
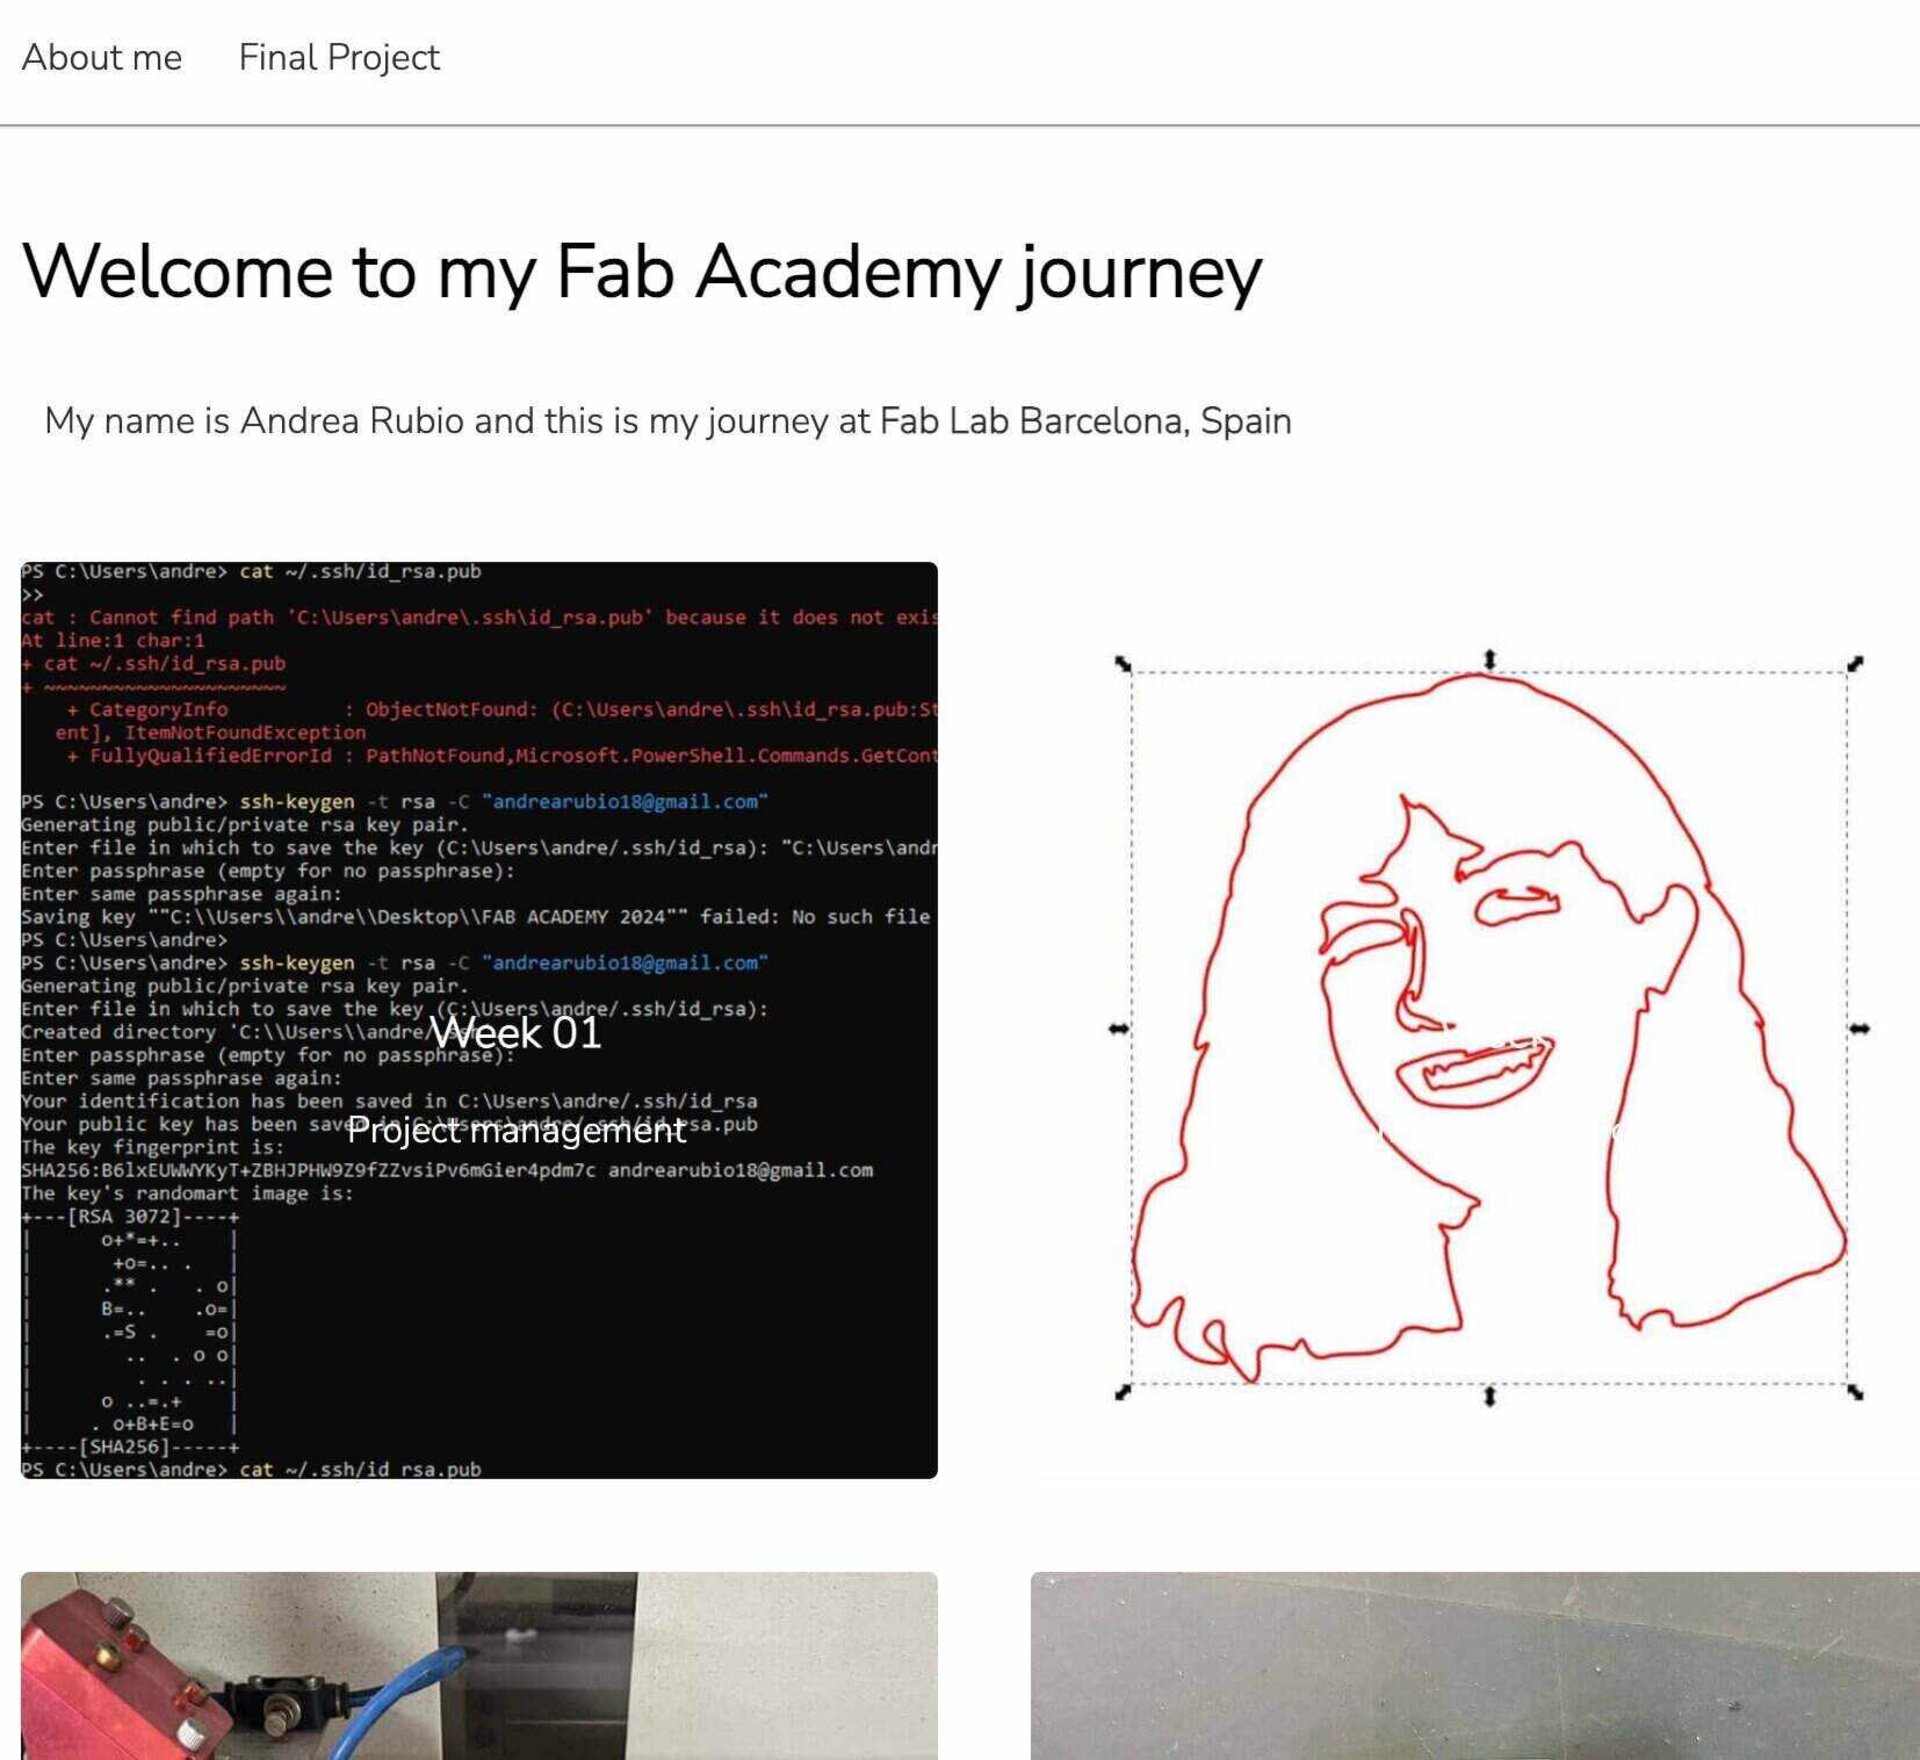
- Suffered through editing her site then decided to just work from the source template by tracking it down from inspecting the orignal code base in my browser.
05 — Editing The Site
List item summary: Used VSCode and copilot exstensively to edit the site
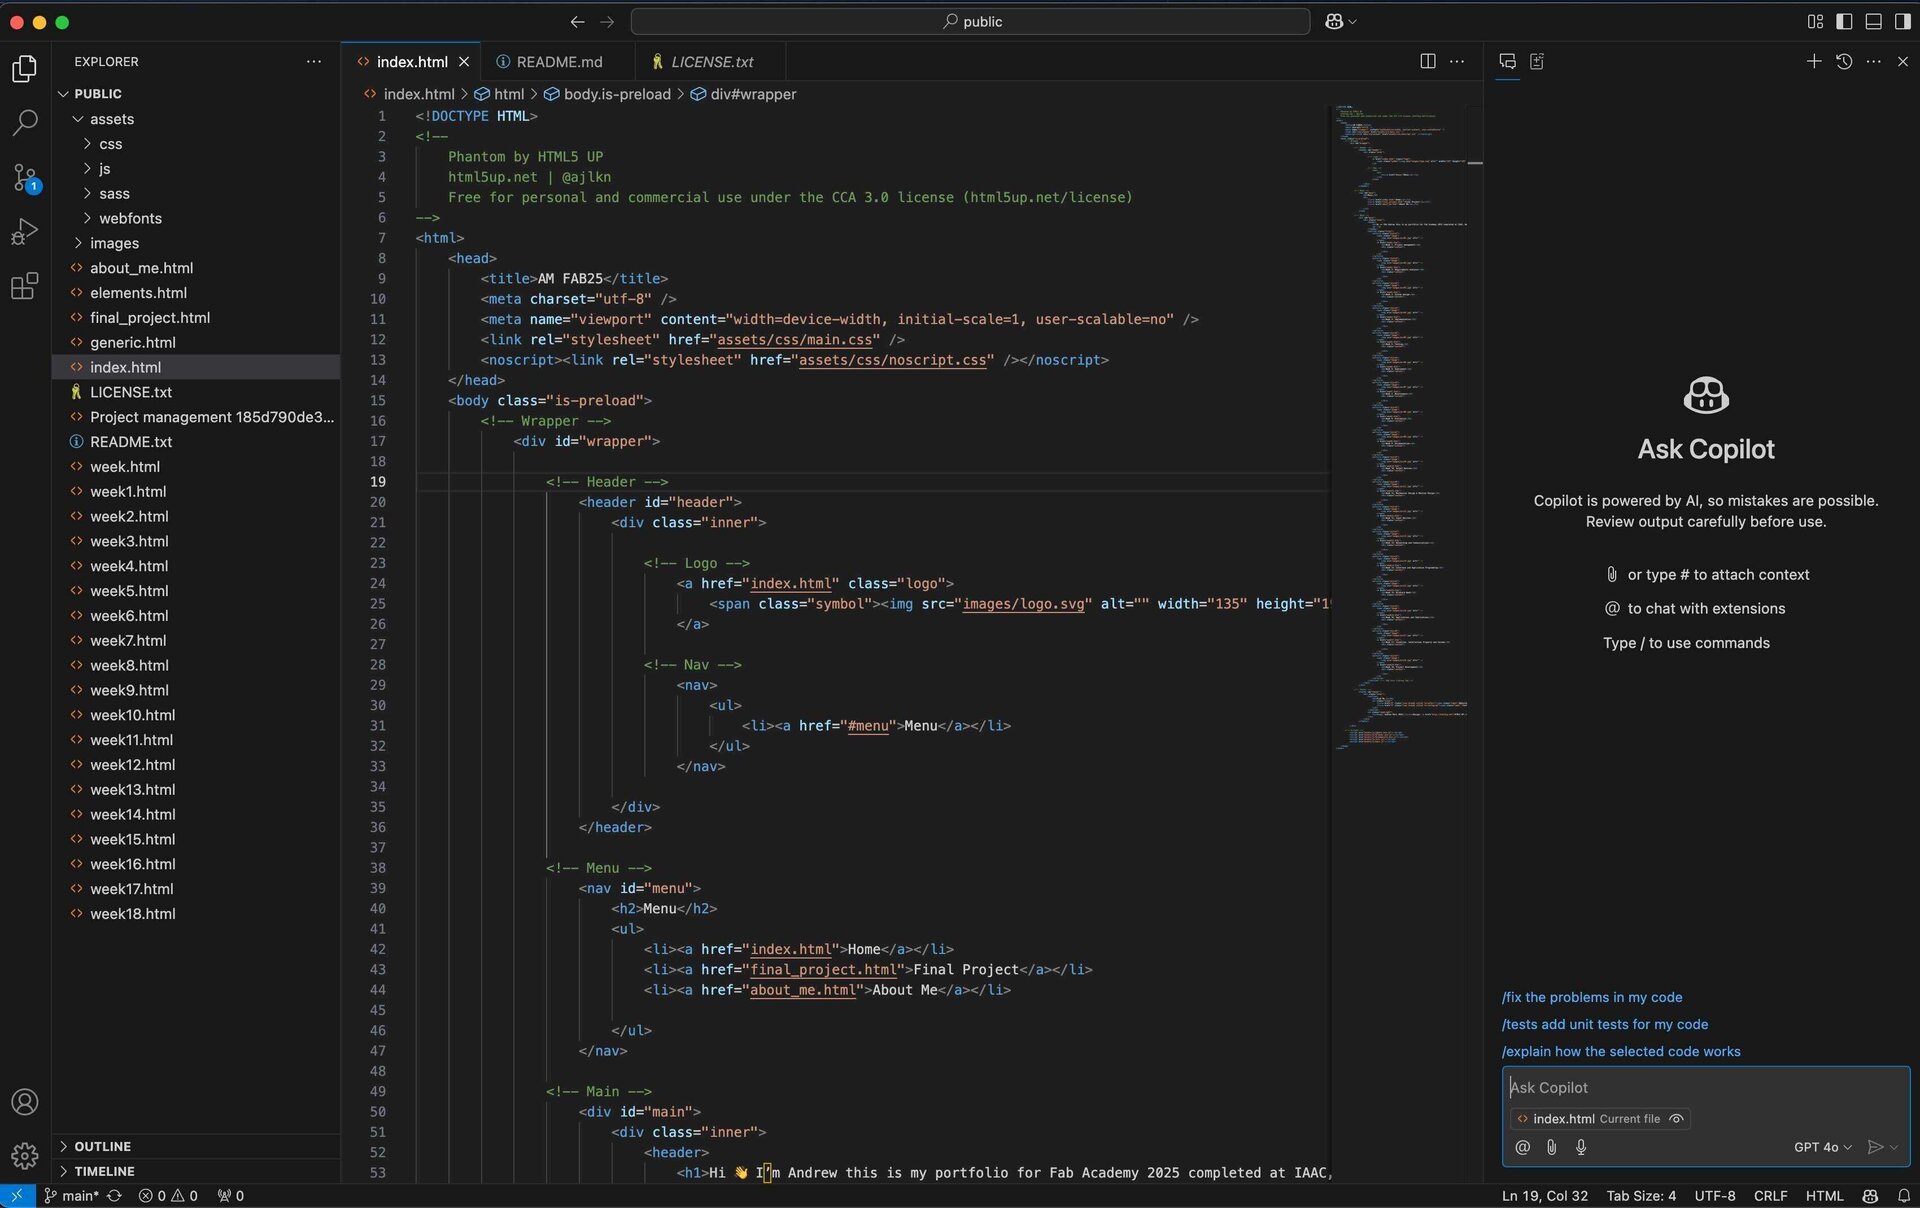
- I worked to emulate the color pallete and design language of my personal site (can be found here) as well as utilizing some of the design language of Notion. I came up with something a bit more Notion-core than I intended, but here we are. I think it looks clean at least.
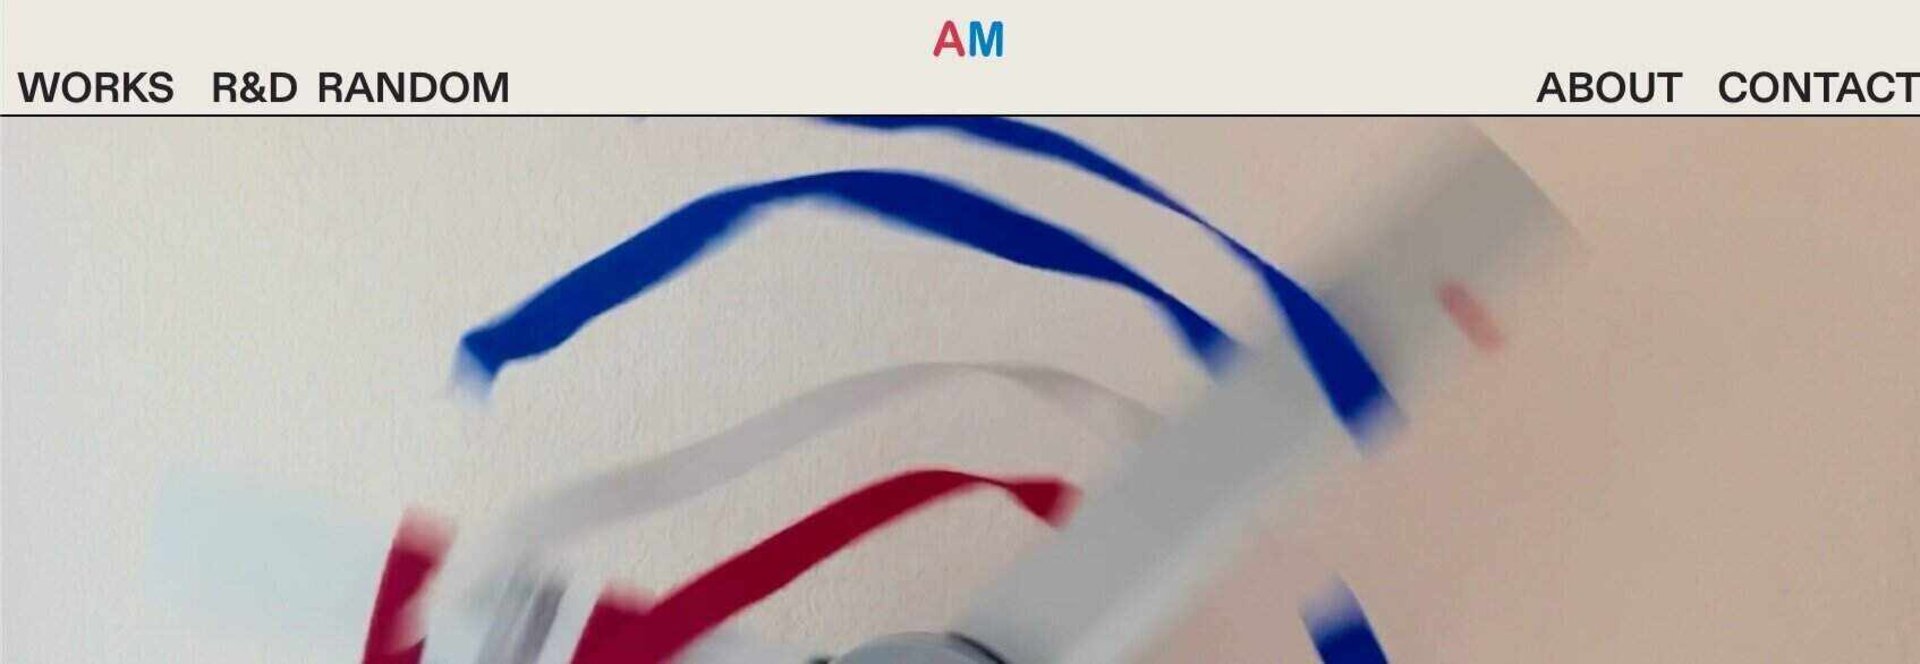
- Objects were edited and items were updated by using a pretty basic workflow of identify relevant HTML and CSS to update and editing them manually and viewing the changes locally. I have built website with web builders and new a little HTML so I was able to callout things I wanted to change in the copilot tab in VS code. This followed a patter of "update link for text x to y", "decrease card padded by 50%"
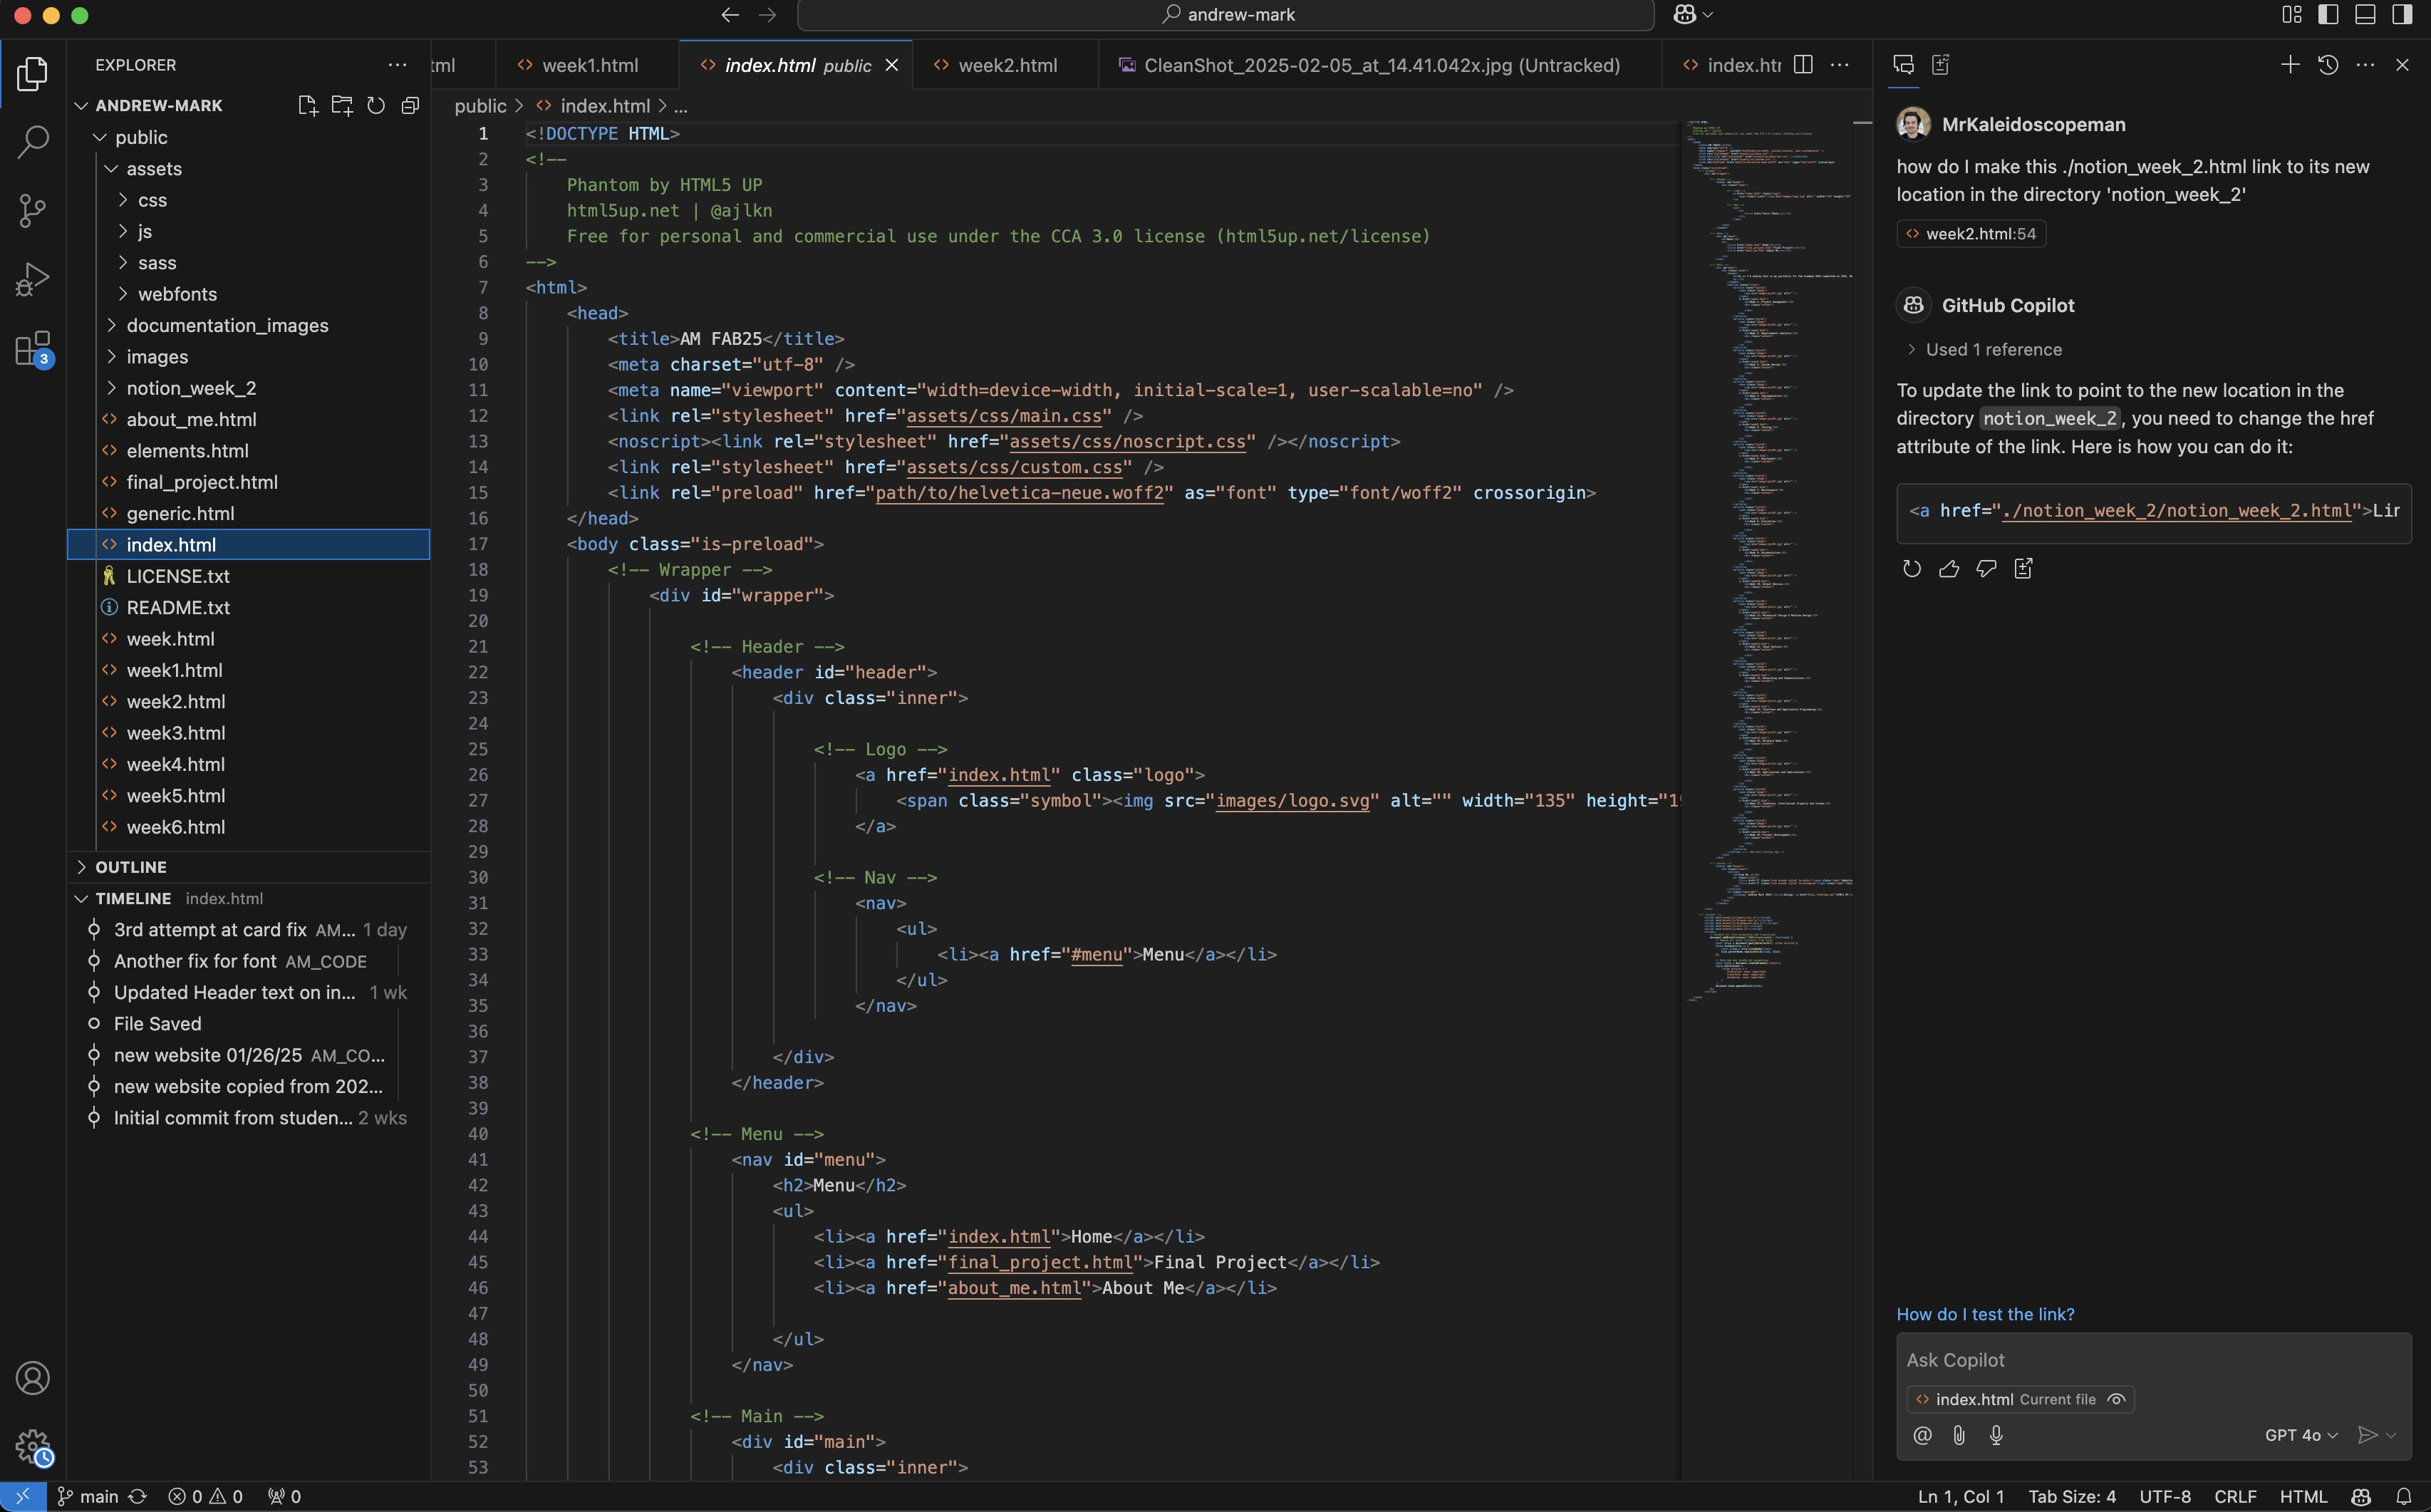
- I had my own custom .svg logo that I than added to the site by simply replacing the original logo.svg file with my own file I named logo.svg.
- I had to experiment to come up with a way of pushing finalized documentation that wasn't a pain in the a$$. I settled on a notion database from which I copy markdown into vs code copilot to then get converted into HTML.
- I am now experimenting with Image Magick as an efficient option to compress images in bulk through the command line.
- This is a hybrid command I developed to resize decrease quality and batch rename.
magick mogrify -format jpg -quality 65 -strip -resize 800x -- *.jpg 2>/dev/null && ls -v -- *.jpg 2>/dev/null | awk '{printf "mv \"%s\" \"project_02_blender_2_%03d.jpg\"\n", $0, NR}' | bash
Thats it for now ;)
