week 10 Output Devices
Group assignment:
- measure the power consumption of an output device
Individual assignment:
- add an output device to a microcontroller board you’ve designed, and program it to do something
Summary:
This week, the group assignment focused on measuring the power consumption of two output devices: an LED module and an OLED display. The LED module with 50 WS2811 LEDs (5V) showed an initial power consumption of 982 mA, which decreased to 764 mA when running a custom lighting sequence. The OLED display, tested with a Xiao ESP32C3, increased the microcontroller’s consumption from 23 mA to 29 mA, with illuminated pixels raising it further to 44 mA, confirming its energy efficiency. For the individual assignment, an OLED display (SSD1306, 128x64 I2C) was integrated into a custom microcontroller board. Using the Arduino IDE, an example program from the Adafruit SSD1306 library was successfully implemented, displaying standard images and verifying proper functionality.
Group Assignment
Tests were conducted to measure the power consumption of two output devices: an LED module and an OLED display.
LED Module A module with 50 WS2811 LEDs (5V) was tested, measuring an initial power consumption of 982 mA using a DC LABPS300SN power supply. Then, a custom code by Pepe was uploaded, keeping three central LEDs permanently blue while sequentially lighting the others in red and green until all 50 LEDs were fully lit. Using a custom PCB with an external 5V power supply, the maximum recorded power consumption was 764 mA.
OLED Display A 0.96” OLED screen with the SSD1306 I2C driver was tested. First, the power consumption of the Xiao ESP32C3 without peripherals was measured at 23 mA. When connecting the OLED, consumption increased to 29 mA. Using a multimeter, the OLED’s specific consumption was determined to be 3.9 mA, with a slight drop in total consumption to 28 mA. Running a test script with illuminated pixels raised the power consumption by 18.7 mA, reaching a total of 44 mA.

These experiments provided insights into measuring the power consumption of two output devices that will be used in the final projects.
Power Consumption Summary
| Device | Test Condition | Power Consumption |
|---|---|---|
| LED Module | 50 WS2811 LEDs at 5V (initial test) | 982 mA |
| Running custom code with sequential lighting effect | 764 mA | |
| OLED Display | Xiao ESP32C3 without peripherals | 23 mA |
| Xiao ESP32C3 + OLED connected | 29 mA | |
| OLED-specific consumption (measured with multimeter) | 3.9 mA | |
| OLED displaying illuminated pixels | 44 mA |
Detials of the work are in the next webpage:
Thoughts:
The OLED display has minimal impact on overall power consumption, increasing the ESP32C3’s draw by only 6 mA when connected.
Displaying illuminated pixels raises consumption to 44 mA, but this is still relatively low.
This confirms that OLED screens are energy-efficient and suitable for battery-powered applications.
Individual assignment
For my inidivual assignment, since my project will have an oled screen I wanted to work with one. I used the SSD1306. It consists of a 0.95 inch display module. 128x64 Pixel I2C.
For the microcontroller I used the one that I have been working these last weeks with. It is the XIAO ESP2C3.
And the platform to program it is Arduino IDE.
First program: Example
First, to complete the assignment I used an example from some libraries I install of Ardafruit.

Then, to load an example I went to Files > Examples > Adafruit SSD1306 > ssd1306_128x64_i2c
It showed some standard images, but at least it was working.

Then, the screen showed the following video:
But it didn’t worked at first, before it worked I had to solder again the pin of the SCL, It worked previusly, but when I tested the screen It did not.
The code is at the bottom of this page in documents.
Ping-Pong game
Then my peer Pepe Vázquez give me a code where the screen shows a ping pong style game, the code is shortes so it is more friendly for noobs like me
The code is at the bottom of the page to download.
Graph
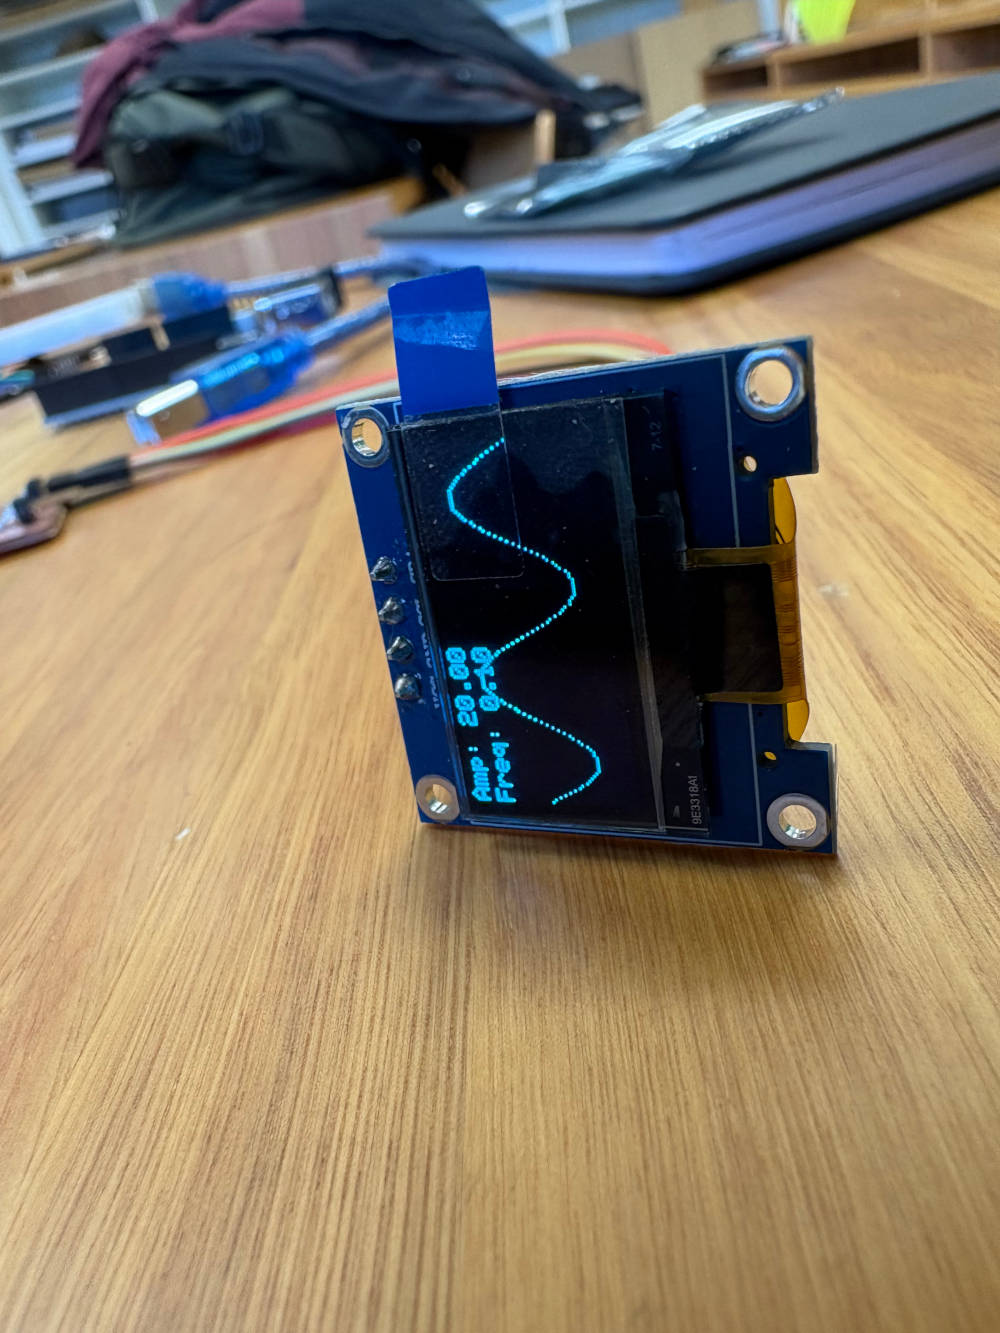
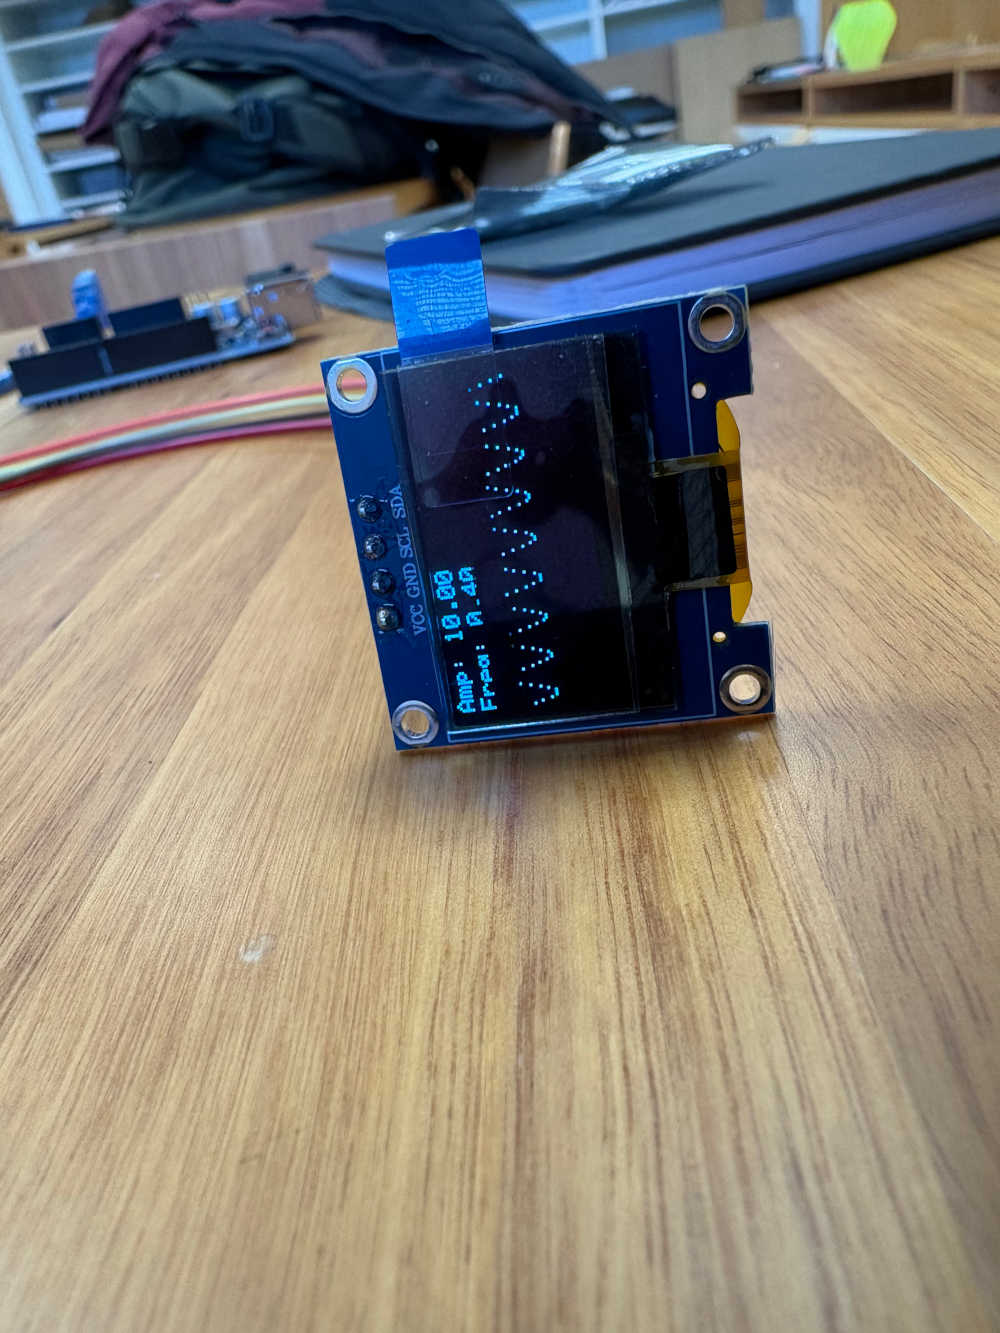
In addition, I did a little program to have a sin graph, where the amplitud and frequency are parametric.
code:
#include <Wire.h>
#include <Adafruit_GFX.h>
#include <Adafruit_SSD1306.h>

#define SCREEN_WIDTH 128
#define SCREEN_HEIGHT 64
#define OLED_RESET    -1
#define SCREEN_ADDRESS 0x3C

Adafruit_SSD1306 display(SCREEN_WIDTH, SCREEN_HEIGHT, &Wire, OLED_RESET);

float amplitude = 10;
float frequency = 0.4;

void setup() {
    if (!display.begin(SSD1306_SWITCHCAPVCC, SCREEN_ADDRESS)) {
        for (;;);
    }
    display.clearDisplay();
}

void loop() {
    display.clearDisplay();

    // Dibujar la onda seno
    for (int x = 0; x < SCREEN_WIDTH; x++) {
        float angle = x * frequency;
        int y = SCREEN_HEIGHT / 2 + amplitude * sin(angle);
        display.drawPixel(x, y, SSD1306_WHITE);
    }

    // Mostrar los valores de amplitud y frecuencia
    display.setTextSize(1);
    display.setTextColor(SSD1306_WHITE);
    display.setCursor(0, 0);
    display.print("Amp: ");
    display.print(amplitude);
    display.setCursor(0, 10);
    display.print("Freq: ");
    display.print(frequency);

    display.display();
    delay(50);
}

Learning Outcomes:
This week’s learning outcomes included understanding how to measure and analyze the power consumption of different output devices, such as LED modules and OLED displays. The group experiment provided insights into how power usage varies based on operation modes and device configurations. Additionally, the individual task involved integrating and programming an OLED display with a custom microcontroller board, reinforcing skills in circuit design, library usage, and debugging in the Arduino environment.
Documentation
- Ping Pong: .zip click here
- Sin: .zip click here
- Example: .zip click here