Week 15
Wildcard Week
| individual assignments | — |
|---|---|
| Design and produce something with a digital process not covered in another assignment, documenting the requirements that your assignment meets, and including everything necessary to reproduce it. |
Organizing
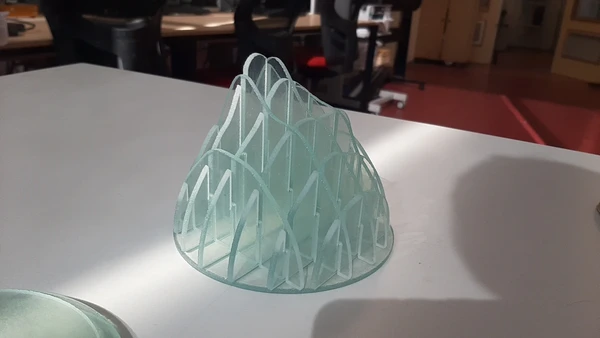
This weeks assignment I decided to work with the waterjet to cut a glass object. I have never work with the machine before but I have seen it working at the HAN university for other peoples projects. My college Puck gave me an instruction of this machine. I tried to document it as best as I can and later worked with the machine independently to produce the glass mountain with you can see on top in the hero shot! This week I made a list of requirements for my assignment:
| wildcard week assignments | — |
|---|---|
| Do test runs for pressure and abrasive and kerf for waterjet cutting glass | |
| Design and make a glass object using the waterjet cutter that slides together | |
| Document the workflow, safety and other tricks about working with the machine |
Design
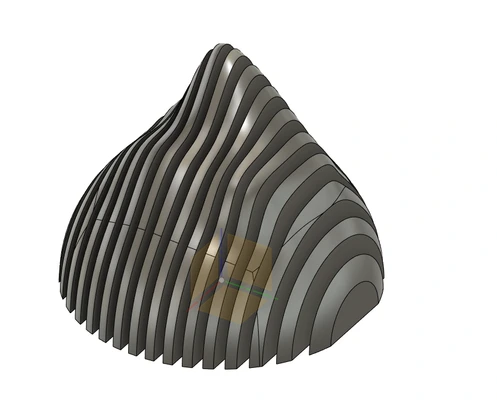
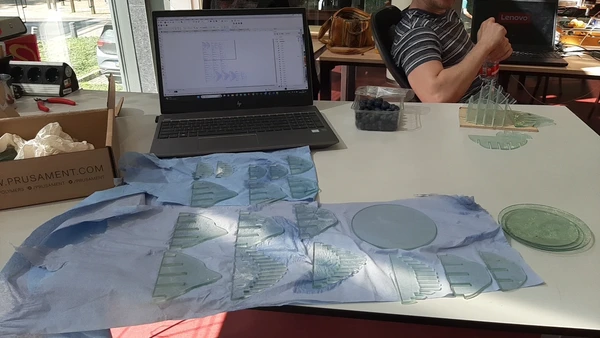
I start the design process making a mountain like shape using the freeform tool in Fusion360. After this I followed a few tutorials to slice my 3D design in 2D slices so I can cut it with the Waterjet. Here you see mee working on the project within Fusion360. But I run into some errors and the process is getting more complicated since I want to make slots that interlock.
I decide to give Slicer a try even though I know it’s no longer supported and maintained by Autodesk I can still download it and get it to run. I export my design from Fusion as an .STL design and this I can open in Slicer.
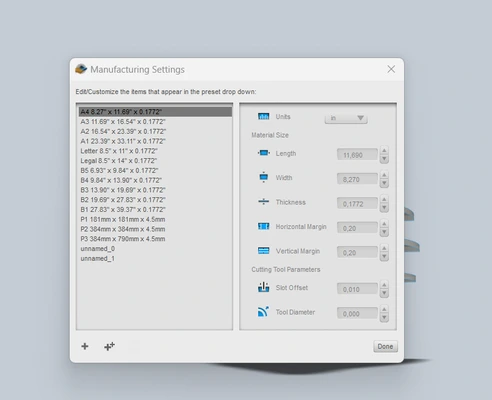
I continue with opening the manufacturing settings I create a new setup with the little plus in the down left corner and fill in the measurements of the peace of glass after this I set the thickness of the glass to 3 mm and I also see I can give the material an offset for the cutting kerf. I discuss it with a college and they ofter use 0 because the waterjet won’t cut on the line (like the lasercutter) but it will cut next to the line so the outside of the kerf aligns with the design and therefore no need for kerf offsets. (spoiler alert, for glass this didn’t work). you can read more about it later.
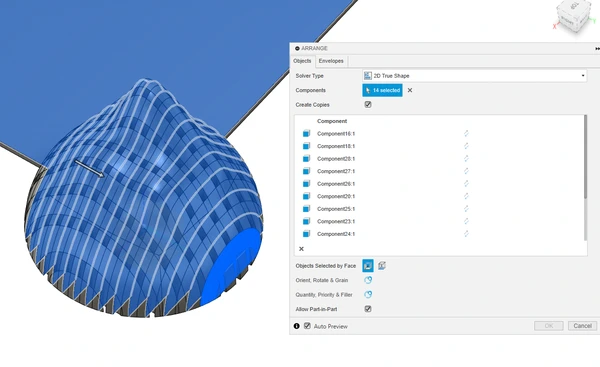
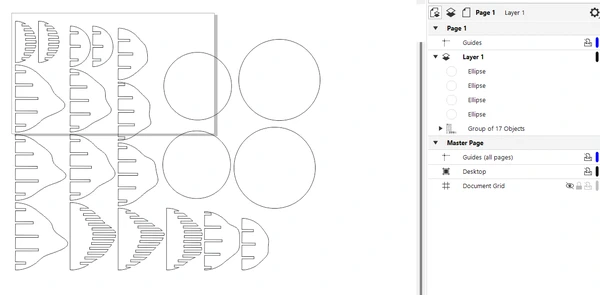
Next step is to play with the amount of panels and the positioning of them to make the design. This is a nice tutorial to follow if your working for the first time with slicer. you will get the hang of it quickly.
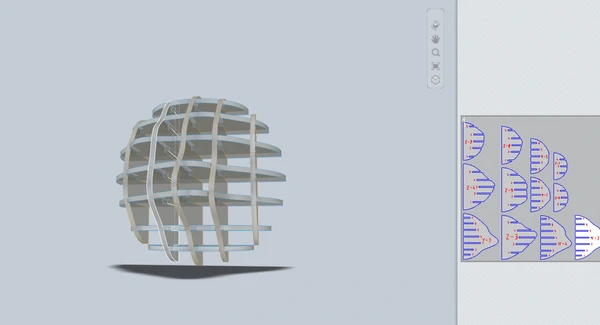 when your happy with your design underneath get plans you can export your design as a DXF filetype in mm. I put the kerf to 0 for my first tests.

Waterjet
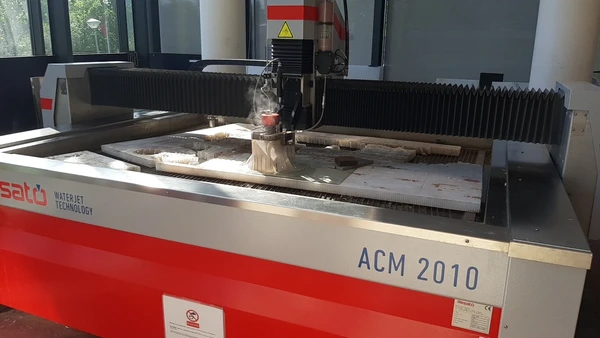 I’m going to use the Resato ACM 2010 waterjet
This machine cuts with highly pressured water and sand particles.
I’m going to use the Resato ACM 2010 waterjet
This machine cuts with highly pressured water and sand particles.
CAM on laptop
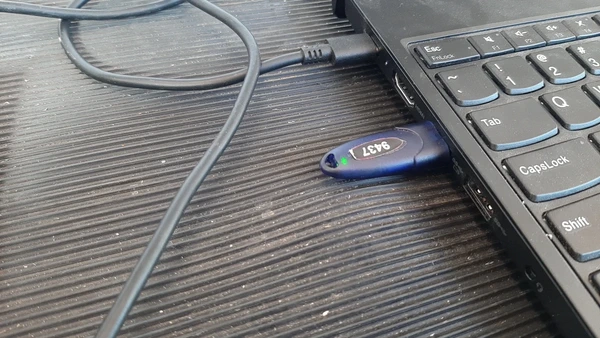
After you have saved your DXF file you start by working inside the IgemsR2020 software to generate the G-code file for the waterjet. Start with putting the Dongle (USB device with software key) in the laptop with the program IgemsR2020 to be able to enter the program.
Open the DXF file go to: Open -> import -> your DXF file -> ok
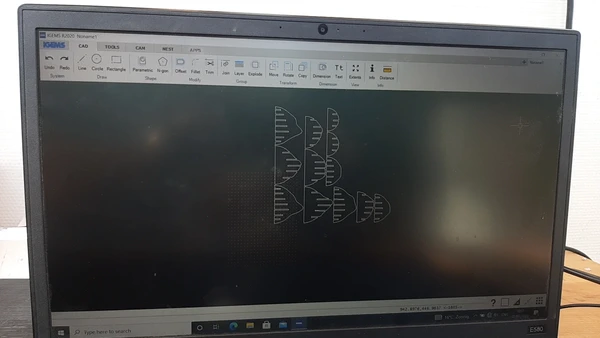
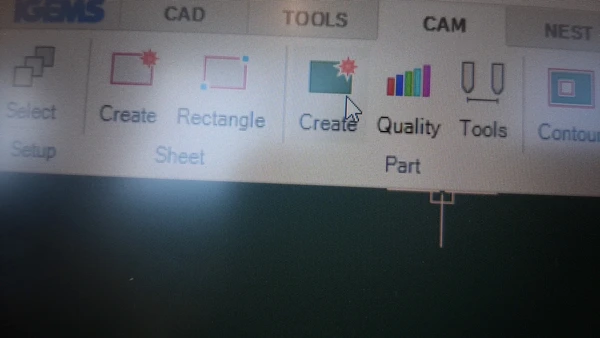
After you open your design you can see the program has different tabs on the upper side of the screen. Go to the CAM tab and start with the Create tab. We will continue with the Order tab and the Process tab. Before you continue it’s important to select al your shapes by dragging a big box arounf it. Now press the Create button. This will give your 2D DXF design a thickness. By doing this the program is able to recognize the contours of your drawing to cut.
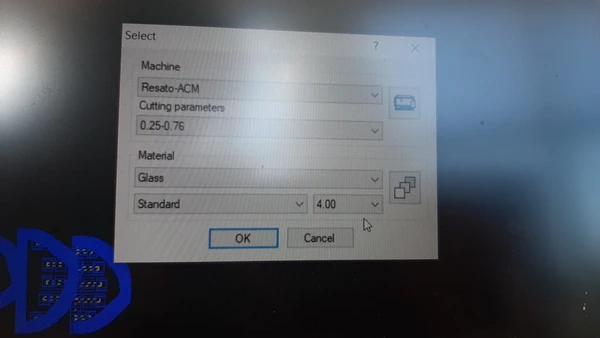
A pop-up menu will open. Within the machine and cutting parameters tab, don’t change these and leave them at the presets. For the Material Choose the material you are going to cut. In my case: glass 4 mm The glass I brought is actually 3mm but there is no preset for 3 mm so I will be using 4 mm instead. Press ok.
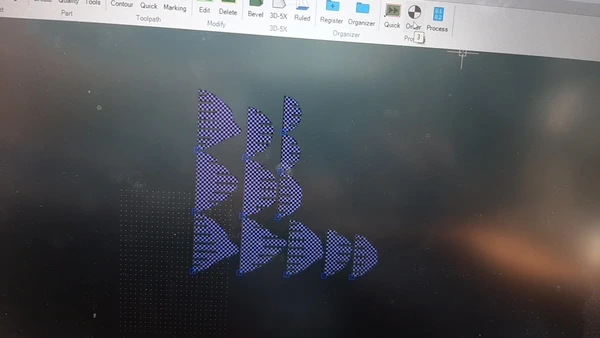
your shapes should now have purples fills. Before you continue it’s important to select al your shapes again by dragging a box around it, it will look like a chessboard fill now.
 With everything selected go to the button Order and press it. This will set the starting coördinates in the left bottom corner. check if it’s doing this.
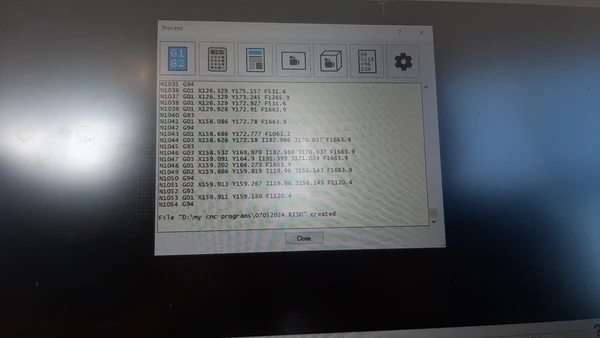
The last step is to go to Process. Here we will save the file as the G-code filetype we need. Select G1G2 press Ok and save the code on the USB as a RISO file. We work with dates as filenames. For example 7_5_2024!
Now unplug the USB stick and take it with you to the waterjet computer.
Prepare the Machine
Start the machine by putting on 4 switches
- The machine itself:
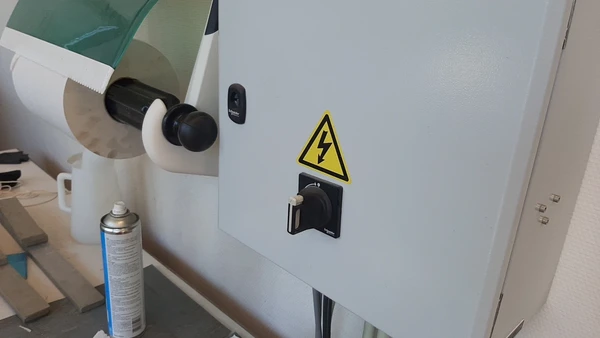
- The pump:
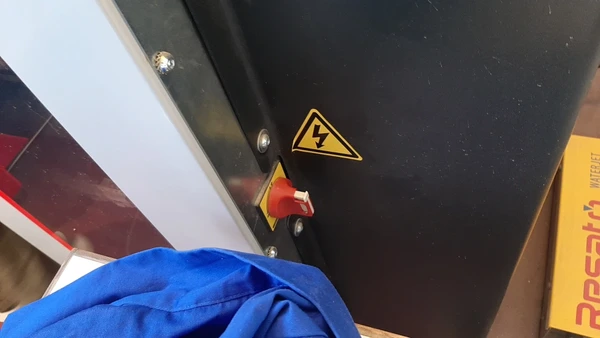
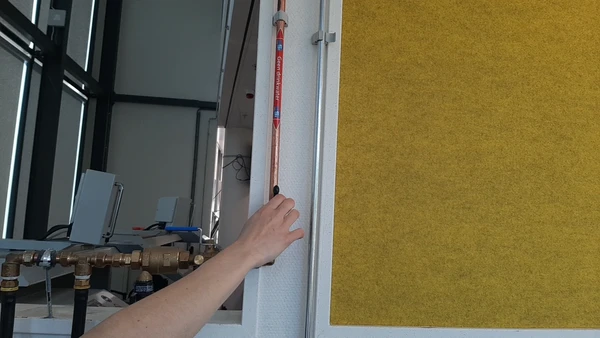
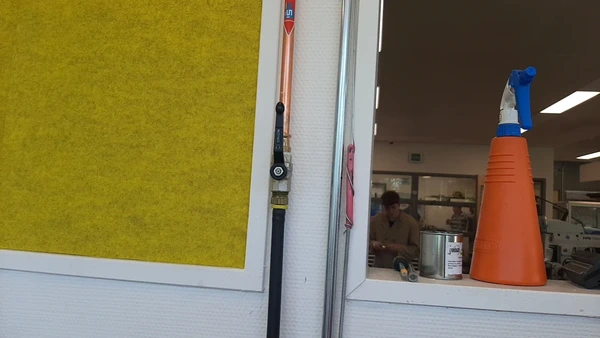
- Open the 2 waterpipes by pulling the handles up.
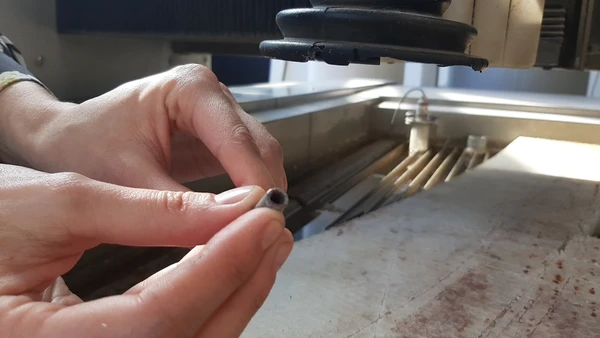
Before you start a new jobs It’s always a good practice to check the nozzle and the head of the machine.
- here you see the sand reservoir
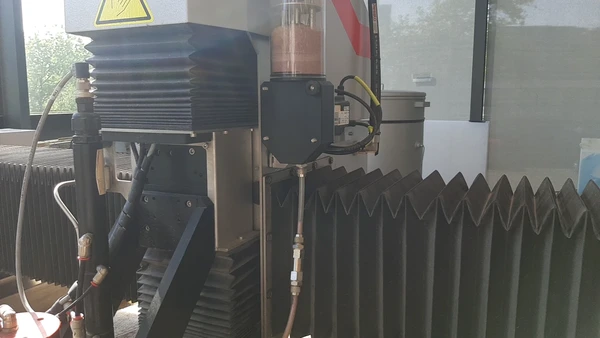
- this tube if very important because it’s feeding the sand
 Make sure there is no water inside the tube because the sand wil clot and constipated the pipe. This if the most common error with this machine. If something is leaking, clogged or worn out the negative pressure causes the water to flow into the pipe.
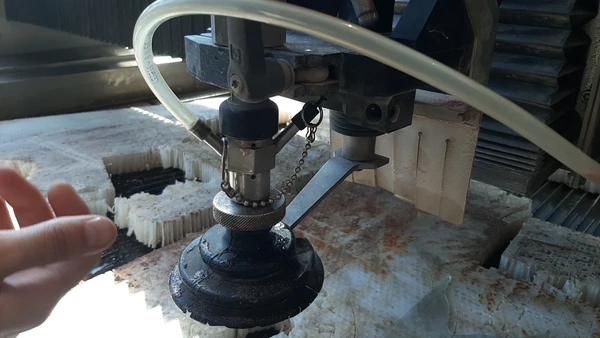
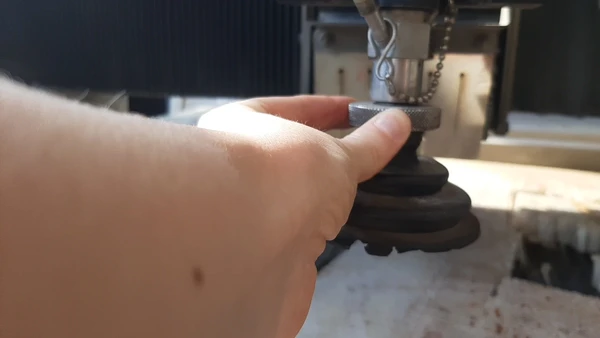
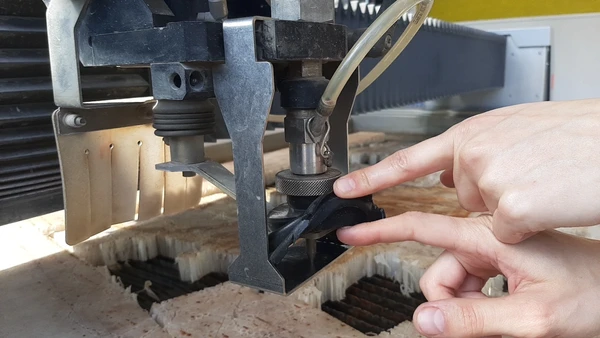
 - If something is wrong use the wrenches first and your hands later to unfasten the nozzle. Watch out! stuff can fall in the water and be lost, put a plate underneath to prevent this!
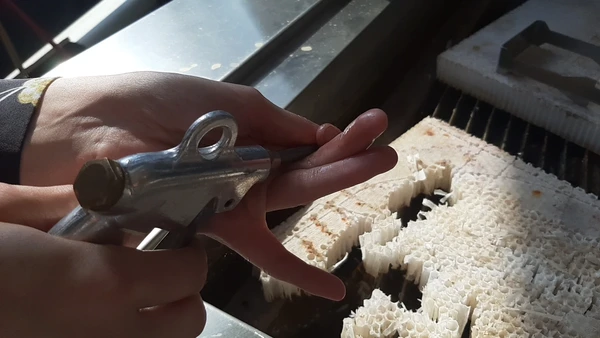
- If you need to clean the nozzle or the head you can use the air and water pistols on the left (air) and right (water) side of the machine.
- For fastening the nozzle first insert the bracket on the head of the machine, you can click it on and off easily. The nozzle should rest on the bracket and then fasten it. Make sure to fasten super tight to prevent leakages. Remove the bracket.
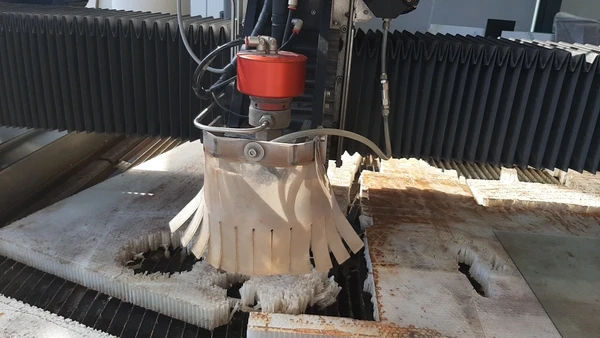
- Put the protecting curtain in front of the nozzle before starting a job for extra protection while cutting anf to keep the sand from spraying al over the place.
 ⚠️
⚠️- Put in your plate material. Make sure it’s 30 cm from the borders of the machine because the cutting range of the machine starts there.
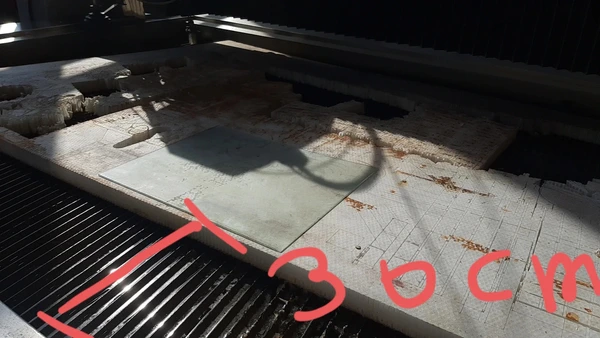
- Put some weights on the plate material to prevent it from moving make sure they are out of the cutting range by measuring beforehand. The machine is now prepared!
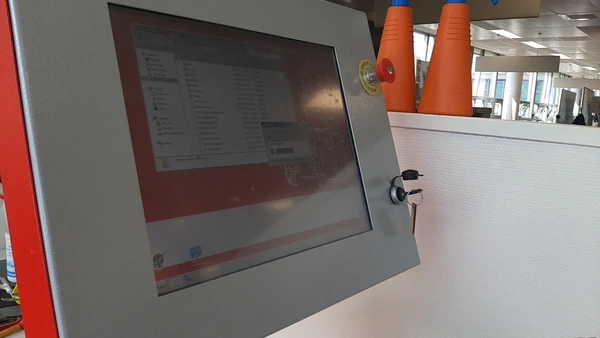
Waterjet computer
Importing the file
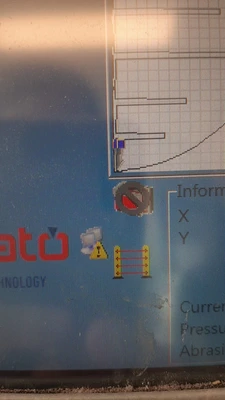
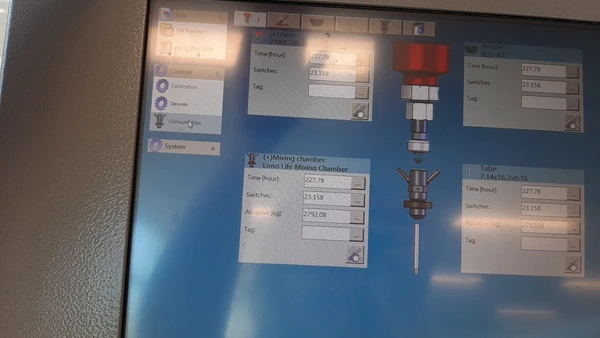
This is what the computer looks like, it’s mounted on a pole near to the waterjet itself. With this computer we will set the 0 coordinates, home and level the machine, start the pump, close the safety light curtain and send the file. We will dop this using the HMI software on the computer.
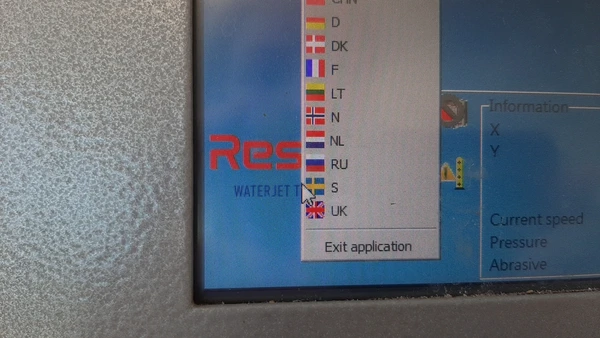
Start by closing the HMI program if it’s open. this makes it easier to open your file. This is a bit odd but you have to go to the bottom left corner to the Resato icon click and hold, a little menu will occur. Select exit application in the menu.
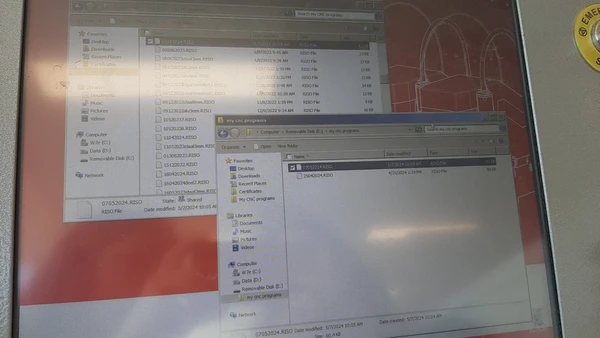
You can now see the desktop, go to file explorer and open the My CNC programs folder. Now put in the USB stick, A pop up menu will occur, open the folder. Drag it next to the My cnc programs folder and click and drag your G-code RISO file from the USB folder into the My CNC programs folder.
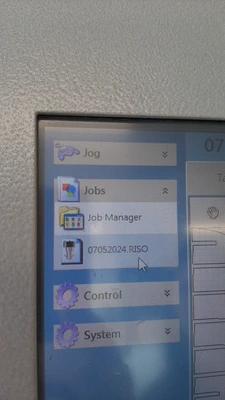
Now start the software again by clicking on the HMI icon on the desktop to open the program. The program will sometimes ask you if you want to load old jobs. We don’t want to do this.
Continue on the left side of the screen. go to -> Jobs -> click on Job manager. Search within my CNC programs folder -> click on the Riso file you have put in this folder. Click on open the file should occur on the left side of the screen now underneath the job manager. Click on it to open your file.
Homing and leveling
We will now start moving the head of the machine. For safety reasons, it will only work after closing the light safety curtain. When you walk passed it, you can recognize it by the stripe on the floor, the machine will shut down automatically because it’s dangerous to come near the machine while it’s running. To close this fence, go to the icon of a fence in the bottom left corner. CLick on it and select reset Zone 1 -> This will activate the safety light curtain.
Go to the Table Setup tab and activate the head of the machine by pressing on the icon of the head. When the icon of the machine is red it’s on if it’s black it’s off. Make sure it’s on.
We can start the homing routine by pressing start in the bottom right corner. When you press start the first time the machine will home automatically. (only the first time after putting on the machine)
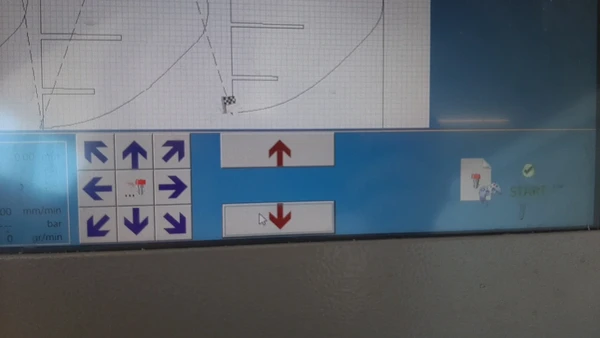
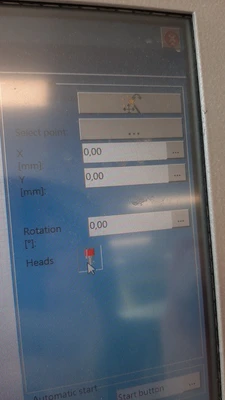
After the homing we can give it new 0 coördinates, move the head to the bottom left corner of the plate material using the arrows. The red arrows are fot up and down.
⚠️Don’t go down to far, you will hit the material with the nozzle so watch out!Now break the safety curtain and walk towards the machine. With your hands (hold the red rigid part of the head) put the nozzle directly above the corner you want to start.
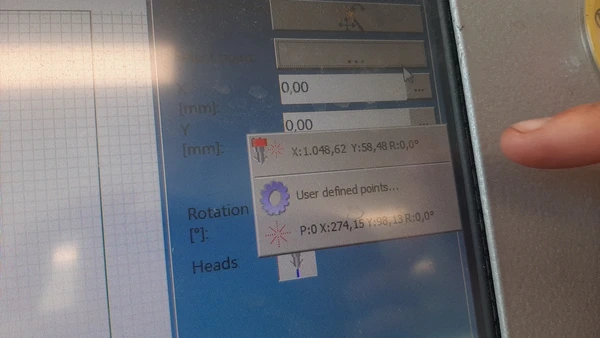
Go back to the computer and go to select point and select the upper line as the new 0 coordinates. The machine will start it’s job from here.
Continue towards the Process Parameters tab.
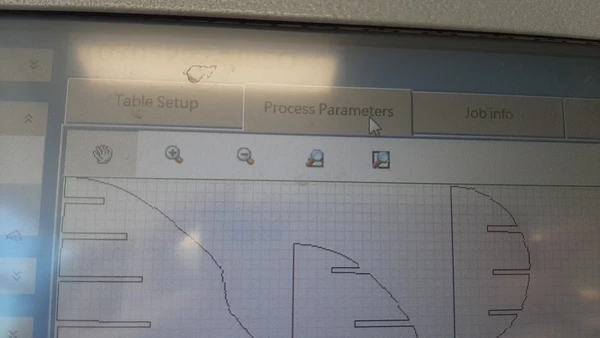
Start with selecting the leveling procedure we will chose method 3 by clicking on the right icon.
 Leveling methods:
first option: manual
second option: leveling the whole plate before you start
third option: before cutting the shape start by leveling.
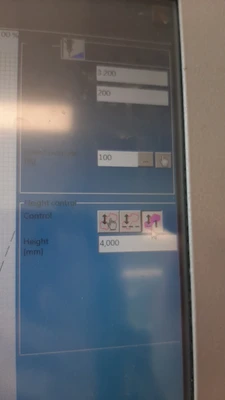
The last thing before staring the job is setting the pressure of the water and the amount of sand. You can find it right above the leveling method in the same Process Parameters tab.
I made some test runs up to 2800 bar but 2500 worked really nice it did not break the glass and made very detailed cuts.ℹ️I used the following settings for cutting 3 mm glass, make sure you don’t use reinforced glass since it will scatter into little peaces.
settings – – Pressure high water, bar 2500 Abrasive high amount of sand gr. per minute 200
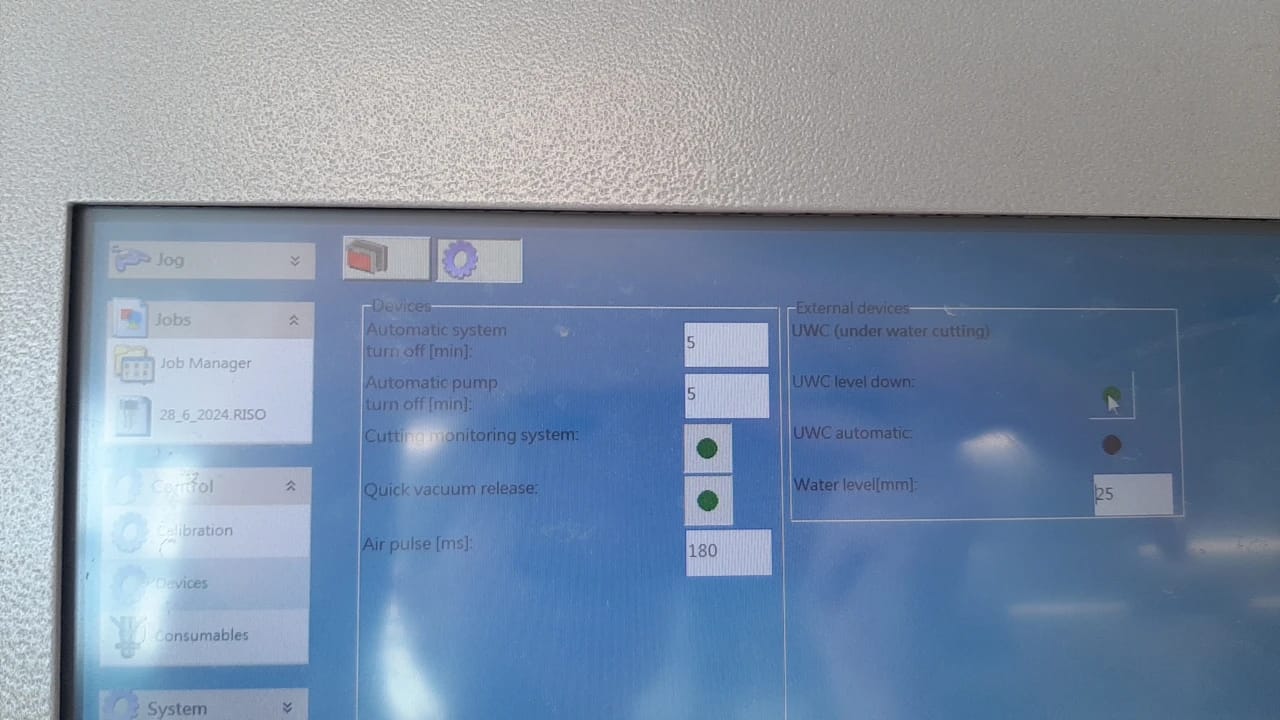
If you want to the product under water you can raise the water level via devices -> gear icon in the tab -> change the UWC to the mm above the metal grid and click on UWC automatic.
Starting the job
To start the job, double check everything above! Put the safety light curtain fence on again.
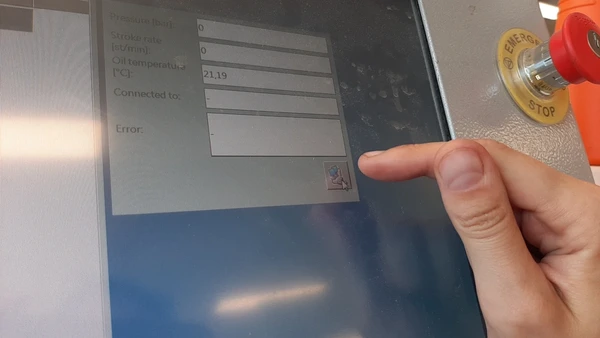
Activate the pump. Go to: control -> devices - > HAN -> oil -> click on computer logo in the bottom right corner. If there is a red cross near to it, t means it’s on.i if not the pump ios off. Here you can also check the oil temperature, It needs to be 25 degrees before it will start. It will warm up gradually.
Select start once and go back to your job file underneath jobs Select start for the second time The program will ask to active the pump if you didn’t do it already, activate it and then it will start automatically.
If something goes wrong you can stop the machine with the stop button, it’s in the same spot the start button was before. Or walk past the safety curtain and it will stop right away. If will remember it’s coordinates and continue where it left so you can easily stop to check if it’s going well and start it again.
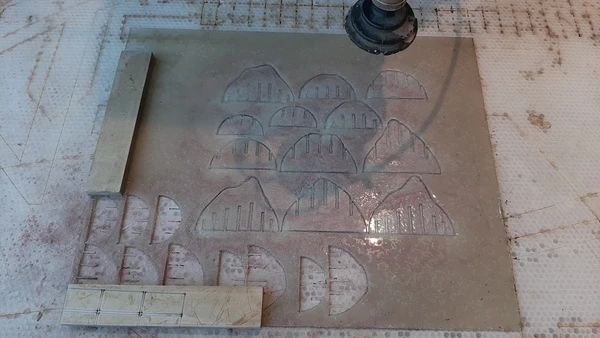
Here you see the machine working:
The making of
kerf
After cutting my first test with kerf offset it did not fit. So I start making a few more tests by exporting the design with 0.3 0.5 and 1 mm kerf straight from slicer. I put two peaces in Coreldraw together and cut them. Still not use fits. I measure the sloths and I see my mistake. I used a positive offset but in this case I need a negative, because unlike the lasercutter this waterjet cuts not in the middle of the line but near the line so the result should be the same measurements as your drawing.
Within Slicer for Fusion I was able to give a positive offset but not a negative offset. Sp I decide to do this within CorelDraw using the contour tool  I give the shapes an inside contour of -0.25 mm and delete the outer contour. This -.25 was a good fit but still a bit loose. I also tried -0.10 mm I think -0.2 mm would have been perfect but I run out of time to test more. So I cut my design on the safe side using -0.25 mm offset for the kerf.

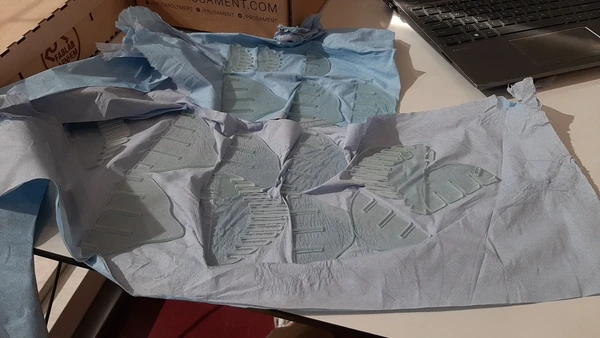
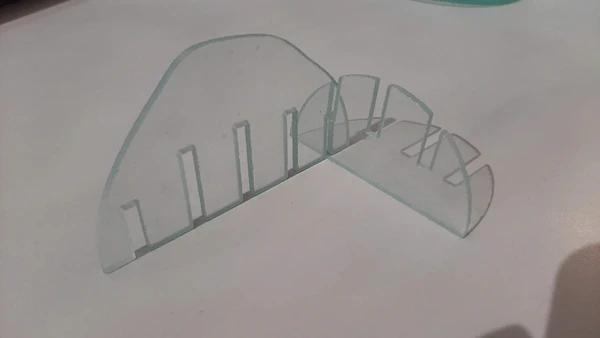 I cut the whole desgin for the first time it came out looking great!
assembling
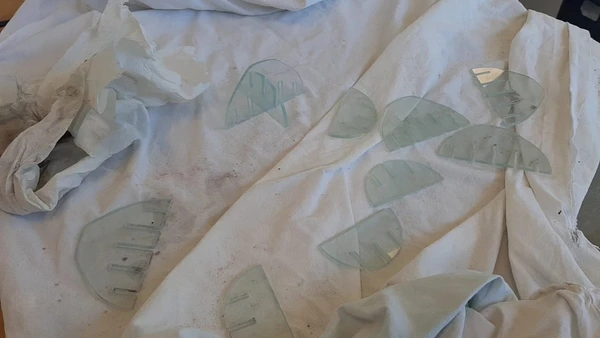
I made a second design with even more panels and thinner parts to cut, trying to push the limits of this machine and material. I also added a few circles for a baseplate.
 although the glass came out perfect while assembling it was to fragile and cracked.
 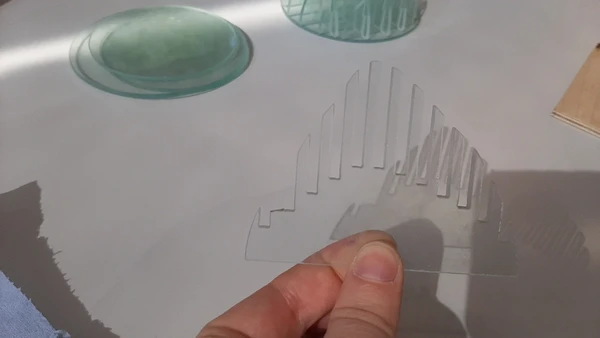 So I continued puzzling my first desgin together with the help of the instructions in slicer and I think it looks fabulous!
- here you can download the files
Reflection
Happy to get myself familiar with this machine that opens up tons of possibility’s. Also very happy with the result of the glass. I leaned a lot about the machine itself from documenting it. I also learned more about kerf offsets and about working with slicer. I-m curious how the object will look with light shinning from underneath. But I first wan’t to focus on working on the kinetic art part for my final project. Time management will become more important these three upcoming weeks..